Love this? Save it for later!
Share the inspiration with your friends
“I wasn’t planning on becoming the neighborhood cake pop queen that chilly Saturday afternoon,” I admit, chuckling as I recall the chaos. The power flickered off just as I was about to frost a traditional red velvet cake I’d baked for a friend’s birthday. With no oven light and a fridge that wouldn’t stop humming, I had to think fast. So, I grabbed some leftover white chocolate from the pantry, some star-shaped sprinkles I’d impulsively bought at a craft store, and a few cake scraps from a failed batch.
Honestly, it was a total mess—crumbs everywhere, a smudged countertop, and my dog eyeing the fallen bits like a treasure hunt. But somehow, rolling those crumbs into balls, dipping them into the melting chocolate, and sprinkling those shiny stars over the top created magic. That accidental batch of red velvet cake pops turned into my go-to party treat. Maybe you’ve been there—when a kitchen mishap turns into a new favorite recipe. These cake pops are just that: sweet, creamy, and dazzling little bites that stole my heart (and everyone else’s) from the first bite.
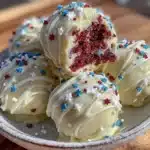
There’s something about the way the smooth white chocolate coats the vibrant red velvet crumb, with a pop of crunch from the star sprinkles, that feels both homemade and special. I keep making them for holidays, casual get-togethers, and even for those “I need a little happy” moments. Let me tell you, once you try these Perfect Red Velvet Cake Pops with White Chocolate and Star Sprinkles, they’ll probably sneak into your recipe rotation too.
Why You’ll Love This Recipe
Trust me, I’ve made my fair share of cake pops, and these stand out for a bunch of reasons that I think you’ll appreciate:
- Quick & Easy: You can whip these up in under an hour, making them perfect for last-minute celebrations or casual sweet cravings.
- Simple Ingredients: No fancy or hard-to-find items here—just everyday pantry staples plus some star sprinkles to make it festive.
- Perfect for Any Occasion: Whether it’s a birthday, holiday party, or just a sweet treat after dinner, these cake pops shine.
- Crowd-Pleaser: Kids and adults alike rave about them. I’ve lost count of how many times they’ve disappeared faster than I expected.
- Unbelievably Delicious: The tender red velvet crumb combined with creamy white chocolate coating and the crunch of the sprinkles makes every bite a delight.
What makes this recipe different? Honestly, it’s the balance of flavors and textures. The white chocolate isn’t too sweet or overpowering, letting the subtle cocoa and tang of the red velvet shine through. Plus, rolling the cake into perfectly sized balls and chilling them before dipping helps the pops hold their shape beautifully. I also use a special technique of gently folding in cream cheese frosting into the cake crumbs, which keeps the cake pops moist but firm enough to dip.
These aren’t just any cake pops — they’re the kind you close your eyes for a second after biting, savoring the sweet, creamy magic. Give them a try, and I bet you’ll keep coming back for more.
What Ingredients You Will Need
This recipe relies on straightforward, wholesome ingredients to create those luscious red velvet cake pops with a smooth white chocolate coating and charming star sprinkles. Most of these you might already have in your kitchen, and a few are easy to pick up at any grocery store.
- For the Cake:
- All-purpose flour – 2 ½ cups (315 g)
- Cocoa powder (unsweetened) – 2 tablespoons (15 g)
- Baking soda – 1 teaspoon (5 g)
- Salt – ½ teaspoon (3 g)
- Granulated sugar – 1 ½ cups (300 g)
- Vegetable oil – 1 cup (240 ml)
- Large eggs – 2 (room temperature)
- Buttermilk – 1 cup (240 ml) (or 1 cup milk + 1 tbsp lemon juice, let sit 5 min)
- Red food coloring – 2 tablespoons (adjust for desired color)
- Vanilla extract – 1 teaspoon (5 ml)
- White vinegar – 1 teaspoon (5 ml)
- For the Frosting Binder:
- Cream cheese (full fat), softened – 4 ounces (115 g)
- Unsalted butter, softened – 2 tablespoons (30 g)
- Powdered sugar – 1 cup (120 g)
- Vanilla extract – ½ teaspoon (2.5 ml)
- For the Coating & Decoration:
- White chocolate chips or melting wafers – 12 ounces (340 g) (I prefer Callebaut or Ghirardelli for smooth melting)
- Star-shaped sprinkles – about ½ cup (for a festive touch!)
- Lollipop sticks or wooden skewers – 20 to 24 pieces
Substitution tips: Use almond or gluten-free flour blend instead of all-purpose flour for gluten-free pops. Swap cream cheese frosting for a dairy-free vegan frosting if needed. In summer, fresh strawberries finely chopped can be gently folded into the batter for a fruity twist.
Equipment Needed
- Mixing bowls – a large one for the cake batter and a smaller one for the frosting.
- Electric mixer or stand mixer – makes mixing the frosting and batter much easier, but a sturdy whisk works in a pinch.
- Baking pans – two 9-inch round pans or equivalent for baking the cake layers.
- Cooling racks – to let the cake cool completely before crumbling.
- Large spoon or cookie scoop – to portion cake balls evenly (about 1.5 tablespoons each works well).
- Baking sheet lined with parchment paper or silicone mat – for chilling the cake pops before dipping.
- Microwave-safe bowl or double boiler – for melting the white chocolate smoothly.
- Lollipop sticks or sturdy wooden skewers – to hold the cake pops securely.
- Refrigerator space – essential for chilling cake balls and setting the coating.
Personally, I find silicone mats way better than parchment paper for chilling since cake pops don’t stick and cleanup is easier. If you don’t have a candy thermometer, no worries—just melt the chocolate slowly in short bursts (15-20 seconds) and stir often to avoid burning. Budget-friendly tip: wooden skewers can be trimmed to size if you can’t find lollipop sticks.
Preparation Method

- Preheat your oven to 350°F (175°C). Grease and flour two 9-inch round cake pans, or line them with parchment paper for easy release. This takes about 10 minutes including prep.
- In a medium bowl, whisk together dry ingredients: 2 ½ cups all-purpose flour, 2 tablespoons cocoa powder, 1 teaspoon baking soda, and ½ teaspoon salt. Set aside.
- In a large bowl, mix wet ingredients: Combine 1 ½ cups granulated sugar with 1 cup vegetable oil until smooth. Beat in 2 large eggs one at a time, then stir in 1 cup buttermilk, 2 tablespoons red food coloring, 1 teaspoon vanilla extract, and 1 teaspoon white vinegar. This step should take around 5 minutes with a mixer.
- Slowly add dry ingredients to wet, mixing gently: Incorporate the flour mixture in batches, mixing just until combined. Overmixing can make the cake dense, so stop as soon as it’s smooth and no flour pockets remain.
- Divide the batter evenly between the prepared pans and bake: Bake for 25-30 minutes until a toothpick inserted in the center comes out clean. The cake will spring back slightly to the touch. Let cool in pans for 10 minutes, then transfer to cooling racks to cool completely (about 1 hour). This cooling is crucial for cake pops to hold shape.
- Prepare the cream cheese frosting binder: In a bowl, beat 4 oz softened cream cheese and 2 tablespoons softened unsalted butter until creamy. Gradually add 1 cup powdered sugar and ½ teaspoon vanilla extract, mixing until smooth and fluffy.
- Crumble cooled cake into a large bowl: Break the cake into fine crumbs with your hands or a fork. Add about half of the cream cheese frosting and mix thoroughly. Add more frosting a little at a time until the mixture holds together when pressed but isn’t too sticky.
- Form cake balls: Using a spoon or cookie scoop, roll the mixture into 1 ½-inch balls and place on a parchment-lined baking sheet. Insert lollipop sticks about halfway into each ball. Chill in the refrigerator for at least 1 hour or until firm.
- Melt white chocolate: In a microwave-safe bowl, heat white chocolate chips or wafers in 20-second intervals, stirring between, until smooth and fully melted. Avoid overheating or burning.
- Dip the chilled cake pops: Holding the stick, dip each cake ball into the melted white chocolate, letting excess drip off. Immediately sprinkle star-shaped sprinkles over the wet coating before it sets. Place back on the parchment-lined sheet.
- Allow cake pops to set: Let them rest at room temperature until the coating hardens, about 30 minutes. For a quicker set, place them in the fridge for 15-20 minutes.
Pro tip: If the chocolate thickens too much while dipping, warm it briefly again. Also, chilling the cake balls well beforehand reduces breakage during dipping. I once forgot this step and ended up with crumbly pops—lesson learned the messy way!
Cooking Tips & Techniques
Making red velvet cake pops might seem straightforward, but a few tricks make all the difference between a smooth, professional look and a crumbly, sad mess.
- Don’t skip chilling: Letting the cake balls chill firmly before dipping keeps them intact. I usually chill mine for at least an hour, sometimes overnight if I’m prepping ahead.
- Mix frosting gradually: Add cream cheese frosting little by little to avoid soggy cake balls. The mixture should feel like play dough — moist but firm.
- Use good quality white chocolate: Cheap chocolate can seize or become grainy when melted. Brands like Ghirardelli melt smoothly and taste rich.
- Temperature matters: Melt chocolate gently at low power, stirring often. If the chocolate is too hot, it can melt the cake balls or cause the coating to be uneven.
- Insert sticks carefully: Dip the tip of each stick in melted chocolate before inserting into cake balls. This acts like glue to hold the pops securely.
- Work quickly with sprinkles: Sprinkle immediately after dipping so they stick well before the chocolate sets.
- Keep your workspace tidy: Cake crumbs have a way of sneaking everywhere, so keep a damp cloth handy to wipe up spills as you go.
- Practice makes perfect: My first batch was lopsided and cracked, but after a few tries, I got the hang of rolling uniform balls and dipping smoothly.
Variations & Adaptations
There are plenty of ways to switch up this recipe to suit your taste or dietary needs:
- Chocolate lovers’ twist: Swap the white chocolate coating for rich dark or milk chocolate. You can even drizzle contrasting chocolate over the coating for a decorative finish.
- Seasonal flavors: Add a teaspoon of pumpkin spice in the cake batter for fall vibes or fold in finely grated orange zest for a citrusy kick.
- Diet-friendly options: Use gluten-free flour blends to make these cake pops gluten-free. For dairy-free, replace cream cheese frosting with a coconut cream-based frosting, and use dairy-free white chocolate.
- Nutty crunch: Roll the dipped cake pops in finely chopped toasted pecans or almonds instead of sprinkles for a sophisticated crunch.
- Personal favorite: I once made these with a swirl of homemade raspberry jam folded gently into the cake mixture before rolling. It added a delightful surprise bite that disappeared too fast!
Serving & Storage Suggestions
These Perfect Red Velvet Cake Pops are best served slightly chilled or at room temperature. I love arranging them upright in a decorated jar or foam block to show off the star sprinkles and glossy white chocolate coating.
They pair beautifully with a hot cup of coffee or a chilled glass of milk—perfect for a cozy afternoon treat or festive party snack.
For storage, keep cake pops in an airtight container in the refrigerator for up to 5 days. If you want to store them longer, wrap individually in plastic wrap and freeze for up to 2 months. Thaw in the fridge overnight before serving.
Reheating isn’t necessary, but if you prefer a softer bite, let them sit at room temperature for 15 minutes before enjoying. Just so you know, the flavors tend to meld nicely after a day, making them even tastier.
Nutritional Information & Benefits
Each cake pop contains approximately 180-220 calories depending on size and exact ingredients used. They provide a moderate amount of fat and sugar, mostly from the cream cheese frosting and white chocolate coating.
Key ingredients like cocoa powder contain antioxidants, while cream cheese adds a bit of protein and calcium. Using buttermilk adds tenderness and a slight tang without a lot of extra fat.
If you’re mindful of allergens, note that this recipe contains dairy, gluten, and eggs. However, with simple substitutions, these cake pops can fit into gluten-free or dairy-free diets too.
From a wellness perspective, I find these cake pops a wonderful occasional treat that brings joy without being overly complicated or heavy. The homemade nature means you control what goes in—no mystery additives or preservatives.
Conclusion
So, there you have it—the Perfect Red Velvet Cake Pops with White Chocolate and Star Sprinkles that started as a kitchen mishap but quickly became a beloved treat. They’re simple to make, fun to decorate, and sure to impress anyone lucky enough to get one.
Feel free to tweak the flavors or decorations to make them truly yours. I love seeing how readers personalize recipes, so don’t hesitate to share your spin on these pops in the comments. Maybe you’ll discover a new favorite too!
Honestly, these cake pops remind me that sometimes the best recipes come from happy accidents and a little bit of sparkle—just like those star sprinkles. Give them a try and brighten your next celebration or quiet evening with these sweet little bites.
FAQs
Can I make red velvet cake pops ahead of time?
Yes! You can prepare the cake balls and dip them a day or two in advance. Store them in an airtight container in the fridge. For longer storage, freeze individually wrapped pops for up to 2 months.
What’s the best way to prevent cake pops from falling off the sticks?
Dip the tip of each stick into melted chocolate before inserting it into the cake ball. This acts as an adhesive, helping the cake pop stay securely on the stick.
Can I use store-bought red velvet cake for this recipe?
Absolutely! If you’re short on time, crumbling a high-quality store-bought red velvet cake and mixing it with cream cheese frosting works well.
How do I fix chocolate that’s too thick for dipping?
Warm it gently in short bursts in the microwave, stirring often. Adding a small amount of coconut oil or vegetable oil can help thin it out.
Are there alternatives to star sprinkles for decoration?
Yes! You can use nonpareils, colored sugar crystals, crushed nuts, or even edible glitter depending on your occasion and taste preferences.
Pin This Recipe!
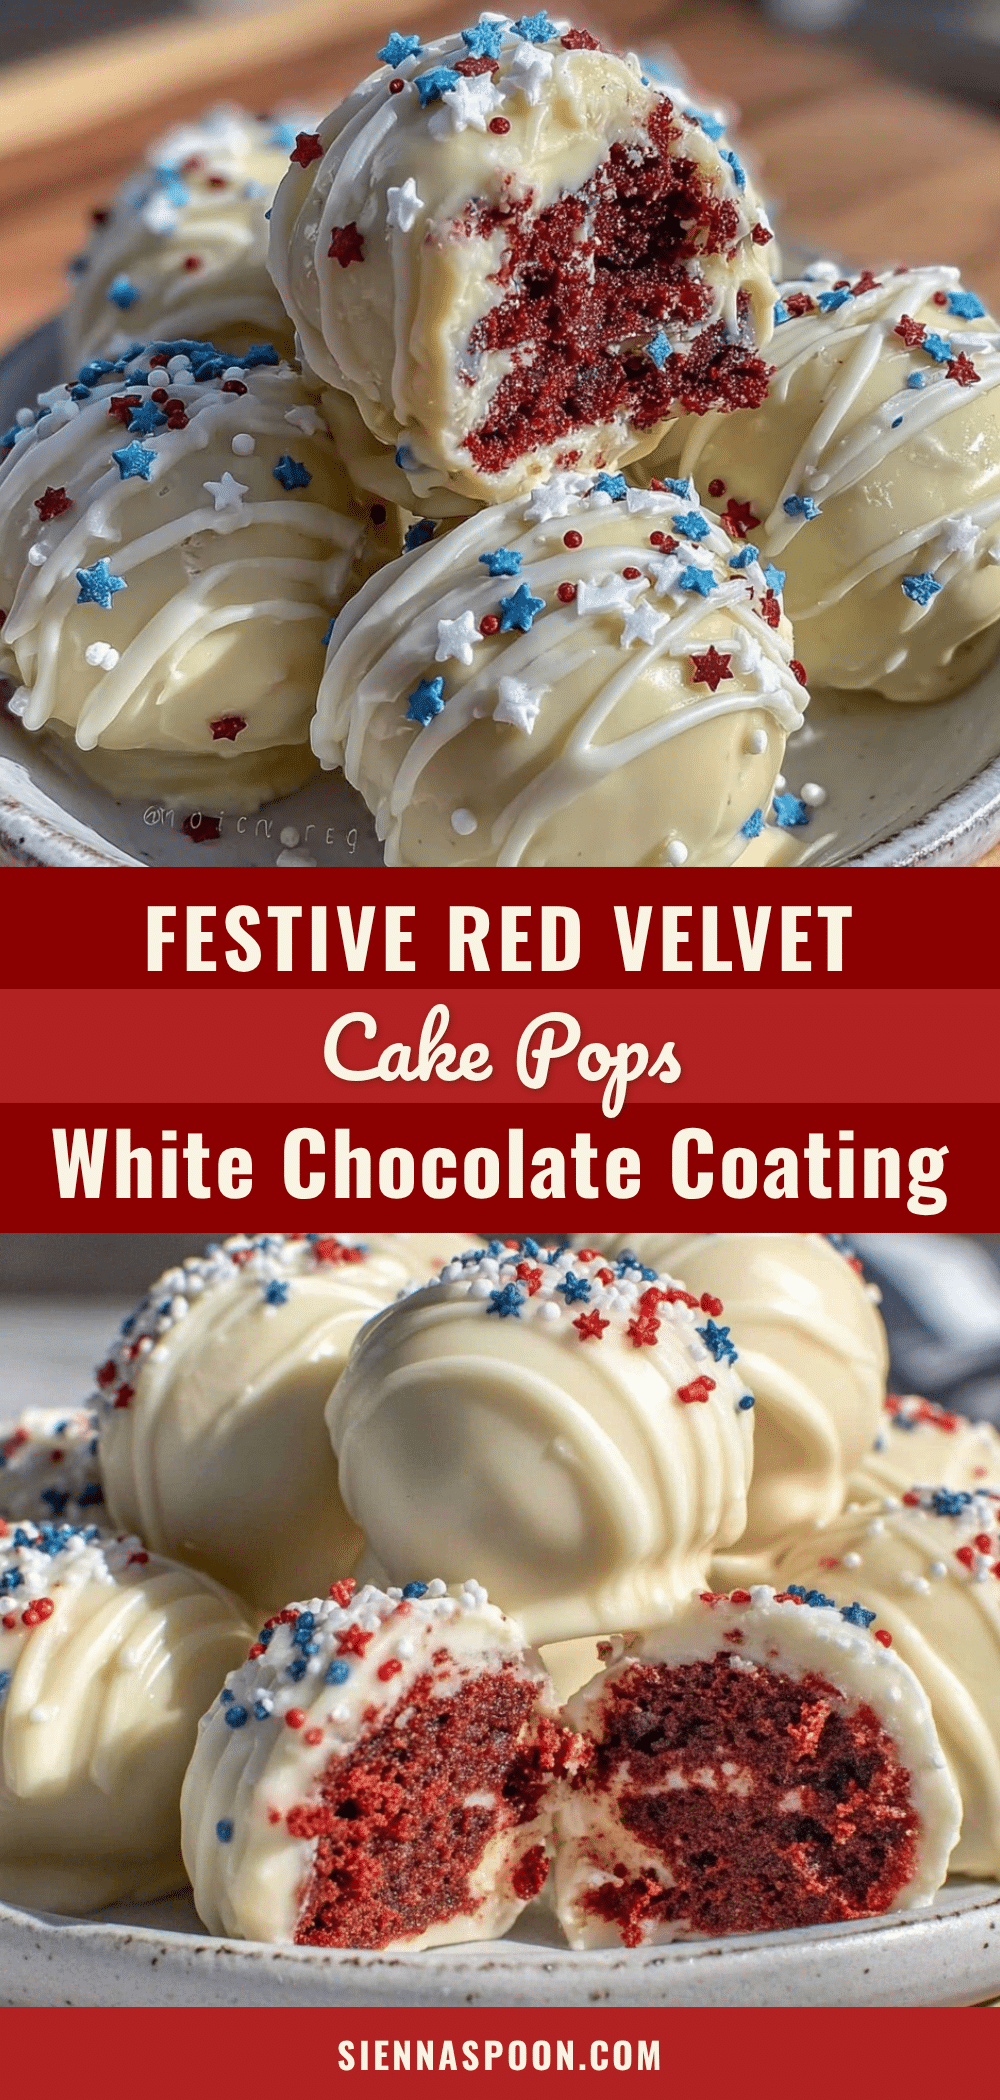
Perfect Red Velvet Cake Pops Recipe Easy Homemade with Star Sprinkles
These red velvet cake pops are sweet, creamy, and dazzling little bites coated in smooth white chocolate and topped with festive star sprinkles. Perfect for any occasion, they are quick and easy to make with simple ingredients.
- Prep Time: 20 minutes
- Cook Time: 30 minutes
- Total Time: 1 hour 50 minutes
- Yield: 20 to 24 cake pops 1x
- Category: Dessert
- Cuisine: American
Ingredients
- 2 ½ cups all-purpose flour (315 g)
- 2 tablespoons unsweetened cocoa powder (15 g)
- 1 teaspoon baking soda (5 g)
- ½ teaspoon salt (3 g)
- 1 ½ cups granulated sugar (300 g)
- 1 cup vegetable oil (240 ml)
- 2 large eggs (room temperature)
- 1 cup buttermilk (240 ml) or 1 cup milk + 1 tbsp lemon juice, let sit 5 min
- 2 tablespoons red food coloring
- 1 teaspoon vanilla extract (5 ml)
- 1 teaspoon white vinegar (5 ml)
- 4 ounces cream cheese (full fat), softened (115 g)
- 2 tablespoons unsalted butter, softened (30 g)
- 1 cup powdered sugar (120 g)
- ½ teaspoon vanilla extract (2.5 ml)
- 12 ounces white chocolate chips or melting wafers (340 g)
- About ½ cup star-shaped sprinkles
- 20 to 24 lollipop sticks or wooden skewers
Instructions
- Preheat oven to 350°F (175°C). Grease and flour two 9-inch round cake pans or line with parchment paper.
- In a medium bowl, whisk together flour, cocoa powder, baking soda, and salt. Set aside.
- In a large bowl, mix sugar and vegetable oil until smooth. Beat in eggs one at a time, then stir in buttermilk, red food coloring, vanilla extract, and white vinegar.
- Slowly add dry ingredients to wet ingredients, mixing gently until just combined.
- Divide batter evenly between pans and bake for 25-30 minutes until a toothpick inserted comes out clean. Cool in pans 10 minutes, then transfer to racks to cool completely (about 1 hour).
- Prepare frosting binder by beating cream cheese and butter until creamy. Gradually add powdered sugar and vanilla extract, mixing until smooth and fluffy.
- Crumble cooled cake into a large bowl. Add about half the frosting and mix thoroughly. Add more frosting as needed until mixture holds together but is not too sticky.
- Roll mixture into 1 ½-inch balls using a spoon or cookie scoop. Place on parchment-lined baking sheet and insert lollipop sticks halfway into each ball. Chill in refrigerator for at least 1 hour until firm.
- Melt white chocolate in microwave-safe bowl in 20-second intervals, stirring until smooth.
- Dip chilled cake pops into melted white chocolate, letting excess drip off. Immediately sprinkle star-shaped sprinkles over coating. Place back on parchment-lined sheet.
- Let cake pops set at room temperature for about 30 minutes or chill in fridge for 15-20 minutes for quicker setting.
Notes
Chill cake balls well before dipping to prevent breakage. Use good quality white chocolate for smooth melting. Dip stick tips in melted chocolate before inserting into cake balls to secure. Work quickly with sprinkles to ensure they stick before chocolate sets. Silicone mats are preferred over parchment for chilling to prevent sticking.
Nutrition
- Serving Size: 1 cake pop
- Calories: 200
- Sugar: 18
- Sodium: 120
- Fat: 12
- Saturated Fat: 6
- Carbohydrates: 24
- Fiber: 1
- Protein: 2
Keywords: red velvet cake pops, cake pops recipe, white chocolate cake pops, star sprinkles, easy cake pops, homemade cake pops, party treats