Love this? Save it for later!
Share the inspiration with your friends
My brother asked why I couldn’t just season the chicken and throw it in the air fryer without any flour or breadcrumbs. I started to explain why that wouldn’t work—then stopped. Honestly, I had no good reason. I’d just always done it the other way, with a coating, because that’s how you get crispy chicken, right? I mean, that’s what every recipe told me.
So I tried it his way. Just rubbed some spices on a boneless breast, set the air fryer, and crossed my fingers. The power flickered halfway through—our old apartment had terrible wiring—and I thought for sure I’d ruined dinner. But when I pulled that chicken out, let me tell you, I stood there staring at it. The skin (well, the outside) had this deep golden color, almost lacquered-looking, and it crackled when I touched it with a fork. No breading. No flour. Nothing but seasoning and hot air.
That was two summers ago, and I haven’t breaded a chicken breast since. Maybe you’ve been there, stuck in a recipe rut, convinced you need a complicated method to get good results. This air fryer chicken recipe changed how I think about cooking entirely. It’s not just easy—it’s the kind of discovery that makes you wonder what else you’ve been overcomplicating.
Why You’ll Love This Recipe
This isn’t just another chicken breast recipe. It’s the one that makes you forget takeout even exists. Here’s why it works so well:
- No Breading Needed : You get that satisfying crunch without any flour, breadcrumbs, or complicated coatings. The air fryer does all the work.
- Ready in Under 20 Minutes : From fridge to plate in about 15 minutes. Perfect for those nights when you’re starving and need dinner now.
- Simple Pantry Ingredients : Chances are you already have everything. Salt, pepper, garlic powder, maybe some paprika. No fancy grocery runs.
- Incredibly Juicy Inside : The high heat seals in moisture while the outside gets perfectly crispy. No dry chicken here—ever.
- Endlessly Versatile : Change up the seasoning, slice it for salads, or serve it whole with veggies. This recipe adapts to whatever you’re craving.
What makes this different from other air fryer chicken recipes? It’s the technique. Most recipes tell you to pound the chicken thin or use a brine. I tried both, and honestly, they add extra steps without much payoff. Instead, this method relies on a simple dry rub and the right air fryer temperature. The result is a chicken breast that’s crispy on the outside, tender on the inside, and requires almost zero effort. I’ve tested this at least a dozen times, tweaking temperatures and timing, and this version never fails. It’s comfort food reimagined—healthier, faster, but with the same soul-soothing satisfaction.
What Ingredients You Will Need
This recipe uses simple, wholesome ingredients to deliver bold flavor and satisfying texture without the fuss. Most of these are pantry staples you probably already have on hand.
- Boneless, skinless chicken breasts (2 medium, about 6-8 ounces each) – Look for breasts that are similar in size so they cook evenly. If they’re huge, consider cutting them in half horizontally.
- Olive oil (1 tablespoon) – Just enough to help the seasoning stick and encourage browning. Avocado oil works great too, especially if you prefer a higher smoke point.
- Salt (1 teaspoon) – I use fine sea salt. Don’t skimp here—salt is what draws out moisture and helps create that crispy exterior.
- Black pepper (½ teaspoon, freshly ground) – Freshly ground makes a difference, but pre-ground works in a pinch.
- Garlic powder (1 teaspoon) – Not garlic salt. Garlic powder gives that savory depth without extra sodium. I recommend the brand McCormick for consistent quality.
- Paprika (1 teaspoon) – Regular or smoked. Smoked paprika adds a subtle depth that makes the chicken taste like it cooked all day. If you only have sweet paprika, that’s fine too.
- Onion powder (½ teaspoon) – Optional but recommended. It rounds out the flavor in a way that’s hard to describe but easy to miss if you skip it.
- Dried thyme or oregano (½ teaspoon) – Either works. Thyme is more classic, but oregano gives it a slightly Italian vibe.
Substitution Guidance: If you’re watching sodium, reduce the salt to ½ teaspoon and add more herbs. For a spicy kick, add ¼ teaspoon cayenne pepper. No air fryer? You can bake these at 425°F for about 20 minutes, flipping halfway—though the texture won’t be quite as crispy. Use dairy-free options if needed; the recipe is already dairy-free as written.
Equipment Needed
You don’t need much for this recipe, which is part of its beauty.
- Air fryer (any size, but a 5-6 quart basket style works best) – I use a Cosori Pro II and love it. The basket is non-stick and easy to clean. If you have an oven-style air fryer, just adjust the cooking time by a minute or two.
- Tongs – For flipping the chicken without losing that precious crust. Silicone-tipped tongs won’t scratch your basket.
- Meat thermometer – This is non-negotiable for perfect chicken. An instant-read digital thermometer takes the guesswork out. I’ve used a ThermoPro TP19 for years and it’s never let me down.
- Small bowl – For mixing the seasoning rub. Any small bowl works.
- Cutting board and knife – For slicing after resting. A sharp chef’s knife makes clean cuts without shredding the meat.
Budget-Friendly Options: No need for fancy equipment. A basic air fryer from a discount store works fine. If you don’t have a meat thermometer, you can check doneness by cutting into the thickest part—just know you’ll lose some juices that way. I’ve done it in a pinch and it still tasted great.
Preparation Method
- Pat the chicken completely dry. Use paper towels and press firmly. This is the most important step for crispy chicken. Any moisture on the surface will steam instead of crisp. (Trust me, I learned this the hard way after a batch of soggy chicken.)
- Mix the seasoning. In a small bowl, combine salt, pepper, garlic powder, paprika, onion powder, and dried thyme. Stir with a fork to break up any clumps. The paprika should give it a nice reddish-brown color.
- Oil the chicken. Drizzle the olive oil over both sides of each breast. Use your hands to rub it in evenly. Don’t drown it—just a light coating. You should see a slight sheen but no pooling oil.
- Season generously. Sprinkle the seasoning mixture over both sides of the chicken. Rub it in gently so it adheres. You want every bite to have flavor, so don’t be shy. The seasoning should look evenly distributed, not patchy.
- Preheat the air fryer. Set it to 400°F (200°C) and let it run for 3-5 minutes. Preheating ensures the chicken starts cooking immediately, which helps create that crust. I usually do this while I’m seasoning the chicken.
- Place chicken in the basket. Arrange the breasts in a single layer. They shouldn’t touch each other—air needs to circulate. If your air fryer is small, cook them one at a time. It takes a few extra minutes but the texture is worth it.
- Cook for 6 minutes. Set a timer. Don’t open the basket during this time. You’ll hear a nice sizzle—that’s the sound of the crust forming.
- Flip and cook again. Using tongs, carefully flip each breast. Cook for another 5-7 minutes, depending on thickness. The chicken is done when the internal temperature reaches 165°F (74°C) in the thickest part. If you don’t have a thermometer, cut into the thickest part—the juices should run clear and there should be no pink.
- Rest before slicing. Transfer the chicken to a cutting board and let it rest for 5 minutes. This is crucial—it lets the juices redistribute so every bite is moist. I know it’s tempting to dig in immediately, but patience pays off here.
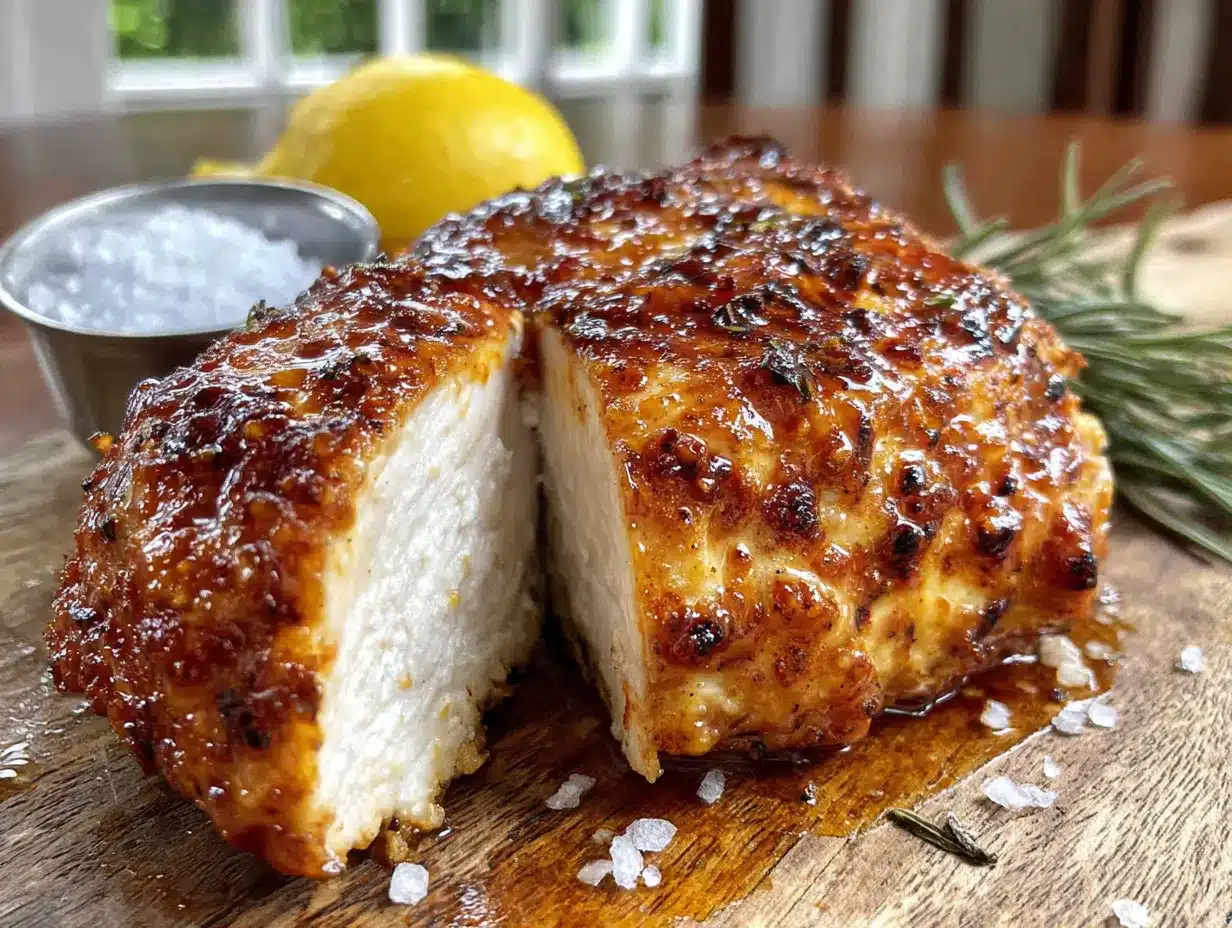
- Slice and serve. Cut against the grain into ½-inch slices. The outside should be golden and crackly, the inside white and juicy. Serve immediately.
Sensory Cues: At step 7, you should hear a steady sizzle. If it’s silent, your air fryer might not be hot enough. At step 9, when you flip, the cooked side should be a deep golden brown with slightly darker edges. If it’s pale, let it cook another minute before flipping next time.
Cooking Tips & Techniques
Over the years, I’ve made every mistake you can imagine with air fryer chicken. Here’s what I’ve learned so you don’t have to repeat my failures.
- Don’t overcrowd the basket. I once tried to cook three large breasts at once. The middle one came out steamed instead of crispy. Air needs to move around each piece. Leave at least an inch of space between them.
- Pat dry, then pat dry again. Seriously. I cannot stress this enough. Moisture is the enemy of crispiness. Even if you think the chicken is dry, give it one more pass with a paper towel. I’ve started doing this right on the cutting board so I can see any extra moisture pooling.
- Let the chicken come to room temperature. Take it out of the fridge 15-20 minutes before cooking. Cold chicken cooks unevenly—the outside might burn before the inside is done. This small step makes a huge difference.
- Use a meat thermometer every time. Chicken breasts vary in thickness, even within the same package. The difference between 160°F and 170°F is the difference between juicy and dry. I’ve ruined enough chicken to know that guessing isn’t worth it.
- Flip with care. When you flip the chicken, the crust is still delicate. Use tongs gently and avoid scraping the basket. If the chicken sticks, it probably needs another minute—don’t force it.
My biggest failure: I once forgot to preheat the air fryer. The chicken cooked for the full time but came out pale and sad. The crust never formed because the temperature never got high enough fast enough. Now I always preheat. Lesson learned.
Variations & Adaptations
This recipe is incredibly flexible. Here are some variations I’ve tried and loved:
- Spicy Cajun Version: Replace the paprika with Cajun seasoning and add ¼ teaspoon cayenne. The heat pairs beautifully with the crispy texture. I serve this with a cool ranch dip to balance the spice.
- Lemon Herb Twist: Add 1 teaspoon dried rosemary and the zest of one lemon to the seasoning mix. Squeeze fresh lemon juice over the cooked chicken before serving. It’s bright, fresh, and perfect for spring.
- Garlic Parmesan Finish: After cooking, brush the chicken with melted butter (or dairy-free alternative) and sprinkle with grated Parmesan and fresh parsley. The cheese gets slightly melty and adds a savory depth.
- Gluten-Free Friendly: This recipe is naturally gluten-free since there’s no breading. Just double-check your spice blends—some contain wheat starch as an anti-caking agent.
- Meal Prep Adaptation: Cook the chicken ahead and store it sliced in the fridge. It reheats beautifully in the air fryer at 350°F for 3 minutes. I often make a double batch on Sunday for salads and wraps all week.
Personal Favorite: The lemon herb version is my go-to. I discovered it by accident when I ran out of paprika and had a lemon sitting on the counter. Now it’s the only way I make it during summer months.
Serving & Storage Suggestions
This crispy chicken breast is versatile enough for any meal. Here’s how to make the most of it:
- Serving Temperature: Serve hot, straight from the air fryer. The crust is at its crispiest within the first 10 minutes. If you need to hold it, keep it in a warm oven (200°F) on a wire rack—not on a plate, where steam will soften the crust.
- Presentation Ideas: Slice against the grain and fan the pieces on a plate. Garnish with fresh herbs like parsley or thyme. For a complete meal, serve alongside roasted vegetables or a simple green salad with lemon vinaigrette.
- Complementary Dishes: This chicken pairs beautifully with mashed potatoes, rice pilaf, or a crisp Caesar salad. For a lighter option, try it with steamed broccoli and quinoa. A glass of chilled Sauvignon Blanc or an iced tea rounds out the meal nicely.
- Storage Instructions: Store leftover chicken in an airtight container in the refrigerator for up to 4 days. The crust will soften, but the flavor remains. For longer storage, freeze sliced chicken in a freezer-safe bag for up to 3 months. Thaw overnight in the fridge before reheating.
- Reheating Tips: The air fryer is your best friend here. Reheat at 350°F for 3-4 minutes. The crust crisps back up almost like fresh. Avoid the microwave—it turns the chicken rubbery and the crust soggy. I’ve tested both methods and the air fryer wins every time.
Flavor Development: Interestingly, the chicken tastes even better the next day. The seasoning melds with the meat overnight, creating a deeper flavor. It’s perfect for cold chicken salad sandwiches or sliced over a lunch salad.
Nutritional Information & Benefits
This recipe is as healthy as it is delicious. Here’s what you’re getting per serving (one chicken breast):
- Calories: Approximately 280-320 (depending on breast size and oil used)
- Protein: 35-40 grams – Excellent for muscle repair and satiety
- Fat: 12-15 grams – Mostly from the olive oil, which provides heart-healthy monounsaturated fats
- Carbohydrates: Less than 2 grams – Naturally low-carb and keto-friendly
- Sodium: 600-700 mg – Can be reduced by using less salt
Health Benefits: Chicken breast is a lean protein source that supports muscle health and keeps you full. The olive oil provides antioxidants and anti-inflammatory properties. The spices—especially paprika and garlic—are rich in vitamins and may support immune function. This recipe is naturally gluten-free, dairy-free, and low-carb, making it suitable for most dietary needs. If you have a nightshade sensitivity, skip the paprika and use more herbs instead.
Personal Perspective: I love that this recipe fits into a balanced lifestyle without feeling like a sacrifice. It’s satisfying enough for a comfort food craving but healthy enough for everyday eating. That’s a rare combination in my book.
Conclusion
This crispy air fryer chicken breast recipe is proof that sometimes the simplest methods produce the best results. No breading, no complicated techniques—just perfectly seasoned chicken with a golden, crackly crust that rivals anything from a restaurant. It’s become my go-to for busy weeknights, meal prep, and even casual dinner parties.
I hope you give this recipe a try and make it your own. Maybe you’ll add a different spice blend or serve it with your favorite sides. That’s the beauty of cooking—you can adapt and experiment until it feels like yours. If you do try it, I’d love to hear how it turned out. Drop a comment below and let me know your favorite variation, or share a photo of your creation. Happy cooking, friends!
Frequently Asked Questions
Can I use frozen chicken breasts in the air fryer?
Yes, but you’ll need to adjust the cooking time. Cook frozen breasts at 380°F for about 20-25 minutes, flipping halfway. The texture won’t be quite as crispy, and you’ll need to season after cooking since the seasoning won’t stick well to frozen meat. For best results, thaw first.
Why isn’t my chicken getting crispy in the air fryer?
The most common reasons are too much moisture on the chicken, overcrowding the basket, or not preheating. Make sure you pat the chicken completely dry with paper towels before seasoning. Also, check that your air fryer reaches 400°F—some models run cooler than their setting indicates.
Can I use chicken thighs instead of breasts?
Absolutely. Boneless, skinless thighs work great with this method. Cook them at 400°F for 12-15 minutes, flipping halfway. They’ll be slightly more tender and forgiving than breasts, with a richer flavor. The internal temperature should reach 165°F.
How do I keep the chicken from sticking to the air fryer basket?
Make sure you oil the chicken, not the basket. A light coating of olive oil on the chicken creates a non-stick barrier. If you’re still having trouble, try lining the basket with parchment paper designed for air fryers—just make sure it doesn’t block the air vents.
Can I meal prep this chicken for the week?
Yes, it’s perfect for meal prep. Cook the chicken as directed, let it cool completely, and store it sliced in an airtight container. It stays good for up to 4 days. Reheat in the air fryer at 350°F for 3-4 minutes to restore the crispiness. Use it in salads, wraps, or alongside grains throughout the week.
Pin This Recipe!
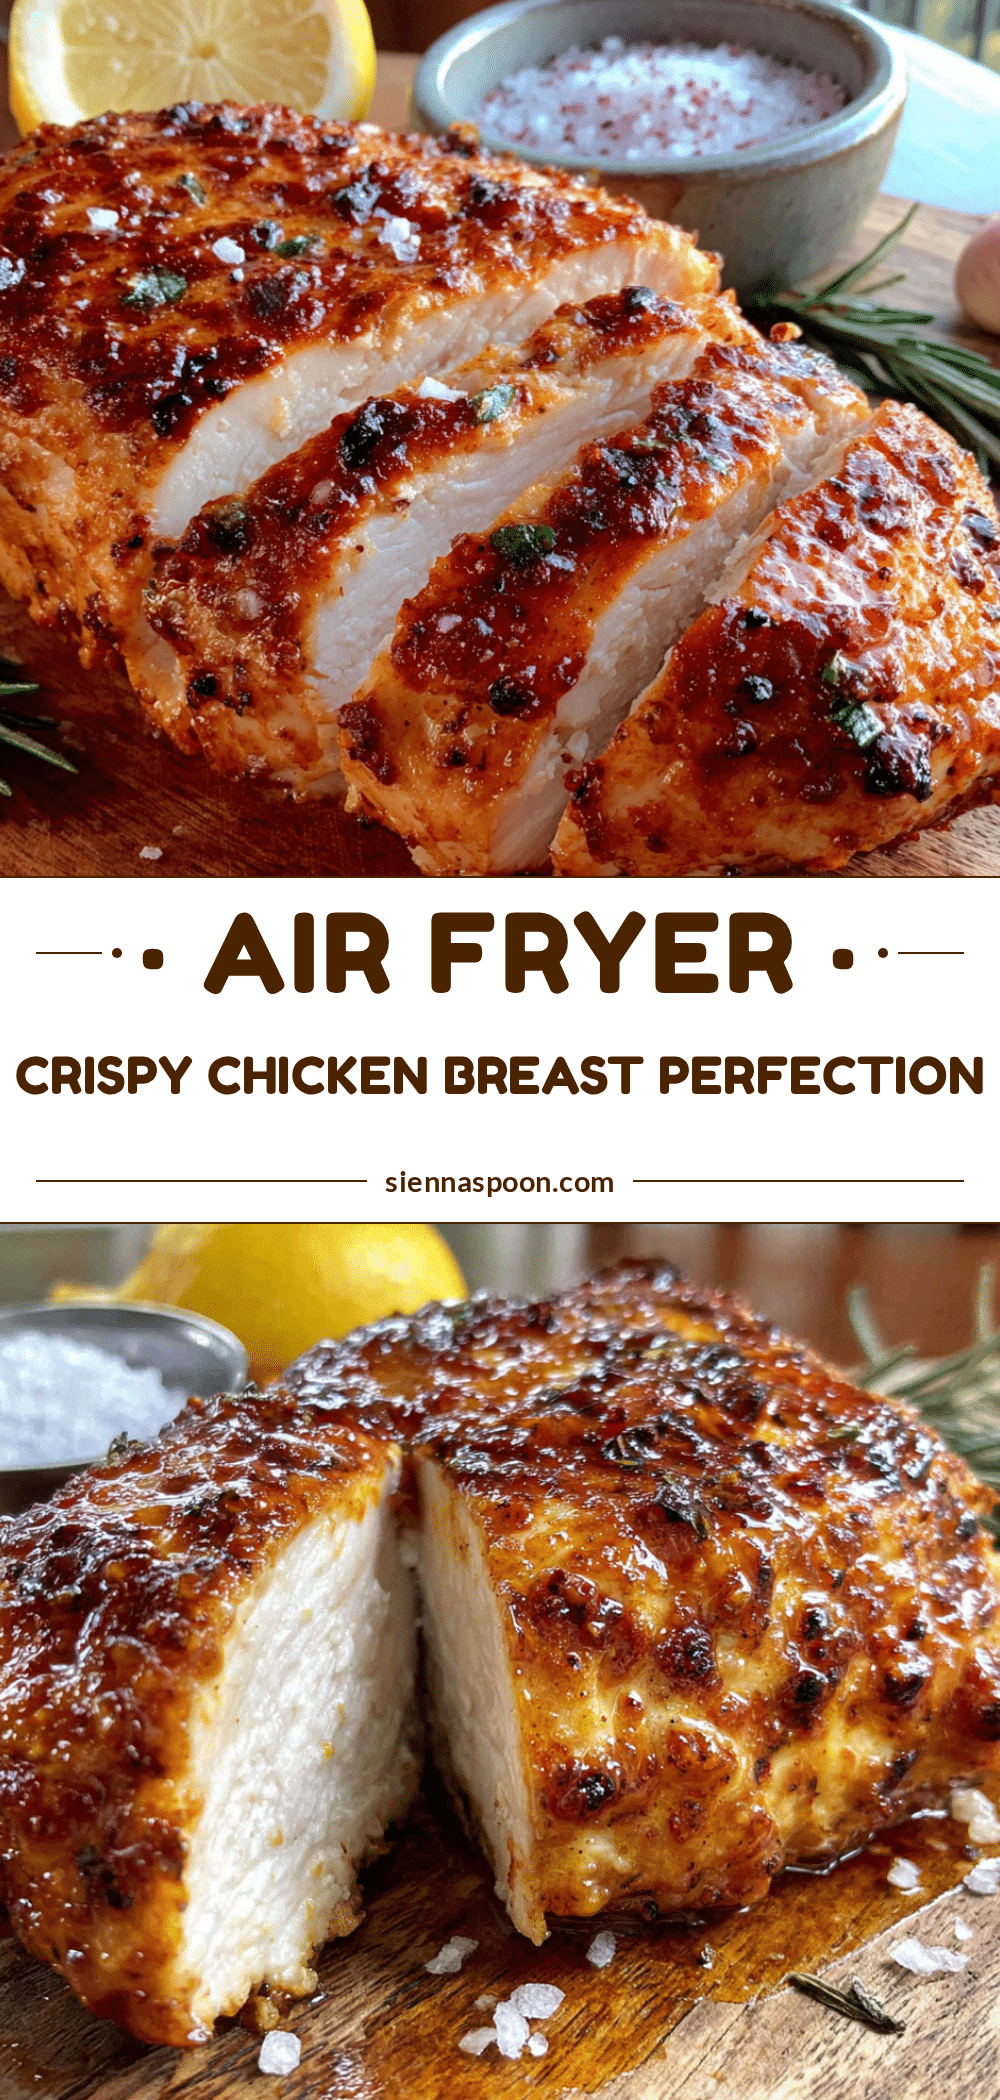
Perfect Crispy Air Fryer Chicken Breast Recipe

This air fryer chicken breast recipe delivers a golden, crackly crust without any breading. Ready in under 20 minutes, it’s juicy inside, crispy outside, and made with simple pantry ingredients.
- Prep Time: 5 minutes
- Cook Time: 12 minutes
- Total Time: 17 minutes
- Yield: 2 servings 1x
- Category: Main Course
- Cuisine: American
Ingredients
- 2 medium boneless, skinless chicken breasts (6–8 ounces each)
- 1 tablespoon olive oil
- 1 teaspoon fine sea salt
- ½ teaspoon freshly ground black pepper
- 1 teaspoon garlic powder
- 1 teaspoon paprika (regular or smoked)
- ½ teaspoon onion powder (optional)
- ½ teaspoon dried thyme or oregano
Instructions
- Pat the chicken completely dry with paper towels.
- In a small bowl, mix salt, pepper, garlic powder, paprika, onion powder, and dried thyme.
- Drizzle olive oil over both sides of each breast and rub in evenly.
- Sprinkle the seasoning mixture over both sides of the chicken and rub gently to adhere.
- Preheat the air fryer to 400°F (200°C) for 3-5 minutes.
- Place chicken in the air fryer basket in a single layer, ensuring they don’t touch.
- Cook for 6 minutes without opening the basket.
- Flip each breast carefully with tongs and cook for another 5-7 minutes, until internal temperature reaches 165°F (74°C).
- Transfer chicken to a cutting board and let rest for 5 minutes.
- Slice against the grain into ½-inch slices and serve immediately.
Notes
Pat the chicken very dry for maximum crispiness. Do not overcrowd the basket. Let chicken come to room temperature for 15-20 minutes before cooking for even results. Use a meat thermometer to ensure doneness without overcooking. For best texture, serve immediately after resting.
Nutrition
- Serving Size: 1 chicken breast
- Calories: 300
- Sodium: 650
- Fat: 14
- Saturated Fat: 2.5
- Carbohydrates: 1
- Protein: 38
Keywords: air fryer chicken breast, crispy chicken, no breading chicken, healthy chicken recipe, quick chicken dinner


