Love this? Save it for later!
Share the inspiration with your friends
It was 10:47 PM on a random Thursday in October, and I had a serious craving for something sweet and crunchy. I didn’t have the energy for a full baking project, but I had a box of Rice Krispies cereal in the pantry and a half-empty bag of marshmallows from the last campfire. The idea that arrived was a little silly, honestly—what if I turned these into little mummies for the kids’ Halloween party the next day? I mean, I was tired, the kitchen was a mess from dinner, and I definitely should have been folding laundry. But there I was, melting butter in a pot at nearly 11 PM, feeling like a mad scientist with a sweet tooth.
Let me tell you, something about the late night loosened the usual rules. I didn’t have fancy candy eyes, so I used mini chocolate chips. I didn’t have white candy melts for the wrappings, so I grabbed a bag of white chocolate chips I’d forgotten about. The kids were asleep, the house was quiet, and I just went for it. I made a mess—marshmallow goo on the counter, chocolate smudged on my favorite spoon—but when I pulled those little mummy faces together, I actually laughed out loud. They were goofy, imperfect, and absolutely perfect.
Maybe you’ve been there—staying up way too late to prep for a school party or a family gathering, wondering if it’s worth the sleep you’re losing. Honestly, it was. These Kid-Approved No-Bake Mummy Rice Krispie Treats became the hit of the classroom the next day, and I’ve been making them every Halloween since. They’re the kind of recipe that proves you don’t need fancy skills or expensive ingredients to create something memorable. Just a little creativity and a late-night impulse can go a long way.
Why You’ll Love This Recipe
I’ve tested this recipe about six times now—yes, six—to get the marshmallow-to-cereal ratio just right. Too sticky and the mummies lose their shape. Too dry and they crumble when you try to wrap them. This version? It’s the Goldilocks of no-bake treats. Here’s why it works so well for busy families like yours.
- Quick & Easy: You can have these ready in under 20 minutes, start to finish. No oven, no fuss, no waiting for dough to chill. Perfect for those “I forgot the class party is tomorrow” moments.
- Simple Ingredients: Butter, marshmallows, Rice Krispies cereal, white chocolate chips, and mini chocolate chips. That’s it. You probably already have most of this in your kitchen right now.
- Perfect for Halloween: These little guys are adorable for classroom parties, trunk-or-treat events, or just a fun Friday night movie snack. They bring the spooky factor without being scary.
- Crowd-Pleaser: I’ve yet to meet a kid who doesn’t love Rice Krispie treats. Add a mummy face, and you’ve got pure magic. Even picky eaters gobble these up.
- Unbelievably Delicious: The combination of crispy cereal, gooey marshmallow, and creamy white chocolate is next-level comfort food. The mini chocolate chip eyes add a little surprise in every bite.
What makes this recipe different from the dozens of other Halloween treats out there? It’s the technique. I found that freezing the treats for just 10 minutes before dipping them in white chocolate makes the wrapping process so much cleaner. No melted marshmallow goo ruining your chocolate. It’s a small trick, but it makes a huge difference. This isn’t just another version—it’s your best version, tested by a tired mom in a messy kitchen at midnight.
This recipe isn’t just good—it is the kind that makes you close your eyes after the first bite. It’s comfort food reimagined for Halloween, faster and easier than baking cookies, but with the same soul-soothing satisfaction. Perfect for impressing your kid’s classmates without stressing yourself out.
What Ingredients You Will Need
This recipe uses simple, wholesome ingredients to deliver bold flavor and satisfying crunch without the fuss. Most of these are pantry staples you likely already have on hand.
- 3 tablespoons unsalted butter (salted works too, just skip the extra salt)
- 10 ounces mini marshmallows (one standard bag—I prefer Jet-Puffed for consistent melting)
- 6 cups Rice Krispies cereal (or any crispy rice cereal; store brands work fine)
- 1 cup white chocolate chips (for the mummy wrappings; Ghirardelli melts beautifully)
- 1 teaspoon coconut oil or vegetable shortening (helps thin the white chocolate for drizzling)
- 1/2 cup mini chocolate chips (for the mummy eyes; dark or milk chocolate both work)
- Pinch of salt (optional, but it balances the sweetness nicely)
For the white chocolate, I recommend using a brand you trust for melting—some cheap white chips seize up and get grainy. If you’re dairy-free, there are excellent vegan white chocolate chips available now; just add an extra teaspoon of coconut oil to help them flow. For the cereal, name brand Rice Krispies gives the classic snap, but I’ve used generic crispy rice cereal with great results. The texture is slightly less crunchy, but still delicious.
If you want to get creative, you can swap the white chocolate for melted candy melts in any color—green mummies are fun for a monster theme. The mini chocolate chips are non-negotiable for the eyes, though. Trust me, I tried using sprinkles once, and they just looked confused. Stick with the chips for that classic mummy stare.
Equipment Needed
You don’t need a fancy kitchen to pull these off. Here’s what I use every time.
- Large pot (4-quart or bigger—you need room to stir the cereal in)
- Wooden spoon or silicone spatula (metal can scratch your pot)
- 9×13-inch baking dish (for pressing the treats; line it with parchment paper for easy removal)
- Parchment paper (trust me, it saves your sanity)
- Small microwave-safe bowl (for melting the white chocolate)
- Piping bag or small zip-top bag (for drizzling the mummy wrappings)
- Sharp knife (for cutting the treats into rectangles)
- Baking sheet (to hold the mummies while you decorate)
- Freezer space (just 10 minutes—clear a spot in your freezer)
If you don’t have a piping bag, a small zip-top bag with the corner snipped off works perfectly. I’ve used both, and honestly, the zip-top bag is easier to control. For the baking dish, you can use a 9×13 or even an 8×8 if you want thicker treats—just adjust your pressing technique. Budget-friendly tip: skip the expensive parchment paper and use wax paper in a pinch, but parchment is less likely to stick.
Preparation Method
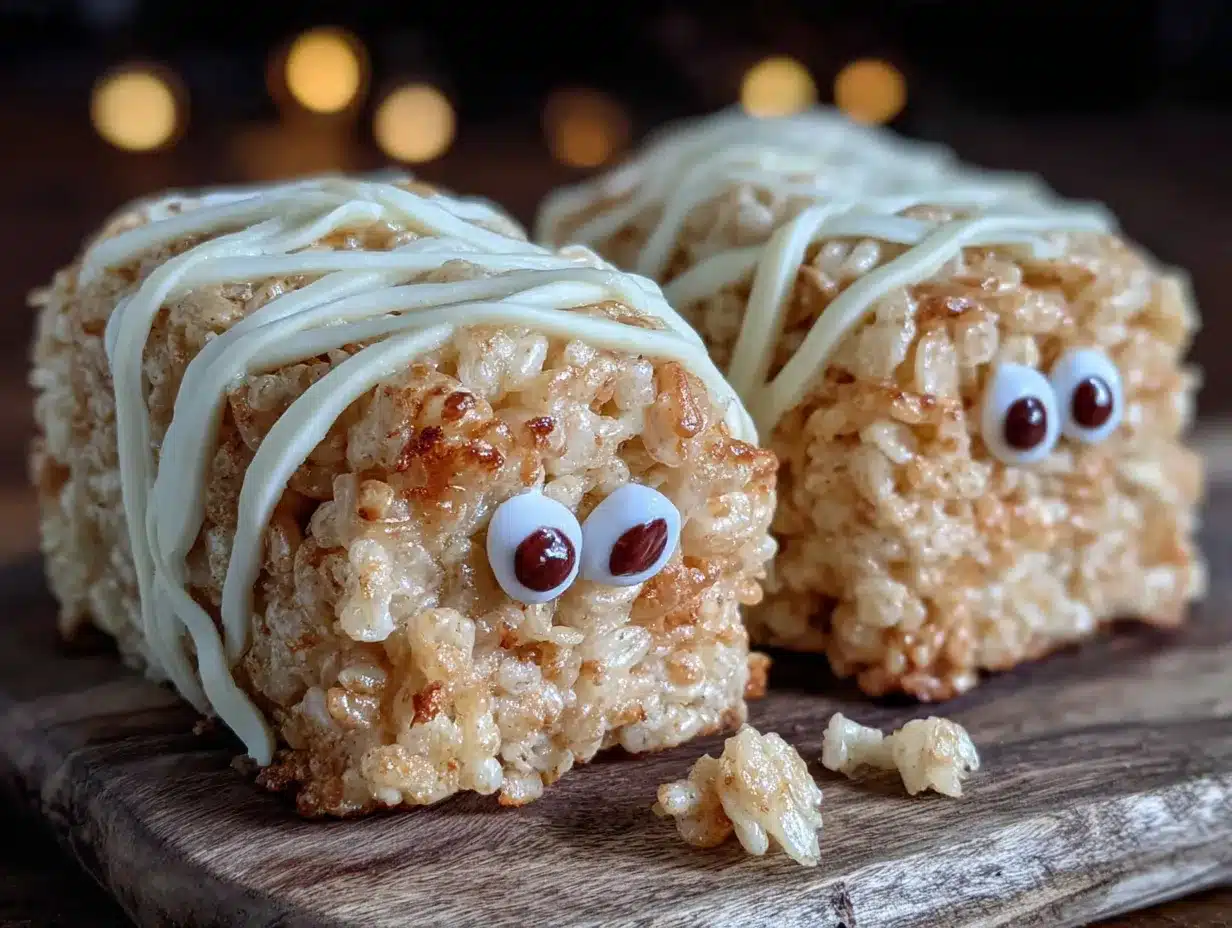
Let’s get these little mummies made. I’ve broken it down step by step so even a first-timer can nail it.
- Prep your workspace. Line your 9×13-inch baking dish with parchment paper, leaving some overhang on the sides. This makes lifting the treats out so much easier later. Spray the parchment lightly with non-stick cooking spray.
- Melt the butter. In your large pot, melt the 3 tablespoons of butter over medium-low heat. Don’t rush this—if the butter burns, the whole batch tastes off. Swirl the pot until it’s fully melted and just starting to bubble.
- Add the marshmallows. Pour in the entire 10-ounce bag of mini marshmallows. Stir constantly with your wooden spoon until they’re completely melted and smooth. This takes about 3-4 minutes. The mixture should be glossy and stretchy, like a warm cloud. Remove from heat immediately once smooth.
- Stir in the cereal. Add the 6 cups of Rice Krispies cereal all at once. Fold gently until every piece is coated in marshmallow. Don’t overmix or you’ll crush the cereal—you want those crispy bits intact. Work quickly before the mixture sets.
- Press into the pan. Scrape the mixture into your prepared baking dish. Press it down firmly and evenly. I use a piece of parchment paper on top and press with my hands—it keeps the sticky mess off your fingers. Aim for an even layer about 1/2 to 3/4 inch thick.
- Cool and cut. Let the treats cool at room temperature for about 15 minutes. Then use your sharp knife to cut them into rectangles—about 2 inches by 3 inches works well. You should get 12 to 15 pieces, depending on how you cut. Don’t worry if they’re not perfect; the mummy wrappings will hide the edges.
- Freeze briefly. Place the cut treats on a baking sheet and pop them in the freezer for exactly 10 minutes. This step is crucial—it firms up the marshmallow so the white chocolate doesn’t melt it when you start decorating. I learned this the hard way after my first batch turned into a gooey mess.
- Melt the white chocolate. In a small microwave-safe bowl, combine the 1 cup of white chocolate chips with 1 teaspoon of coconut oil. Microwave in 20-second intervals, stirring between each, until smooth. Don’t overheat or the chocolate will seize. It should be pourable but not runny.
- Create the mummy wrappings. Transfer the melted white chocolate to your piping bag or zip-top bag. Snip a tiny corner off the tip. Working with one treat at a time, drizzle the white chocolate back and forth across the top to look like mummy bandages. Don’t cover the whole surface—leave gaps for the eyes. Let your lines be uneven and messy; that’s the charm.
- Add the eyes. While the white chocolate is still wet, press two mini chocolate chips into the gaps for eyes. Place them slightly off-center for a goofy mummy look. I like to angle them a little so it looks like the mummy is looking sideways.
- Set and serve. Let the treats sit at room temperature until the white chocolate is fully set, about 20 minutes. If you’re in a hurry, you can pop them back in the freezer for 5 minutes. Serve immediately or store for later.
Cooking Tips & Techniques
I’ve made these treats at least a dozen times now, and I’ve learned a few things along the way. Let me save you from my mistakes.
Don’t rush the marshmallow melting. I once cranked the heat to high because I was impatient, and the marshmallows turned brown and grainy. Low and slow is the way to go. You want a smooth, glossy mixture that stretches when you lift the spoon. If you see any lumps, keep stirring—they’ll melt eventually.
The freezer trick is non-negotiable. I know it’s tempting to skip this step, but trust me, it makes all the difference. Warm marshmallow treats will melt the white chocolate into a puddle, and your mummies will look like they’ve been through a swamp. Ten minutes in the freezer firms them up just enough to handle the drizzle without turning into a sticky disaster.
Work in batches. Don’t drizzle all the treats at once. The white chocolate will start to set as you work, and you’ll end up with thick, clumpy bandages. Drizzle two or three treats at a time, add their eyes, then move on. It keeps everything looking fresh and clean.
Use a light hand with the white chocolate. Less is more here. You want to see the treat peeking through the bandages, not a solid white blob. Think of it like wrapping a present—you want the paper to show through the ribbons. If you accidentally cover the whole thing, just call it a “ghost mummy” and move on. No one will complain.
Timing is everything. If you’re making these for a party, prep the treats up to step 6 the night before. Keep them in an airtight container at room temperature, then do the decorating the next day. It breaks the work into manageable chunks and keeps you from feeling rushed.
Variations & Adaptations
One of the best things about this recipe is how easy it is to tweak. Here are some variations I’ve tried and loved.
Gluten-Free Mummies: Rice Krispies are naturally gluten-free, but double-check your brand. Some generic crispy rice cereals contain malt flavoring, which has gluten. I use the name brand to be safe. The rest of the ingredients are gluten-free too, so this is an easy win for celiac-friendly parties.
Vegan Version: Swap the butter for a plant-based alternative (I like Miyoko’s salted butter), use vegan marshmallows (Dandies are my go-to), and choose dairy-free white chocolate chips. The coconut oil helps everything melt smoothly. The texture is slightly less chewy, but still delicious.
Chocolate Mummies: For a richer treat, use chocolate Rice Krispies cereal or add 2 tablespoons of cocoa powder to the marshmallow mixture before stirring in the cereal. The dark chocolate pairs beautifully with the white chocolate bandages. My kids call these “chocolate mummies” and they disappear fast.
Colorful Bandages: Instead of white chocolate, use colored candy melts in green, orange, or purple. It’s a fun way to match a party theme. I made purple ones for a “monster mash” party once, and they were a huge hit. Just follow the melting instructions on the package.
Mini Mummy Bites: Press the mixture into a mini muffin tin instead of a baking dish. You’ll get bite-sized mummies that are perfect for little hands. Just spray the tin well with non-stick spray and press the mixture in firmly. Reduce the decorating time since they’re smaller.
Serving & Storage Suggestions
These mummy treats are best served at room temperature, right after the white chocolate has set. The contrast between the soft, chewy marshmallow and the crisp white chocolate is pure magic. Arrange them on a platter with some fake spiderwebs or plastic spiders for a spooky presentation. My kids love when I add little googly eyes to the platter itself—it sets the mood.
For storage, place the treats in an airtight container at room temperature. They’ll stay fresh for up to 3 days, though they rarely last that long in my house. If you stack them, separate layers with parchment paper to prevent the white chocolate from sticking. Don’t refrigerate them—the marshmallow gets hard and loses that soft, chewy texture.
You can freeze the undecorated treats for up to a month. Just wrap them tightly in plastic wrap and then foil. When you’re ready to serve, thaw them at room temperature for about 30 minutes, then decorate as directed. The texture is still perfect. I’ve done this for last-minute school parties, and it’s a lifesaver.
One thing I love about this recipe is that the flavors actually get better after a day. The marshmallow softens slightly, and the white chocolate sets into a perfect snap. If you can resist eating them all immediately, they’re even better the next day.
Nutritional Information & Benefits
Let’s be real—these are a treat, not a health food. But here’s the estimated breakdown for one mummy treat (based on 12 servings).
- Calories: Approximately 220 per treat
- Total Fat: 8g
- Saturated Fat: 5g
- Carbohydrates: 36g
- Sugar: 22g
- Protein: 2g
- Sodium: 180mg
The Rice Krispies cereal provides a small amount of iron and B vitamins, and the butter adds a touch of vitamin A. But honestly, these are about fun and celebration, not daily nutrition. If you’re serving them at a party, balance them out with some fruit or veggie platters. For my family, they’re a once-a-year Halloween tradition, and that’s perfectly fine.
If you have allergy concerns, note that this recipe contains dairy (butter, white chocolate) and may contain traces of gluten depending on your cereal brand. The mini chocolate chips often contain soy lecithin, so check labels if you have soy allergies. For a nut-free version, verify that all your ingredients are processed in nut-free facilities.
Conclusion
These Kid-Approved No-Bake Mummy Rice Krispie Treats are proof that you don’t need to be a pastry chef to make something magical. They’re simple enough for a weeknight, fun enough for a party, and delicious enough to make you forget you’re eating a glorified Rice Krispie treat. I love that I can make them with my kids without stressing about hot ovens or complicated techniques. It’s the kind of recipe that builds memories, not messes.
I encourage you to make these your own. Use different candy eyes, try colored bandages, or let the kids go wild with the drizzling. The imperfections are what make them charming. Honestly, the goofier they look, the more everyone loves them. So grab your ingredients, clear some freezer space, and get ready to create something that will make your family smile.
I’d love to hear how yours turn out. Drop a comment below with your favorite mummy face variation, or share a photo of your creations. Don’t forget to pin this recipe for later—you’ll thank me when Halloween rolls around and you need a quick win. Happy haunting, and happy snacking!
Frequently Asked Questions
Can I use regular marshmallows instead of mini marshmallows?
Yes, you can. Use about 40 regular marshmallows (one standard 10-ounce bag) instead of the mini ones. They take a bit longer to melt, so keep stirring over low heat. The texture will be the same once melted.
How do I keep the white chocolate from seizing?
Make sure your bowl is completely dry—any water will cause the chocolate to seize. Also, don’t overheat it. Microwave in short bursts and stir between each. The coconut oil helps keep it smooth and pourable.
Can I make these ahead of time for a party?
Absolutely. You can make the treats up to step 6 (cutting them into rectangles) up to 2 days ahead. Store them in an airtight container at room temperature. Decorate them the day of the party for the freshest look.
My treats came out too hard. What did I do wrong?
You probably overcooked the marshmallow mixture. Once the marshmallows are fully melted, remove from heat immediately. If you keep cooking, the sugar crystallizes and makes the treats hard and brittle. Next time, take it off the heat as soon as it’s smooth.
Can I use a different cereal?
Yes! Cocoa Pebbles, Fruity Pebbles, or even puffed rice cereal all work well. Just keep the ratio the same—6 cups of cereal to 10 ounces of marshmallows. The texture might vary slightly, but the mummies will still be delicious.
Pin This Recipe!
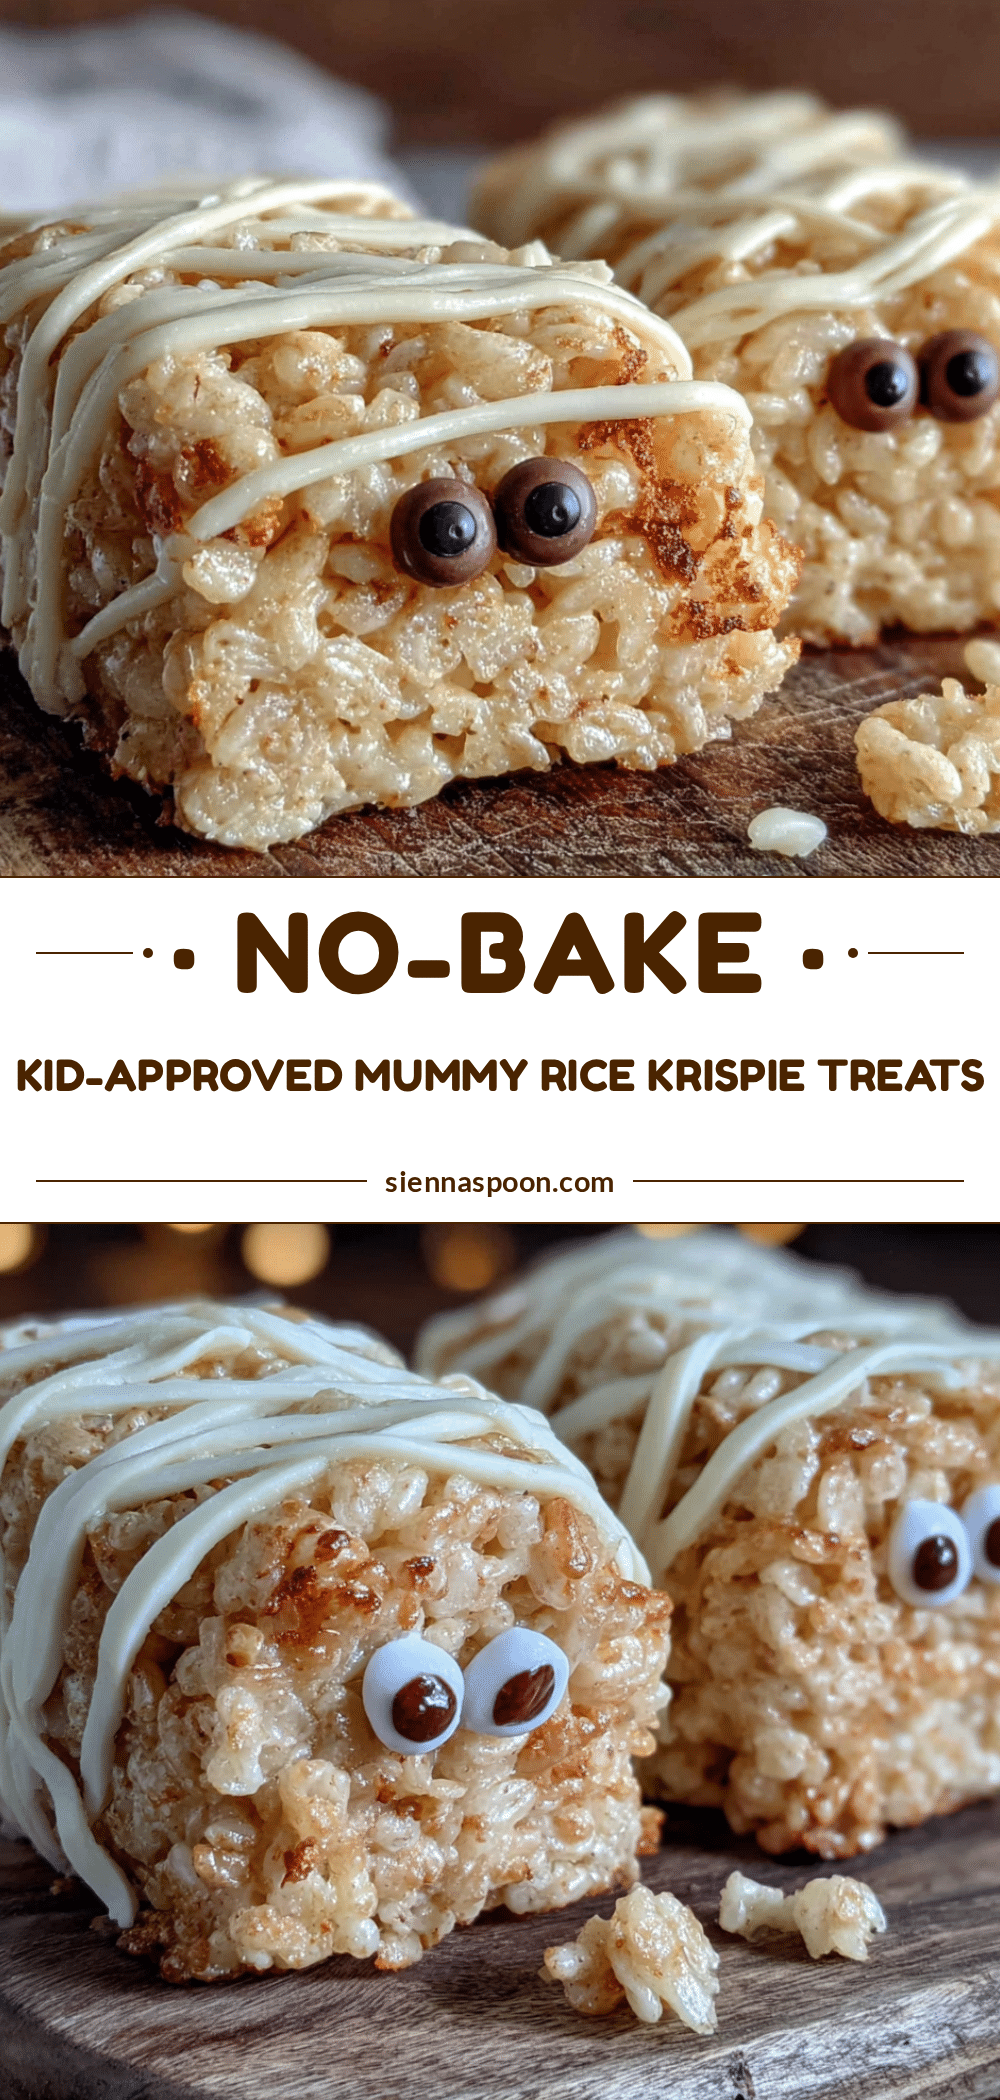
Kid-Approved No-Bake Mummy Rice Krispie Treats
These adorable no-bake mummy Rice Krispie treats are perfect for Halloween parties and classroom celebrations. Made with simple ingredients and ready in under 20 minutes, they’re a fun and delicious treat that kids love to help make.
- Prep Time: 15 minutes
- Cook Time: 5 minutes
- Total Time: 20 minutes
- Yield: 12-15 servings 1x
- Category: Dessert
- Cuisine: American
Ingredients
- 3 tablespoons unsalted butter
- 10 ounces mini marshmallows (one standard bag)
- 6 cups Rice Krispies cereal
- 1 cup white chocolate chips
- 1 teaspoon coconut oil or vegetable shortening
- 1/2 cup mini chocolate chips
- Pinch of salt (optional)
Instructions
- Prep your workspace. Line your 9×13-inch baking dish with parchment paper, leaving some overhang on the sides. Spray the parchment lightly with non-stick cooking spray.
- Melt the butter. In your large pot, melt the 3 tablespoons of butter over medium-low heat. Don’t rush this—if the butter burns, the whole batch tastes off. Swirl the pot until it’s fully melted and just starting to bubble.
- Add the marshmallows. Pour in the entire 10-ounce bag of mini marshmallows. Stir constantly with your wooden spoon until they’re completely melted and smooth. This takes about 3-4 minutes. The mixture should be glossy and stretchy, like a warm cloud. Remove from heat immediately once smooth.
- Stir in the cereal. Add the 6 cups of Rice Krispies cereal all at once. Fold gently until every piece is coated in marshmallow. Don’t overmix or you’ll crush the cereal—you want those crispy bits intact. Work quickly before the mixture sets.
- Press into the pan. Scrape the mixture into your prepared baking dish. Press it down firmly and evenly. I use a piece of parchment paper on top and press with my hands—it keeps the sticky mess off your fingers. Aim for an even layer about 1/2 to 3/4 inch thick.
- Cool and cut. Let the treats cool at room temperature for about 15 minutes. Then use your sharp knife to cut them into rectangles—about 2 inches by 3 inches works well. You should get 12 to 15 pieces, depending on how you cut. Don’t worry if they’re not perfect; the mummy wrappings will hide the edges.
- Freeze briefly. Place the cut treats on a baking sheet and pop them in the freezer for exactly 10 minutes. This step is crucial—it firms up the marshmallow so the white chocolate doesn’t melt it when you start decorating.
- Melt the white chocolate. In a small microwave-safe bowl, combine the 1 cup of white chocolate chips with 1 teaspoon of coconut oil. Microwave in 20-second intervals, stirring between each, until smooth. Don’t overheat or the chocolate will seize. It should be pourable but not runny.
- Create the mummy wrappings. Transfer the melted white chocolate to your piping bag or zip-top bag. Snip a tiny corner off the tip. Working with one treat at a time, drizzle the white chocolate back and forth across the top to look like mummy bandages. Don’t cover the whole surface—leave gaps for the eyes. Let your lines be uneven and messy; that’s the charm.
- Add the eyes. While the white chocolate is still wet, press two mini chocolate chips into the gaps for eyes. Place them slightly off-center for a goofy mummy look.
- Set and serve. Let the treats sit at room temperature until the white chocolate is fully set, about 20 minutes. If you’re in a hurry, you can pop them back in the freezer for 5 minutes. Serve immediately or store for later.
Notes
Freezing the treats for 10 minutes before dipping in white chocolate makes the wrapping process cleaner. Work in batches when drizzling white chocolate to prevent it from setting. Use a light hand with the white chocolate—you want to see the treat peeking through the bandages. The treats can be stored in an airtight container at room temperature for up to 3 days. Undecorated treats can be frozen for up to a month.
Nutrition
- Serving Size: 1 mummy treat
- Calories: 220
- Sugar: 22
- Sodium: 180
- Fat: 8
- Saturated Fat: 5
- Carbohydrates: 36
- Protein: 2
Keywords: Halloween treats, no-bake desserts, Rice Krispie treats, mummy treats, kid-friendly recipes, easy Halloween recipes, party snacks


