Love this? Save it for later!
Share the inspiration with your friends
Hand me that bowl, my neighbor said, not even looking up from the pile of mail she was sorting. I’d stopped by to borrow a ladder—a very unglamorous Tuesday errand—and the smell of something warm and sweet hit me before I even got past her front door. It was that specific, cozy scent of bananas getting roasted in butter and sugar, the kind of smell that makes you forget why you walked into a room in the first place. She had a single, very sad-looking banana on the counter, and I honestly thought she was just making breakfast for her kid. But no, she was pulling out a loaf pan.
She wasn’t trying to impress me. She wasn’t testing a recipe for a blog. She was just… making banana bread because the banana was there. And let me tell you, the way she handled the batter—with this complete lack of fuss, just dumping oil in instead of creaming butter—I almost felt bad for how complicated I’d been making it for years. I stood there, ladder forgotten, watching her pour the batter into a pan that wasn’t even greased properly (she just waved a butter wrapper over it). That’s when I realized: the best banana bread isn’t about technique. It’s about not overthinking it. Maybe you’ve been there, staring at overripe bananas and a complicated recipe, wondering if it’s worth the effort. This one? It is. And honestly, I haven’t looked back since.
Why You’ll Love This Recipe
This isn’t just another banana bread recipe—this is the one that actually works when you have zero time and a craving that won’t wait. After testing this method about a dozen times (and failing a few, let me be honest), I can promise you this version is foolproof. I’ve even had my 12-year-old nephew make it solo, and it came out perfect.
- Quick & Easy: From mixing bowl to oven in under 10 minutes. No stand mixer, no sifting, no nonsense. It’s ready to eat in about an hour flat.
- Simple Ingredients: You probably have everything in your pantry right now. No buttermilk, no sour cream, no weird extracts that you’ll use once and forget about.
- Perfect for Last-Minute Cravings: Got unexpected guests? Need a hostess gift? This bread saves the day without saving a mess.
- Crowd-Pleaser: It’s moist, tender, and has that perfect crackly top that makes everyone think you spent hours on it. Kids and adults fight over the end pieces.
- Unbelievably Delicious: The texture is almost cake-like—soft, not dense or gummy. The flavor is pure banana comfort, with a hint of vanilla that just makes sense.
What makes this one different from the rest? It’s the no-knead, no-creaming method. By using oil instead of butter and mixing by hand, you avoid overworking the gluten, which keeps the bread incredibly tender. Plus, the same-day aspect means you don’t have to wait for bananas to turn into science experiments. You can use perfectly yellow bananas and still get amazing flavor. This is comfort food reimagined—faster, easier, but with the same soul-soothing satisfaction that makes you close your eyes after the first bite.
What Ingredients You Will Need
This recipe uses simple, wholesome ingredients to deliver bold flavor and satisfying texture without the fuss. Most of these are pantry staples, so you can whip this up whenever the mood strikes.
- Ripe Bananas (3 medium, about 1 cup mashed): The riper, the better for sweetness, but even just-yellow bananas work here. Mash them well with a fork—lumps are fine, but you want mostly smooth.
- Granulated Sugar (¾ cup): Adds sweetness and helps create that beautiful golden crust. You can reduce to ½ cup if your bananas are very sweet.
- Vegetable Oil (⅓ cup): This is the secret to the tender crumb. I use canola or avocado oil for a neutral flavor. (Use melted coconut oil for a subtle tropical note.)
- Large Eggs (2, room temperature): They bind everything together and add richness. If you’re in a rush, place cold eggs in warm water for 5 minutes.
- Vanilla Extract (1 teaspoon): Pure vanilla is best, but imitation works fine. It rounds out the banana flavor beautifully.
- All-Purpose Flour (1 ½ cups): Spoon and level for accuracy—scooping directly can pack the flour and make the bread dry. I recommend King Arthur Flour for consistent results.
- Baking Soda (1 teaspoon): This is your leavening agent. Make sure it’s fresh (test it by dropping a pinch in vinegar—it should fizz).
- Salt (½ teaspoon): Don’t skip this! It balances the sweetness and enhances the banana flavor.
- Optional Mix-ins (½ cup): Chocolate chips, walnuts, or blueberries are all fair game. I personally love dark chocolate chunks—they melt into little pockets of gooeyness.
Substitution Guidance: For a gluten-free option, use a 1:1 gluten-free baking flour blend. For a dairy-free version, this recipe is already dairy-free since it uses oil! If you want to reduce sugar, try ½ cup coconut sugar or monk fruit sweetener—just note the texture will be slightly denser.
Equipment Needed
You don’t need a fancy kitchen for this recipe. Here’s what you’ll need, along with a few tips I’ve picked up along the way.
- 9×5-inch Loaf Pan: The standard size. If you use an 8×4 pan, the bread will take longer to bake and may have a domed top. I use a light-colored metal pan for even browning.
- Large Mixing Bowl: Any bowl works, but a wide one makes mashing and mixing easier.
- Whisk or Fork: For mashing bananas and mixing the wet ingredients. No electric mixer needed!
- Spatula or Wooden Spoon: For folding the dry ingredients into the wet. A rubber spatula is great for scraping the bowl clean.
- Measuring Cups and Spoons: Accurate measurements matter here. Use dry measuring cups for flour and liquid measuring cups for oil.
- Parchment Paper (optional but recommended): Lining the pan makes lifting the bread out effortless. If you don’t have it, just grease the pan well with butter or oil.
- Cooling Rack: Helps the bread cool evenly and prevents a soggy bottom. If you don’t have one, just tilt the loaf pan to let air circulate.
Budget-Friendly Tip: Don’t have a loaf pan? Use an 8×8 square pan and reduce the baking time by about 10 minutes. It’ll be a thinner, snackable bread that’s perfect for cutting into squares.
Preparation Method
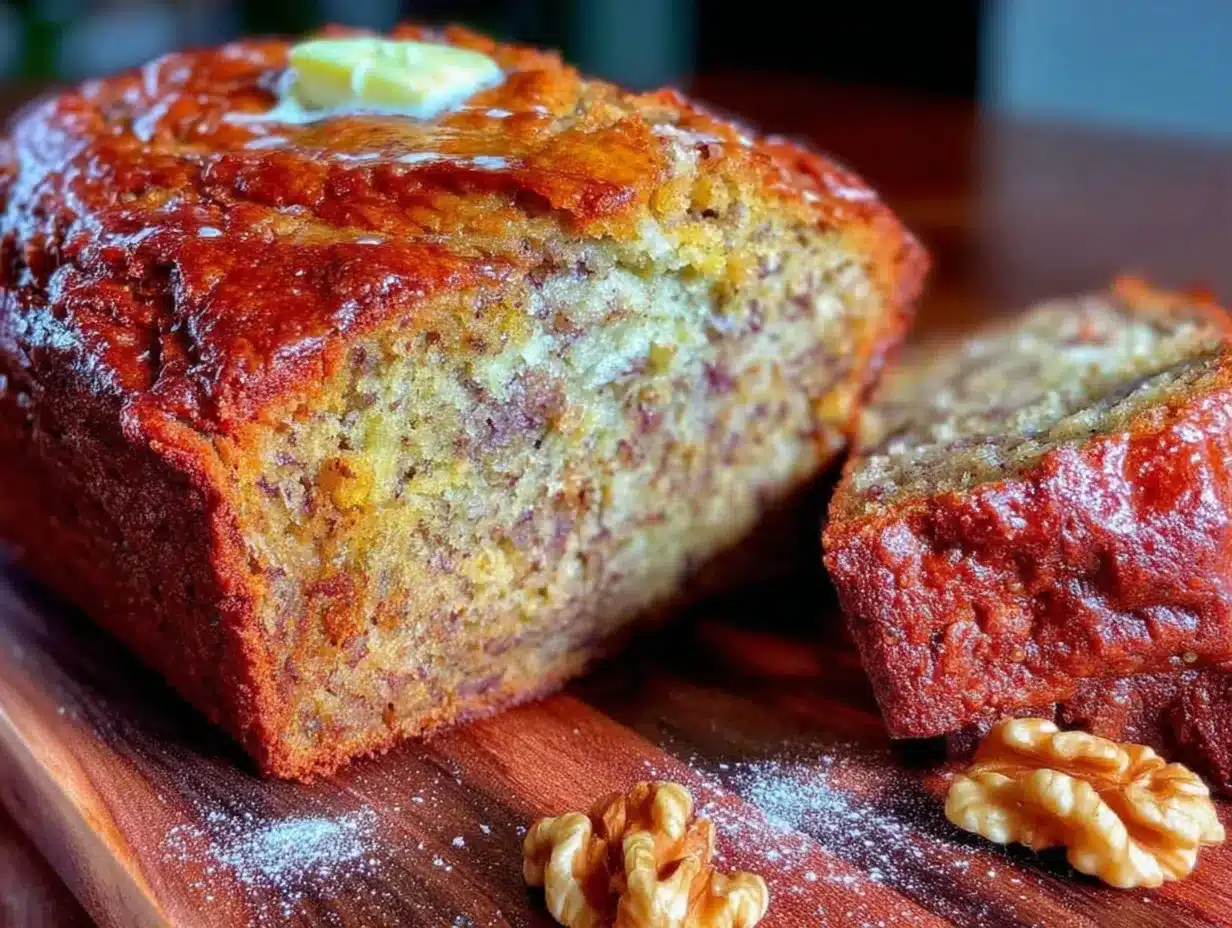
Let’s get to the good part. This method is so simple, you’ll memorize it after one go. Follow these steps, and you’ll have a perfect loaf every time.
- Preheat your oven to 350°F (175°C). Place the rack in the middle position. Grease your 9×5-inch loaf pan with butter or oil, or line it with parchment paper, leaving a 2-inch overhang on the long sides for easy removal.
- Mash the bananas. In your large mixing bowl, add the 3 ripe bananas. Use a fork to mash them until they’re mostly smooth with a few small lumps remaining. You want about 1 cup of mashed banana. Personal tip: If your bananas are very ripe and soft, they’ll mash in seconds. If they’re firmer, microwave them for 20 seconds to soften.
- Add the wet ingredients. To the mashed bananas, add the ¾ cup granulated sugar, ⅓ cup vegetable oil, 2 large eggs, and 1 teaspoon vanilla extract. Whisk everything together until well combined and smooth. The mixture should look pale and slightly frothy. Don’t overmix—just until the eggs are incorporated.
- Mix the dry ingredients. In a separate small bowl, whisk together the 1 ½ cups all-purpose flour, 1 teaspoon baking soda, and ½ teaspoon salt. This ensures the baking soda is evenly distributed. If you’re adding mix-ins like chocolate chips, toss them in a tablespoon of the flour mixture to prevent them from sinking to the bottom.
- Combine wet and dry. Pour the dry ingredients into the wet ingredients. Use a spatula or wooden spoon to fold them together gently. Stir just until you no longer see streaks of flour—about 10 to 15 strokes. A few lumps are perfectly fine. Here’s where most people go wrong: overmixing develops gluten, which makes the bread tough. Stop when it’s just combined.
- Fold in optional mix-ins. If using, gently fold in ½ cup of chocolate chips, nuts, or berries. Don’t overmix—you want them evenly distributed, not smashed into the batter.
- Pour into the pan. Scrape the batter into your prepared loaf pan. Use the spatula to spread it evenly. Give the pan a gentle tap on the counter to release any air bubbles. The batter will be thick and slightly lumpy—that’s exactly right.
- Bake for 50 to 60 minutes. Place the pan in the preheated oven. Bake until the top is deep golden brown and a toothpick inserted into the center comes out clean or with a few moist crumbs. Check at the 45-minute mark—if the top is browning too quickly, tent it loosely with aluminum foil.
- Cool in the pan. Let the bread cool in the pan on a wire rack for 10 minutes. This allows it to set and makes it easier to remove.
- Remove and cool completely. Use the parchment paper overhang to lift the bread out of the pan. Transfer it to the wire rack to cool completely before slicing. I know it’s tempting, but slicing while warm can make it crumble. Let it cool for at least 30 minutes for clean slices.
Troubleshooting Tip: If the center is still wet after 60 minutes but the top is very dark, your oven might run hot. Next time, reduce the temperature to 325°F (160°C) and bake for 60 to 70 minutes. Also, make sure your baking soda is fresh—old baking soda won’t give enough lift.
Cooking Tips & Techniques
I’ve made this banana bread more times than I can count, and I’ve learned a few things the hard way. Here are my best tips to guarantee success.
- The banana ripeness sweet spot: You want bananas that are heavily speckled with brown spots—almost entirely brown is even better. They’re sweeter and easier to mash. But here’s the thing: if you only have yellow bananas, you can still make this bread. Just add an extra tablespoon of sugar and 2 tablespoons of milk to compensate for the lack of natural moisture.
- Don’t overmix the batter: This is the number one mistake I see. Once you add the flour, mix just until it disappears. Overmixing develops gluten, which makes banana bread tough and rubbery instead of tender. I once overmixed a batch while distracted by a phone call, and it came out like a hockey puck. Learn from my failure.
- Use room temperature eggs: Cold eggs can seize the oil and make the batter lumpy. If you forgot to take them out of the fridge, place them in a bowl of warm water for 5 minutes. It makes a real difference in how smoothly the batter comes together.
- The toothpick test is your friend: Insert a toothpick into the center of the bread. If it comes out clean or with a few moist crumbs, it’s done. If it’s wet with batter, give it another 5 minutes. But don’t open the oven door too often—it lets out heat and can cause the bread to sink.
- Let it cool properly: Cooling in the pan for 10 minutes is non-negotiable. It allows the steam to redistribute and the structure to set. Cutting too early will result in a gummy, falling-apart mess. Patience pays off here.
Variations & Adaptations
This recipe is a fantastic base for creativity. Here are a few variations I’ve tried and loved.
- Chocolate Chip Banana Bread: Fold in ½ cup of semi-sweet or dark chocolate chips. The warmth of the bread melts them into gooey pockets. I like to sprinkle a few extra chips on top before baking for a prettier look.
- Nutty Banana Bread: Add ½ cup of chopped walnuts or pecans. Toast them lightly in a dry pan for 3 minutes first—it brings out their flavor and keeps them crunchy in the bread.
- Vegan Banana Bread: Replace the eggs with 2 flax eggs (2 tablespoons ground flaxseed mixed with 6 tablespoons water, left to sit for 5 minutes). Use coconut sugar instead of granulated. The texture will be slightly denser but still delicious.
- Gluten-Free Banana Bread: Swap the all-purpose flour with a 1:1 gluten-free baking blend. I’ve tested this with Bob’s Red Mill, and it works beautifully. Add an extra tablespoon of oil to keep it moist.
- Spiced Banana Bread: Add 1 teaspoon of cinnamon, ½ teaspoon of nutmeg, and ¼ teaspoon of ground ginger to the dry ingredients. It gives the bread a warm, cozy flavor that’s perfect for fall.
Personal Variation: My favorite twist is adding ½ cup of sour cream or Greek yogurt to the wet ingredients. It makes the bread incredibly moist and gives it a slight tang that pairs beautifully with the sweetness. Just reduce the oil to ¼ cup to keep the consistency right.
Serving & Storage Suggestions
This banana bread is wonderful on its own, but here are some ways to make it even more special.
Serving: Serve warm or at room temperature. For an extra treat, toast a slice and spread it with butter, cream cheese, or a drizzle of honey. It’s also amazing with a scoop of vanilla ice cream for a simple dessert. Pair it with a cup of coffee or a glass of cold milk for the ultimate comfort snack.
Storage: Store leftover banana bread in an airtight container at room temperature for up to 4 days. To keep it moist, place a paper towel in the container to absorb excess moisture. Do not refrigerate—it will dry out the bread.
Freezing: This bread freezes beautifully. Wrap the cooled loaf tightly in plastic wrap, then in aluminum foil, and freeze for up to 3 months. To thaw, leave it at room temperature for a few hours or pop individual slices in the toaster. You can also freeze individual slices for grab-and-go snacks.
Reheating: For that fresh-from-the-oven taste, microwave a slice for 15 seconds or toast it in a toaster oven for 5 minutes at 350°F. The flavors actually deepen after a day or two, so day-old banana bread is often the best.
Nutritional Information & Benefits
Here’s an approximate nutritional breakdown per slice (based on 10 slices, without mix-ins):
| Nutrient | Amount per Slice |
|---|---|
| Calories | 220 |
| Total Fat | 9g |
| Saturated Fat | 1g |
| Cholesterol | 35mg |
| Sodium | 200mg |
| Total Carbohydrates | 33g |
| Dietary Fiber | 1g |
| Sugars | 18g |
| Protein | 3g |
Health Benefits: Bananas are a great source of potassium, which supports heart health and muscle function. They also provide vitamin B6 and vitamin C. Using oil instead of butter reduces saturated fat, making this a slightly lighter option. For a lower-sugar version, use just ½ cup of sugar or a sugar substitute.
Dietary Considerations: This recipe is naturally dairy-free. For a vegan option, see the variations section. It contains gluten and eggs unless adapted. Always check your mix-ins for potential allergens.
Conclusion
This easy no-knead banana bread is proof that the best recipes don’t need to be complicated. It started with a neighbor who didn’t even realize she was teaching me something, and now it’s the loaf I turn to whenever I need a little comfort or a quick gift. It’s forgiving, adaptable, and always delivers that perfect moist crumb and crackly top.
I really hope you give this one a try. Maybe add your own twist—a handful of chocolate chips, a sprinkle of cinnamon, or just leave it plain and simple. Whatever you do, don’t overmix and don’t skip the cooling time. Trust me on that. I’d love to hear how it turns out for you. Drop a comment below and let me know what mix-ins you used or if you made it for a special occasion. Happy baking, friend!
Frequently Asked Questions
Can I use frozen bananas for this recipe?
Absolutely! Thaw them completely at room temperature, then drain off any excess liquid before mashing. Frozen bananas are often even sweeter and more flavorful than fresh ones.
Why did my banana bread sink in the middle?
This usually happens if the bread is underbaked or if you opened the oven door too early. Make sure your baking soda is fresh and bake until a toothpick comes out clean. Also, avoid slamming the oven door.
Can I make this recipe into muffins?
Yes! Divide the batter into a greased 12-cup muffin tin. Bake at 350°F for 18 to 22 minutes, or until a toothpick inserted into the center comes out clean. Perfect for grab-and-go breakfasts.
How do I make the top extra crackly?
For that iconic crackly top, let the batter rest in the pan for 10 minutes before baking. You can also sprinkle a little coarse sugar on top right before it goes in the oven for extra crunch.
Can I reduce the sugar without ruining the texture?
You can reduce the sugar to ½ cup without major issues, but the bread will be less sweet and slightly less moist. For a healthier swap, try ½ cup of coconut sugar or maple syrup (reduce the oil by 1 tablespoon if using maple syrup).
Pin This Recipe!
Easy No-Knead Banana Bread Ready in 1 Hour
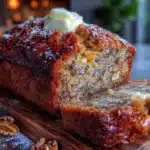
This easy no-knead banana bread is proof that the best recipes don’t need to be complicated. It’s forgiving, adaptable, and always delivers that perfect moist crumb and crackly top.
- Prep Time: 10 minutes
- Cook Time: 50 minutes
- Total Time: 1 hour
- Yield: 10 servings 1x
- Category: Dessert
- Cuisine: American
Ingredients
- 3 medium ripe bananas (about 1 cup mashed)
- ¾ cup granulated sugar
- ⅓ cup vegetable oil (canola or avocado oil recommended)
- 2 large eggs (room temperature)
- 1 teaspoon vanilla extract
- 1 ½ cups all-purpose flour (spooned and leveled)
- 1 teaspoon baking soda
- ½ teaspoon salt
- ½ cup optional mix-ins (chocolate chips, walnuts, or blueberries)
Instructions
- Preheat your oven to 350°F (175°C). Grease a 9×5-inch loaf pan with butter or oil, or line it with parchment paper, leaving a 2-inch overhang on the long sides.
- In a large mixing bowl, mash the bananas with a fork until mostly smooth with a few small lumps remaining (about 1 cup).
- Add the granulated sugar, vegetable oil, eggs, and vanilla extract to the mashed bananas. Whisk until well combined and smooth.
- In a separate small bowl, whisk together the all-purpose flour, baking soda, and salt.
- Pour the dry ingredients into the wet ingredients. Fold gently with a spatula or wooden spoon until just combined (about 10 to 15 strokes). Do not overmix.
- If using, gently fold in optional mix-ins (chocolate chips, nuts, or berries).
- Pour the batter into the prepared loaf pan and spread evenly. Tap the pan gently on the counter to release air bubbles.
- Bake for 50 to 60 minutes, until the top is deep golden brown and a toothpick inserted into the center comes out clean or with a few moist crumbs. Check at 45 minutes and tent with foil if browning too quickly.
- Let the bread cool in the pan on a wire rack for 10 minutes.
- Use the parchment paper overhang to lift the bread out of the pan. Transfer to a wire rack and cool completely before slicing (at least 30 minutes).
Notes
Don’t overmix the batter to avoid tough bread. Use room temperature eggs for smoother batter. Let the bread cool completely before slicing for clean slices. For a crackly top, let the batter rest in the pan for 10 minutes before baking. Store in an airtight container at room temperature for up to 4 days. Freezes well for up to 3 months.
Nutrition
- Serving Size: 1 slice
- Calories: 220
- Sugar: 18
- Sodium: 200
- Fat: 9
- Saturated Fat: 1
- Carbohydrates: 33
- Fiber: 1
- Protein: 3
Keywords: banana bread, easy banana bread, no-knead banana bread, quick banana bread, moist banana bread, dairy-free banana bread