Love this? Save it for later!
Share the inspiration with your friends
I was stuck in the longest checkout line of my life—the one at the craft store the day before Halloween. My cart was overflowing with orange glitter, fake spiderwebs, and way too many bags of candy corn I didn’t actually need. The woman behind me, holding nothing but a single roll of parchment paper, leaned forward and squinted at my chaos. “You’re going all out, huh?” she said, laughing. I admitted I was trying to come up with a last-minute treat for my kid’s class party, and everything I’d tried so far had either fallen apart or taken three hours. She nodded slowly, then said, “You know what I used to make? Mummy sugar cookie bars. They look fancy, but honestly, they’re the easiest thing you’ll ever bake.”
I almost didn’t believe her. The woman had the calm energy of someone who bakes sourdough from memory, not a person throwing together a spooky Halloween treat in under an hour. But she scribbled the recipe on the back of a receipt she found in her purse, handed it over, and said, “Trust me, you’ll thank me later.” I stuffed it in my pocket, forgot about it for two days, and then found it crumpled at the bottom of my bag on Halloween morning with exactly forty-five minutes before the party started. Let me tell you—I have never been so grateful for a stranger’s receipt in my entire life.
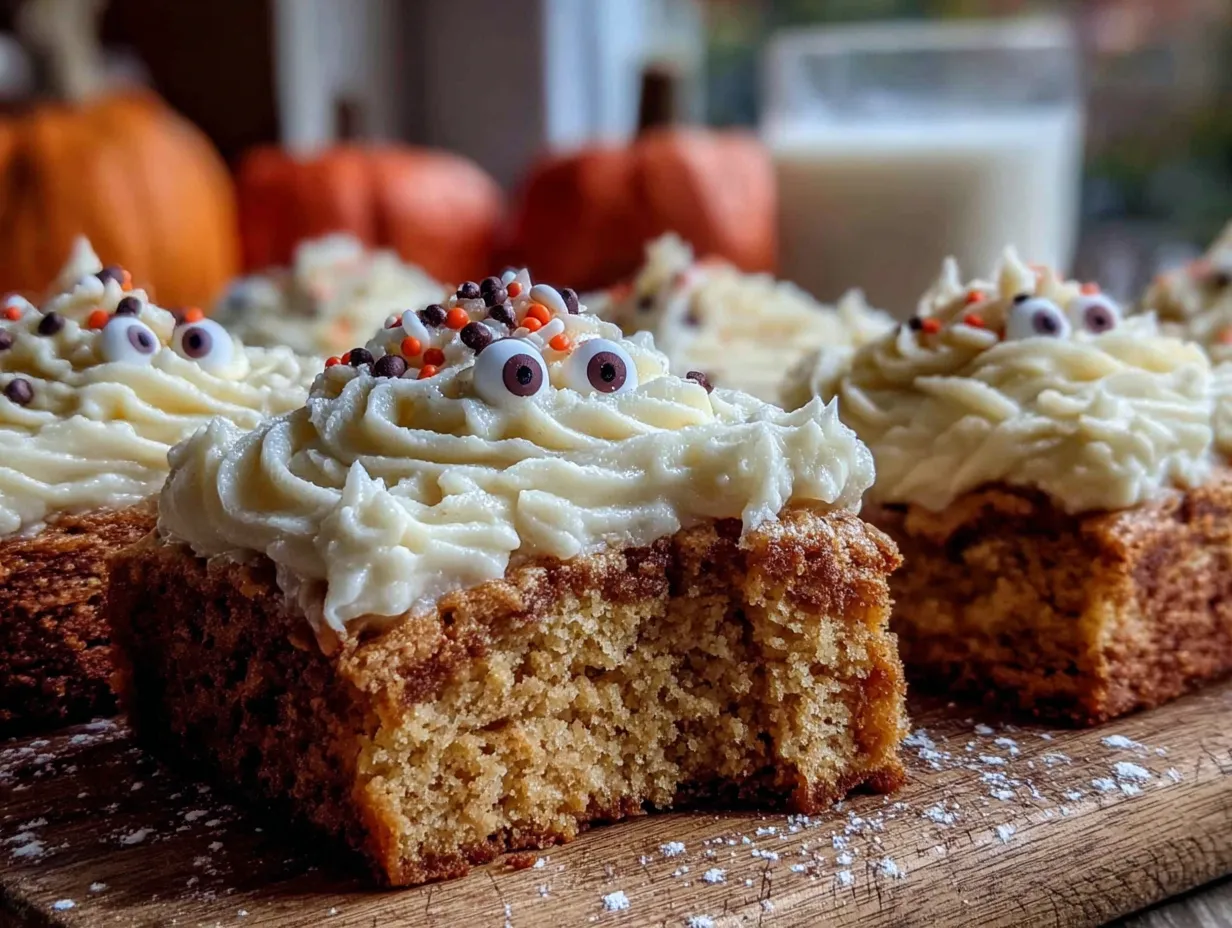
These mummy sugar cookie bars saved me that day. They’re soft, buttery, and covered in a simple powdered sugar icing that you can pipe on in messy little lines to look like gauze. The best part? You don’t need any cookie cutters, fancy decorating tools, or an extra hour of chilling dough. I mean, who has time for that on Halloween morning? Maybe you’ve been there—staring at a Pinterest board full of perfect ghost cupcakes and realizing you have zero time and even less patience. These bars are your answer.
I’ve made them every year since, and honestly, they get better each time. That chance encounter in the checkout line turned into my go-to Halloween tradition, and I’m betting it’ll become yours too.
Why You’ll Love This Recipe
Let me be real with you—I’ve tested about a dozen different Halloween cookie recipes over the years, and most of them either taste amazing but look like a mess, or look cute but taste like cardboard. These mummy sugar cookie bars are the rare unicorn that nails both. After making them for three different parties, two family gatherings, and one very chaotic classroom celebration, I can confidently say they’re foolproof.
- Quick & Easy: From start to finish, you’re looking at about 35 minutes. No chilling the dough, no rolling it out, no fighting with sticky cookie cutters. You press the dough into a pan, bake, and decorate. That’s it.
- Simple Ingredients: Butter, sugar, flour, eggs, vanilla, and powdered sugar. You probably have everything in your pantry right now. No weird extracts or specialty baking mixes.
- Perfect for Halloween Parties: Whether it’s a school celebration, a work potluck, or a spooky movie night at home, these bars disappear fast. Kids love the mummy design, and adults love that they’re not overly sweet.
- Crowd-Pleaser: I’ve served these next to store-bought cupcakes and fancy bakery cookies, and these plain little mummy bars always get the most comments. People cannot resist the cute factor.
- Unbelievably Delicious: The texture is what gets me every time—soft and chewy in the middle with slightly crisp edges. The icing sets just enough to hold its shape but stays soft when you bite into it.
What makes these different from every other Halloween cookie recipe out there? It’s the technique. Instead of rolling and cutting individual cookies, you press the dough into a single pan, bake it as one big slab, and then cut it into bars. This means zero wasted dough, perfectly even baking, and way less cleanup. Plus, the ratio of soft cookie to icing is just right—you get enough sweetness to feel like a treat without it being overwhelming.
Honestly, this is the kind of recipe that makes you close your eyes after the first bite. It’s comfort food with a spooky twist—simple, nostalgic, and just fun to make. Perfect for impressing other parents at the school party without stressing yourself out.
What Ingredients You Will Need
This recipe uses simple, everyday ingredients to create a soft, buttery sugar cookie base with a creamy icing topping. Nothing fancy here—just good basic baking staples that work together beautifully.
For the Sugar Cookie Bars
- 1 cup (2 sticks) unsalted butter, softened to room temperature (I prefer using Land O’Lakes for consistent results)
- 1 cup granulated sugar (adds sweetness and helps create that tender crumb)
- 1 large egg, room temperature
- 1 teaspoon vanilla extract (use pure vanilla extract if you have it—the flavor difference is noticeable)
- 2 cups all-purpose flour (spoon and level it—don’t scoop directly from the bag or you’ll get too much)
- 1/2 teaspoon baking powder (for a little lift without making them cakey)
- 1/4 teaspoon salt (balances the sweetness and enhances the buttery flavor)
For the Icing & Decoration
- 1 cup powdered sugar, sifted (sifting prevents lumps in your icing)
- 2-3 tablespoons milk (start with 2 tablespoons and add more if needed for piping consistency)
- 1/2 teaspoon vanilla extract
- Candy eyes (the little black-and-white edible ones—you can find them at any craft store or grocery store baking aisle)
Ingredient Tips & Substitutions: If you’re out of unsalted butter, you can use salted butter and just skip the added salt in the recipe. For a dairy-free version, swap the butter with a good quality vegan butter stick (I like Miyoko’s) and use oat milk in the icing. The texture will be slightly different but still delicious. If you don’t have candy eyes on hand, you can pipe tiny dots of black icing onto white icing dots—it takes a little more time but works in a pinch.
One thing I’ve learned the hard way: make sure your butter is truly softened, not melted. If it’s too warm, the dough will spread too much in the pan and your bars will be thin and greasy. Leave it on the counter for about an hour before you start baking, or if you’re in a rush, cut it into small cubes and let it sit for 20 minutes.
Equipment Needed
You don’t need a fully stocked bakery to make these mummy sugar cookie bars. Here’s what you’ll actually use:
- 9×13-inch baking pan (metal or glass both work, but metal gives slightly crisper edges)
- Parchment paper (non-negotiable—it makes lifting the bars out so much easier and saves you from scrubbing the pan)
- Electric hand mixer or stand mixer (you can mix by hand with a wooden spoon, but it’ll take some elbow grease to get the butter and sugar creamy)
- Mixing bowls (one medium, one small)
- Spatula (for pressing the dough into the pan evenly)
- Piping bag or zip-top bag (for the icing—a zip-top bag with the corner snipped off works perfectly if you don’t own piping bags)
- Cooling rack (lets air circulate so the bars cool evenly and the icing sets properly)
- Sharp knife (for cutting clean bars—a bench scraper works great too)
I’ve made these in a cheap dollar store pan before, and honestly, they still turned out great. The parchment paper is the real hero here. Don’t skip it. Also, if you don’t have a cooling rack, just use a cutting board—but let the bars cool completely before icing, or the icing will melt into a puddle.
Preparation Method
Let’s get these mummy sugar cookie bars into your oven. I’ve broken this down step by step so you can follow along without any surprises.
- Preheat your oven to 350°F (175°C). Line your 9×13-inch baking pan with parchment paper, leaving a little overhang on two opposite sides. This creates handles that make lifting the baked cookie slab out super easy later.
- Cream the butter and sugar together. In a large mixing bowl, beat the softened butter and granulated sugar together on medium speed until light and fluffy—about 2-3 minutes. You want the mixture to look pale and feel airy when you scrape it. Scrape down the sides of the bowl halfway through. If you’re using a hand mixer, this is the arm workout you didn’t ask for.
- Add the egg and vanilla. Crack the egg into the butter mixture, add the vanilla extract, and beat on low speed until just combined. Don’t overmix here—you just want everything incorporated. The mixture might look a little separated at this point, and that’s totally fine.
- Mix the dry ingredients separately. In a smaller bowl, whisk together the flour, baking powder, and salt. This ensures the baking powder and salt are evenly distributed so you don’t end up with a salty bite in one corner of the pan.
- Combine wet and dry ingredients. Gradually add the flour mixture to the butter mixture, mixing on low speed. Stop as soon as the flour disappears into the dough. The dough will be thick and slightly sticky—that’s exactly what you want. If it seems too sticky to handle, refrigerate it for 10 minutes.
- Press the dough into the pan. Transfer the dough to your prepared pan. Using a spatula or your lightly floured hands, press it into an even layer. This is important—if some spots are thicker than others, they’ll bake unevenly. Take your time and make sure it reaches all the corners.
- Bake for 18-22 minutes. Place the pan on the middle rack of your oven. Bake until the edges are lightly golden and the center looks set—it shouldn’t jiggle when you gently shake the pan. A toothpick inserted in the center should come out with a few moist crumbs, not wet batter. Every oven runs differently, so start checking at 18 minutes. My oven takes exactly 20 minutes, but yours might be faster or slower.
- Cool completely in the pan. This step requires patience, I know. Place the pan on a cooling rack and let the cookie slab cool completely—about 45 minutes to an hour. If you try to ice it while it’s still warm, the icing will turn into a runny mess and slide right off. I learned this the hard way during a very stressful Halloween morning.
- Lift the slab out and cut into bars. Once completely cool, use the parchment paper handles to lift the entire cookie slab out of the pan. Place it on a cutting board. Use a sharp knife to trim off the edges if you want clean, square bars (I usually save the trimmings for snacking). Cut the slab into 12 even rectangles—cut it in half lengthwise, then cut each half into six pieces.
- Make the icing. In a small bowl, whisk together the sifted powdered sugar, 2 tablespoons of milk, and the vanilla extract. Stir until smooth. You’re looking for a consistency that’s thick but still pipeable—it should hold its shape when you lift the whisk but still flow through a piping tip. If it’s too thick, add another teaspoon of milk. Too thin? Add a little more powdered sugar.
- Pipe the mummy stripes. Transfer the icing to a piping bag or a small zip-top bag. Snip off a tiny corner (about 1/8 inch). Pipe horizontal lines across each bar to create the mummy wrapping effect. Don’t worry about making them perfect—mummies are supposed to look a little messy. Leave a small gap in the middle for the eyes.
- Add the candy eyes. While the icing is still wet, press two candy eyes into the gap on each bar. Press them gently so they stick. Let the icing set for about 15-20 minutes before serving or stacking.
Cooking Tips & Techniques
After making these mummy sugar cookie bars at least a dozen times, I’ve collected a few hard-won lessons that’ll save you from my mistakes.
Don’t overbake. This is the number one mistake I see people make. Sugar cookies are meant to be soft, and they continue baking from residual heat even after you pull them out of the oven. The moment the edges turn light golden and the center looks dry on top, pull them out. Overbaked bars turn into crunchy hockey pucks, and nobody wants that.
Let the bars cool completely. I cannot stress this enough. I once tried to speed things up by putting the pan in the fridge for 20 minutes, and the icing still melted because the center was warmer than I thought. Give it the full hour on the counter. Go fold laundry, watch a Halloween movie, or scroll through your phone—just leave those bars alone.
Pipe with confidence. The mummy stripes don’t need to be perfect. In fact, the messier they are, the more they look like actual mummy bandages. If you mess up a stripe, just scrape off the icing with a toothpick and try again. The candy eyes hide a multitude of sins.
Use room temperature ingredients. Cold eggs can seize up your butter mixture and make the dough tough. Leave your egg on the counter for 30 minutes before you start, or place it in a bowl of warm water for 5 minutes if you’re in a hurry.
Press the dough evenly. I use the bottom of a measuring cup to press the dough into the pan—it gives you a flat, even surface without getting your hands sticky. Works like a charm every time.
Variations & Adaptations
One of the best things about this recipe is how easy it is to change up. Here are a few variations I’ve tried and loved:
Gluten-Free Mummy Bars: Substitute the all-purpose flour with a 1:1 gluten-free baking flour blend (I like King Arthur’s). The texture will be slightly more tender, but they hold together beautifully. Add an extra tablespoon of butter to compensate for the drier flour blend.
Chocolate Mummy Bars: Swap 1/4 cup of the flour for unsweetened cocoa powder. You’ll get a chocolate sugar cookie base that looks amazing with white mummy stripes. The chocolate version is my husband’s favorite—he says it tastes like brownies but lighter.
Pumpkin Spice Mummy Bars: Add 1 teaspoon of pumpkin pie spice to the flour mixture and replace the vanilla extract with maple extract. These are perfect for fall parties that aren’t specifically Halloween—think Thanksgiving gatherings or harvest festivals.
Ghost Bars Instead: Skip the mummy stripes and pipe ghost shapes instead—just make a round blob of icing and add two eyes. It’s even faster than the mummy design, and kids absolutely lose their minds over them.
Make-Ahead Option: You can bake the cookie slab up to two days in advance, wrap it tightly in plastic wrap, and store it at room temperature. Cut and ice the bars on the day you plan to serve them. The cookie stays soft and fresh this way.
Serving & Storage Suggestions
These mummy sugar cookie bars are best served at room temperature. The cookie is soft and buttery, and the icing has a nice creamy texture that firms up just enough to hold its shape. If you’ve refrigerated them, let them sit out for about 15 minutes before serving so the texture softens back up.
Presentation Ideas: Arrange the bars on a black or orange platter for maximum Halloween vibes. Sprinkle a few edible glitter stars or orange sanding sugar around the edges for extra sparkle. I like to serve them alongside a bowl of popcorn balls and some apple cider for a complete Halloween snack spread.
Storage: Store leftover bars in an airtight container at room temperature for up to 4 days. If you stack them, place a sheet of parchment paper between layers to prevent the icing from sticking. Do not refrigerate them unless you absolutely have to—the fridge dries out the cookies and makes them less enjoyable.
Freezer Instructions: You can freeze the un-iced cookie slab for up to 3 months. Wrap it tightly in plastic wrap, then aluminum foil. When you’re ready to use it, thaw it at room temperature, then cut and ice as directed. I’ve done this for last-minute school parties, and it works perfectly.
Reheating: If you want that just-baked warmth, pop an individual bar in the microwave for 8-10 seconds. The icing will soften slightly, but it won’t melt off if you keep it short. Honestly, they’re so good at room temperature that I rarely bother reheating.
Nutritional Information & Benefits
Let’s be honest—these are a treat, not a health food. But here’s the estimated nutritional breakdown per bar (based on 12 servings):
- Calories: Approximately 280
- Total Fat: 16g
- Saturated Fat: 10g
- Carbohydrates: 33g
- Sugar: 20g
- Protein: 3g
- Sodium: 95mg
Dietary Considerations: This recipe contains dairy (butter, milk) and gluten (flour). It can be made gluten-free with a proper flour blend and dairy-free with vegan butter and plant-based milk. The recipe is egg-free adaptable—use a flax egg (1 tablespoon ground flaxseed mixed with 3 tablespoons water) for a vegan version.
Health Perspective: I’m a firm believer that treats have a place in a balanced diet. These bars use real butter and sugar, not artificial sweeteners or weird additives. They’re made from scratch with ingredients you can pronounce, which is more than you can say for most store-bought Halloween treats. Plus, the portion-controlled bar format helps with mindful eating—one bar feels satisfying without sending you into a sugar coma.
FAQs
Can I use a different pan size?
Yes, but the baking time will change. A 9×9-inch pan will give you thicker bars that need about 25-28 minutes of baking time. A jelly roll pan (10×15-inch) will give you thinner, crispier bars that bake in about 15 minutes. Just keep an eye on them and check for doneness with a toothpick.
Can I make the icing ahead of time?
You can, but it’s better to make it fresh. The icing tends to harden and develop a crust if stored for more than a few hours. If you need to prep ahead, make the cookie base and store it un-iced, then whip up the icing right before you’re ready to decorate.
Why did my cookie bars turn out hard?
Most likely you overbaked them or overmixed the dough. Overmixing develops too much gluten, which makes the bars tough. Overbaking dries them out. Next time, mix just until the flour disappears and pull the bars out the moment the edges turn golden.
Can I use store-bought cookie dough?
You can, but I don’t recommend it. Store-bought sugar cookie dough has a different texture and spread ratio—it usually bakes flatter and greasier. The homemade version is so simple that it’s worth the extra five minutes of mixing. You’ll taste the difference.
How do I get clean cuts on my bars?
Use a sharp, non-serrated knife and wipe it clean between cuts. For the cleanest edges, chill the baked cookie slab in the fridge for 20 minutes before cutting. This firms up the butter and prevents the bars from crumbling or squishing under the knife.
Conclusion
These mummy sugar cookie bars are everything I want in a Halloween recipe—they’re cute without being fussy, delicious without being complicated, and they come together fast enough to save you from a last-minute panic. That stranger in the craft store checkout line changed my Halloween game forever, and I’m so glad I trusted her scribbled recipe on that crumpled receipt.
I really hope you give these a try, whether you’re making them for a classroom party, a spooky movie night, or just because you want something fun to bake on a October afternoon. Don’t be afraid to make them your own—add sprinkles, use different candy eyes, or turn them into ghosts instead. The recipe is forgiving, and the results are always worth it.
If you make these, I’d love to hear how they turned out. Drop a comment below, tag me in your photos, or tell me what Halloween traditions you have in your kitchen. And if you’re looking for more easy holiday treats, you might also enjoy my soft pumpkin cookies with cream cheese frosting or these no-bake chocolate peanut butter bars. Happy Halloween, friend—go make some mummies!
Pin This Recipe!
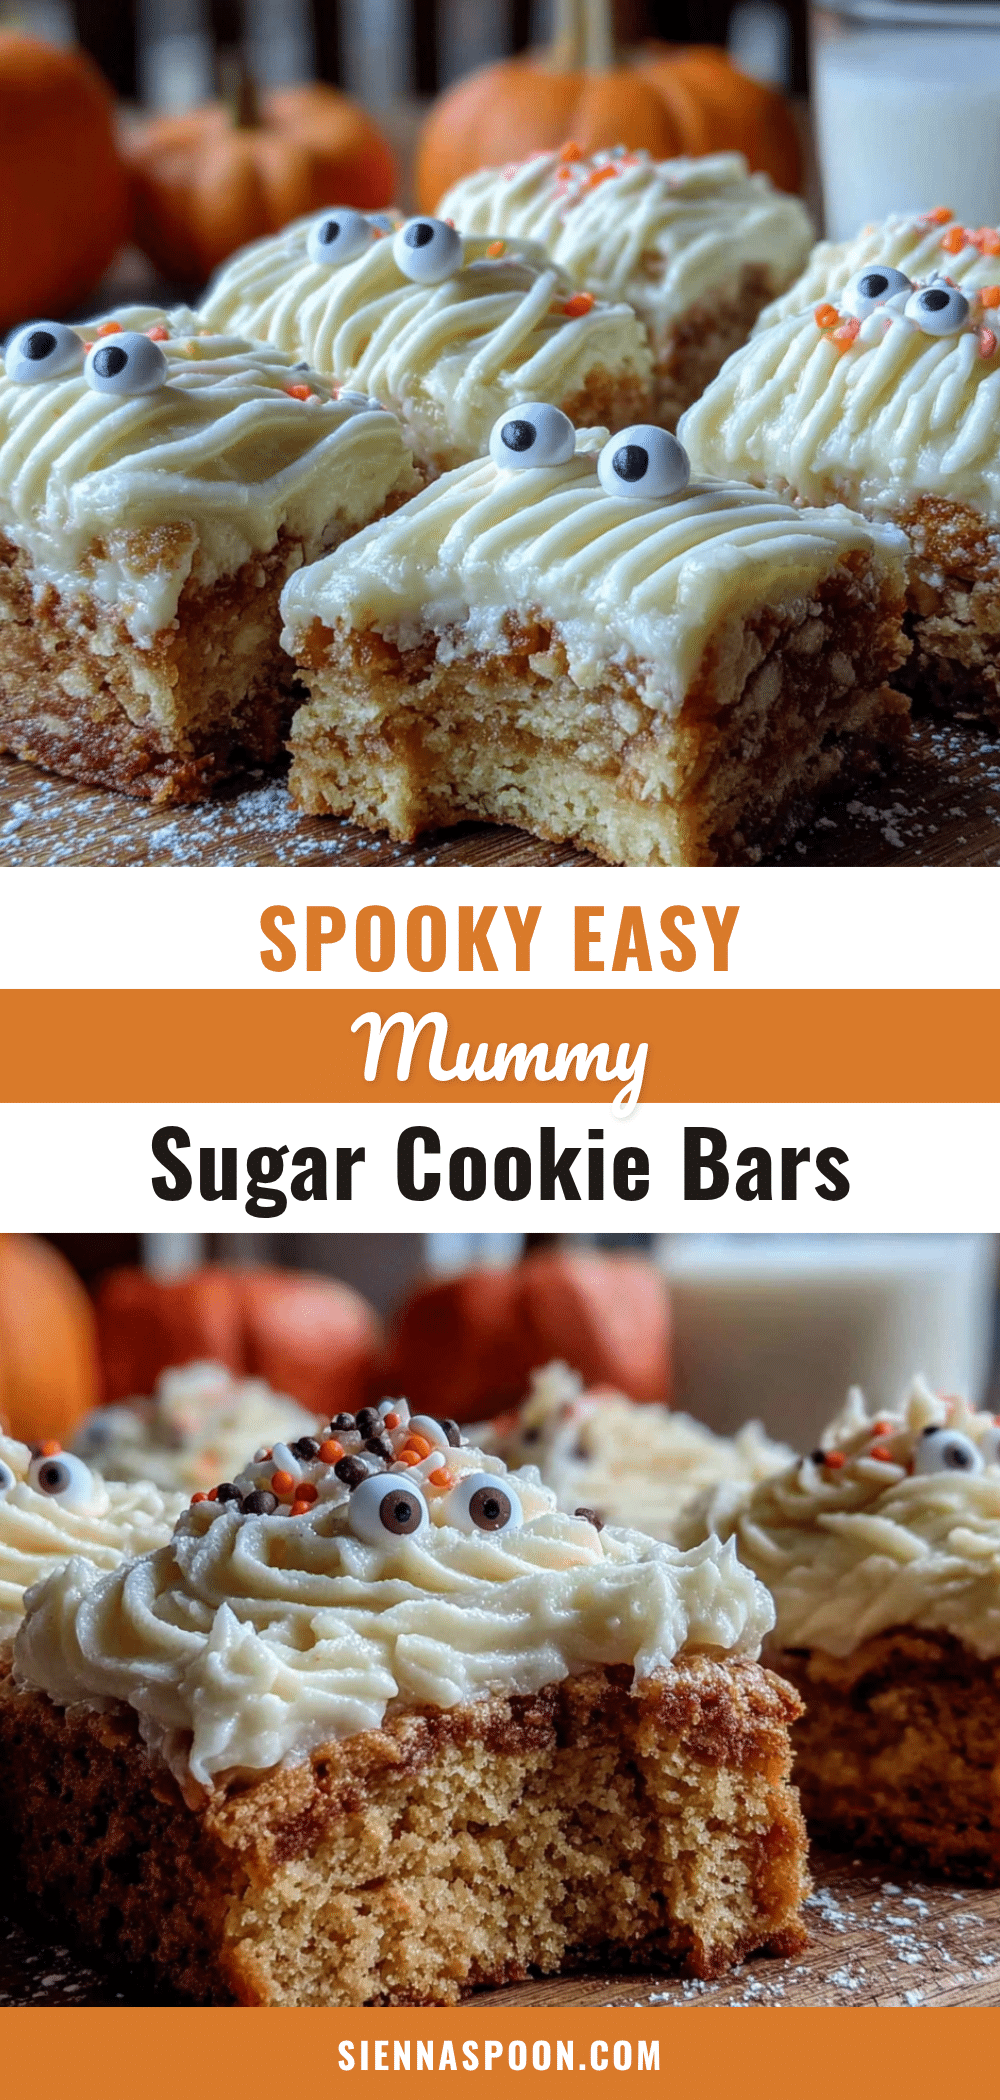
Easy Mummy Sugar Cookie Bars – Perfect Spooky Halloween Treat
Soft, buttery sugar cookie bars topped with a simple powdered sugar icing piped into mummy stripes and finished with candy eyes. An easy, no-fuss Halloween treat that comes together in about 35 minutes.
- Prep Time: 15 minutes
- Cook Time: 20 minutes
- Total Time: 35 minutes
- Yield: 12 servings 1x
- Category: Dessert
- Cuisine: American
Ingredients
- 1 cup (2 sticks) unsalted butter, softened to room temperature
- 1 cup granulated sugar
- 1 large egg, room temperature
- 1 teaspoon vanilla extract
- 2 cups all-purpose flour (spooned and leveled)
- 1/2 teaspoon baking powder
- 1/4 teaspoon salt
- 1 cup powdered sugar, sifted
- 2–3 tablespoons milk
- 1/2 teaspoon vanilla extract
- Candy eyes (for decoration)
Instructions
- Preheat oven to 350°F (175°C). Line a 9×13-inch baking pan with parchment paper, leaving overhang on two opposite sides.
- In a large bowl, beat softened butter and granulated sugar together on medium speed until light and fluffy, about 2-3 minutes.
- Add egg and vanilla extract; beat on low speed until just combined.
- In a separate bowl, whisk together flour, baking powder, and salt.
- Gradually add dry ingredients to wet ingredients, mixing on low speed until just combined. Dough will be thick and slightly sticky.
- Press dough evenly into prepared pan using a spatula or lightly floured hands.
- Bake for 18-22 minutes, until edges are lightly golden and center is set. Cool completely in the pan on a cooling rack (about 45 minutes to 1 hour).
- Lift cookie slab out using parchment handles. Cut into 12 even rectangles.
- For icing: whisk together sifted powdered sugar, 2 tablespoons milk, and 1/2 teaspoon vanilla extract until smooth. Add more milk if needed for piping consistency.
- Transfer icing to a piping bag or zip-top bag with a tiny corner snipped off. Pipe horizontal lines across each bar to create mummy wrapping, leaving a gap for eyes.
- Press two candy eyes into the gap on each bar while icing is still wet. Let icing set for 15-20 minutes before serving.
Notes
Make sure butter is truly softened, not melted. Cool bars completely before icing to prevent melting. Pipe mummy stripes messily for best effect. Store in an airtight container at room temperature for up to 4 days.
Nutrition
- Serving Size: 1 bar
- Calories: 280
- Sugar: 20
- Sodium: 95
- Fat: 16
- Saturated Fat: 10
- Carbohydrates: 33
- Protein: 3
Keywords: mummy sugar cookie bars, Halloween cookies, easy Halloween treat, sugar cookie bars, spooky dessert, no-chill cookie bars


