Love this? Save it for later!
Share the inspiration with your friends
This was supposed to be a proper grown-up charcuterie board. I had the nice wooden board out, the fancy little cheese knives, and I was carefully arranging prosciutto roses like some kind of Instagram influencer. Then my three-year-old walked in, took one look at my masterpiece, and asked, “Where’s the toy?” I mean, honestly. She wanted a Lunchable. Not just any Lunchable — she wanted the one with the little cracker sandwiches and the tiny piece of chocolate. I had spent twenty minutes folding prosciutto into flowers, and she wanted processed meat and a sticker. So I did what any reasonable parent would do — I put the prosciutto away, grabbed some salami and cheddar, and made our own version right there on the kitchen counter. And you know what? It was better. It was so much better.
That first attempt was messy. I used a regular knife to cut the cheese into squares, and they were all different sizes. The salami slices were too thick, the crackers kept breaking, and honestly, it looked like a toddler had assembled it — because one had. But my daughter didn’t care. She sat there on the kitchen floor, eating her little DIY snack box, and she was happier than she’d ever been with the store-bought version. That’s when it hit me. I wasn’t just making a snack. I was making the snack. The one she would remember. The one she’d ask for again and again. And let’s face it, the store-bought ones are convenient, but they’re also full of stuff I can’t pronounce. So I kept experimenting. I bought those little star-shaped cookie cutters, figured out the perfect cracker-to-cheese ratio, and finally nailed a version that looks cute, tastes amazing, and takes about ten minutes to throw together.
This easy copycat Lunchable snack box with salami and cheese stars is now a weekly staple in our house. It’s the kind of recipe that makes you feel like a superhero parent — or a superhero adult who just wants a fun lunch. You can pack it for school, take it to work, or eat it on the couch while watching your favorite show. No judgment here. And the best part? You control every single ingredient. No mystery meat, no weird preservatives, just good, simple food that tastes like childhood but feels like a win. Honestly, I’ve made these for playdates, road trips, and even as a lazy dinner when I just couldn’t cook. They always disappear. Always.
Why You’ll Love This Recipe
Let me tell you why this easy copycat Lunchable snack box with salami and cheese stars has completely taken over my kitchen. I’ve tested this recipe at least a dozen times, tweaking the cheese thickness, trying different salami brands, and even experimenting with cracker types. Here’s what I’ve learned — and why you’ll fall in love with it too.
- Quick & Easy: This comes together in under ten minutes. I’m serious. While the coffee is brewing, you can have a whole week’s worth of snack boxes assembled. It’s perfect for those mornings when you realize you have nothing packed for lunch and the bus is coming in fifteen minutes.
- Simple Ingredients: You need exactly four things — salami, cheese, crackers, and maybe a little fruit or veggie on the side. No fancy grocery trips. No weird ingredients you’ll use once and forget about. You probably have most of this in your fridge right now.
- Perfect for Lunchboxes: This is the ultimate school lunch hack. It’s fun, it’s portable, and it doesn’t get soggy. Plus, kids actually eat it. No more trading away their lunch or coming home with a full bento box.
- Crowd-Pleaser: I’ve served these at birthday parties, playdates, and even adult game nights. Everyone loves them. There’s something about bite-sized food that makes people happy. It’s like the universe’s universal law or something.
- Unbelievably Customizable: You can swap the salami for turkey, use different cheese shapes, or add a little treat on the side. The possibilities are endless, and that’s what makes this recipe so fun.
What makes this different from the store-bought version? First, the quality. You’re using real cheese from a block, not that plasticky processed stuff. Second, the control. You decide how thick the cheese is, how much salami goes in, and what crackers you pair it with. Third, the cost. Homemade versions are way cheaper per serving than those little plastic trays. And fourth — the joy factor. When you cut cheese into little stars or dinosaurs or hearts, it’s just more fun. I don’t make the rules. That’s just science.
This isn’t just a snack. It’s the kind of food that makes you feel like you’ve got your life together — even if you’re eating it standing over the kitchen sink. It’s comfort food that’s actually good for you. It’s fast food without the guilt. And honestly, once you start making your own, you’ll never go back to the boxed version. Trust me on this one.
What Ingredients You Will Need
This recipe uses simple, wholesome ingredients to deliver that nostalgic Lunchable experience without the processed stuff. The beauty of this easy copycat Lunchable snack box with salami and cheese stars is that you can adapt it to whatever you have on hand. Here’s what I typically use:
For the Main Components
- Salami: About 4-6 slices per box. I prefer Genoa salami for its classic flavor, but any hard salami works. Look for slices that are thin but not paper-thin — you want them to hold up without tearing. I like the Boar’s Head brand for consistent quality, but store-brand works just fine too.
- Cheddar Cheese: A 4-ounce block of sharp cheddar. Get a block, not pre-sliced. Blocks cut so much better with cookie cutters and taste way fresher. White cheddar gives a nice visual contrast against the salami, but orange cheddar looks more “classic Lunchable.” Your call.
- Crackers: About 8-10 mini crackers per box. I use Ritz or Club crackers for that buttery, salty base. You can also use wheat crackers, gluten-free crackers, or even pretzel thins. The key is finding something sturdy enough to hold the cheese and salami without crumbling.
Optional Add-Ins

- Fresh Fruit: A handful of grapes, apple slices, or berries. The sweetness balances the salty meat and cheese perfectly. I usually add red grapes because they don’t brown and they look pretty next to the salami.
- Vegetable Sticks: Carrot sticks, cucumber rounds, or bell pepper strips. Adds crunch and color. My kids actually eat vegetables when they’re in a snack box format. Something about the compartmentalization makes it more appealing.
- Sweet Treat: A few chocolate chips, a mini cookie, or a square of dark chocolate. That little sweet bite at the end is what makes a Lunchable feel like a treat. I use dark chocolate chips because they don’t melt as easily and they’re lower in sugar.
- Dipping Sauce: A small container of honey mustard, ranch, or hummus. If you’re feeling fancy, a little Dijon mustard pairs beautifully with salami and cheddar. I’ve even used a tiny dollop of fig jam for a sweet-savory combo that’s surprisingly amazing.
Ingredient Selection Tips
When choosing salami, look for brands that use minimal additives and no nitrates if possible. I’ve found that Applegate Naturals makes a good clean salami that tastes great and doesn’t have weird ingredients. For the cheese, I always go with sharp cheddar because it has more flavor and stands up to the salami better than mild cheddar. If you want to get creative, try pepper jack for a little heat or gouda for a smoky twist.
For the crackers, I’ve tested a bunch of options. Ritz are the classic choice — they’re buttery, salty, and perfectly round. But I’ve also used Annie’s bunny crackers for a fun shape, and Simple Mills almond flour crackers for a gluten-free option. The key is finding crackers that are sturdy enough to hold the toppings without breaking. Nobody wants a sad, broken cracker situation.
If you’re making these for a party or a special occasion, consider adding some pickles or olives on the side. The brininess cuts through the richness of the salami and cheese beautifully. I once added cornichons to a batch for a grown-up version, and they were a huge hit. Just saying.
Equipment Needed
You don’t need much to make this easy copycat Lunchable snack box with salami and cheese stars. Here’s what I use and what you can substitute if you don’t have the fancy stuff:
- Small Cookie Cutters: Star-shaped ones are my favorite, but you can use hearts, dinosaurs, flowers, or any shape your heart desires. I found a set of six mini cutters on Amazon for like eight bucks, and they’ve lasted years. If you don’t have cookie cutters, just cut the cheese into small squares or use a knife to make little triangles.
- Cutting Board: A medium-sized board works best. I prefer wood because it’s gentler on knife blades, but plastic is fine too. Just make sure it’s clean and dry before you start.
- Sharp Knife: A chef’s knife or a utility knife for cutting the cheese block into slices. You want something sharp enough to cut cleanly through the cheese without smushing it. A dull knife will just frustrate you and make the cheese look ragged.
- Bento Box or Lunch Container: Any container with compartments works. I use a simple three-compartment bento box from the grocery store, but you can use a muffin tin, a plate, or even a paper towel. The compartments keep everything separate and prevent the crackers from getting soggy.
- Small Bowls: For holding the cut cheese stars, salami slices, and crackers while you assemble. I use little prep bowls, but ramekins or even small cups work fine.
One tip I learned the hard way — chill the cheese block for about ten minutes before cutting. It makes the cheese firmer and the cookie cutter cuts much cleaner. Room temperature cheese tends to get soft and sticky, and your stars will look more like blobs. Ask me how I know this. Actually, don’t. Just trust me on the chilling thing.
If you’re making these for a school lunch, invest in a good insulated lunch bag with an ice pack. The cheese and salami need to stay cold until lunchtime. I use a PackIt lunch bag that has built-in ice packs, and it keeps everything perfectly chilled for hours. Worth every penny.
Preparation Method
- Chill the cheese (5 minutes): Place your block of cheddar in the freezer for about 10 minutes before you start. This step is optional but honestly, it makes a huge difference. The cheese gets firm enough that your cookie cutters will glide through it like butter. If you skip this step, the cheese might stick to the cutter and you’ll end up with messy shapes.
- Slice the cheese (2 minutes): Remove the cheese from the freezer and cut it into ¼-inch thick slices. You want them thick enough to hold their shape but thin enough to bite through easily. Aim for slices that are about the thickness of two stacked quarters. If they’re too thin, they’ll break. Too thick, and they’ll be hard to cut with the cookie cutter.
- Cut the cheese stars (3 minutes): Press your star-shaped cookie cutter firmly into each cheese slice. Give it a little twist to release the shape. If the cheese sticks, gently push it out with your finger. Place each star on a plate as you go. You should get about 4-5 stars per slice, depending on the size of your cutter. Don’t worry about the scraps — save them for melting on burgers or snacking later.
- Prepare the salami (1 minute): If your salami is pre-sliced, you’re already done. If it’s a whole salami stick, slice it into thin rounds. Aim for about ⅛-inch thickness. You can also fold the salami slices in half or roll them into little cones for a fancy look. My kids prefer them flat, so that’s what I do.
- Count your crackers (1 minute): Open your cracker sleeve and count out how many you need. I usually do 8-10 crackers per box. Arrange them in a single layer in one compartment of your bento box. Make sure they’re not stacked on top of each other, or they’ll break during transport.
- Assemble the box (2 minutes): Place the salami slices in one compartment, the cheese stars in another, and the crackers in the third. If you’re adding fruit or veggies, put them in any empty space or use a separate container. The key is keeping the crackers away from anything moist so they stay crunchy.
- Add extras (1 minute): If you’re including a sweet treat or dipping sauce, add those now. I usually put a few chocolate chips in a small silicone cup or a tiny container. For dipping sauce, a little 2-ounce container with a lid works perfectly.
- Pack it up (1 minute): Close the lid on your bento box and store it in the refrigerator until you’re ready to go. If you’re packing for lunch, add an ice pack to keep everything cold. The snack box will stay fresh for up to 3 days in the fridge, though the crackers might start to soften after day one.
One thing I want to mention — don’t overthink the assembly. This is supposed to be easy. If your cheese stars aren’t perfect, that’s fine. If the salami slices overlap a little, no big deal. The whole point of this easy copycat Lunchable snack box with salami and cheese stars is that it’s quick and fun. You’re not entering a food competition. You’re just making a snack that tastes good and makes people smile.
If you’re making these for a party or a playdate, you can set up a little DIY station. Put out bowls of cheese stars, salami slices, crackers, and various toppings, and let everyone build their own snack box. It’s interactive, it’s fun, and it takes the pressure off you. Plus, kids love having control over their food. Just be prepared for some weird combinations. My nephew once made a snack box with cheese stars, chocolate chips, and pickles. He said it was “experimental.” I didn’t try it.
Cooking Tips & Techniques
After making this easy copycat Lunchable snack box with salami and cheese stars more times than I can count, I’ve picked up a few tricks that make the process smoother and the results better. Here’s what I’ve learned, sometimes the hard way:
Use a sharp cookie cutter. This sounds obvious, but dull cutters will crush the cheese instead of cutting it. If your cutter is getting dull, you can sharpen it by running the edge along a piece of sandpaper a few times. Or just buy a new set — they’re cheap. I keep a dedicated set just for cheese because I don’t want my cutters tasting like soap from the dishwasher.
Don’t skip the chilling step. I know I said this already, but it bears repeating. Cold cheese cuts cleaner, holds its shape better, and doesn’t stick to the cutter. If you’re in a hurry, pop the cheese in the freezer for 5 minutes instead of 10. It’s not as effective, but it’s better than nothing.
Layer strategically. When packing the snack box, put the heaviest items on the bottom and the lightest on top. Salami slices are heavier than cheese stars, so they go in the bottom of their compartment. This prevents things from shifting around and getting crushed during transport. I learned this after opening my daughter’s lunchbox to find a pile of cracker crumbs and a sad, lonely cheese star.
Keep crackers separate until serving. If you’re packing these ahead of time, store the crackers in a separate bag or container and add them right before serving. Crackers absorb moisture from everything around them, and nobody wants a soggy cracker. I use small snack bags for the crackers and tuck them into the lunchbox just before my kids leave for school.
Make it a meal. This snack box is perfect as-is, but you can easily turn it into a full meal by adding more components. Throw in some hard-boiled eggs, a yogurt tube, or a small salad. The bento box format makes it easy to create a balanced lunch that covers all the food groups. I’ve done versions with hummus, veggie sticks, and pita chips that were basically adult Lunchables and they were amazing.
Get the kids involved. This is a great recipe for little hands. Let them press the cookie cutters into the cheese, arrange the crackers, and place the salami slices. It’s a fine motor skill activity disguised as snack prep. My daughter loves making her own snack box, and she’s way more likely to eat it if she helped make it. Win-win.
Variations & Adaptations
One of the best things about this easy copycat Lunchable snack box with salami and cheese stars is how adaptable it is. I’ve tried all kinds of variations, and honestly, they’ve all been good. Here are some of my favorites:
Turkey and Swiss Roll-Ups: Swap the salami for turkey slices and the cheddar for Swiss cheese. Roll them up together and slice into little pinwheels. This version is lower in fat and has a milder flavor that picky eaters tend to prefer. I made these for a friend’s kid who “doesn’t like salami” and she ate the whole thing without complaint.
Veggie Lover’s Box: Skip the meat entirely and use cucumber rounds, bell pepper strips, and cherry tomatoes alongside the cheese stars. Add a small container of hummus or ranch for dipping. This is perfect for vegetarian kids or adults who want a lighter option. I actually prefer this version for my own lunch — it’s refreshing and doesn’t leave me feeling heavy.
Gluten-Free Version: Use gluten-free crackers or rice cakes instead of regular crackers. Most hard cheeses and salamis are naturally gluten-free, just double-check the labels to be sure. I’ve used Simple Mills almond flour crackers and they work beautifully. They’re a little more delicate than Ritz, so handle them gently.
Breakfast Lunchable: Yes, this is a thing. Use mini pancakes or waffles instead of crackers, add cheese stars and turkey sausage rounds, and include a small container of maple syrup for dipping. My kids go crazy for this version. It’s like breakfast for lunch, which is basically the best thing ever.
Dessert Lunchable: For a sweet treat, use graham crackers, chocolate chips, and marshmallows. Add some fruit like strawberries or banana slices. It’s like a deconstructed s’mores snack box. I’ve made these for movie nights and they’re always a hit. Just don’t let the marshmallows get warm or they’ll get sticky.
Spicy Version: Use pepper jack cheese and spicy salami or chorizo. Add some pickled jalapeños on the side for extra heat. This is my personal favorite for adult snacking. The spice from the pepper jack pairs perfectly with the salty salami, and the crackers provide a nice cooling crunch.
I once made a Mediterranean-inspired version with feta cheese stars, salami, olives, and pita chips. It was incredible. The salty feta and briny olives complemented the salami perfectly. I served it at a small gathering and everyone asked for the recipe. So don’t be afraid to get creative — the possibilities are endless.
Serving & Storage Suggestions
This easy copycat Lunchable snack box with salami and cheese stars is best served cold or at room temperature. If you’re packing it for lunch, keep it chilled with an ice pack until you’re ready to eat. The cheese stars will hold their shape best when cold, and the salami slices won’t get greasy.
For presentation, I like to arrange everything neatly in compartments. It sounds silly, but the visual appeal of a well-organized snack box makes it more enjoyable to eat. I’ve noticed that my kids eat more of their lunch when everything looks cute and organized. There’s something about those little compartments that feels special.
Storage Instructions:
- Refrigerator: Assemble the snack box and store it in an airtight container in the fridge for up to 3 days. Keep the crackers separate if you’re storing for more than a day. The cheese stars and salami will stay fresh, but the crackers will start to soften after 24 hours.
- Freezer: You can freeze the cheese stars and salami separately for up to 3 months. Thaw them in the refrigerator overnight before assembling. I don’t recommend freezing assembled snack boxes because the texture of everything will suffer. The crackers will definitely get soggy.
- Meal Prep: Cut the cheese stars and portion the salami ahead of time. Store them in separate containers in the fridge. Then just grab and assemble in the morning. This saves so much time during busy weeks. I usually prep enough for the whole week on Sunday afternoon.
Reheating: You don’t need to reheat anything in this snack box. It’s meant to be eaten cold. If you want to warm the salami slightly, you can microwave it for 10-15 seconds, but honestly, it’s better cold. The cheese stars will melt if you heat them, which could be delicious but defeats the purpose of the snack box format.
One thing I’ve noticed — the flavors actually get better after a few hours in the fridge. The salami and cheese sort of meld together, and the crackers absorb a tiny bit of flavor from everything around them. Not enough to get soggy, but enough to taste more integrated. So don’t worry if you make these the night before. They’ll be even better the next day.
If you’re serving these at a party, arrange everything on a platter instead of individual boxes. Put the cheese stars in a bowl, the salami on a plate, and the crackers in a basket. Let guests build their own combinations. It’s interactive and fun, and it looks beautiful on a table.
Nutritional Information & Benefits
Here’s the approximate nutritional breakdown for one serving of this easy copycat Lunchable snack box with salami and cheese stars (based on 4 salami slices, 6 cheese stars, and 8 crackers):
| Nutrient | Amount |
|---|---|
| Calories | 350-400 |
| Protein | 18-22g |
| Fat | 24-28g |
| Carbohydrates | 18-22g |
| Fiber | 1-2g |
| Sugar | 2-4g |
| Sodium | 800-1000mg |
| Calcium | 200-300mg |
These values will vary based on the specific brands and quantities you use. The salami is the main source of protein and sodium, while the cheese provides calcium and fat. The crackers add carbohydrates and a little more sodium.
From a health perspective, this snack box offers a good balance of protein, fat, and carbs. The protein from the salami and cheese will keep you full and satisfied, while the crackers provide quick energy. If you’re watching your sodium intake, look for low-sodium salami and crackers. You can also add more vegetables to increase the fiber and nutrient content.
The cheese stars are a good source of calcium, which is important for bone health. Salami provides B vitamins and iron, though it is processed meat, so enjoy it in moderation. I like to balance this snack box with plenty of fresh fruit and vegetables throughout the day.
If you have dietary restrictions, this recipe is easy to adapt. Use gluten-free crackers for a celiac-friendly version. Choose nitrate-free salami for a cleaner option. And if you’re dairy-free, use plant-based cheese alternatives — though I’ll be honest, they don’t cut into stars as nicely as real cheese. But they’ll still taste good.
Frequently Asked Questions
Can I use other types of cheese for the stars?
Absolutely! Any semi-hard cheese works well. Try Gouda, provolone, Monterey Jack, or even mozzarella if you can get it firm enough. Softer cheeses like brie or goat cheese won’t hold their shape with a cookie cutter, so stick with firmer options. I’ve even used Colby Jack and it cut beautifully.
How far in advance can I make these snack boxes?
You can assemble them up to 3 days in advance if you keep the crackers separate. Store the cheese stars and salami in an airtight container in the fridge, and add the crackers just before serving. If you store everything together, the crackers will get soft within 24 hours. Trust me on this — I learned the hard way.
Can I use a different shape instead of stars?
Of course! Use whatever cookie cutters you have. Hearts, dinosaurs, flowers, circles — anything works. My kids love when I use seasonal shapes like pumpkins in October or snowflakes in December. It makes the snack box feel special and festive. I once used a tiny alphabet cutter and spelled out my daughter’s name in cheese. She thought I was a magician.
Is this recipe safe for school lunchboxes?
Yes, as long as you keep it cold. Use an insulated lunch bag with an ice pack to keep the salami and cheese at a safe temperature until lunchtime. Most schools have refrigeration available, but it’s better to be safe. If you’re worried about food safety, you can also use shelf-stable salami sticks that don’t require refrigeration until opened.
Can I make this recipe nut-free?
Yes, this recipe is naturally nut-free as written. Just make sure your crackers are nut-free — most standard crackers are, but always check the label. If you’re adding any extras like chocolate chips or dips, verify those are nut-free too. I always double-check when packing for school because you never know about allergies in the classroom.
Conclusion
This easy copycat Lunchable snack box with salami and cheese stars has become such a staple in our house that I honestly can’t imagine going back to the store-bought version. It’s faster, cheaper, healthier, and honestly, way more fun. There’s something deeply satisfying about cutting cheese into little stars and arranging everything in neat compartments. It feels like a small act of love, you know?
I love that this recipe is flexible enough to work for anyone — kids, adults, picky eaters, adventurous foodies. You can dress it up for a party or keep it simple for a weekday lunch. You can make it ahead or throw it together in minutes. It’s the kind of recipe that meets you where you are, no judgment, no fuss.
So go ahead and give it a try. Raid your fridge for whatever cheese and crackers you have, dig out those cookie cutters from the back of the drawer, and make yourself a snack that feels like a treat. And when you do, I’d love to hear about it. What shapes did you use? What combinations did you try? Drop a comment below and share your creation — I read every single one and I love seeing what you come up with. Happy snacking!
Pin This Recipe!
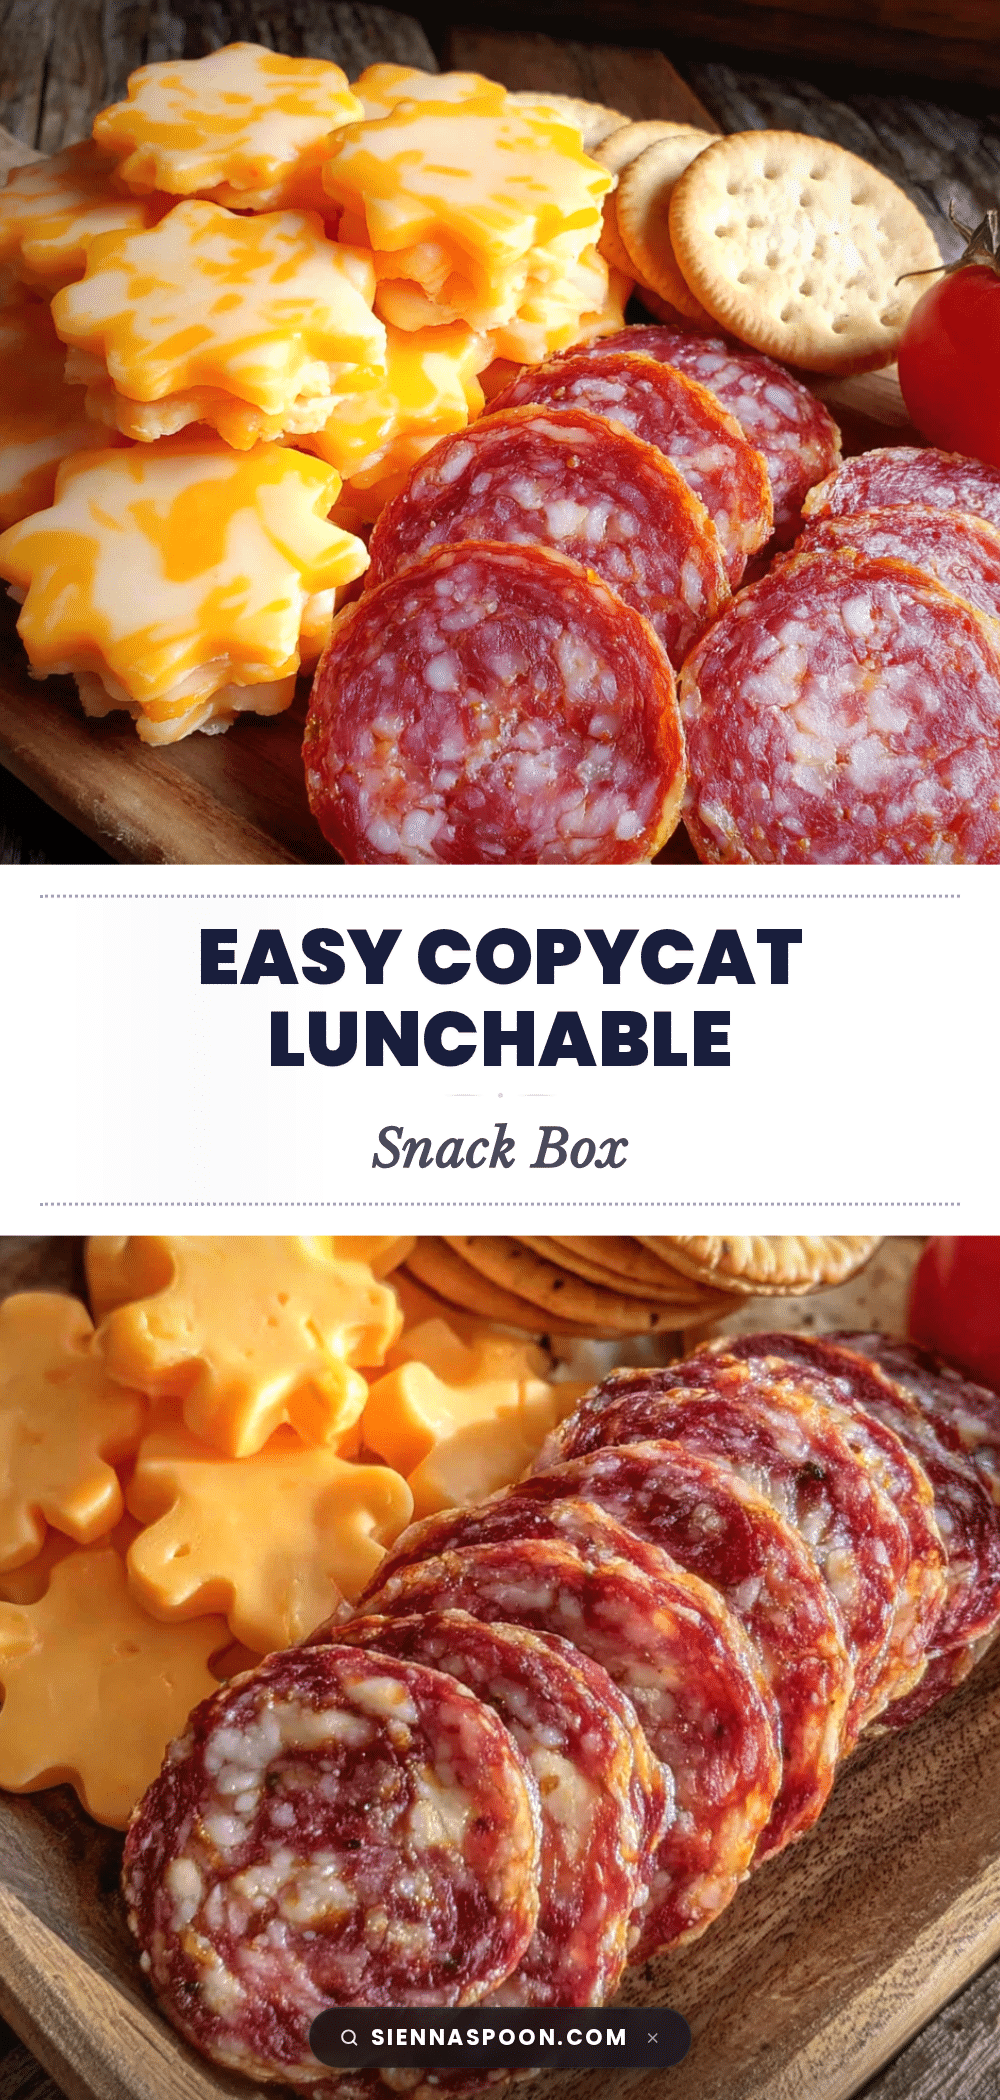
Easy Copycat Lunchable: Salami and Cheese Stars Snack Box

A quick and easy homemade version of the classic Lunchable snack box, featuring salami, cheddar cheese stars, and crackers. Perfect for school lunches, road trips, or a fun snack that’s healthier and more customizable than the store-bought version.
- Prep Time: 10 minutes
- Cook Time: 0 minutes
- Total Time: 10 minutes
- Yield: 1 serving 1x
- Category: Snack
- Cuisine: American
Ingredients
- 4–6 slices Genoa salami (or any hard salami)
- 4 oz block sharp cheddar cheese
- 8–10 mini crackers (Ritz or Club crackers recommended)
- Optional: fresh fruit (grapes, apple slices, berries)
- Optional: vegetable sticks (carrot sticks, cucumber rounds, bell pepper strips)
- Optional: sweet treat (chocolate chips, mini cookie, dark chocolate square)
- Optional: dipping sauce (honey mustard, ranch, hummus, Dijon mustard, fig jam)
Instructions
- Chill the cheese: Place the block of cheddar in the freezer for about 10 minutes to firm up for cleaner cutting.
- Slice the cheese: Remove cheese from freezer and cut into ¼-inch thick slices.
- Cut the cheese stars: Press a star-shaped cookie cutter firmly into each cheese slice, twisting slightly to release. Place stars on a plate. Save scraps for later use.
- Prepare the salami: If using a whole salami stick, slice into thin rounds (about ⅛-inch thick). Pre-sliced salami can be used as is or folded/rolled.
- Count your crackers: Open cracker sleeve and count out 8-10 crackers per box. Arrange in a single layer in one compartment of a bento box.
- Assemble the box: Place salami slices in one compartment, cheese stars in another, and crackers in the third. Keep crackers away from moist items to maintain crunch.
- Add extras: If including fruit, veggies, sweet treat, or dipping sauce, add them to empty spaces or separate containers.
- Pack it up: Close the lid and refrigerate until ready to serve. For lunch, include an ice pack to keep everything cold. The snack box stays fresh for up to 3 days in the fridge.
Notes
Chill the cheese block for about 10 minutes before cutting for cleaner shapes. Keep crackers separate until serving to prevent sogginess. This recipe is highly customizable—try different cheeses, meats, or add-ins. For school lunches, use an insulated bag with an ice pack to keep ingredients cold.
Nutrition
- Serving Size: 1 snack box
- Calories: 350400
- Sugar: 24
- Sodium: 8001000
- Fat: 2428
- Saturated Fat: 1216
- Carbohydrates: 1822
- Fiber: 12
- Protein: 1822
Keywords: copycat lunchable, salami and cheese stars, snack box, bento box lunch, easy snack, kid-friendly lunch, homemade lunchable, school lunch idea