Love this? Save it for later!
Share the inspiration with your friends
My roommate asked why I couldn’t just throw everything in one pan and call it dinner. I started to explain why that wouldn’t work — something about browning meat separately and layering flavors. Then I stopped. She was holding an open box of pre-shredded cheese and looking at me like I was overcomplicating things. Honestly? I was.
That night, I let her take the lead. She dumped the ground beef in the skillet, added rice straight from the bag, and poured in some beef broth without measuring. I cringed internally. But twenty minutes later, we were both staring at a pan of the creamiest, cheesiest ground beef rice I’d ever tasted. I mean, I had to admit it — she was right. The whole thing came together in one pan, no draining, no extra pots, no fuss.
I’ve been making this easy cheesy one-pan ground beef rice ever since. It’s become my go-to for those nights when I want something hearty but don’t have the energy for a sink full of dishes. Maybe you’ve been there — staring at your stove, wondering if dinner can actually be simple without tasting like a compromise. Trust me, this one delivers. The rice cooks perfectly in the broth, the beef stays tender, and the cheese melts into every bite. It’s the kind of meal that makes you wonder why we overthink dinner so much. Let me show you how to make it.
Why You’ll Love This Recipe
This isn’t just another ground beef recipe. After testing this dish at least a dozen times — tweaking the liquid ratio, testing different cheeses, and even burning a batch or two — I can confidently say this version is foolproof. Here’s why it works:
- One Pan, No Mess: Everything cooks in a single skillet. No colander to wash, no extra pot for rice. You’ll have dinner on the table and only one pan to clean.
- Ready in 30 Minutes: From the moment you turn on the stove to the first bite, it takes about half an hour. Perfect for busy weeknights when hangry family members are circling the kitchen.
- Budget-Friendly Ingredients: Ground beef, rice, cheese, and a few pantry staples. No fancy grocery trips required. You probably have most of this already.
- Kid-Approved and Crowd-Pleasing: My niece calls this “the cheesy meat rice” and asks for it every time she visits. Adults love it too — it’s comfort food that hits the spot every single time.
- Endlessly Customizable: Swap the cheese, add vegetables, or spice it up. This recipe adapts to whatever you have on hand without losing its soul.
What makes this recipe different from the dozens of other ground beef rice dishes out there? It’s the cooking method. By simmering the rice directly in the beef broth with the seasoned meat, every grain absorbs maximum flavor. The cheese melts in at the very end, creating a creamy coating without making the dish heavy or greasy. It’s the kind of meal that makes you close your eyes after the first bite — simple, satisfying, and surprisingly perfect.
What Ingredients You Will Need
This recipe uses simple, wholesome ingredients that come together to create something truly comforting. Most of these are pantry staples, which makes this dish perfect for those nights when you need dinner fast.
- Ground beef (1 lb / 450g): I recommend 80/20 ground beef for the best flavor. The fat adds richness without making the dish greasy. If you use leaner beef, you might need to add a tablespoon of oil.
- Long-grain white rice (1 cup / 200g): Uncle Ben’s or any standard long-grain works beautifully. Avoid instant rice — it turns mushy. Basmati also works if that’s what you have.
- Beef broth (2 cups / 480ml): Use low-sodium broth so you can control the salt. I prefer Swanson or Kitchen Basics for consistent flavor.
- Shredded cheddar cheese (1.5 cups / 170g): Sharp cheddar gives the best flavor. Shred it yourself if you have time — pre-shredded cheese has anti-caking agents that affect melting. But honestly, I use pre-shredded all the time and it’s still delicious.
- Onion (1 medium, diced): Yellow or white onion works. It adds a savory base that makes the dish taste like it simmered for hours.
- Garlic (3 cloves, minced): Fresh garlic is best. Don’t skip it — it’s the secret to that deep, savory flavor.
- Tomato paste (2 tablespoons): This adds a subtle tang and deepens the color. It’s a small ingredient that makes a big difference.
- Paprika (1 teaspoon): Smoked paprika if you have it, regular works fine too. It adds warmth without heat.
- Salt and black pepper (to taste): Start with 1 teaspoon salt and ½ teaspoon pepper, then adjust at the end.
- Butter (1 tablespoon): A little butter stirred in at the end adds richness and helps the cheese melt smoothly.
- Fresh parsley (for garnish, optional): Adds a pop of color and freshness. Completely optional but pretty.
Substitution notes: Use ground turkey or chicken instead of beef — just add a tablespoon of oil. For a gluten-free option, ensure your broth is certified gluten-free. You can swap cheddar with Monterey Jack, Colby, or a Mexican blend. If you’re dairy-free, use your favorite shredded vegan cheese, though the texture will be slightly different.
Equipment Needed
One of the best things about this recipe is how little equipment it requires. Here’s what you’ll need:
- Large skillet or Dutch oven (12-inch / 30cm with a lid): A deep, heavy-bottomed skillet works best. I use my trusty cast iron skillet for even heat distribution. A non-stick skillet also works great for easy cleanup.
- Wooden spoon or spatula: For breaking up the ground beef and stirring the rice. A silicone spatula works too.
- Sharp knife and cutting board: For dicing the onion and mincing garlic.
- Measuring cups and spoons: For accurate ingredient portions. Eyeballing works too once you’ve made it a few times.
- Lid: Your skillet must have a tight-fitting lid to trap steam and cook the rice properly. If your skillet doesn’t have a lid, use a sheet of aluminum foil tightly crimped around the edges.
I’ve made this in a cheap non-stick pan from the grocery store and it turned out great. Don’t overthink the equipment — if you have a pan with a lid, you’re good to go.
Preparation Method
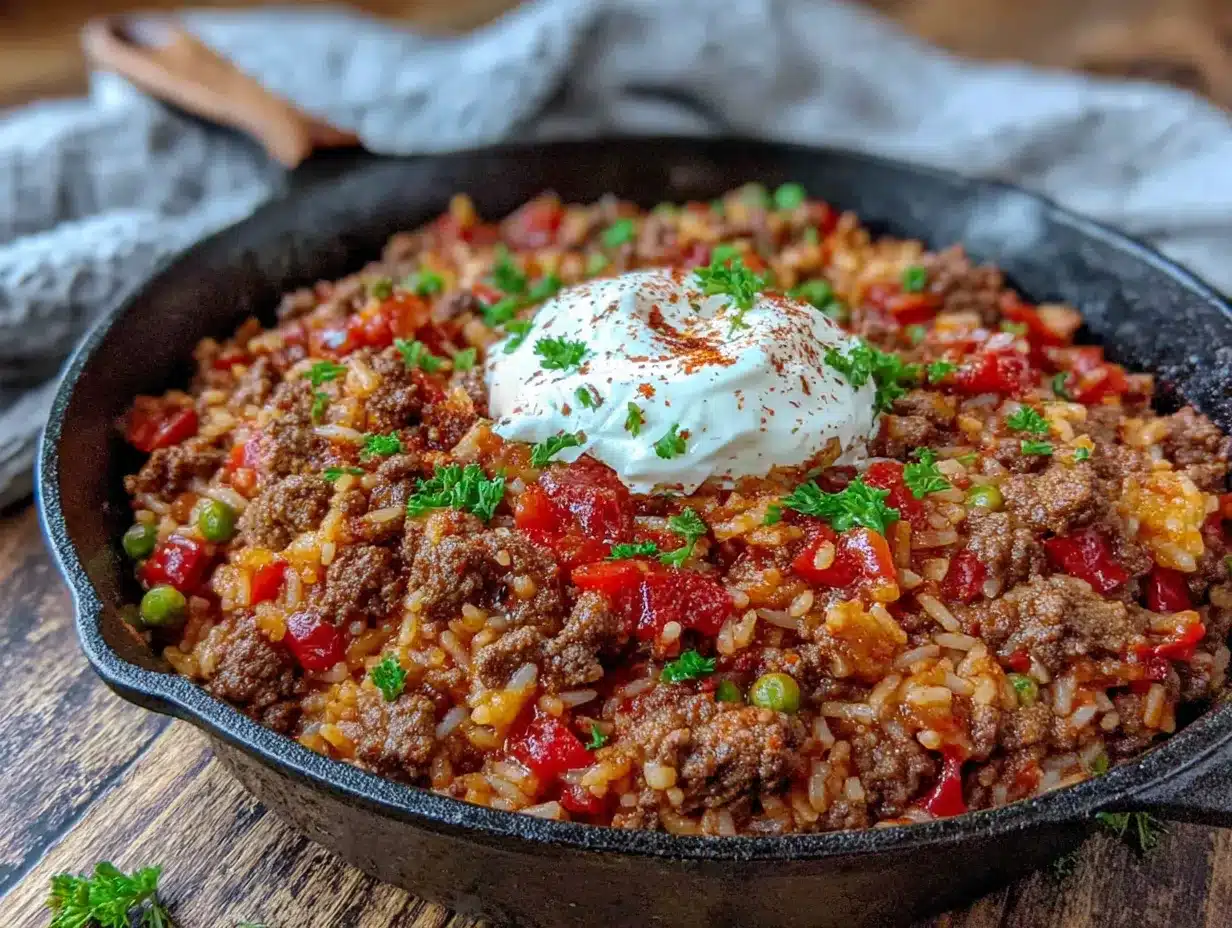
Follow these steps carefully, and you’ll have dinner ready in no time. I’ve included visual cues at each stage so you know exactly what to look for.
- Brown the ground beef (5 minutes): Place your skillet over medium-high heat. Add the ground beef and break it apart with your wooden spoon. Cook for 4-5 minutes, stirring occasionally, until no pink remains. The beef should be sizzling and golden brown in spots — that browning adds flavor. Do not drain the fat unless you’re using very fatty beef (like 70/30). For 80/20, leave about 1 tablespoon of fat in the pan for flavor.
- Sauté the aromatics (2 minutes): Reduce heat to medium. Add the diced onion to the pan with the beef. Cook for 1-2 minutes until the onion softens and becomes translucent. Add the minced garlic and cook for 30 seconds until fragrant — you’ll smell it immediately. Stir constantly so the garlic doesn’t burn.
- Add tomato paste and seasonings (1 minute): Push the meat mixture to one side of the pan. Add the tomato paste to the empty space and let it sizzle for about 30 seconds. This caramelizes the paste and deepens its flavor. Then stir everything together, add the paprika, salt, and pepper. Mix well until everything is evenly coated.
- Add rice and broth (30 seconds): Pour in the uncooked rice and stir to coat it with the meat mixture. Let it toast for about 30 seconds — this helps keep the grains separate. Then pour in the beef broth. Stir everything together, scraping the bottom of the pan to release any browned bits. Those bits are pure flavor.
- Simmer the rice (18-20 minutes): Bring the mixture to a boil. Once it’s bubbling, reduce the heat to low, cover the skillet with the lid, and let it simmer. Do not lift the lid during cooking — the steam is what cooks the rice. Set a timer for 18 minutes. The liquid should be gently bubbling, not furiously boiling.
- Check the rice (1 minute): After 18 minutes, remove the lid carefully (steam is hot!). The rice should be tender and most of the liquid absorbed. If there’s still liquid pooling at the bottom, re-cover and cook for 2-3 more minutes. If the rice is still firm, add ¼ cup more broth and cook for 5 more minutes.
- Add butter and cheese (2 minutes): Remove the pan from heat. Stir in the butter until melted. Then sprinkle the shredded cheddar cheese evenly over the top. Cover the pan again and let it sit for 2 minutes — the residual heat will melt the cheese perfectly. For extra gooey cheese, you can stir it in instead.
- Fluff and serve (1 minute): Uncover and fluff the rice with a fork. The cheese should be stretchy and coating every grain. Garnish with fresh parsley if desired. Serve hot straight from the pan.
Pro tip: If the rice at the bottom of the pan starts to stick or burn slightly, don’t panic. That’s called “socarrat” — the crispy rice at the bottom — and some people absolutely love it. Just scrape it up and mix it in for extra texture.
Cooking Tips & Techniques
I’ve made this easy cheesy one-pan ground beef rice more times than I can count, and I’ve learned a few things the hard way. Here are my best tips:
Don’t lift the lid. I know it’s tempting to peek, but every time you lift that lid, steam escapes and your rice takes longer to cook. Trust the process. Set a timer and walk away.
Toast the rice briefly. That 30-second toasting step isn’t just for show. It coats each grain with a thin layer of fat, which helps them stay separate instead of clumping together. Skip this and you risk mushy rice.
Use the right rice. Long-grain white rice is your friend here. Brown rice takes much longer to cook and needs more liquid. Jasmine rice works but will be slightly stickier. Never use instant rice — it disintegrates into mush.
Adjust liquid for altitude. If you live at a high altitude (above 3,500 feet), you’ll need to add about ¼ cup more broth and cook for 5-10 minutes longer. The lower boiling point at altitude means slower cooking.
Season thoughtfully. Cheese adds salt, so go easy on the salt early on. I start with 1 teaspoon and add more at the end if needed. You can always add salt, but you can’t take it out.
One time I forgot to add the rice before the broth. I had this soupy beef mixture and had to scoop everything out, rinse the pan, and start over. It was a mess. Write yourself a sticky note if you’re easily distracted — rice goes in before the liquid!
Variations & Adaptations
This recipe is incredibly flexible. Here are some ways to make it your own:
Spicy Southwest Version: Add 1 diced jalapeño with the onions, use pepper jack cheese instead of cheddar, and stir in a can of drained black beans and corn at the end. Top with sliced avocado and a squeeze of lime. This version is my personal favorite when I want something with a kick.
Vegetable-Packed Version: Add 1 cup of frozen peas and carrots when you add the broth. Or stir in 2 cups of fresh spinach at the very end — it wilts down into the rice beautifully. Mushrooms, bell peppers, and zucchini all work great too. Just dice them small so they cook through.
Cheese Swap Options: Try Monterey Jack for a milder flavor, Gouda for smokiness, or a Mexican blend for extra meltiness. For a grown-up twist, use Gruyère — it’s nutty and amazing with the beef.
Low-Carb Adaptation: Swap the rice for cauliflower rice. Use 3 cups of frozen cauliflower rice and reduce the broth to 1 cup. Cook for only 10 minutes covered, then stir in the cheese. The texture is different but still delicious.
One-Pan Pasta Version: Replace the rice with 8 ounces of small pasta (like elbow macaroni or orzo). Use 2.5 cups of broth and cook for 10-12 minutes. Stir in the cheese at the end for a cheesy beef pasta situation.
Serving & Storage Suggestions
This dish is best served hot, straight from the pan. The cheese is at its stretchiest and the rice is perfectly tender. Scoop generous portions into bowls and top with fresh parsley, a sprinkle of extra cheese, or a dollop of sour cream if you’re feeling fancy.
What to serve with it: A simple green salad with a lemon vinaigrette balances the richness. Steamed broccoli or roasted green beans are excellent sides. If you want to go all out, serve it with warm tortillas or crusty bread to soak up any cheesy bits left in the bowl.
Storage: Leftovers keep well in an airtight container in the refrigerator for up to 4 days. The rice will absorb more liquid as it sits, so don’t be alarmed if it seems drier the next day. That’s normal.
Reheating: The best way to reheat is in a skillet over medium-low heat with a splash of water or broth. Cover and let it steam for 3-4 minutes, stirring occasionally. The microwave works too — just add a damp paper towel over the bowl to add moisture and heat in 30-second bursts.
Freezing: This dish freezes well for up to 3 months. Let it cool completely, then portion into freezer-safe containers. Thaw overnight in the refrigerator and reheat as directed. The texture won’t be quite as perfect as fresh, but it’s still a solid meal prep option.
Flavors actually deepen overnight, so leftovers taste even better the next day. I often make a double batch just for lunch the next day.
Nutritional Information & Benefits
Here’s the approximate nutritional breakdown per serving (based on 6 servings):
| Nutrient | Amount per Serving |
|---|---|
| Calories | 420 |
| Protein | 28g |
| Fat | 18g |
| Saturated Fat | 9g |
| Carbohydrates | 35g |
| Fiber | 1g |
| Sugar | 2g |
| Sodium | 680mg |
This dish provides a solid balance of protein from the beef, carbohydrates from the rice for energy, and calcium from the cheese. The beef is also a great source of iron and B vitamins. To boost the fiber content, serve with a side of vegetables or stir in some frozen peas.
If you’re watching your sodium, use low-sodium broth and go easy on the added salt. You can also reduce the cheese slightly to lower the saturated fat. This recipe fits well into a balanced diet when paired with vegetables and enjoyed in reasonable portions.
Conclusion
This easy cheesy one-pan ground beef rice is proof that dinner doesn’t have to be complicated to be amazing. It’s the recipe I turn to when I’m tired, when I’m busy, and when I just want something that feels like a warm hug in a bowl. The rice cooks perfectly, the cheese melts into every bite, and the whole thing comes together with minimal effort and maximum flavor.
I hope you give this recipe a try and make it your own. Add your favorite vegetables, swap in a different cheese, or spice it up to your liking. That’s the beauty of a simple recipe — it becomes yours the moment you start cooking. Let me know how it turns out in the comments below. Did you add anything special? Did your family love it as much as mine does? I’d love to hear about your version. Happy cooking!
Frequently Asked Questions
Can I use brown rice instead of white rice?
Yes, but you’ll need to adjust the cooking time and liquid. Use 2.5 cups of broth instead of 2, and cook for 40-45 minutes covered. Brown rice requires more liquid and a longer simmer to become tender.
How do I prevent the rice from becoming mushy?
Don’t lift the lid while the rice is cooking, use long-grain rice instead of short-grain, and make sure your heat is on low — not medium — during the simmering stage. Mushy rice usually means too much liquid or too high heat.
Can I make this recipe in a slow cooker or Instant Pot?
For the Instant Pot, brown the beef using the sauté function, then add the remaining ingredients (reduce broth to 1.5 cups). Pressure cook on high for 5 minutes with natural release. For a slow cooker, brown the beef first, then cook on low for 2-3 hours — but the rice may become softer than the stovetop version.
What’s the best cheese for melting?
Sharp cheddar is my top pick for flavor and meltability. Monterey Jack, Colby, and Gouda are also excellent melters. Avoid pre-shredded cheese if you can — it contains starches that prevent smooth melting. But honestly, in a pinch, pre-shredded still works fine.
Can I add vegetables to this dish?
Absolutely! Frozen peas, corn, diced bell peppers, and spinach all work wonderfully. Add heartier vegetables like carrots or bell peppers with the onions so they cook through. Add delicate vegetables like spinach or peas at the very end, just before the cheese.
Pin This Recipe!

Easy Cheesy Ground Beef Rice: Best One-Pan Dinner in 30 Min

This one-pan ground beef and rice dish is creamy, cheesy, and ready in 30 minutes. Perfect for busy weeknights, it uses simple ingredients and minimal cleanup.
- Prep Time: 10 minutes
- Cook Time: 20 minutes
- Total Time: 30 minutes
- Yield: 6 servings 1x
- Category: Main Course
- Cuisine: American
Ingredients
- 1 lb (450g) ground beef (80/20 recommended)
- 1 cup (200g) long-grain white rice
- 2 cups (480ml) low-sodium beef broth
- 1.5 cups (170g) shredded sharp cheddar cheese
- 1 medium onion, diced
- 3 cloves garlic, minced
- 2 tablespoons tomato paste
- 1 teaspoon paprika (smoked preferred)
- 1 teaspoon salt (or to taste)
- ½ teaspoon black pepper (or to taste)
- 1 tablespoon butter
- Fresh parsley for garnish (optional)
Instructions
- Brown the ground beef in a large skillet over medium-high heat for 4-5 minutes, breaking it apart, until no pink remains. Do not drain fat (leave about 1 tablespoon).
- Reduce heat to medium. Add diced onion and cook for 1-2 minutes until softened. Add minced garlic and cook for 30 seconds until fragrant.
- Push meat mixture to one side. Add tomato paste to empty space and let sizzle for 30 seconds. Stir together with paprika, salt, and pepper.
- Add uncooked rice and stir to coat, toasting for about 30 seconds. Pour in beef broth, scraping up any browned bits from the bottom.
- Bring to a boil, then reduce heat to low, cover, and simmer for 18-20 minutes. Do not lift the lid during cooking.
- After 18 minutes, check rice. If tender and liquid absorbed, proceed. If not, cook 2-3 more minutes or add ¼ cup more broth and cook 5 minutes.
- Remove from heat. Stir in butter until melted. Sprinkle cheese evenly over top, cover, and let sit for 2 minutes until melted.
- Fluff with a fork, garnish with parsley if desired, and serve hot.
Notes
Don’t lift the lid while rice simmers to ensure proper cooking. For high altitude (above 3,500 ft), add ¼ cup more broth and cook 5-10 minutes longer. Leftovers keep in the fridge for up to 4 days and freeze for up to 3 months.
Nutrition
- Serving Size: 1 serving (about 1.5
- Calories: 420
- Sugar: 2
- Sodium: 680
- Fat: 18
- Saturated Fat: 9
- Carbohydrates: 35
- Fiber: 1
- Protein: 28
Keywords: one-pan dinner, ground beef, cheesy rice, easy dinner, 30-minute meal, comfort food


