Love this? Save it for later!
Share the inspiration with your friends
This was supposed to be a proper, from-scratch s’mores pie for my daughter’s birthday party. I had this whole vision in my head—a graham cracker crust I’d make myself, a silky homemade marshmallow fluff, the whole nine yards. But then Tuesday happened. You know the kind of Tuesday I mean? The one where you forget to take the butter out to soften, the baby decides naps are for quitters, and you realize the store-bought marshmallows you grabbed are somehow stale. I was already feeling that familiar pinch of panic, the kind that makes you wonder why you ever thought you could pull off a homemade dessert for fifteen kids and their parents. The oven was preheating, I had chocolate melting on the stovetop, and I was stirring a pot of sugar syrup for the marshmallow that I just knew was going to seize up.
In a moment of pure, exhausted desperation, I looked at the box of graham crackers in my pantry, the tub of Cool Whip I’d bought as a backup for something else, and the giant bag of chocolate chips. A thought, half-formed and frankly a little ridiculous, popped into my head. What if I just… didn’t? What if I layered it all together like a giant, no-bake lasagna of s’mores goodness? I mean, the kids would eat anything with chocolate and marshmallow, right? So I abandoned the pie. I tossed the failed sugar syrup down the drain, turned off the oven, and started layering. I felt like a fraud, honestly. A mom who’d given up on the fancy recipe and was just throwing things together.
What came out of the fridge the next day was nothing like my original plan. It was better. The graham crackers had softened into a tender, cake-like layer, the chocolate had set into a fudgy ribbon, and the marshmallow filling was this impossibly light, creamy cloud. It wasn’t fancy. It wasn’t fussy. But the kids went absolutely silent, which is the highest compliment you can get from a room full of six-year-olds. And the parents? They were asking for the recipe. I just smiled and said it was a little accident I’d stumbled onto. Maybe you’ve been there—the moment you stop trying so hard and something truly delicious happens. This cake stayed in my rotation because it taught me that sometimes the best recipes are the ones you almost didn’t make.
Why You’ll Love This Recipe
Let me tell you, after making this cake for every barbecue, potluck, and birthday party for the last two years, I can confidently say it’s a game-changer. It’s not just another dessert; it’s the dessert that makes you look like a hero without breaking a sweat. Honestly, I’ve brought this to a Fourth of July picnic where it sat next to a gourmet bakery cake, and by the end of the night, my humble icebox cake was the empty dish. That’s the kind of power we’re talking about here.
- Quick & Easy: This comes together in about 20 minutes of active time. No baking, no candy thermometers, no stress. You can literally make it while your kids are watching one episode of their favorite show.
- Simple Ingredients: You probably have most of this in your pantry right now. Graham crackers, chocolate chips, marshmallows, and a few other staples. No fancy grocery store trips required.
- Perfect for a Crowd: This recipe makes a generous 9×13 pan that serves 12-16 people easily. It’s the ideal dessert for birthday parties, summer cookouts, or family reunions.
- Crowd-Pleaser: I’ve yet to meet a kid who doesn’t love this. But here’s the secret—adults go crazy for it too. There’s something about that nostalgic s’mores flavor that gets everyone.
- Unbelievably Delicious: The texture is what gets you. The graham crackers soften into a tender, almost cake-like layer, while the chocolate filling stays rich and fudgy. It’s comfort food at its finest.
What makes this recipe different from all the other no-bake desserts out there? It’s the texture. Most icebox cakes turn into a soggy mess, but this one has the perfect balance. The marshmallow cream keeps everything light and airy, while the chocolate layer provides a rich, dense counterpoint. I’ve tested this with different brands of graham crackers, different types of chocolate, and even different marshmallow products. This version is the one that works every single time. It’s the kind of dessert that makes you close your eyes after the first bite, not because it’s fancy, but because it tastes exactly like the best summer memory you’ve ever had.
What Ingredients You Will Need
This recipe uses simple, everyday ingredients to create something truly special. The magic is in how they come together, not in any exotic or hard-to-find items. Most of these are probably already in your kitchen, which makes this the perfect last-minute dessert.
- Graham Crackers: You’ll need about 2 full boxes (or 24-30 full sheets). I prefer the classic Honey Maid brand for their consistent size and texture. Don’t use the low-fat or gluten-free versions unless you’ve tested them—they can behave differently. You want the standard, full-fat graham crackers for the best softening texture.
- Chocolate Chips: 2 cups (about 12 ounces) of semi-sweet or milk chocolate chips. I personally like Ghirardelli semi-sweet for a richer flavor that balances the sweetness of the marshmallow. If you’re using milk chocolate, the cake will be sweeter, which kids love. For a darker, more adult version, go with 60% cacao dark chocolate chips.
- Heavy Cream: 1 cup. This is what you’ll use to make the chocolate ganache layer. Don’t substitute with milk or half-and-half—the fat content in heavy cream is crucial for getting that smooth, fudgy texture that sets up properly in the fridge.
- Marshmallow Fluff or Creme: 1 jar (about 7 ounces). I’ve tested this with both store-brand and name-brand marshmallow fluff. Jet-Puffed is my go-to because it has a consistent texture that whips up beautifully. Do not use mini marshmallows melted down—they don’t create the same light, airy texture.
- Cream Cheese: 8 ounces, softened to room temperature. This is the secret ingredient that gives the marshmallow layer structure and a slight tang. It balances the sweetness and keeps the filling from being one-dimensional. Make sure it’s truly softened, or you’ll end up with lumps.
- Butter: 2 tablespoons, unsalted and softened. This goes into the marshmallow layer to add richness and help the texture stay smooth.
- Vanilla Extract: 1 teaspoon. Pure vanilla extract is worth it here—the flavor really shines through. Imitation vanilla will work, but it won’t be as warm and complex.
- Powdered Sugar: 1 cup. This stabilizes the marshmallow filling and adds just a touch of sweetness. Don’t skip it, or the filling will be too soft to hold its shape.
- Optional Toppings: Extra graham cracker crumbs, chocolate shavings, or a few mini marshmallows for garnish. I like to sprinkle a handful of crushed graham crackers on top for that classic s’mores look.
Equipment Needed
You don’t need a fancy kitchen to make this cake. In fact, that’s one of the best things about it. Here’s what you’ll need:
- 9×13-inch Baking Dish: This is the perfect size for serving a crowd. Glass or ceramic works best because it conducts cold evenly. I’ve used my trusty Pyrex dish for years, and it’s never let me down.
- Electric Mixer: A hand mixer or stand mixer will make whipping the marshmallow filling a breeze. You can do it by hand with a whisk, but your arm will get a workout. Trust me on this one.
- Medium Saucepan: For making the chocolate ganache. A heavy-bottomed saucepan prevents scorching.
- Mixing Bowls: You’ll need at least two—one for the chocolate ganache and one for the marshmallow filling.
- Spatula: A rubber spatula is essential for spreading the layers evenly. I like having two on hand.
- Measuring Cups and Spoons: Standard set for accurate measurements.
- Plastic Wrap: To cover the dish while it chills. This prevents the cake from absorbing any fridge odors.
If you don’t have a 9×13 dish, you can use two 8×8 square pans or even a large trifle bowl. The layering will be a bit different, but the taste will be the same. I’ve also made this in a deep springform pan, which gives it a beautiful, tall presentation.
Preparation Method
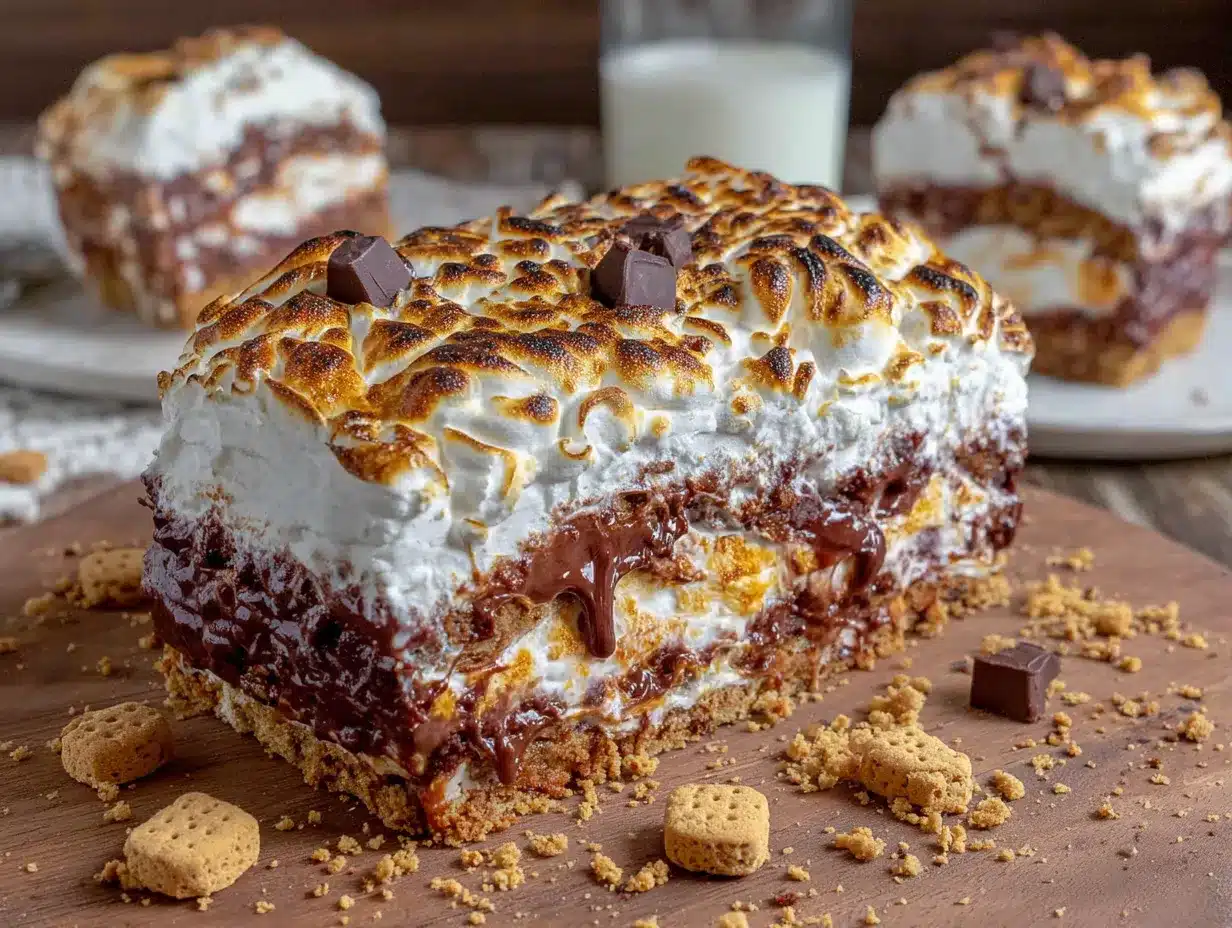
Alright, let’s get to the fun part. This recipe is so simple, you’ll wonder why you ever bothered with complicated desserts. Follow these steps, and you’ll have a dessert that looks like you spent hours on it.
- Make the Chocolate Ganache Layer: In a medium saucepan, heat 1 cup of heavy cream over medium heat until it just begins to simmer. You’ll see small bubbles forming around the edges—don’t let it come to a full boil. Remove the pan from the heat and add 2 cups of chocolate chips. Let it sit for 2-3 minutes without stirring. Then, gently whisk until the chocolate is completely melted and the mixture is smooth and glossy. Set it aside to cool slightly while you prepare the other layers. It should be warm but not hot to the touch.
- Prepare the Marshmallow Filling: In a large mixing bowl, beat 8 ounces of softened cream cheese and 2 tablespoons of softened butter together until smooth and creamy. This takes about 2 minutes with an electric mixer on medium speed. Scrape down the sides of the bowl, then add 1 jar of marshmallow fluff, 1 teaspoon of vanilla extract, and 1 cup of powdered sugar. Beat on low speed until combined, then increase to medium-high and beat for 2-3 minutes until the mixture is light, fluffy, and doubled in volume. Don’t overbeat, or it can become too stiff.
- Layer the Graham Crackers: Arrange a single layer of graham crackers in the bottom of your 9×13 dish. You’ll need to break some crackers to fit the edges. I like to create a tight, puzzle-like fit so there are no gaps. This is the foundation of your cake, so take your time here.
- Add the First Chocolate Layer: Pour about half of the slightly cooled chocolate ganache over the graham crackers. Use a spatula to spread it evenly, making sure it gets into all the corners. It doesn’t have to be perfect—it will set as it chills.
- Add the Marshmallow Layer: Carefully spread half of the marshmallow filling over the chocolate layer. Use an offset spatula or the back of a spoon to spread it gently. Try not to mix the chocolate and marshmallow layers together—you want distinct stripes.
- Repeat the Layers: Add another layer of graham crackers on top of the marshmallow filling. Press down gently so they adhere. Repeat with the remaining chocolate ganache, then the remaining marshmallow filling. Top with a final layer of graham crackers.
- Make the Topping: If you want to get fancy, you can reserve a few tablespoons of the chocolate ganache to drizzle on top. Otherwise, simply sprinkle the top layer of graham crackers with some crushed graham cracker crumbs and a few mini marshmallows for garnish.
- Chill the Cake: Cover the dish tightly with plastic wrap and refrigerate for at least 6 hours, but overnight is best. This is the most important step—the graham crackers need time to soften and absorb the moisture from the fillings. If you try to serve it too early, the layers won’t have set properly, and it will be a crumbly mess.
- Serve and Enjoy: When you’re ready to serve, remove the cake from the fridge about 15 minutes before cutting. This allows it to soften slightly for easier slicing. Use a sharp knife to cut into squares, wiping the blade clean between cuts for neat edges. Serve cold or at room temperature—both are delicious.
Cooking Tips & Techniques
After making this cake more times than I can count, I’ve learned a few tricks that make all the difference. Let me share them with you so you can avoid my early mistakes.
The Ganache Temperature is Critical: When you pour the hot cream over the chocolate chips, let it sit for a full 2-3 minutes before stirring. This allows the heat to gently melt the chocolate without shocking it. If you stir too soon, the chocolate can seize up and become grainy. Trust me, I learned this the hard way when I made a lumpy mess for my sister’s bridal shower.
Don’t Overbeat the Marshmallow Filling: It’s tempting to keep mixing until it’s super stiff, but stop when it’s light and fluffy. Overbeating can cause the cream cheese to break down, making the filling runny. You want it to hold its shape but still be spreadable.
Press the Graham Crackers Gently: When you add each new layer of graham crackers, press down just enough to make them adhere to the filling below. Don’t smash them. You want them to stay intact so they form distinct layers. If you press too hard, they’ll break apart and the layers will blend together.
Plan Ahead: This cake needs at least 6 hours to set, but it’s actually better after 24 hours. The flavors meld together, and the texture becomes perfectly tender. I often make this the day before I need it, which is a lifesaver when you’re hosting a party.
Use Room Temperature Cream Cheese: This is non-negotiable. Cold cream cheese will leave you with lumpy filling. Take it out of the fridge at least an hour before you start, or microwave it for 10-15 seconds if you’re in a hurry. Just be careful not to melt it.
Variations & Adaptations
One of the best things about this recipe is how adaptable it is. You can change it up based on what you have on hand or who you’re serving. Here are some of my favorite variations.
Peanut Butter S’mores Cake: Add 1/2 cup of creamy peanut butter to the marshmallow filling. Beat it in with the cream cheese and butter for a delicious peanut butter and chocolate combination. This is a huge hit with kids and adults alike. I made this for a Super Bowl party, and it was gone before the halftime show.
Mint Chocolate S’mores Cake: Add 1/2 teaspoon of peppermint extract to the chocolate ganache. You can also crush a few mint candies and sprinkle them between the layers for a refreshing twist. This is perfect for the holidays or St. Patrick’s Day.
Berry S’mores Cake: Add a layer of fresh berries between the marshmallow filling and the graham crackers. Sliced strawberries, raspberries, or blueberries all work beautifully. The tartness of the berries cuts through the sweetness of the chocolate and marshmallow. I love making this in the summer when berries are at their peak.
Gluten-Free Version: Use gluten-free graham crackers. I’ve tested this with several brands, and Schär is my favorite for texture. The rest of the ingredients are naturally gluten-free, so this is an easy swap.
Vegan Version: Use vegan graham crackers, dairy-free chocolate chips, coconut cream instead of heavy cream, and a vegan cream cheese alternative. Miyoko’s brand works well for the cream cheese. The texture will be slightly different, but it’s still delicious.
Serving & Storage Suggestions
This cake is incredibly versatile when it comes to serving. Here’s how to get the best results.
Serving Temperature: I prefer to serve this cake cold, straight from the fridge. The layers are firm and distinct, and the graham crackers have that perfect tender-but-not-soggy texture. If you prefer a softer, more pudding-like consistency, let it sit at room temperature for 20-30 minutes before serving.
Presentation Ideas: Cut the cake into neat squares and serve on a platter. For a fun touch, you can serve each square with a dollop of whipped cream and a sprinkle of graham cracker crumbs. If you’re feeling fancy, drizzle a little extra chocolate sauce over the top. I like to use a piping bag for a clean, professional look.
Complementary Dishes: This cake pairs beautifully with a cold glass of milk, a hot cup of coffee, or a scoop of vanilla ice cream. For a summer party, serve it alongside fresh fruit skewers or a light salad to balance the richness.
Storage Instructions: Cover the dish tightly with plastic wrap or transfer leftovers to an airtight container. The cake will keep in the refrigerator for up to 5 days. The texture actually improves after the first day as the flavors meld together. I’ve never had leftovers last longer than that in my house, but it should be fine for up to a week.
Freezing Instructions: You can freeze this cake for up to 3 months. Wrap the entire dish in a layer of plastic wrap, then a layer of aluminum foil. To serve, thaw it in the refrigerator overnight. The texture might be slightly softer after freezing, but it’s still delicious.
Reheating: This cake is meant to be served cold, so no reheating is necessary. However, if you want a warm dessert experience, you can microwave individual squares for 10-15 seconds. The chocolate will get slightly melty, which is a nice treat.
Nutritional Information & Benefits
Let’s be real—this is a dessert, and it’s meant to be indulgent. But that doesn’t mean it can’t have some redeeming qualities. Here’s a breakdown of what you’re getting.
Estimated Nutritional Values (per serving, based on 16 servings):
- Calories: 380
- Total Fat: 22g
- Saturated Fat: 13g
- Cholesterol: 45mg
- Sodium: 250mg
- Total Carbohydrates: 45g
- Dietary Fiber: 2g
- Sugars: 32g
- Protein: 5g
Health Benefits of Key Ingredients: The dark chocolate in this recipe is a good source of antioxidants, specifically flavonoids, which can support heart health. The cream cheese provides a small amount of calcium and protein. And the graham crackers offer a bit of whole grain fiber, depending on the brand you choose.
Dietary Considerations: This recipe is not gluten-free unless you use gluten-free graham crackers. It contains dairy from the cream, cream cheese, and butter. It can be made vegan with the substitutions mentioned above. It is not low-carb or keto-friendly due to the sugar content.
Potential Allergens: This recipe contains dairy, gluten (from the graham crackers), and may contain traces of soy depending on the chocolate chips you use. Always check labels if you’re serving someone with allergies.
Personal Wellness Perspective: I believe in balance. This cake is a treat, not an everyday food. But when you do indulge, it should be worth it. This cake is worth it. The joy it brings to a table full of people is something you can’t measure in calories. So go ahead, have a slice. You deserve it.
Conclusion
This no-bake s’mores icebox cake has become my go-to dessert for every occasion, and I think it’s time it became yours too. It’s the kind of recipe that proves you don’t need fancy techniques or expensive ingredients to create something truly memorable. Whether you’re feeding a crowd at a birthday party, bringing a dish to a potluck, or just want a special treat for your family, this cake delivers every single time.
What I love most about this recipe is how forgiving it is. You can customize it, adapt it, and make it your own. Don’t like marshmallow? Use more chocolate. Want a peanut butter twist? Go for it. This is your canvas, and the possibilities are endless. I’ve had readers tell me they’ve made this for everything from graduation parties to Christmas dinners, and it’s always a hit.
So here’s my challenge to you: make this cake this week. Take a picture, share it with your friends, and let me know how it turned out. Did your kids love it? Did your husband ask for the recipe? Did you add your own special twist? I want to hear all about it. Drop a comment below, tag me on social media, or send me an email. Your feedback makes this community so special, and I can’t wait to see what you create. Now go on, get in that kitchen, and make some magic. You’ve got this!
Frequently Asked Questions
Can I use store-bought chocolate pudding instead of ganache?
You can, but the texture will be different. The ganache sets up into a firm, fudgy layer that holds its shape when sliced. Pudding is much softer and will result in a more custard-like texture. If you’re in a pinch, instant chocolate pudding made with heavy cream instead of milk will give you a thicker result.
How far in advance can I make this cake?
You can make this cake up to 2 days in advance. In fact, it’s better after 24 hours because the flavors have time to meld. Just keep it covered in the refrigerator until you’re ready to serve. If you’re making it more than 2 days ahead, I recommend freezing it.
Can I use low-fat cream cheese or light Cool Whip?
I don’t recommend it. The full-fat versions provide the structure and richness that make this cake work. Low-fat cream cheese has more water content, which can make the filling runny. If you’re looking to lighten it up, you can use a lighter hand with the chocolate ganache or serve smaller portions.
Why did my graham crackers turn out soggy?
This usually happens if you don’t let the cake chill long enough, or if you used too much liquid in the filling. The graham crackers need time to absorb moisture gradually. If they’re soggy, try chilling for a full 24 hours next time, and make sure your ganache isn’t too thin. Also, don’t press the layers too hard.
Can I make this in a different size pan?
Absolutely! You can use an 8×8 square pan for a taller cake, or a 9-inch round springform pan for a more elegant presentation. Just adjust the layering accordingly. For a smaller pan, you may have leftover filling, which you can use to make a small trifle or enjoy as a dip with graham crackers.
Pin This Recipe!
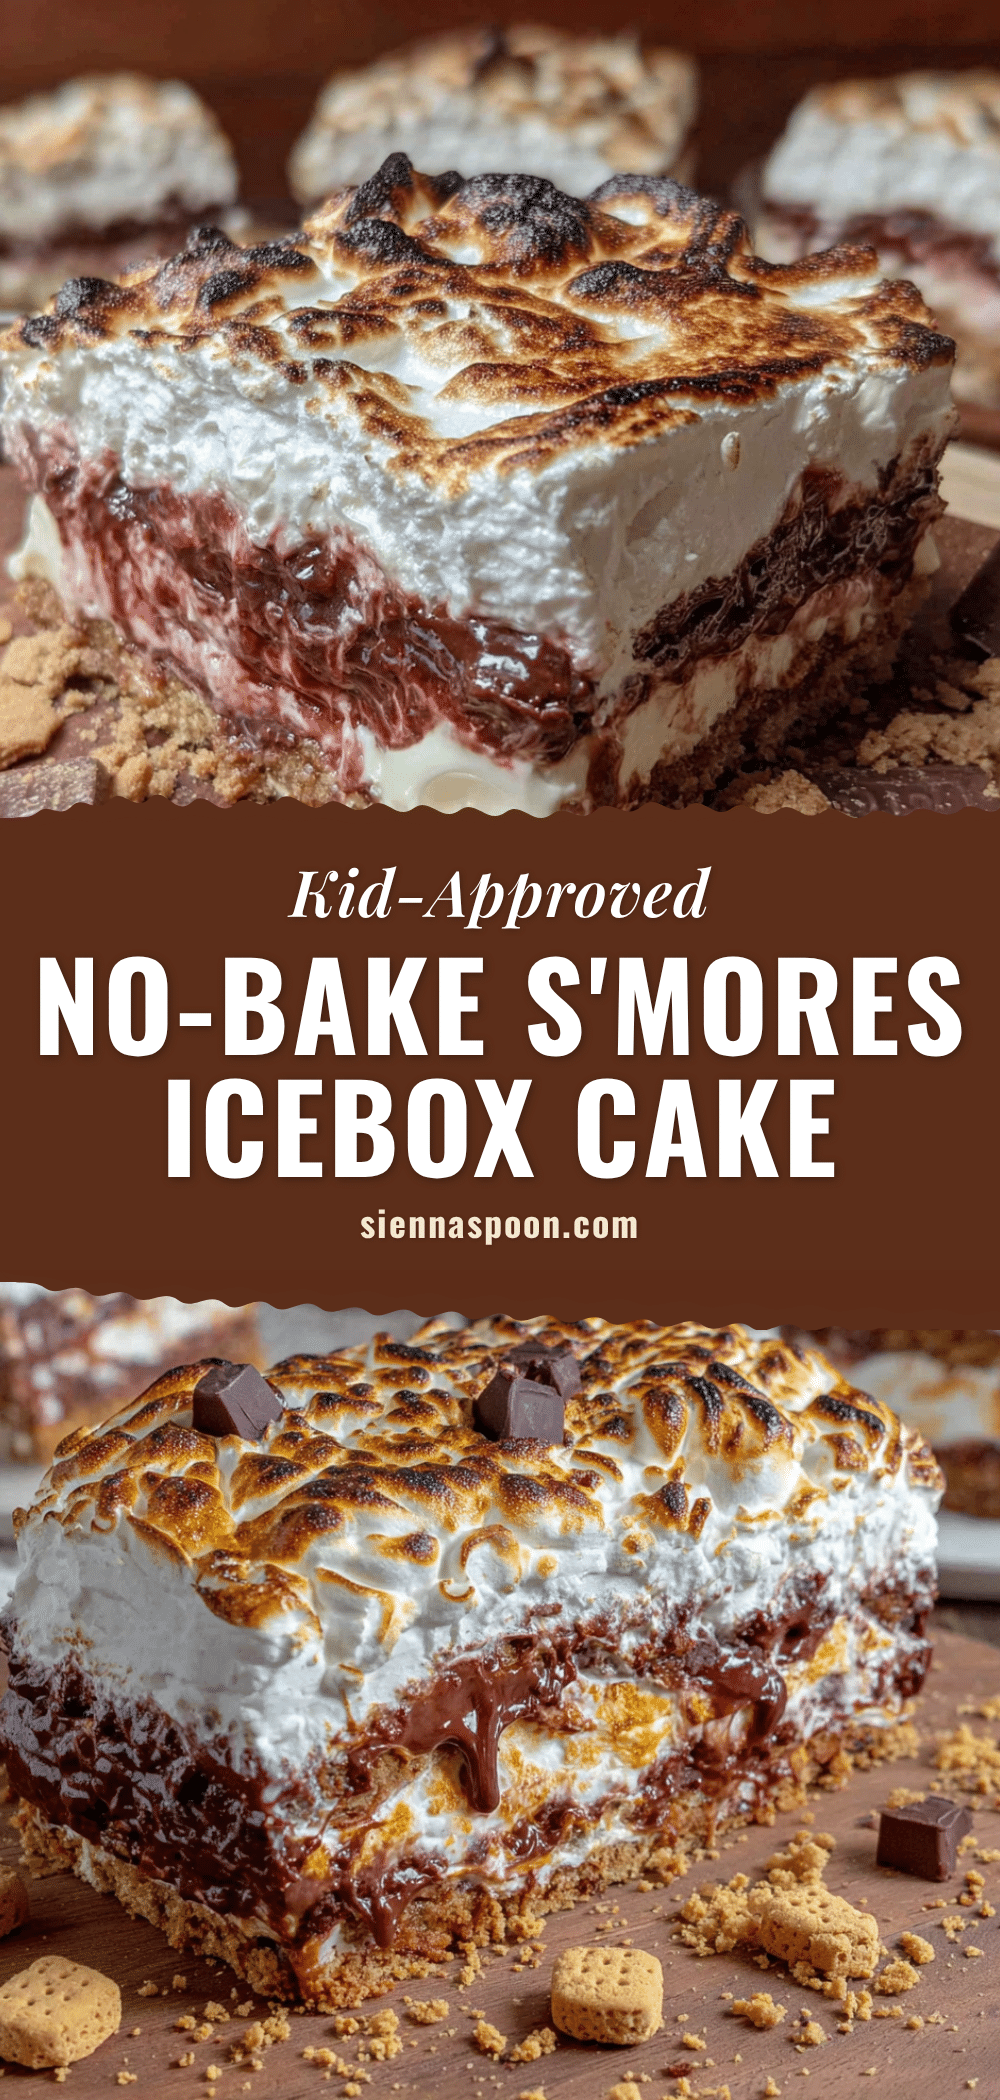
Best Easy No-Bake Smores Icebox Cake for a Crowd
A no-bake s’mores icebox cake that layers graham crackers, chocolate ganache, and marshmallow filling for a crowd-pleasing dessert. Perfect for parties and potlucks, this easy recipe requires only 20 minutes of active time.
- Prep Time: 20 minutes
- Cook Time: 0 minutes
- Total Time: 6 hours 20 minutes (includes chilling)
- Yield: 12-16 servings 1x
- Category: Dessert
- Cuisine: American
Ingredients
- 2 boxes (24-30 full sheets) graham crackers
- 2 cups (12 ounces) semi-sweet or milk chocolate chips
- 1 cup heavy cream
- 1 jar (7 ounces) marshmallow fluff or creme
- 8 ounces cream cheese, softened
- 2 tablespoons unsalted butter, softened
- 1 teaspoon vanilla extract
- 1 cup powdered sugar
- Optional: extra graham cracker crumbs, chocolate shavings, or mini marshmallows for garnish
Instructions
- Make the chocolate ganache: In a medium saucepan, heat 1 cup heavy cream over medium heat until it just begins to simmer. Remove from heat, add 2 cups chocolate chips, let sit 2-3 minutes, then whisk until smooth. Set aside to cool slightly.
- Prepare the marshmallow filling: In a large bowl, beat 8 ounces softened cream cheese and 2 tablespoons softened butter until smooth. Add 1 jar marshmallow fluff, 1 teaspoon vanilla, and 1 cup powdered sugar. Beat on low then medium-high until light and fluffy (2-3 minutes).
- Layer the graham crackers: Arrange a single layer of graham crackers in the bottom of a 9×13-inch dish, breaking to fit tightly.
- Add first chocolate layer: Pour half of the slightly cooled ganache over the crackers and spread evenly.
- Add marshmallow layer: Spread half of the marshmallow filling over the chocolate layer.
- Repeat layers: Add another layer of graham crackers, then remaining ganache, then remaining marshmallow filling. Top with a final layer of graham crackers.
- Make the topping: Optionally drizzle reserved ganache or sprinkle crushed graham crackers and mini marshmallows on top.
- Chill: Cover tightly with plastic wrap and refrigerate at least 6 hours, preferably overnight.
- Serve: Remove from fridge 15 minutes before cutting. Slice into squares and serve cold or at room temperature.
Notes
The cake needs at least 6 hours to set, but 24 hours is ideal for best texture. Use room temperature cream cheese to avoid lumps. For a gluten-free version, use gluten-free graham crackers. For a vegan version, use vegan graham crackers, dairy-free chocolate chips, coconut cream, and vegan cream cheese.
Nutrition
- Serving Size: 1 square (based on 1
- Calories: 380
- Sugar: 32
- Sodium: 250
- Fat: 22
- Saturated Fat: 13
- Carbohydrates: 45
- Fiber: 2
- Protein: 5
Keywords: no-bake, s'mores, icebox cake, graham cracker, chocolate, marshmallow, crowd-pleaser, easy dessert


