Love this? Save it for later!
Share the inspiration with your friends
The Halloween potluck was in six hours and I’d completely forgotten. Everyone else would be bringing those elaborate cake pops that look like eyeballs, or those graveyard brownies with the crumbled Oreo dirt. I had a half-empty bag of sugar, three sad egg whites sitting in the fridge, and a sudden, sweaty-palmed panic. Honestly, I almost just grabbed a bag of chips on the way out. But then I remembered a trick I’d messed up a dozen times before—meringue. It’s the ultimate underdog recipe, you know? It looks fancy, but it’s really just a happy accident waiting to happen. I whipped those egg whites until my arm ached, folded in the sugar, and piped out these wobbly little ghost shapes. I didn’t even have time to let them cool properly before I ran out the door. And guess what? They were the first thing to disappear. Someone actually asked me for the recipe, and I had to sheepishly admit it was a three-ingredient panic move. That’s why I keep coming back to them. They’re the little recipe that could—proving you don’t need a week of prep to win the day.
Why You’ll Love This Recipe
Let’s be real for a second. You want something that looks like you spent hours on it, but you also want your sanity. These ghost meringue cookies deliver on both fronts without the stress. I’ve tested this recipe about seven times to get that perfect, pillowy texture that doesn’t crack or weep on you. It’s the kind of thing you can whip up while your kid is doing homework or while you’re half-watching a movie.
- Quick & Easy: From start to finish, you’re looking at about 10 minutes of active work. The oven does the rest of the heavy lifting.
- Simple Ingredients: You likely have these three things in your kitchen right now. No special trip to the store required.
- Perfect for Halloween: These are the star of any spooky spread, from classroom parties to office potlucks.
- Crowd-Pleaser: They’re naturally gluten-free and low-fat, so almost everyone can enjoy them.
- Unbelievably Delicious: The texture is like a little cloud that melts on your tongue. It’s pure, simple sweetness.
What makes this version different from the rest? It’s the technique. Most recipes tell you to just whip and bake, but I figured out that a tiny splash of vinegar stabilizes the meringue so you don’t get that dreaded deflation. It’s not just another recipe—it’s the one that finally works. And honestly, there’s something so satisfying about biting into a ghost that’s crispy on the outside and chewy on the inside. It’s comfort food that feels light, which is a rare combo.
What Ingredients You Will Need
This recipe uses the most basic pantry staples to create something that feels a little bit magical. The simplicity is the whole point—you don’t need a chemistry lab to make these little guys.
- 3 large egg whites (room temperature is key here—cold eggs won’t whip up as high)
- 3/4 cup (150g) granulated white sugar (don’t use powdered sugar, it changes the structure)
- 1/2 teaspoon vanilla extract (or any flavor extract you love—peppermint is fun for a winter ghost)
- Optional but recommended: 1/4 teaspoon cream of tartar or white vinegar (this is my secret weapon for stable meringue)
- Mini chocolate chips for eyes (about 2 tablespoons, or just use a piping bag of melted chocolate)
I always use large eggs from a trusted brand like Eggland’s Best because they have the most consistent whites. If you’re using fresh farm eggs, make sure they’re at least a week old—older egg whites whip up better. For the sugar, I prefer C&H or Domino because they dissolve evenly. And that cream of tartar? It’s not essential, but it’s the difference between a ghost that stands tall and one that slumps over like it’s had a long day. You can find it in the spice aisle, and a tiny bottle lasts forever.
If you’re out of cream of tartar, use a drop of lemon juice or white vinegar. It does the same job—stabilizing the egg white proteins so they hold their shape. For a dairy-free option, you’re already set because meringue is naturally dairy-free. Just make sure your chocolate chips are dairy-free if that matters to you.
Equipment Needed
You don’t need a fancy kitchen for this, but having the right tools makes the process so much smoother. I’ve made these with a whisk and a sore arm before, so trust me when I say a mixer is worth it.
- Electric hand mixer or stand mixer (a hand mixer works great, and you can find decent ones for under $20)
- Large glass or metal mixing bowl (plastic bowls can hold onto grease, which kills meringue)
- Rubber spatula (for folding in the last bits of sugar)
- Piping bag with a round tip (or a sturdy zip-top bag with the corner snipped off)
- Baking sheet lined with parchment paper (don’t skip the parchment—these will stick otherwise)
- Cooling rack (optional but helpful for even cooling)
I’ve used a cheap hand mixer for years and it works fine. If you don’t have a piping bag, just use a spoon to drop dollops of meringue onto the sheet. They won’t look as ghost-like, but they’ll taste the same. Just make sure your bowl is spotless—any bit of grease or yolk will ruin your meringue. I wipe mine down with a little lemon juice and a paper towel before I start, just to be safe.
Preparation Method
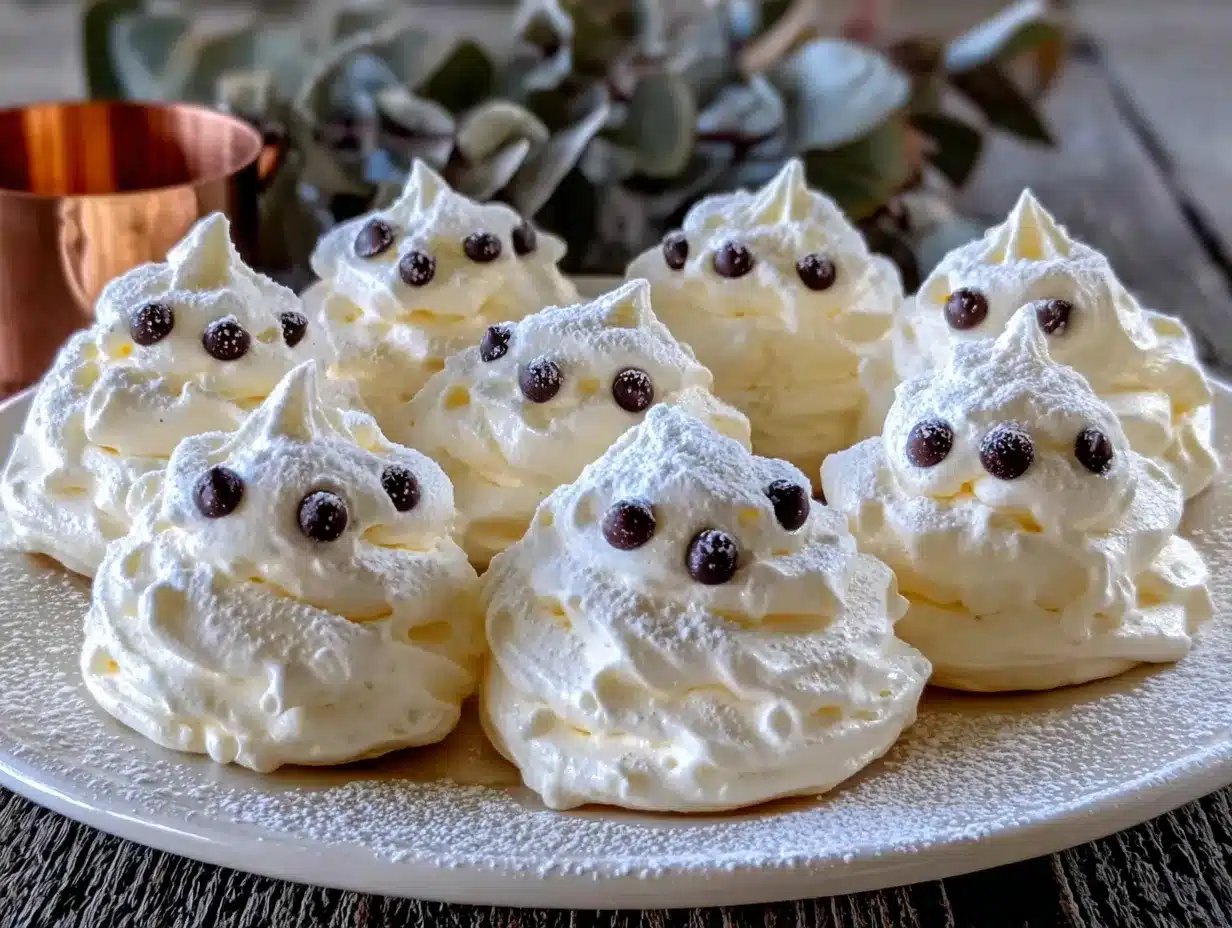
Alright, let’s make some ghosts. This is where the magic happens, and I’m going to walk you through every step so you don’t end up with flat puddles of sugar.
- Preheat your oven to 200°F (95°C). Yes, that’s low. We’re not baking these—we’re drying them out. Line a baking sheet with parchment paper and set it aside.
- Separate your eggs carefully. Crack each egg and let the white fall into a small bowl first, then transfer it to your large mixing bowl. This way, if you get a bit of yolk in one, you haven’t ruined the whole batch. The bowl should be completely clean and dry. Any grease will stop the whites from whipping up.
- Start whipping on low speed. Once the egg whites are frothy and bubbly, add the cream of tartar or vinegar if you’re using it. This usually takes about 30 seconds. You’ll see the bubbles get smaller and tighter.
- Gradually add the sugar. Turn the mixer to medium speed and start adding the sugar, one tablespoon at a time. I know it feels slow, but this is crucial. If you dump it all in at once, the sugar won’t dissolve properly and you’ll get grainy meringue. Keep adding until all the sugar is incorporated.
- Whip until stiff peaks form. Crank the mixer up to high speed and let it go for about 5 to 7 minutes. The mixture should look glossy and thick. When you lift the beater, the meringue should stand up in a firm peak that doesn’t flop over. Rub a little between your fingers—if it feels gritty, keep whipping. It should feel smooth.
- Add the vanilla. Pour in the vanilla extract and give it one final whip on low speed, just until it’s combined. Don’t overmix at this stage or you’ll deflate all that air you just worked for.
- Pipe the ghosts. Spoon the meringue into your piping bag fitted with a round tip. Hold the bag straight up and pipe a tall, round dollop onto the parchment. As you lift the bag, pull up slightly to create a little point on top—that’s the ghost’s head. Leave about 2 inches between each ghost because they don’t spread much, but they need a little breathing room.
- Add the eyes. Gently press two mini chocolate chips into each ghost for eyes. Do this right after piping, before the meringue starts to form a skin. If you wait too long, the chips won’t stick.
- Bake for 60 to 75 minutes. Slide the sheet into the oven and let them dry out. Don’t open the oven door for the first 45 minutes, or the sudden rush of cool air can make them collapse. They’re done when they feel dry and firm to the touch, and they lift easily off the parchment. They shouldn’t be brown at all—just pale and ghostly.
- Turn off the oven and let them cool inside. This is my favorite trick. Once the time is up, turn off the oven and crack the door open slightly. Let the ghosts sit in there for another hour. This step dries them out completely and gives them that perfect, airy crunch.
One time I forgot to add the cream of tartar and my ghosts looked like sad, flat pancakes. Don’t be like me. That little acid makes all the difference. Also, if you live in a humid climate, these are trickier to make. Pick a dry day if you can, or run a dehumidifier in your kitchen. Humidity is the enemy of meringue.
Cooking Tips & Techniques
I’ve made more bad meringue than I’d like to admit, so let me save you the trouble. Here are the things I wish someone had told me.
The bowl must be immaculate. I cannot stress this enough. A single speck of egg yolk or a greasy bowl will ruin your meringue. Wash your bowl with hot, soapy water, then wipe it down with a little lemon juice or vinegar on a paper towel. It sounds extra, but it works.
Don’t rush the sugar. I know you want to just dump it in and be done, but slow and steady wins this race. If you add the sugar too fast, it won’t dissolve, and you’ll end up with a gritty texture. Take your time. It’s only a few minutes.
Test for stiff peaks properly. Lift the beater straight up. The meringue should form a sharp peak that doesn’t curl over. If it flops, keep whipping. But be careful—overwhipping can make it grainy and separate. You’ll see it start to look curdled. Stop before that happens.
Low and slow is the way. These bake at 200°F for a reason. High heat will brown them and cause cracks. If your oven runs hot, use an oven thermometer to check. I’ve had ovens that say 200°F but are actually running at 250°F, and my ghosts came out looking like toasted marshmallows.
One time I tried to make these on a rainy day and they never got crisp. They stayed chewy and sticky, which was not the look I was going for. Now I only make them when the weather is dry. It’s a real thing.
Variations & Adaptations
These ghosts are a blank canvas, and I love playing around with them. Here are some fun twists I’ve tried.
Chocolate Ghosts: Swap 2 tablespoons of the sugar for unsweetened cocoa powder. Sift it in with the sugar to avoid lumps. You get a chocolate ghost that tastes like a light brownie. My niece went crazy for these.
Peppermint Specters: Replace the vanilla with 1/2 teaspoon of peppermint extract. Add a drop of red food coloring to make them pink, or leave them white for a winter ghost. These are perfect for Christmas cookie exchanges.
Vegan Meringue: Use aquafaba (the liquid from a can of chickpeas) instead of egg whites. You’ll need about 1/2 cup of aquafaba for this recipe. Whip it the same way, and it works surprisingly well. The texture is a bit softer, but the flavor is neutral.
Lemon Spirits: Add 1 teaspoon of lemon zest and replace the vanilla with lemon extract. The citrus cuts through the sweetness and makes them taste bright and fresh. I made these for a spring party and they were gone in minutes.
If you want a different shape, pipe them into little swirls or kisses. They don’t have to be ghosts. You can even color the meringue with gel food coloring for a rainbow effect. Just be gentle when you fold it in.
Serving & Storage Suggestions
These ghosts are best served at room temperature, right after they’ve cooled. They have that perfect snap when you bite into them, followed by a soft, melt-in-your-mouth center. I like to arrange them on a platter with some fake spiderwebs or orange sprinkles for a Halloween vibe.
They pair beautifully with a cup of hot cocoa or a warm apple cider. The sweetness of the meringue balances the bitterness of dark chocolate, so try them alongside a dark chocolate bark if you’re feeling fancy. For a party, set them out in a big bowl and watch them disappear.
Storage: Keep them in an airtight container at room temperature. Do NOT refrigerate them—the moisture will make them sticky and soft. They’ll stay fresh for about 2 weeks, but honestly, they never last that long in my house. If you live in a humid area, add a silica gel packet to the container to absorb moisture.
Freezing: You can freeze them for up to 3 months. Place them in a single layer in a freezer-safe container with parchment between layers. Thaw them at room temperature for about 30 minutes before serving. They might lose a little bit of their crunch, but they’ll still be delicious.
The flavors actually develop a bit over time. After a day or two, the vanilla becomes more pronounced and the texture evens out. So if you can resist eating them all immediately, they’re even better the next day.
Nutritional Information & Benefits
These ghost meringue cookies are surprisingly light, which is rare for a dessert. Each cookie has about 25 calories, 0 grams of fat, and 6 grams of sugar. They’re naturally gluten-free and dairy-free, making them a safe option for a lot of dietary restrictions.
Egg whites are a great source of protein, with about 3 grams per serving. They’re also low in cholesterol and contain essential amino acids. The sugar is the main source of carbs, so if you’re watching your sugar intake, you can use a sugar substitute like Swerve or monk fruit sweetener. Just note that the texture might be slightly different—I’ve tested it with Swerve and it worked, but the meringue was a little less stable.
These are also a good option for people on a low-fat diet or anyone looking for a lighter dessert. They satisfy that sweet tooth without weighing you down. I love having a couple after dinner when I want something sweet but don’t want to feel stuffed.
Just be aware that they contain eggs, so they’re not suitable for anyone with an egg allergy. The vegan version with aquafaba solves that problem, though.
Conclusion
These ghost meringue cookies are proof that you don’t need a million ingredients or a ton of time to make something special. They’re the little recipe that surprises everyone, and I love that about them. Whether you’re making them for a Halloween party, a classroom treat, or just because you want a light, airy snack, they deliver every time.
I really hope you give them a try. Play around with the flavors, make them your own, and don’t stress about perfection. The first time I made these, half of them cracked and looked like ghosts that had seen some things. They still tasted amazing. So go ahead, whip up a batch, and let me know how they turn out. I’d love to hear about your ghostly creations—drop a comment below or tag me in your photos. Happy haunting!
Frequently Asked Questions
Can I make these without a piping bag?
Absolutely. Just use a sturdy zip-top bag and snip off a corner. Or use a spoon to drop dollops of meringue onto the sheet. They won’t look as ghost-like, but they’ll taste the same. You can even shape them with a spatula if you’re feeling creative.
Why did my meringue collapse?
This usually happens for a few reasons. Your bowl might have had grease on it, or you didn’t whip the egg whites to stiff peaks. It could also be that you opened the oven door too early. Make sure your bowl is spotless and wait until the meringue is fully dry before opening the oven.
Can I use liquid egg whites from a carton?
I don’t recommend it. Liquid egg whites are pasteurized and often have stabilizers that prevent them from whipping up properly. Fresh egg whites from whole eggs give you the best volume and texture. Save the carton stuff for scrambled eggs.
How do I know when they’re done baking?
They should feel dry and firm to the touch. They’ll lift easily off the parchment paper without sticking. If they feel soft or sticky, give them more time. The low temperature dries them out slowly, so don’t rush it.
Can I add food coloring to the meringue?
Yes, but use gel food coloring instead of liquid. Liquid coloring adds moisture and can deflate the meringue. Fold it in gently with a spatula after you’ve reached stiff peaks. A little goes a long way.
Pin This Recipe!
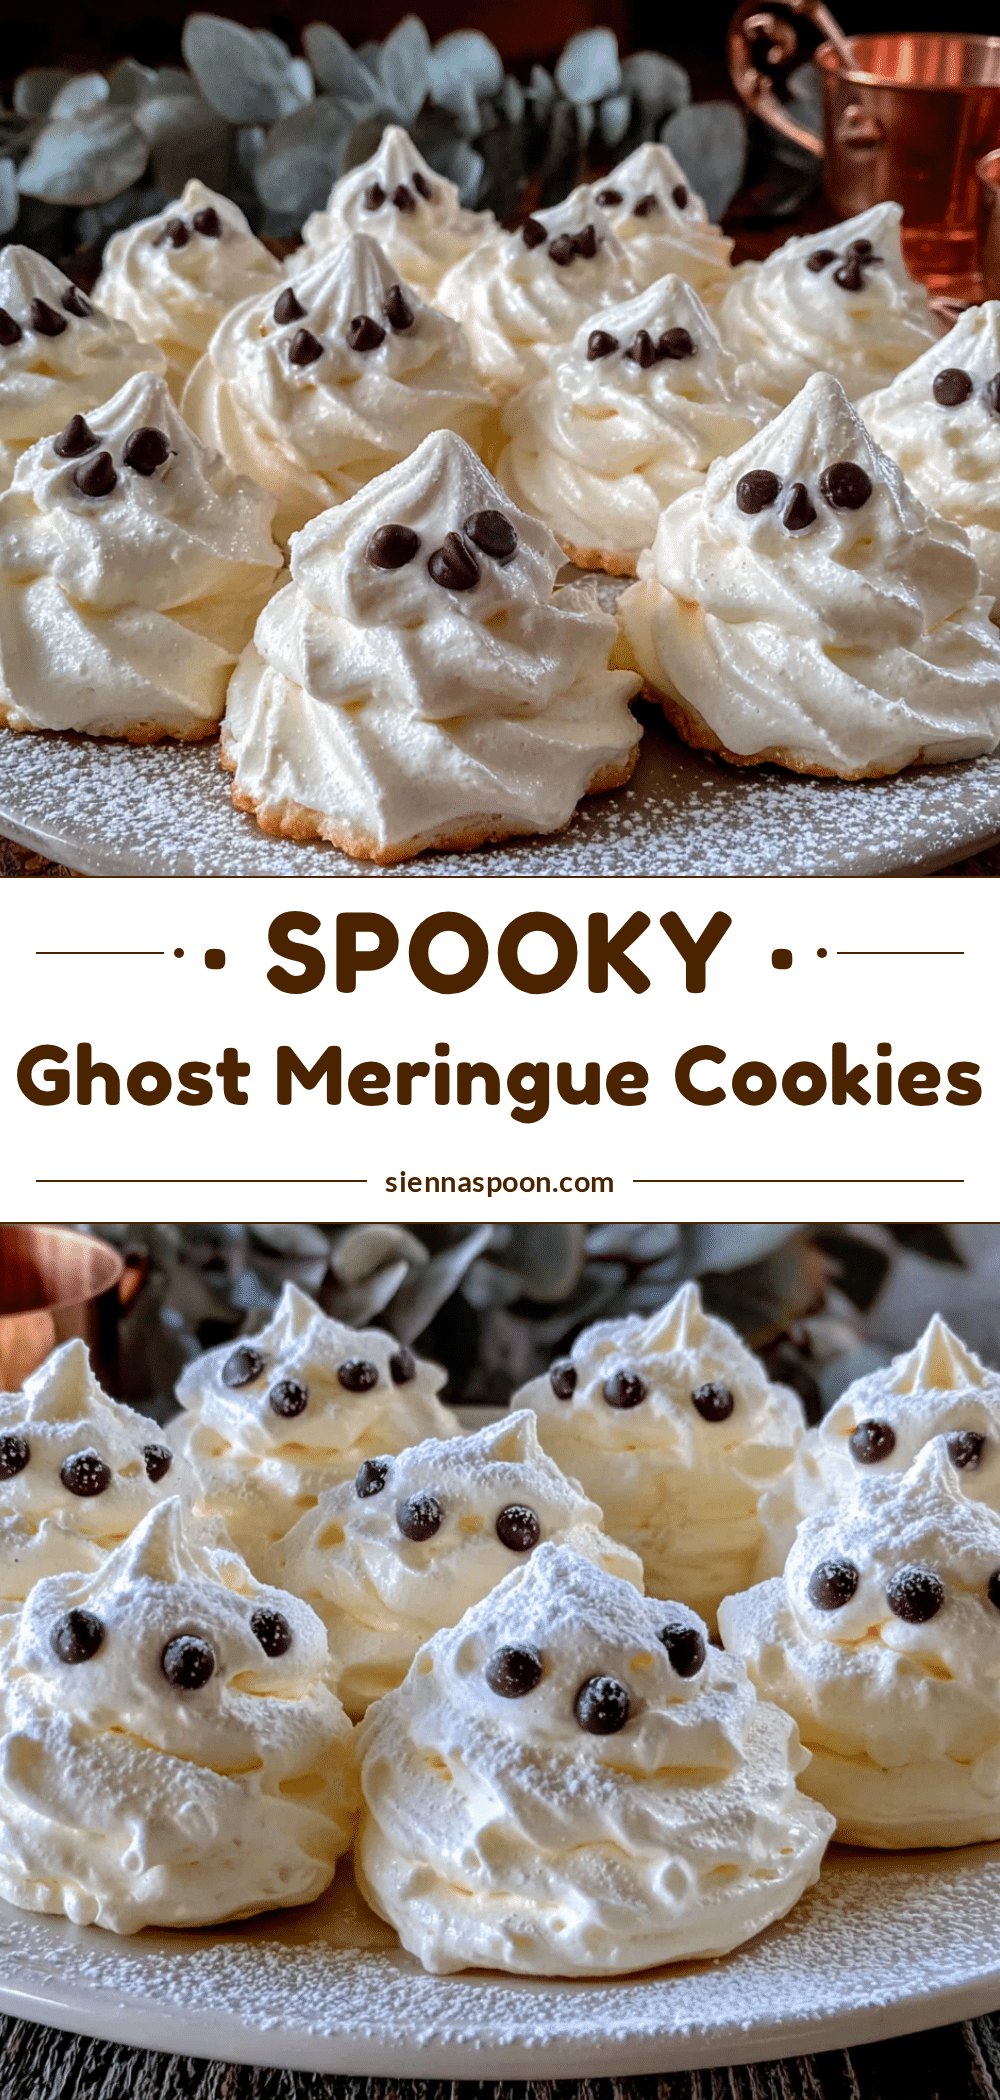
Best 3-Ingredient Ghost Meringue Cookies (Easy & Airy)
These ghost meringue cookies are light, airy, and perfect for Halloween. Made with just three simple ingredients, they look fancy but are incredibly easy to make.
- Prep Time: 10 minutes
- Cook Time: 60-75 minutes
- Total Time: 1 hour 10 minutes to 1 hour 25 minutes
- Yield: 24 servings 1x
- Category: Dessert
- Cuisine: American
Ingredients
- 3 large egg whites (room temperature)
- 3/4 cup (150g) granulated white sugar
- 1/2 teaspoon vanilla extract
- Optional: 1/4 teaspoon cream of tartar or white vinegar
- Mini chocolate chips for eyes (about 2 tablespoons)
Instructions
- Preheat your oven to 200°F (95°C). Line a baking sheet with parchment paper.
- Separate your eggs carefully, transferring each white to a small bowl first, then to a large mixing bowl. Ensure the bowl is completely clean and dry.
- Start whipping the egg whites on low speed until frothy and bubbly, about 30 seconds. Add cream of tartar or vinegar if using.
- Gradually add the sugar, one tablespoon at a time, while mixing on medium speed. Continue until all sugar is incorporated.
- Increase speed to high and whip until stiff peaks form, about 5 to 7 minutes. The mixture should be glossy and thick, and the meringue should stand up in a firm peak.
- Add vanilla extract and whip on low speed just until combined.
- Spoon meringue into a piping bag fitted with a round tip. Pipe tall, round dollops onto the parchment, pulling up slightly to create a point on top. Leave about 2 inches between each ghost.
- Gently press two mini chocolate chips into each ghost for eyes immediately after piping.
- Bake for 60 to 75 minutes. Do not open the oven door for the first 45 minutes. They are done when dry and firm to the touch and lift easily off the parchment.
- Turn off the oven and crack the door open slightly. Let the ghosts cool inside for another hour to dry out completely.
Notes
For best results, use room temperature egg whites and ensure your bowl is completely clean and grease-free. A tiny splash of vinegar or cream of tartar stabilizes the meringue. Avoid making these on humid days. Store in an airtight container at room temperature for up to 2 weeks; do not refrigerate.
Nutrition
- Serving Size: 1 cookie
- Calories: 25
- Sugar: 6
- Sodium: 10
- Carbohydrates: 6
- Protein: 1
Keywords: ghost meringue cookies, Halloween cookies, 3-ingredient cookies, easy meringue, gluten-free cookies, dairy-free cookies


