Love this? Save it for later!
Share the inspiration with your friends
It was 11:47 PM on a random Wednesday, and I had a desperate craving for stuffing. Not the kind you make for Thanksgiving with all the fanfare and family opinions. I mean the kind you eat straight from the baking dish at 1 AM because it’s just that good. I didn’t have day-old bread or fresh herbs from the store, but I had a stale baguette on the counter, a stick of butter, and a bag of sage that was probably two weeks past its prime. And honestly, that’s when the best ideas happen — when you’re too tired to overthink and just go with your gut.
I’ve always been the person who camps out by the stuffing at holiday dinners. It’s the unsung hero of the spread, you know? Everyone fights over turkey and mashed potatoes, but I’m over here making sure I get the corner piece with all the crispy edges. That night, standing in my kitchen in my pajamas, I decided to make the stuffing I’d always wanted but never had the guts to attempt for a crowd. Brown butter. Lots of sage. And a texture that’s somehow both crispy and tender.
Here’s the thing — I messed up the first batch. I browned the butter too fast and ended up with burnt bits that tasted like regret. The second batch? That was the one. I let the butter foam and bubble until it smelled like toasted nuts and heaven. I tore the bread by hand because I didn’t have a knife clean. The sage leaves crackled in the hot butter like little green fireworks. And when I pulled that dish out of the oven at midnight, I knew I had something special.
Maybe you’ve been there — standing in your kitchen late at night, chasing a craving that doesn’t make sense but feels absolutely necessary. That’s how this brown butter sage stuffing was born. Not from a family recipe passed down for generations, but from a tired cook who just really wanted something good. And let me tell you, it’s the stuffing that has since stolen every dinner party I’ve ever brought it to. Guests fight over the crispy bits. People ask for the recipe before they’ve even finished eating. It’s that kind of dish — the one that makes you look like a hero even when you’re just following your midnight instincts.
Why You’ll Love This Recipe
I’ve tested this brown butter sage stuffing more times than I can count. I’ve made it for Thanksgiving with fifteen people watching. I’ve made it for casual potlucks where it disappeared in ten minutes. I’ve even made it on a Tuesday just because. Every single time, it delivers. Here’s why this recipe stands out from every other stuffing you’ve tried:
- Quick & Easy: Comes together in under 45 minutes, with only 15 minutes of active prep. Perfect for when you’re hosting and need one less thing to stress about.
- Simple Ingredients: No fancy grocery trips needed. Bread, butter, sage, onion, celery, and broth — that’s it. You probably have most of this in your kitchen right now.
- Perfect for Hosting: This dish scales beautifully for a crowd. Double it, triple it — it only gets better. Plus, you can prep it a day ahead and bake it when guests arrive.
- Crowd-Pleaser: I’ve served this to kids who “don’t like stuffing” and adults who claim they’re “not carb people.” It wins everyone over. The brown butter does something magical.
- Unbelievably Delicious: The texture is what gets people. Crispy edges from the browned butter, tender middle from the broth, and those crispy sage leaves on top that taste like fried herbs.
What makes this stuffing different from the rest is the technique. Most recipes skip the browning step, but that’s where all the flavor lives. The butter transforms from simple fat into something nutty, rich, and almost caramelized. When you combine that with fresh sage, you get this incredible savory depth that makes everyone at the table close their eyes after the first bite. It’s comfort food reimagined — faster, more flavorful, but with the same soul-soothing satisfaction that only stuffing can provide.
This recipe is for the host who wants to impress without spending all day in the kitchen. It’s for the cook who knows that the side dish often steals the show. And honestly, it’s for anyone who has ever stood over a baking dish at midnight, eating stuffing straight from the pan, and thought, “This is the best thing I’ve ever made.”
What Ingredients You Will Need
This brown butter sage stuffing uses simple, wholesome ingredients to deliver bold flavor and satisfying texture without the fuss. Most of these are pantry staples, which means you can make this on a whim — just like I did that first late night.
- 1 loaf (about 450g) day-old crusty bread — A baguette, sourdough, or Italian loaf works best. The stale texture is key because it soaks up the broth without turning to mush. If your bread is fresh, cube it and toast it in a 300°F oven for 10 minutes.
- 1 cup (226g) unsalted butter — Use a good quality butter here since it’s the star. I prefer Kerrygold or Plugrà for the richness. Don’t use salted butter — you want to control the salt level yourself.
- 1/2 cup (20g) fresh sage leaves — Plus 2 tablespoons finely chopped sage. The whole leaves get crispy in the brown butter for garnish. The chopped sage infuses the stuffing with that earthy, slightly peppery flavor. Fresh is non-negotiable here — dried sage won’t give you the same result.
- 1 large yellow onion (about 300g), diced — Yellow onions have the right balance of sweetness and sharpness. Red onions are too mild, white onions are too harsh. Trust me on this one.
- 3 celery stalks (about 150g), diced — Celery adds that classic stuffing crunch and freshness. Make sure to dice it small so it distributes evenly.
- 2 cups (480ml) low-sodium chicken or vegetable broth — Low-sodium is important because the bread absorbs liquid and can get salty fast. I use Swanson’s low-sodium chicken broth for the best flavor.
- 2 large eggs, lightly beaten — Eggs bind the stuffing together so it holds its shape when you cut into it. If you’re vegan, you can use a flax egg (1 tablespoon ground flaxseed mixed with 3 tablespoons water, let sit for 5 minutes).
- 1 teaspoon kosher salt — Plus more to taste. I use Diamond Crystal kosher salt. If you’re using table salt, reduce to 1/2 teaspoon.
- 1/2 teaspoon black pepper — Freshly ground is best. The pre-ground stuff just doesn’t have the same pop.
- 1/2 teaspoon garlic powder — Optional but recommended. It adds a subtle savory note that complements the brown butter beautifully.
Ingredient Selection Tips: When choosing sage, look for leaves that are vibrant green with no brown spots. The fresher the sage, the more aromatic it will be. For the bread, avoid anything too soft like sandwich bread — it will turn into paste. A good crusty loaf with some chew is ideal. If you’re gluten-free, use a sturdy gluten-free bread and toast it well before using.
Substitution Guidance: You can swap the chicken broth for vegetable broth to make this vegetarian. For a dairy-free version, use a high-quality vegan butter like Miyoko’s — just note that it won’t brown the same way, but it will still be delicious. If you don’t have fresh sage, use 1 tablespoon dried sage, but add it to the butter while it’s browning to rehydrate it.
Equipment Needed
You don’t need a fancy kitchen to make this brown butter sage stuffing. Here’s what you’ll need:
- Large skillet or sauté pan — For browning the butter and cooking the vegetables. A 12-inch skillet is ideal. Stainless steel works best because you can see the butter change color. Non-stick works too, but you won’t get as many crispy bits stuck to the pan.
- 9×13-inch baking dish — This is the standard size for this recipe. If you’re doubling it, use two dishes or a larger roasting pan. I’ve used a cast iron skillet before too, which gives amazing crispy edges.
- Large mixing bowl — For combining the bread cubes with the broth mixture. You need a bowl big enough to toss everything without spilling.
- Chef’s knife and cutting board — For dicing the onion and celery. A sharp knife makes all the difference — dull knives crush the vegetables and release too much moisture.
- Whisk — For beating the eggs and mixing the broth. A fork works in a pinch.
- Wooden spoon or spatula — For stirring the butter and vegetables. Wooden spoons are great because they don’t scratch your pans.
Budget-Friendly Options: If you don’t have a 9×13-inch dish, use a cast iron skillet or even a foil pan. I’ve made this in a disposable aluminum pan when traveling to a friend’s house for Friendsgiving, and it worked perfectly. Just place it on a baking sheet for stability.
Personal Note: I’ve made this recipe so many times that I can do it with my eyes closed. But I’ll never forget the first time I used a cheap non-stick pan for browning the butter — it was impossible to see the color change, and I ended up with burnt butter. Invest in a light-colored pan if you can. It’s a game-changer.
Preparation Method
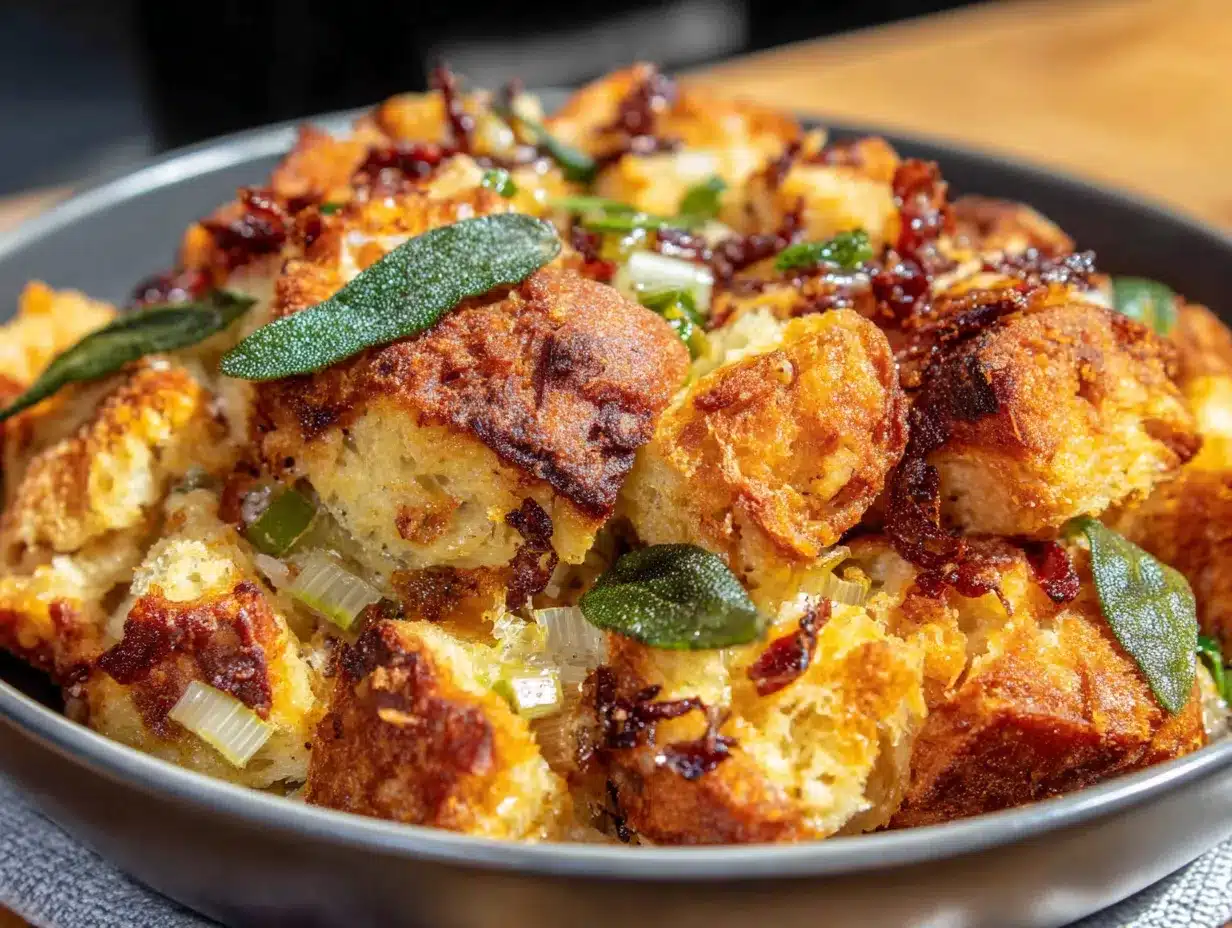
Follow these steps carefully, and you’ll have the best brown butter sage stuffing of your life. I’ve included all the little details that make a difference — the things I learned from my midnight experiments.
- Preheat your oven to 375°F (190°C). Position the rack in the middle of the oven. While it’s heating, cut your bread into 1-inch cubes. If your bread isn’t stale, spread the cubes on a baking sheet and toast for 10 minutes. You want them dry but not browned.
- Start browning the butter. Place the 1 cup of butter in your large skillet over medium heat. Let it melt completely, then continue cooking. Swirl the pan occasionally. After about 5-7 minutes, the butter will start to foam. This is normal — don’t panic. The foam will subside, and you’ll see golden brown specks forming at the bottom of the pan. The butter will smell nutty and amazing. This is your signal.
- Fry the sage leaves. Once the butter is browned, drop in the 1/2 cup of whole sage leaves. They’ll sizzle and crisp up in about 30 seconds. Use a slotted spoon to transfer them to a paper towel-lined plate. They’ll get even crispier as they cool. Don’t skip this step — these crispy sage leaves are the best part of the whole dish.
- Cook the vegetables. Add the diced onion and celery to the remaining brown butter in the pan. Cook over medium heat for 6-8 minutes, stirring occasionally, until the onions are translucent and the celery is tender. The vegetables will soak up all that brown butter goodness. Season with 1/2 teaspoon of salt and 1/4 teaspoon of pepper.
- Mix the broth and eggs. In a separate bowl or measuring cup, whisk together the 2 cups of broth, the 2 beaten eggs, the 2 tablespoons of chopped sage, the remaining 1/2 teaspoon of salt, the remaining 1/4 teaspoon of pepper, and the garlic powder. Whisk until everything is well combined. The eggs should be fully incorporated into the broth.
- Combine everything. Place the bread cubes in your large mixing bowl. Pour the cooked vegetables and all the brown butter over the bread. Toss gently to coat. Then pour the broth mixture over everything. Use your hands or a spatula to gently fold everything together. Don’t overmix — you want some chunks of bread to stay intact. Let the mixture sit for 10 minutes so the bread can absorb the liquid. This is crucial for the perfect texture.
- Transfer to the baking dish. Grease your 9×13-inch dish with a little butter or non-stick spray. Pour the stuffing mixture into the dish and spread it evenly. Don’t press it down too firmly — you want some texture and air pockets for crispy edges.
- Bake to perfection. Bake for 30-35 minutes, until the top is golden brown and crispy. The edges should be dark and crunchy — that’s the best part. Halfway through baking, you can drizzle a little melted butter over the top if you want extra crispiness.
- Add the crispy sage garnish. As soon as the stuffing comes out of the oven, crumble the crispy sage leaves over the top. They’ll add a beautiful texture and burst of flavor. Let the stuffing rest for 5 minutes before serving. This allows it to set so it holds its shape when you scoop it.
Sensory Cues: At step 2, you’ll know the butter is ready when it smells like toasted nuts and has a deep golden color. At step 8, the stuffing is done when the top is deeply golden and you can see the edges pulling away from the sides of the dish slightly. The kitchen will smell incredible — like a Thanksgiving dinner that’s been perfected over years.
Cooking Tips & Techniques
I’ve learned a few things from my late-night stuffing experiments — including some spectacular failures. Here are the tips that will save you from making the same mistakes I did.
Don’t rush the brown butter. This is the number one mistake people make. Brown butter goes from perfect to burnt in about 30 seconds. Keep the heat at medium, not high. Watch for the color change and the nutty aroma. When you see those brown specks forming, immediately remove the pan from the heat. I once walked away to answer a text, and came back to butter that looked like coffee grounds. It was a sad, sad day.
Use day-old bread. Fresh bread will turn into a soggy mess. If you only have fresh bread, cube it and spread it on a baking sheet. Leave it out overnight, or bake it at 300°F for 10-15 minutes to dry it out. The drier the bread, the better it will absorb the broth without falling apart.
Let the mixture rest before baking. This is the step everyone skips, and it makes a huge difference. After you combine everything, let it sit for 10-15 minutes. This allows the bread to fully absorb the liquid. If you bake it immediately, you’ll end up with pockets of raw broth and dry bread. Patience pays off here.
For extra crispy edges. Spread the stuffing in a thinner layer if you want more crispy surface area. You can also use a larger dish — a 9×13-inch is standard, but an 11×15-inch will give you more edges. I’ve even made individual servings in a muffin tin for maximum crispiness. They look adorable and everyone fights over them.
Make it ahead of time. This stuffing is perfect for hosting because you can prep it the day before. Assemble everything up to step 6, cover it, and refrigerate. The next day, let it sit at room temperature for 30 minutes, then bake as directed. You might need to add 5-10 minutes to the baking time since it’s starting from cold.
Timing and multitasking. While the bread is toasting (if needed), you can start browning the butter. While the vegetables cook, whisk together the broth and eggs. Everything moves quickly once you start, so have all your ingredients measured and ready to go. I learned this the hard way when I was scrambling to chop celery while my butter was browning.
Variations & Adaptations
This brown butter sage stuffing is incredible as written, but it’s also a great base for customization. Here are some variations I’ve tried and loved:
1. Sausage and Apple Stuffing: Brown 1 pound of Italian sausage (casings removed) in the pan before adding the vegetables. Crumble it up and cook until browned. Remove it, then proceed with the recipe. Add 1 diced apple (Honeycrisp or Granny Smith) along with the onion and celery. The sweetness of the apple and the savory sausage are a perfect match for the brown butter and sage. This version is always a hit at my Friendsgiving gatherings.
2. Mushroom and Thyme Stuffing: Sauté 8 ounces of sliced cremini mushrooms in the brown butter before adding the vegetables. Cook until they release their liquid and start to brown. Swap the sage for fresh thyme (use 2 teaspoons of leaves). The earthy mushrooms and aromatic thyme create a deeper, more complex flavor. This is my go-to for vegetarian guests — it’s hearty and satisfying.
3. Gluten-Free and Dairy-Free Version: Use a sturdy gluten-free bread (I like Schär’s artisan loaf). Toast it well to ensure it holds up. For the butter, use a high-quality vegan butter like Miyoko’s. It won’t brown the same way, but you can add a teaspoon of nutritional yeast to the butter while it melts for a nutty flavor. Use vegetable broth instead of chicken broth. The texture will be slightly different, but it’s still delicious.
4. Spicy Southwest Stuffing: Add 1 diced jalapeño (seeds removed for less heat) along with the vegetables. Stir in 1 teaspoon of cumin and 1/2 teaspoon of smoked paprika with the seasonings. Use cornbread instead of crusty bread for a totally different texture. Top with chopped cilantro before serving. This version is unexpected and always sparks conversation at the table.
5. Cranberry Pecan Stuffing: Fold in 1/2 cup of dried cranberries and 1/2 cup of toasted pecans after combining the bread and broth. The tart cranberries and crunchy pecans add texture and brightness. This is perfect for holiday dinners where you want something a little special. I made this for Christmas last year, and my aunt asked for the recipe three times.
Serving & Storage Suggestions
This brown butter sage stuffing is versatile enough for any occasion. Here’s how to serve it, store it, and make it last.
Serving Temperature and Presentation: Serve the stuffing hot, straight from the oven. The crispy edges are at their best within the first 15 minutes. Transfer it to a serving platter if you want to be fancy, but I usually just bring the baking dish to the table — it looks rustic and inviting. Garnish with extra crispy sage leaves and a sprinkle of flaky sea salt right before serving. The salt crystals add a nice crunch and burst of flavor.
What to Serve Alongside: This stuffing is the perfect side for roasted turkey, chicken, or pork. It also pairs beautifully with a simple green salad dressed with lemon vinaigrette to cut through the richness. For a holiday spread, serve it alongside mashed potatoes, roasted vegetables, and cranberry sauce. For a casual dinner, I’ve served it with roasted chicken and a side of steamed green beans — it’s simple but satisfying.
Storage Instructions: Store leftover stuffing in an airtight container in the refrigerator for up to 4 days. The flavors actually deepen overnight as the herbs meld together. I’ve had leftovers that tasted better the next day — the brown butter flavor becomes even more pronounced.
Freezing Instructions: You can freeze this stuffing for up to 3 months. Let it cool completely, then wrap the dish tightly in plastic wrap and foil. To reheat, thaw in the refrigerator overnight, then bake at 350°F for 20-25 minutes, covered with foil. Remove the foil for the last 5 minutes to crisp up the top. I’ve done this for holiday prep, and it works beautifully.
Reheating Methods: The best way to reheat stuffing is in the oven. Microwave reheating makes it soggy. Spread the stuffing in a single layer on a baking sheet, drizzle with a little broth or melted butter, and bake at 350°F for 10-15 minutes. For individual portions, use a toaster oven. The edges will get crispy again, and the interior will stay tender.
How Flavors Develop Over Time: Fresh out of the oven, this stuffing is all about the crispy texture and bright sage flavor. After a day in the fridge, the flavors mellow and meld together. The brown butter becomes more subtle, and the sage infuses everything. Some people prefer it the next day — it’s less intense but more cohesive. I love it both ways, honestly.
Nutritional Information & Benefits
While this stuffing is definitely a comfort food, it does have some redeeming qualities. Here’s the nutritional breakdown per serving (based on 8 servings):
- Calories: 320
- Total Fat: 18g
- Saturated Fat: 11g
- Cholesterol: 85mg
- Sodium: 520mg
- Total Carbohydrates: 32g
- Dietary Fiber: 2g
- Sugars: 4g
- Protein: 7g
Health Benefits of Key Ingredients: Sage is packed with antioxidants and has anti-inflammatory properties. It’s also been shown to support brain health and memory. The onions and celery provide fiber and vitamins C and K. The eggs add protein and healthy fats. While this isn’t a health food, it’s made with real, whole ingredients — no preservatives or artificial flavors.
Dietary Considerations: This recipe can be made vegetarian by using vegetable broth. For a gluten-free version, use gluten-free bread and ensure your broth is gluten-free. For a dairy-free version, use vegan butter. It’s not low-carb or keto-friendly due to the bread, but you could try using cauliflower rice or keto bread as a substitute (though I haven’t tested this myself).
Potential Allergens: This recipe contains gluten (bread), dairy (butter), and eggs. If you’re serving guests with allergies, be sure to label the dish clearly. I always make a note when I bring this to potlucks.
Personal Wellness Perspective: I believe in balance. This stuffing is a treat — something to enjoy on special occasions or when you need a little comfort. I don’t stress about the calories or fat content when I’m sharing it with people I love. Food is about connection, joy, and creating memories. And this stuffing delivers on all three.
Conclusion
This brown butter sage stuffing is more than just a recipe — it’s the side dish that will make you the hero of every dinner party, potluck, and holiday gathering. It started as a late-night experiment in my pajamas, and now it’s the dish people request by name. The nutty richness of the brown butter, the earthy aroma of fresh sage, and the perfect balance of crispy edges and tender center make it absolutely unforgettable.
I encourage you to make this your own. Add your favorite mix-ins, adjust the herbs to your taste, or serve it alongside your family’s traditional dishes. The best recipes are the ones that evolve with the cook. And honestly, this one is forgiving enough for beginners and impressive enough for seasoned hosts.
I’d love to hear how it turns out for you. Did you add sausage? Did you double the crispy sage leaves? Did you eat it straight from the baking dish at midnight like I did? Drop a comment below and let me know. Share your photos, your variations, your successes (and even your failures — I’ve had plenty of those). This recipe is meant to be shared, adapted, and loved. So go ahead — make it for your next gathering, and watch it disappear.
Happy cooking, friends. And remember — the best dishes often start with a craving and a little bit of late-night courage.
Frequently Asked Questions
Can I make this stuffing ahead of time?
Absolutely! Assemble the stuffing completely, cover it, and refrigerate for up to 24 hours before baking. Let it sit at room temperature for 30 minutes before putting it in the oven. You may need to add 5-10 minutes to the baking time since it’s starting from cold.
Can I use dried sage instead of fresh?
You can, but fresh sage really makes a difference in this recipe. The fresh leaves get crispy when fried in the brown butter, which is one of the best parts of the dish. If you must use dried, use 1 tablespoon and add it to the butter while it’s browning to rehydrate it.
How do I prevent the stuffing from being too soggy?
The key is using day-old or toasted bread. Fresh bread absorbs too much liquid and turns into paste. Also, don’t skip the resting step after mixing — it allows the bread to absorb the liquid evenly. And finally, bake it uncovered so the top can crisp up.
Can I double this recipe for a crowd?
Yes, this recipe doubles beautifully. Use two 9×13-inch baking dishes or one large roasting pan. You may need to increase the baking time by 5-10 minutes. I’ve made a triple batch for Thanksgiving before, and it was the first dish to run out.
What’s the best bread to use for stuffing?
A crusty bread like sourdough, French baguette, or Italian loaf works best. Avoid soft sandwich bread — it will turn into mush. The bread should be sturdy enough to hold its shape after absorbing the liquid. Day-old bread is ideal because it’s dry and absorbs the broth perfectly.
Pin This Recipe!
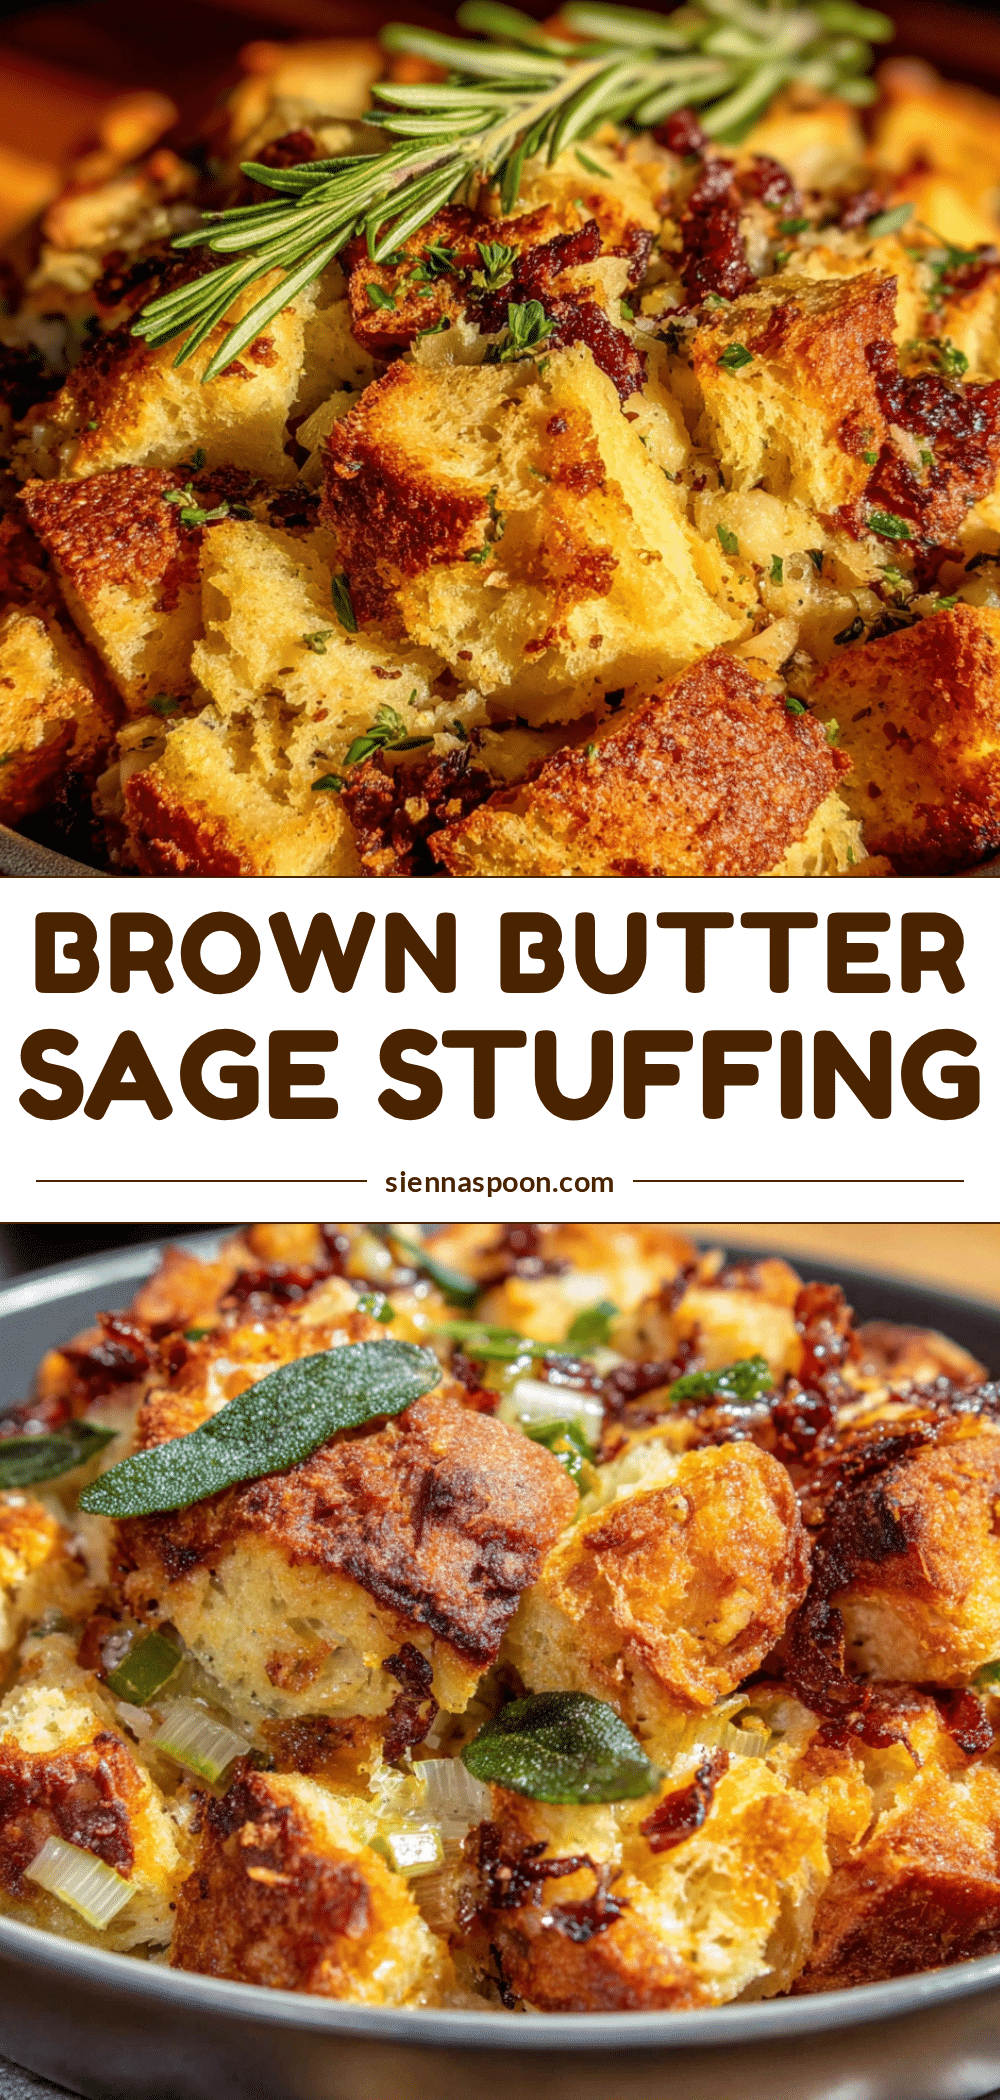
The Best Brown Butter Sage Stuffing Recipe – Easy & Homemade

This brown butter sage stuffing is the ultimate comfort food, featuring nutty browned butter, crispy sage leaves, and a perfect balance of crispy edges and tender center. It’s quick, easy, and guaranteed to steal the show at any dinner table.
- Prep Time: 15 minutes
- Cook Time: 30 minutes
- Total Time: 45 minutes
- Yield: 8 servings 1x
- Category: Side Dish
- Cuisine: American
Ingredients
- 1 loaf (about 450g) day-old crusty bread (sourdough, French baguette, or Italian loaf)
- 1 cup (226g) unsalted butter (preferably Kerrygold or Plugrà)
- 1/2 cup (20g) fresh sage leaves, plus 2 tablespoons finely chopped
- 1 large yellow onion (about 300g), diced
- 3 celery stalks (about 150g), diced
- 2 cups (480ml) low-sodium chicken or vegetable broth
- 2 large eggs, lightly beaten
- 1 teaspoon kosher salt (Diamond Crystal; reduce to 1/2 tsp if using table salt)
- 1/2 teaspoon black pepper, freshly ground
- 1/2 teaspoon garlic powder (optional)
Instructions
- Preheat your oven to 375°F (190°C). Cut the bread into 1-inch cubes. If the bread isn’t stale, spread the cubes on a baking sheet and toast for 10 minutes until dry but not browned.
- Place the 1 cup of butter in a large skillet over medium heat. Let it melt completely, then continue cooking, swirling occasionally, for 5-7 minutes until the butter foams, subsides, and golden brown specks form at the bottom. It should smell nutty.
- Drop the 1/2 cup of whole sage leaves into the browned butter. They will sizzle and crisp in about 30 seconds. Use a slotted spoon to transfer them to a paper towel-lined plate.
- Add the diced onion and celery to the remaining brown butter in the pan. Cook over medium heat for 6-8 minutes, stirring occasionally, until the onions are translucent and the celery is tender. Season with 1/2 teaspoon of salt and 1/4 teaspoon of pepper.
- In a separate bowl or measuring cup, whisk together the 2 cups of broth, the 2 beaten eggs, the 2 tablespoons of chopped sage, the remaining 1/2 teaspoon of salt, the remaining 1/4 teaspoon of pepper, and the garlic powder until well combined.
- Place the bread cubes in a large mixing bowl. Pour the cooked vegetables and all the brown butter over the bread. Toss gently to coat. Then pour the broth mixture over everything. Use your hands or a spatula to gently fold together. Let the mixture sit for 10 minutes so the bread can absorb the liquid.
- Grease a 9×13-inch baking dish with butter or non-stick spray. Pour the stuffing mixture into the dish and spread it evenly without pressing down too firmly.
- Bake for 30-35 minutes, until the top is golden brown and crispy. The edges should be dark and crunchy.
- As soon as the stuffing comes out of the oven, crumble the crispy sage leaves over the top. Let the stuffing rest for 5 minutes before serving.
Notes
Don’t rush the brown butter; it goes from perfect to burnt in about 30 seconds. Use day-old bread for best texture. Let the mixture rest before baking to allow the bread to absorb the liquid. For extra crispy edges, spread the stuffing in a thinner layer or use a larger dish. This stuffing can be assembled a day ahead and refrigerated; add 5-10 minutes to baking time if starting from cold.
Nutrition
- Serving Size: 1 serving (about 1 c
- Calories: 320
- Sugar: 4
- Sodium: 520
- Fat: 18
- Saturated Fat: 11
- Carbohydrates: 32
- Fiber: 2
- Protein: 7
Keywords: brown butter sage stuffing, homemade stuffing, Thanksgiving stuffing, easy stuffing recipe, crispy stuffing, holiday side dish


