Love this? Save it for later!
Share the inspiration with your friends
My nephew asked me last week why I couldn’t just dip pretzel rods in white chocolate and call it a day. He was eight, and he’d watched me fussing over a batch of Halloween treats—dipping, drizzling, sprinkling—for what felt like hours. I started to explain why that wouldn’t work, why we needed layers and textures and something more impressive. Then I stopped. He was right, honestly. Sometimes the simplest idea is the best one, and the best ideas come from people who haven’t learned to overcomplicate things yet.
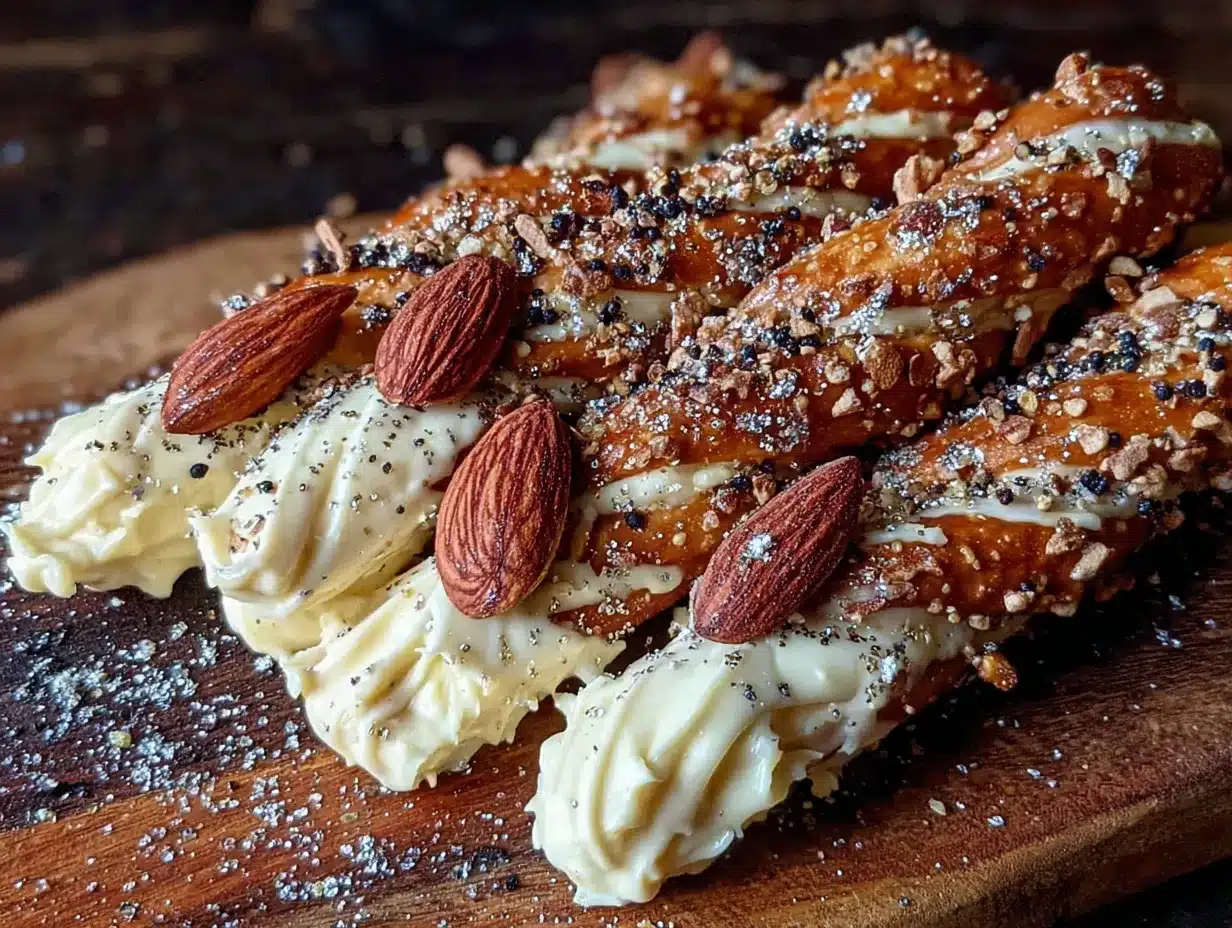
That conversation turned into these Spooky White Chocolate Pretzel Fingers, and let me tell you—they’re exactly what a Halloween treat should be. Creepy without being complicated. Delicious without being precious. I mean, we’re talking about pretzel rods dipped in creamy white chocolate, topped with a slivered almond fingernail, and finished with a dab of red gel for that “bloody” cuticle effect. It’s gross in the best possible way. My nephew took one bite, looked at me with chocolate all over his face, and said, “See? I told you.”
These aren’t just cute—they’re genuinely good. The salty crunch of the pretzel against the sweet white chocolate, the weirdly satisfying snap of the almond “nail,” the way they look like actual witch fingers sitting on a platter. You know that feeling when something is both adorable and disturbing at the same time? That’s these pretzel fingers. And honestly, they take maybe twenty minutes to make, start to finish. No baking, no complicated steps, no special equipment. Just a little patience while the chocolate sets, and you’ve got a Halloween treat that’ll steal the show at any party, classroom event, or spooky movie night.
I’ve made these every Halloween since that afternoon with my nephew. They’re the recipe that reminds me why I love cooking with kids—they see the world differently, and sometimes their way is better. So grab some pretzel rods and white chocolate, and let’s make something wonderfully creepy together.
Why You’ll Love This Recipe
These Spooky White Chocolate Pretzel Fingers are the kind of Halloween treat that checks every box. They’re fun to make, even more fun to serve, and they disappear faster than any candy I’ve ever put out. Here’s why you’ll want to add them to your Halloween rotation this year:
- Incredibly Easy: No baking, no complicated techniques. If you can melt chocolate and dip a pretzel, you can make these. Total active time is about 15 minutes.
- Simple Ingredients: You need exactly four things—pretzel rods, white chocolate chips or melting wafers, slivered almonds, and red decorating gel. That’s it. No weird specialty items.
- Perfect for Halloween: These look genuinely creepy in the best way. Kids love them, adults get a kick out of them, and they’re guaranteed to be the talk of any Halloween gathering.
- Crowd-Pleaser: Sweet and salty is a winning combo, and the almond “fingernail” adds this weirdly satisfying crunch. I’ve yet to meet someone who doesn’t reach for a second one.
- Kid-Friendly Activity: This is a great recipe to make with little helpers. They can dip, decorate, and arrange the fingers on a platter. Just supervise the melting chocolate part.
What makes these different from every other Halloween treat you’ve seen? It’s the attention to detail. The slivered almond isn’t just there for looks—it adds a nutty crunch that balances the sweetness. The red gel at the base of the almond creates that “bloody cuticle” effect that makes people do a double-take. And the white chocolate coating isn’t too thick or too thin—it’s just enough to cover the pretzel without overwhelming the saltiness. I’ve tested this with different chocolate brands, different pretzel sizes, different almond placements. Trust me—this version is the one that works.
These pretzel fingers are the kind of treat that makes you close your eyes after the first bite. They’re Halloween fun without the Halloween fuss. Perfect for parties, classroom treats, or just a cozy night watching Hocus Pocus.
What Ingredients You Will Need
This recipe uses simple, everyday ingredients that come together to create something genuinely spooky. Most of these are probably already in your pantry, which makes this an easy last-minute Halloween project.
For the Pretzel Fingers
- Pretzel rods (1 package, about 12-16 rods) – Look for thick, sturdy pretzel rods that won’t break easily during dipping. I prefer Snyder’s of Hanover brand for their consistent size and satisfying crunch. You want straight rods, not the twisted kind, because they need to look like fingers.
- White chocolate chips or melting wafers (12 ounces, about 2 cups) – Melting wafers are easier to work with because they don’t require tempering, but good-quality white chocolate chips work beautifully too. Ghirardelli white chocolate chips are my go-to—they melt smoothly and have a creamy flavor that’s not too sweet. Avoid white chocolate “bark” or candy coating if you can, as it can taste waxy.
- Slivered almonds (about ¼ cup) – These become the fingernails. Look for slivered almonds that are relatively uniform in size and shape. You want pieces that are flat and wide enough to look like a nail, not tiny slivers. I like Blue Diamond brand for their consistent quality.
- Red decorating gel (1 tube) – This creates the “bloody” cuticle effect. Wilton red decorating gel works perfectly and is widely available at craft stores or online. You can also use red icing in a squeeze bottle if that’s what you have.
Optional Additions
- Coconut oil (1 teaspoon) – If your white chocolate seems thick when melted, add a tiny bit of coconut oil to thin it out. This helps with smooth dipping and gives a shinier finish.
- Orange or black sprinkles – For extra Halloween flair, you can sprinkle these on before the chocolate sets. I’ve done this with orange jimmies and it looks festive without distracting from the “finger” effect.
- Green food coloring – If you want witchy green fingers instead of pale ones, add a drop or two of gel food coloring to the melted white chocolate. I tried this once and it was fun, but the white version is creepier.
Ingredient Tips & Substitutions
For a dairy-free version, use dairy-free white chocolate chips (Enjoy Life makes a good one) and skip the coconut oil if you’re avoiding all dairy. The texture will be slightly different, but the flavor is still great. If you can’t find slivered almonds, sliced almonds work in a pinch—just break them into fingernail-sized pieces. And if you’re making these for a crowd that includes nut allergies, skip the almond entirely and use a small candy corn piece for the nail instead. It’s a different look, but still cute and creepy.
Equipment Needed
- Microwave-safe bowl – For melting the white chocolate. A glass measuring cup works great because the pour spout makes dipping easier.
- Baking sheet – Line it with parchment paper or wax paper for setting the dipped pretzels. A rimmed baking sheet is best to prevent rolling.
- Spatula or spoon – For stirring the melting chocolate and helping coat the pretzels.
- Small piping bag or zip-top bag – For piping the red gel if you want more control. Honestly, the tube usually works fine on its own.
- Tweezers – This sounds fancy, but tweezers make placing the almond fingernails so much easier. Clean ones from your bathroom drawer work perfectly. I learned this after losing three almonds to the chocolate abyss with my fingers.
If you don’t have a microwave, you can melt the white chocolate in a double boiler on the stovetop. Just bring an inch of water to a simmer in a small saucepan, place a heat-safe bowl on top, and stir until melted. It takes a few extra minutes but works just as well. And if you don’t have parchment paper, wax paper or even a silicone baking mat will do the job. No need to buy anything special for this recipe.
Preparation Method
- Prep your workspace – Line a baking sheet with parchment paper or wax paper. Set it aside. Arrange your pretzel rods, slivered almonds, and red decorating gel nearby so everything is within reach. Trust me, once you start dipping, you don’t want to be hunting for almonds.
- Melt the white chocolate – Place the white chocolate chips or melting wafers in a microwave-safe bowl. Microwave in 30-second intervals, stirring well after each interval. White chocolate burns easily, so don’t walk away. After about 90 seconds total, it should be mostly melted with a few lumps. Stir until smooth. If it seems too thick, add ½ teaspoon of coconut oil and stir again. The consistency should be like thick cream—coating but not gloppy.
- Dip the pretzels – Hold a pretzel rod by one end and dip it into the melted white chocolate, rotating to coat about three-quarters of the rod. You want the bottom end fully covered—that’s where the fingernail goes—and the top end bare so it looks like a finger emerging from a hand. Let excess chocolate drip back into the bowl for a few seconds. I usually tap the pretzel gently against the side of the bowl to encourage the drips.
- Place on baking sheet – Transfer the dipped pretzel to the prepared baking sheet. Position it so the chocolate-coated end is pointing toward you. Work quickly—the chocolate starts setting fast, especially if your kitchen is cool.
- Add the fingernail – While the chocolate is still wet, press a slivered almond into the tip of the coated end. Angle it slightly upward, like a real fingernail growing out from the fingertip. Use tweezers for precision—your fingers will get chocolate everywhere otherwise. Press gently so the almond stays put but doesn’t sink completely into the chocolate. Repeat for all pretzels.
- Add the “bloody” cuticle – Squeeze a small dot of red decorating gel right at the base of the almond, where it meets the white chocolate. This creates the illusion of a bloody cuticle. Don’t overdo it—a tiny dot is enough. Too much red gel looks messy rather than creepy. I learned this the hard way when my first batch looked like a crime scene.
- Set the chocolate – Let the pretzels sit at room temperature until the chocolate is completely firm, about 20-30 minutes. If you’re in a hurry, you can pop the baking sheet in the refrigerator for 10 minutes. Just don’t leave them in too long or condensation can form on the chocolate when you bring them out.
- Arrange and serve – Once the chocolate is set, carefully peel the pretzels off the parchment paper. Arrange them on a platter like a hand—fan them out from a central point with the almond nails facing up. The effect is delightfully creepy. Serve immediately or store as directed below.
Pro tip: If the chocolate starts thickening while you’re working, pop the bowl back in the microwave for 10 seconds and stir. Don’t overheat it—just enough to loosen it up again. And if a pretzel rod breaks, don’t panic. Just dip the broken end and call it a “broken finger.” It’s Halloween—imperfections add character.
Cooking Tips & Techniques
I’ve made these Spooky White Chocolate Pretzel Fingers more times than I can count, and I’ve learned a few things the hard way. Here are my best tips for perfect results every time.
Don’t overheat the white chocolate. White chocolate burns at a lower temperature than milk or dark chocolate. If it seizes up (turns grainy and stiff), you’ve overheated it and there’s no saving it. Start over with fresh chocolate. I ruined an entire batch the first time I made these because I walked away from the microwave. Never again.
Work in small batches. Melt only half the chocolate at a time if you’re making a big batch. It stays fluid longer and you won’t feel rushed. When the first batch gets too thick, melt the second half and keep going. This is especially important in a warm kitchen where chocolate stays fluid longer.
Use the right pretzels. Thick, sturdy pretzel rods are essential. Thin ones break too easily during dipping and don’t look like fingers. I’ve tried multiple brands, and Snyder’s of Hanover are consistently the best—they’re substantial without being too thick, and they don’t have that weird hollow center some brands have.
Position the almond carefully. The almond should sit at the very tip of the pretzel, covering the end completely. If it’s too far back, it looks like a weird growth instead of a fingernail. If it’s too far forward, it falls off when the chocolate sets. Aim for the almond to cover the last ¼ inch of the pretzel tip, with the pointed end facing outward.
Let them set completely. I know it’s tempting to dig in right away, but the chocolate needs to be fully firm before you move the pretzels. If you try to peel them off the parchment too early, the chocolate will crack or smudge. Patience pays off here. I usually make these the night before I need them so I don’t have to wait.
Keep extra almonds handy. Some almonds will break or be too small. Have a few extra on hand so you can pick the best ones. And if an almond falls off after the chocolate sets? Just dab a tiny bit of melted chocolate on the spot and press a new almond in place. No one will know.
Variations & Adaptations
These Spooky White Chocolate Pretzel Fingers are endlessly adaptable. Here are some of my favorite variations:
Witch Fingers: Add a drop of green gel food coloring to the melted white chocolate and stir until you get a pale green color. The green fingers look witchy and gross, and kids absolutely love them. I did this for a Halloween party last year and they were the first thing to disappear.
Dark Chocolate Version: Swap the white chocolate for dark or milk chocolate. The dark chocolate version looks more like actual fingers (especially with the almond nail), and the bitterness balances the saltiness of the pretzel beautifully. Use high-quality dark chocolate chips for the best flavor. The red gel cuticle pops against dark chocolate in a way that’s genuinely unsettling.
Nut-Free Version: If you’re serving these at a school or party where nut allergies are a concern, skip the almond fingernails entirely. Instead, use a small candy corn piece pressed into the tip of the chocolate. It looks like a weird, triangular nail and it’s honestly kind of adorable. You can also use a small piece of white candy melt shaped into a nail.
Spider Finger Version: Before the chocolate sets, press a few black sprinkles or mini chocolate chips onto the top of the finger to look like hairy knuckles or spider legs. It’s extra creepy and adds texture. I tried this once for a “spider-themed” Halloween party and everyone thought they were actual bugs at first glance.
Gluten-Free Version: Use gluten-free pretzel rods. There are several good options available now, and they work exactly the same way. Just check the package to make sure your white chocolate is also gluten-free—some brands use wheat-based additives.
Serving & Storage Suggestions
These pretzel fingers are best served at room temperature, arranged on a platter in a fan pattern that looks like a creepy hand reaching out from the plate. I like to place them on a black platter for maximum spooky effect, but any dark surface works. For a party, arrange them on a bed of crushed chocolate cookies (looks like dirt) or orange sprinkles (looks like fall leaves).
They pair beautifully with other Halloween treats like pumpkin cupcakes, caramel apples, or a bowl of candy corn. For drinks, serve them with warm apple cider, hot chocolate with marshmallows, or a pumpkin spice latte. The salty-sweet combo works with just about anything.
Storage: Store the pretzel fingers in an airtight container at room temperature for up to 5 days. Layer them between sheets of parchment paper to prevent sticking. Do not refrigerate them unless absolutely necessary—the condensation can make the chocolate look dull and blotchy. If you must refrigerate, let them come to room temperature before serving so the condensation evaporates.
Freezing: You can freeze these for up to 3 months. Place them in a single layer on a baking sheet and freeze until solid (about 1 hour), then transfer to a freezer-safe container or zip-top bag with parchment between layers. Thaw at room temperature for about 30 minutes before serving. The texture holds up surprisingly well.
Make Ahead: These are perfect for making a day or two ahead of a party. The flavors actually meld together a bit, and the chocolate sets completely so they’re less fragile. I always make mine the night before Halloween so I can focus on costumes and decorations the day of.
Nutritional Information & Benefits
Let’s be honest—these are a treat, not a health food. But here’s the approximate nutritional breakdown for one pretzel finger (based on a standard pretzel rod, white chocolate coating, and one almond):
| Nutrient | Amount per serving (1 finger) |
|---|---|
| Calories | 180-220 |
| Total Fat | 10-12g |
| Saturated Fat | 6-7g |
| Carbohydrates | 22-26g |
| Sugar | 16-18g |
| Protein | 3-4g |
| Sodium | 200-250mg |
On the plus side, white chocolate does contain calcium (from the milk solids) and a small amount of protein. Almonds are rich in vitamin E, healthy fats, and magnesium. And pretzels provide a quick source of energy. But honestly, these are about fun and flavor, not nutrition. Enjoy them in moderation as part of a balanced Halloween celebration.
If you’re watching your sugar intake, you can use sugar-free white chocolate chips. The texture is slightly different, but the flavor is still good. And if you’re vegan, dairy-free white chocolate chips work beautifully—just check the label for milk solids.
Potential allergens: This recipe contains dairy (white chocolate), gluten (pretzels), and tree nuts (almonds). See the variations section above for substitution ideas.
Conclusion
These Spooky White Chocolate Pretzel Fingers are exactly what Halloween treats should be—fun, creepy, and absolutely delicious. They come together in minutes with simple ingredients, they look impressive on a platter, and they taste like a salty-sweet dream. Whether you’re making them for a Halloween party, a classroom celebration, or just a cozy night in with a scary movie, they’re guaranteed to be a hit.
I love these because they remind me of that afternoon with my nephew—the moment I stopped overthinking and let simplicity win. Sometimes the best recipes are the ones that don’t try too hard. These pretzel fingers don’t need fancy techniques or complicated ingredients. They just need a little creativity and a willingness to be a little weird.
So go ahead—make a batch this Halloween. Add extra red gel if you want them bloodier. Use green chocolate if you want witch fingers. Skip the almonds if you’re feeding a crowd with allergies. Make them your own. And when someone takes a bite and does a double-take at the “fingernail,” you’ll know you’ve done something right.
I’d love to hear how yours turn out! Drop a comment below and let me know if you tried any fun variations, or tag me in your photos on Pinterest. Happy Halloween, and happy snacking!
Frequently Asked Questions
Can I use almond bark instead of white chocolate chips?
Absolutely! Almond bark (or candy coating) melts even more smoothly than white chocolate chips and doesn’t require tempering. It’s a great option if you want a foolproof coating. Just be aware that it can taste slightly waxy compared to real white chocolate. I’ve used both, and I prefer the flavor of real white chocolate, but almond bark is definitely easier to work with.
How do I keep the almond fingernails from falling off?
Make sure you press the almond into the chocolate while it’s still wet and fluid. If the chocolate has started to set, the almond won’t stick properly. Also, use a generous enough coating of chocolate on the tip of the pretzel—a thin layer won’t hold the almond in place. And if all else fails, dab a tiny bit of melted chocolate on the almond and press it back on. Works every time.
Can I make these ahead of time for a party?
Yes! These are perfect for making 1-2 days ahead. Store them in an airtight container at room temperature, layered between parchment paper. They actually hold up better after a day because the chocolate has fully set and the flavors have melded. Just don’t refrigerate them unless you have to, and let them come to room temperature before serving.
Why did my white chocolate seize up and get grainy?
White chocolate seizes when it gets too hot or when even a tiny drop of water gets into the bowl. To prevent this, always microwave in short intervals (30 seconds or less) and stir thoroughly between each interval. Make sure your bowl and utensils are completely dry. If your chocolate does seize, unfortunately there’s no saving it—you’ll need to start over with fresh chocolate. I’ve been there, and it’s frustrating, but it happens to everyone.
Can I use something other than pretzel rods?
Pretzel rods work best because they’re shaped like fingers, but you can use thick pretzel sticks in a pinch. If you use regular pretzel twists or mini pretzels, they won’t have the same “finger” look, but they’ll still taste great as a dipped treat. For a completely different take, try this technique with breadsticks or even carrot sticks (for a healthier option). The almond nail and red gel work on any finger-shaped base.
Pin This Recipe!

Spooky White Chocolate Pretzel Fingers: Easy Halloween Treat

These Spooky White Chocolate Pretzel Fingers are a fun, easy Halloween treat made with pretzel rods dipped in white chocolate, topped with a slivered almond fingernail and a dab of red gel for a bloody cuticle effect. They’re creepy, delicious, and ready in about 20 minutes.
- Prep Time: 15 minutes
- Cook Time: 0 minutes
- Total Time: 20 minutes
- Yield: 12-16 servings 1x
- Category: Dessert
- Cuisine: American
Ingredients
- 1 package (12-16) pretzel rods
- 12 ounces (about 2 cups) white chocolate chips or melting wafers
- 1/4 cup slivered almonds
- 1 tube red decorating gel
- 1 teaspoon coconut oil (optional, for thinning chocolate)
- Orange or black sprinkles (optional, for decoration)
- Green food coloring (optional, for witch fingers)
Instructions
- Line a baking sheet with parchment paper or wax paper. Arrange pretzel rods, slivered almonds, and red decorating gel nearby.
- Place white chocolate chips or melting wafers in a microwave-safe bowl. Microwave in 30-second intervals, stirring well after each, until mostly melted and smooth (about 90 seconds total). If too thick, stir in 1/2 teaspoon coconut oil.
- Hold a pretzel rod by one end and dip it into the melted white chocolate, rotating to coat about three-quarters of the rod. Let excess chocolate drip back into the bowl.
- Transfer the dipped pretzel to the prepared baking sheet with the chocolate-coated end pointing toward you.
- While the chocolate is still wet, press a slivered almond into the tip of the coated end, angling it slightly upward like a fingernail. Use tweezers for precision.
- Squeeze a small dot of red decorating gel at the base of the almond to create a bloody cuticle effect.
- Repeat for all pretzels. Let the pretzels sit at room temperature until the chocolate is completely firm, about 20-30 minutes (or refrigerate for 10 minutes).
- Once set, carefully peel the pretzels off the parchment. Arrange on a platter in a fan pattern like a hand. Serve immediately or store as directed.
Notes
Don’t overheat white chocolate—it burns easily. Work in small batches if making a large amount. Use thick, sturdy pretzel rods for best results. If an almond falls off after setting, dab a bit of melted chocolate and reattach. Store in an airtight container at room temperature for up to 5 days. Freeze for up to 3 months.
Nutrition
- Serving Size: 1 pretzel finger
- Calories: 200
- Sugar: 17
- Sodium: 225
- Fat: 11
- Saturated Fat: 6.5
- Carbohydrates: 24
- Fiber: 1
- Protein: 3.5
Keywords: Halloween treats, white chocolate pretzels, spooky snacks, easy Halloween recipe, pretzel fingers, no-bake dessert


