Love this? Save it for later!
Share the inspiration with your friends
I was standing in the Halloween aisle at the grocery store last October, staring at a bag of plastic eyeballs, when it hit me — not literally, though that would have made a better story. My cart was already overflowing with candy corn and those little pumpkin-shaped Reese’s, but I needed something savory. Something that would make the kids at my neighbor’s annual Halloween block party actually pause between sugar rushes. And then I saw them: those ridiculous, glossy eyeballs, and I thought, “What if I could make something that looks this ridiculous but actually tastes amazing?”
Now, I’m not usually one for cutesy themed food, honestly. I’ve seen too many Pinterest fails to get my hopes up. But the idea of turning classic deviled eggs into spooky monster eyeballs just wouldn’t let go. I mean, deviled eggs are already the perfect party food — protein-packed, make-ahead friendly, and everyone devours them. The challenge was figuring out how to make them look genuinely creepy without ruining the texture or flavor. Let me tell you, the first attempt was a disaster. The “whites” looked more like sad, lumpy ghosts than eyeballs, and I used so much food coloring my fingers were stained green for two days.
But you know what? I kept at it. Three batches later, I finally cracked the code (pun absolutely intended). These Spooky Monster Eyeball Deviled Eggs are the result of some serious trial and error, and they’re now the first thing to disappear at every Halloween gathering I bring them to. There’s something deeply satisfying about watching grown adults hesitate before taking a bite of something that looks back at them. And then watching their faces light up when they taste that creamy, tangy, perfectly seasoned filling. Maybe you’ve been there — that moment when a silly idea turns into something genuinely good, and you can’t help but feel a little proud of yourself.
Why You’ll Love This Recipe
Let me tell you why these spooky deviled eggs are about to become your new Halloween MVP. I’ve tested this recipe at four different parties now, and I’ve learned exactly what works and what doesn’t so you don’t have to.
- Quick & Easy: These come together in about 30 minutes of active time, and you can make them a day ahead. Perfect for when you’re already juggling costume emergencies and last-minute candy runs.
- Simple Ingredients: You probably already have everything in your kitchen except maybe the black olives. No weird specialty items, no expensive food coloring kits.
- Perfect for Halloween Parties: These are the ultimate conversation starter. Kids love them, adults love them, and everyone takes a photo before they eat one.
- Crowd-Pleaser: I’ve watched picky eaters, health-conscious friends, and even my uncle who “doesn’t do deviled eggs” go back for seconds. They’re that good.
- Unbelievably Delicious: The combination of creamy egg yolks, tangy mustard, and that perfect hint of paprika is classic for a reason. The “monster” makeover doesn’t change the flavor one bit — it just makes it more fun.
What makes these different from every other Halloween deviled egg recipe out there? It’s the technique. Instead of using food coloring that can make the filling taste weird or stain your teeth, I use a simple trick with black olives and pimentos to create the eyeball effect. The result is a deviled egg that looks genuinely spooky but tastes exactly like the classic version you already love. No artificial flavors, no weird textures, just pure deviled egg perfection with a monster makeover.
This recipe is comfort food reimagined for the spookiest night of the year. It’s the kind of appetizer that makes people smile, laugh, and then genuinely enjoy every bite. Perfect for impressing your party guests without spending hours in the kitchen, or for turning a simple Halloween snack into something your family will request every October.
What Ingredients You Will Need
This recipe uses simple, wholesome ingredients to deliver that classic deviled egg flavor with a spooky twist. Most of these are pantry staples, and the few special additions are easy to find at any grocery store.
For the Deviled Eggs
- 12 large eggs — Use the freshest eggs you can find for easier peeling. Room temperature eggs are ideal for hard boiling.
- 1/3 cup mayonnaise — I prefer Duke’s or Hellmann’s for the creamiest texture. Avoid Miracle Whip here — it’s too tangy.
- 1 tablespoon yellow mustard — This gives the classic yellow color and tangy flavor. You can use Dijon for a more sophisticated taste.
- 1 teaspoon white vinegar — A tiny splash brightens up the filling without making it watery.
- 1/4 teaspoon salt — Fine sea salt works best. Adjust to taste.
- 1/4 teaspoon black pepper — Freshly ground if you have it.
- 1/2 teaspoon paprika — Plus extra for garnish. Smoked paprika adds a nice depth if you want to experiment.
For the Monster Eyeball Decoration
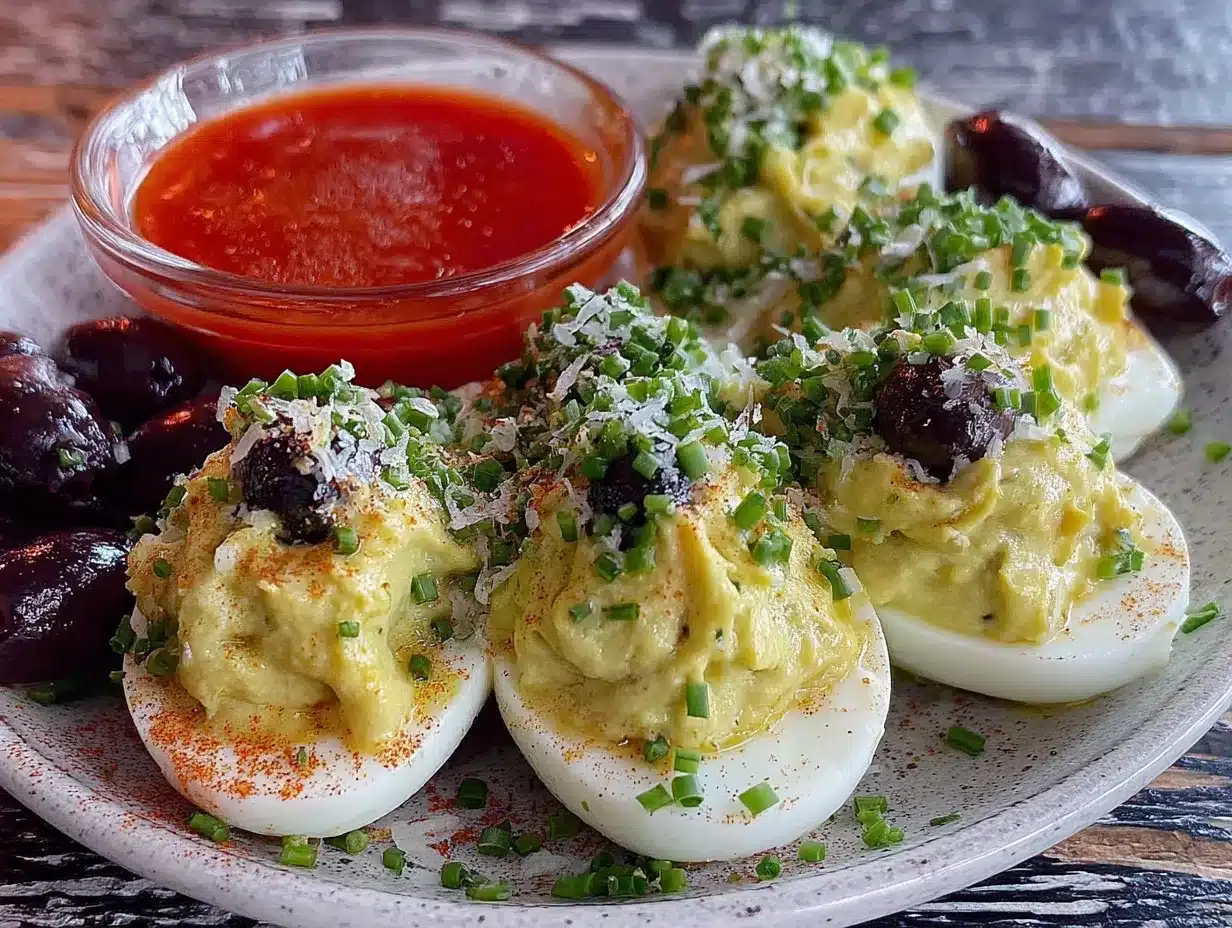
- 1 can (6 ounces) large pitted black olives — Look for the jumbo size if you can find them. They make better eyeballs.
- 1 jar (4 ounces) pimentos — These create the “bloodshot” effect. You can also use roasted red peppers, finely diced.
- Fresh chives or green onion tops — For the “veins” on the eyeballs. You’ll need about 6-8 thin strips.
Substitution Notes
If you’re feeding a crowd with dietary restrictions, here are some swaps that work well. Use avocado oil mayonnaise for a cleaner ingredient list. For a dairy-free version, check that your mayo doesn’t contain milk solids — most don’t. If you can’t find pimentos, finely diced roasted red bell peppers work perfectly. And if black olives aren’t your thing, you can use sliced green olives stuffed with pimentos for a different eyeball look.
I recommend buying extra eggs — trust me on this one. Sometimes eggs don’t peel perfectly, and you’ll want spares. Plus, you might find yourself wanting to make a second batch once you see how fast these disappear.
Equipment Needed
You don’t need anything fancy for these spooky deviled eggs, but having the right tools makes the process much smoother. Here’s what I use:
- Large saucepan or pot — Big enough to hold 12 eggs in a single layer. A 3-quart pot works perfectly.
- Sharp knife and cutting board — For slicing the eggs cleanly and dicing the olives.
- Small mixing bowl — For combining the filling ingredients.
- Fork or potato masher — For mashing the yolks to a smooth consistency. A fork works fine, but a potato masher is faster.
- Piping bag or zip-top bag — For filling the egg whites neatly. A zip-top bag with the corner snipped off works great if you don’t have a piping bag.
- Small offset spatula or butter knife — For smoothing the filling if you’re not piping.
- Tweezers or small tongs — For placing the olive “eyeballs” precisely. This is optional but helpful.
I’ve made these with just a fork and a plastic bag before, and they turned out perfectly. Don’t let a lack of fancy equipment stop you. The only tool I really recommend investing in is a good egg slicer — it makes getting clean, even slices so much easier, and they’re usually under ten dollars at any kitchen store.
Preparation Method
Let me walk you through this step by step. I’ve made these so many times I could do it in my sleep, and I’ve learned all the little tricks that make the difference between good deviled eggs and great ones.
Step 1: Hard Boil the Eggs
Place your 12 eggs in a single layer in a large saucepan. Cover them with cold water by about an inch. Bring the water to a full rolling boil over high heat — you’ll see big bubbles breaking the surface. Once it’s boiling, cover the pot, turn off the heat completely, and let it sit for exactly 12 minutes. This method gives you perfectly cooked yolks without that weird green ring around the outside.
Step 2: Ice Bath
While the eggs are cooking, fill a large bowl with ice and cold water. When the 12 minutes are up, use a slotted spoon to transfer the eggs immediately to the ice bath. Let them sit for at least 10 minutes. This stops the cooking process and makes the eggs much easier to peel. I’ve skipped this step before when I was in a hurry, and I regretted it — the shells stuck to the whites and I ended up with mangled eggs.
Step 3: Peel and Slice
Gently tap each egg on the counter to crack the shell all over, then peel under running cold water. The water helps loosen the shell. Pat the peeled eggs dry with paper towels. Using a sharp knife, slice each egg in half lengthwise. Carefully pop out the yolks into a small bowl. Arrange the egg white halves on a serving platter, cut side up.
Step 4: Make the Filling
Add the mayonnaise, yellow mustard, white vinegar, salt, pepper, and paprika to the bowl with the egg yolks. Mash everything together with a fork until it’s completely smooth. I like to press the mixture through a fine-mesh sieve for the silkiest texture, but that’s optional. Taste it and adjust the seasoning — you might want a little more salt or an extra dash of paprika. The filling should be creamy and spreadable but not runny.
Step 5: Prepare the Eyeballs
Drain the black olives and pat them dry. Cut each olive in half crosswise (not lengthwise). You should get two little round “eyeball” shapes from each olive. Drain the pimentos and pat them dry too. Cut the pimentos into tiny pieces — you want them small enough to look like bloodshot veins. Cut your chives or green onion tops into thin, 1-inch strips.
Step 6: Fill the Eggs
Spoon the yolk mixture into a piping bag or a zip-top bag with a small corner snipped off. Pipe the filling into each egg white half, mounding it slightly. You want it to be nice and full — these are monster eyeballs, after all.
Step 7: Assemble the Monsters
Gently press one olive half, cut side down, into the center of each filled egg. The olive creates the “pupil” of the eyeball. Take a tiny piece of pimento and place it at the edge of the olive to look like a bloodshot vein. Arrange two or three chive strips around the olive to look like spider veins or monster capillaries. Press them gently into the filling so they stay in place.
Step 8: Final Touches
Sprinkle a tiny pinch of paprika over the exposed filling around each eyeball. This gives it a slightly “gory” look that’s perfect for Halloween. Cover the platter with plastic wrap and refrigerate for at least 30 minutes before serving. This helps the flavors meld and makes the filling firmer.
Cooking Tips & Techniques
After making these spooky deviled eggs more times than I care to count, I’ve collected some hard-won wisdom. Let me save you from my mistakes.
The egg peeling struggle is real. I’ve tried every trick in the book — adding baking soda to the water, using older eggs, starting with warm water. The method I shared above (boil, cover, rest, ice bath) gives me the best results about 90% of the time. But here’s the thing: some eggs just don’t want to cooperate. If you end up with a few ugly ones, just chop them up and make egg salad. No one has to know.
Don’t overfill the eggs. I know it’s tempting to pile on the filling, but if you pipe too much, the olive eyeball will slide right off. Aim for a nice mound that’s about half an inch above the edge of the egg white. The filling should be sturdy enough to hold the olive in place.
Make the filling ahead of time. You can prepare the yolk mixture up to two days in advance and store it in a piping bag in the fridge. Then all you have to do on party day is fill the eggs and add the decorations. This is a lifesaver when you’re hosting.
Keep the olives dry. Wet olives won’t stick to the filling. Pat them thoroughly with paper towels before you cut them. I learned this the hard way when my first batch of eyeballs kept rolling off like they were trying to escape.
Chill between steps. If your kitchen is warm, pop the filled eggs in the fridge for 10 minutes before adding the olive eyes. The firmer filling holds the decorations much better.
Variations & Adaptations
One of the best things about this recipe is how easy it is to customize. Here are some variations I’ve tried and loved:
Spicy Monster Eyes
Add 1/2 teaspoon of cayenne pepper or a tablespoon of sriracha to the yolk mixture. The heat pairs surprisingly well with the creamy filling and gives the monsters a little attitude. I made these for a Halloween party with my spicy food-loving friends, and they were gone in minutes.
Avocado Monster Eyes
Replace half the mayonnaise with mashed ripe avocado. The green color is perfect for Halloween, and the filling gets an extra creamy texture. Just add a squeeze of lemon juice to keep the avocado from browning. This version is also a hit with my health-conscious friends.
Smoked Salmon Monster Eyes
Fold 2 ounces of finely chopped smoked salmon into the yolk mixture. The smoky flavor adds a sophisticated twist that’s perfect for adult parties. Top each eyeball with a tiny piece of fresh dill instead of chives. I served these at a Halloween cocktail party and people couldn’t stop raving about them.
Vegetarian and Gluten-Free
This recipe is naturally gluten-free and vegetarian as written. Just double-check your mayonnaise label to make sure it’s gluten-free — most major brands are, but it’s always good to verify.
Dairy-Free Option
Use a vegan mayonnaise like Follow Your Heart or Just Mayo. The texture will be slightly different, but the flavor is still delicious. I’ve tested this with vegan mayo and my non-vegan friends couldn’t tell the difference.
Serving & Storage Suggestions
These spooky deviled eggs are best served cold, straight from the fridge. Arrange them on a platter lined with black or orange lettuce leaves for maximum Halloween effect. I like to scatter a few extra olive “eyeballs” around the platter for decoration — it makes the whole spread look creepier.
For a complete Halloween spread, pair these with other spooky snacks like mummy pigs in a blanket, Halloween charcuterie board, and ghost-shaped pumpkin cheesecake bites. The savory-sweet combination is perfect for a party where people are grazing all night.
As for drinks, these eggs pair beautifully with a crisp white wine like Sauvignon Blanc or a light beer like a pilsner. For a non-alcoholic option, sparkling apple cider with a splash of pomegranate juice looks like something a vampire would drink — perfect for the theme.
Storage: These will keep in the refrigerator for up to 2 days, but they’re best within 24 hours. Store them in a single layer in an airtight container. Don’t freeze them — the texture will be ruined.
Reheating: Don’t. These are served cold. If you’ve refrigerated them for more than an hour, just let them sit at room temperature for about 10 minutes before serving to take the chill off.
One thing I love about these is that the flavors actually get better after a few hours in the fridge. The filling firms up, the seasonings meld together, and the olives absorb a little bit of the creamy goodness. They’re actually better the next day, which makes them perfect for make-ahead entertaining.
Nutritional Information & Benefits
Here’s the nutritional breakdown for one spooky deviled egg (half an egg with filling and decoration):
| Nutrient | Amount |
|---|---|
| Calories | 75 |
| Protein | 6g |
| Fat | 5g |
| Saturated Fat | 1.5g |
| Carbohydrates | 1g |
| Fiber | 0g |
| Sugar | 0.5g |
| Sodium | 150mg |
| Cholesterol | 95mg |
Eggs are a fantastic source of high-quality protein, vitamin D, vitamin B12, and choline — which is important for brain health. The black olives add healthy monounsaturated fats and antioxidants. And the pimentos are rich in vitamin C.
These are naturally low-carb and keto-friendly, making them a great option for guests with dietary restrictions. They’re also gluten-free and nut-free. The main allergen to be aware of is eggs, obviously, and some people may be sensitive to the sulfites in olives.
I love that these spooky deviled eggs let me indulge in a classic party food without feeling like I’m completely abandoning my healthy eating habits. They’re satisfying, protein-packed, and actually pretty good for you — a rare combination in the world of Halloween treats.
Conclusion
These Spooky Monster Eyeball Deviled Eggs are everything I want in a Halloween recipe — fun, delicious, and surprisingly easy to pull off. They look like something that took hours of effort, but honestly, they come together in about 30 minutes of active work. The best part is watching people’s reactions when they see them. Kids giggle, adults take photos, and everyone eats them up.
I’ve made these for three Halloweens now, and they’ve become my signature party dish. Every year, someone asks for the recipe, and every year, I tweak something slightly. That’s the beauty of this recipe — it’s a perfect canvas for your own creativity. Want them spicier? Add some cayenne. Want them more dramatic? Use jumbo olives. Want them extra creepy? Add a few drops of green food coloring to the filling for a more “monstrous” look.
I’d love to hear how yours turn out. Leave a comment below and tell me about your Halloween party, or share a photo of your monster eyeballs — I promise I won’t judge your piping skills. And if you come up with a variation I haven’t tried, definitely let me know. I’m always looking for new ways to make these spooky little guys even better.
Happy Halloween, and happy cooking! Remember, the best recipes are the ones that make people smile — and these definitely deliver on that front.
Frequently Asked Questions
Can I make these spooky deviled eggs a day ahead?
Absolutely! In fact, they taste even better the next day. Prepare the eggs completely, cover them tightly with plastic wrap, and refrigerate. Add any delicate decorations like chive strips just before serving to keep them looking fresh.
Why are my deviled eggs hard to peel?
This usually happens with very fresh eggs. The ice bath method I described helps a lot, but if you’re still struggling, try using eggs that are about a week old. They peel much more easily. Also, peeling under running water makes a big difference.
Can I use food coloring instead of olives for the eyeballs?
You can, but I don’t recommend it. Food coloring can make the filling taste bitter and can stain your guests’ mouths and teeth. The olive and pimento method gives you a much cleaner, more professional look without any weird flavors.
How long will these keep in the refrigerator?
These will stay fresh for up to 2 days in an airtight container. After that, the texture of the filling starts to change and the eggs may develop an off smell. For best quality, serve them within 24 hours.
Can I make these without mayonnaise?
Yes! You can substitute the mayonnaise with plain Greek yogurt or mashed avocado. Greek yogurt will give you a tangier, lighter filling, while avocado will make it creamier and greener. Both work beautifully, though the texture will be slightly different from the classic version.
Pin This Recipe!
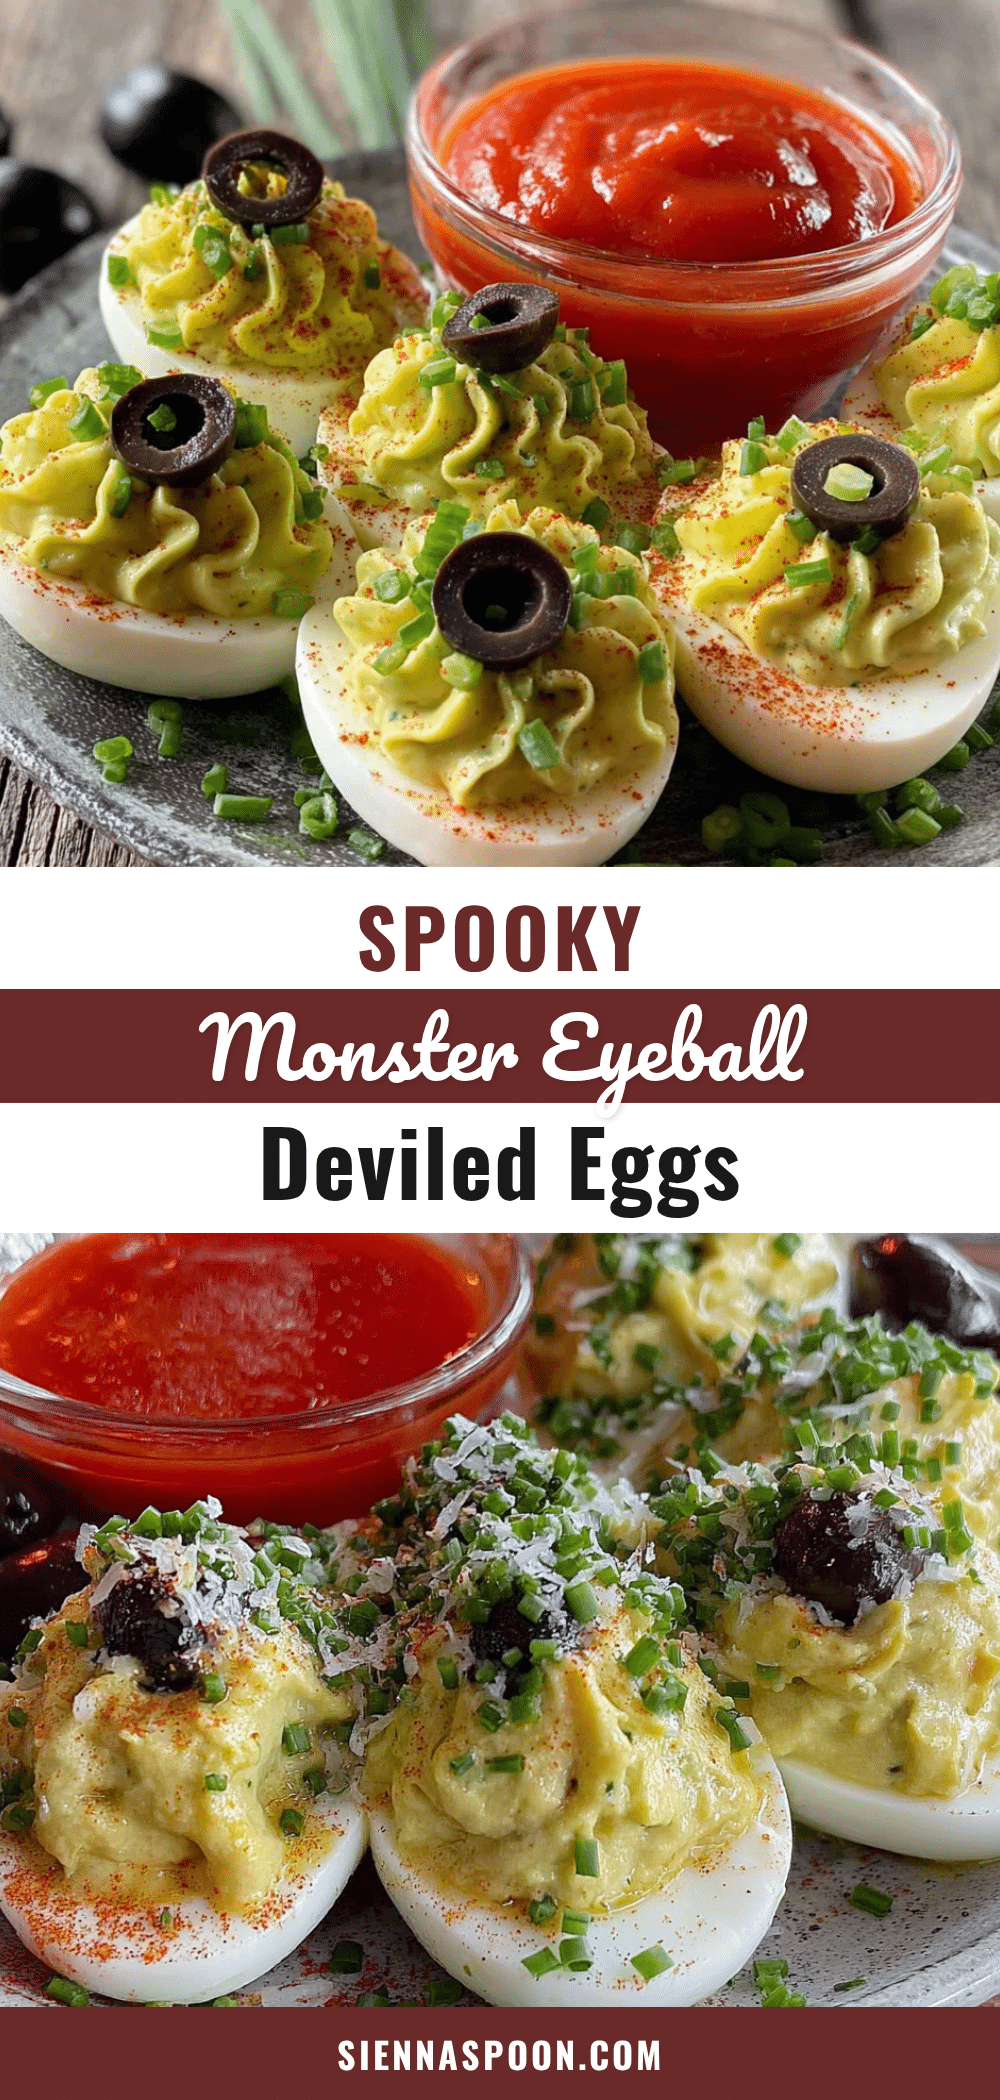
Spooky Monster Eyeball Deviled Eggs: Best Easy Halloween Appetizer
These spooky deviled eggs are the perfect Halloween party appetizer. Creamy, tangy, and topped with olive ‘eyeballs,’ they look creepy but taste like the classic deviled eggs you already love.
- Prep Time: 30 minutes
- Cook Time: 12 minutes
- Total Time: 42 minutes
- Yield: 24 deviled eggs (12 servings of 2 each) 1x
- Category: Appetizer
- Cuisine: American
Ingredients
- 12 large eggs
- 1/3 cup mayonnaise
- 1 tablespoon yellow mustard
- 1 teaspoon white vinegar
- 1/4 teaspoon salt
- 1/4 teaspoon black pepper
- 1/2 teaspoon paprika
- 1 can (6 ounces) large pitted black olives
- 1 jar (4 ounces) pimentos
- Fresh chives or green onion tops
Instructions
- Place 12 eggs in a single layer in a large saucepan. Cover with cold water by about an inch. Bring to a full rolling boil over high heat. Once boiling, cover the pot, turn off the heat, and let sit for exactly 12 minutes.
- While eggs cook, fill a large bowl with ice and cold water. After 12 minutes, transfer eggs to the ice bath using a slotted spoon. Let sit for at least 10 minutes.
- Gently tap each egg on the counter to crack the shell all over, then peel under running cold water. Pat dry. Slice each egg in half lengthwise. Pop out yolks into a small bowl. Arrange egg white halves on a serving platter, cut side up.
- Add mayonnaise, yellow mustard, white vinegar, salt, pepper, and paprika to the bowl with the yolks. Mash together with a fork until completely smooth. Taste and adjust seasoning.
- Drain black olives and pat dry. Cut each olive in half crosswise to get two round ‘eyeball’ shapes. Drain pimentos and pat dry. Cut pimentos into tiny pieces. Cut chives or green onion tops into thin, 1-inch strips.
- Spoon yolk mixture into a piping bag or zip-top bag with a small corner snipped off. Pipe filling into each egg white half, mounding slightly.
- Gently press one olive half, cut side down, into the center of each filled egg. Place a tiny piece of pimento at the edge of the olive. Arrange 2-3 chive strips around the olive to look like veins. Press gently into the filling.
- Sprinkle a tiny pinch of paprika over the exposed filling around each eyeball. Cover platter with plastic wrap and refrigerate for at least 30 minutes before serving.
Notes
For easier peeling, use eggs that are about a week old. The ice bath is crucial for easy peeling. Pat olives dry to help them stick to the filling. These can be made a day ahead and taste even better the next day. Store in an airtight container in the refrigerator for up to 2 days.
Nutrition
- Serving Size: 2 deviled eggs
- Calories: 150
- Sugar: 1
- Sodium: 300
- Fat: 10
- Saturated Fat: 3
- Carbohydrates: 2
- Protein: 12
Keywords: Halloween deviled eggs, monster eyeball deviled eggs, spooky deviled eggs, easy Halloween appetizer, deviled eggs recipe


