Love this? Save it for later!
Share the inspiration with your friends
My roommate freshman year asked why I couldn’t just dump everything into one bowl and skip the stovetop entirely. I started to explain why that wouldn’t work—then stopped. She had a point, honestly. I was standing there with a pot of boiling water, a cutting board covered in chopped veggies, and a sink full of dishes I didn’t want to wash. She just wanted to eat. So I handed her a package of ramen, a jar of peanut butter, and a bowl. She looked at me like I was crazy. Then she proved me wrong.
That night changed everything about how I eat ramen. She crushed the noodles right in the package, dumped them in a bowl with some hot water from the dorm kettle, and stirred in a spoonful of peanut butter and a splash of soy sauce. I stood there watching her eat it, waiting for her to admit it was terrible. She didn’t. She just shrugged and said, “Told you.” And honestly? I tried it the next day. She was right. It was good. Really good.
Since then, I’ve been obsessed with finding ways to upgrade instant ramen without cooking, without extra dishes, and without spending more than a few minutes. You know that feeling when you’re starving and the dining hall is closed or you just don’t have the energy to deal with a real meal? This is for those moments. This quick no-cook college dorm ramen upgrade bowl is the kind of thing you’ll make when you need something fast, filling, and actually satisfying. It’s been my go-to for late nights, lazy Sundays, and everything in between.
Why You’ll Love This Recipe
Let me tell you why this recipe has become my absolute favorite way to eat instant ramen. I’ve tested dozens of combinations, and this one wins every single time. It’s not just about convenience—it’s about making something that actually tastes like a real meal.
- No Cooking Required: You don’t need a stove, microwave, or any fancy equipment. Just hot water from a kettle or the dorm bathroom sink. Seriously.
- Five Minutes Flat: From start to finish, you’re looking at about five minutes. That’s faster than ordering delivery and way cheaper.
- Pantry Staples Only: Everything you need is probably already in your dorm room or kitchen. No special trips to the grocery store required.
- Endlessly Customizable: This is a base recipe that you can tweak based on what you have or what you’re craving. It’s forgiving and flexible.
- Actually Filling: The peanut butter adds protein and healthy fats, so you’re not hungry again in an hour. It turns a snack into a real meal.
- Zero Dishes: You eat it right out of the bowl you made it in. One bowl, one fork. That’s it.
What makes this different from every other ramen hack out there is the texture. Most no-cook ramen recipes end up mushy or uneven. This method, with crushed noodles and a quick steep, gives you perfectly tender noodles with just enough bite. The peanut butter melts into a creamy sauce that coats every strand. It’s comfort food that doesn’t require any actual cooking effort.
This is the kind of recipe that makes you feel like you’ve discovered a secret. Every time I make it, I close my eyes after the first bite. It’s that good. And when you’re a college student on a budget with zero energy, that first bite matters more than you’d think.
What Ingredients You Will Need
This recipe uses simple, affordable ingredients that are easy to find and even easier to keep in your dorm room. The magic happens when these basic pantry staples come together in one bowl.
- 1 package instant ramen noodles (any brand works, but I prefer Maruchan or Nissin for texture. Discard or save the seasoning packet for another use.)
- 2 tablespoons creamy peanut butter (adds richness and protein. Use natural peanut butter if you prefer less sugar, but the standard stuff melts more smoothly.)
- 1 tablespoon soy sauce (or tamari for gluten-free. Adds salty umami depth.)
- 1 teaspoon sesame oil (optional but highly recommended. It adds a toasty, nutty flavor that makes everything taste more complex.)
- 1 teaspoon sriracha or chili garlic sauce (adjust to your spice tolerance. I use a full teaspoon, but start with half if you’re sensitive.)
- 1/2 teaspoon garlic powder (not garlic salt—you want the flavor without extra sodium)
- 1/2 teaspoon ginger powder (optional, but it adds a warm, aromatic note that makes the bowl taste more authentic)
- 1/4 cup hot water (from a kettle or the hottest tap water available. The temperature matters more than you’d think.)
- Optional toppings: sliced green onions, sesame seeds, a soft-boiled egg (if you have access to a microwave), crushed red pepper flakes, or a squeeze of lime
I always keep a jar of peanut butter and a bottle of soy sauce in my dorm pantry. They’re the backbone of so many quick meals, not just this one. For the sesame oil, I recommend Kadoya or Ottogi—they have the best flavor without being overpowering. If you can’t find sesame oil, you can skip it, but honestly, it makes a huge difference.
One thing I learned the hard way: don’t use crunchy peanut butter. It sounds like it would add texture, but the chunks don’t melt properly and you end up with weird peanut bits in your soup. Stick with smooth. Your future self will thank you.
Equipment Needed
You don’t need much for this recipe, which is the whole point. Here’s what you’ll need:
- A microwave-safe bowl or large mug (at least 16 ounces. I use a ceramic ramen bowl I found at a thrift store for two dollars.)
- A kettle or microwave (for heating water. If you don’t have a kettle, you can microwave water in a mug for 1-2 minutes.)
- A fork or chopsticks (for stirring and eating. Chopsticks work better for mixing the peanut butter into the noodles.)
- A measuring spoon (optional, but helpful for getting the ratios right. I’ve made this so many times I just eyeball it now.)
If you don’t have a microwave-safe bowl, a large coffee mug works perfectly. I’ve made this in a pint glass before—not ideal, but it got the job done. The key is having something deep enough to hold the noodles and water without spilling when you stir.
For the kettle, I use a cheap electric one from Target that cost fifteen bucks. It’s lasted me three years so far. If you’re in a dorm without a kitchen, a hot water dispenser or even the hot water tap in the common room works fine. Just make sure the water is actually hot, not lukewarm.
Preparation Method
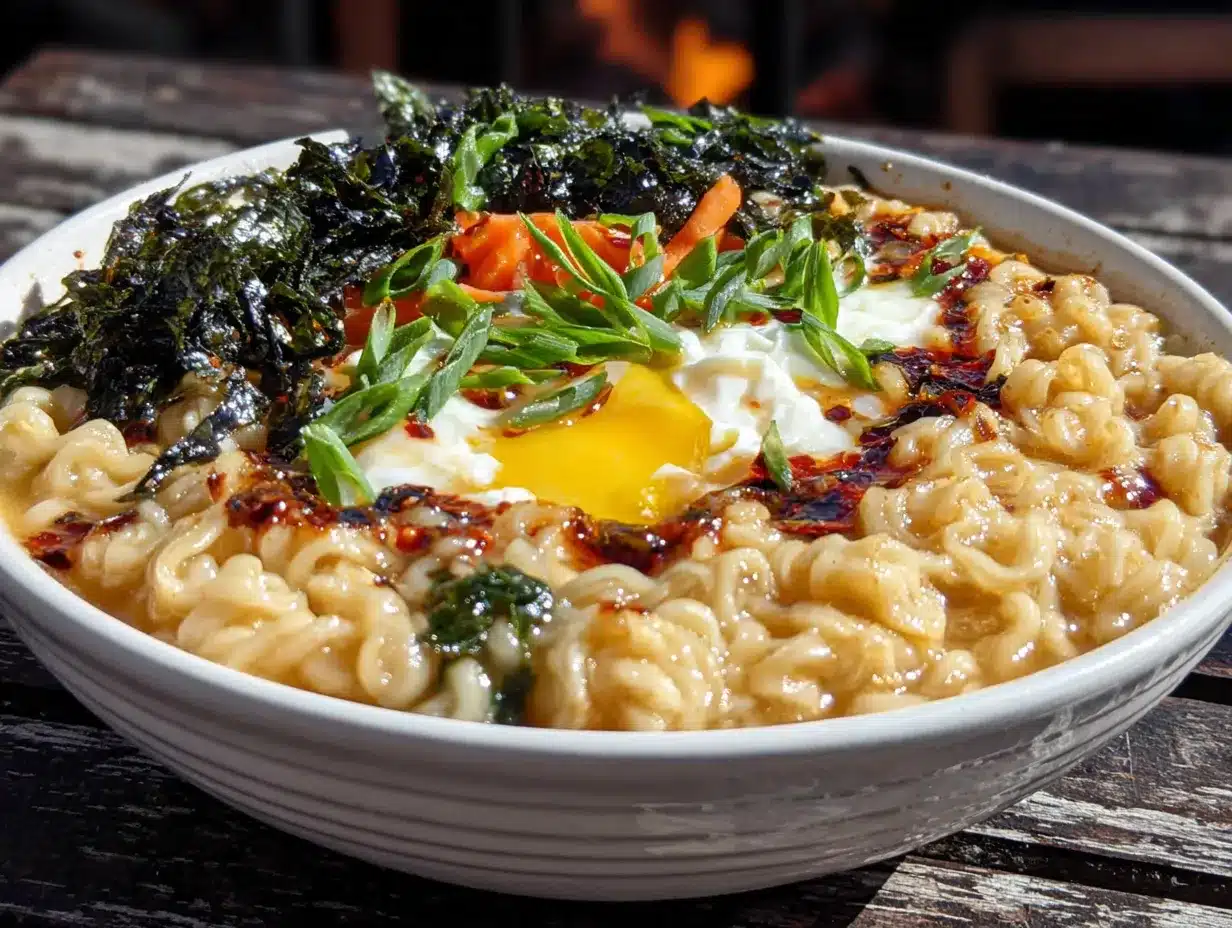
This method is dead simple, but there are a few tricks that make the difference between a sad bowl of noodles and something genuinely delicious. Follow these steps and you’ll get it right every time.
- Crush the ramen noodles. Keep the noodles in the package and use your hands to break them into small pieces—about the size of a quarter. Don’t crush them into dust, just break them up so they cook evenly. I learned this the hard way when I left them whole and ended up with a clump of undercooked noodles in the center.
- Add the noodles to your bowl. Dump the crushed noodles into your microwave-safe bowl. Discard the seasoning packet or save it for another use. (I keep mine in a ziplock bag and use them for seasoning popcorn or adding to soup.)
- Add the flavor base. Spoon in the peanut butter, soy sauce, sesame oil, sriracha, garlic powder, and ginger powder right on top of the dry noodles. Don’t stir yet—just let them sit on top. This makes it easier to mix everything once the water is added.
- Pour in the hot water. Carefully pour 1/4 cup of hot water over the noodles and flavor base. The water should be hot enough to steam—if it’s not steaming, it won’t melt the peanut butter properly. I use water from my electric kettle set to 200°F. If you’re using a microwave, heat the water in a separate mug for 1 minute 30 seconds.
- Stir vigorously. Use a fork or chopsticks to stir everything together until the peanut butter is completely melted and the noodles are coated in the sauce. This takes about 30 seconds of consistent stirring. Don’t rush this step—if the peanut butter isn’t fully incorporated, you’ll end up with clumps.
- Let it sit for 2 minutes. Cover the bowl with a plate or a paper towel and let it sit for exactly 2 minutes. This allows the noodles to soften and absorb the sauce. I set a timer on my phone because I always forget and end up eating them too early.
- Stir again and add toppings. Give it one more stir, then add any toppings you want. I like sliced green onions and a sprinkle of sesame seeds. If you have a soft-boiled egg from the dining hall, slice it in half and lay it on top. The runny yolk mixing into the sauce is next-level.
- Eat immediately. This doesn’t keep well, so eat it right away. The noodles will continue to absorb liquid and get softer, so the first few minutes are the sweet spot. I usually eat mine straight from the bowl while standing at my desk. No shame.
A few notes from experience: if the noodles seem too dry after the 2-minute rest, add another tablespoon of hot water and stir. If they’re too wet, let them sit uncovered for another minute. The texture should be creamy but not soupy, with each noodle separate and coated.
Also, don’t skip the resting step. I know it’s tempting to dig in right away, but those two minutes make a huge difference. The noodles go from crunchy to tender, and the flavors meld together in a way that stirring alone can’t achieve.
Cooking Tips & Techniques
After making this recipe more times than I care to count, I’ve picked up a few tricks that make a real difference. Here’s what I’ve learned:
Water temperature is everything. If your water isn’t hot enough, the peanut butter won’t melt properly and you’ll end up with a grainy texture. I learned this the hard way when I used warm tap water and ended up with a bowl of sad, clumpy noodles. The water needs to be steaming—just below boiling. If you’re using a microwave, heat the water for at least 90 seconds.
Crush the noodles before adding anything else. I’ve tried crushing them in the bowl and it never works as well. The pieces are uneven and some end up too small while others are too big. Crushing them in the package gives you more control and less mess. Plus, it’s oddly satisfying.
Use a fork for mixing, chopsticks for eating. Forks are better at breaking up clumps of peanut butter and incorporating everything evenly. But chopsticks are better for eating—they let you pick up the perfect amount of noodles without getting sauce all over your hands. If you only have one utensil, go with the fork.
Don’t overdo the water. It’s tempting to add more water because you think the noodles need it, but this recipe is meant to be a creamy bowl, not a soup. Start with 1/4 cup and add more only if needed. You can always add, but you can’t take away.
Make it ahead of time (sort of). You can prep the dry ingredients—crushed noodles, spices, and even the peanut butter—in a ziplock bag. Then when you’re hungry, just dump it in a bowl, add hot water, and stir. I’ve done this for road trips and study sessions, and it works perfectly.
One mistake I still make: adding the sriracha before tasting. Sometimes the chili garlic sauce is spicier than I remember, and I end up with a bowl that’s too hot to eat. Now I always start with half the spice and add more after tasting. You can always add heat, but you can’t take it away.
Variations & Adaptations
This recipe is incredibly flexible. Here are some of my favorite variations that I’ve tried over the years:
Spicy Peanut Version: Add an extra teaspoon of sriracha and a pinch of cayenne pepper. Top with crushed red pepper flakes and a drizzle of chili oil if you have it. This is my go-to when I need something to wake me up.
Garlic Lovers Version: Use 1 teaspoon garlic powder instead of 1/2, and add a minced fresh garlic clove if you have one. The fresh garlic adds a pungent kick that powdered garlic can’t replicate. Just make sure it’s finely minced so it dissolves in the hot water.
Vegan Version: This recipe is already vegan if you use a plant-based ramen brand. Check the ingredients on your ramen—some brands use egg in the noodles. I like Nissin’s Top Ramen for a vegan option. Also, skip the egg topping and use extra green onions and sesame seeds instead.
Protein Boost Version: Add a handful of frozen edamame or a scoop of collagen powder (unflavored) when you add the hot water. The edamame thaws in the hot water and adds protein and texture. I’ve also added canned chickpeas, drained and rinsed, with good results.
Cold Noodle Version: This sounds weird, but it works. Skip the hot water entirely. Crush the noodles, mix the peanut butter and soy sauce with 2 tablespoons of cold water, and toss everything together. Let it sit for 5 minutes so the noodles soften slightly. The texture is crunchy and chewy at the same time. I discovered this when my kettle broke and I was too lazy to boil water.
Breakfast Version: Add a teaspoon of maple syrup or honey to the sauce for a sweet-savory combo. Top with a fried egg if you have access to a stove. The sweetness balances the spice and makes it feel like a morning meal.
Serving & Storage Suggestions
This recipe is best enjoyed fresh, but here’s how to make the most of it:
Serving: Serve immediately in the same bowl you made it in. The noodles are at their best within the first 5 minutes. If you’re serving it to someone else, let them add their own toppings so they can customize it to their taste. I like to serve mine with a side of cucumber slices or carrot sticks for crunch.
Temperature: Eat it warm, not hot. If it’s too hot, let it sit for another minute before digging in. The flavors actually deepen as it cools slightly. I’ve found that the peanut butter flavor is more pronounced when the bowl isn’t scorching hot.
Storage: This doesn’t store well. The noodles continue to absorb liquid and will become mushy within 10-15 minutes. If you have leftovers, which is rare, you can refrigerate them for up to 24 hours, but the texture won’t be the same. Reheat by adding a tablespoon of hot water and microwaving for 30 seconds.
Pairing suggestions: This bowl pairs well with a simple side salad or some raw veggies. I like to eat it with a handful of baby spinach or some cucumber slices. For a drink, cold water or iced green tea balances the richness of the peanut sauce.
Flavor development: If you let the bowl sit for 3-4 minutes instead of 2, the flavors become more intense. The peanut butter melds with the soy sauce and spices in a way that’s deeper and more complex. I’ve started letting mine sit a little longer on purpose.
Nutritional Information & Benefits
Here’s the rough nutritional breakdown for one serving (without toppings):
- Calories: Approximately 450-500 calories
- Protein: 14-16 grams (thanks to the peanut butter and ramen noodles)
- Fat: 20-24 grams (mostly healthy fats from peanut butter and sesame oil)
- Carbohydrates: 55-60 grams
- Fiber: 3-4 grams
- Sodium: 800-1000 mg (varies by soy sauce and ramen brand)
This bowl is a good source of plant-based protein and healthy fats. The peanut butter provides monounsaturated fats, which are heart-healthy, and the sesame oil adds antioxidants. The garlic and ginger have anti-inflammatory properties, making this a surprisingly nutritious meal for something that takes five minutes to make.
If you’re watching your sodium, use low-sodium soy sauce and skip the ramen seasoning packet entirely. You can also use whole wheat ramen noodles for extra fiber. For a lower-carb option, use shirataki noodles instead of ramen—just rinse them well and add them directly to the sauce without crushing.
This recipe is naturally dairy-free and can be made gluten-free by using tamari instead of soy sauce and a gluten-free ramen brand. It’s also vegan as long as you choose a plant-based ramen. The only common allergen is peanuts, but you can substitute almond butter or sunflower seed butter if needed.
Conclusion
This quick no-cook college dorm ramen upgrade bowl is proof that you don’t need a kitchen, fancy ingredients, or any real cooking skills to make something delicious. It’s the kind of recipe that saves you on those nights when you’re hungry, tired, and broke. And honestly, it tastes way better than it has any right to.
I’ve made this bowl in dorm rooms, hotel rooms, and even on a camping trip when I didn’t want to build a fire. Every time, it hits the spot. The peanut butter and soy sauce combination is timeless, and the fact that you can make it in five minutes with zero cleanup is just a bonus.
Try it once, and you’ll see what I mean. And then try it with different toppings and variations—that’s where the real fun begins. I’d love to hear what combinations you come up with. Drop a comment below and let me know your favorite way to upgrade your ramen. Maybe you’ll teach me something new, just like my roommate did all those years ago.
Frequently Asked Questions
Can I use a different nut butter instead of peanut butter?
Absolutely. Almond butter, cashew butter, or sunflower seed butter all work well. Just keep in mind that different nut butters have different consistencies—almond butter is thicker, so you might need an extra tablespoon of hot water to thin it out. Sunflower seed butter can turn green when mixed with soy sauce (it’s a chemical reaction, totally safe), so don’t panic if that happens.
What if I don’t have a kettle or microwave?
You can use the hottest water from your tap. Most dorm sinks have hot water that’s around 120-140°F, which is enough to soften the noodles and melt the peanut butter. It won’t be as hot as boiling water, so let the noodles sit for 3-4 minutes instead of 2. You can also ask a friend in another dorm room if you can use their microwave—college neighbors are usually happy to help.
Can I use the seasoning packet from the ramen?
You can, but I don’t recommend it. The seasoning packet is very salty and often contains MSG, which can overpower the peanut butter and soy sauce. If you want to use it, start with half the packet and taste before adding more. I’ve tried it both ways and prefer the bowl without the packet—the flavors are more balanced and less artificial.
How do I make this less spicy?
Simply leave out the sriracha or chili garlic sauce. You can also use a smaller amount—start with 1/4 teaspoon and add more if you want. The garlic powder and ginger powder don’t add heat, just flavor, so you can keep those. If you accidentally make it too spicy, add a little more peanut butter to mellow it out.
Can I make this in a microwave instead of using a kettle?
Yes. Crush the noodles, add them to a microwave-safe bowl with the other ingredients and 1/4 cup of water. Microwave on high for 1 minute 30 seconds. Stir well, then let it sit for 1 minute before eating. The microwave method actually softens the noodles more thoroughly than the hot water method, so the texture is slightly softer. Both methods work great—it just depends on what you have available.
Pin This Recipe!
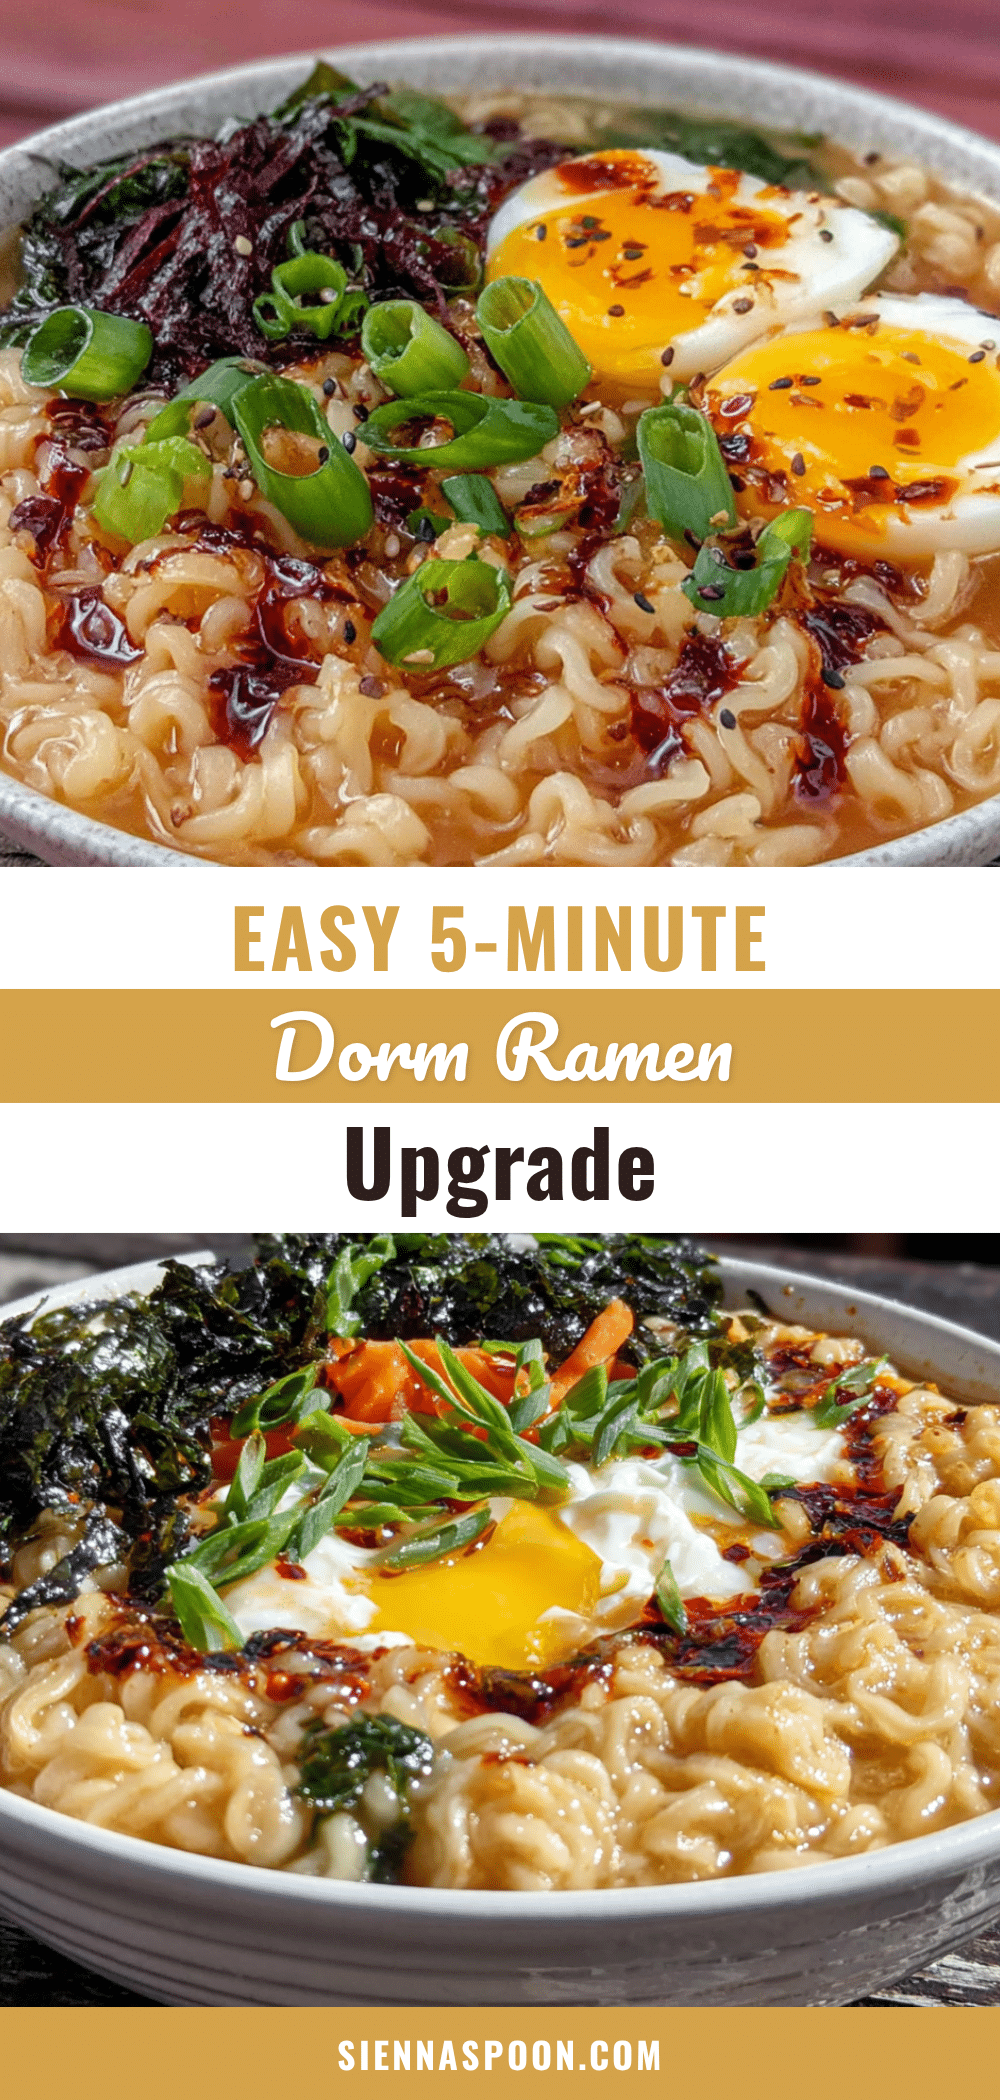
Quick No-Cook Ramen Upgrade Bowl: Easy 5-Minute Dorm Dinner

A quick, no-cook ramen bowl upgraded with peanut butter, soy sauce, and spices. Ready in 5 minutes with zero dishes, perfect for dorm rooms or lazy nights.
- Prep Time: 5 minutes
- Cook Time: 0 minutes
- Total Time: 5 minutes
- Yield: 1 serving 1x
- Category: Main Course
- Cuisine: Asian Fusion
Ingredients
- 1 package instant ramen noodles (any brand, discard or save seasoning packet)
- 2 tablespoons creamy peanut butter
- 1 tablespoon soy sauce (or tamari for gluten-free)
- 1 teaspoon sesame oil (optional but recommended)
- 1 teaspoon sriracha or chili garlic sauce (adjust to taste)
- 1/2 teaspoon garlic powder
- 1/2 teaspoon ginger powder (optional)
- 1/4 cup hot water (from kettle or microwave)
- Optional toppings: sliced green onions, sesame seeds, soft-boiled egg, crushed red pepper flakes, lime squeeze
Instructions
- Crush the ramen noodles in the package into small pieces (about quarter-sized).
- Add crushed noodles to a microwave-safe bowl. Discard or save seasoning packet.
- Add peanut butter, soy sauce, sesame oil, sriracha, garlic powder, and ginger powder on top of dry noodles. Do not stir yet.
- Pour 1/4 cup hot water (steaming, just below boiling) over the noodles and flavor base.
- Stir vigorously with a fork or chopsticks until peanut butter is fully melted and noodles are coated (about 30 seconds).
- Cover bowl with a plate or paper towel and let sit for exactly 2 minutes to soften noodles and meld flavors.
- Stir again, add desired toppings (green onions, sesame seeds, soft-boiled egg, etc.), and eat immediately.
Notes
Water temperature is critical: use steaming hot water (just below boiling) to melt peanut butter properly. Crush noodles in package for even pieces. Don’t skip the 2-minute rest—it allows noodles to soften and flavors to meld. If noodles seem dry after resting, add 1 tablespoon hot water; if too wet, let sit uncovered 1 minute. For a spicier version, add extra sriracha or cayenne. For a protein boost, add frozen edamame or canned chickpeas with hot water.
Nutrition
- Serving Size: 1 bowl
- Calories: 450500
- Sugar: 46
- Sodium: 8001000
- Fat: 2024
- Saturated Fat: 34
- Carbohydrates: 5560
- Fiber: 34
- Protein: 1416
Keywords: ramen, no-cook, dorm meal, quick dinner, peanut butter ramen, easy recipe, 5-minute meal