Love this? Save it for later!
Share the inspiration with your friends
Introduction
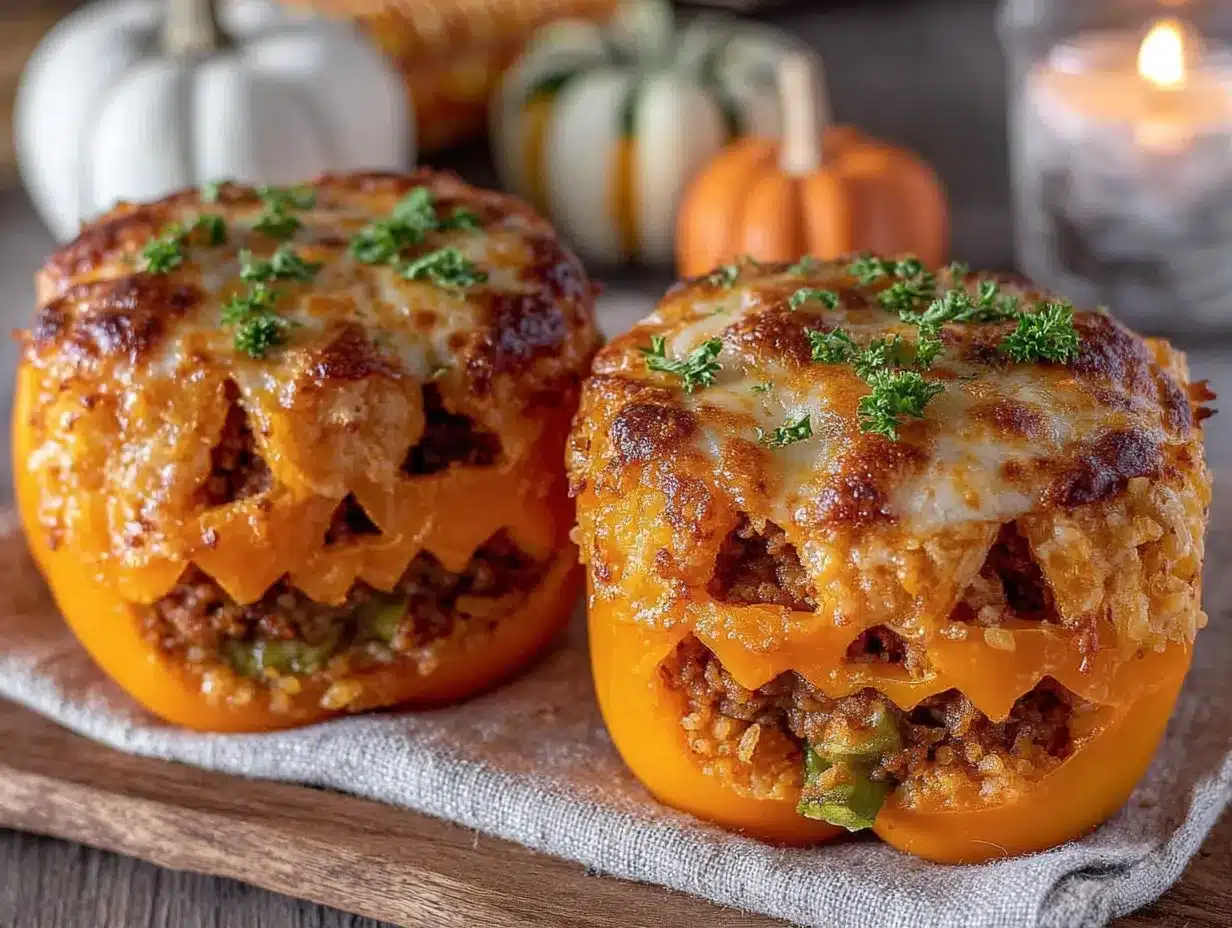
Jen wasn’t trying to impress anyone. I’d stopped by to grab a casserole dish I’d lent her months ago, and the smell hit me before I even made it past her front door. Something warm and savory and just a little bit smoky—the kind of smell that makes you realize you’re hungrier than you thought. I found her in the kitchen, two kids tugging at her jeans, a cartoon playing on a tablet propped against the salt shaker. She was pulling a baking sheet out of the oven, and on it sat four of the most ridiculous, wonderful things I’d ever seen: bell peppers with tiny faces carved into them, grinning up at me like little orange pumpkins.
“Oh, those,” she said when I asked. She shrugged, like she’d just thrown together some nachos. “They’re just stuffed peppers. The kids wanted something fun for Halloween.” Just stuffed peppers. I mean, I’d been stressing over what to make for dinner that week, and here she was, turning a Tuesday night into a tiny holiday celebration without breaking a sweat. She let me try one—warm rice, seasoned meat, melted cheese peeking through the carved-out smile—and honestly, I think I made a sound that embarrassed us both.
I’ve been making these Quick Jack-O-Lantern Stuffed Bell Peppers ever since that night. Maybe you’ve been there, staring at the calendar, realizing Halloween falls on a Wednesday and you’ve got zero energy for anything elaborate. These are the answer. They look like you put in way more effort than you actually did, and they taste like the kind of comfort food that makes a regular weeknight feel special. Let me show you how easy they really are.
Why You’ll Love This Recipe
I’ve tested this recipe about a dozen times since that night at Jen’s house, tweaking the filling, adjusting the bake time, figuring out the best way to carve the faces so they actually look like jack-o-lanterns and not confused emojis. Here’s why I keep coming back to it—and why I think you will too:
- Quick & Easy: From start to table in about 30 minutes. No marinating, no complicated steps, no waiting around. This is a real weeknight hero.
- Simple Ingredients: Ground meat, rice, cheese, canned tomatoes, and bell peppers. You probably have most of this in your kitchen right now. No special Halloween grocery run required.
- Perfect for Busy Weeknights: Halloween or not, this is a fun way to break up the dinner routine. The kids get excited about the faces, and you get a balanced meal on the table without a fuss.
- Crowd-Pleaser: I’ve served these to picky eaters and adults alike. Everyone thinks they’re adorable, and the filling is classic comfort food that just works.
- Unbelievably Delicious: The peppers get tender in the oven, the filling stays juicy, and the melted cheese on top gets all bubbly and golden. It’s the kind of dinner that makes you forget you’re eating vegetables.
What makes this recipe different from every other stuffed pepper you’ve seen? It’s the face, honestly. That little carved smile turns a simple dinner into an event. But it’s also the filling—I’ve found the perfect ratio of meat to rice to tomato sauce so it’s not too dry or too soupy. This isn’t just another version of stuffed peppers. It’s the one that’ll get your kids to actually eat their dinner on Halloween night without a fight.
This recipe is the kind that makes you close your eyes after the first bite. It’s comfort food with a silly, seasonal twist—faster than you’d think, but with the same soul-soothing satisfaction. Perfect for impressing your family without stressing yourself out.
What Ingredients You Will Need
This recipe uses simple, wholesome ingredients to deliver big flavor and a fun presentation without any fuss. Most of these are pantry staples, which is exactly what you want on a busy weeknight.
- 4 large orange bell peppers – Look for ones that are squat and round, like little pumpkins. They need to stand up straight on their own. Yellow or red peppers work too, but orange really sells the jack-o-lantern look.
- 1 pound ground beef (or ground turkey, or ground chicken) – I use 85/15 for the best balance of flavor and moisture. Ground pork works great too.
- 1 cup cooked rice – Leftover rice from takeout is perfect here. White rice, brown rice, or even quinoa all work. If you’re starting from dry, cook about 1/3 cup uncooked rice.
- 1 can (15 ounces) tomato sauce – I recommend Hunt’s or Muir Glen for a smooth, consistent sauce. Don’t use crushed tomatoes here—they’re too thick.
- 1 cup shredded mozzarella cheese – Part-skim melts beautifully. Sharp cheddar or a Mexican blend also works if that’s what you have.
- 1 small onion, finely diced – Yellow or white onion. Dice it small so it cooks through quickly and doesn’t leave crunchy bits.
- 2 cloves garlic, minced – Fresh is best, but jarred minced garlic works in a pinch. Use about 1 teaspoon.
- 1 teaspoon dried oregano – Adds that warm, slightly bitter Italian note. Italian seasoning works too.
- 1/2 teaspoon smoked paprika – This is my secret ingredient. It adds a subtle smokiness that makes the filling taste like it cooked all day. Regular paprika works, but smoked is better.
- Salt and black pepper to taste – About 1/2 teaspoon salt and 1/4 teaspoon pepper is a good starting point.
- 2 tablespoons olive oil – For sautéing the onion and garlic. Avocado oil works too.
- Optional: Fresh parsley or chives for garnish – Adds a pop of green and makes the peppers look even more festive.
Substitution notes: For a vegetarian version, use cooked lentils or a plant-based ground meat substitute instead of beef. For a gluten-free option, use certified gluten-free rice and check your tomato sauce label. If you don’t have rice, cooked quinoa or even riced cauliflower works—just squeeze the extra moisture out of the cauliflower first.
Equipment Needed
You don’t need anything fancy to make these peppers, which is exactly how I like my weeknight dinners. Here’s what you’ll need:
- A sharp paring knife – This is essential for carving the jack-o-lantern faces. A serrated knife works too, but a small, sharp blade gives you more control. I use a Victorinox paring knife—it’s cheap and stays sharp forever.
- A baking dish – An 8×8 or 9×13 glass or ceramic dish works. You want something that holds the peppers upright without them tipping over. I’ve used a cast iron skillet in a pinch too.
- A large skillet – For browning the meat and sautéing the vegetables. A 10- or 12-inch skillet is perfect.
- A small spoon – For scooping out the pepper seeds and membranes. A melon baller works even better.
- Aluminum foil – To cover the dish while baking so the peppers steam and get tender without drying out.
- Measuring cups and spoons – For the rice, tomato sauce, and seasonings.
If you don’t have a baking dish, you can use a rimmed baking sheet—just crumple a piece of foil into a ring to help the peppers stay upright. I’ve done this more times than I’d like to admit, and it works perfectly.
Preparation Method
Let’s get these little guys on the table. The whole process takes about 30 minutes, and most of that is hands-off oven time.
- Preheat your oven to 375°F (190°C). While it’s heating, get your filling started. This saves time and keeps things moving.
- Cook the filling. Heat 2 tablespoons of olive oil in a large skillet over medium heat. Add the diced onion and cook for 3-4 minutes, until it’s soft and translucent. Add the minced garlic and cook for 30 seconds more, until it smells amazing. Add the ground beef and break it up with a wooden spoon. Cook for 5-6 minutes, until it’s browned and no longer pink. Drain off any excess fat if there’s a lot—I usually leave a little for flavor.
- Season the meat. Stir in the dried oregano, smoked paprika, 1/2 teaspoon salt, and 1/4 teaspoon black pepper. Cook for 1 minute to toast the spices. Then pour in the tomato sauce and the cooked rice. Stir everything together and let it simmer for 2-3 minutes, until the rice has absorbed some of the sauce and the filling looks cohesive. Taste it and adjust the salt if needed. Turn off the heat and set the skillet aside.
- Prepare the peppers. While the filling simmers, wash the bell peppers and pat them dry. Using your sharp paring knife, cut the top off each pepper—about 1/2 inch from the stem. Set the tops aside. Reach inside each pepper and pull out the seeds and white membranes. A small spoon works great for this. Rinse the peppers inside and out to remove any stray seeds.
- Carve the faces. Here’s the fun part. Using your paring knife, carefully cut small triangles for eyes and a little crescent or jagged smile for the mouth. Cut all the way through the pepper wall. Don’t go too big—remember, the filling stays inside, so you want the holes to be cute, not gaping. I usually do two triangle eyes and a wavy smile with three or four teeth. If you mess up, just flip that side to the back—no one will know.
- Stuff the peppers. Place the carved peppers upright in your baking dish. Spoon the filling into each pepper, packing it gently with the back of the spoon. Fill them all the way to the top—the filling will settle as it bakes. If you have extra filling, you can pile it on top or save it for lunch tomorrow.
- Top with cheese. Sprinkle the shredded mozzarella evenly over the tops of the stuffed peppers. Don’t skip this—the melted cheese is what makes them look finished and delicious.
- Bake. Cover the baking dish tightly with aluminum foil. Bake for 15 minutes. Then remove the foil and bake for another 5-7 minutes, until the cheese is melted and bubbly and the peppers are tender when poked with a fork. The peppers should be bright and slightly softened but still holding their shape.
- Garnish and serve. Let the peppers rest for 2-3 minutes before serving. Sprinkle with fresh parsley or chives if you’re feeling fancy. Serve them warm, with the little pepper tops placed next to them like little hats if you want to be extra charming.
Pro tip: If your peppers are wobbling in the baking dish, slice a tiny bit off the bottom to make them flat. Don’t cut too much, or you’ll lose the filling.
Cooking Tips & Techniques
I’ve made these peppers about a dozen times now, and I’ve learned a few things the hard way. Let me save you some trouble.
Don’t overcook the peppers. The first time I made these, I left them in the oven too long, and the faces got all droopy and sad. You want the peppers tender but still firm enough to hold their shape. Fifteen minutes covered and five minutes uncovered is the sweet spot. If your peppers are on the smaller side, check them at 12 minutes.
Carve the faces after you cut the tops off. I once tried carving the faces before cutting the tops, and it was a mess. The pepper kept rolling around, and I nearly stabbed myself. Cut the top off first, then carve. It’s much more stable.
Use a small knife for the faces. A big chef’s knife is useless here. You want a paring knife with a pointed tip. I use a 3.5-inch Victorinox, and it makes perfect little triangles every time. If you don’t have a paring knife, a serrated steak knife works in a pinch.
Make the rice ahead of time. This is the biggest time-saver. Cook a batch of rice on Sunday and use it for these peppers on Tuesday. Leftover takeout rice is ideal—it’s already seasoned and has the perfect texture. If you’re cooking rice from scratch, start it before you do anything else so it has time to cool slightly.
Don’t skip the smoked paprika. I know it’s just one spice, but it makes a huge difference. It adds a depth that makes the filling taste like it’s been simmering for hours. If you don’t have it, add a dash of cumin and a pinch of cayenne to get close.
Variations & Adaptations
One of the best things about this recipe is how flexible it is. Here are a few ways to make it your own:
- Vegetarian version: Swap the ground beef for cooked lentils or a plant-based ground meat substitute. I’ve used Beyond Meat crumbles, and they work beautifully. Add an extra 1/4 cup of rice to bulk it up. The texture is slightly different, but the flavor is still fantastic.
- Spicy version: Add 1/2 teaspoon of red pepper flakes or a diced jalapeño to the filling. Use pepper jack cheese instead of mozzarella. The heat pairs surprisingly well with the sweet bell peppers.
- Mexican-inspired version: Swap the oregano and smoked paprika for cumin and chili powder. Use salsa instead of tomato sauce. Top with cotija cheese and fresh cilantro instead of mozzarella. Serve with sour cream on the side.
- Low-carb version: Skip the rice entirely and double the meat. Or use riced cauliflower—just squeeze it dry in a clean kitchen towel before adding it to the skillet. The texture is a little less hearty, but it still works.
- Make it ahead: Stuff the peppers and arrange them in the baking dish up to 24 hours in advance. Cover and refrigerate. When you’re ready to eat, add 5-10 minutes to the covered bake time since they’ll be starting from cold.
I tried the spicy version last week, and honestly, it might be my new favorite. The pepper jack cheese gets all bubbly and golden, and the heat cuts through the richness of the beef. My husband ate three of them, which I took as a win.
Serving & Storage Suggestions
These peppers are best served warm, right out of the oven. The cheese should be melted and stretchy, and the peppers should be tender but not mushy. I like to serve them with a simple side salad or some crusty bread to soak up any extra sauce. A dollop of sour cream on the side is also fantastic—it cools down the heat if you went the spicy route.
For a Halloween dinner, arrange the peppers on a platter with the little tops placed next to them like hats. Scatter some candy corn or mini pumpkins around the platter for a festive touch. The kids will lose their minds, I promise.
Storage: Leftover stuffed peppers keep well in the refrigerator for up to 4 days. Store them in an airtight container. The flavors actually meld together overnight, so they might taste even better the next day. I’ve eaten them cold straight from the fridge, and they’re still delicious.
Reheating: The best way to reheat is in the oven at 350°F for 10-12 minutes, covered with foil. This keeps the peppers from drying out. You can also microwave them for 1-2 minutes if you’re in a hurry, but the peppers will be softer. For the crispiest result, reheat in an air fryer at 350°F for 5 minutes.
Freezing: These peppers freeze beautifully. Let them cool completely, then wrap each pepper individually in plastic wrap and place them in a freezer bag. They’ll keep for up to 3 months. To reheat, thaw in the refrigerator overnight, then bake at 350°F for 20 minutes, covered with foil.
Nutritional Information & Benefits
Here’s the estimated nutritional breakdown for one stuffed pepper (using 85/15 ground beef and part-skim mozzarella):
| Nutrient | Amount per Serving |
|---|---|
| Calories | 380 |
| Protein | 25g |
| Fat | 18g |
| Carbohydrates | 28g |
| Fiber | 4g |
| Sugar | 8g |
| Sodium | 620mg |
Bell peppers are packed with vitamin C—one orange pepper has more than double the vitamin C of an orange. They’re also a great source of vitamin A and antioxidants. The rice provides sustained energy, and the beef delivers a solid dose of protein and iron. This is a balanced meal that actually keeps you full for hours, which is rare for a weeknight dinner that comes together in 30 minutes.
If you’re watching your sodium, use low-sodium tomato sauce and reduce the added salt. You can also swap the mozzarella for a low-fat version. The recipe is naturally gluten-free if you use certified gluten-free ingredients.
Conclusion
These Quick Jack-O-Lantern Stuffed Bell Peppers are the kind of recipe that makes you feel like a hero without actually doing much work. They’re fun enough for Halloween but simple enough for any busy weeknight when you need dinner on the table fast. The faces make everyone smile, and the filling is the kind of comfort food that leaves you satisfied, not stuffed.
I love this recipe because it reminds me of that night at Jen’s house—the chaos, the cartoon playing on the tablet, the way she shrugged off something that felt genuinely special. That’s what good cooking is, honestly. It’s not about perfection or elaborate techniques. It’s about making something that brings a little joy to an ordinary Tuesday.
I’d love to see your versions of these peppers. Tag me in your photos, leave a comment below with your favorite face carving trick, or let me know if you tried a variation that blew your mind. Happy Halloween, and happy cooking!
Frequently Asked Questions
Can I use other colors of bell peppers?
Absolutely. Orange peppers look the most like pumpkins, but red, yellow, or even green peppers work. Green peppers have a slightly more bitter taste, so keep that in mind. If you’re making these for Halloween, stick with orange for the full effect.
Can I make these in an air fryer?
Yes! Preheat your air fryer to 350°F. Place the stuffed peppers in the basket, making sure they’re not touching. Cook for 12-15 minutes, checking at the 10-minute mark. The cheese might brown faster, so keep an eye on it. No need to cover with foil in the air fryer.
How do I keep the peppers from tipping over?
If your peppers are wobbly, slice a thin piece off the bottom to create a flat surface. Just don’t cut too much or the filling will leak out. You can also nestle them together in the baking dish so they support each other.
Can I use ground turkey instead of beef?
Definitely. Ground turkey works great, but it’s leaner, so the filling might be a little drier. Add an extra tablespoon of olive oil or a splash of chicken broth to keep it moist. Ground chicken or ground pork are also excellent options.
How do I get the faces to look like real jack-o-lanterns?
Use a sharp paring knife and cut small, deliberate shapes. Triangles for the eyes, a crescent or wavy line for the mouth. Don’t make the holes too big, or the filling will spill out. Practice on a scrap piece of pepper first if you’re nervous. And remember—imperfect faces have character. That’s part of the charm.
Pin This Recipe!
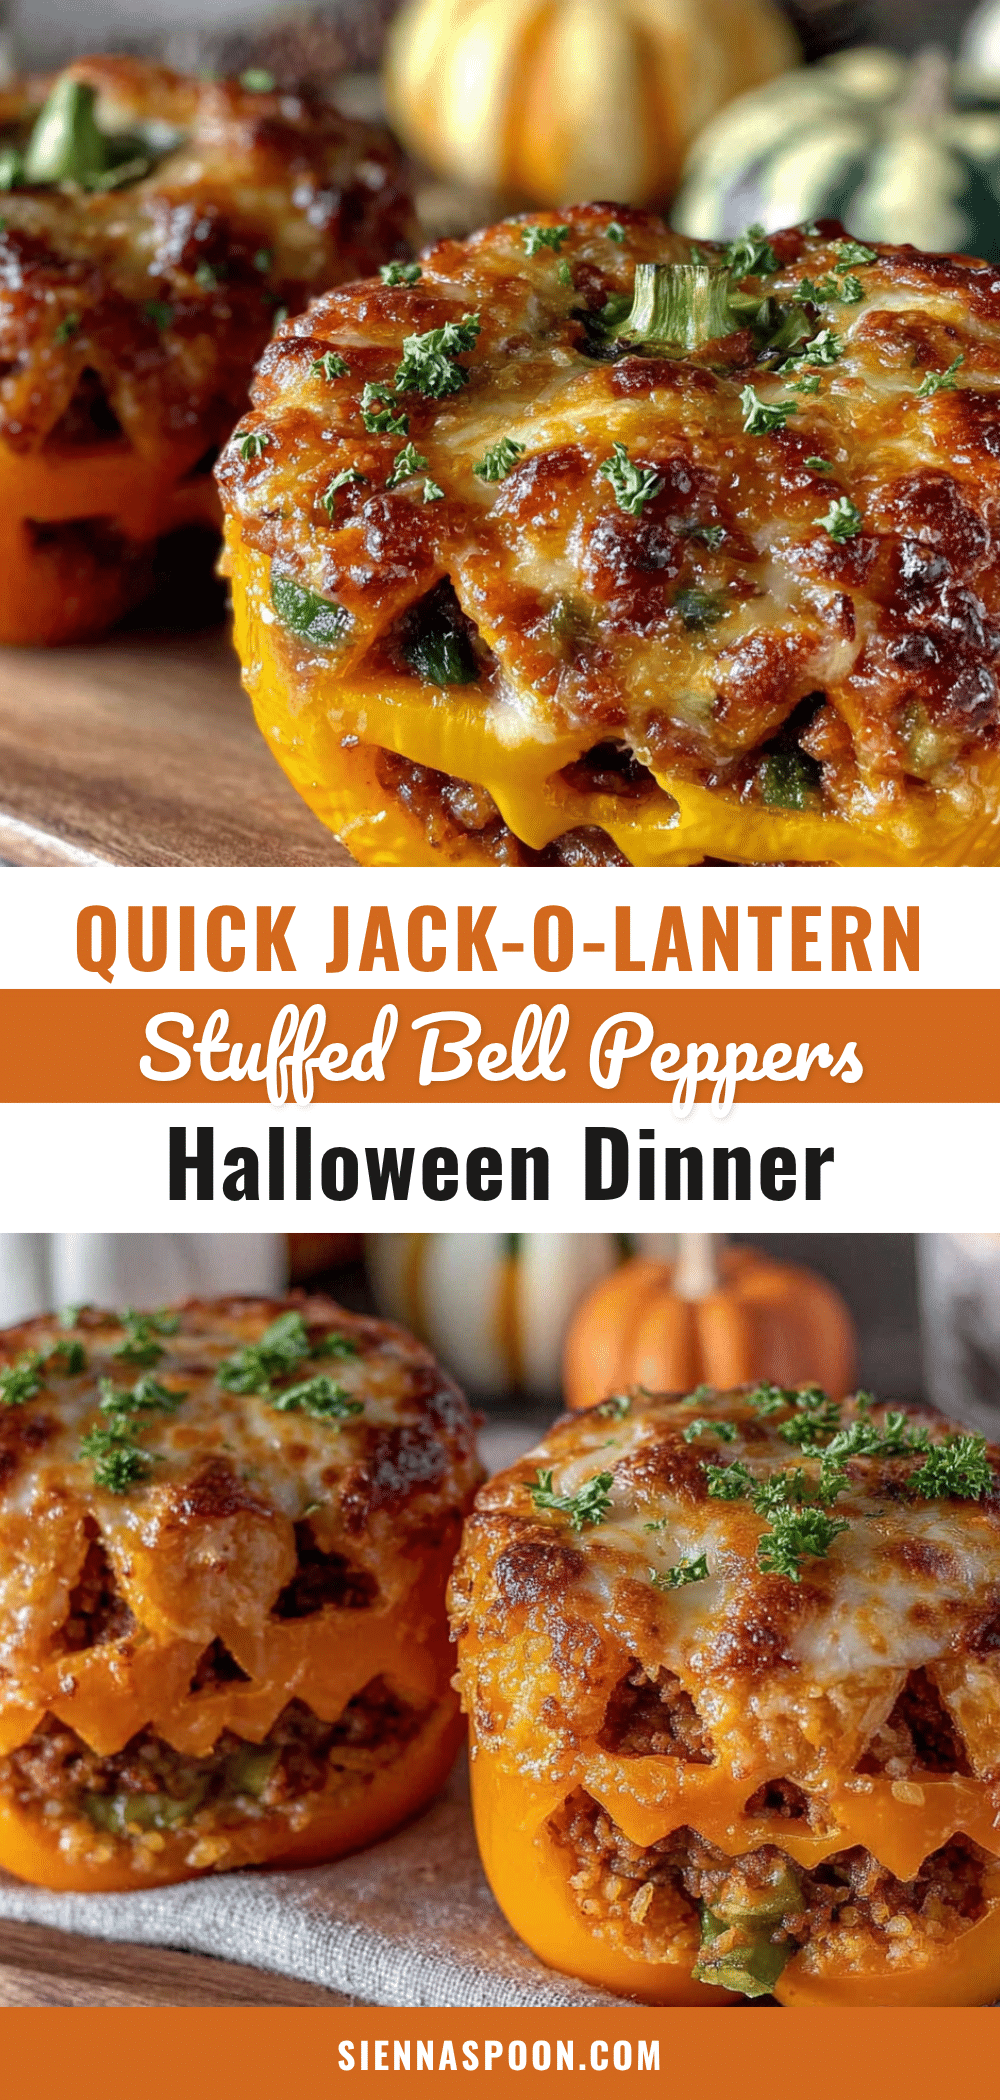
Quick Jack-O-Lantern Stuffed Bell Peppers: Easy Halloween Dinner

These adorable stuffed bell peppers are carved to look like little jack-o-lanterns, filled with a savory mixture of ground beef, rice, and cheese. A fun and easy weeknight dinner that’s perfect for Halloween or any busy night.
- Prep Time: 15 minutes
- Cook Time: 20 minutes
- Total Time: 35 minutes
- Yield: 4 servings 1x
- Category: Main Course
- Cuisine: American
Ingredients
- 4 large orange bell peppers
- 1 pound ground beef (85/15)
- 1 cup cooked rice
- 1 can (15 ounces) tomato sauce
- 1 cup shredded mozzarella cheese
- 1 small onion, finely diced
- 2 cloves garlic, minced
- 1 teaspoon dried oregano
- 1/2 teaspoon smoked paprika
- 1/2 teaspoon salt
- 1/4 teaspoon black pepper
- 2 tablespoons olive oil
- Optional: Fresh parsley or chives for garnish
Instructions
- Preheat your oven to 375°F (190°C).
- Cook the filling: Heat 2 tablespoons of olive oil in a large skillet over medium heat. Add the diced onion and cook for 3-4 minutes, until soft and translucent. Add the minced garlic and cook for 30 seconds more. Add the ground beef and break it up with a wooden spoon. Cook for 5-6 minutes, until browned and no longer pink. Drain off any excess fat if needed.
- Season the meat: Stir in the dried oregano, smoked paprika, 1/2 teaspoon salt, and 1/4 teaspoon black pepper. Cook for 1 minute. Then pour in the tomato sauce and the cooked rice. Stir together and let it simmer for 2-3 minutes, until the rice has absorbed some of the sauce. Taste and adjust salt if needed. Turn off the heat and set aside.
- Prepare the peppers: Wash the bell peppers and pat them dry. Using a sharp paring knife, cut the top off each pepper—about 1/2 inch from the stem. Set the tops aside. Remove the seeds and white membranes from inside each pepper. Rinse the peppers inside and out.
- Carve the faces: Using a paring knife, carefully cut small triangles for eyes and a crescent or jagged smile for the mouth. Cut all the way through the pepper wall. Don’t make the holes too big.
- Stuff the peppers: Place the carved peppers upright in a baking dish. Spoon the filling into each pepper, packing it gently with the back of the spoon. Fill them all the way to the top.
- Top with cheese: Sprinkle the shredded mozzarella evenly over the tops of the stuffed peppers.
- Bake: Cover the baking dish tightly with aluminum foil. Bake for 15 minutes. Then remove the foil and bake for another 5-7 minutes, until the cheese is melted and bubbly and the peppers are tender when poked with a fork.
- Garnish and serve: Let the peppers rest for 2-3 minutes before serving. Sprinkle with fresh parsley or chives if desired. Serve warm, with the little pepper tops placed next to them like hats if desired.
Notes
For a vegetarian version, use cooked lentils or plant-based ground meat substitute. For a gluten-free option, use certified gluten-free rice and check your tomato sauce label. If your peppers are wobbly, slice a thin piece off the bottom to create a flat surface. Don’t overcook the peppers—they should be tender but still hold their shape. Make the rice ahead of time to save time. Don’t skip the smoked paprika—it adds depth.
Nutrition
- Serving Size: 1 stuffed pepper
- Calories: 380
- Sugar: 8
- Sodium: 620
- Fat: 18
- Saturated Fat: 7
- Carbohydrates: 28
- Fiber: 4
- Protein: 25
Keywords: stuffed bell peppers, jack-o-lantern peppers, Halloween dinner, easy weeknight dinner, ground beef recipe, kid-friendly dinner


