Love this? Save it for later!
Share the inspiration with your friends
I spent three years convinced that chia pudding was a cruel joke the wellness world was playing on all of us. Every single time I tried it—at cafes, from friends, from my own stubborn attempts—it turned into this sad, slimy, grainy mess that sat in the fridge until I finally threw it away with a heavy sigh. Then my sister showed up at my door last Tuesday holding two little mason jars, looking way too pleased with herself. “Just try it,” she said, shoving one into my hands. I took a bite expecting the usual regret, and honestly? I almost dropped the jar. The texture was creamy but firm, the chia seeds had actually softened instead of staying crunchy, and there was zero of that weird watery layer on top that always grossed me out. I stood there in my kitchen, fork halfway to my mouth, and demanded to know her secret. She just smiled and said she’d figured out the trick after her kids kept coming home from school with half-eaten, soggy lunchbox cups. That was the moment I realized I’d been doing chia pudding wrong for years—and this version, these Perfect No-Sog Overnight Chia Pudding Lunchbox Cups, changed everything. Maybe you’ve been there too, staring at a jar of sad pudding wondering what all the fuss is about. Let me tell you, this recipe is different.
Why You’ll Love This Recipe
I’ve tested this recipe at least a dozen times tweaking ratios, trying different milks, and even timing how long the chia seeds need to sit before they hit that perfect spoonable consistency. What I landed on is a lunchbox-friendly chia pudding that stays creamy without turning into a soggy disaster, even after sitting in a backpack all morning.
- Quick & Easy : Comes together in under 10 minutes of active prep time. Mix, pour, refrigerate, and you’re done. Perfect for busy mornings or Sunday meal prep sessions.
- Simple Ingredients : You probably already have chia seeds, milk, and a sweetener in your pantry. No fancy superfood powders or obscure health store finds required.
- Perfect for Lunchboxes : These individual cups hold up beautifully in lunch bags, backpacks, or picnic coolers. No leaks, no spills, no sad soggy texture by lunchtime.
- Crowd-Pleaser : My picky nephew actually asked for seconds. That never happens. Kids and adults both love the creamy, pudding-like texture.
- Unbelievably Delicious : The secret ratio I use gives you a thick, velvety consistency that feels indulgent without being heavy. It’s comfort food that happens to be good for you.
What makes this version different from every other chia pudding recipe out there is the technique. Most recipes tell you to just stir everything together and walk away. That’s exactly how you end up with clumpy, watery pudding. I figured out that a brief rest period before the final stir makes all the difference. It’s a tiny extra step that transforms the final texture completely.
This is the kind of recipe that makes you feel like you’ve hacked the system. It’s healthy, it’s portable, and it tastes like a treat. Perfect for busy parents packing school lunches, for meal-preppers who want grab-and-go breakfasts, or for anyone who’s ever been disappointed by a soggy chia pudding and given up.
What Ingredients You Will Need
This recipe uses simple, wholesome ingredients that work together to create that perfect no-sog texture. Most of these are pantry staples, which makes these lunchbox cups incredibly easy to throw together on a whim.
- Chia seeds (¼ cup / 40g) – The star of the show. White and black chia seeds both work fine here. I personally prefer white chia seeds for a lighter color, but black ones are perfectly fine too. Look for fresh seeds—they should smell nutty, not musty.
- Unsweetened almond milk (1 cup / 240ml) – I use unsweetened vanilla almond milk for a subtle sweetness and flavor. Any milk works here: dairy milk, oat milk, coconut milk, or soy milk. Full-fat coconut milk gives an extra creamy texture if you want something richer.
- Pure maple syrup (2 tablespoons / 30ml) – Adds just the right amount of sweetness without being overwhelming. Honey or agave nectar work as substitutes. If you’re watching sugar intake, use a few drops of stevia or monk fruit sweetener instead.
- Vanilla extract (1 teaspoon / 5ml) – Pure vanilla extract makes a noticeable difference in flavor. Imitation vanilla works in a pinch, but the real stuff adds a warmth that elevates the whole pudding.
- Pinch of sea salt (⅛ teaspoon) – Don’t skip this! A tiny pinch of salt balances the sweetness and enhances all the flavors. It’s the secret ingredient that makes everything taste more like itself.
- Optional toppings – Fresh berries, sliced bananas, chopped nuts, shredded coconut, or a drizzle of nut butter. Keep toppings separate until serving to maintain that no-sog texture. If packing for lunchboxes, store toppings in a small separate container.
I recommend using Bob’s Red Mill chia seeds for consistent quality. They’re always fresh and absorb liquid evenly without clumping. For the milk, Califia Farms unsweetened almond milk is my go-to because it has a clean taste that doesn’t overpower the other ingredients.
Equipment Needed
You don’t need fancy equipment to make these lunchbox cups. Here’s what you’ll need:
- Mason jars or small containers (4 to 6, 8-ounce / 240ml capacity) – Wide-mouth mason jars work perfectly. They’re leak-proof, stackable, and easy to pack. Any small container with a tight-fitting lid works too.
- Whisk or fork – A small whisk helps break up any clumps in the chia seeds. A fork works in a pinch, but a whisk is more efficient.
- Measuring cups and spoons – Accurate measurements matter for the perfect texture. Use proper measuring spoons, not random spoons from your drawer.
- Small mixing bowl or liquid measuring cup – For mixing the milk, maple syrup, vanilla, and salt before adding the chia seeds. A bowl with a spout makes pouring into jars much easier.
- Spatula – To scrape every last bit of that chia mixture into the jars. Waste not, want not.
If you don’t have mason jars, small glass meal prep containers with lids work great. I’ve even used washed and reused yogurt containers in a pinch—just make sure they’re clean and dry. The key is having containers with tight seals to prevent leaks in lunchboxes.
Preparation Method
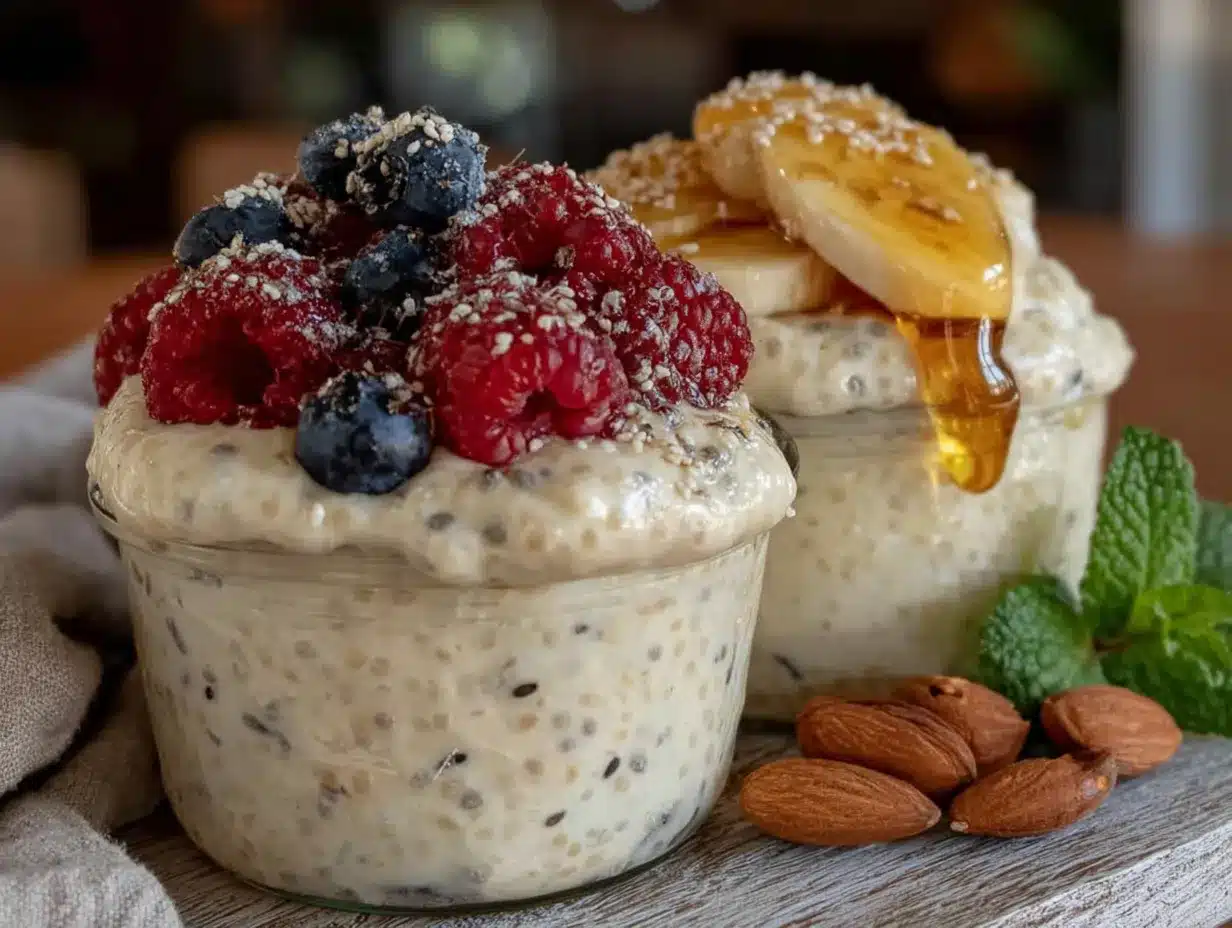
Follow these steps carefully, and you’ll have perfect no-sog chia pudding every single time. The secret is in the timing and the technique, not complicated ingredients.
-
Mix the liquid base – In a small mixing bowl or a 2-cup liquid measuring cup, combine 1 cup (240ml) unsweetened almond milk, 2 tablespoons (30ml) maple syrup, 1 teaspoon (5ml) vanilla extract, and a pinch of sea salt. Whisk until everything is well combined. Taste it here—it should be slightly sweeter than you want the final pudding to be, because the chia seeds will absorb some of the sweetness.
-
Add the chia seeds – Sprinkle ¼ cup (40g) chia seeds evenly over the liquid mixture. Do NOT stir yet. Let the seeds sit on top of the liquid for about 30 seconds. This brief rest allows the seeds to start absorbing liquid from the bottom up, which prevents them from clumping together when you stir.
-
Whisk vigorously – After the 30-second rest, whisk the mixture vigorously for about 45 seconds. Make sure you scrape the bottom and corners of the bowl to incorporate any seeds that settled. You should see the seeds starting to swell and the mixture beginning to thicken slightly. If you see any clumps, keep whisking until they break apart.
-
Rest and whisk again – Let the mixture sit on the counter for 5 minutes. Set a timer—don’t skip this step. After 5 minutes, whisk again for another 30 seconds. This second whisking is the magic step that prevents that watery layer from forming on top. The seeds have absorbed some liquid and are now evenly suspended in the mixture.
-
Pour into jars – Divide the mixture evenly among your 4 to 6 jars or containers. Leave about ½ inch of space at the top for toppings or expansion. If you’re using a bowl with a spout, this step is effortless. Otherwise, use a ladle or a measuring cup with a spout.
-
Refrigerate overnight – Place the jars in the refrigerator, uncovered, for the first 30 minutes. This allows any excess moisture to evaporate slightly. After 30 minutes, screw on the lids and refrigerate for at least 6 hours or overnight. The pudding will continue to thicken as it chills.
-
Check the texture – In the morning, check your pudding. It should be thick and creamy, with no watery layer on top. If it seems too thick, stir in a tablespoon of milk at a time until it reaches your desired consistency. If it’s too thin, let it chill for another hour—it will continue to set.
A note on timing: I’ve made the mistake of rushing this process more times than I care to admit. The 5-minute rest and second whisking step is not optional. It’s the difference between perfect creamy pudding and a sad, watery mess. Trust me on this one.
Cooking Tips & Techniques
After multiple batches of trial and error, I’ve learned a few things that make these lunchbox cups foolproof.
The biggest mistake people make is not whisking enough. Chia seeds are tiny sponges, and if you don’t distribute them evenly at the start, they’ll clump together and leave dry patches. Whisk like you mean it. I once got distracted by a phone call and only gave my mixture a half-hearted stir. The result was a jar of chia seed clumps floating in watery milk. Not cute.
Temperature matters. Use cold milk straight from the refrigerator. Cold liquid slows down the initial absorption, giving you more time to whisk the seeds evenly before they start swelling. If you use warm milk, the seeds absorb too quickly and clump before you can mix them properly.
Batch prep strategy. I make a double batch every Sunday and portion them into individual jars for the week. They stay perfect in the fridge for up to 5 days. Just grab one in the morning, add toppings, and go. It’s a game-changer for busy mornings when you don’t have time to think about breakfast.
The topping trap. If you’re packing these for lunchboxes, keep toppings separate until serving. Fresh berries release moisture over time and will turn your perfect pudding into a soggy mess. I use small silicone muffin cups as mini containers for toppings—they fit perfectly inside the lunchbox alongside the pudding jar.
Consistency check. After the first hour in the fridge, give each jar a gentle shake. This redistributes any seeds that may have settled at the bottom and ensures even thickening. I learned this trick after opening a jar that was perfectly creamy on top but had a dense seed layer at the bottom.
Variations & Adaptations
This base recipe is incredibly versatile. Here are some of my favorite ways to change it up:
- Chocolate version – Add 1 tablespoon (5g) unsweetened cocoa powder to the liquid mixture before adding the chia seeds. Whisk well to dissolve any lumps. The chocolate pairs beautifully with a dollop of peanut butter on top.
- Berry swirl – After pouring the pudding into jars, drop in small spoonfuls of berry compote or jam. Use a knife to gently swirl it through the pudding. Strawberry, raspberry, or mixed berry all work wonderfully.
- Dairy-free and vegan – This recipe is already vegan if you use maple syrup and plant-based milk. Coconut milk gives an extra creamy texture that feels indulgent without dairy.
- Protein boost – Stir in 1 scoop (about 30g) of your favorite vanilla or unflavored protein powder after the second whisking. You may need to add an extra tablespoon of milk to adjust the consistency. This makes a great post-workout snack.
- Spiced chai – Add ½ teaspoon ground cinnamon, ¼ teaspoon ground ginger, and a pinch of cardamom to the liquid mixture. It tastes like chai tea in pudding form—perfect for fall lunchboxes.
I once tried a matcha version by whisking in 1 teaspoon of matcha powder. The color was beautiful, but the flavor was a bit earthy for my taste. If you’re a matcha fan, go for it—just make sure to sift the powder first to avoid clumps.
Serving & Storage Suggestions
These pudding cups are best served cold, straight from the refrigerator. The texture is at its peak when thoroughly chilled. If you’re packing for lunch, add toppings just before serving to maintain that perfect no-sog texture.
Storage – Keep the sealed jars in the refrigerator for up to 5 days. The pudding actually gets creamier on day two and three as the chia seeds continue to soften. I’ve found that day three is the sweet spot for texture. After day five, the pudding may start to separate slightly—just give it a stir if that happens.
Freezing – You can freeze these pudding cups for up to 2 months. Thaw overnight in the refrigerator before serving. The texture may be slightly less creamy after freezing, but it’s still perfectly good. I recommend freezing without toppings and adding them fresh after thawing.
Reheating – These are meant to be eaten cold, but if you prefer a warmer pudding, microwave a single jar for 20 to 30 seconds. Stir well before eating. The texture will be softer and more like a warm porridge. I personally prefer them cold, but my husband loves them warm with a drizzle of honey.
Flavor development – The flavors meld and deepen over time. The vanilla and maple become more pronounced after a day or two in the fridge. If you’re making these for a special occasion, prepare them a day ahead for the best flavor.
Nutritional Information & Benefits
Each serving (one jar made with unsweetened almond milk and maple syrup) contains approximately:
- Calories: 150
- Protein: 5g
- Fat: 8g
- Carbohydrates: 16g
- Fiber: 10g
- Sugar: 8g
Chia seeds are packed with omega-3 fatty acids, which support heart and brain health. They’re also an excellent source of fiber—one serving provides about 40% of your daily recommended intake. The fiber helps keep you full and satisfied, making these cups a great breakfast or snack option.
This recipe is naturally gluten-free, dairy-free (if using plant-based milk), and vegan. It’s also low in added sugar if you use a sugar-free sweetener. The main allergen to note is chia seeds themselves—while uncommon, some people do have seed allergies. If you’re serving these to others, it’s always good to check.
I love that this recipe feels indulgent while actually being good for you. It’s the kind of breakfast that makes you feel like you’re treating yourself, even though you’re nourishing your body at the same time.
Conclusion
These Perfect No-Sog Overnight Chia Pudding Lunchbox Cups are proof that a few simple ingredients and one smart technique can completely transform a recipe. No more sad, watery pudding or crunchy, unappetizing seeds. Just creamy, satisfying cups that hold up beautifully in lunchboxes, backpacks, or your own fridge for grab-and-go mornings.
I encourage you to make this recipe your own. Swap the milk, change up the sweetener, or try one of the variations I shared. The base technique stays the same, but the flavor combinations are endless. That’s the beauty of a good recipe—it gives you a solid foundation to play with.
Honestly, this recipe has become a staple in my kitchen, and I have a feeling it will become one in yours too. It’s simple, reliable, and genuinely delicious. Give it a try, and let me know how it turns out. Did you try a fun flavor combination? Did your kids actually eat it without complaining? I’d love to hear your stories in the comments below. And if you loved it, share it with a friend who’s been struggling with soggy chia pudding. They’ll thank you for it.
Frequently Asked Questions
Can I use different types of milk?
Absolutely! Any milk works—dairy, almond, oat, soy, or coconut. Just keep in mind that thicker milks like full-fat coconut milk will give you a creamier pudding, while thinner milks like skim dairy may result in a slightly less thick texture. Adjust the chia seed ratio if needed.
How long do these chia pudding cups last in the fridge?
They stay fresh for up to 5 days when stored in sealed containers in the refrigerator. The texture actually improves after a day or two as the chia seeds continue to soften. After day 5, they may start to separate slightly—just give them a stir before eating.
Can I make these without maple syrup?
Yes! Substitute with honey, agave nectar, or a sugar-free sweetener like stevia or monk fruit. Start with a smaller amount and adjust to your taste. You can also use mashed banana or date paste for natural sweetness, but this will change the texture slightly.
Why did my chia pudding turn out watery?
This usually happens when the chia seeds aren’t given enough time to absorb the liquid, or when they weren’t whisked thoroughly enough. Make sure you follow the 5-minute rest and second whisking step. Also, check that your chia seeds are fresh—old seeds lose their ability to absorb liquid properly.
Can I freeze these pudding cups?
Yes, you can freeze them for up to 2 months. Thaw overnight in the refrigerator before serving. The texture may be slightly less creamy after freezing, but it’s still perfectly good. I recommend freezing without toppings and adding them fresh after thawing for the best results.
Pin This Recipe!
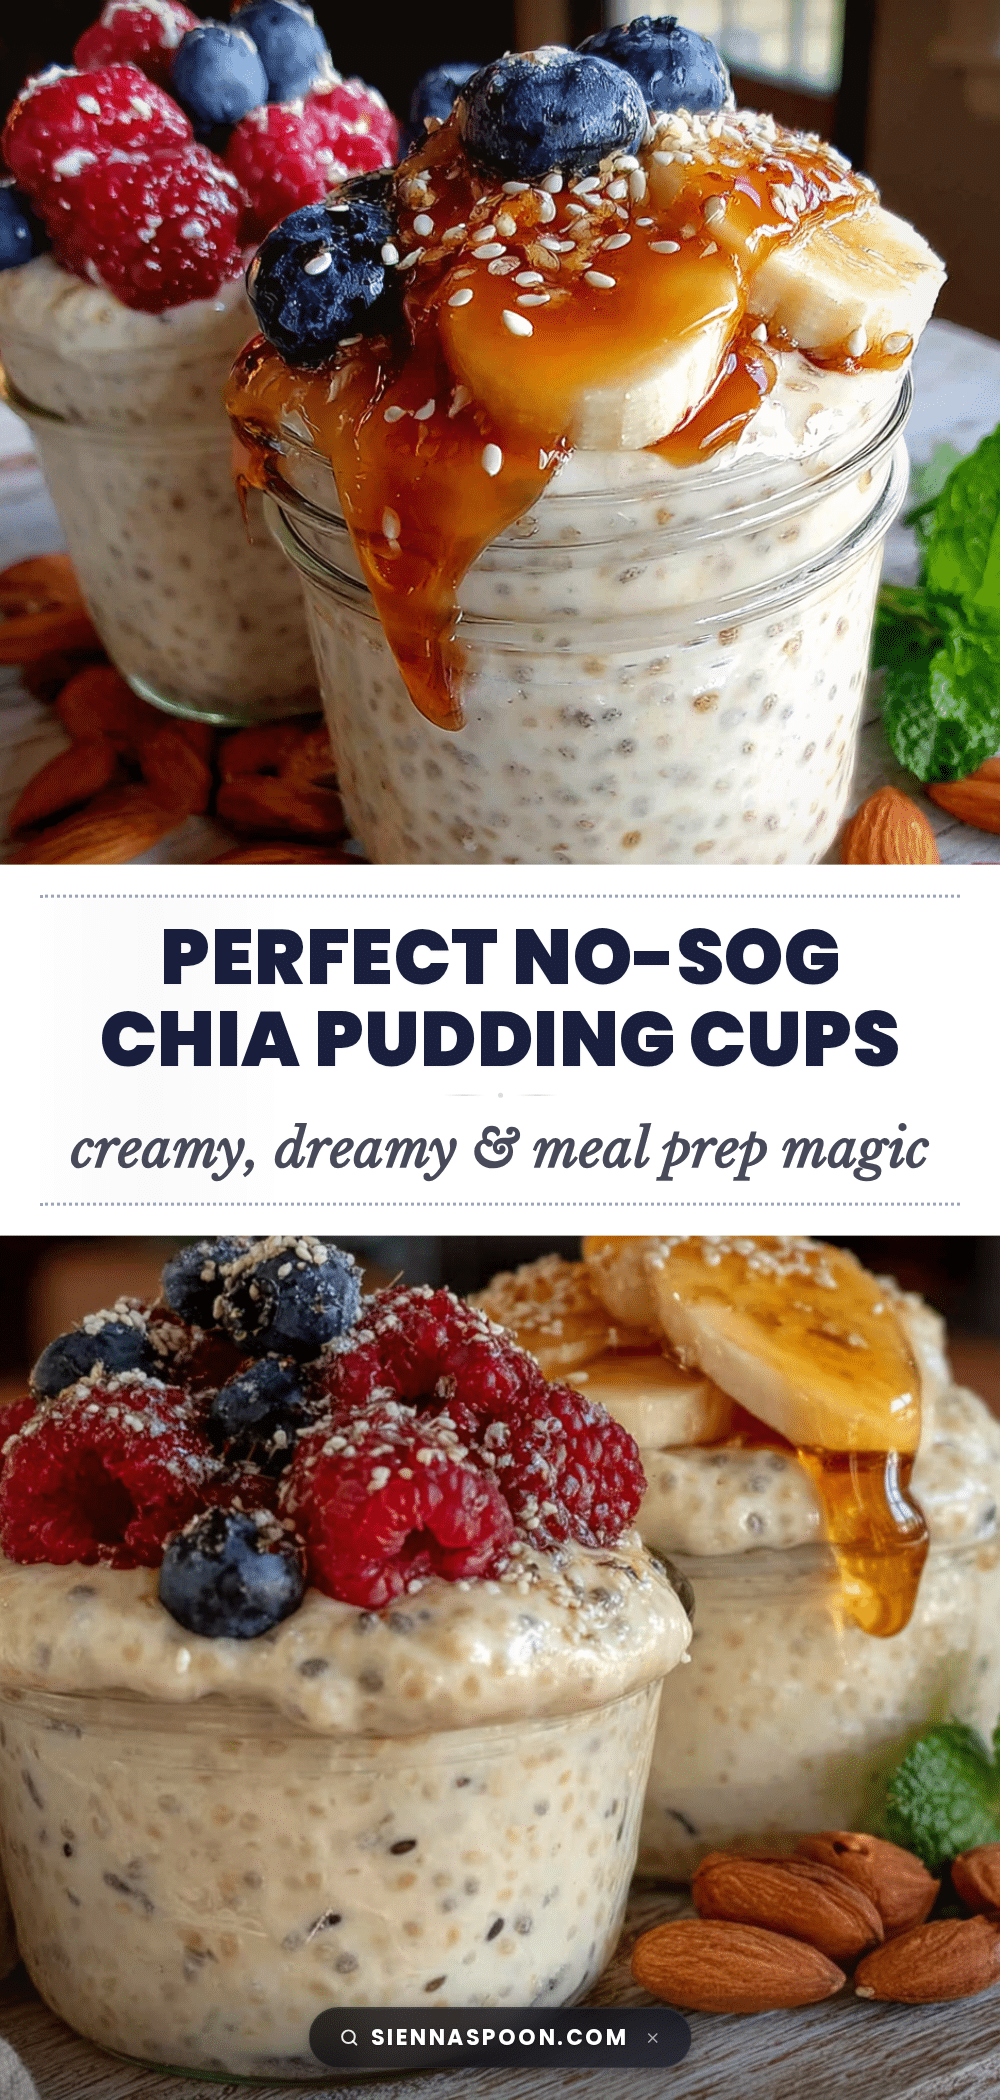
Perfect No-Sog Overnight Chia Pudding Lunchbox Cups
These creamy, no-sog chia pudding cups are perfect for lunchboxes and meal prep. The secret technique of a brief rest and second whisking ensures a velvety texture without any watery layer.
- Prep Time: 10 minutes
- Cook Time: 0 minutes
- Total Time: 6 hours 10 minutes (includes chilling)
- Yield: 4 to 6 servings 1x
- Category: Breakfast / Snack
- Cuisine: American
Ingredients
- ¼ cup (40g) chia seeds
- 1 cup (240ml) unsweetened almond milk
- 2 tablespoons (30ml) pure maple syrup
- 1 teaspoon (5ml) vanilla extract
- ⅛ teaspoon sea salt
- Optional toppings: fresh berries, sliced bananas, chopped nuts, shredded coconut, or nut butter
Instructions
- In a small mixing bowl or 2-cup liquid measuring cup, combine almond milk, maple syrup, vanilla extract, and sea salt. Whisk until well combined.
- Sprinkle chia seeds evenly over the liquid mixture. Do not stir. Let sit for 30 seconds.
- Whisk vigorously for about 45 seconds, scraping the bottom and corners to incorporate all seeds.
- Let the mixture sit on the counter for 5 minutes. Set a timer.
- After 5 minutes, whisk again for 30 seconds.
- Divide the mixture evenly among 4 to 6 jars or containers, leaving about ½ inch of space at the top.
- Refrigerate uncovered for 30 minutes, then cover with lids and refrigerate for at least 6 hours or overnight.
- Check texture in the morning. If too thick, stir in a tablespoon of milk at a time. If too thin, chill for another hour.
Notes
The 5-minute rest and second whisking step is crucial to prevent a watery layer. Keep toppings separate until serving to maintain texture. For best results, use cold milk straight from the refrigerator. The pudding gets creamier on day two and three.
Nutrition
- Serving Size: 1 jar (made with uns
- Calories: 150
- Sugar: 8
- Sodium: 120
- Fat: 8
- Saturated Fat: 1
- Carbohydrates: 16
- Fiber: 10
- Protein: 5
Keywords: chia pudding, overnight chia pudding, no-sog chia pudding, lunchbox cups, healthy breakfast, meal prep, vegan, gluten-free


