Love this? Save it for later!
Share the inspiration with your friends
My sister-in-law, Jen, wasn’t trying to impress anyone that Tuesday morning. I’d stopped by to drop off a casserole dish she’d lent me, and the smell hit me before I even got through the screen door. It wasn’t cinnamon rolls, which is what I’d have bet money on. It was something warmer, earthier—pumpkin, maybe, but not pie. She had a toddler on her hip and a spatula in her other hand, looking like she’d just rolled out of bed. A muffin tin sat on the counter, filled with little golden domes that looked more like breakfast than dessert.
“Oh, those are just for the kids’ lunches this week,” she said when I asked. Just for lunches. Like she hadn’t accidentally created the most perfect grab-and-go breakfast I’d seen in months. I mean, honestly—I’d been spending way too much money on those pouches and bars that claim to be healthy but cost a small fortune. Here she was, making a whole batch for pennies, and her kids were actually eating them without a fight. You know that feeling when you realize someone has quietly solved a problem you’ve been wrestling with for ages?
She handed me one while it was still warm, and let me tell you—it was soft, not too sweet, with that cozy pumpkin flavor that just feels like fall. But the best part? She made them on a Sunday in about thirty minutes, and they lasted all week. I walked out of there with the recipe scribbled on a napkin and a new mission: to make these for my own crew. These Kid-Approved Pumpkin Baked Oatmeal Cups have been in heavy rotation ever since, and honestly, they’re the reason I actually have time for coffee in the morning now.
Why You’ll Love This Recipe
Let’s be real for a second. Mornings are chaos. You’re trying to get everyone out the door with shoes on and something in their stomachs, and the last thing you need is a complicated breakfast recipe that leaves you with a sink full of dishes. These pumpkin baked oatmeal cups solve that problem in the best way possible.
- Budget-Friendly: Made with pantry staples like oats, pumpkin puree, and eggs—no fancy ingredients required. A single batch costs a fraction of what you’d pay for store-bought breakfast bars.
- Kid-Approved: My own kids are picky eaters who would rather eat air than something “healthy,” but they gobble these up. The pumpkin makes them moist and naturally sweet, so you don’t need a ton of added sugar.
- Perfect for Meal Prep: Bake them on Sunday, and you’ve got breakfast or snacks ready for the whole week. They reheat beautifully in the microwave in about 20 seconds.
- Freezer-Friendly: Make a double batch and stash some in the freezer for those mornings when you forgot to plan ahead. They thaw overnight in the fridge or warm up straight from frozen.
- Simple Ingredients: You probably already have most of these in your pantry. No weird flours or specialty items that cost ten bucks a bag.
What makes these different from every other baked oatmeal recipe out there? It’s the texture. These aren’t mushy or soggy—they hold their shape like a muffin but stay soft and tender inside. The trick is getting the oat-to-liquid ratio just right, and I’ve tested this until it was perfect. Plus, they’re not overly sweet, which means you can eat them for breakfast without feeling like you’re having dessert. They’re comfort food that actually works for real life.
I’ve made these for playdates, school mornings, and even as a quick snack before soccer practice. Every time, someone asks for the recipe. That’s when I know I’ve got a winner.
What Ingredients You Will Need
This recipe uses simple, wholesome ingredients that work together to create something truly satisfying. Most of these are pantry staples, so you probably won’t need to make a special trip to the store.
For the Oatmeal Cups
- 2 cups rolled oats (not instant—they get too mushy. Old-fashioned oats give the best texture)
- 1 teaspoon baking powder (helps them rise just a little so they’re not dense)
- 1 ½ teaspoons pumpkin pie spice (or make your own with cinnamon, nutmeg, ginger, and cloves)
- ½ teaspoon cinnamon (because you can never have too much cinnamon)
- ¼ teaspoon salt (balances the sweetness and brings out the pumpkin flavor)
- 1 cup canned pumpkin puree (not pumpkin pie filling—make sure it’s 100% pumpkin)
- 2 large eggs (room temperature works best, but cold is fine in a pinch)
- ¼ cup maple syrup (or honey, if that’s what you have. Both work great)
- 1 teaspoon vanilla extract (adds warmth and depth)
- 1 cup milk (any kind works—dairy, almond, oat, whatever you’ve got)
- ¼ cup melted coconut oil or unsalted butter (for richness and moisture)
- Optional: ⅓ cup mini chocolate chips or chopped nuts (my kids prefer chocolate chips, but walnuts or pecans are delicious too)
Ingredient Tips from My Kitchen
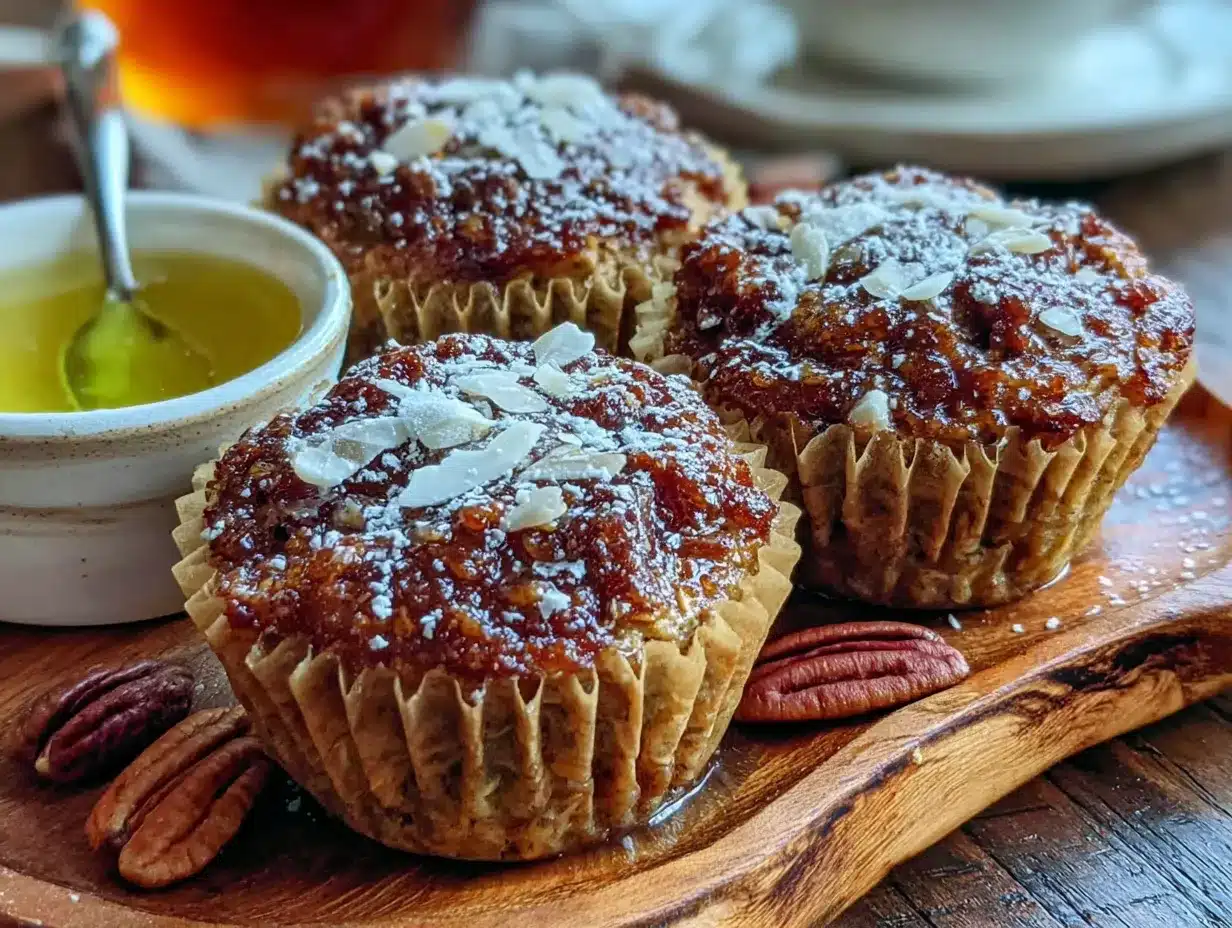
I’ve learned a few things making these over and over. First, don’t skip the salt—it sounds weird in a sweet breakfast, but it makes everything taste more balanced. Second, if you’re using a different milk like almond or oat, that’s totally fine, but the texture might be slightly less tender. Whole milk gives the richest result. And here’s a tip I wish someone had told me earlier: let the batter sit for about five minutes before scooping it into the muffin tin. It gives the oats time to absorb some liquid, which makes the cups more uniform and less likely to fall apart.
For the pumpkin, I always stock up when it goes on sale in the fall. Canned pumpkin keeps for ages, so I grab a few extra cans and stash them in the pantry. Libby’s is my go-to brand because it’s consistently thick and not watery, but store brands work fine too. Just make sure you’re getting pure pumpkin puree, not pumpkin pie filling, which has sugar and spices already added.
Equipment Needed
You don’t need anything fancy for these pumpkin baked oatmeal cups, which is one of the reasons I love them. Here’s what you’ll need:
- Standard 12-cup muffin tin (non-stick or regular—just grease it well either way)
- Mixing bowls (one large, one medium)
- Whisk (for combining wet ingredients)
- Rubber spatula (for scraping every last bit of batter)
- Measuring cups and spoons (accuracy matters here)
- Muffin liners (optional but recommended for easy cleanup. I use parchment paper liners)
- Ice cream scoop or large spoon (for evenly distributing the batter)
- Cooling rack (helps them cool evenly so they don’t get soggy on the bottom)
If you don’t have a muffin tin, you can bake this in an 8×8 square pan and cut it into squares. Just add about 5-10 minutes to the baking time. I’ve done that when my muffin tin was in the dishwasher, and it worked perfectly. A silicone muffin pan also works well—no greasing needed, and the cups pop right out.
Preparation Method
These come together fast, which is exactly what you want when you’re meal prepping for a busy week. Here’s how to do it:
- Preheat your oven to 375°F (190°C). Grease your muffin tin well with butter or cooking spray, or line it with muffin liners. I’ve forgotten to grease before, and let me tell you—scrubbing baked-on oatmeal is not a fun way to spend your morning. Don’t skip this step.
- In a large bowl, whisk together the dry ingredients: rolled oats, baking powder, pumpkin pie spice, cinnamon, and salt. Make sure the baking powder is evenly distributed so your cups rise evenly. Give it a good stir—about 20 seconds of whisking should do it.
- In a separate medium bowl, combine the wet ingredients: pumpkin puree, eggs, maple syrup, vanilla extract, milk, and melted coconut oil or butter. Whisk until everything is smooth and well combined. The mixture should be a uniform orange color with no streaks of egg white.
- Pour the wet ingredients into the dry ingredients. Stir with a rubber spatula until just combined. Don’t overmix—a few small lumps are fine. Overmixing can make the oatmeal cups tough instead of tender. If you’re adding chocolate chips or nuts, fold them in now.
- Let the batter rest for 5 minutes. This is the secret step that makes a real difference. The oats absorb some of the liquid, which helps the cups hold their shape better. Use this time to clean up a few dishes or pour yourself a cup of coffee.
- Scoop the batter evenly into the prepared muffin cups. An ice cream scoop makes this easy and ensures each cup has the same amount of batter. Fill each cup almost to the top—they won’t rise much, so you can fill them generously. You should get exactly 12 cups.
- Bake for 18-22 minutes, or until the tops are set and golden brown around the edges. A toothpick inserted into the center should come out mostly clean, with just a few moist crumbs. Every oven is different, so start checking at 18 minutes. If the tops are browning too fast but the centers aren’t set, tent the pan loosely with foil for the last few minutes.
- Let the oatmeal cups cool in the pan for 5 minutes. This helps them set up properly. Then transfer them to a wire rack to cool completely. If you try to remove them too soon, they might fall apart. Patience, my friend—it’s worth the wait.
The first time I made these, I forgot to let the batter rest and pulled them out of the pan too early. Half of them crumbled into a delicious but messy pile of oatmeal. They still tasted amazing, but they weren’t pretty. Learn from my mistakes. Let them rest, let them cool, and you’ll have perfect little cups every time.
Cooking Tips & Techniques
I’ve made these pumpkin baked oatmeal cups more times than I can count, and I’ve picked up a few tricks along the way. Here’s what I wish I’d known from the start:
Don’t skip the resting step. I know it’s tempting to hurry things along, but letting the batter sit for five minutes before baking is non-negotiable. The oats need time to absorb some of the liquid, or your cups will be loose and fall apart. Think of it as giving the ingredients a chance to get to know each other.
Use room temperature eggs if you can. Cold eggs can make the coconut oil or butter seize up, creating little lumps in your batter. If you forgot to take them out of the fridge, just place them in a bowl of warm water for five minutes before cracking them. It makes a difference.
Check your pumpkin puree. Some brands are more watery than others. If your pumpkin puree looks thin or has liquid pooling on top, spoon it off before measuring. Too much liquid will make your oatmeal cups soggy. I learned this the hard way with a store brand that was way too runny.
Bake them until they’re just set. Overbaking dries them out, and nobody wants a dry oatmeal cup. The tops should be firm to the touch but still slightly soft in the center. They’ll continue to set as they cool, so err on the side of underdone rather than overdone.
Double the batch if you have freezer space. These freeze beautifully, and having a stash in the freezer means you’re always prepared for busy mornings. I make a double batch every other week, and it saves me so much time and money.
One more thing—if your kids are extra picky about texture, try pulsing the oats in a food processor a few times before mixing. It breaks them down slightly and creates a more uniform texture that some kids prefer. My youngest loves them this way, while my oldest prefers the whole oats. Go figure.
Variations & Adaptations
One of the best things about this recipe is how flexible it is. Here are some ways to change it up based on what you have on hand or what your family likes:
Dairy-Free Version: Use almond milk, oat milk, or coconut milk in place of dairy milk. Coconut oil works perfectly instead of butter. I’ve made this version for friends with dairy allergies, and nobody could tell the difference.
Gluten-Free Option: Use certified gluten-free rolled oats. That’s the only swap you need—everything else is naturally gluten-free. Just double-check your pumpkin pie spice blend to make sure it doesn’t have any additives.
Lower Sugar: Cut the maple syrup to 3 tablespoons instead of ¼ cup. The pumpkin adds natural sweetness, so you won’t miss it much. You can also use a sugar-free syrup if that’s your thing, though I haven’t tried it myself.
Add-In Ideas: Mini chocolate chips are my kids’ favorite, but I’ve also made these with chopped pecans, dried cranberries, shredded coconut, or a mix of all three. One time I added a tablespoon of chia seeds for extra fiber, and nobody even noticed.
Savory Twist: This might sound weird, but hear me out—omit the maple syrup and add a pinch of black pepper and some grated cheddar cheese. You get a savory pumpkin oatmeal cup that’s surprisingly good with eggs for breakfast. My husband loves these, though the kids are still on the fence.
Pumpkin-Free Version: You can swap the pumpkin puree for sweet potato puree or butternut squash puree. The flavor will be slightly different, but the texture works the same way. I’ve done this when I ran out of pumpkin and had a leftover baked sweet potato in the fridge.
My personal favorite variation? Adding a handful of dark chocolate chips and a pinch of flaky sea salt on top before baking. The salty-sweet combination is irresistible, and it makes these feel a little more special for weekend mornings.
Serving & Storage Suggestions
These pumpkin baked oatmeal cups are incredibly versatile when it comes to serving. Here’s how I handle them:
How to Serve: I like them slightly warm, straight from the microwave for about 20 seconds. A dollop of Greek yogurt or a drizzle of maple syrup on top makes them feel like a treat. For a more filling breakfast, serve them alongside a hard-boiled egg or a piece of fruit. My kids eat them plain, straight out of the container, which is fine by me.
Room Temperature: They’re also delicious at room temperature, which makes them perfect for lunchboxes or picnics. I’ve packed them for road trips, and they hold up beautifully without getting messy.
Storage: Store the oatmeal cups in an airtight container in the refrigerator for up to 5 days. I usually layer them between sheets of parchment paper so they don’t stick together. They actually taste better on day two or three, as the flavors have time to meld.
Freezing: These freeze like a dream. Arrange them in a single layer on a baking sheet and freeze until solid, about 2 hours. Then transfer them to a freezer-safe bag or container. They’ll keep for up to 3 months. To thaw, just leave them in the fridge overnight, or microwave one straight from frozen for about 30-40 seconds.
Reheating: The microwave is your friend here. 20-25 seconds for a refrigerated cup, 30-40 seconds for frozen. If you’re reheating a whole batch, pop them in a 350°F oven for about 10 minutes. They come out tasting almost as fresh as the day you made them.
One thing I love about these is that the flavor actually improves over time. The spices meld together, and the oats soften even more. By day three, they’re at their peak. If you can keep them that long without everyone eating them all, that is.
Nutritional Information & Benefits
These pumpkin baked oatmeal cups are a solid choice for a balanced breakfast or snack. Here’s a rough estimate of the nutrition per cup (based on 12 servings, without optional add-ins):
- Calories: 165
- Protein: 5g
- Carbohydrates: 24g
- Fiber: 4g
- Sugar: 8g (from maple syrup and pumpkin)
- Fat: 6g
- Iron: 8% of daily value
- Vitamin A: 70% of daily value (from the pumpkin)
Pumpkin is packed with vitamin A, which is great for eye health and immune function. Oats provide soluble fiber, which helps keep you full and supports healthy digestion. The eggs add protein, and the maple syrup gives you a little natural energy without the crash you get from refined sugar.
If you’re watching your sugar intake, you can easily reduce the maple syrup to 3 tablespoons without sacrificing much sweetness. And if you need a higher-protein version, add a scoop of unflavored protein powder or collagen peptides to the dry ingredients. I’ve done this, and it works well—just add an extra tablespoon of milk to keep the batter moist.
These are also naturally nut-free if you skip the optional nuts, making them a safe option for school lunches. Just double-check your oat label if you need them to be gluten-free.
Conclusion
Look, I’m not saying these pumpkin baked oatmeal cups will solve all your morning problems. But they’ll solve a few of them. They’re cheap to make, easy to prep ahead, and actually taste good enough that your kids will eat them without a fight. That’s a win in my book.
What I love most about this recipe is how forgiving it is. You can swap ingredients, adjust the sweetness, add whatever mix-ins you have on hand, and they still turn out great. It’s the kind of recipe that makes you feel like a capable, organized adult—even on those mornings when you’re running on three hours of sleep and cold coffee.
So go ahead and give these a try. Make a batch on Sunday, stash them in the fridge, and give yourself the gift of an easy breakfast all week long. And when your kids ask for seconds (trust me, they will), you can smile knowing you spent pennies per serving. If you make them, come back and let me know how they turned out in the comments. I’d love to hear about your variations and what your family thought.
Happy baking, friends. You’ve got this.
Frequently Asked Questions
Can I use quick oats instead of rolled oats?
You can, but the texture will be different. Quick oats absorb liquid faster and create a softer, almost mushy texture. Rolled oats give you a chewier, more substantial cup that holds its shape better. If you only have quick oats, reduce the milk by about 2 tablespoons and check for doneness a few minutes earlier.
Can I make these without eggs?
Yes, you can substitute each egg with a flax egg (1 tablespoon ground flaxseed mixed with 3 tablespoons water, let sit for 5 minutes). The texture will be slightly denser, but they’ll still taste great. I’ve made them this way for a friend with egg allergies, and they were a hit.
How do I keep these from sticking to the muffin tin?
Grease the pan really well, or use paper liners. I prefer parchment paper liners because nothing sticks to them. If you’re using a non-stick pan, a generous spray of cooking oil should do the trick. Let them cool in the pan for at least 5 minutes before trying to remove them—that helps a lot.
Can I use fresh pumpkin instead of canned?
Absolutely, but you’ll need to cook and puree it first. Fresh pumpkin has more water than canned, so you’ll want to drain it in a fine-mesh strainer or cheesecloth for about 30 minutes to remove excess liquid. Otherwise, your oatmeal cups might turn out soggy. Canned is more consistent, but fresh works if that’s what you have.
How long do these last in the freezer?
Up to 3 months if stored properly in an airtight container or freezer bag. I like to freeze them in a single layer on a baking sheet first, then transfer them to a bag so they don’t stick together. To reheat, just microwave one for 30-40 seconds straight from frozen. They taste almost as good as fresh.
Pin This Recipe!
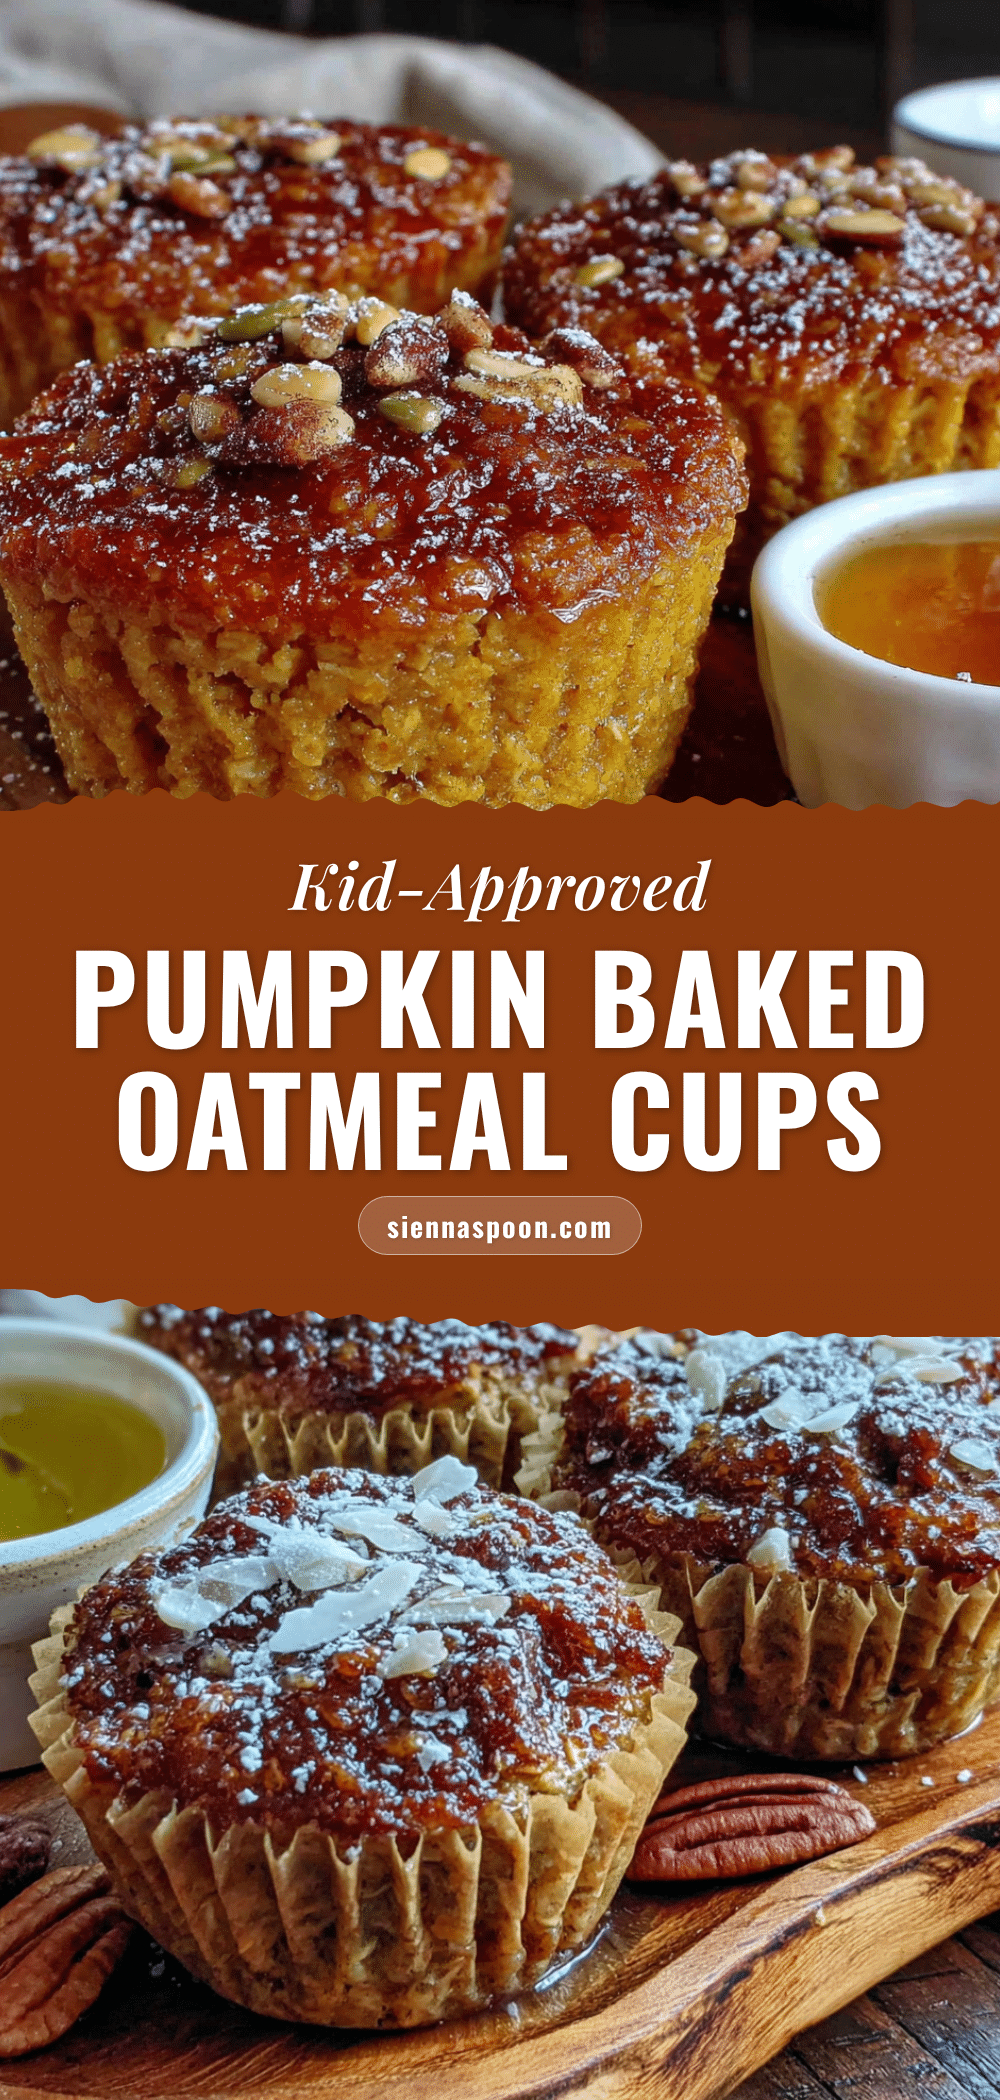
Kid-Approved Pumpkin Baked Oatmeal Cups

These pumpkin baked oatmeal cups are a budget-friendly, kid-approved breakfast that’s perfect for meal prep. Made with simple pantry staples, they’re soft, not too sweet, and reheat beautifully all week long.
- Prep Time: 10 minutes
- Cook Time: 20 minutes
- Total Time: 30 minutes
- Yield: 12 servings 1x
- Category: Breakfast
- Cuisine: American
Ingredients
- 2 cups rolled oats
- 1 teaspoon baking powder
- 1 ½ teaspoons pumpkin pie spice
- ½ teaspoon cinnamon
- ¼ teaspoon salt
- 1 cup canned pumpkin puree
- 2 large eggs
- ¼ cup maple syrup
- 1 teaspoon vanilla extract
- 1 cup milk
- ¼ cup melted coconut oil or unsalted butter
- Optional: ⅓ cup mini chocolate chips or chopped nuts
Instructions
- Preheat your oven to 375°F (190°C). Grease your muffin tin well with butter or cooking spray, or line it with muffin liners.
- In a large bowl, whisk together the dry ingredients: rolled oats, baking powder, pumpkin pie spice, cinnamon, and salt.
- In a separate medium bowl, combine the wet ingredients: pumpkin puree, eggs, maple syrup, vanilla extract, milk, and melted coconut oil or butter. Whisk until smooth.
- Pour the wet ingredients into the dry ingredients. Stir with a rubber spatula until just combined. If adding chocolate chips or nuts, fold them in now.
- Let the batter rest for 5 minutes.
- Scoop the batter evenly into the prepared muffin cups, filling each almost to the top.
- Bake for 18-22 minutes, or until the tops are set and golden brown around the edges. A toothpick inserted into the center should come out mostly clean.
- Let the oatmeal cups cool in the pan for 5 minutes, then transfer them to a wire rack to cool completely.
Notes
Let the batter rest for 5 minutes before baking to help the cups hold their shape. Use room temperature eggs if possible. Check pumpkin puree for excess water and spoon off if needed. Bake until just set to avoid drying out. Double the batch for freezing.
Nutrition
- Serving Size: 1 oatmeal cup
- Calories: 165
- Sugar: 8
- Sodium: 120
- Fat: 6
- Saturated Fat: 3
- Carbohydrates: 24
- Fiber: 4
- Protein: 5
Keywords: pumpkin baked oatmeal cups, kid-approved breakfast, meal prep breakfast, budget-friendly breakfast, pumpkin oatmeal cups, easy breakfast recipe


