Love this? Save it for later!
Share the inspiration with your friends
Jen wasn’t trying to impress anyone. I’d stopped by to drop off a casserole dish she’d loaned me, and the smell hit me before I even got through the screen door. It wasn’t the usual Sunday roast or the faint scent of cleaning products. It was butter—no, browned butter—mixed with something sweet and warm, like a bakery had somehow materialized in her tiny kitchen. I stood there for a second, holding that dish, just breathing it in.
She waved me in, apologizing for the mess. There were measuring cups everywhere, a dusting of flour on her jeans, and a pan of what looked like muffins cooling on the stove. “Oh, those,” she said when I asked, practically shrugging. “Just something the kids helped me throw together this morning.” Just something. Let me tell you, there was nothing “just” about them. They were golden on top, with little crinkly, sugary tops that looked like they belonged in a fancy pastry case. She handed me one, still warm, and honestly, I think I made a sound I’m not proud of.
That first bite was a revelation. It had the dense, tender crumb of a perfect muffin, but the top was all cinnamon-sugar crunch, like a donut that decided to get its life together. And that smell? The browned butter gave it this nutty, almost toffee-like depth that regular muffins just don’t have. I asked for the recipe, and she scribbled it on a scrap of envelope. It was a mess, with crossed-out words and “add a splash more cider” written in the margin. You know that feeling when you taste something and immediately know it’s going to become a problem? Because you’re going to want to make it all the time? That was this muffin.
I’ve tweaked it a bit over the years—added a little more spice, figured out the trick to getting that donut-like top without actually frying anything—but the heart of it is still Jen’s casual, no-big-deal recipe. It’s the kind of thing you make on a crisp Saturday morning when you want the house to smell like fall, but you don’t want to spend all day in the kitchen. It’s the reason I keep making it, and the reason my kids now ask for “those apple muffin things” every single weekend.
Why You’ll Love This Recipe
These aren’t just another apple muffin. I’ve tested a lot of muffin recipes over the years, and this one is different. It’s the perfect mashup of a classic, bakery-style muffin and a warm, cinnamon-sugar donut, but you get all that goodness without the hassle of deep frying. It’s a win for everyone at the table.
- Budget-Friendly Ingredients: You probably have most of this in your pantry right now. No fancy extracts or expensive specialty flours. Just real, simple stuff that won’t wreck your grocery budget.
- Quick & Easy: From start to finish, you’re looking at about 35 minutes. That’s fast enough for a school morning but special enough for a lazy Sunday brunch.
- Kid-Approved & Family-Friendly: This is the kind of recipe that makes picky eaters happy. The donut-style topping is a total crowd-pleaser, and the apple flavor is mild and sweet, not tart or overpowering.
- Perfect for Fall Baking: The smell alone is worth it. Brown butter, apple cider, and cinnamon—it’s basically autumn in a muffin tin.
- Unbelievably Delicious: That browned butter is the secret weapon. It adds a rich, nutty flavor you just can’t get from regular melted butter. It makes the muffin taste way more complicated than it actually is.
What makes this recipe stand out from the dozens of other apple muffin recipes out there? It’s the texture. The combination of a thick, tangy apple cider reduction and browned butter creates an incredibly moist, tender crumb that stays fresh for days. And the cinnamon-sugar coating? That’s the donut part. You brush the warm muffins with melted butter and roll them in a spicy sugar mix. It creates a slightly crunchy, sweet crust that is absolutely irresistible. Honestly, it’s the kind of muffin that makes you close your eyes after the first bite. It’s comfort food reimagined—faster, easier, but with the same soul-soothing satisfaction. Perfect for impressing weekend guests without any stress.
What Ingredients You Will Need
This recipe uses simple, wholesome ingredients to deliver that big, bold fall flavor. Most of these are pantry staples, which makes this a great last-minute baking project.
- For the Muffins:
- 1 cup (240ml) apple cider: This is the star of the show. You’ll reduce it on the stove to concentrate the apple flavor. Don’t skip this step—it’s what makes the muffins taste so intensely appley. I prefer a fresh, unfiltered cider for the best taste.
- ½ cup (1 stick / 113g) unsalted butter: You’ll brown this butter for that signature nutty flavor. It’s a game-changer. I use Land O’Lakes or Kerrygold for baking.
- ⅓ cup (67g) granulated sugar: For sweetness and a tender crumb.
- ⅓ cup (67g) packed light brown sugar: Adds moisture and a hint of molasses flavor that pairs beautifully with the apple and browned butter.
- 1 large egg: Room temperature is best for a smooth batter.
- ½ cup (120ml) buttermilk: The acidity in buttermilk makes the muffins incredibly tender. If you don’t have buttermilk, you can make a quick substitute by adding 1 tablespoon of lemon juice or white vinegar to ½ cup of regular milk and letting it sit for 5 minutes.
- 1 teaspoon vanilla extract: Pure vanilla extract adds warmth and depth.
- 1 ½ cups (188g) all-purpose flour: Spoon and level your flour for the most accurate measurement. Too much flour will make the muffins dry.
- 1 ½ teaspoons baking powder: For lift and a light texture.
- ½ teaspoon baking soda: Helps the muffins brown and rise.
- ½ teaspoon salt: Balances the sweetness and enhances all the flavors.
- 1 teaspoon ground cinnamon: The classic fall spice.
- ½ teaspoon ground nutmeg: Freshly grated is amazing, but pre-ground works perfectly.
- ⅛ teaspoon ground cloves: Just a pinch for warmth.
- For the Donut Topping:
- ¼ cup (½ stick / 57g) unsalted butter: Melted, for brushing the warm muffins.
- ⅓ cup (67g) granulated sugar: The base of the coating.
- 1 tablespoon ground cinnamon: For that signature donut shop flavor.
- Pinch of salt: To cut the sweetness.
Ingredient Selection Tip: When it comes to the apple cider, I’ve found that the cloudy, unfiltered kind gives the best flavor. It’s less processed and tastes more like fresh apples. For the buttermilk, full-fat is my go-to for the richest muffins, but low-fat will work just fine. If you need a dairy-free option, you can use a plant-based milk with a splash of apple cider vinegar to mimic buttermilk.
Equipment Needed
You don’t need a ton of fancy equipment for these muffins, which is part of their charm. Here’s what you’ll need to have on hand:
- Standard 12-cup muffin tin: I recommend a non-stick pan for easy release. If yours is prone to sticking, use paper liners.
- Piping bags or a zip-top bag: This is my secret for getting that bakery-style domed top. You’ll pipe the batter into the muffin cups instead of scooping it. It makes a huge difference!
- Medium saucepan: For reducing the apple cider and browning the butter.
- Large mixing bowls: One for the wet ingredients and one for the dry.
- Whisk: For combining the dry ingredients.
- Rubber spatula: For folding the batter together without overmixing.
- Pastry brush: For brushing the melted butter onto the warm muffins.
- Pie plate or shallow bowl: For the cinnamon-sugar coating.
- Cooling rack: Essential for letting the muffins cool evenly before coating.
Budget-Friendly Tip: If you don’t have a piping bag, don’t worry! Just snip the corner off a sturdy zip-top bag. It works like a charm and is way easier to clean up.
Preparation Method
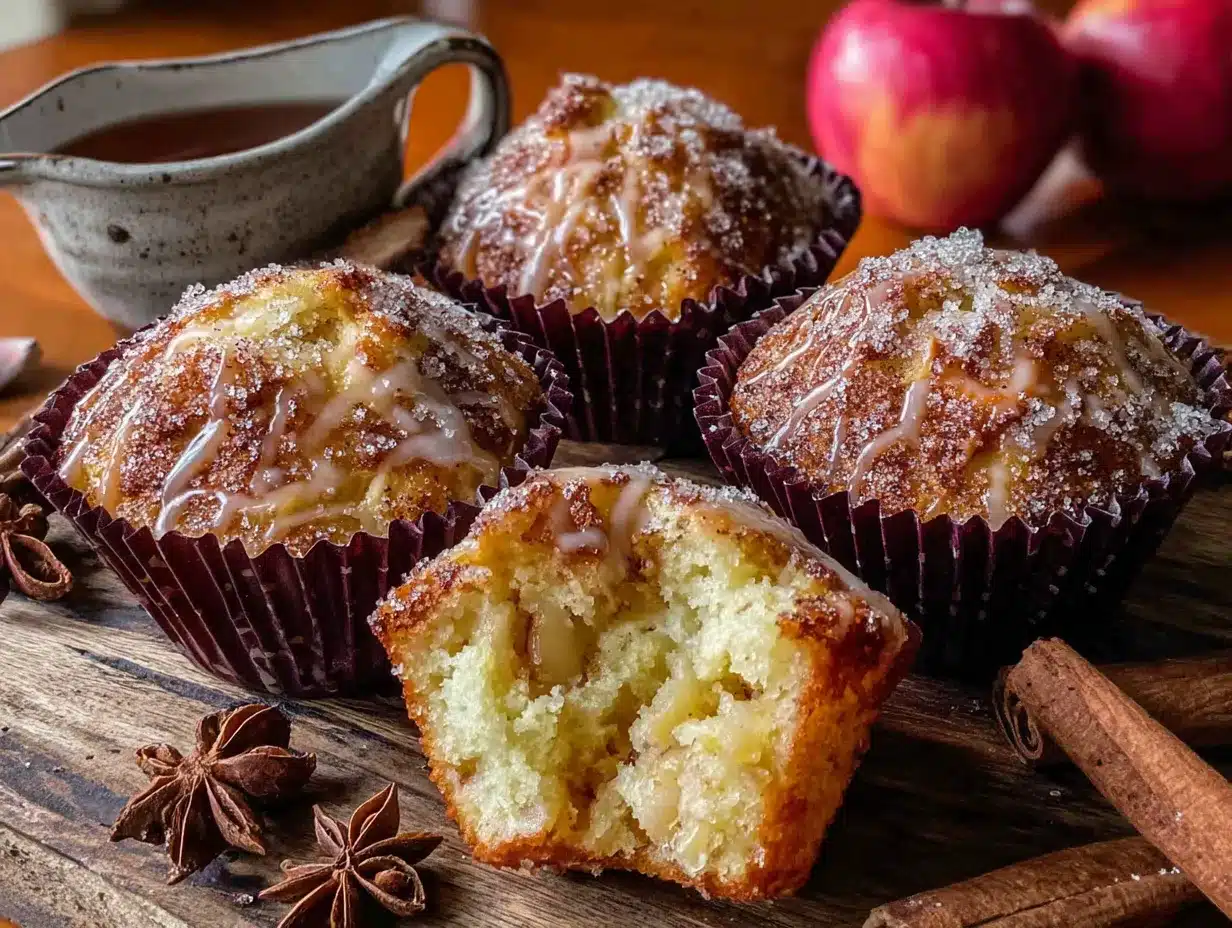
Let’s get baking! This recipe comes together in a few simple stages. Take your time with the brown butter—it’s the heart of the flavor.
- Reduce the Apple Cider: Pour the 1 cup of apple cider into your medium saucepan. Bring it to a boil over medium-high heat, then reduce the heat to a steady simmer. Let it bubble away for about 12-15 minutes, or until it has reduced to about ¼ cup. It should look syrupy and smell intensely of apples. Keep an eye on it so it doesn’t burn. Pour it into a small bowl and let it cool while you brown the butter.
- Brown the Butter: In the same saucepan (no need to wash it!), add the ½ cup of butter. Melt it over medium heat, swirling the pan occasionally. It will start to crackle and foam. Keep swirling. After a few minutes, the foam will subside, and you’ll see little brown specks forming at the bottom of the pan. The butter will smell nutty and toasty. This is your cue! Immediately remove the pan from the heat and pour the browned butter into a heat-safe bowl to stop it from cooking further. Let it cool for a few minutes.
- Preheat and Prep: Preheat your oven to 350°F (175°C). Generously grease your 12-cup muffin tin with butter or non-stick spray. If you’re using paper liners, give them a light spray too—it helps the muffin tops release cleanly.
- Mix the Wet Ingredients: In a large bowl, whisk together the cooled browned butter, ⅓ cup granulated sugar, and ⅓ cup packed brown sugar until well combined. It will look a little grainy. Whisk in the 1 large egg, the ½ cup buttermilk, the 1 teaspoon vanilla extract, and the cooled, reduced apple cider. Mix until smooth.
- Combine the Dry Ingredients: In a separate medium bowl, whisk together the 1 ½ cups all-purpose flour, 1 ½ teaspoons baking powder, ½ teaspoon baking soda, ½ teaspoon salt, 1 teaspoon cinnamon, ½ teaspoon nutmeg, and ⅛ teaspoon cloves.
- Make the Batter: Pour the dry ingredients into the wet ingredients. Use your rubber spatula to fold everything together gently. Stir just until you see the last streaks of flour disappear. Do not overmix! Overmixing will make the muffins tough. The batter will be thick and a little fluffy.
- Fill the Muffin Tin: This is the trick for tall, bakery-style tops. Transfer the batter to your piping bag or zip-top bag and snip off the tip. Pipe the batter into each muffin cup, filling them all the way to the very top. Don’t be shy—a full cup is what gives you that domed muffin top.
- Bake: Bake for 15-18 minutes, or until the tops are golden brown and a toothpick inserted into the center of a muffin comes out clean or with a few moist crumbs. My oven runs a little hot, so I start checking at the 15-minute mark.
- Cool and Coat: Let the muffins cool in the pan for exactly 5 minutes. This is important—they need to be warm but not too hot to handle. While they cool, melt the remaining ¼ cup of butter in a small bowl. In a separate shallow bowl, whisk together the ⅓ cup granulated sugar, 1 tablespoon cinnamon, and a pinch of salt.
- The Donut Treatment: After 5 minutes, transfer the warm muffins to a cooling rack. Working one at a time, brush the top and sides of each warm muffin with the melted butter. Immediately roll it in the cinnamon-sugar mixture, making sure to coat it completely. Place it back on the rack to set.
Cooking Tips & Techniques
I’ve made these muffins a lot of times, and I’ve definitely learned a few things the hard way. Here are my best tips to get it right every time.
- Don’t Walk Away from the Brown Butter: I know it sounds dramatic, but seriously, don’t. It can go from perfectly browned to burnt in about 30 seconds. The moment you see those brown specks and smell that nutty aroma, pull it off the heat. I once got distracted by a text message and had to start over. It’s a heartbreaking smell.
- The Piping Bag is a Game-Changer: I used to use a cookie scoop for these, and they were always a little flat. Piping the batter fills the cup completely and evenly, which gives you that beautiful domed top. It also creates a slightly denser, more donut-like texture because you’re not deflating the batter by scooping it.
- Don’t Overmix the Batter: This is the number one rule of muffin making. Mix until the flour just disappears. A few lumps are totally fine. Overmixing develops the gluten and leads to tough, dense muffins. We want them tender and soft.
- Use a Kitchen Scale: For the most consistent results, especially with the flour, I highly recommend using a kitchen scale. 1 ½ cups of flour can vary wildly depending on how you scoop it. 188 grams is always 188 grams.
- Check for Doneness Early: Every oven is different. Start checking your muffins at 15 minutes. A toothpick inserted into the center should come out clean. If the tops are getting too dark but the centers aren’t done, tent the pan loosely with aluminum foil for the last few minutes.
Variations & Adaptations
This recipe is pretty perfect as is, but it’s also a great base for experimenting. Here are a few ways to switch it up.
- Spiced-Up Cider: For a more complex flavor, simmer the apple cider with a cinnamon stick, a star anise pod, and a few slices of fresh ginger before reducing it. Strain it before using it in the batter. It adds a lovely, warm spice note.
- Apple Cider Donut Muffin Tops: If you have a muffin top pan, you can make these as “donut tops.” Just pipe the batter into the wells, filling them to the top, and bake for about 10-12 minutes. They’ll be thinner and have a higher coating-to-muffin ratio—which is never a bad thing.
- Maple Glaze Version: Instead of the cinnamon-sugar coating, make a simple maple glaze. Whisk together 1 cup of powdered sugar, 2 tablespoons of maple syrup, and 1-2 tablespoons of milk until smooth. Drizzle it over the cooled muffins. It’s a little more decadent and perfect for a special occasion.
- Add-In Options: Fold in ½ cup of finely chopped pecans or walnuts with the dry ingredients for a little crunch. You can also add ½ cup of fresh or frozen (don’t thaw) blueberries or chopped fresh apple for extra fruit.
- Dairy-Free Adaptation: Use a high-quality vegan butter stick for the browned butter and the topping. Use a dairy-free milk (like oat or almond) mixed with 1 tablespoon of apple cider vinegar as a buttermilk substitute. The texture will be slightly different, but they’ll still be delicious.
Serving & Storage Suggestions
These muffins are best served the day they’re made, especially while they’re still slightly warm from the coating. The cinnamon-sugar topping is perfectly crunchy at this stage.
- Serving: They’re fantastic on their own, but a hot cup of coffee or a cold glass of milk is the perfect companion. For a fun brunch, serve them alongside a frittata or scrambled eggs. The sweet and savory combo is always a hit.
- Storage: Store any leftover muffins in an airtight container at room temperature for up to 2-3 days. The coating will soften over time, but they’ll still taste amazing. I like to place a paper towel at the bottom of the container to absorb any excess moisture.
- Freezing: These muffins freeze beautifully! Let them cool completely, then place them in a single layer in a freezer-safe bag or container. They’ll keep for up to 3 months. To thaw, just leave them on the counter for an hour or pop them in the microwave for 15-20 seconds.
- Reheating: The best way to revive a day-old muffin is to pop it in a 300°F (150°C) oven or toaster oven for 5-7 minutes. It will crisp up the outside and warm the inside perfectly. You can also use the microwave, but the topping will be softer.
Nutritional Information & Benefits
While these are definitely a treat, they’re made with real, whole ingredients. Here’s a rough estimate of the nutritional info per muffin (based on 12 muffins).
| Nutrient | Amount per Muffin |
|---|---|
| Calories | ~280 |
| Fat | 14g |
| Saturated Fat | 8g |
| Carbohydrates | 37g |
| Sugar | 23g |
| Protein | 3g |
| Fiber | 1g |
Health Benefits: The apple cider provides a dose of antioxidants and a little bit of Vitamin C. The browned butter, while rich, adds a depth of flavor that means you’re satisfied with just one muffin. Using buttermilk keeps the muffins tender without needing a ton of extra fat. If you’re watching your sugar, you could reduce the sugar in the topping by half, but honestly, the coating is what makes them taste like a donut!
Conclusion
These Kid-Approved Brown Butter Apple Cider Donut Muffins are more than just a recipe—they’re a feeling. They’re the smell of a perfect fall morning, the joy of a warm, sweet treat, and the satisfaction of making something truly special without a ton of effort. I love how they bring people together, whether it’s a quiet weekend at home or a bustling family brunch. The browned butter adds a touch of sophistication, but the cinnamon-sugar coating keeps them fun and kid-friendly.
I really hope you give these a try. Don’t be afraid to make them your own—play around with the spices, add some nuts, or try that maple glaze. The best recipes are the ones you tweak and make your own. When you do make them, I’d love to hear about it! Drop a comment below and let me know how they turned out, or share a photo on social media. Happy baking, friends! I promise, your kitchen is about to smell incredible.
Frequently Asked Questions
Can I use apple juice instead of apple cider?
You can, but the flavor will be much milder and sweeter. Apple cider is unfiltered and has a more complex, tangy apple taste. If you only have juice, the muffins will still be good, but they won’t have that same deep, autumnal flavor. You might want to add a pinch more cinnamon to compensate.
Why did my brown butter burn?
This happens to the best of us! Brown butter can go from perfect to burnt very quickly. The key is to keep a close eye on it, swirling the pan constantly. Once the foam subsides and you see brown specks forming, take it off the heat immediately. If it smells burnt, it’s best to start over. Burnt butter will make the muffins taste bitter.
Can I make these gluten-free?
Yes! I’ve had success using a 1:1 gluten-free baking flour blend, like the one from King Arthur Flour or Bob’s Red Mill. Make sure your blend contains xanthan gum. The texture will be slightly more delicate, but they’ll still be delicious. Don’t overmix the batter, and let them cool completely in the pan before handling.
My muffins didn’t get a dome on top. What happened?
The most common reason for flat muffin tops is that the muffin cups weren’t filled enough. You need to fill them all the way to the very top. Using a piping bag instead of a scoop also helps because it doesn’t deflate the batter. Also, make sure your baking powder and baking soda are fresh—old leavening agents won’t give you a good rise.
Can I skip the cinnamon-sugar coating?
You absolutely can! These muffins are delicious even without the coating. If you’re short on time or want a less sweet muffin, just skip the butter bath and the cinnamon sugar. They’ll be more like a classic, tender apple cider muffin. You could also dust them with a little powdered sugar for a simpler finish.
Pin This Recipe!
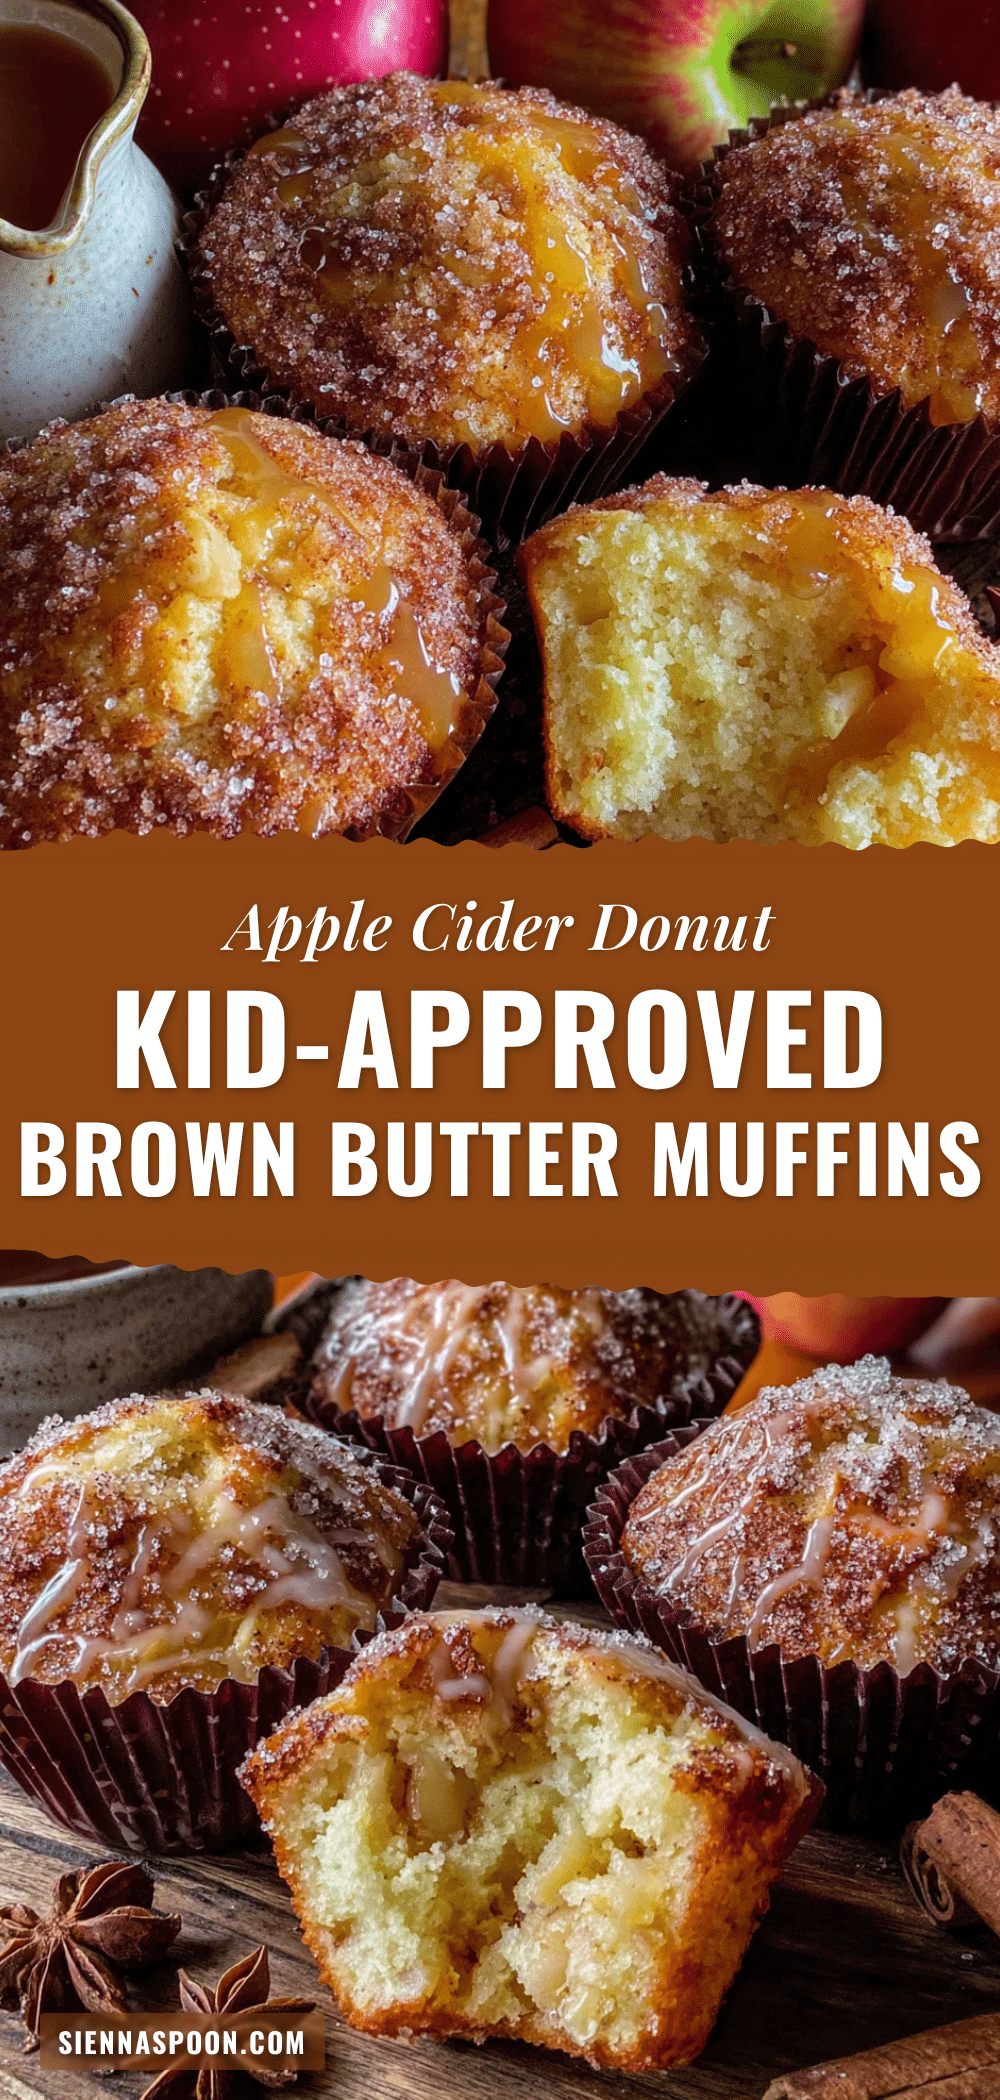
Kid-Approved Brown Butter Apple Cider Donut Muffins (Easy Fall Recipe)

These aren’t just another apple muffin. They’re the perfect mashup of a classic, bakery-style muffin and a warm, cinnamon-sugar donut, but you get all that goodness without the hassle of deep frying. The browned butter adds a rich, nutty flavor that makes these muffins taste way more complicated than they actually are.
- Prep Time: 15 minutes
- Cook Time: 18 minutes
- Total Time: 35 minutes
- Yield: 12 servings 1x
- Category: Dessert
- Cuisine: American
Ingredients
- 1 cup (240ml) apple cider
- ½ cup (1 stick / 113g) unsalted butter
- ⅓ cup (67g) granulated sugar
- ⅓ cup (67g) packed light brown sugar
- 1 large egg
- ½ cup (120ml) buttermilk
- 1 teaspoon vanilla extract
- 1 ½ cups (188g) all-purpose flour
- 1 ½ teaspoons baking powder
- ½ teaspoon baking soda
- ½ teaspoon salt
- 1 teaspoon ground cinnamon
- ½ teaspoon ground nutmeg
- ⅛ teaspoon ground cloves
- ¼ cup (½ stick / 57g) unsalted butter (for topping)
- ⅓ cup (67g) granulated sugar (for topping)
- 1 tablespoon ground cinnamon (for topping)
- Pinch of salt (for topping)
Instructions
- Reduce the Apple Cider: Pour the 1 cup of apple cider into your medium saucepan. Bring it to a boil over medium-high heat, then reduce the heat to a steady simmer. Let it bubble away for about 12-15 minutes, or until it has reduced to about ¼ cup. It should look syrupy and smell intensely of apples. Keep an eye on it so it doesn’t burn. Pour it into a small bowl and let it cool while you brown the butter.
- Brown the Butter: In the same saucepan (no need to wash it!), add the ½ cup of butter. Melt it over medium heat, swirling the pan occasionally. It will start to crackle and foam. Keep swirling. After a few minutes, the foam will subside, and you’ll see little brown specks forming at the bottom of the pan. The butter will smell nutty and toasty. This is your cue! Immediately remove the pan from the heat and pour the browned butter into a heat-safe bowl to stop it from cooking further. Let it cool…
- Preheat and Prep: Preheat your oven to 350°F (175°C). Generously grease your 12-cup muffin tin with butter or non-stick spray. If you’re using paper liners, give them a light spray too—it helps the muffin tops release cleanly.
- Mix the Wet Ingredients: In a large bowl, whisk together the cooled browned butter, ⅓ cup granulated sugar, and ⅓ cup packed brown sugar until well combined. It will look a little grainy. Whisk in the 1 large egg, the ½ cup buttermilk, the 1 teaspoon vanilla extract, and the cooled, reduced apple cider. Mix until smooth.
- Combine the Dry Ingredients: In a separate medium bowl, whisk together the 1 ½ cups all-purpose flour, 1 ½ teaspoons baking powder, ½ teaspoon baking soda, ½ teaspoon salt, 1 teaspoon cinnamon, ½ teaspoon nutmeg, and ⅛ teaspoon cloves.
- Make the Batter: Pour the dry ingredients into the wet ingredients. Use your rubber spatula to fold everything together gently. Stir just until you see the last streaks of flour disappear. Do not overmix! Overmixing will make the muffins tough. The batter will be thick and a little fluffy.
- Fill the Muffin Tin: This is the trick for tall, bakery-style tops. Transfer the batter to your piping bag or zip-top bag and snip off the tip. Pipe the batter into each muffin cup, filling them all the way to the very top. Don’t be shy—a full cup is what gives you that domed muffin top.
- Bake: Bake for 15-18 minutes, or until the tops are golden brown and a toothpick inserted into the center of a muffin comes out clean or with a few moist crumbs. My oven runs a little hot, so I start checking at the 15-minute mark.
- Cool and Coat: Let the muffins cool in the pan for exactly 5 minutes. This is important—they need to be warm but not too hot to handle. While they cool, melt the remaining ¼ cup of butter in a small bowl. In a separate shallow bowl, whisk together the ⅓ cup granulated sugar, 1 tablespoon cinnamon, and a pinch of salt.
- The Donut Treatment: After 5 minutes, transfer the warm muffins to a cooling rack. Working one at a time, brush the top and sides of each warm muffin with the melted butter. Immediately roll it in the cinnamon-sugar mixture, making sure to coat it completely. Place it back on the rack to set.
Notes
Don’t walk away from the brown butter; it can go from perfectly browned to burnt in about 30 seconds. The piping bag is a game-changer for getting tall, bakery-style tops. Don’t overmix the batter; mix until the flour just disappears. Use a kitchen scale for the most consistent results. Start checking for doneness at 15 minutes.
Nutrition
- Serving Size: 1 muffin
- Calories: 280
- Sugar: 23
- Fat: 14
- Saturated Fat: 8
- Carbohydrates: 37
- Fiber: 1
- Protein: 3
Keywords: apple cider muffins, brown butter muffins, donut muffins, fall baking, kid-friendly muffins, easy muffin recipe