Love this? Save it for later!
Share the inspiration with your friends
There used to be a tiny cheese shop tucked between a dry cleaner and a used bookstore on Main Street—the kind of place you walked into for one thing and left with three because the owner, a woman named Gretchen who wore the same faded apron every day, insisted you try her latest creation. She made this pumpkin-shaped cheese ball every October, displayed it on a wooden board with crackers fanned out like autumn leaves, and I swear the thing had a gravitational pull. When the shop closed two years ago—Gretchen retired to Vermont, lucky woman—I went through a genuine period of mourning for that cheese ball. After seven attempts—including one that looked less like a pumpkin and more like a lumpy orange potato—I finally cracked it. And honestly, this version might even be better than Gretchen’s. Not because I’m a cheese wizard or anything, but because I figured out a trick she never shared: a pinch of smoked paprika in the coating that makes people stop mid-conversation and ask, “What is in this?”
I remember the first time I made it for my book club last November. I set it on the coffee table, and for a solid thirty seconds, nobody touched it. They just stared at this little orange cheese pumpkin sitting there like it was a centerpiece. Then Sarah—she’s the one who always brings store-bought hummus—finally broke off a piece of cracker and dipped it. You know that feeling when you’ve been trying to recreate something for months, and the first bite actually matches the memory? That was it. She didn’t even say anything at first, just closed her eyes and made this little noise that told me everything I needed to know.
What gets me about this recipe is how simple it is. I mean, it’s basically cream cheese, cheddar, and a few seasonings shaped into a ball and rolled in paprika. But the way it looks on a table—sitting there like a tiny, edible jack-o-lantern—it just makes people happy. There’s something about food that looks like something else that breaks the ice at parties. Maybe you’ve been to those gatherings where everyone stands around holding a drink and pretending to be interested in small talk. This cheese ball changes that. It gives people a reason to gather around, to point, to laugh, to say, “Wait, that’s cheese?” And then they eat it, and the conversation actually gets good.
I’ve made this for Halloween parties, Thanksgiving appetizer spreads, and even a random Tuesday in October when I just needed a little seasonal joy. It never lasts more than twenty minutes on the table. Not once. And the best part? It takes maybe fifteen minutes of actual work. The rest is just chilling time—which is code for “time you spend doing literally anything else while your cheese ball gets its act together.” So if you’ve been looking for an appetizer that looks impressive, tastes incredible, and doesn’t require you to actually cook anything, this is it. Let me show you how to make the best easy pumpkin-shaped cheese ball you’ll ever serve.
Why You’ll Love This Recipe
Listen, I’ve tested a lot of appetizer recipes over the years. Some look great but taste like nothing. Others taste amazing but look like a blob on a plate. This pumpkin-shaped cheese ball is the rare unicorn that nails both. It’s the kind of recipe that makes people think you spent hours in the kitchen when really, you just stirred some cheese together and got creative with paprika. Let me break down exactly why this one deserves a spot in your fall recipe rotation.
- Quick & Easy: From start to finish, you’re looking at about 15 minutes of active prep time. The rest is just letting it chill in the fridge. You can literally make this the morning of your party and forget about it until guests arrive.
- Simple Ingredients: Cream cheese, cheddar, a few pantry seasonings, and some paprika for the color. No weird specialty items, no trips to three different stores. You probably have most of this stuff already.
- Perfect for Fall Gatherings: Halloween party? Thanksgiving appetizer? Random October potluck? This thing belongs on every fall table. It’s festive without being cheesy—well, okay, it is cheesy, but you know what I mean.
- Crowd-Pleaser: I’ve served this to kids who swear they hate cheese (they don’t, they just haven’t tried this one) and adults who consider themselves cheese snobs. Everyone goes back for seconds. And thirds.
- Unbelievably Delicious: The combination of creamy, tangy cream cheese with sharp cheddar and a hint of garlic and onion—it’s simple but perfectly balanced. The smoked paprika coating adds this subtle warmth that makes people keep eating without quite knowing why.
What makes this recipe different from every other cheese ball recipe you’ll find online? It’s the texture. I use a trick I picked up from a catering chef friend: I let the cream cheese soften completely before mixing, then I refrigerate the mixture briefly before shaping. This gives you a cheese ball that’s firm enough to hold its pumpkin shape but still creamy and spreadable at room temperature. No dry, crumbly mess here. No greasy separation either. Just smooth, rich, perfectly seasoned cheese that spreads like a dream on a sturdy cracker.
This isn’t just another appetizer recipe. It’s the kind that makes people stop and take a picture before they eat it. It’s the kind that gets requested every year at Friendsgiving. It’s the kind that makes you look like a kitchen genius when really, you just followed a few simple steps. And honestly? That’s my favorite kind of recipe to share.
What Ingredients You Will Need
This recipe uses simple, everyday ingredients to create something that looks and tastes far more complicated than it actually is. The magic happens through the combination of textures and flavors—creamy, tangy, sharp, and just a little smoky. Here’s everything you’ll need, along with a few tips I’ve picked up along the way.
For the Cheese Ball Base
- 16 ounces cream cheese, softened to room temperature (I prefer Philadelphia for its consistent creaminess, but any full-fat block cream cheese works well. Avoid the spreadable tub version—it has too much air and water mixed in.)
- 2 cups sharp cheddar cheese, finely shredded (Buy a block and shred it yourself if you can. Pre-shredded cheese has anti-caking agents that affect texture. Extra sharp cheddar gives the best flavor punch.)
- 1/4 cup grated Parmesan cheese (The good stuff in the refrigerated section, not the green can. It adds a salty, nutty depth that balances the cream cheese beautifully.)
- 1 tablespoon ranch seasoning mix (Store-bought is fine, but I’ve also made this with homemade ranch mix when I have it on hand. The dill and chive notes are what make this cheese ball so addictive.)
- 1/2 teaspoon garlic powder (Not garlic salt—we’re controlling the salt ourselves. Garlic powder gives a mellow, rounded flavor that fresh garlic would overpower.)
- 1/4 teaspoon onion powder (A little goes a long way. It adds savory depth without making anyone chew on onion bits.)
- Pinch of cayenne pepper, optional (This is my secret weapon. It doesn’t make the cheese ball spicy—it just wakes up all the other flavors. If you’re serving kids or spice-averse guests, leave it out.)
For the Pumpkin Coating and Decoration
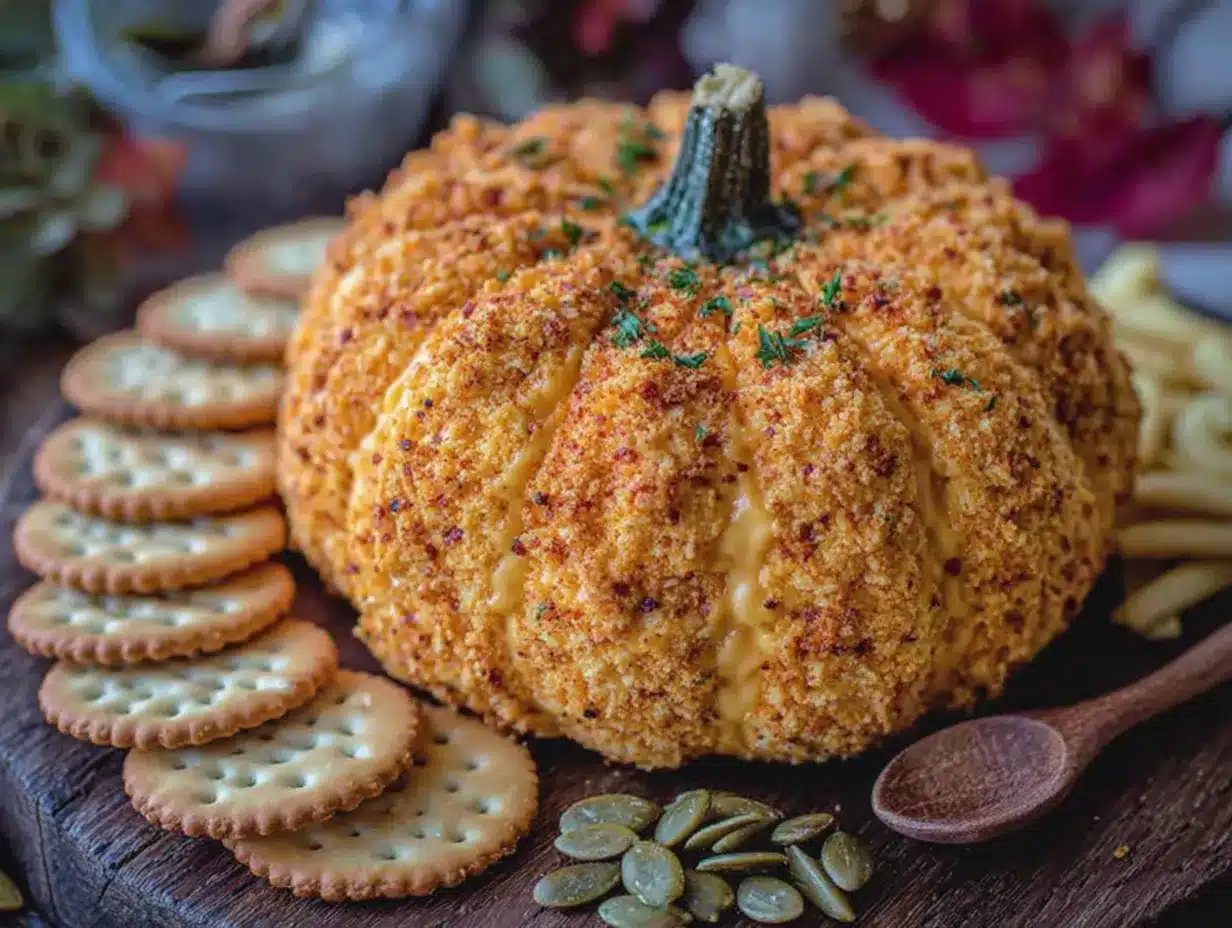
- 1/4 cup paprika (Regular paprika, not smoked—though I’ve used smoked in a pinch and it was delicious. The color is what matters here. Make sure your paprika is fresh; old paprika looks brown and sad.)
- 1 teaspoon smoked paprika (Optional but highly recommended. This is the trick that makes people ask what’s in the coating. It adds a subtle warmth that regular paprika doesn’t provide.)
- 1 pretzel stick or small cinnamon stick (For the pumpkin stem. A pretzel stick gives a salty contrast, while a cinnamon stick adds a hint of sweetness. Both work great.)
- Fresh parsley or chives, finely chopped (For the “vines” and leaves around the stem. It adds a pop of green that makes the pumpkin look more realistic.)
For Serving
- Assorted crackers (I recommend a mix of textures—buttery Ritz-style crackers, sturdy wheat crackers, and something with a little salt on top. The cheese ball is rich, so you want crackers that can hold up without breaking.)
- Fresh vegetables, optional (Celery sticks, bell pepper strips, and cucumber rounds all work beautifully. They add color and a fresh crunch that contrasts with the creamy cheese.)
One thing I learned the hard way: don’t skip the step of letting your cream cheese come to room temperature. I know, I know, you’re in a hurry. But cold cream cheese doesn’t blend smoothly, and you’ll end up with lumpy white streaks in your otherwise perfect orange cheese ball. Set it out on the counter about an hour before you start. Trust me on this one.
Equipment Needed
You don’t need a fancy kitchen to make this recipe. In fact, you probably already own everything required. But having the right tools makes the process smoother and the results more consistent. Here’s what you’ll need:
- Large mixing bowl (Any bowl big enough to hold all the ingredients and give you room to stir without flinging cheese everywhere. I use my grandmother’s old ceramic mixing bowl because it makes me feel connected to something, but a standard stainless steel bowl works just fine.)
- Hand mixer or stand mixer (You can absolutely mix this by hand with a wooden spoon—I’ve done it—but a mixer makes the texture much smoother and saves your arm. A hand mixer is perfect for this job.)
- Rubber spatula (For scraping down the sides of the bowl and getting every last bit of cheese mixture. The spatula is the unsung hero of this recipe.)
- Plastic wrap (For wrapping the cheese ball while it chills. Don’t skip this—it prevents the cheese from absorbing fridge odors and keeps the surface from drying out.)
- Small bowl or shallow dish (For mixing and holding the paprika coating. Something wide enough to roll the cheese ball in without making a mess.)
- Serving platter or board (A wooden board or ceramic platter works beautifully. Something with a little contrast to show off the orange color.)
- Parchment paper or wax paper (Optional, but helpful for shaping the cheese ball without getting cheese all over your hands. You can also use disposable gloves if you have them.)
If you don’t have a hand mixer, no worries. Just make sure your cream cheese is really, really soft, and use a sturdy fork to mash and mix everything together. It takes a little more elbow grease, but the results are the same. I’ve made this recipe in a college dorm kitchen with nothing but a fork and a plastic bowl, and it still turned out great.
Preparation Method
Alright, let’s get to the fun part. This recipe comes together in a few simple stages, and I’ll walk you through each one with the kind of detail I wish someone had given me the first time I made it. Take your time with the first step—it makes everything else easier.
- Soften the cream cheese. Take your cream cheese out of the refrigerator about 60 minutes before you start. Unwrap the blocks and place them on a plate. They should be soft enough that you can press a finger into them easily, but not so warm that they’re melting. If you forgot to plan ahead (it happens to the best of us), you can microwave the cream cheese in 10-second bursts on low power, turning the block over between each burst. But honestly, the counter method gives better results.
- Mix the cheese base. Place the softened cream cheese in a large mixing bowl. Beat it with a hand mixer on medium speed until it’s completely smooth and fluffy—about 2 minutes. Scrape down the sides of the bowl with a rubber spatula. Add the shredded cheddar, Parmesan, ranch seasoning, garlic powder, onion powder, and cayenne (if using). Beat on low speed until everything is just combined. Don’t overmix at this stage, or the cheddar will break down too much and make the mixture greasy. You want to see small flecks of cheddar throughout.
- Taste and adjust. Here’s the step nobody tells you about. Take a tiny bit of the mixture and taste it. Is it salty enough? Does it need more garlic? More ranch seasoning? Adjust now, before it chills. I’ve learned that the flavors mellow slightly as the cheese ball chills, so I usually go a little heavier on the seasonings than I think I need. Trust your palate.
- Chill the mixture. Scoop the cheese mixture onto a large piece of plastic wrap. Form it into a rough ball shape, then wrap it tightly. Refrigerate for at least 2 hours, or up to overnight. This step is crucial—the mixture needs to firm up enough that you can shape it into a pumpkin without it collapsing. I usually make the mixture the night before and shape it the next morning. The flavors actually get better as they meld together overnight.
- Shape the pumpkin. Once the mixture is firm, unwrap it and place it on a clean piece of parchment paper or wax paper. Use your hands to form it into a ball, then gently flatten the top slightly and taper the bottom a little—you’re going for a pumpkin shape, not a perfect sphere. Don’t stress about making it perfect. Real pumpkins are lumpy and asymmetrical anyway. If the mixture starts to get too soft and sticky, pop it back in the fridge for 15 minutes.
- Create the ridges (optional but worth it). Here’s the trick that makes it look like a real pumpkin: use the back of a butter knife or a wooden skewer to gently press vertical lines into the cheese ball, starting from the top and working down to the bottom. Space them about an inch apart. You’re not cutting into the cheese—just creating gentle indentations that mimic pumpkin ridges. This makes a huge difference in the final presentation.
- Apply the coating. In a small bowl, mix the regular paprika with the smoked paprika (if using). Spread the mixture on a plate or in a shallow dish. Carefully roll the shaped cheese ball in the paprika, using your hands to gently press the coating onto all surfaces. Don’t forget the top and the bottom. The coating should be thick enough that no white cheese shows through, but not so thick that it’s falling off in clumps. I usually use about 2 to 3 tablespoons of the paprika mixture and save the rest for another use.
- Add the stem and decorations. Gently press a pretzel stick or cinnamon stick into the top center of the cheese ball to create the stem. Arrange a few small parsley or chive pieces around the base of the stem to look like vines and leaves. If you want to get really fancy, you can add a small bay leaf or two for extra autumn vibes.
- Final chill. Place the finished cheese ball on a plate or small tray and refrigerate for at least 30 minutes before serving. This lets the coating set and the shape hold. You can make it up to 24 hours ahead and keep it covered in the fridge—just add the stem and decorations right before serving.
- Serve and watch it disappear. Transfer the cheese ball to your serving board or platter. Arrange crackers and vegetables around it. Let it sit at room temperature for about 15 minutes before serving—this softens it to the perfect spreading consistency. Then stand back and watch people’s faces light up when they realize it’s cheese.
Cooking Tips & Techniques
Over the years, I’ve made this cheese ball more times than I can count, and I’ve learned a few things the hard way. Here are my best tips for getting it right every single time, along with a few stories about my less-successful attempts so you can avoid the same mistakes.
Use full-fat cream cheese. I know, I know, we’re all trying to be healthy. But low-fat or non-fat cream cheese has a different texture and water content. It doesn’t firm up as well, and it can make your cheese ball greasy or grainy. Save the low-fat stuff for spreading on bagels and use the real deal here. Your guests will thank you.
Shred your own cheddar. This is the tip I’m most stubborn about. Pre-shredded cheese is coated with cellulose (basically wood pulp) to prevent clumping, and that coating affects how the cheese melts and blends. When you shred your own cheddar from a block, it incorporates into the cream cheese much more smoothly. The texture difference is noticeable. I learned this lesson after making a cheese ball that had an oddly gritty texture—turns out, it was the pre-shredded cheese.
Don’t skip the chilling steps. I made this mistake exactly once. I was in a rush to get to a party, so I skipped the initial chill and tried to shape the cheese ball while the mixture was still soft. It was a disaster. The cheese ball flattened into a sad, misshapen blob, and the paprika coating soaked in and turned into a paste. Give the mixture time to firm up. Your patience will be rewarded with a perfect pumpkin shape.
Use a light touch with the paprika coating. The first time I made this, I went overboard with the paprika, rolling the cheese ball around until it was completely caked. It looked beautiful at first, but as it sat out at room temperature, the paprika started to absorb moisture from the cheese and turned into a dark, muddy mess. Now I use a lighter hand—just enough to coat the surface evenly without creating a thick layer. A little goes a long way.
Let it come to room temperature before serving. This is the most common mistake I see people make. They take the cheese ball straight from the fridge and put it on the table, and everyone struggles to spread this cold, hard block of cheese onto crackers. Let it sit out for 15 to 20 minutes before serving. The texture becomes creamy and spreadable, and the flavors open up. I usually take it out of the fridge when I start setting out the rest of the appetizers, so by the time people are ready to eat, it’s perfect.
Make it ahead for better flavor. This recipe actually improves with time. The flavors meld together as the cheese ball sits in the fridge, so making it a day ahead gives you a more complex, well-rounded taste. I often make two at a time—one for the party and one to keep in the fridge for snacking throughout the week. Not that it ever lasts that long.
Variations & Adaptations
One of the things I love about this recipe is how flexible it is. Once you have the basic technique down, you can customize it to fit almost any dietary need, flavor preference, or occasion. Here are some of my favorite variations, along with a few I’ve tried that didn’t work (so you don’t have to make the same mistakes).
Spicy Pumpkin Cheese Ball: If you like a little heat, add 1 to 2 tablespoons of finely chopped pickled jalapeños or a teaspoon of chipotle powder to the cheese mixture. The smoky heat pairs beautifully with the creamy base. I made this version for a football party last fall, and it was gone before the first quarter ended. Just be careful not to add too much liquid from the pickled jalapeños, or the mixture will be too soft to shape.
Herb and Garlic Cheese Ball: Skip the ranch seasoning and instead mix in 2 tablespoons of fresh chopped herbs (parsley, chives, dill, and a little thyme work wonderfully) along with 2 minced garlic cloves. This version is less “party appetizer” and more “elevated dinner party snack.” It pairs beautifully with a glass of white wine and some crusty bread.
Dairy-Free Version: I tested this for a friend who’s lactose intolerant, and it actually worked better than I expected. Use dairy-free cream cheese (I like the Miyoko’s brand for its creamy texture) and a dairy-free shredded cheddar. The flavor is slightly different—a little tangier, a little less rich—but the texture holds up well. Just make sure your dairy-free cream cheese is firm enough to shape. Some brands are softer than others.
Nutty Pumpkin Cheese Ball: For extra texture and flavor, mix 1/4 cup of finely chopped toasted pecans or walnuts into the cheese mixture before chilling. You can also press some chopped nuts into the outside of the cheese ball before applying the paprika coating. The crunch adds a lovely contrast to the creamy cheese. I tried this with almonds once, and the texture was too hard—pecans or walnuts are the way to go.
Sweet and Savory Version: This one might sound weird, but trust me. Add 2 tablespoons of honey or maple syrup to the cheese mixture, along with a pinch of cinnamon. The sweetness balances the tangy cream cheese and sharp cheddar in a way that’s surprisingly delicious. Serve it with apple slices and graham crackers for a fall-inspired snack board. I discovered this combination by accident when I was out of ranch seasoning and desperate—it turned out to be one of my favorite variations.
Serving & Storage Suggestions
How you serve and store this cheese ball makes a big difference in the overall experience. Here’s everything I’ve learned about getting the most out of this recipe, from presentation tips to storage tricks.
Serving Temperature: This cheese ball is at its absolute best when served slightly chilled but not cold. Take it out of the refrigerator about 15 to 20 minutes before you plan to serve it. At this temperature, the texture is creamy and spreadable without being soft or greasy. If you leave it out too long (more than 2 hours), the cheese ball will start to soften and lose its shape, so keep an eye on it during parties.
Presentation Ideas: I like to serve this cheese ball on a wooden board or a slate platter, surrounded by an assortment of crackers and fresh vegetables. For a fall-themed presentation, arrange the crackers in a pattern that mimics pumpkin vines, or scatter a few small decorative gourds and autumn leaves around the board. A small bowl of olives or pickled vegetables on the side adds a nice tangy contrast. If you’re serving this at a Halloween party, you can even add a small plastic spider or two for a spooky touch.
What to Serve With It: The classic pairing is buttery crackers, but this cheese ball is versatile enough to work with all kinds of accompaniments. Try it with apple slices, pear slices, or grapes for a sweet contrast. Celery sticks and bell pepper strips add a fresh crunch. Pretzel chips or bagel chips provide a salty, sturdy base. And if you’re feeling indulgent, serve it with warm, crusty bread or toasted baguette slices.
Storage Instructions: Leftover cheese ball (if you have any—it’s rare in my house) can be stored in the refrigerator for up to 5 days. Wrap it tightly in plastic wrap or store it in an airtight container to prevent it from absorbing other flavors. The paprika coating may darken slightly over time, but the flavor will still be good. I do not recommend freezing this cheese ball—the texture changes too much upon thawing, and it becomes grainy and watery.
Re-shaping After Storage: If you’ve stored the cheese ball and it’s lost its pumpkin shape, don’t worry. Let it sit at room temperature for about 10 minutes to soften slightly, then use your hands to re-shape it into a pumpkin. You may need to add a fresh dusting of paprika to cover any bare spots. I’ve done this many times, and it works like a charm.
Flavor Development: One thing I love about this recipe is that the flavors actually improve after a day or two in the fridge. The garlic and onion mellow out, the ranch seasoning blends more evenly, and everything comes together into a cohesive, well-rounded flavor. So don’t be afraid to make this ahead of time. In fact, I recommend it.
Nutritional Information & Benefits
Let’s be real—this is not a health food. It’s a cheese ball, and it’s meant to be enjoyed as a special treat. But that doesn’t mean it can’t fit into a balanced eating plan. Here’s a rough breakdown of what you’re looking at, along with a few notes on the nutritional benefits of the ingredients.
Estimated Nutritional Values (per serving, based on 16 servings):
- Calories: 180-200
- Total Fat: 16g
- Saturated Fat: 10g
- Cholesterol: 45mg
- Sodium: 320mg
- Total Carbohydrates: 3g
- Dietary Fiber: 0g
- Sugars: 1g
- Protein: 7g
Health Benefits of Key Ingredients: Cream cheese provides calcium and protein, though it’s higher in saturated fat than some other dairy options. Cheddar cheese is a good source of calcium, phosphorus, and vitamin A. The paprika in the coating contains capsaicin (in small amounts) and antioxidants like vitamin A and vitamin E. If you use fresh herbs for decoration, they add a tiny boost of vitamins and antioxidants as well.
Dietary Considerations: This recipe is naturally vegetarian and can be made gluten-free by serving it with gluten-free crackers or vegetables. It is not dairy-free, vegan, or low-fat in its standard form, but I’ve included variations above for dairy-free adaptations. The recipe contains dairy (cream cheese, cheddar, Parmesan) and may contain gluten depending on the crackers you serve with it.
My Personal Take: Look, I’m not here to tell you that a cheese ball is a superfood. It’s not. But I do believe that food should be enjoyed without guilt, especially when it brings people together. This recipe is about celebration, about gathering around a table, about sharing something delicious with the people you care about. And honestly? A little bit of cheese and crackers shared with good company is good for the soul, even if it’s not exactly a health food. Balance is everything.
Conclusion
This easy pumpkin-shaped cheese ball has become my go-to fall appetizer for a reason. It’s simple enough to throw together on a busy weekday, yet impressive enough to be the star of any party spread. The combination of creamy, tangy, and savory flavors, wrapped in a festive coating of paprika, is the kind of thing that makes people stop and ask for the recipe. And the best part? You can customize it a hundred different ways to suit your taste.
I love this recipe because it reminds me of that little cheese shop and Gretchen’s faded apron. It reminds me that sometimes the best recipes come from trying to recreate a memory. And it reminds me that food doesn’t have to be complicated to be special. A few simple ingredients, a little bit of patience, and a whole lot of love—that’s all you need.
I’d love to hear how your pumpkin cheese ball turns out. Did you add any fun variations? Did your guests love it as much as mine do? Drop a comment below and let me know. And if you share a photo on social media, tag me—I love seeing your creations. Here’s to good cheese, good company, and a fall season full of delicious moments.
Frequently Asked Questions
Can I make this cheese ball ahead of time?
Absolutely! In fact, I recommend it. You can prepare the cheese mixture and shape it into a pumpkin up to 24 hours in advance. Just keep it wrapped tightly in plastic wrap in the refrigerator, and add the paprika coating and stem decoration right before serving. The flavors actually get better as they meld together overnight.
Why did my cheese ball turn out too soft to shape?
This usually happens for one of two reasons: either the cream cheese wasn’t fully softened (which creates a lumpy texture) or the mixture wasn’t chilled long enough. Make sure your cream cheese is at room temperature before mixing, and give the mixture at least 2 hours in the fridge to firm up. If it’s still too soft after chilling, add another 30 minutes.
Can I use low-fat cream cheese?
I don’t recommend it. Low-fat cream cheese has a higher water content and doesn’t firm up as well, which makes it harder to shape into a pumpkin. It can also make the cheese ball greasy or grainy. Stick with full-fat cream cheese for the best texture and flavor.
How do I get the ridges to look like a real pumpkin?
After shaping the cheese ball into a pumpkin form, use the back of a butter knife or a wooden skewer to gently press vertical lines into the surface, starting from the top and working down. Space them about an inch apart. You’re not cutting into the cheese—just creating gentle indentations. This simple step makes a huge difference in the final presentation.
What if I don’t have ranch seasoning mix?
No problem! You can make your own by combining 1 tablespoon of dried dill, 1 tablespoon of dried chives, 1 teaspoon of garlic powder, 1 teaspoon of onion powder, and 1/2 teaspoon of salt. Or you can simply skip it and add extra garlic and onion powder along with some fresh or dried herbs. The cheese ball will still be delicious.
Pin This Recipe!
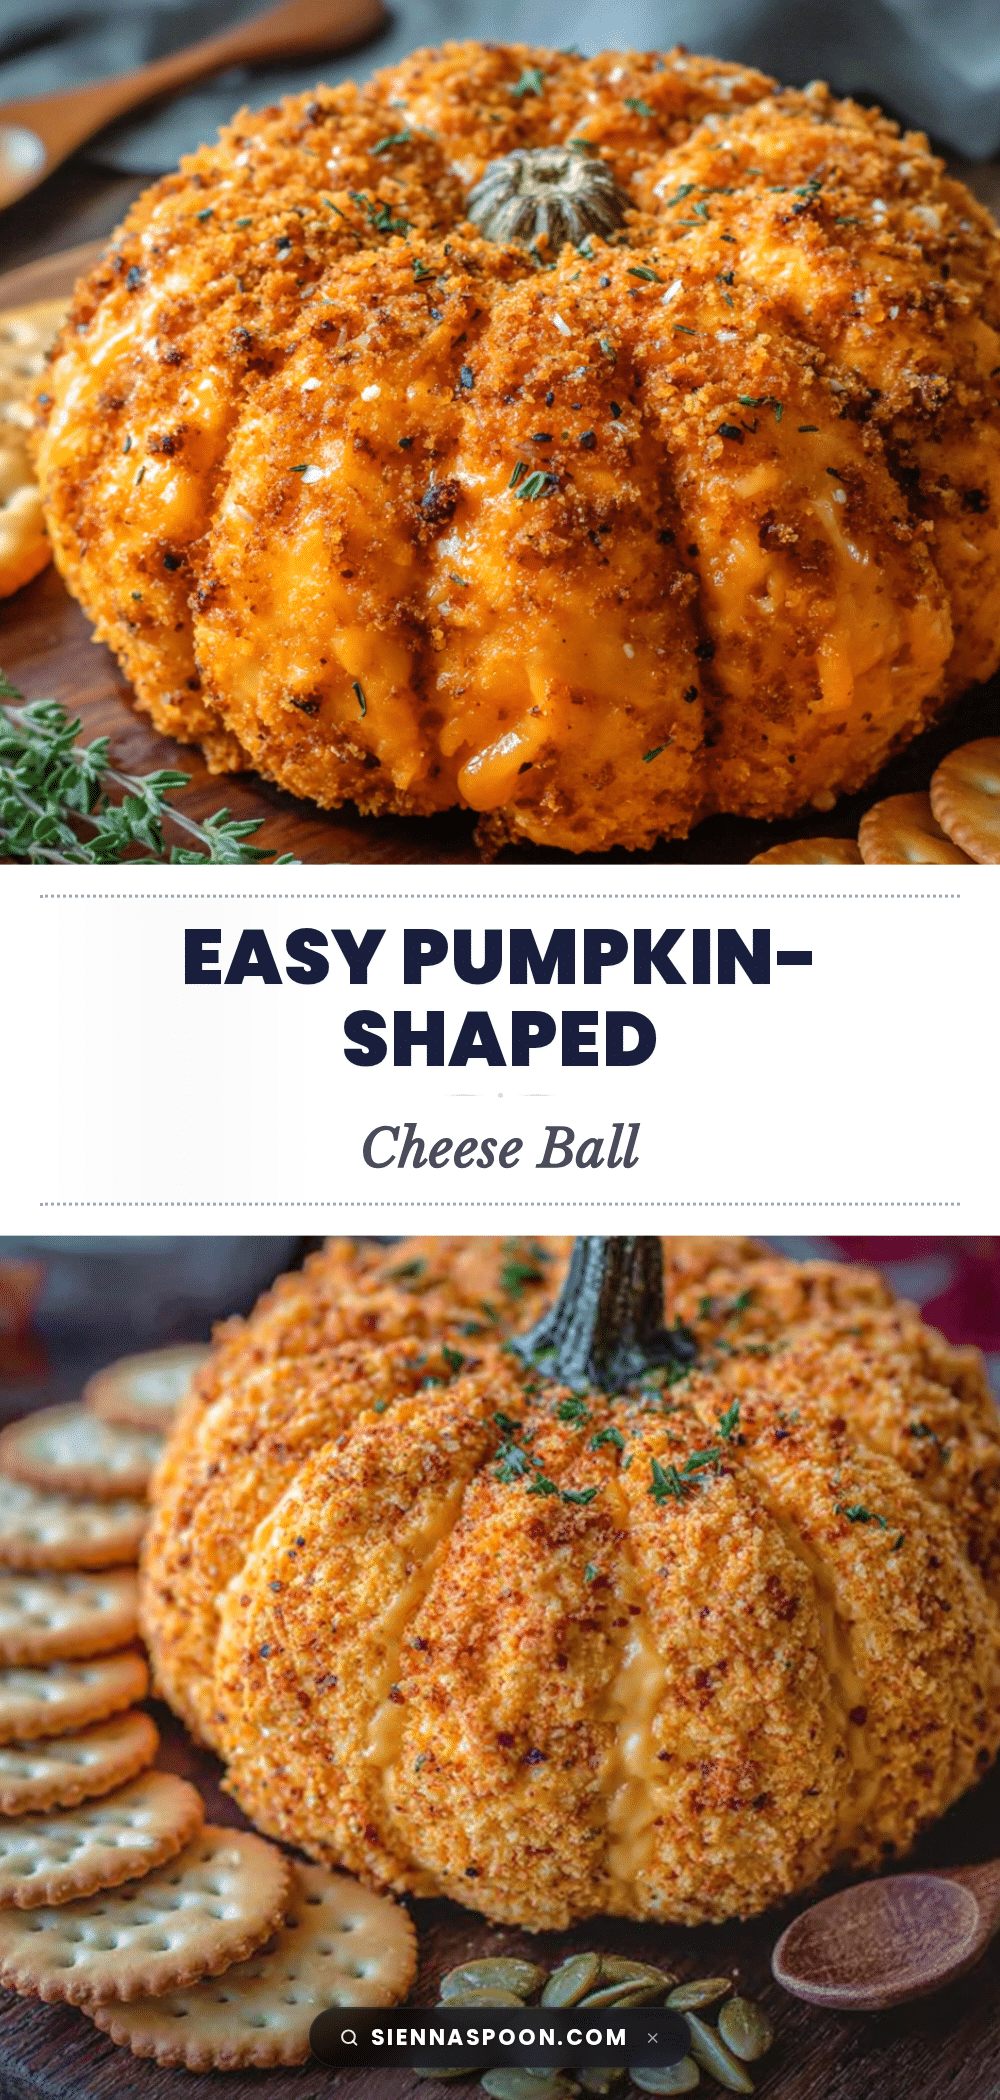
Easy Pumpkin-Shaped Cheese Ball: Best Appetizer Recipe

This easy pumpkin-shaped cheese ball is a festive fall appetizer that looks impressive and tastes incredible. Made with cream cheese, cheddar, and a few seasonings, it’s quick to prepare and perfect for Halloween, Thanksgiving, or any autumn gathering.
- Prep Time: 15 minutes
- Cook Time: 0 minutes
- Total Time: 2 hours 45 minutes (includes chilling)
- Yield: 16 servings 1x
- Category: Appetizer
- Cuisine: American
Ingredients
- 16 ounces cream cheese, softened to room temperature
- 2 cups sharp cheddar cheese, finely shredded
- 1/4 cup grated Parmesan cheese
- 1 tablespoon ranch seasoning mix
- 1/2 teaspoon garlic powder
- 1/4 teaspoon onion powder
- Pinch of cayenne pepper (optional)
- 1/4 cup paprika
- 1 teaspoon smoked paprika (optional)
- 1 pretzel stick or small cinnamon stick (for stem)
- Fresh parsley or chives, finely chopped (for decoration)
- Assorted crackers (for serving)
- Fresh vegetables (optional, for serving)
Instructions
- Soften the cream cheese: Take cream cheese out of refrigerator about 60 minutes before starting. Unwrap and place on a plate until soft enough to press a finger into easily.
- Mix the cheese base: In a large mixing bowl, beat softened cream cheese with a hand mixer on medium speed until smooth and fluffy (about 2 minutes). Scrape down sides. Add shredded cheddar, Parmesan, ranch seasoning, garlic powder, onion powder, and cayenne (if using). Beat on low until just combined.
- Taste and adjust: Taste the mixture and adjust seasonings if needed. Flavors mellow slightly as the cheese ball chills, so go a little heavier on seasonings if desired.
- Chill the mixture: Scoop mixture onto a large piece of plastic wrap. Form into a rough ball shape, wrap tightly, and refrigerate for at least 2 hours or up to overnight.
- Shape the pumpkin: Unwrap the firm mixture and place on parchment paper. Use hands to form into a ball, then gently flatten the top and taper the bottom slightly to resemble a pumpkin. If mixture gets too soft, refrigerate for 15 minutes.
- Create the ridges (optional): Use the back of a butter knife or wooden skewer to gently press vertical lines into the cheese ball, spaced about an inch apart, to mimic pumpkin ridges.
- Apply the coating: In a small bowl, mix regular paprika with smoked paprika (if using). Spread on a plate. Carefully roll the shaped cheese ball in the paprika, pressing gently to coat all surfaces evenly.
- Add the stem and decorations: Gently press a pretzel stick or cinnamon stick into the top center for the stem. Arrange small parsley or chive pieces around the base of the stem to look like vines and leaves.
- Final chill: Place finished cheese ball on a plate and refrigerate for at least 30 minutes before serving. Can be made up to 24 hours ahead; add stem and decorations just before serving.
- Serve: Transfer to a serving board, arrange crackers and vegetables around it. Let sit at room temperature for 15 minutes before serving for perfect spreading consistency.
Notes
Use full-fat cream cheese for best texture. Shred cheddar from a block for smoother blending. Don’t skip chilling steps—they ensure the cheese ball holds its shape. Let cheese ball come to room temperature before serving for creamy spreadability. Flavors improve if made a day ahead.
Nutrition
- Serving Size: 1 serving (based on
- Calories: 190
- Sugar: 1
- Sodium: 320
- Fat: 16
- Saturated Fat: 10
- Carbohydrates: 3
- Protein: 7
Keywords: pumpkin cheese ball, fall appetizer, Halloween appetizer, cheese ball recipe, easy appetizer, cream cheese, cheddar, paprika


