Love this? Save it for later!
Share the inspiration with your friends
“I don’t do the whole red, white, and blue dessert thing,” my friend Lisa declared every July 4th for years. She swore it felt forced, like summer’s best flavors were better left unshackled by holiday colors. Then, last summer, I made this Easy Patriotic Layered Ice Cream Pie just to see if it could win her over. Spoiler: It did. One lazy evening, she was caught in the kitchen, sneaking slice after slice while pretending she was “just curious about the texture.”
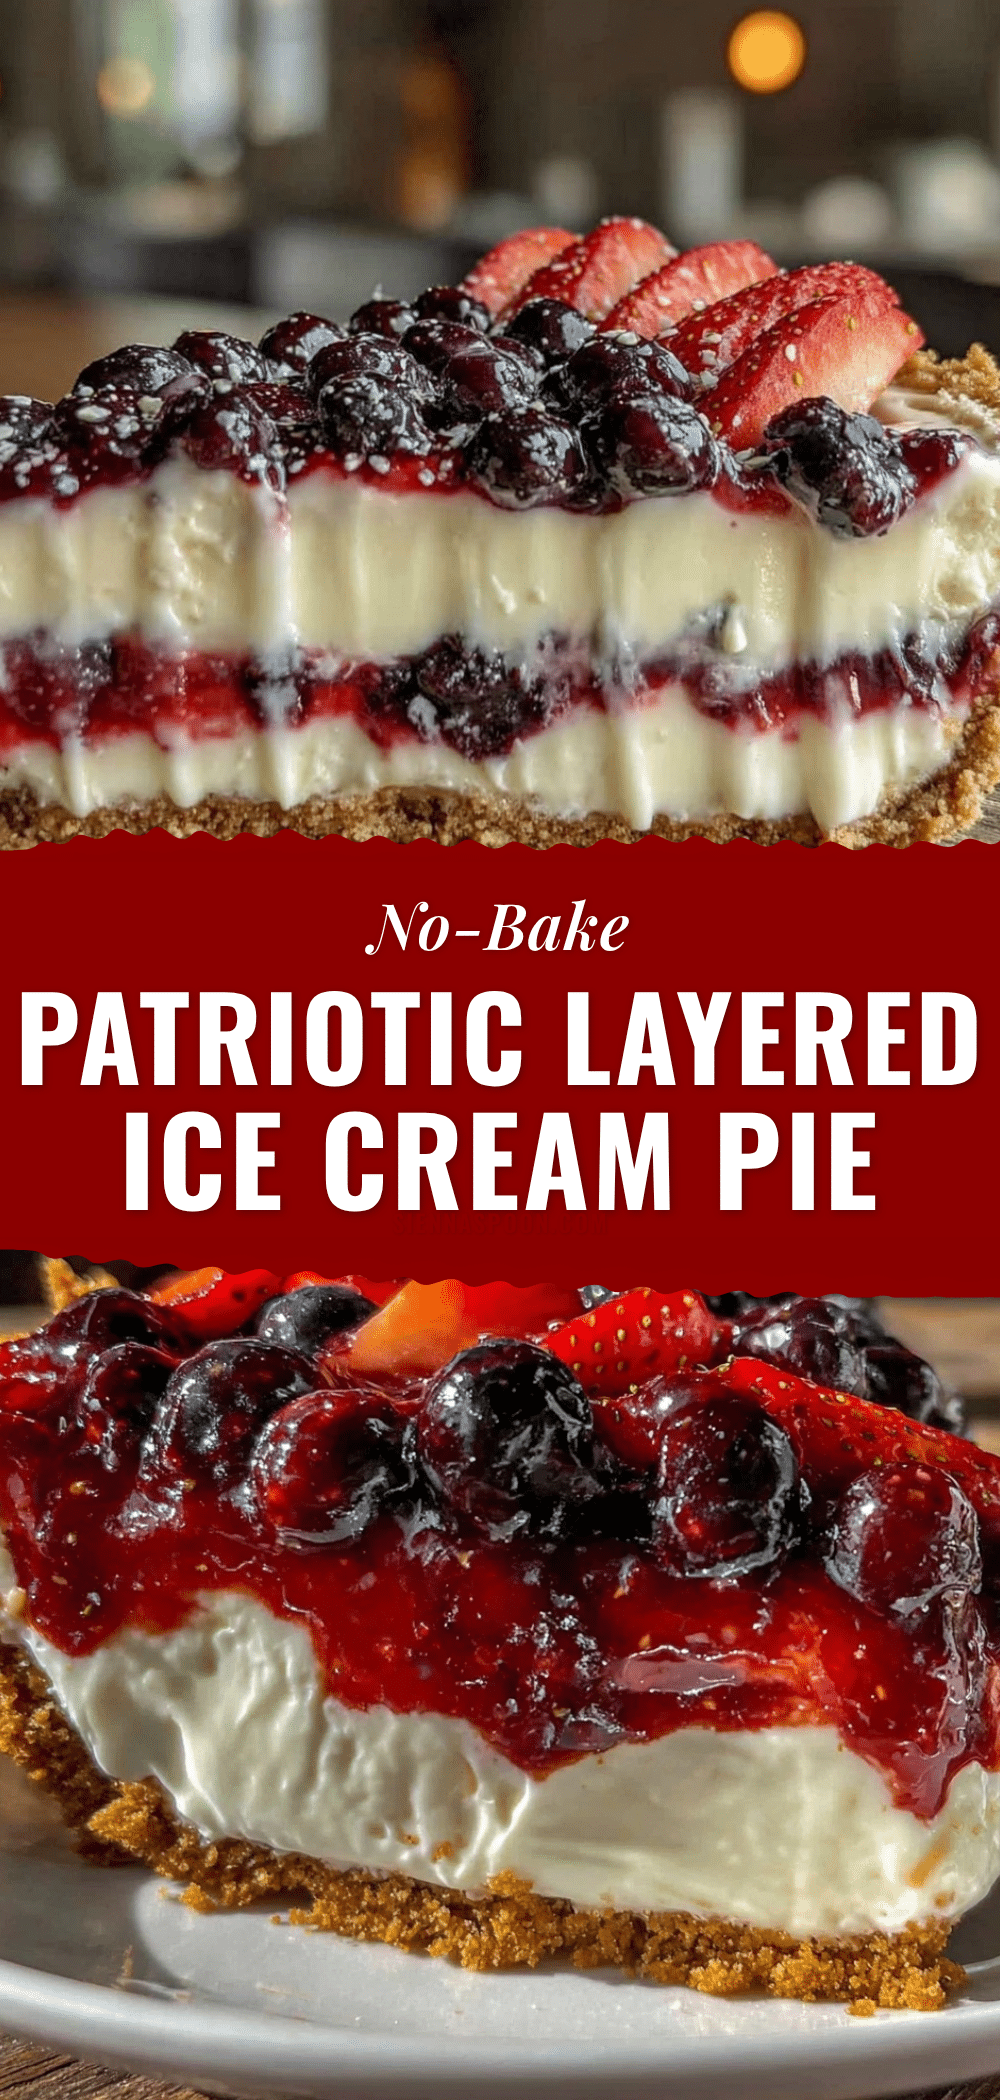
The thing is, Lisa’s skepticism wasn’t unfounded. Patriotic desserts often come off as more gimmick than good — you know, heavy on the food coloring and light on actual flavor. But this no-bake ice cream pie flips the script. It’s creamy, refreshing, and honestly, a little bit nostalgic. The layered effect isn’t just for show; each tier brings a smooth, cool burst of vanilla, strawberry, and blueberry ice cream, nestled atop a crumbly cookie crust that holds its own without getting soggy.
I remember the day I whipped it up: the kitchen was a mess, with berry stains on the counter and a half-melted tub of ice cream hastily scooped. The power flickered (typical summer storm), so I had to rush to the freezer to save the pie. Maybe you’ve been there — trying to keep a frozen dessert intact while juggling a dozen other things.
What stuck with me, though, was how effortless it was to pull together this no-bake dessert that felt special yet approachable. Lisa’s slow conversion from “no thanks” to “can I have another slice?” was a quiet victory. Since then, this Easy Patriotic Layered Ice Cream Pie has become a staple around my place whenever summer rolls around. It’s proof that sometimes, the simplest recipes are the ones that surprise you — and your guests — the most.
Why You’ll Love This Recipe
Honestly, this Easy Patriotic Layered Ice Cream Pie is a quiet showstopper. I mean, it’s almost too easy, but don’t let that fool you — it delivers on taste and looks like you spent way more time on it. Here’s why this recipe keeps making its way onto my summer menu:
- Quick & Easy: Takes about 15 minutes to assemble, perfect for those last-minute dessert cravings or when the grill is calling.
- Simple Ingredients: No need to scour specialty stores — vanilla, strawberry, and blueberry ice cream, plus a cookie crust you can grab from any grocery aisle.
- Perfect for Summer Gatherings: Whether it’s a 4th of July BBQ or an impromptu picnic, this pie travels well and impresses without pressure.
- Crowd-Pleaser: Kids adore the vibrant colors, and adults appreciate the nostalgic flavor combo without being overly sweet.
- Unbelievably Delicious: The creamy layers melt into each other perfectly, while the crust adds a satisfying crunch — a texture contrast that just works.
What sets this recipe apart from the countless patriotic desserts out there? It’s the layering technique that keeps each flavor distinct yet harmonious. I blend the ice cream slightly before layering (just enough to soften it), so it spreads evenly without turning into a melty mess. No artificial colors or gimmicks here — just real flavors that feel like summer in every bite.
This pie isn’t just a dessert; it’s a little celebration in itself. It’s the kind of dish that invites you to slow down for a moment, savor the creamy sweetness, and maybe, just maybe, rethink what a festive summer treat can be.
What Ingredients You Will Need
This recipe calls for straightforward, wholesome ingredients that combine to create a delightful texture and flavor profile — no fuss, no frills, just pure summer goodness. Most of these are pantry or freezer staples, making this pie a go-to whenever you want a quick no-bake dessert.
- Cookie Crust:
- 1 ½ cups graham cracker crumbs (I prefer Honey Maid for that perfect balance of sweetness and crunch)
- 6 tablespoons unsalted butter, melted (adds richness and helps bind the crust)
- 2 tablespoons granulated sugar (optional, depending on your cookie crumbs’ sweetness)
- Ice Cream Layers:
- 1 pint vanilla ice cream, softened (room temperature for easy spreading)
- 1 pint strawberry ice cream, softened (use real fruit bits if you can find them for texture)
- 1 pint blueberry ice cream, softened (or you can swap for blueberry frozen yogurt for a tangier twist)
- Toppings (Optional):
- Fresh berries (strawberries, blueberries) for garnish
- Whipped cream (store-bought or homemade, to add a light finish)
- Red, white, and blue sprinkles for festive flair
For a gluten-free crust, you can swap graham crackers for gluten-free cookie crumbs or crushed nuts. If dairy is a concern, some plant-based ice creams work well, but keep in mind they might melt a bit faster. I’ve found that letting the ice cream soften just enough before layering helps keep the structure intact.
Equipment Needed
Since this is a no-bake dessert, you’re looking at minimal equipment — a real win for summer when nobody wants to sweat over the stove.
- 9-inch (23 cm) pie dish or springform pan — I prefer glass for seeing the layers, but any pie plate works.
- Mixing bowls for combining crust ingredients and softening ice cream.
- Spoon or spatula for spreading the ice cream layers evenly.
- Measuring cups and spoons — accuracy helps with the crust binding.
- Optional: electric mixer for whipping cream if you decide to add that topping.
If you don’t have a springform pan, a regular pie dish will do just fine, though unmolding might be trickier. For budget-friendly options, a sturdy plastic pie plate works well and is less prone to breakage. Keeping your ice cream soft but not melted is key, so a good freezer with consistent temperature control is your best ally here.
Preparation Method
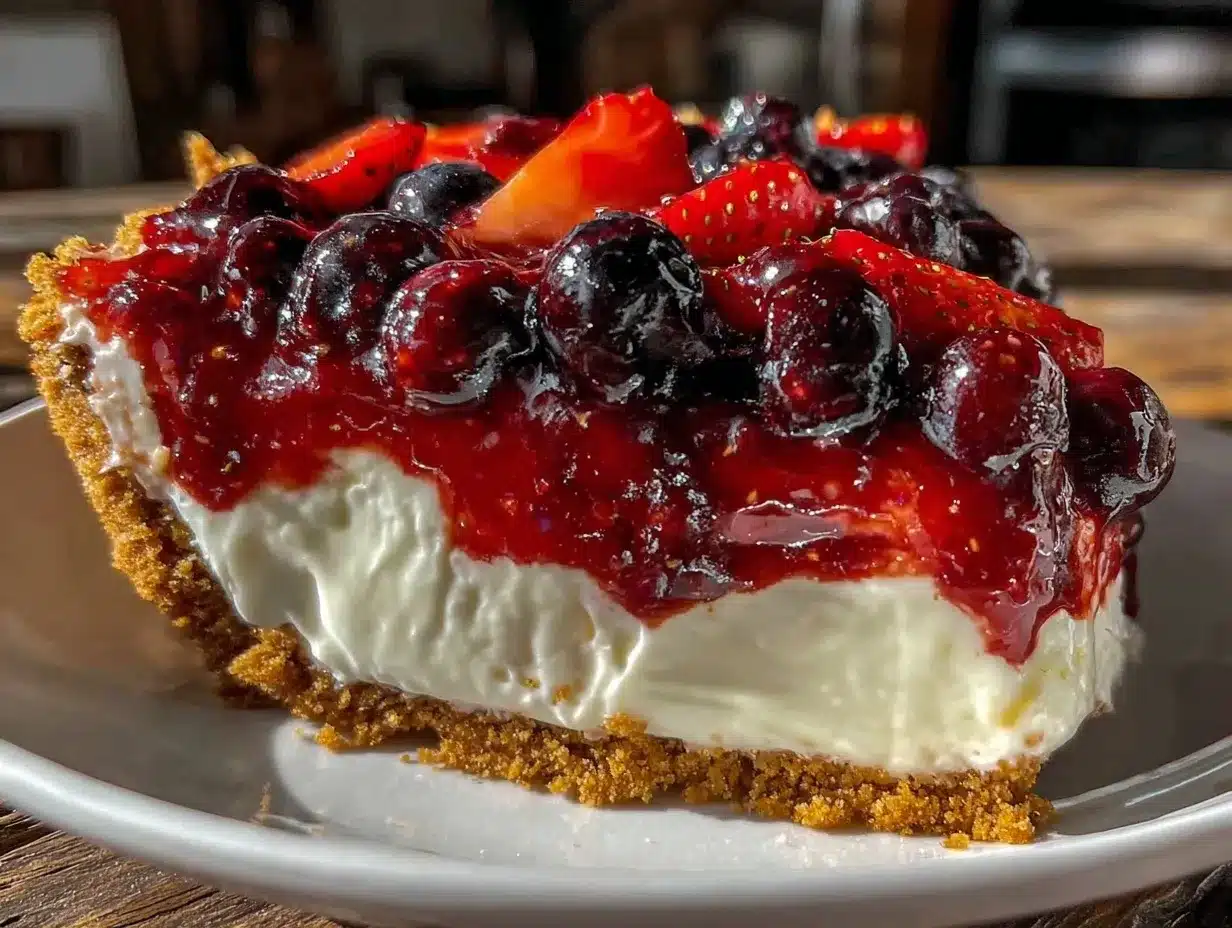
- Make the crust: In a medium bowl, combine 1 ½ cups graham cracker crumbs, 6 tablespoons melted unsalted butter, and 2 tablespoons granulated sugar. Stir until the crumbs are evenly coated and resemble wet sand. This should take about 3 minutes.
Tip: Press the mixture firmly and evenly into the bottom and slightly up the sides of your 9-inch pie dish. Use the bottom of a flat measuring cup to get a compact crust — this helps prevent crumbling. - Chill the crust: Place the crust in the freezer for 10 minutes while you prepare the ice cream layers. This keeps it firm and helps with assembly.
- Prepare the ice cream layers: Let each pint of ice cream sit out for 5-7 minutes to soften slightly. You want it spreadable but not melted. Using a spatula, spread the vanilla ice cream evenly over the chilled crust to form the first layer. Smooth it out gently.
Note: Work quickly to avoid melting — if it gets too soft, pop it back in the freezer for a few minutes. - Add the strawberry layer: Spread the softened strawberry ice cream over the vanilla layer, smoothing it out evenly. Take care not to mix the layers too much; a clean edge between them looks best.
Tip: Use an offset spatula if you have one to get a smooth finish. - Finish with the blueberry layer: Repeat the spreading process with the softened blueberry ice cream on top. Smooth it gently and cover the pie loosely with plastic wrap.
Warning: Avoid pressing the wrap directly onto the ice cream to prevent it sticking. - Freeze the pie: Place pie in the freezer for at least 4 hours, preferably overnight, to let the layers firm up completely. This step is crucial for clean slices.
- Serve: Before serving, let the pie sit at room temperature for 5 minutes to soften slightly for easier slicing. Garnish with fresh berries, whipped cream, or sprinkles if you like.
Personal tip: I find that slicing with a warm, sharp knife (run under hot water and dried) helps get those clean, perfect slices without melting the pie.
Cooking Tips & Techniques
Making a no-bake layered ice cream pie sounds simple, but there are a few tricks to keep it tasting great and looking sharp every time.
- Softening the Ice Cream: Letting the ice cream sit out just long enough to be spreadable is key. Too cold and it won’t smooth out; too warm and it’ll melt into a puddle. Patience here pays off.
- Crust Compacting: Don’t skimp on pressing that crust down firmly. Otherwise, it crumbles when you slice, and no one wants a sandy mess on their plate.
- Layering Without Mixing: When you spread each ice cream flavor, use gentle strokes. Rushing leads to colors bleeding together, which loses the visual impact.
- Freezer Time: The longer the pie freezes, the firmer the layers. Overnight is ideal, especially if you want clean slices.
- Cutting the Pie: A warm knife is your best friend here. It glides through the ice cream without dragging or melting it.
From experience, I once forgot to chill the crust before layering. The bottom got soggy, and the whole pie was a soggy disaster. Lesson learned: chilling that crust is non-negotiable!
Variations & Adaptations
Feel like mixing things up? This Easy Patriotic Layered Ice Cream Pie is pretty forgiving and lends itself well to some fun tweaks.
- Dairy-Free Adaptation: Use coconut milk or almond milk-based ice creams and swap the butter crust for a coconut oil and nut-based crust.
- Flavor Swaps: Instead of strawberry and blueberry, try raspberry and blackberry for a tart twist, or peach and mango for a tropical vibe.
- Crust Options: Replace graham crackers with crushed pretzels for a salty-sweet combo or use chocolate cookie crumbs for a rich, decadent base.
- Alcohol Boost: For an adult version, swirl in a tablespoon of bourbon or rum into one of the softened ice cream layers.
- Personal Variation: I once added a thin layer of crushed fresh strawberries between vanilla and strawberry layers for extra texture — it was a hit at our picnic!
Serving & Storage Suggestions
Serve this pie chilled, straight from the freezer. Let it sit for 5 minutes beforehand so the ice cream softens just enough to cut smoothly. Presentation-wise, fresh berries on top add a nice pop of color and a fresh contrast to the creamy layers.
This dessert pairs well with a light sparkling beverage or iced tea to balance the richness. For a festive brunch, serve alongside crispy garlic chicken or a fresh green salad for a complete meal.
To store, keep the pie tightly wrapped in plastic wrap or in an airtight container in the freezer for up to 5 days. Avoid freezer burn by ensuring good coverage. When reheating, it’s really about letting it soften at room temperature rather than heating.
Flavors meld a bit after a day, sometimes making the layers less distinct but more harmonious. I kind of like it both ways — fresh and vibrant or slightly softened and mellowed.
Nutritional Information & Benefits
This pie isn’t exactly health food, but it’s a sweet treat that can be enjoyed in moderation. Each slice (about 1/8 of the pie) contains roughly:
- Calories: 280-320 kcal
- Fat: 14-18 g (mostly from the butter and ice cream)
- Sugar: 20-25 g
- Protein: 3-4 g
Using real fruit ice creams adds antioxidants and vitamins, and you can always swap in lower-sugar or dairy-free versions to suit dietary preferences. This dessert is gluten-free if you use gluten-free cookie crumbs for the crust.
From a wellness perspective, I appreciate that this pie is a no-bake option that doesn’t require processed syrups or artificial coloring. It’s a dessert that feels honest — indulgent but not over the top.
Conclusion
There you have it: an Easy Patriotic Layered Ice Cream Pie that’s as simple as it is satisfying. It’s the kind of recipe that sneaks up on you — with its creamy layers, crunchy crust, and festive colors — and turns skeptics into believers. Whether you’re celebrating a summer holiday or just craving a cool treat, this no-bake dessert fits the bill perfectly.
Feel free to make it your own — swap flavors, try new toppings, or keep it classic. I love this pie because it brings people together without fuss, and honestly, because it’s so darn good that I sometimes make it when no one’s around just for myself.
If you give it a try, I’d love to hear how it turned out! Leave a comment, share your tweaks, or snap a pic — it’s always fun to see this pie make its way into kitchens across the country. Here’s to sweet summer moments, one slice at a time.
Frequently Asked Questions
- Can I make this pie ahead of time?
Yes! Make it up to 24 hours in advance and keep it frozen until ready to serve. - What if I don’t have graham crackers?
You can use crushed digestive biscuits, Oreos, or even pretzels for the crust. - How do I prevent the ice cream layers from melting?
Work quickly while spreading and keep the pie in the freezer between steps. - Can I use homemade ice cream?
Absolutely! Just make sure it’s softened enough to spread easily. - Is this recipe gluten-free?
It can be, if you use gluten-free cookie crumbs for the crust.
Pin This Recipe!
Easy Patriotic Layered Ice Cream Pie
A no-bake, layered ice cream pie featuring vanilla, strawberry, and blueberry ice cream atop a crunchy cookie crust. Perfect for summer gatherings and patriotic celebrations.
- Prep Time: 15 minutes
- Cook Time: 0 minutes
- Total Time: 4 hours 15 minutes
- Yield: 8 servings 1x
- Category: Dessert
- Cuisine: American
Ingredients
- 1 ½ cups graham cracker crumbs
- 6 tablespoons unsalted butter, melted
- 2 tablespoons granulated sugar (optional)
- 1 pint vanilla ice cream, softened
- 1 pint strawberry ice cream, softened
- 1 pint blueberry ice cream, softened
- Fresh berries (strawberries, blueberries) for garnish (optional)
- Whipped cream (store-bought or homemade) for topping (optional)
- Red, white, and blue sprinkles for festive flair (optional)
Instructions
- In a medium bowl, combine graham cracker crumbs, melted butter, and granulated sugar. Stir until crumbs are evenly coated and resemble wet sand.
- Press the mixture firmly and evenly into the bottom and slightly up the sides of a 9-inch pie dish. Use the bottom of a flat measuring cup to compact the crust.
- Place the crust in the freezer for 10 minutes to firm up.
- Let each pint of ice cream sit out for 5-7 minutes to soften slightly.
- Spread the softened vanilla ice cream evenly over the chilled crust to form the first layer. Smooth gently.
- Spread the softened strawberry ice cream over the vanilla layer, smoothing it out evenly without mixing layers.
- Spread the softened blueberry ice cream over the strawberry layer and smooth gently. Cover the pie loosely with plastic wrap, avoiding direct contact with the ice cream.
- Freeze the pie for at least 4 hours, preferably overnight, to let the layers firm up completely.
- Before serving, let the pie sit at room temperature for 5 minutes to soften slightly for easier slicing.
- Garnish with fresh berries, whipped cream, or sprinkles if desired.
- For clean slices, use a warm, sharp knife (run under hot water and dried) to cut the pie.
Notes
Let ice cream soften just enough to spread but not melt. Press crust firmly to avoid crumbling. Freeze pie overnight for best slicing results. Use a warm knife for clean cuts. For gluten-free, substitute crust with gluten-free cookie crumbs or crushed nuts. Dairy-free versions possible with plant-based ice creams and alternative crusts.
Nutrition
- Serving Size: 1 slice (1/8 of pie)
- Calories: 280320
- Sugar: 2025
- Fat: 1418
- Protein: 34
Keywords: patriotic dessert, no-bake pie, layered ice cream pie, summer dessert, 4th of July dessert, easy ice cream pie


