Love this? Save it for later!
Share the inspiration with your friends
I was standing in the checkout line at the craft store—not for baking supplies, but for glitter and googly eyes for a last-minute school project. The woman behind me, a retired art teacher with a shopping cart full of orange pipe cleaners, leaned over and said, “You know what kids actually remember from Halloween parties? It’s never the store-bought stuff.” She was right, and before I knew it, she was scribbling down a recipe on the back of a receipt. It was for these Halloween Rice Krispie Treat Pops, and honestly, I almost didn’t believe how simple they were. She called them “the lazy parent’s secret weapon,” and I’ve never looked back.
That chance encounter changed my Halloween game completely. I mean, here I was, ready to spend twenty bucks on a pre-made kit, and this stranger handed me the blueprint for something way better. These Halloween Rice Krispie Treat Pops are exactly what you need when you want homemade charm without the stress. They come together in about twenty minutes, and the kids can help with almost every step—which, let me tell you, is a lifesaver when you’re trying to keep little hands busy on a school night.
Maybe you’ve been there, staring at a Pinterest board full of elaborate Halloween desserts that require fondant and food coloring and three hours you definitely don’t have. That was me, too, until this recipe found me. The best part? These treats look like you spent all day on them, but the secret is just a little creativity and a lot of marshmallow. I’ve been making them every October since, and they never fail to get those wide-eyed “you made these?” reactions. Honestly, that feeling never gets old.
Why You’ll Love This Recipe
Let me tell you why these Halloween Rice Krispie Treat Pops have earned a permanent spot in my fall rotation. I’ve tested this recipe through countless Halloween parties, school events, and even a few adult gatherings where nobody could resist grabbing one. Here’s what makes them stand out:
- Quick & Easy : Comes together in under 20 minutes, which is perfect for those evenings when you realize the class party is tomorrow and you’ve got nothing prepared. I’ve been there more times than I’d like to admit.
- Simple Ingredients : You probably already have everything in your pantry right now. No fancy extracts, no specialty decorations—just marshmallows, cereal, butter, and a few candy pieces for faces.
- Perfect for Halloween : These work for classroom parties, trunk-or-treat events, family movie nights, or even as a spooky treat for the neighbors. They’re portable, which is a huge plus.
- Crowd-Pleaser : Kids and adults both go crazy for them. I’ve watched grown men sneak seconds at office parties. The nostalgia factor is real.
- Unbelievably Delicious : The combination of crispy cereal, gooey marshmallow, and a slight buttery richness is basically comfort food on a stick. Plus, the decorating part is genuinely fun.
What makes this recipe different from all the other versions out there? It’s the texture. I’ve perfected the marshmallow-to-butter ratio so the treats stay soft and chewy for days, not hard and crumbly by the next morning. No one wants a Rice Krispie Treat that shatters when you bite into it. This version stays perfectly bendy and tender, which makes it easier to shape into pops and even easier to eat.
This recipe isn’t just good—it’s the kind that makes you feel like a Halloween hero without breaking a sweat. It’s homemade charm with zero stress, and honestly, that’s the best kind of treat to share.
What Ingredients You Will Need
This recipe uses simple, everyday ingredients that you can find at any grocery store. The beauty of these Halloween Rice Krispie Treat Pops is that the ingredients are mostly pantry staples, and the decorations are completely flexible based on what you have on hand or what’s on sale.
For the Treat Base
- 3 tablespoons unsalted butter (salted butter works too, just skip the extra salt)
- 1 package (10 ounces) marshmallows (about 40 regular marshmallows or 4 cups mini marshmallows; I prefer Jet-Puffed for the best melt)
- 6 cups crispy rice cereal (like Kellogg’s Rice Krispies; store brands work fine, but the texture might be slightly different)
- 1/4 teaspoon vanilla extract (optional, but it adds a nice warmth that balances the sweetness)
- Pinch of salt (only if using unsalted butter; this prevents the treats from tasting flat)
For the Pops and Decorations

- 12-15 lollipop sticks or paper straws (craft stores sell these cheap, or use sturdy straws in a pinch)
- 1 cup candy melts or white chocolate chips (orange, green, or white work best for Halloween colors)
- Assorted candy decorations : candy eyes, orange sprinkles, black licorice strings, candy corn, mini chocolate chips, or M&M’s in Halloween colors
- 1 tablespoon coconut oil or vegetable shortening (helps thin the melted candy for easier dipping)
Ingredient Selection Tips
For the best texture, use fresh marshmallows. Stale marshmallows don’t melt as smoothly and can make the treats grainy. I learned this the hard way when I used an open bag that had been sitting in my pantry for months—the treats turned out lumpy and wouldn’t hold together. If your marshmallows feel hard or dry, buy a new bag.
For the candy melts, I recommend Wilton brand for consistent melting. Ghirardelli white chocolate chips also work beautifully and taste slightly better, but they can be a bit more finicky to melt. Just go slow and low with the heat.
Substitution Guidance
Need a dairy-free version? Use vegan butter and dairy-free marshmallows (Dandies brand is my go-to). For a gluten-free option, most crispy rice cereals are naturally gluten-free, but double-check the label—some store brands add barley malt. If you can’t find lollipop sticks, pretzel sticks work great and add a salty contrast. Just be aware they’re more fragile and might snap if the treats are too thick.
Equipment Needed
You don’t need a fancy kitchen to pull these off. Here’s what you’ll need:
- Large saucepan or Dutch oven (non-stick is ideal, but any pot works if you grease it well)
- 9×13-inch baking dish (or a similar sized pan; I’ve used a jelly roll pan for thinner treats that are easier to cut)
- Parchment paper or wax paper (non-negotiable for easy removal; trust me, nothing sticks worse than marshmallow to bare metal)
- Large mixing bowl (for combining cereal and marshmallow mixture)
- Spatula or wooden spoon (silicone spatulas are easiest to clean, but a buttered wooden spoon works too)
- Sharp knife or pizza cutter (pizza cutter makes cleaner cuts through the treats)
- Microwave-safe bowl (for melting candy melts)
- Lollipop sticks or paper straws
- Wax paper or foam block (to hold the pops upright while the coating sets)
If you don’t have a 9×13 pan, you can use a 9×9 square pan for thicker treats or a cookie sheet for thinner ones. Just adjust your cutting size accordingly. For the melting, a double boiler works great if you have one, but the microwave method is faster and requires less cleanup. I’ve melted candy in a glass measuring cup dozens of times with zero issues—just do 30-second intervals and stir well between each.
One tip: grease your spatula with a little butter or non-stick spray before pressing the mixture into the pan. This prevents the sticky marshmallow from clinging to everything. I keep a small dish of butter nearby just for this purpose.
Preparation Method
Alright, let’s make these Halloween Rice Krispie Treat Pops. The whole process takes about 20 minutes of active time, plus a bit of cooling. Here’s the step-by-step breakdown:
Step 1: Prep Your Pan and Tools
Line your 9×13-inch baking dish with parchment paper, leaving some overhang on two sides. This creates “handles” that make lifting the treats out later super easy. Lightly grease the parchment with butter or non-stick spray. Set aside.
Also, grease a large mixing bowl and your spatula with butter. I know it sounds excessive, but marshmallow sticks to everything, and you’ll thank me later when cleanup takes two minutes instead of twenty.
Step 2: Melt the Butter and Marshmallows
Place the 3 tablespoons of butter in a large saucepan over medium-low heat. Let it melt completely, swirling the pan occasionally. Once the butter is melted, add the entire package of marshmallows. Stir constantly with your greased spatula until the marshmallows are fully melted and the mixture is smooth and glossy. This takes about 4-5 minutes.
Here’s the trick: don’t rush this step. If the heat is too high, the marshmallows will brown and seize up, creating a grainy texture. Keep the flame low and be patient. When the mixture looks like thick, stretchy glue, you’re there. Remove the pan from the heat immediately.
Stir in the vanilla extract and salt (if using) at this point. The vanilla will sizzle a bit—that’s normal and smells amazing.
Step 3: Combine with Cereal
Pour the 6 cups of crispy rice cereal into your greased large mixing bowl. Pour the hot marshmallow mixture over the cereal. Using your greased spatula, fold everything together gently but thoroughly. You want every piece of cereal coated, but try not to crush the cereal too much—the crunch is what makes these treats special.
Work quickly here because the mixture starts setting as it cools. If it gets too stiff to stir, you can microwave the bowl for 10-15 seconds to soften it up again.
Step 4: Press into the Pan
Transfer the mixture to your prepared baking dish. Using your greased spatula (or buttered hands—seriously, butter your palms), press the mixture evenly into the pan. Don’t smash it down too hard, or the treats will be dense and hard. You want a gentle, even pressure that creates a uniform layer.
Let the treats cool at room temperature for about 15-20 minutes. Don’t put them in the fridge—rapid cooling can make them hard and brittle.
Step 5: Cut into Shapes
Once cooled but still slightly warm, lift the treats out of the pan using the parchment overhang. Place on a cutting board. Use a sharp knife or pizza cutter to cut into rectangles, squares, or use Halloween-shaped cookie cutters for fun shapes. Ghosts, pumpkins, and bats work great. If using cookie cutters, dip them in butter or spray with non-stick spray first to prevent sticking.
For pops, I recommend cutting rectangles about 2×3 inches. This size holds well on a stick without being too heavy.
Step 6: Insert the Sticks
Gently insert a lollipop stick into the bottom of each treat, pushing about halfway through. If the treat cracks, don’t panic—just press the cereal back together around the stick. The candy coating will hold everything together later.
Place the treats on a wax paper-lined baking sheet, leaving space between each one. Pop them in the freezer for 10 minutes. This firms them up and makes the dipping process much cleaner.
Step 7: Melt and Dip
In a microwave-safe bowl, combine 1 cup of candy melts with 1 tablespoon of coconut oil. Microwave in 30-second intervals, stirring well after each, until completely smooth. The coconut oil helps the coating flow better and gives a shinier finish.
Hold each frozen treat by the stick and dip it into the melted candy, tilting the bowl to cover the top and sides. Let the excess drip off for a few seconds. If you want to add sprinkles or candy eyes, do it immediately while the coating is still wet.
Place the dipped pops upright in a foam block or stick them into a heavy mug filled with rice or beans to hold them steady. Let them set at room temperature for about 15-20 minutes.
Step 8: Decorate and Serve
Once the base coating is set, you can add extra details using melted candy in a piping bag or a zip-top bag with the corner snipped off. Draw little faces, spiderwebs, or stripes. Get creative—there are no rules here.
Let everything set completely before serving. Store in an airtight container at room temperature for up to 5 days. Though honestly, they never last that long in my house.
Cooking Tips & Techniques
I’ve made these Halloween Rice Krispie Treat Pops at least two dozen times, and I’ve learned a few things the hard way. Here are my best tips for success:
Don’t overmix. I know it’s tempting to keep stirring until everything looks perfectly uniform, but overmixing crushes the cereal and leads to dense, tough treats. Fold gently, just until no dry cereal remains. A few stray uncoated pieces are fine—they’ll get covered in candy coating anyway.
Watch your heat. Marshmallows are temperamental. If your heat is too high, they’ll brown and develop a weird, slightly burnt flavor that ruins the whole batch. Keep it on medium-low and stir constantly. The moment they’re smooth, pull the pan off the heat.
Butter is your best friend. Grease everything that touches the marshmallow mixture—the bowl, the spatula, your hands, the knife. It sounds wasteful, but it saves so much frustration. I keep a stick of butter on the counter just for this purpose during Halloween season.
Freeze before dipping. This was a game-changer for me. Chilling the treats for 10-15 minutes in the freezer firms them up enough that they don’t crumble or fall off the stick when you dip them in warm candy. Don’t skip this step.
Thin your candy coating. Straight candy melts are often too thick for smooth dipping. Adding a little coconut oil or shortening makes the coating thinner, shinier, and easier to work with. It also helps it set with a nice snap instead of a chalky finish.
Work in small batches. If you’re making a big batch for a party, only melt half the candy coating at a time. It starts to thicken as it cools, and reheating it too many times can make it seize up. Fresh melted coating is always easier to work with.
One mistake I made early on: I used cheap, off-brand candy melts, and they never fully set. They stayed tacky and smudged all over the wax paper. Spend the extra dollar on a trusted brand—it makes a real difference.
Variations & Adaptations
These Halloween Rice Krispie Treat Pops are endlessly customizable. Here are some of my favorite variations:
Spider Pops
Cut the treats into round shapes using a biscuit cutter. After dipping in black or dark chocolate candy melts, add eight pretzel stick legs (four on each side) before the coating sets. Use two candy eyes on top. These are always a hit at spooky parties.
Pumpkin Patch Pops
Cut the treats into triangles or rounds. Dip in orange candy melts, then use a green M&M or a small green candy for the stem. Draw little lines on the orange coating with a toothpick to look like pumpkin ridges. Add a tiny leaf made from green fondant or a slivered almond.
Ghostly White Pops
Skip the colored coating and dip in plain white candy melts. Use black decorating gel or melted dark chocolate to draw simple ghost faces—two eyes and an open mouth. These are the easiest variation and perfect for little kids to help with.
Gluten-Free Version
Most crispy rice cereals are gluten-free, but always check the label. Use gluten-free marshmallows (Dandies brand is reliable) and ensure your candy melts are certified gluten-free. The recipe works exactly the same otherwise.
Nut-Free Option
This recipe is naturally nut-free if you use plain candy melts and avoid nut-containing decorations. Double-check your candy eyes and sprinkles—some brands process them on shared equipment. I always buy from brands that clearly label “nut-free” to be safe.
My personal favorite variation? I once made a batch using cocoa-flavored crispy rice cereal and dipped them in orange candy melts. The chocolate-cereal base gave them a subtle brownie-like flavor that paired beautifully with the sweet orange coating. My kids still ask for “the chocolate Halloween pops” every year.
Serving & Storage Suggestions
These Halloween Rice Krispie Treat Pops are best served at room temperature. The candy coating should be firm and snappy, and the treat inside should be soft and chewy. If they’ve been in the fridge, let them sit out for 10-15 minutes before serving so the texture softens up.
For presentation, I love arranging them in a large mason jar or a festive pumpkin-shaped bucket. Stick them upright like a bouquet, and they instantly become the centerpiece of any Halloween spread. They also look adorable wrapped individually in cellophane bags tied with orange ribbon—perfect for party favors or classroom treats.
Storage Instructions: Store the pops in an airtight container at room temperature for up to 5 days. Layer them between sheets of wax paper to prevent the candy coatings from sticking together. Do not refrigerate—the moisture in the fridge can make the treats soggy and cause the candy coating to sweat.
Freezer Instructions: These freeze beautifully! Place the fully decorated pops in a single layer on a baking sheet and freeze until solid (about 1 hour). Then transfer them to a freezer-safe bag or container, layering with wax paper. They’ll keep for up to 3 months. To serve, thaw at room temperature for about 20 minutes. The texture remains surprisingly fresh.
Reheating Tips: Honestly, these are best eaten as-is, but if you want a warm, gooey center, microwave a pop for about 10 seconds. The coating might get a little sticky, but the inside becomes melty and delicious. Just don’t overdo it, or the whole thing will collapse off the stick.
One thing I love about these treats: the flavors actually mellow and meld together after a day or two. The marshmallow sweetness softens, and the cereal stays perfectly crunchy. They’re actually better on day two than day one, in my opinion.
Nutritional Information & Benefits
Let’s be honest—these Halloween Rice Krispie Treat Pops are a treat, not a health food. But here’s the estimated nutritional breakdown for one pop (based on a 2×3-inch portion with white candy coating and minimal decorations):
- Calories: Approximately 180-220
- Total Fat: 8-10g
- Saturated Fat: 5-6g
- Carbohydrates: 28-32g
- Sugar: 18-22g
- Protein: 2-3g
- Sodium: 120-150mg
These values will vary depending on the type and amount of candy coating and decorations you use. Dark chocolate coating will add antioxidants, while white chocolate adds more sugar. If you’re watching your sugar intake, you can use sugar-free marshmallows and dark chocolate with a higher cocoa percentage.
Dietary Considerations: This recipe can be made gluten-free and nut-free with simple substitutions (see variations above). It contains dairy from the butter, marshmallows, and candy melts, but vegan alternatives are available. The treats are naturally egg-free and soy-free (check your candy melts for soy lecithin if this is a concern).
Health Benefits: While these are definitely a treat, the crispy rice cereal does provide some iron and B vitamins from fortification. The butter adds a small amount of Vitamin A. And honestly, the biggest benefit is the joy they bring—sharing homemade treats with loved ones has real emotional and social benefits. Everything in moderation, right?
Conclusion
These Halloween Rice Krispie Treat Pops have become a non-negotiable tradition in my house every October. They’re the recipe I turn to when I want something homemade that looks impressive but doesn’t require hours in the kitchen. The best part? Watching kids’ faces light up when they see a ghost or spider on a stick that they helped make themselves.
I love that this recipe is forgiving. You can mess up the cutting, overmix the cereal, or drop a pop on the floor (yes, I’ve done all three), and they still turn out delicious. That’s the kind of recipe worth keeping in your back pocket.
Now I want to hear from you! Have you tried making Halloween Rice Krispie Treat Pops? What’s your favorite way to decorate them? Drop a comment below and share your spooky creations. And if you try this recipe, tag me in your photos—I love seeing what you come up with. Remember, the messier the decorating session, the better the memories. Happy Halloween, and happy snacking!
Frequently Asked Questions
Can I use a different cereal?
Absolutely! Cocoa Krispies, Fruity Pebbles, or even generic crispy rice cereal all work. Just keep in mind that different cereals have different densities, so you might need to adjust the marshmallow-to-cereal ratio slightly. Start with 5 cups instead of 6 and add more if the mixture looks too wet.
Why did my treats turn out hard?
This usually happens for two reasons: overcooking the marshmallows or pressing the mixture too firmly into the pan. Marshmallows should melt just until smooth—any longer and they’ll set up hard. When pressing the treats into the pan, use gentle, even pressure. Think “patting” rather than “smashing.”
Can I make these ahead of time for a party?
Yes! You can make the plain treats (without sticks or coating) up to 2 days ahead and store them in an airtight container. Then insert the sticks, dip, and decorate the day you plan to serve them. Alternatively, fully assembled pops can be made 3-4 days in advance and stored at room temperature.
How do I prevent the lollipop sticks from falling out?
Make sure you insert the stick at least halfway into the treat. Dipping the tip of the stick in melted candy before inserting it acts like glue and helps hold everything together. Also, freezing the treats before dipping firms them up so the stick stays put.
My candy melts are lumpy and won’t smooth out. What went wrong?
This is usually caused by overheating or moisture getting into the chocolate. Always melt in short 30-second bursts and stir thoroughly between each. If your candy melts are still lumpy, add another teaspoon of coconut oil and stir vigorously. If they’ve seized completely, you may need to start over with fresh melts—unfortunately, seized candy cannot be saved.
Pin This Recipe!
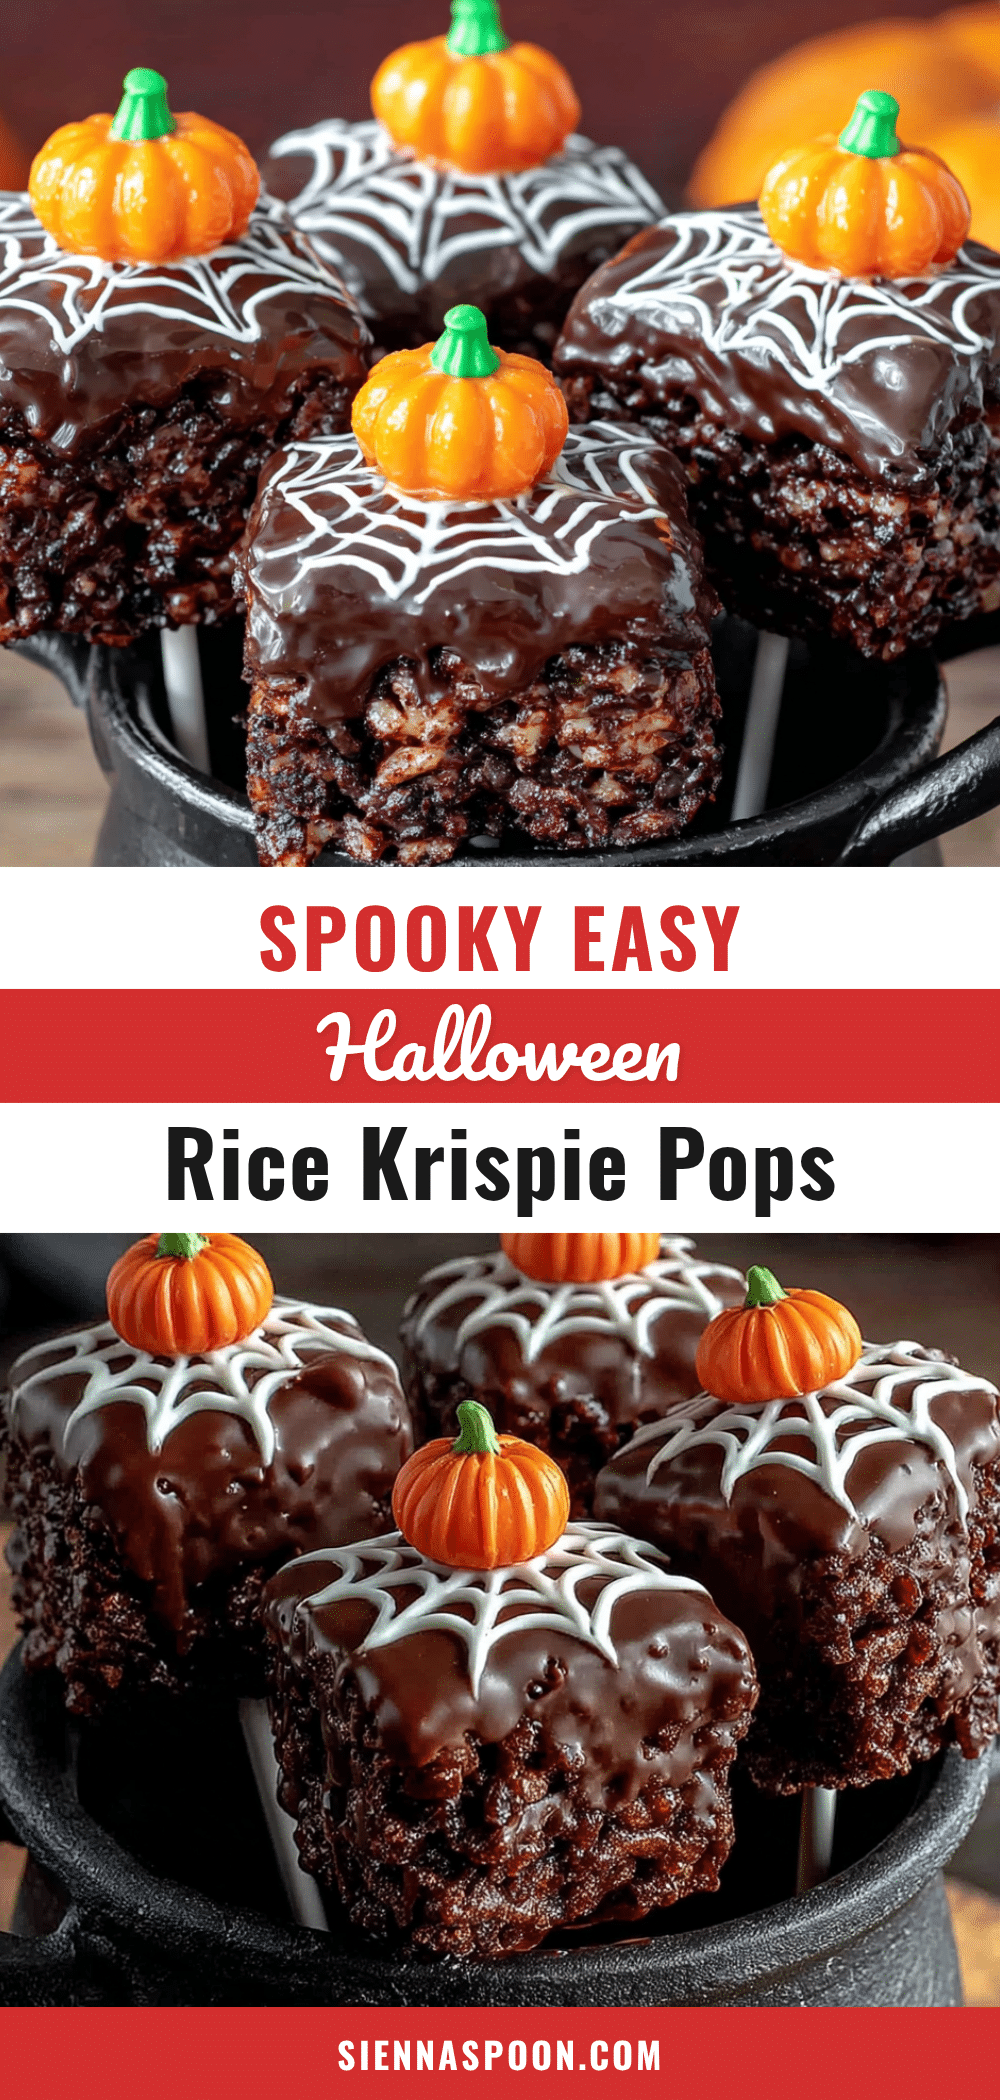
Easy Halloween Rice Krispie Treat Pops: 20-Minute Fun

These Halloween Rice Krispie Treat Pops are quick, easy, and perfect for spooky celebrations. Made with simple pantry ingredients, they come together in about 20 minutes and can be decorated as ghosts, spiders, or pumpkins for a fun, homemade treat that kids and adults love.
- Prep Time: 15 minutes
- Cook Time: 5 minutes
- Total Time: 20 minutes
- Yield: 12-15 servings 1x
- Category: Dessert
- Cuisine: American
Ingredients
- 3 tablespoons unsalted butter (salted butter works too, just skip the extra salt)
- 1 package (10 ounces) marshmallows (about 40 regular marshmallows or 4 cups mini marshmallows)
- 6 cups crispy rice cereal (like Kellogg’s Rice Krispies)
- 1/4 teaspoon vanilla extract (optional)
- Pinch of salt (only if using unsalted butter)
- 12–15 lollipop sticks or paper straws
- 1 cup candy melts or white chocolate chips (orange, green, or white work best for Halloween colors)
- Assorted candy decorations: candy eyes, orange sprinkles, black licorice strings, candy corn, mini chocolate chips, or M&M’s in Halloween colors
- 1 tablespoon coconut oil or vegetable shortening
Instructions
- Line a 9×13-inch baking dish with parchment paper, leaving overhang on two sides. Lightly grease the parchment with butter or non-stick spray. Also grease a large mixing bowl and spatula with butter.
- Place 3 tablespoons of butter in a large saucepan over medium-low heat. Melt completely, then add the entire package of marshmallows. Stir constantly until fully melted and smooth, about 4-5 minutes. Remove from heat immediately.
- Stir in vanilla extract and salt (if using).
- Pour 6 cups of crispy rice cereal into the greased large mixing bowl. Pour the hot marshmallow mixture over the cereal and fold together gently but thoroughly until every piece is coated.
- Transfer the mixture to the prepared baking dish. Using a greased spatula or buttered hands, press evenly into the pan with gentle pressure. Let cool at room temperature for 15-20 minutes.
- Lift the treats out of the pan using the parchment overhang. Cut into rectangles about 2×3 inches, or use Halloween-shaped cookie cutters.
- Gently insert a lollipop stick into the bottom of each treat, pushing about halfway through. Place on a wax paper-lined baking sheet and freeze for 10 minutes.
- In a microwave-safe bowl, combine 1 cup of candy melts with 1 tablespoon of coconut oil. Microwave in 30-second intervals, stirring well after each, until completely smooth.
- Hold each frozen treat by the stick and dip into the melted candy, tilting the bowl to cover the top and sides. Let excess drip off. Add sprinkles or candy eyes immediately while coating is wet.
- Place dipped pops upright in a foam block or heavy mug filled with rice or beans to hold them steady. Let set at room temperature for 15-20 minutes.
- Once base coating is set, add extra details using melted candy in a piping bag or zip-top bag with the corner snipped off. Let everything set completely before serving.
Notes
For best texture, use fresh marshmallows. Don’t overmix the cereal to avoid dense treats. Freeze treats before dipping to prevent crumbling. Thin candy coating with coconut oil for smoother dipping. Store in an airtight container at room temperature for up to 5 days. Can be frozen for up to 3 months.
Nutrition
- Serving Size: 1 pop (2x3-inch port
- Calories: 200
- Sugar: 20
- Sodium: 135
- Fat: 9
- Saturated Fat: 5.5
- Carbohydrates: 30
- Protein: 2.5
Keywords: Halloween treats, Rice Krispie treats, easy dessert, no-bake, kid-friendly, Halloween party, spooky treats, homemade candy


