Love this? Save it for later!
Share the inspiration with your friends
I wasn’t expecting cooking advice from my accountant, but there I was, halfway through a meeting about quarterly taxes, watching him sketch a dessert on a sticky note. “You have to try these pumpkin cheesecake bars,” he said, sliding the napkin across his desk. “My wife’s family has been making them for decades.” I stared at the scribbled measurements—a little of this, a handful of that—and honestly, I almost laughed. An accountant, of all people, giving me a baking tip? But something about the way his eyes lit up when he described the creamy filling and the gingersnap crust made me tuck that sticky note into my bag.
The next weekend, I found myself standing in my kitchen, staring at that messy handwriting, wondering if this was a terrible idea. I mean, who takes baking advice from their tax guy? But let me tell you—those bars were absolutely incredible. The first bite had this unexpected moment where the tangy cream cheese and the warm pumpkin spice just clicked. I’ve been tweaking that original recipe ever since, and this version is hands-down the best it’s ever been. Maybe you’ve been looking for that one dessert that screams fall without all the fuss. These Fall Pumpkin Pie Cheesecake Bars are exactly that.
Why You’ll Love This Recipe
I’ve tested this recipe more times than I care to admit. There were batches that cracked, fillings that didn’t set, and one memorable disaster where I forgot the sugar entirely. But through all those trials, I landed on something truly special. Let me tell you why this version is different.
- Quick & Easy : Comes together in under 45 minutes of active prep time, perfect for busy fall weekends or last-minute Thanksgiving cravings.
- Simple Ingredients : No fancy grocery trips needed; you likely already have everything in your kitchen.
- Perfect for Fall Gatherings : Great for Friendsgiving, holiday parties, or cozy Sunday dinners with the family.
- Crowd-Pleaser : Always gets rave reviews from kids and adults alike—I’ve seen people fight over the last piece.
- Unbelievably Delicious : The texture combo is next-level comfort food. You get a crunchy crust, a silky cheesecake layer, and that cozy pumpkin pie filling all in one bite.
What makes this recipe different from the rest? It’s the way the cream cheese layer stays perfectly tangy against the sweet, spiced pumpkin. I use a water bath method that prevents cracking, and I’ve dialed in the baking time so you get that perfect jiggle in the center. This isn’t just another version—it’s your best version.
This recipe is the kind that makes you close your eyes after the first bite. It’s comfort food reimagined—rich, creamy, and packed with all those warm fall spices we crave when the leaves start turning. Perfect for impressing guests without stress, or turning a simple weekend into something memorable.
What Ingredients You Will Need
This recipe uses simple, wholesome ingredients to deliver bold flavor and satisfying texture without the fuss. Most of these are pantry staples, especially if you do a lot of fall baking.
For the Crust
- 1 ½ cups gingersnap cookie crumbs (about 20-25 cookies, crushed finely)
- ¼ cup granulated sugar
- 6 tablespoons unsalted butter, melted
- ¼ teaspoon salt
For the Cheesecake Layer
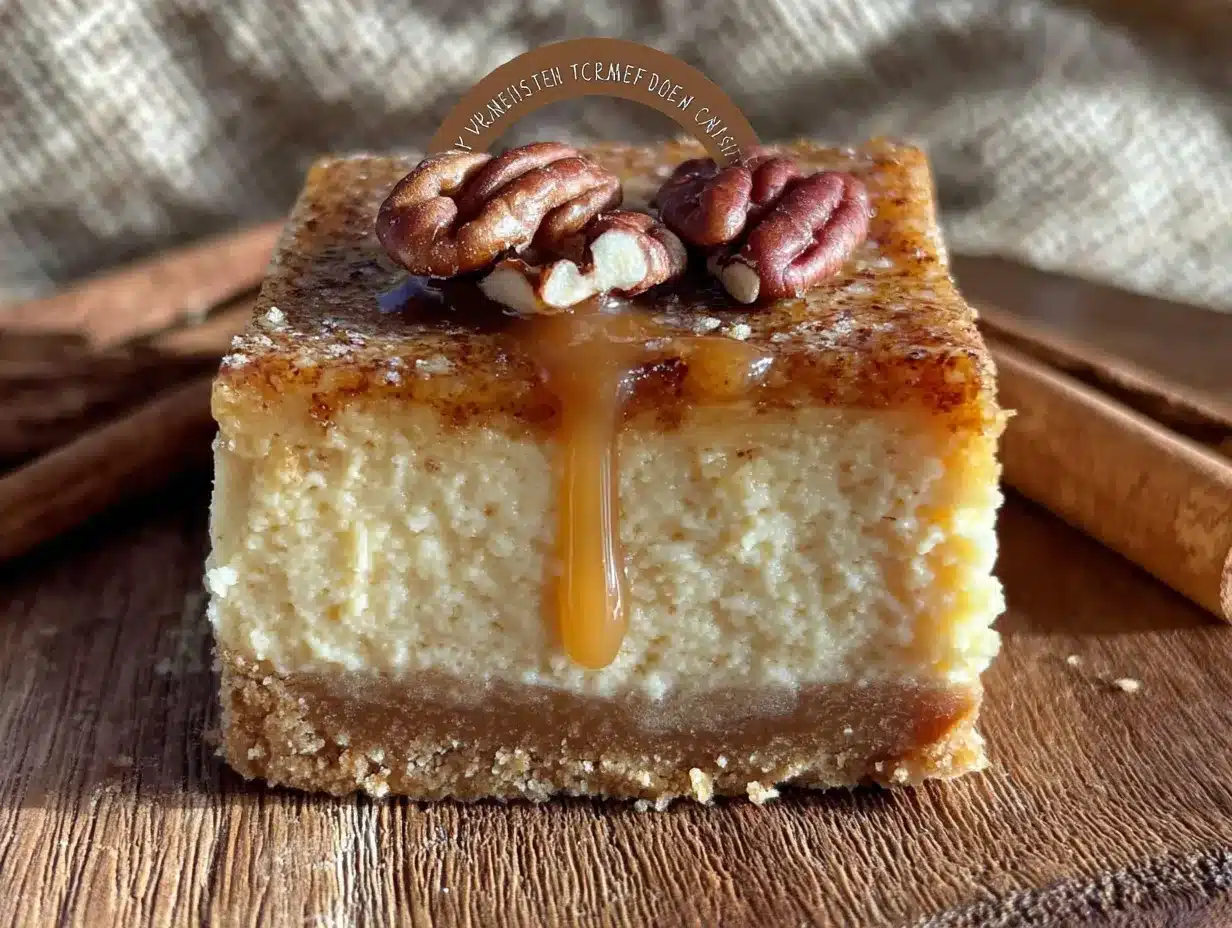
- 16 ounces cream cheese, softened to room temperature (I recommend Philadelphia for best texture)
- ½ cup granulated sugar
- 2 large eggs, room temperature
- 1 teaspoon vanilla extract
- 2 tablespoons all-purpose flour
For the Pumpkin Layer
- 1 cup pumpkin puree (not pumpkin pie filling—look for 100% pure pumpkin, I like Libby’s)
- ½ cup granulated sugar
- ¼ cup packed light brown sugar
- 2 large eggs, room temperature
- ½ cup heavy cream (adds richness—don’t skip this)
- 1 teaspoon vanilla extract
- 1 ½ teaspoons pumpkin pie spice
- ½ teaspoon ground cinnamon
- ¼ teaspoon ground ginger
- ¼ teaspoon salt
- 2 tablespoons all-purpose flour
For the crust, I’ve tried both graham crackers and shortbread cookies, but gingersnaps are the winner. Their molasses and ginger notes just sing with the pumpkin and cream cheese. If you can’t find gingersnaps, use graham crackers and add an extra ½ teaspoon of ground ginger to the crust mixture.
Make sure your cream cheese and eggs are truly at room temperature. I learned this the hard way—cold ingredients lead to a lumpy, grainy cheesecake layer. Just leave them on the counter for about 30 minutes before you start.
Equipment Needed
- 9×9-inch square baking pan (an 8×8 works too, but your bars will be thicker and need a few extra minutes of baking time)
- Parchment paper (for easy lifting—trust me on this)
- Food processor or ziplock bag and rolling pin (for crushing cookies)
- Electric hand mixer or stand mixer
- Large mixing bowls (at least two)
- Medium saucepan (for the water bath)
- Aluminum foil (to wrap the pan)
- Spatula
- Sharp knife (for clean slices)
I used my grandmother’s old 9×9 for years, and it worked perfectly. You don’t need fancy equipment here—just a good pan and some parchment paper. If you don’t have a food processor, put the gingersnaps in a ziplock bag and go to town with a rolling pin. It’s oddly satisfying.
Preparation Method
- Preheat your oven to 325°F (160°C). Line your 9×9-inch pan with parchment paper, leaving some overhang on two opposite sides. This creates little handles for lifting the bars out later.
- Make the crust. In a food processor, pulse the gingersnap cookies until they become fine crumbs. You should have about 1 ½ cups. Transfer to a medium bowl, add the sugar and salt, then pour in the melted butter. Stir until the mixture looks like wet sand and holds together when you squeeze it.
- Press the crust into the pan. Dump the crumb mixture into your prepared pan. Use the bottom of a measuring cup or a flat glass to press it down firmly and evenly. I cannot stress this enough—press it really well. A loose crust will fall apart when you cut the bars. Bake for 10 minutes, then set aside to cool slightly while you make the fillings.
- Make the cheesecake layer. In a large bowl, beat the softened cream cheese with an electric mixer on medium speed until smooth and creamy, about 2 minutes. Scrape down the sides of the bowl. Add the sugar and beat for another minute until fluffy. Add the eggs one at a time, beating on low after each addition just until combined—don’t overmix. Add the vanilla and flour, then mix on low until just incorporated. Set aside.
- Make the pumpkin layer. In a separate large bowl, whisk together the pumpkin puree, granulated sugar, and brown sugar until smooth. Add the eggs one at a time, whisking gently. Pour in the heavy cream and vanilla, and whisk until combined. Add the pumpkin pie spice, cinnamon, ginger, salt, and flour. Whisk until everything is smooth and no lumps remain.
- Layer the fillings. Pour the cheesecake mixture over the crust and spread it into an even layer using a spatula. Then, carefully spoon the pumpkin mixture over the cheesecake layer. Use the spatula to gently spread it—try not to mix the two layers too much, though a little swirl is fine and looks beautiful.
- Prepare the water bath. Wrap the bottom and sides of your baking pan with a double layer of aluminum foil. Place the pan inside a larger baking dish (like a 9×13). Place the whole setup on the middle rack of your oven. Carefully pour hot water into the larger dish until it comes about 1 inch up the sides of the smaller pan. This gentle steam bath prevents cracking.
- Bake. Bake for 45-55 minutes, or until the edges are set and the center has a slight jiggle when you gently shake the pan. It should look mostly set but still a bit wobbly in the very middle. If the top starts browning too quickly, tent loosely with foil after 30 minutes.
- Cool gradually. Turn off the oven and crack the door open. Let the cheesecake bars sit in the oven for 1 hour. This slow cooling prevents sudden temperature changes that cause cracks. Then, remove the pan from the water bath, take off the foil, and let it cool completely on a wire rack.
- Chill. Once cooled to room temperature, cover the pan with plastic wrap and refrigerate for at least 4 hours, but overnight is best. This is the hardest part—I know you want to dig in. But trust me, the texture sets perfectly overnight.
- Slice and serve. When ready to serve, lift the bars out using the parchment paper handles. Use a sharp knife, wiping it clean between cuts, to get those beautiful, clean slices. Serve cold or at room temperature.
Cooking Tips & Techniques
I’ve made this recipe at least a dozen times, and let me tell you—I’ve learned some things the hard way. Here are my best tips for success.
Room temperature ingredients are non-negotiable. I once tried to rush the process and used cold cream cheese straight from the fridge. The cheesecake layer came out lumpy and didn’t set properly. Just give your ingredients 30 minutes on the counter. Your future self will thank you.
Don’t overmix the fillings. When you beat air into the cheesecake batter, it can cause cracks during baking. Mix just until each addition is incorporated, then stop. A few small lumps are better than an overmixed batter.
The water bath is your friend. I know it sounds fussy, but it makes a huge difference. The steam keeps the oven moist and prevents the top from drying out and cracking. If you’re short on time, you can place a shallow pan of hot water on the rack below the cheesecake, but the water bath method is more reliable.
Check for doneness correctly. The center should still jiggle slightly when you shake the pan. If it looks completely solid, it’s overbaked. Overbaked cheesecake bars will be dry and crumbly. I pulled mine out one minute too late once, and the texture was just sad.
Patience is key. The cooling and chilling steps are not optional. I know you’re hungry, but cutting into warm cheesecake bars is a recipe for a gooey mess. Give them the full overnight chill—the flavors meld and the texture becomes perfectly creamy.
Variations & Adaptations
One of the best things about this recipe is how easy it is to adapt. Here are some of my favorite variations I’ve tried over the years.
Gluten-Free Version: Use gluten-free gingersnap cookies for the crust, and swap the all-purpose flour in both fillings with a 1:1 gluten-free baking flour blend. I’ve tested this with Bob’s Red Mill, and it works beautifully.
Dairy-Free Version: Use dairy-free cream cheese (like Kite Hill or Violife) and substitute the heavy cream with full-fat coconut cream. Use a plant-based butter for the crust. The texture will be slightly different, but still delicious.
Bourbon Maple Twist: Add 2 tablespoons of bourbon and 1 tablespoon of maple syrup to the pumpkin layer. The warmth of the bourbon and the sweetness of the maple pair beautifully with the fall spices. I made this version for a Friendsgiving party, and it disappeared in minutes.
Chocolate Swirl Variation: Melt ½ cup of semi-sweet chocolate chips and drizzle it over the pumpkin layer before baking. Use a knife to gently swirl it through. The chocolate and pumpkin combination is surprisingly good—think chocolate pumpkin bread, but cheesecake.
Nutty Crust Option: Add ½ cup of finely chopped pecans or walnuts to the crust mixture. Toast them first for extra flavor. This adds a lovely crunch and pairs perfectly with the creamy fillings.
Serving & Storage Suggestions
These bars are incredibly versatile when it comes to serving. I love them chilled straight from the fridge on a warm fall afternoon, but they’re also fantastic at room temperature with a dollop of fresh whipped cream.
Serving Temperature: For the best texture, let the bars sit at room temperature for about 15 minutes before serving. This takes the chill off and allows the flavors to open up. If you’re serving them for a party, arrange them on a platter and garnish with a light dusting of cinnamon or a few candied pecans.
Complementary Pairings: These bars are wonderful with a cup of hot apple cider, a spiced chai latte, or even a bold cup of coffee. For a dessert spread, serve them alongside a warm apple crisp or a slice of classic pecan pie.
Storage Instructions: Store leftover bars in an airtight container in the refrigerator for up to 5 days. I find they actually taste better on day two or three, as the flavors have more time to meld together. You can also freeze them for up to 3 months.
Freezing Tips: To freeze, wrap individual bars tightly in plastic wrap, then place them in a freezer-safe bag or container. When you’re ready to enjoy one, just thaw it in the refrigerator overnight. The texture stays remarkably creamy—I’ve tested this multiple times.
Reheating: If you prefer warm bars, microwave individual servings for 10-15 seconds. Just be careful not to overheat, or the cheesecake layer can become runny.
Nutritional Information & Benefits
While these bars are definitely a treat, they do offer some nutritional benefits worth noting. Here’s the estimated breakdown per serving (assuming 16 servings):
- Calories: 285
- Protein: 5g
- Fat: 17g
- Carbohydrates: 29g
- Fiber: 1g
- Sugar: 21g
Health Benefits of Key Ingredients: Pumpkin is packed with vitamin A, which supports eye health and immune function. It’s also rich in fiber and antioxidants. Cream cheese provides calcium and protein, while the eggs add high-quality protein and essential amino acids.
Dietary Considerations: This recipe contains gluten, dairy, and eggs. For gluten-free and dairy-free options, check the variations section above. If you’re watching your sugar intake, you can reduce the sugar in the pumpkin layer by ¼ cup without significantly affecting the texture.
I personally love that this dessert feels indulgent but has a hidden vegetable component. It’s not health food by any means, but knowing there’s real pumpkin in there makes me feel a little better about going back for seconds.
Conclusion
These Fall Pumpkin Pie Cheesecake Bars are everything I love about autumn baking. They combine two classic desserts into one perfectly portioned bar that’s impressive enough for company but simple enough for a Tuesday night craving. The gingersnap crust, the silky cheesecake, and that warm, spiced pumpkin layer—it’s a combination that just works.
I hope you give these a try and make them your own. Maybe you’ll add extra cinnamon, or swap in a different crust, or serve them with a drizzle of caramel sauce. That’s the beauty of a good recipe—it becomes yours the moment you put your spin on it.
I’d love to hear how yours turn out. Drop a comment below and let me know if you tried any variations or if these bars made it to your holiday table. And if you’re looking for more fall inspiration, you might enjoy my classic pumpkin pie recipe or these apple cider donut muffins. Happy baking, friends!
Frequently Asked Questions
Can I use a different crust for these cheesecake bars?
Absolutely! Graham crackers, shortbread cookies, or even vanilla wafers work well. Just adjust the spices to match—add a little ginger and cinnamon to graham crackers to mimic the gingersnap flavor.
Why did my cheesecake layer crack?
Cracking usually happens from overbaking or sudden temperature changes. Make sure you use a water bath, don’t overmix the batter, and cool the bars gradually in the oven with the door cracked open.
Can I make these bars ahead of time?
Yes, and I actually recommend it. These bars taste even better after a day or two in the fridge. You can make them up to 3 days in advance and store them covered in the refrigerator.
Can I use pumpkin pie filling instead of pumpkin puree?
I wouldn’t recommend it. Pumpkin pie filling is already sweetened and spiced, which would throw off the balance of this recipe. Stick with 100% pure pumpkin puree for the best results.
How do I get clean slices when cutting the bars?
Use a sharp knife and wipe it clean with a damp paper towel between each cut. For the cleanest slices, chill the bars for at least 4 hours or overnight before cutting.
Pin This Recipe!
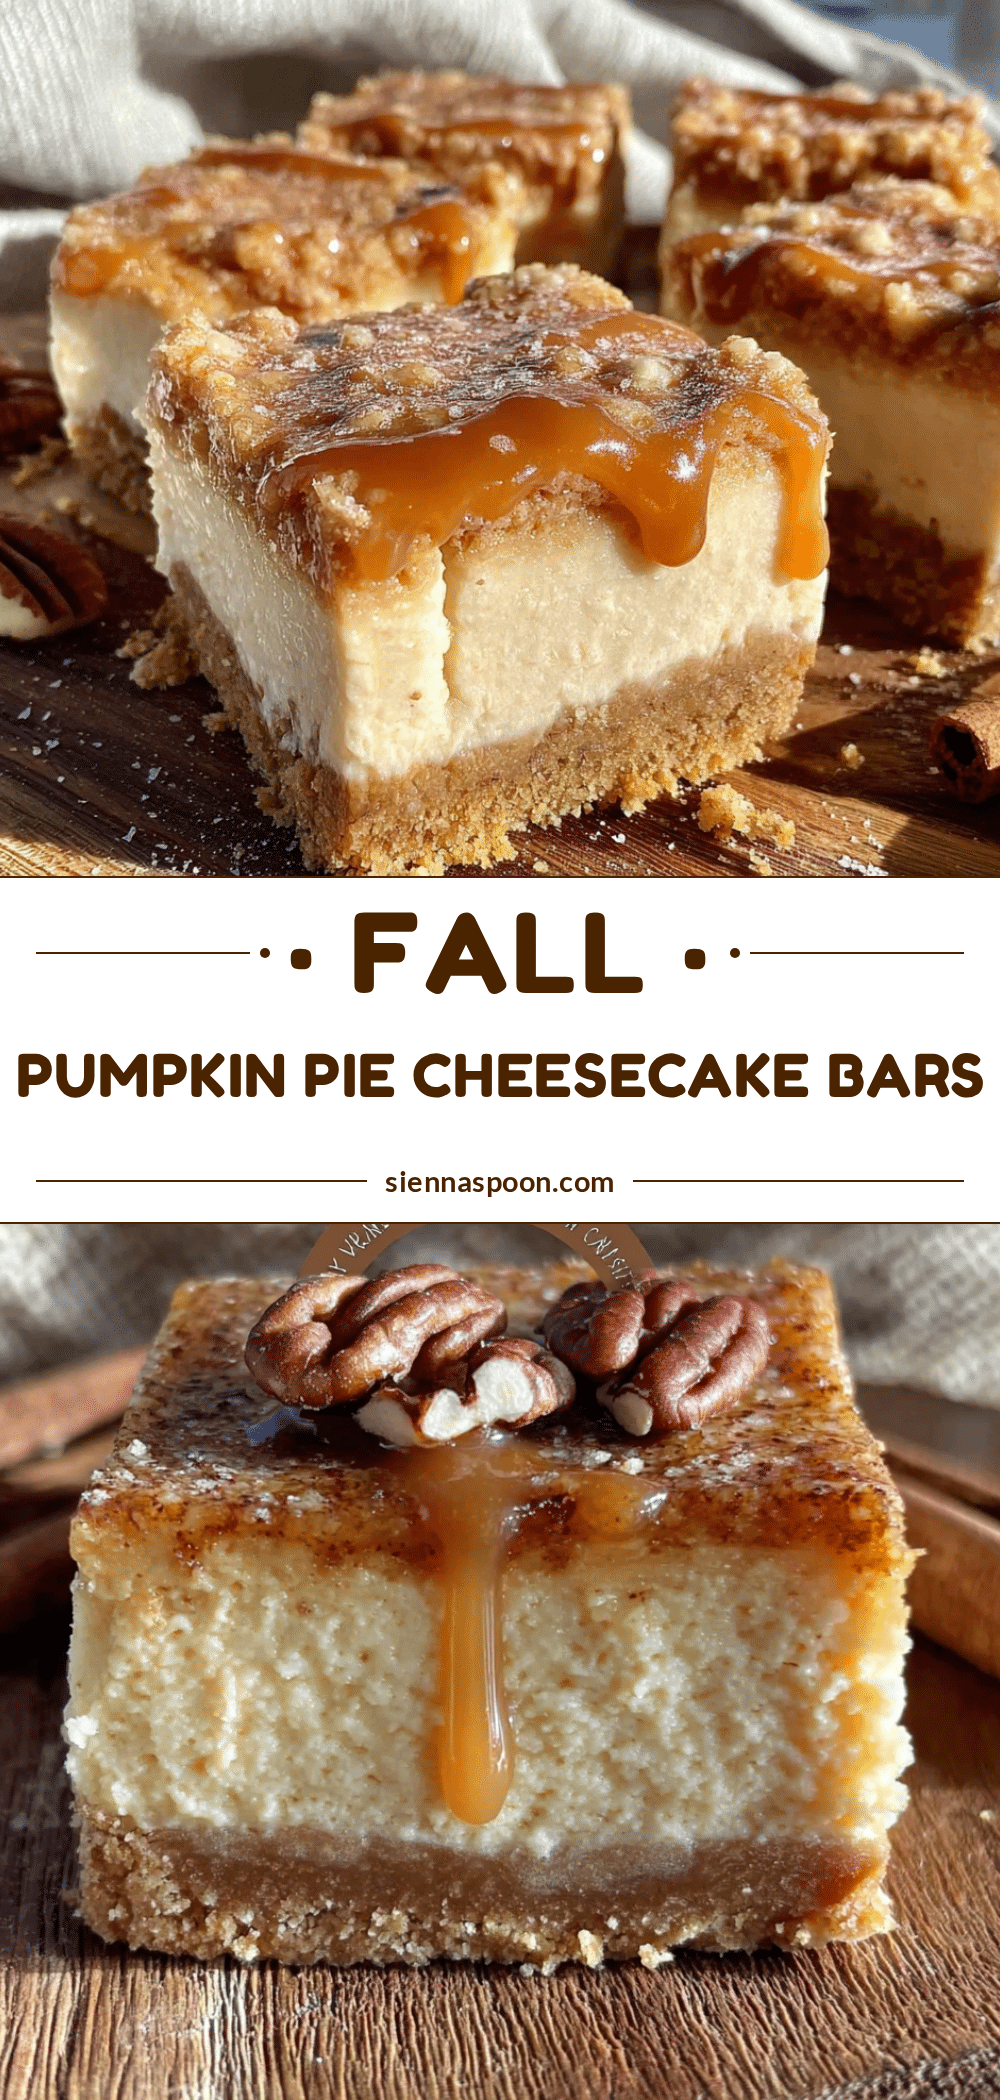
Easy Fall Pumpkin Pie Cheesecake Bars Recipe
These Fall Pumpkin Pie Cheesecake Bars combine a crunchy gingersnap crust, silky cheesecake, and warm spiced pumpkin filling for the ultimate autumn dessert. Quick to prepare and perfect for holiday gatherings, they’re a crowd-pleaser that tastes even better the next day.
- Prep Time: 30 minutes
- Cook Time: 55 minutes
- Total Time: 6 hours 25 minutes (includes chilling)
- Yield: 16 servings 1x
- Category: Dessert
- Cuisine: American
Ingredients
- 1 ½ cups gingersnap cookie crumbs (about 20–25 cookies, crushed finely)
- ¼ cup granulated sugar
- 6 tablespoons unsalted butter, melted
- ¼ teaspoon salt
- 16 ounces cream cheese, softened to room temperature
- ½ cup granulated sugar
- 2 large eggs, room temperature
- 1 teaspoon vanilla extract
- 2 tablespoons all-purpose flour
- 1 cup pumpkin puree (not pumpkin pie filling)
- ½ cup granulated sugar
- ¼ cup packed light brown sugar
- 2 large eggs, room temperature
- ½ cup heavy cream
- 1 teaspoon vanilla extract
- 1 ½ teaspoons pumpkin pie spice
- ½ teaspoon ground cinnamon
- ¼ teaspoon ground ginger
- ¼ teaspoon salt
- 2 tablespoons all-purpose flour
Instructions
- Preheat your oven to 325°F (160°C). Line your 9×9-inch pan with parchment paper, leaving some overhang on two opposite sides.
- Make the crust: In a food processor, pulse the gingersnap cookies until they become fine crumbs. Transfer to a medium bowl, add the sugar and salt, then pour in the melted butter. Stir until the mixture looks like wet sand and holds together when squeezed.
- Press the crust into the pan: Dump the crumb mixture into your prepared pan. Use the bottom of a measuring cup or a flat glass to press it down firmly and evenly. Bake for 10 minutes, then set aside to cool slightly.
- Make the cheesecake layer: In a large bowl, beat the softened cream cheese with an electric mixer on medium speed until smooth and creamy, about 2 minutes. Scrape down the sides. Add the sugar and beat for another minute until fluffy. Add the eggs one at a time, beating on low after each addition just until combined. Add the vanilla and flour, then mix on low until just incorporated. Set aside.
- Make the pumpkin layer: In a separate large bowl, whisk together the pumpkin puree, granulated sugar, and brown sugar until smooth. Add the eggs one at a time, whisking gently. Pour in the heavy cream and vanilla, and whisk until combined. Add the pumpkin pie spice, cinnamon, ginger, salt, and flour. Whisk until smooth.
- Layer the fillings: Pour the cheesecake mixture over the crust and spread into an even layer. Carefully spoon the pumpkin mixture over the cheesecake layer and gently spread it, trying not to mix the two layers too much.
- Prepare the water bath: Wrap the bottom and sides of your baking pan with a double layer of aluminum foil. Place the pan inside a larger baking dish. Place the whole setup on the middle rack of your oven. Carefully pour hot water into the larger dish until it comes about 1 inch up the sides of the smaller pan.
- Bake for 45-55 minutes, or until the edges are set and the center has a slight jiggle when you gently shake the pan. If the top starts browning too quickly, tent loosely with foil after 30 minutes.
- Cool gradually: Turn off the oven and crack the door open. Let the cheesecake bars sit in the oven for 1 hour. Then, remove the pan from the water bath, take off the foil, and let it cool completely on a wire rack.
- Chill: Once cooled to room temperature, cover the pan with plastic wrap and refrigerate for at least 4 hours, but overnight is best.
- Slice and serve: When ready to serve, lift the bars out using the parchment paper handles. Use a sharp knife, wiping it clean between cuts, to get clean slices. Serve cold or at room temperature.
Notes
Room temperature ingredients are crucial for a smooth texture. Don’t overmix the fillings to prevent cracks. The water bath helps prevent cracking. For best results, chill overnight. To freeze, wrap individual bars tightly in plastic wrap and store in a freezer-safe bag for up to 3 months.
Nutrition
- Serving Size: 1 bar
- Calories: 285
- Sugar: 21
- Sodium: 220
- Fat: 17
- Saturated Fat: 10
- Carbohydrates: 29
- Fiber: 1
- Protein: 5
Keywords: pumpkin cheesecake bars, fall dessert, pumpkin pie cheesecake, gingersnap crust, easy cheesecake bars, Thanksgiving dessert


