Love this? Save it for later!
Share the inspiration with your friends
“You won’t believe how simple this is,” my friend Mia said, sliding the bowl of chocolate pudding across the counter with a grin. It was one of those lazy Sunday afternoons when the sky was drizzly, and the kitchen smelled like warm cocoa and comfort. Honestly, I wasn’t expecting much—just a quick dessert to satisfy a sweet tooth. But the moment I took that first spoonful of this easy chocolate pudding with creamy, silky texture, I was hooked.
What’s funny is, Mia had been making this recipe for years, but it wasn’t until I tried it myself that I realized just how foolproof it is. No fancy equipment, no complicated steps—just simple ingredients coming together in a way that somehow feels luxurious. Maybe you’ve been there, craving something rich and chocolatey but not willing to spend hours fussing in the kitchen. This pudding fits right into that sweet spot.
That afternoon, we laughed over a few kitchen mishaps (I forgot to set the timer, of course) while the pudding thickened on the stove. The texture ended up silky smooth, almost velvety, without a single lump in sight. It’s one of those recipes you keep coming back to—not just because it tastes amazing, but because it reminds you that sometimes, the easiest things can be the most satisfying. Let me tell you, this recipe has been my go-to ever since, especially on those nights when I want chocolate without all the fuss.
Why You’ll Love This Recipe
Having tested countless chocolate pudding recipes over the years, I can say this one stands out for a few good reasons. It’s a true beginner’s dream, and yet it doesn’t skimp on flavor or texture. Here’s what makes it special:
- Quick & Easy: Comes together in under 20 minutes, perfect for busy evenings or last-minute dessert emergencies.
- Simple Ingredients: You probably already have everything in your pantry—no need for exotic chocolate types or fancy additives.
- Perfect for Any Occasion: Whether you’re serving up a cozy night treat or a casual family dinner finale, this pudding fits right in.
- Crowd-Pleaser: Kids love it, adults adore it, and it’s always a hit at potlucks or casual get-togethers.
- Unbelievably Delicious: The creamy, silky texture combined with deep chocolate flavor makes it feel indulgent without being complicated.
What really sets this easy chocolate pudding recipe apart is the smoothness—the secret is in the gradual heating and constant stirring, which creates that melt-in-your-mouth texture you don’t often get with simple stovetop puddings. Plus, it’s adaptable: you can tweak the sweetness or chocolate intensity to your liking, making it a recipe that feels truly yours every time you make it.
Honestly, this pudding isn’t just dessert; it’s a little moment of calm and joy after a hectic day. And if you’re anything like me, that silky bite of chocolate comfort is exactly what you need sometimes.
What Ingredients You Will Need
This recipe uses straightforward, pantry-friendly ingredients that come together to create that lush, creamy chocolate pudding without any fuss. Here’s what you’ll need:
- Granulated sugar – ⅔ cup (130g); balances the bitterness of the cocoa and adds sweetness
- Unsweetened cocoa powder – ⅓ cup (35g); I prefer Dutch-processed for a smoother flavor, but natural cocoa works fine too
- Cornstarch – ¼ cup (30g); acts as the thickening agent for that perfect pudding texture
- Salt – ¼ teaspoon; enhances the chocolate flavor
- Whole milk – 2¾ cups (650ml); for creaminess; you can swap with almond or oat milk for a dairy-free option
- Heavy cream – ½ cup (120ml); boosts the silky mouthfeel (optional but highly recommended)
- Vanilla extract – 1 teaspoon; adds warmth and depth to the flavor
- Bittersweet or semisweet chocolate chips – 3 ounces (85g); melts into the pudding for richness; I like Ghirardelli for consistent quality
- Butter – 1 tablespoon (14g), unsalted and softened; gives the pudding a luscious finish
Feel free to experiment a little—if you want a dairy-free pudding, swap the milk and cream with full-fat coconut milk. For a less sweet version, reduce the sugar by a tablespoon or two. And in summer, stirring in fresh raspberries on top adds a bright contrast that’s hard to beat.
Equipment Needed
- Medium saucepan: A good-quality, heavy-bottomed pan works best to prevent scorching.
- Whisk: Essential for smooth mixing and avoiding lumps as the pudding thickens.
- Measuring cups and spoons: Accurate measurements make a big difference in pudding texture.
- Heatproof spatula: For stirring in butter and chocolate at the end.
- Bowls or ramekins: For chilling and serving the pudding.
If you don’t have a whisk, a fork can work in a pinch, but whisking constantly is key to a silky pudding. Also, using a heavy-bottomed saucepan might seem like extra fuss, but it really helps keep the heat even so you don’t end up with burnt bits. For budget-friendly options, non-stick pans are fine, just watch the heat closely.
Preparation Method

- Mix dry ingredients: In your medium saucepan, whisk together ⅔ cup granulated sugar, ⅓ cup cocoa powder, ¼ cup cornstarch, and ¼ teaspoon salt. This ensures the cocoa and cornstarch are evenly distributed. (2 minutes)
- Add milk and cream: Gradually pour in 2¾ cups whole milk and ½ cup heavy cream while whisking constantly to prevent lumps. The mixture will look thin and runny at this point. (3 minutes)
- Cook over medium heat: Place the saucepan on medium heat. Keep whisking—honestly, this is the trickiest part but stick with it! The pudding will start to thicken after about 5 to 7 minutes. You’ll notice it gets glossy and coats the back of your spoon. (7-10 minutes)
- Simmer and stir: Once thickened, reduce heat slightly and cook for another 1-2 minutes, whisking constantly to avoid lumps or burning. If you see any lumps forming, vigorously whisk or use a fine mesh strainer later. (2 minutes)
- Remove from heat and add chocolate: Stir in 3 ounces of bittersweet chocolate chips until fully melted. Then, mix in 1 tablespoon softened butter and 1 teaspoon vanilla extract. This step is what gives the pudding that ultra-smooth, creamy finish. (2 minutes)
- Pour and chill: Transfer the pudding into individual bowls or ramekins. Cover the surface with plastic wrap pressed directly onto the pudding to prevent a skin from forming. Chill in the fridge for at least 2 hours before serving. (2+ hours chilling)
Quick tip: If you get interrupted mid-stir (yes, happened to me once), just keep whisking as soon as you can to keep things smooth. Also, don’t rush the heating—slow and steady wins the silky texture race here.
Cooking Tips & Techniques
Making pudding might seem simple, but a few tricks can make your version stand out. First, constant whisking during cooking is key. I’ve learned the hard way that walking away for even a minute means lumps or burnt bits waiting to happen. Trust me, that whisk is your best friend here.
Use medium heat rather than high—too hot, and the cocoa can scorch or the pudding thickens unevenly. Also, adding the chocolate chips off the heat is important; that prevents the chocolate from seizing or becoming grainy.
If you want a perfectly smooth pudding, strain it through a fine mesh sieve after cooking. I don’t always bother, but when I do, it’s like velvet in a bowl.
Finally, don’t underestimate the plastic wrap trick. Pressing it directly on the pudding surface stops that annoying skin from forming, which ruins the silky feel.
For multitasking, start chilling your pudding early in the day—you can make it hours ahead, freeing you up for dinner prep or relaxing before guests arrive.
Variations & Adaptations
- Dairy-Free Version: Swap whole milk and cream for coconut milk or almond milk. Use a dairy-free butter alternative for the finishing touch.
- Extra Chocolatey: Use dark cocoa powder and add an additional ounce of chocolate chips. You can also stir in a tablespoon of espresso powder to deepen the flavor.
- Spiced Chocolate: Add a pinch of cinnamon, a dash of cayenne pepper, or a splash of orange extract to give the pudding a warm, unexpected twist.
- Vegan Adaptation: Use cornstarch, coconut or oat milk, dairy-free chocolate, and coconut oil instead of butter. Whisk thoroughly for the same creamy texture.
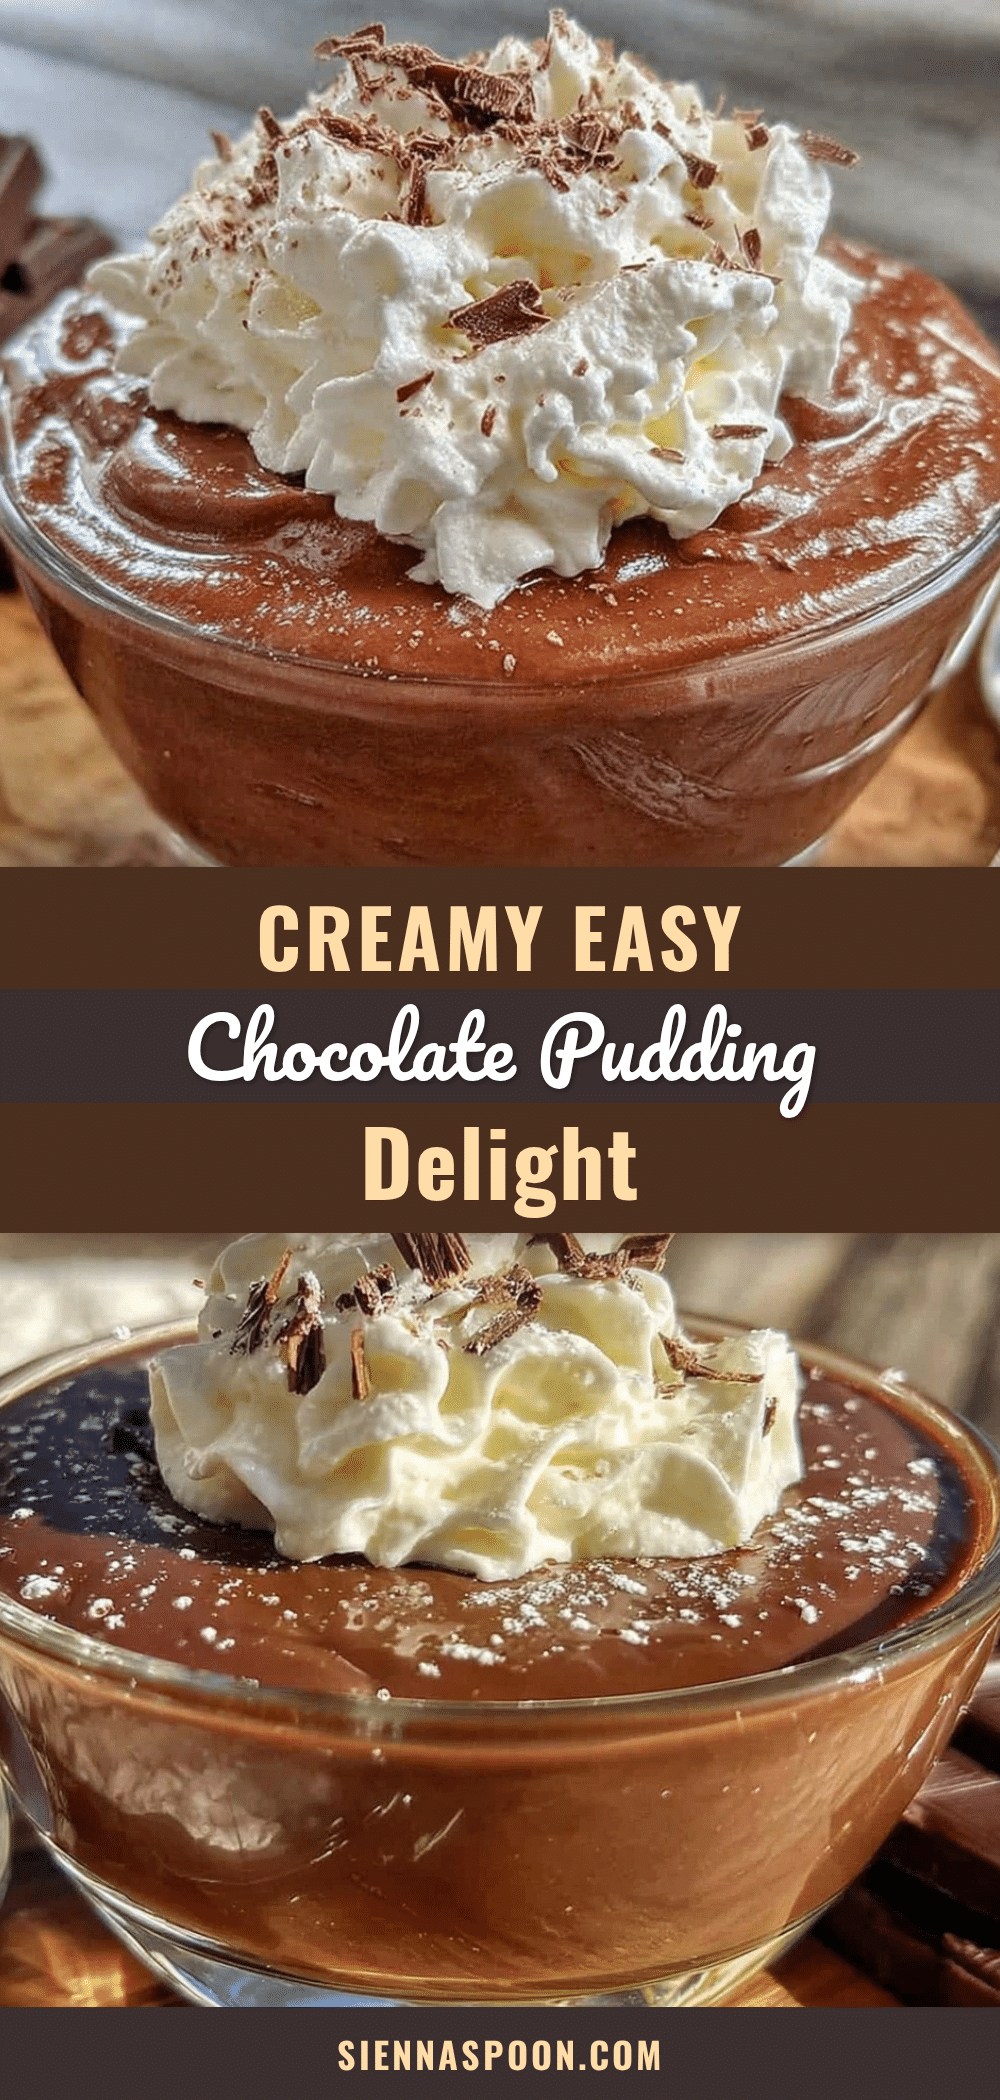
- Personal Favorite: Once chilled, I like to top mine with a dollop of whipped cream and a sprinkle of sea salt flakes. The salty-sweet combo is a game changer.
Serving & Storage Suggestions
This pudding tastes best chilled but not ice-cold—let it sit at room temperature for 5-10 minutes before serving to fully enjoy its creamy texture. Serve in pretty ramekins or glass cups for a little extra charm.
Pair it with fresh berries, a mint sprig, or a crunchy cookie on the side for contrast. A cup of strong coffee or creamy milk complements the chocolate beautifully.
Store leftovers covered tightly in the fridge for up to 3 days. If you want to keep it longer, this pudding freezes well—thaw overnight in the fridge and whisk gently before serving to restore texture.
Over time, the flavors meld and deepen, so sometimes I find the pudding tastes even better the next day. Just make sure to cover it well to keep that silky surface intact.
Nutritional Information & Benefits
This easy chocolate pudding clocks in at about 230 calories per serving (based on 6 servings). It offers a comforting treat without going overboard on sugar or fat when enjoyed in moderation.
The cocoa powder brings antioxidants and a touch of magnesium, which is great for mood and muscle function. Using whole milk and cream gives you calcium and vitamin D, essential for bone health.
For those with dietary needs, this recipe is easily adaptable to gluten-free and dairy-free diets by swapping ingredients as mentioned earlier.
From a wellness perspective, I appreciate how this pudding satisfies chocolate cravings without the heavy processed ingredients found in many store-bought desserts.
Conclusion
If you’re after a dessert that’s straightforward, comforting, and genuinely delicious, this easy chocolate pudding with creamy, silky texture is a winner. It’s the kind of recipe that feels special without demanding a lot of time or skill.
Make it your own by adjusting the chocolate intensity or adding your favorite toppings. Honestly, it’s a recipe that welcomes creativity—and trust me, once you try it, you’ll keep coming back.
I love this pudding because it reminds me that sometimes, simple pleasures are the best. So go ahead, grab your whisk, and give it a try—I’d love to hear how you customize yours!
Don’t forget to leave a comment below sharing your experience or any twists you’ve tried. Sharing our kitchen wins (and messes) is part of the fun!
FAQs About Easy Chocolate Pudding with Creamy Silky Texture
Can I make this pudding ahead of time?
Absolutely! This pudding actually tastes better after chilling for a few hours or overnight, and it keeps well in the fridge for up to 3 days.
What if I don’t have cornstarch?
You can substitute with arrowroot powder or tapioca starch in the same amount, but cornstarch gives the best classic pudding consistency.
How do I avoid lumps in my pudding?
Whisk constantly while heating, and add the milk gradually to the dry ingredients. If lumps form, strain the pudding through a fine sieve before chilling.
Can I use a different type of chocolate?
Yes! Semisweet or bittersweet chocolate chips work best. Avoid milk chocolate as it may make the pudding too sweet and thin.
Is this recipe suitable for vegans?
With a few swaps—dairy-free milk and cream alternatives, and vegan chocolate and butter substitutes—you can easily make this pudding vegan-friendly.
Pin This Recipe!
Easy Chocolate Pudding Recipe with Creamy Silky Texture Perfect for Beginners

A simple, quick, and foolproof chocolate pudding recipe with a creamy, silky texture that’s perfect for beginners and comforting for any occasion.
- Prep Time: 5 minutes
- Cook Time: 15 minutes
- Total Time: 2 hours 20 minutes
- Yield: 6 servings 1x
- Category: Dessert
- Cuisine: American
Ingredients
- ⅔ cup granulated sugar (130g)
- ⅓ cup unsweetened cocoa powder (35g), Dutch-processed preferred
- ¼ cup cornstarch (30g)
- ¼ teaspoon salt
- 2¾ cups whole milk (650ml)
- ½ cup heavy cream (120ml), optional but recommended
- 1 teaspoon vanilla extract
- 3 ounces bittersweet or semisweet chocolate chips (85g)
- 1 tablespoon unsalted butter (14g), softened
Instructions
- In a medium saucepan, whisk together ⅔ cup granulated sugar, ⅓ cup cocoa powder, ¼ cup cornstarch, and ¼ teaspoon salt to evenly distribute dry ingredients. (2 minutes)
- Gradually pour in 2¾ cups whole milk and ½ cup heavy cream while whisking constantly to prevent lumps. The mixture will look thin and runny. (3 minutes)
- Place the saucepan on medium heat. Keep whisking constantly as the pudding thickens, about 5 to 7 minutes, until glossy and coats the back of a spoon. (7-10 minutes)
- Reduce heat slightly and cook for another 1-2 minutes, whisking constantly to avoid lumps or burning. (2 minutes)
- Remove from heat and stir in 3 ounces bittersweet chocolate chips until melted. Mix in 1 tablespoon softened butter and 1 teaspoon vanilla extract for a smooth finish. (2 minutes)
- Transfer pudding into bowls or ramekins. Cover surface with plastic wrap pressed directly onto pudding to prevent skin formation. Chill in fridge for at least 2 hours before serving.
Notes
Constant whisking during cooking is essential to avoid lumps and burning. Use medium heat for even cooking. Adding chocolate chips off the heat prevents graininess. Press plastic wrap directly on pudding surface to prevent skin. For smoother pudding, strain through a fine mesh sieve after cooking. Can be made dairy-free or vegan with substitutions.
Nutrition
- Serving Size: 1 serving (about 1/6
- Calories: 230
- Sugar: 25
- Sodium: 150
- Fat: 11
- Saturated Fat: 7
- Carbohydrates: 32
- Fiber: 3
- Protein: 4
Keywords: chocolate pudding, easy dessert, creamy pudding, stovetop pudding, beginner recipe, silky texture, quick chocolate dessert