Love this? Save it for later!
Share the inspiration with your friends
“I wasn’t expecting to find the perfect garlic bread recipe scribbled on a napkin at a late-night diner,” my friend Mark confessed as he slid the worn paper across the table. It was a chilly Thursday evening, and the diner was buzzing with the usual crowd seeking comfort food. Mark, never one to shy away from a midnight snack, had struck up a conversation with the cook, who shared his secret for making a crispy garlic bread loaf with butter and herbs that “melts in your mouth but crunches just right.”
Honestly, I was skeptical at first. I mean, garlic bread is simple, right? But this recipe had a certain charm — it wasn’t just slathered butter and garlic tossed on any old loaf. There was a rhythm to the method, a balance of fresh herbs and just the right amount of butter that made it feel special. I still remember the slight mess I made trying to peel the garlic cloves while the diner’s jukebox played a scratchy tune in the background. The aroma that filled my kitchen that night was unforgettable, like the warmth of a cozy fire on a cold evening.
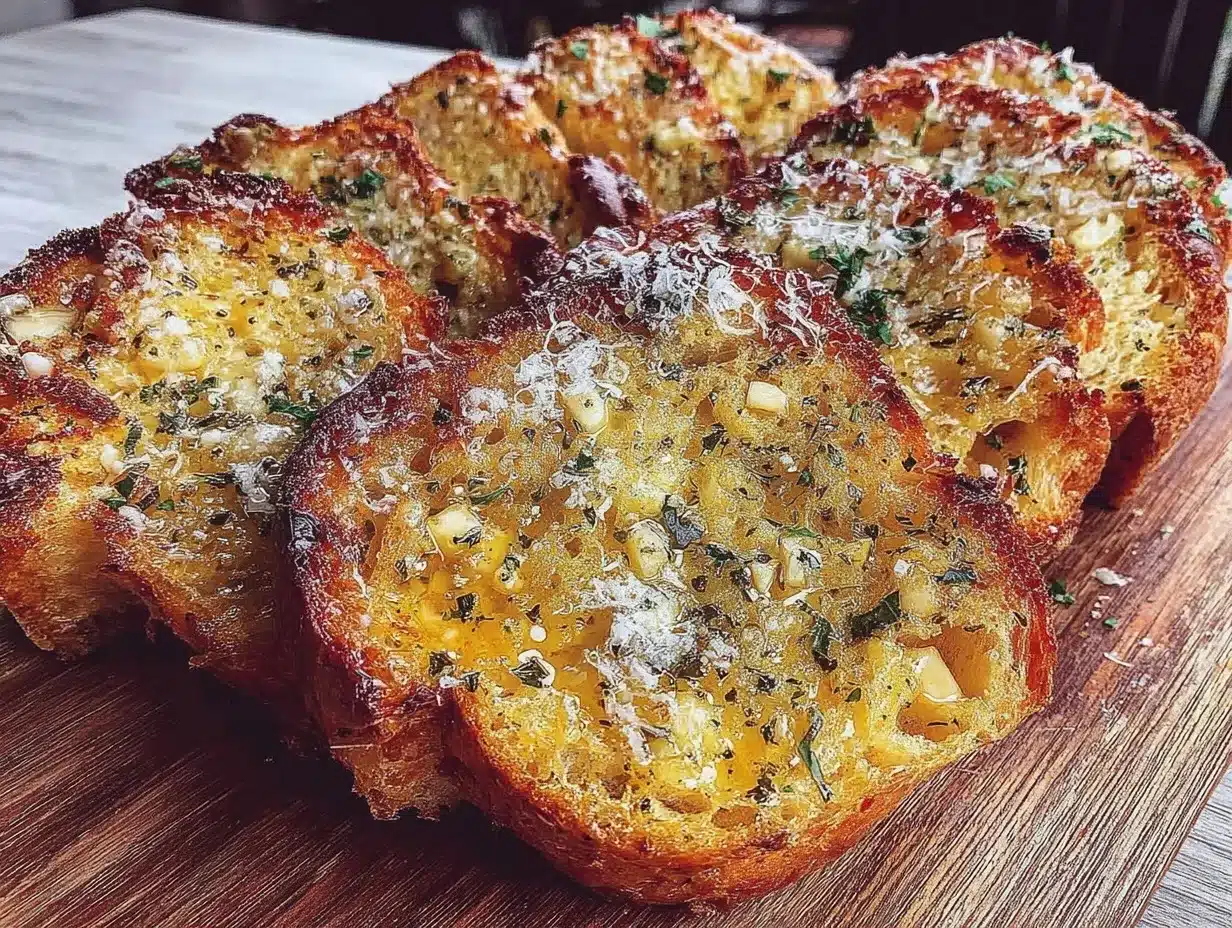
Maybe you’ve been there — craving that perfect garlic bread that’s crispy on the outside, soft and flavorful inside, and bursting with buttery herb goodness. It’s the kind of recipe that sticks with you, the one you pull out when you want to impress without stress. Let me tell you, this version is exactly that — a comforting, crunchy, herb-infused treat that you’ll want to make again and again.
Why You’ll Love This Recipe
After countless trials in my kitchen, this crispy garlic bread loaf with butter and herbs has earned its place as a go-to favorite. I’m not just saying this because of the rave reviews from my friends (though that helps). There’s a reason this recipe stands out, and I’m excited to share why it might become your favorite too.
- Quick & Easy: Ready in under 30 minutes, it’s a lifesaver for those busy weeknights or spontaneous dinner parties.
- Simple Ingredients: No complicated shopping lists here — just your trusty pantry staples and fresh herbs from the garden or market.
- Perfect for Any Occasion: Whether it’s a cozy family dinner or a casual brunch, this bread fits right in.
- Crowd-Pleaser: Kids and adults alike can’t resist the crispy edges and rich garlic butter flavor.
- Unbelievably Delicious: The crispy crust combined with the savory, herbaceous butter makes every bite a little moment of joy.
What really sets this recipe apart is the technique — spreading the butter-herb mixture between thick slices of loaf before baking seals in the moisture and flavors, while the oven’s heat creates that irresistible crunch. You’re not just making garlic bread; you’re crafting comfort food that feels a bit fancy but is honestly so simple.
This recipe isn’t just another garlic bread; it’s the kind that makes you close your eyes after the first bite and smile, the kind that turns a simple meal into a little celebration. And trust me, once you try it, you’ll keep coming back to it again and again.
What Ingredients You Will Need
This crispy garlic bread loaf with butter and herbs uses straightforward, wholesome ingredients designed to deliver bold flavor without fuss. Most of these are pantry staples, and if you shop for fresh herbs, you’ll notice how much brighter the bread tastes.
- 1 large loaf of crusty bread: A French baguette or Italian bread works beautifully for that perfect crunch.
- 1/2 cup (113g) unsalted butter, softened: Using unsalted lets you control the saltiness perfectly.
- 4-5 large garlic cloves, finely minced: Fresh garlic is a must — it gives that punchy flavor.
- 2 tablespoons fresh parsley, finely chopped: Adds vibrant color and herbaceous notes.
- 1 tablespoon fresh thyme leaves: Optional but highly recommended for a subtle earthiness.
- 1/2 teaspoon sea salt: Balances the flavors.
- 1/4 teaspoon freshly ground black pepper: Just a touch to brighten the taste.
- Optional: 1/4 teaspoon red pepper flakes: For a bit of heat if you’re feeling adventurous.
Tip: I personally like using Plugrá butter for its rich, creamy texture, but any good-quality butter will do. If you want a dairy-free option, swap in a plant-based butter and make sure your bread choice fits your dietary needs. For herbs, if fresh parsley or thyme are out of season, a teaspoon of dried versions works in a pinch, though fresh is always best.
Equipment Needed
- Baking sheet: A rimmed sheet works best to catch any drips of butter and keep your oven clean.
- Sharp serrated knife: Essential for slicing the bread without squashing it.
- Mixing bowl: For blending the garlic butter and herbs.
- Spatula or butter knife: To spread the mixture evenly between slices.
- Optional: Parchment paper: For easier cleanup and to prevent sticking.
I’ve tried this with different knives, and honestly, a dull blade just makes a mess of the loaf — so invest in a good serrated knife if you can. For spreading the butter, a flexible silicone spatula is my favorite because it gets into the corners without tearing the bread. And if you’re on a budget, no worries — a simple baking sheet and a butter knife will get you there just fine.
Preparation Method
- Preheat your oven to 375°F (190°C). This temperature crisps the bread perfectly without burning the garlic butter.
- Slice the bread: Using your serrated knife, cut the loaf into 1-inch (2.5 cm) thick slices, but don’t cut all the way through — leave about 1/2 inch (1.25 cm) at the bottom so the loaf stays in one piece.
- Make the garlic herb butter: In a mixing bowl, combine the softened butter, minced garlic, chopped parsley, thyme leaves, sea salt, black pepper, and red pepper flakes if using. Mix thoroughly until well blended.
- Spread the butter mixture: Using your spatula or butter knife, generously spread the garlic herb butter between each slice and also over the top and sides of the loaf. Don’t be shy — this is where the flavor lives!
- Wrap the loaf: Wrap the entire loaf loosely in aluminum foil to keep the butter from burning and to let the bread steam slightly while baking.
- Bake for 15 minutes: Place the wrapped loaf on your baking sheet and bake for 15 minutes. The butter will melt, and the bread will soften inside.
- Unwrap and crisp: Carefully unwrap the foil and bake the loaf for an additional 10-12 minutes until the crust is golden and crispy. Keep an eye on it — the garlic can burn quickly at this stage.
- Serve warm: Remove from the oven and let it cool for a few minutes before serving. You want it warm enough that the butter is still melty but not so hot it burns your tongue.
Quick tip: If you notice the bread getting too brown too fast, tent it back with foil. Also, for a little extra crispness, you can finish it under the broiler for 1-2 minutes but watch closely — I once left it too long and had to toss the top crust (lesson learned!).
Cooking Tips & Techniques
Let me share some tricks I’ve picked up making this crispy garlic bread loaf with butter and herbs over the years. These little bits will save you from common pitfalls and ensure a perfect outcome every time.
- Use softened butter: It’s easier to mix with the herbs and garlic, giving you an even spread and better flavor distribution.
- Don’t overdo the garlic: Fresh garlic is powerful! Five cloves are enough for a loaf this size; more might overpower and become bitter after baking.
- Cut but don’t slice through the loaf: Keeping the base intact helps the bread hold its shape and makes serving easier.
- Wrap the loaf tightly: Wrapping helps the butter soak in without burning and keeps the bread moist inside.
- Watch the oven closely towards the end: The final crisping phase can turn from perfect to burnt in a minute or two.
- Use fresh herbs when possible: They add brightness and a fresh aroma that dried herbs can’t match.
- Multitask: While the bread bakes, it’s a great time to prepare a salad or get your main dish ready.
Honestly, I learned most of these from a few too many burnt batches and a kitchen full of garlic smell! But now, it’s pretty foolproof once you get the hang of it.
Variations & Adaptations
This garlic bread loaf recipe is super flexible. Here are a few ways I’ve tweaked it depending on the occasion or what I had on hand:
- Cheesy twist: Add shredded mozzarella or Parmesan between the slices before baking for a gooey, cheesy surprise.
- Vegan version: Swap the butter for a plant-based spread and skip the cheese additions — fresh herbs and garlic still shine.
- Spicy kick: Increase the red pepper flakes or add a dash of smoked paprika for a smokier heat.
- Seasonal herbs: Use rosemary or basil in place of thyme and parsley depending on what’s fresh in your garden or market.
- Different breads: Try a sourdough boule or even a sturdy whole wheat loaf for a nuttier flavor.
My personal favorite is the cheesy version for weekend brunches — it’s always a hit, especially paired with a simple tomato salad. You can easily customize the herbs and spices to suit your taste, so don’t hesitate to experiment a little.
Serving & Storage Suggestions
This crispy garlic bread loaf with butter and herbs is best served warm, straight from the oven, when the butter is still melty and the crust is crispy. It pairs amazingly well with hearty soups, pasta dishes, or even a fresh green salad.
If you’re planning to serve it later, wrap the bread in foil and keep it at room temperature for up to 2 hours. For longer storage, place it in an airtight container or wrap tightly in plastic wrap and refrigerate for up to 3 days.
To reheat, pop the bread in a 350°F (175°C) oven for 5-7 minutes to revive that crispy crust and warm the butter inside. Avoid microwaving if you want to keep the texture crisp — trust me, soggy garlic bread is no fun!
Over time, the flavors of the garlic and herbs meld even more, so leftovers (if any!) can taste even better the next day. Just reheat gently as described, and enjoy.
Nutritional Information & Benefits
Here’s a rough estimate per serving (1-2 slices, about 60g):
| Calories | 180 kcal |
|---|---|
| Fat | 10g (mostly from butter) |
| Carbohydrates | 20g |
| Protein | 4g |
| Fiber | 1g |
Garlic is well-known for its antioxidant properties and potential heart health benefits. Fresh herbs like parsley and thyme add vitamins and minerals along with flavor, making this not just tasty but a mild boost to your daily greens.
This recipe can be adapted to gluten-free by using gluten-free bread, and with a plant-based butter substitute, it can suit dairy-free diets too. Just watch the ingredients on your bread to avoid allergens.
I appreciate that this garlic bread is a treat but also brings some wholesome ingredients to the table — comfort food that feels a little nourishing, too.
Conclusion
This crispy garlic bread loaf with butter and herbs is a simple, satisfying recipe that brings a little magic to your table. It’s quick enough for weeknights, impressive enough for guests, and flexible enough to suit many tastes and dietary needs. I love it for its balance of crunchy crust and buttery, garlicky warmth that makes every meal feel cozy.
Feel free to tweak the herbs, spice levels, or bread type to make it your own. And hey, if you try adding cheese or a spicy twist, let me know how it goes — I’m always curious about new takes! Your kitchen might get a little messy along the way (mine sure does), but the results? Totally worth it.
Go ahead, give this recipe a try and share your thoughts below — I’d love to hear your stories and any adaptations you discover. Here’s to crispy, buttery, herb-filled goodness that never disappoints!
FAQs
Can I use pre-minced garlic for this recipe?
While fresh garlic gives the best flavor and aroma, you can use pre-minced garlic in a pinch. Just reduce the amount slightly, as pre-minced garlic can be more potent or sometimes less fresh.
What’s the best bread to use for crispy garlic bread?
A crusty loaf like a French baguette or Italian bread works best, as it crisps nicely while staying soft inside. Avoid super soft sandwich bread, which can get soggy.
Can I prepare the garlic butter mixture ahead of time?
Absolutely! You can mix the garlic butter up to a day in advance and keep it refrigerated. Bring it to room temperature before spreading for easier handling.
How do I keep the bread from getting soggy?
Cutting the loaf without slicing all the way through and wrapping it in foil during baking helps keep moisture inside without sogginess. Also, finishing with unwrap baking crisps the crust perfectly.
Is it possible to freeze this garlic bread?
Yes! Wrap the prepared, unbaked loaf tightly in plastic wrap and foil, then freeze. Bake from frozen, adding a few extra minutes to the baking time for best results.
Pin This Recipe!
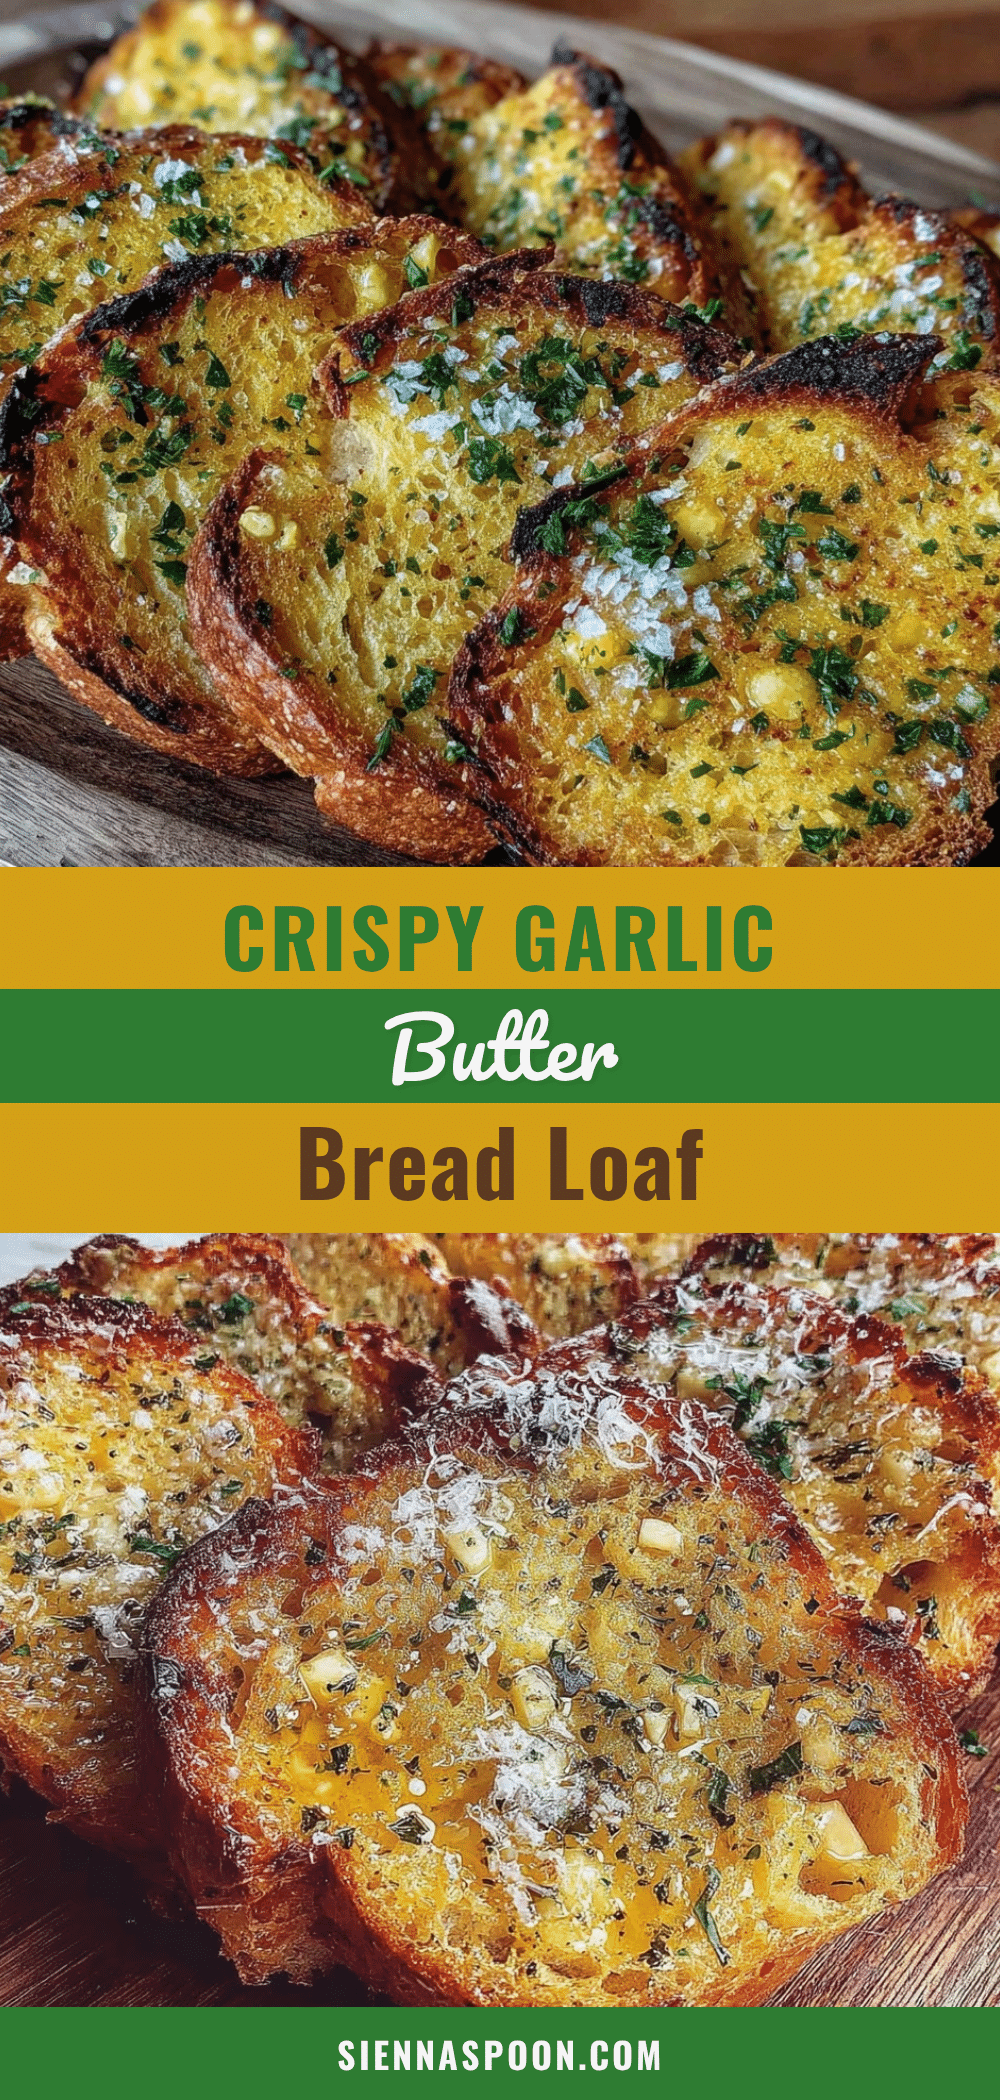
Crispy Garlic Bread Loaf Recipe Easy Homemade Butter Herb Bread

A quick and easy recipe for a crispy garlic bread loaf with butter and herbs that is crunchy on the outside, soft and flavorful inside, and bursting with buttery herb goodness.
- Prep Time: 10 minutes
- Cook Time: 27 minutes
- Total Time: 37 minutes
- Yield: 8 servings 1x
- Category: Side Dish
- Cuisine: Italian
Ingredients
- 1 large loaf of crusty bread (French baguette or Italian bread recommended)
- 1/2 cup (113g) unsalted butter, softened
- 4–5 large garlic cloves, finely minced
- 2 tablespoons fresh parsley, finely chopped
- 1 tablespoon fresh thyme leaves (optional)
- 1/2 teaspoon sea salt
- 1/4 teaspoon freshly ground black pepper
- Optional: 1/4 teaspoon red pepper flakes
Instructions
- Preheat your oven to 375°F (190°C).
- Using a serrated knife, cut the loaf into 1-inch (2.5 cm) thick slices, but do not cut all the way through—leave about 1/2 inch (1.25 cm) at the bottom so the loaf stays in one piece.
- In a mixing bowl, combine the softened butter, minced garlic, chopped parsley, thyme leaves, sea salt, black pepper, and red pepper flakes if using. Mix thoroughly until well blended.
- Using a spatula or butter knife, generously spread the garlic herb butter between each slice and also over the top and sides of the loaf.
- Wrap the entire loaf loosely in aluminum foil to keep the butter from burning and to let the bread steam slightly while baking.
- Place the wrapped loaf on a baking sheet and bake for 15 minutes.
- Carefully unwrap the foil and bake the loaf for an additional 10-12 minutes until the crust is golden and crispy. Watch closely to avoid burning.
- Remove from the oven and let it cool for a few minutes before serving. Serve warm.
Notes
Use softened butter for easier mixing and better flavor distribution. Do not slice through the loaf completely to keep it intact. Wrap the loaf tightly in foil to keep moisture and prevent burning. Watch the bread closely during the final crisping phase to avoid burning. Fresh herbs are preferred but dried can be used in a pinch. For extra crispness, finish under the broiler for 1-2 minutes but watch carefully.
Nutrition
- Serving Size: 1-2 slices (about 60
- Calories: 180
- Sugar: 1
- Sodium: 230
- Fat: 10
- Saturated Fat: 6
- Carbohydrates: 20
- Fiber: 1
- Protein: 4
Keywords: garlic bread, crispy garlic bread, butter herb bread, homemade garlic bread, easy garlic bread recipe, garlic bread loaf