Love this? Save it for later!
Share the inspiration with your friends
Introduction
It was 11:17 PM on a quiet Tuesday, and a strange craving for something cheesy and crunchy hit me hard. I didn’t have the usual stash of shredded cheddar or the fancy panko breadcrumbs that I’d normally reach for when making mac and cheese, but I had elbow macaroni, some leftover mixed cheeses, and a half-empty bag of crushed tortilla chips. Honestly, it felt like the kitchen was daring me to break the rules. So, with no audience but the hum of the fridge and a flickering overhead light, I improvised a bit — mixing the macaroni with gooey cheese, folding in that unexpected crunchy surprise, and baking them in muffin tins for bite-sized cups. The result? Weirdly genius, perfectly crispy on the outside, meltingly cheesy on the inside, and just the right kind of snack to satisfy that late-night urge.
You know that feeling when a recipe just clicks, even if it’s born out of what you had on hand rather than what the cookbook said? That’s exactly why these crispy cheesy baked mac and cheese cups stuck with me. They’re a little wild, a little comforting, and totally shareable. Maybe you’ve been there too — staring at your pantry at night, daring yourself to make something unexpectedly delicious. Let me tell you, these cups are worth that kitchen chaos and the occasional cracked muffin tin in the process.
Since that night, this recipe has become my go-to for quick snacks, party bites, or even a quirky side dish when I want to impress without fuss. It’s a little bit nostalgic, a little bit inventive, and honestly, one of those recipes that makes you close your eyes after the first bite because it just feels right.
Why You’ll Love This Recipe
From my many late-night kitchen escapades and countless test batches, I’ve come to appreciate exactly why this recipe hits the spot every time. Here’s why these crispy cheesy baked mac and cheese cups deserve a permanent spot in your snack arsenal:
- Quick & Easy: Comes together in under 30 minutes, perfect when you want a snack fast or need to whip up something for unexpected guests.
- Simple Ingredients: No need for fancy or hard-to-find items — just pantry staples and whatever cheese you have on hand.
- Perfect for Parties: These little cups are ideal for brunches, potlucks, or casual get-togethers where finger food rules the table.
- Crowd-Pleaser: Kids and adults alike rave about the crispy edges and gooey center — hard to resist that combo!
- Unbelievably Delicious: The contrast of textures — crisp on the outside, cheesy and creamy inside — makes every bite a winner.
What makes this recipe different from the usual mac and cheese? For starters, baking individual cups means each has that coveted crust, which you can’t get from a casserole dish. Plus, mixing in crunchy bits like crushed chips or breadcrumbs before baking adds a surprising texture twist. It’s comfort food turned snack-sized, perfect for when you want both nostalgia and novelty.
If you’re wondering why it’s stuck with me, it’s because it’s flexible, forgiving, and just straight-up tasty. Plus, it’s the kind of recipe that makes you feel like a kitchen rebel — creating something new from what’s left in the fridge. I’m betting you’ll love making it your own too.
What Ingredients You Will Need
This recipe uses simple, wholesome ingredients to deliver bold flavor and satisfying texture without a fuss. Most of these are pantry staples, and if you’re missing something, I’ve got easy swaps for you below.
- Elbow macaroni: About 2 cups (uncooked) or 200 grams — the classic choice for perfect bite-sized pasta.
- Cheese blend: 2 cups (about 200 grams) shredded cheese — I recommend a mix of sharp cheddar and mozzarella for gooey melt and flavor depth. Brands like Cabot or Sargento work great.
- Milk: 1 cup (240 ml) whole milk or 2% for creamy texture (use unsweetened almond milk for dairy-free).
- Butter: 2 tablespoons (about 28 grams), unsalted and melted to add richness.
- All-purpose flour: 2 tablespoons (15 grams) to make a smooth cheese sauce base.
- Garlic powder: 1/2 teaspoon for subtle savory notes.
- Onion powder: 1/2 teaspoon to round out the flavor.
- Salt & Pepper: To taste — start with 1/2 teaspoon salt and a pinch of pepper.
- Crunchy topping: 1 cup (about 100 grams) crushed tortilla chips or panko breadcrumbs — this adds the irresistible crispy texture on top.
- Optional add-ins: A pinch of smoked paprika or cayenne for a little kick, or chopped herbs like parsley or chives for freshness.
If you want to swap ingredients, you can use gluten-free flour if needed, or swap the macaroni for small shells or cavatappi. For a dairy-free version, try vegan cheese and plant-based milk, but be warned that the cheesy flavor might be less intense. I’ve also tried adding a little cream cheese for extra creaminess — totally worth it.
Equipment Needed
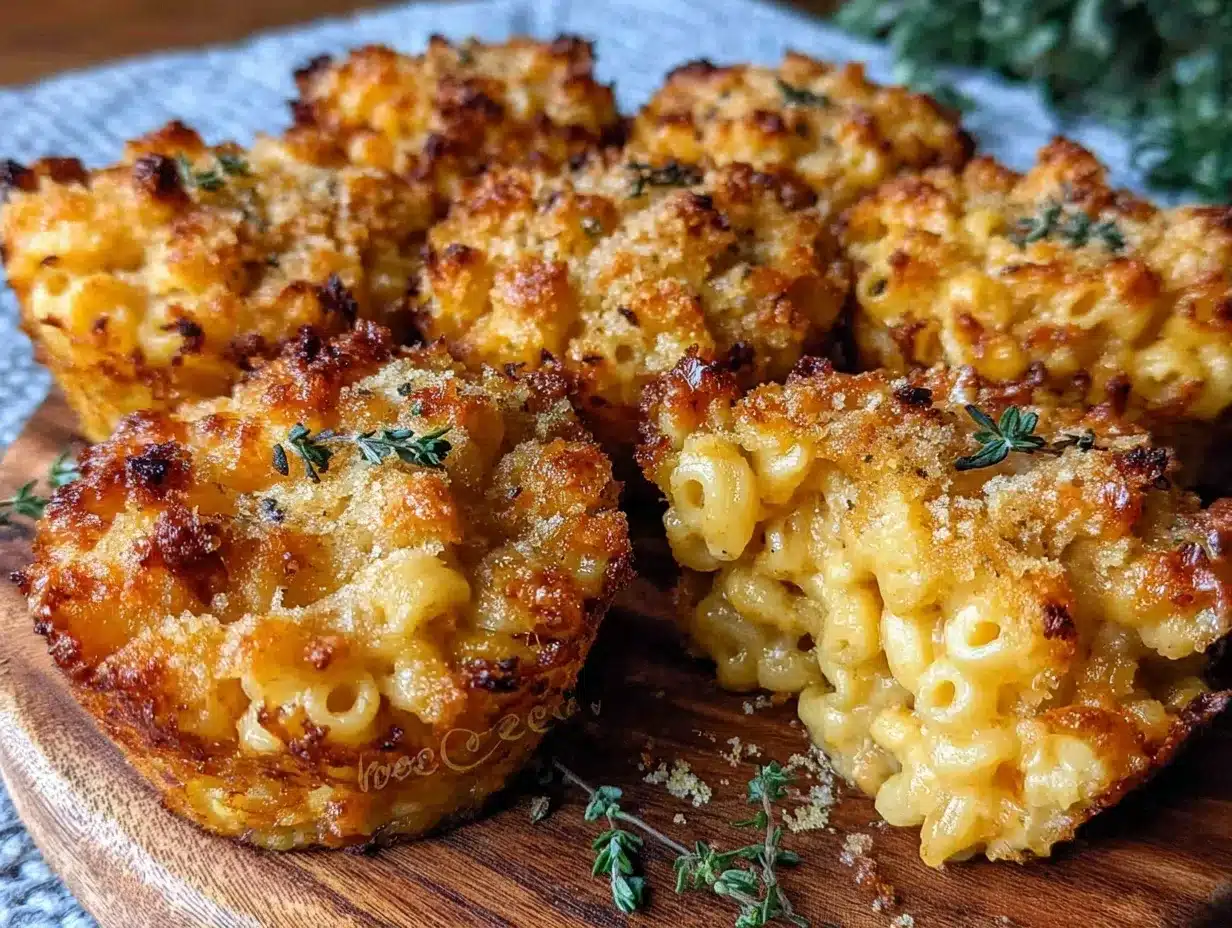
To make these crispy cheesy baked mac and cheese cups, here’s what you’ll want ready:
- Muffin tin: Essential for shaping the mac and cheese into individual cups. A standard 12-cup muffin pan works perfectly.
- Mixing bowls: One for the cheese sauce and one for combining the pasta and sauce.
- Medium saucepan: For making the cheese sauce.
- Whisk and wooden spoon: To stir and blend the sauce smoothly.
- Measuring cups and spoons: For precise ingredient amounts.
- Non-stick spray or butter: To grease the muffin tin and help the cups release easily.
If you don’t have a muffin tin, you can try small ramekins or even silicone baking cups, but the cooking time might vary slightly. Personally, I prefer metal tins because they help get that golden crust just right. Cleaning up is easy if you spray the cups well or line them with parchment squares. Budget-friendly tip: a decent muffin pan can be found in any kitchen store or online for under $15 — worth every penny for this recipe and many more.
Preparation Method
- Cook the macaroni: Bring a large pot of salted water to a boil. Add 2 cups (200 grams) elbow macaroni and cook until just al dente, about 6-7 minutes. Drain and run under cold water to stop the cooking. Set aside.
- Make the cheese sauce: In a medium saucepan, melt 2 tablespoons (28 grams) unsalted butter over medium heat. Whisk in 2 tablespoons (15 grams) all-purpose flour and cook for 1-2 minutes until it forms a smooth paste and starts to bubble — this step is crucial to avoid a floury taste.
- Slowly add milk: Gradually whisk in 1 cup (240 ml) whole milk, stirring constantly to keep the sauce smooth. Let it simmer gently until it thickens, about 4-5 minutes. You should see it coat the back of a spoon.
- Add seasonings and cheese: Remove from heat and stir in 2 cups (200 grams) shredded cheese, 1/2 teaspoon garlic powder, 1/2 teaspoon onion powder, salt, and pepper. Stir until the cheese melts fully and the sauce is creamy.
- Combine pasta and sauce: In a large bowl, gently fold the cooked macaroni into the cheese sauce until evenly coated.
- Prepare muffin tin: Grease a 12-cup muffin pan with non-stick spray or butter to prevent sticking.
- Spoon mixture into cups: Divide the cheesy macaroni evenly among the muffin cups, pressing down lightly to compact.
- Add crunchy topping: Sprinkle 1 cup crushed tortilla chips or panko breadcrumbs over each cup for that signature crispy finish.
- Bake: Preheat your oven to 375°F (190°C). Bake the cups for 20-25 minutes until the tops are golden brown and crisp, and the cheese sauce bubbles around the edges.
- Cool and remove: Let the cups cool in the pan for about 5 minutes before gently removing with a small spatula. They’re best served warm but hold their shape nicely as they cool.
Pro tip: If your cheese sauce seems too thick before baking, add a splash of milk to loosen it. Also, don’t skip the resting time after baking — it helps the cups firm up so they don’t fall apart when you pick them up.
Cooking Tips & Techniques
Making the perfect crispy cheesy baked mac and cheese cups takes a little know-how, and I’m happy to share what I’ve learned after many kitchen experiments.
- Don’t overcook your pasta: Since the macaroni will bake again, cook it just until al dente. Overcooked pasta turns mushy once baked.
- Make a smooth cheese sauce: Whisk the flour and butter thoroughly before adding milk to avoid lumps. A smooth sauce means creamy cups inside.
- Use a blend of cheeses: Sharp cheddar gives flavor punch, mozzarella adds meltiness. Mixing cheeses balances taste and texture.
- Crunchy topping matters: Panko breadcrumbs or crushed chips provide the crispy contrast that turns this recipe from good to unforgettable.
- Grease muffin tins well: Trust me, it saves you from the heartbreak of stuck cups or broken edges.
- Timing is key: Bake just until golden and bubbly. Too long, and the cups dry out; too short, and they aren’t crispy enough.
- Multitask: While the sauce thickens, prep your muffin tin and crush your topping to save time.
In my early attempts, I learned the hard way that skipping the flour step or rushing the sauce leads to a grainy texture. Also, I once forgot to grease the pan — oh, the mess! But these little lessons make the final result even sweeter.
Variations & Adaptations
This recipe is pretty flexible, so feel free to tweak it according to what you like or what’s in your kitchen.
- Dietary Twist: Make it gluten-free by swapping all-purpose flour for a gluten-free blend and using gluten-free pasta and breadcrumbs.
- Flavor Boost: Stir in cooked bacon bits, caramelized onions, or roasted garlic to add deeper savory notes.
- Spicy Kick: Add a pinch of cayenne pepper or mix in diced jalapeños for a little heat.
- Vegan Option: Use plant-based cheese and milk alternatives, plus a vegan butter substitute. The texture changes a bit but still satisfying.
- Seasonal Upgrades: Mix in steamed broccoli florets or roasted butternut squash cubes for a veggie boost.
Personally, I once tossed in some sun-dried tomatoes and fresh basil for a Mediterranean spin — surprisingly delicious! Also, if you want to try a different cooking method, air-frying the cups gives a similar crispness but watch your timing carefully.
Serving & Storage Suggestions
These crispy cheesy baked mac and cheese cups are best served warm, right out of the oven when the cheese is still melty and the crust is at its crispiest. They make fantastic finger food for parties, paired with a simple green salad or tomato soup for a cozy meal.
To store leftovers, pop them in an airtight container and refrigerate for up to 3 days. When you’re ready to eat, reheat in a preheated oven at 350°F (175°C) for about 10 minutes to bring back the crisp exterior. Avoid microwaving unless you don’t mind a softer texture.
They also freeze well — wrap each cup individually in plastic wrap, then place in a freezer-safe container for up to 2 months. Thaw overnight in the fridge before reheating.
Fun fact: The flavors actually deepen if you make them a day ahead, so prepping in advance can be a smart move for gatherings.
Nutritional Information & Benefits
Each serving of these mac and cheese cups offers a comforting dose of protein and calcium thanks to the cheese, plus energy-boosting carbs from the pasta. Here’s a rough estimate per cup:
| Nutrient | Amount |
|---|---|
| Calories | 220-250 kcal |
| Protein | 10-12 grams |
| Carbohydrates | 20-25 grams |
| Fat | 12-15 grams |
| Calcium | 15% DV |
The use of real cheese provides beneficial nutrients like calcium and vitamin B12. If you want to make it lighter, try using part-skim cheeses and whole wheat pasta. Note, this recipe contains dairy and gluten, so substitute accordingly for allergies.
From a wellness perspective, this dish hits the comfort food mark without going overboard on heaviness, especially if you keep portions in check. Honestly, it feels like a treat that you can make a bit healthier without losing the soul of the dish.
Conclusion
These crispy cheesy baked mac and cheese cups are a brilliant blend of comfort and crunch, perfect for anytime snacking or casual entertaining. They’re easy to make, adaptable, and just downright fun to eat.
Feel free to tweak the cheeses, add your favorite spices, or sneak in veggies to make them truly your own. I love how this recipe lets me be a little creative, especially when I’m cooking late at night with limited ingredients. It’s a reminder that sometimes the best bites come from unexpected moments and a little kitchen chaos.
Give these a try, and if you do, I’d love to hear how you made them yours! Drop a comment below or share your twists — let’s keep the cheesy goodness going.
Remember, food is about joy and experimentation, so enjoy every crispy, gooey bite.
FAQs
Can I make these mac and cheese cups ahead of time?
Yes! You can prepare the cups and refrigerate them for up to 24 hours before baking. Just add a couple of extra minutes to the baking time if baking straight from the fridge.
What cheeses work best for this recipe?
A blend of sharp cheddar and mozzarella works great for flavor and meltiness. You can also experiment with gouda, Monterey Jack, or even a little parmesan for a sharper bite.
How do I prevent the mac and cheese cups from sticking to the pan?
Grease your muffin tin thoroughly with butter or non-stick spray. You can also use silicone muffin cups for easier removal.
Can I freeze these mac and cheese cups?
Absolutely. Wrap individual cups tightly and freeze for up to 2 months. Thaw overnight before reheating in the oven.
Are there vegetarian options for this recipe?
Yes, this recipe is vegetarian as is. For a vegan version, use plant-based cheese and milk substitutes, though texture and flavor will vary.
Pin This Recipe!

Crispy Cheesy Baked Mac and Cheese Cups

These crispy cheesy baked mac and cheese cups are a quick, easy, and delicious snack or party bite with a perfect crunchy exterior and gooey cheesy interior.
- Prep Time: 10 minutes
- Cook Time: 25 minutes
- Total Time: 35 minutes
- Yield: 12 servings 1x
- Category: Snack
- Cuisine: American
Ingredients
- 2 cups (200 grams) elbow macaroni (uncooked)
- 2 cups (200 grams) shredded cheese blend (sharp cheddar and mozzarella recommended)
- 1 cup (240 ml) whole milk or 2%
- 2 tablespoons (28 grams) unsalted butter, melted
- 2 tablespoons (15 grams) all-purpose flour
- 1/2 teaspoon garlic powder
- 1/2 teaspoon onion powder
- 1/2 teaspoon salt, or to taste
- Pinch of pepper, or to taste
- 1 cup (100 grams) crushed tortilla chips or panko breadcrumbs
- Optional: pinch of smoked paprika or cayenne pepper
- Optional: chopped parsley or chives
Instructions
- Bring a large pot of salted water to a boil. Add 2 cups (200 grams) elbow macaroni and cook until just al dente, about 6-7 minutes. Drain and rinse under cold water to stop cooking. Set aside.
- In a medium saucepan, melt 2 tablespoons (28 grams) unsalted butter over medium heat. Whisk in 2 tablespoons (15 grams) all-purpose flour and cook for 1-2 minutes until smooth and bubbling.
- Gradually whisk in 1 cup (240 ml) whole milk, stirring constantly. Simmer gently until thickened, about 4-5 minutes, coating the back of a spoon.
- Remove from heat and stir in 2 cups (200 grams) shredded cheese, 1/2 teaspoon garlic powder, 1/2 teaspoon onion powder, salt, and pepper until cheese melts and sauce is creamy.
- In a large bowl, fold the cooked macaroni into the cheese sauce until evenly coated.
- Grease a 12-cup muffin pan with non-stick spray or butter.
- Divide the cheesy macaroni evenly among muffin cups, pressing down lightly to compact.
- Sprinkle 1 cup crushed tortilla chips or panko breadcrumbs over each cup.
- Preheat oven to 375°F (190°C). Bake cups for 20-25 minutes until tops are golden brown and crisp, and cheese sauce bubbles around edges.
- Let cups cool in pan for 5 minutes before gently removing with a spatula. Serve warm.
Notes
Cook pasta just until al dente to avoid mushy cups. Whisk flour and butter thoroughly before adding milk to prevent lumps. Grease muffin tins well to prevent sticking. Let cups rest after baking to firm up. Add a splash of milk if cheese sauce is too thick before baking.
Nutrition
- Serving Size: 1 mac and cheese cup
- Calories: 235
- Sugar: 2
- Sodium: 350
- Fat: 13.5
- Saturated Fat: 8
- Carbohydrates: 22.5
- Fiber: 1
- Protein: 11
Keywords: mac and cheese, baked mac and cheese, cheesy snacks, party food, crispy mac and cheese cups, easy mac and cheese


