Love this? Save it for later!
Share the inspiration with your friends
I wasn’t expecting to get cooking advice from my plumber, but there I was, standing in my kitchen with a leaky pipe, listening to him describe exactly how to make the perfect game day snack. His name was Dave, and he’d been fixing my garbage disposal for about ten minutes when the conversation shifted from PVC joints to provolone. “You gotta make ‘em look like little footballs,” he said, wiping his hands on a rag. “My wife cuts the cheese sticks in half and shapes them. Kids go nuts for them.” I laughed, thinking it was a quirky one-off thing, but honestly, the image stuck with me. That night, I found myself in the grocery aisle, staring at a block of mozzarella, wondering if Dave was onto something.
So I tried it. I cut the cheese, shaped the pieces, breaded them, and baked them until they were golden and crisp. Let me tell you, the first batch came out a little lopsided—some looked more like deflated balloons than footballs. But the taste? Absolutely spot on. The crunch of the panko, the warm, gooey center—it was everything you want from a cheese stick, but somehow better because it looked like a mini pigskin. I brought them to a watch party the next weekend, and they were gone before the first quarter ended. People kept asking where I bought them, and I had to admit, “Actually, my plumber gave me the idea.”
Maybe you’ve been there—stuck in a rut with the same old dips and chips, looking for something that actually feels special but doesn’t require a culinary degree. These crispy baked football-shaped cheese sticks are that recipe. They’re fun, they’re ridiculously easy, and they bring a smile to everyone’s face. I mean, who doesn’t love cheese that looks like a football? That’s the kind of snack that wins game day. And honestly, I’ve never looked at my plumbing the same way again.
Why You’ll Love This Recipe
These aren’t just another cheese stick recipe. After testing multiple batches (and eating more than my fair share of mistakes), I can confidently say this version hits every note. Here is why this recipe stands out from the crowd:
- Quick & Easy: From fridge to table in under 25 minutes. Perfect for when guests show up early or you need a last-minute snack that looks impressive.
- Simple Ingredients: You probably have most of these in your kitchen right now. No exotic spices or hard-to-find items—just cheese, breadcrumbs, and a few pantry staples.
- Perfect for Game Day: The football shape is a total conversation starter. It fits the theme without being cheesy (pun intended) or over-the-top.
- Crowd-Pleaser: I’ve served these to kids, adults, picky eaters, and cheese snobs. Every single person reaches for seconds. They disappear faster than nachos.
- Unbelievably Delicious: The outside is perfectly crispy and golden, while the inside stays warm, melty, and stretchy. That contrast is pure magic.
What makes this recipe different is the technique. Instead of deep-frying (which is messy and heavy), we bake them at a high temperature to get that crunch without the grease. Plus, the football shape isn’t just for looks—it creates more surface area for the breading to stick, meaning more crunch in every bite. This isn’t just another version of cheese sticks; it’s the best version I’ve ever made.
Honestly, this recipe is the kind that makes you close your eyes after the first bite. It’s comfort food reimagined—fun, festive, and deeply satisfying. Perfect for impressing guests without stress, or turning a simple snack into something memorable. You’ll feel like a hero, and all you did was shape some cheese.
What Ingredients You Will Need
This recipe uses simple, wholesome ingredients to deliver bold flavor and satisfying texture without the fuss. Most of these are pantry staples, so you might not even need a grocery run.
- Mozzarella cheese block: 8 ounces, cold (use part-skim or whole milk; whole milk melts creamier)
- Panko breadcrumbs: 1 cup (I prefer Ian’s or Progresso for extra crunch)
- All-purpose flour: 1/2 cup
- Large eggs: 2, beaten
- Garlic powder: 1 teaspoon
- Onion powder: 1/2 teaspoon
- Dried oregano: 1/2 teaspoon
- Salt: 1/2 teaspoon
- Black pepper: 1/4 teaspoon
- Paprika: 1/2 teaspoon (adds color and mild smokiness)
- Cooking spray: Olive oil or avocado oil spray (for crisping)
- Marinara sauce: For dipping (store-bought or homemade)
Ingredient Tips: I recommend using a block of mozzarella rather than pre-shredded cheese. Pre-shredded cheese contains anti-caking agents that prevent it from melting smoothly. The block gives you that perfect stretchy pull. For the panko, I’ve tried Kikkoman and 4C brands—both work great, but Kikkoman tends to be flakier. If you want a gluten-free option, use gluten-free panko and substitute the flour with almond flour or a 1:1 gluten-free blend.
For the seasoning, feel free to adjust based on your preferences. Love heat? Add 1/4 teaspoon cayenne pepper. Prefer Italian flavors? Swap oregano for basil and add a pinch of thyme. The paprika is optional but recommended—it gives the breading a beautiful golden-orange color that makes the cheese sticks look even more appetizing.
Equipment Needed
You don’t need a fancy kitchen to pull this off. Here’s what you’ll need:
- Baking sheet: A standard half-sheet pan works perfectly. Line it with parchment paper or a silicone baking mat for easy cleanup.
- Sharp knife: For cutting the cheese block into sticks. A chef’s knife or a serrated knife works best.
- Three shallow bowls: For the flour, eggs, and breadcrumb mixture. Pie plates or wide soup bowls work great.
- Cutting board: For shaping the cheese sticks into footballs.
- Measuring spoons and cups: For accuracy.
- Wire rack: Optional, but placing the breaded cheese sticks on a wire rack before baking helps the coating dry evenly, resulting in a crunchier texture.
- Tongs: For flipping the sticks halfway through baking.
Budget-Friendly Alternatives: If you don’t have a wire rack, no worries—just place the breaded sticks directly on the parchment-lined baking sheet. They’ll still crisp up nicely. A pizza stone can also work in a pinch for even heat distribution, but it’s not necessary. I’ve made these in a tiny apartment oven with a beat-up baking sheet, and they came out fantastic. Don’t let missing equipment stop you.
Preparation Method
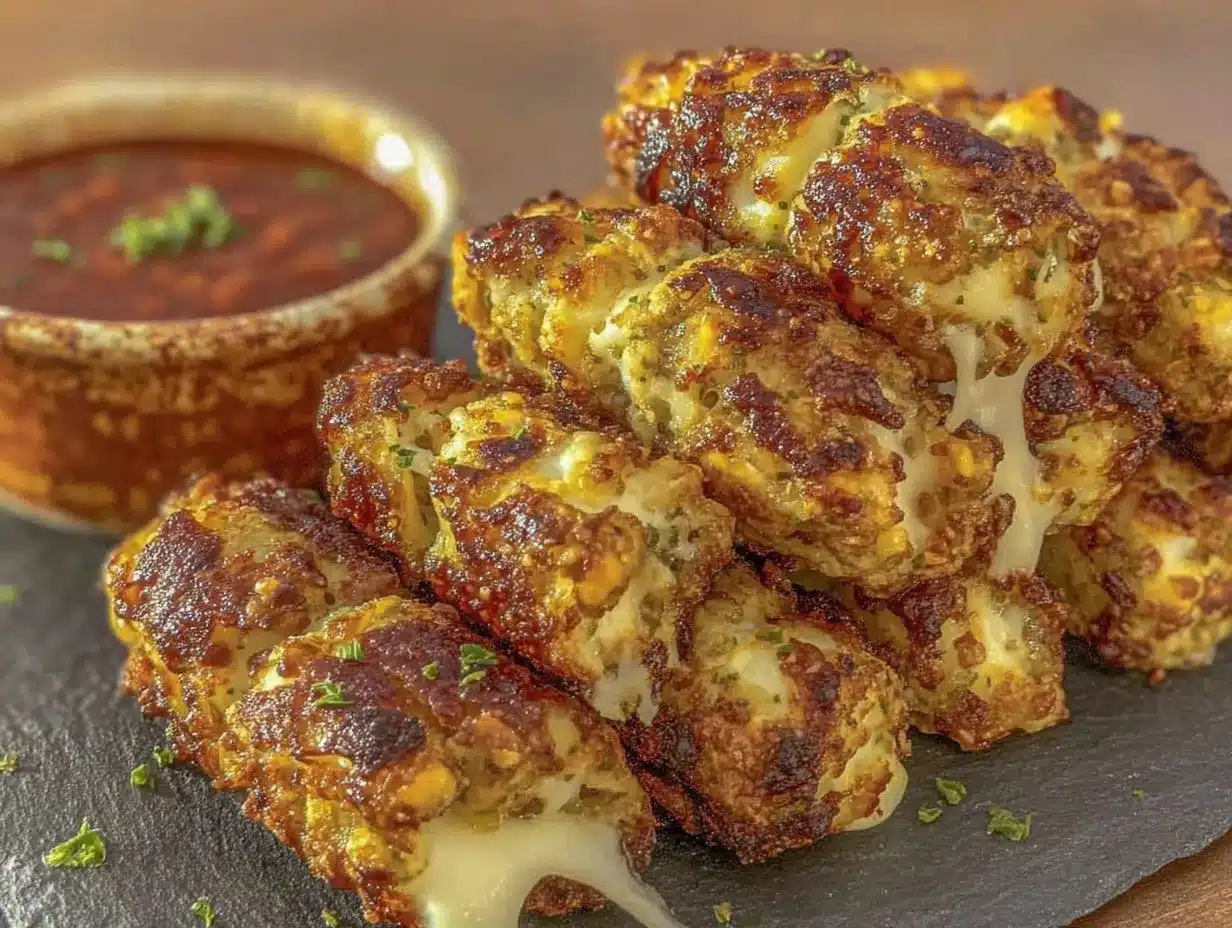
- Preheat your oven to 425°F (220°C). Line a baking sheet with parchment paper or a silicone mat. Preheating is crucial—the high heat ensures the outside gets crispy before the cheese has a chance to melt into a puddle.
- Cut the mozzarella block into sticks about 3 inches long and 1/2 inch thick. You should get about 12-14 sticks from an 8-ounce block. If the edges are uneven, trim them slightly—uniformity helps them cook evenly.
- Shape each stick into a football: Gently pinch the ends of each cheese stick to taper them, then roll the center slightly to create a rounded middle. Don’t worry if they’re not perfect—handmade shapes add character. Work quickly so the cheese doesn’t warm up too much.
- Set up your breading station: In the first shallow bowl, add the flour. In the second bowl, beat the eggs with a splash of water (about 1 tablespoon). In the third bowl, combine the panko breadcrumbs, garlic powder, onion powder, oregano, salt, pepper, and paprika. Mix the dry ingredients well with a fork.
- Bread each cheese stick: First, roll a stick in the flour until lightly coated. Shake off any excess. Then, dip it into the beaten eggs, letting any extra drip off. Finally, press it into the panko mixture, making sure all sides are coated. For extra crunch, do a double dip: repeat the egg and panko steps once more. Place the breaded stick on the prepared baking sheet.
- Chill the breaded sticks: Place the baking sheet in the freezer for 10-15 minutes. This step is non-negotiable—it firms up the cheese and helps the breading stick during baking. I learned this the hard way after my first batch turned into a cheesy mess in the oven.
- Spray with oil: Remove the sheet from the freezer. Lightly spray each cheese stick with cooking spray. This helps the panko turn golden and crispy. Don’t soak them—just a light mist.
- Bake for 8-10 minutes: Place the sheet in the preheated oven. Bake for 4-5 minutes, then carefully flip each stick using tongs. Bake for another 4-5 minutes, until the breading is golden brown and the cheese is just starting to soften. Watch closely—ovens vary, and you want them crispy, not exploded.
- Serve immediately: Transfer the cheese sticks to a serving platter. Let them rest for 1-2 minutes (so no one burns their mouth), then serve with warm marinara sauce.
Sensory Cues: When you flip the sticks, the bottom should be a deep golden brown. The panko should feel firm to the touch. If you see any cheese oozing out, pull them out immediately—they’re done. The smell of toasted breadcrumbs and melted cheese will fill your kitchen, and that’s your signal that success is near.
Cooking Tips & Techniques
I’ve made these cheese sticks more times than I care to admit, and each batch taught me something new. Here are the tricks that make the biggest difference:
Keep the cheese cold. This is the number one rule. Warm cheese melts too fast and will leak through the breading. If the cheese starts feeling soft while you’re shaping or breading, pop it back in the fridge for a few minutes. I once tried to rush this step and ended up with a baking sheet full of cheesy blobs. Not my finest moment.
Double breading is worth it. Yes, it takes an extra minute per stick, but the payoff is a thicker, crunchier crust that holds up better. The first time I made these, I did a single coat and they were good, but not great. The double coat makes them restaurant-quality.
Don’t overcrowd the baking sheet. Leave at least an inch of space between each stick. If they’re too close, they steam instead of crisp. I learned this when I tried to fit 14 sticks on one small sheet—they came out soggy on the sides. Use two sheets if needed, and rotate them halfway through baking.
Use a wire rack for freezing. If you have one, place the breaded sticks on a wire rack set over a baking sheet before freezing. This allows air to circulate, drying the coating evenly. It’s a small step that makes a big difference in crunch.
Watch the clock. These go from perfectly crispy to overdone in about 60 seconds. Set a timer for 8 minutes and check them. If they need more time, add it in 1-minute increments. Your nose will also tell you—when you smell toasted cheese, they’re close.
Variations & Adaptations
One of the best things about this recipe is how flexible it is. Here are some variations I’ve tried and loved:
Spicy Buffalo Style: Add 1/2 teaspoon cayenne pepper and 1/4 teaspoon chili powder to the panko mixture. After baking, drizzle the sticks with buffalo sauce and serve with ranch dressing. My brother-in-law requests these every time he visits.
Herb & Parmesan Crust: Mix 1/4 cup grated Parmesan cheese into the panko mixture, and add 1 teaspoon dried basil and 1/2 teaspoon dried parsley. The Parmesan adds a salty, nutty flavor that pairs beautifully with mozzarella.
Gluten-Free Version: Use gluten-free panko (I like Aleia’s) and substitute the all-purpose flour with almond flour or a gluten-free all-purpose blend. The texture is slightly different but still delicious. I tested this for a friend with celiac disease, and she gave it two thumbs up.
Air Fryer Adaptation: Preheat your air fryer to 375°F (190°C). Spray the basket with oil, arrange the sticks in a single layer (work in batches), and cook for 5-6 minutes, flipping halfway. They come out even crispier than oven-baked and cook faster.
Stuffed Cheese Sticks: Before shaping, cut a small slit in the side of each cheese stick and stuff it with a thin slice of pepperoni or a small piece of cooked sausage. Reshape and bread as usual. It’s a fun surprise inside.
Serving & Storage Suggestions
Serving: These cheese sticks are best served hot and fresh from the oven. Arrange them on a wooden board or a festive platter, and place a small bowl of warm marinara sauce in the center. For extra flair, sprinkle some fresh parsley or oregano on top. They also pair beautifully with ranch dressing, garlic aioli, or a spicy sriracha mayo.
What to serve alongside: These are perfect as part of a game day spread. Pair them with classic nachos, buffalo wings, or a big bowl of chili. For drinks, a cold beer or a fizzy soda balances the richness of the cheese. If you’re hosting a party, serve them as an appetizer before a main course like sliders or pulled pork sandwiches.
Storage: If you have leftovers (unlikely, but possible), let them cool completely, then store them in an airtight container in the refrigerator for up to 3 days. The texture will soften, but they’re still tasty.
Reheating: The oven is your best friend here. Preheat to 375°F (190°C), place the sticks on a baking sheet, and bake for 5-7 minutes until heated through and crispy again. The microwave will make them soggy—avoid it if you can. I’ve also reheated them in an air fryer at 350°F (175°C) for 3 minutes, and they came out almost as good as fresh.
Freezing: You can freeze the breaded, unbaked cheese sticks. Place them on a baking sheet in a single layer and freeze until solid (about 1 hour). Transfer them to a freezer bag or container. When ready to bake, add 2-3 minutes to the baking time—no need to thaw. This is a lifesaver for last-minute guests.
Nutritional Information & Benefits
Here’s an approximate nutritional breakdown per serving (3 cheese sticks):
| Nutrient | Amount |
|---|---|
| Calories | 290 |
| Total Fat | 16g |
| Saturated Fat | 8g |
| Cholesterol | 85mg |
| Sodium | 520mg |
| Carbohydrates | 18g |
| Fiber | 1g |
| Sugar | 2g |
| Protein | 18g |
Health Benefits: Mozzarella is a good source of calcium and protein, which supports bone health and muscle repair. The panko breadcrumbs provide quick energy from carbohydrates, making this a satisfying snack. Baking instead of frying reduces the fat content significantly—these have about half the fat of traditional fried cheese sticks. Plus, the spices like oregano and garlic powder offer antioxidants and anti-inflammatory properties. While this is an indulgent snack, it’s a smarter choice than many game day options. I love knowing I’m serving something that tastes decadent but isn’t deep-fried.
Dietary Considerations: This recipe contains dairy, gluten, and eggs. For a gluten-free version, see the variations section. For a dairy-free option, use a plant-based mozzarella block (look for one that melts well, like Violife or Miyoko’s). The texture will be slightly different, but it still works.
Conclusion
These crispy baked football-shaped cheese sticks are more than just a snack—they’re a conversation starter, a crowd-pleaser, and a recipe that makes you look like a kitchen hero without breaking a sweat. Whether you’re hosting a Super Bowl party, a casual get-together, or just treating yourself on a Friday night, they deliver every single time.
I love how this recipe brings people together. There’s something about pulling a tray of golden, cheesy footballs out of the oven that makes everyone smile. And knowing that the idea came from my plumber, Dave, makes it even better. It’s a reminder that great recipes can come from the most unexpected places—you just have to be open to them.
Now it’s your turn. Try this recipe, make it your own, and don’t be afraid to get creative with the shapes and flavors. I’d love to hear how they turn out! Drop a comment below and let me know your favorite dipping sauce or any fun variations you tried. Share this recipe with your fellow game day fans, and tag me in your photos—I can’t wait to see your football-shaped creations. Happy cooking, and here’s to good food and good company!
Frequently Asked Questions
Can I use string cheese instead of a block?
Yes, you can! String cheese is already portioned and easy to shape into footballs. Just gently pinch the ends to taper them. The texture will be slightly different, but it works well in a pinch.
Why did my cheese leak out during baking?
This usually happens when the cheese isn’t cold enough before baking. Make sure you freeze the breaded sticks for at least 10 minutes. Also, double-check that the breading is fully sealed—any cracks will let cheese escape. If you see gaps, press the breading firmly to patch them.
Can I make these ahead of time?
Absolutely! You can bread the cheese sticks, freeze them on a baking sheet, then transfer them to a freezer bag. When you’re ready to serve, bake them straight from frozen, adding 2-3 minutes to the cooking time. This is my favorite trick for stress-free entertaining.
What’s the best cheese for this recipe?
Mozzarella is the classic choice because it melts beautifully and has a mild flavor. However, you can experiment with provolone, Monterey Jack, or even a mix of cheddar and mozzarella. Just avoid hard cheeses like Parmesan—they don’t melt as well.
How do I get the breading to stick better?
Make sure the cheese sticks are dry before breading. Pat them with a paper towel if needed. Also, the flour layer is crucial—it acts as a glue for the egg. Don’t skip it! Chilling the breaded sticks before baking also helps the coating adhere.
Pin This Recipe!
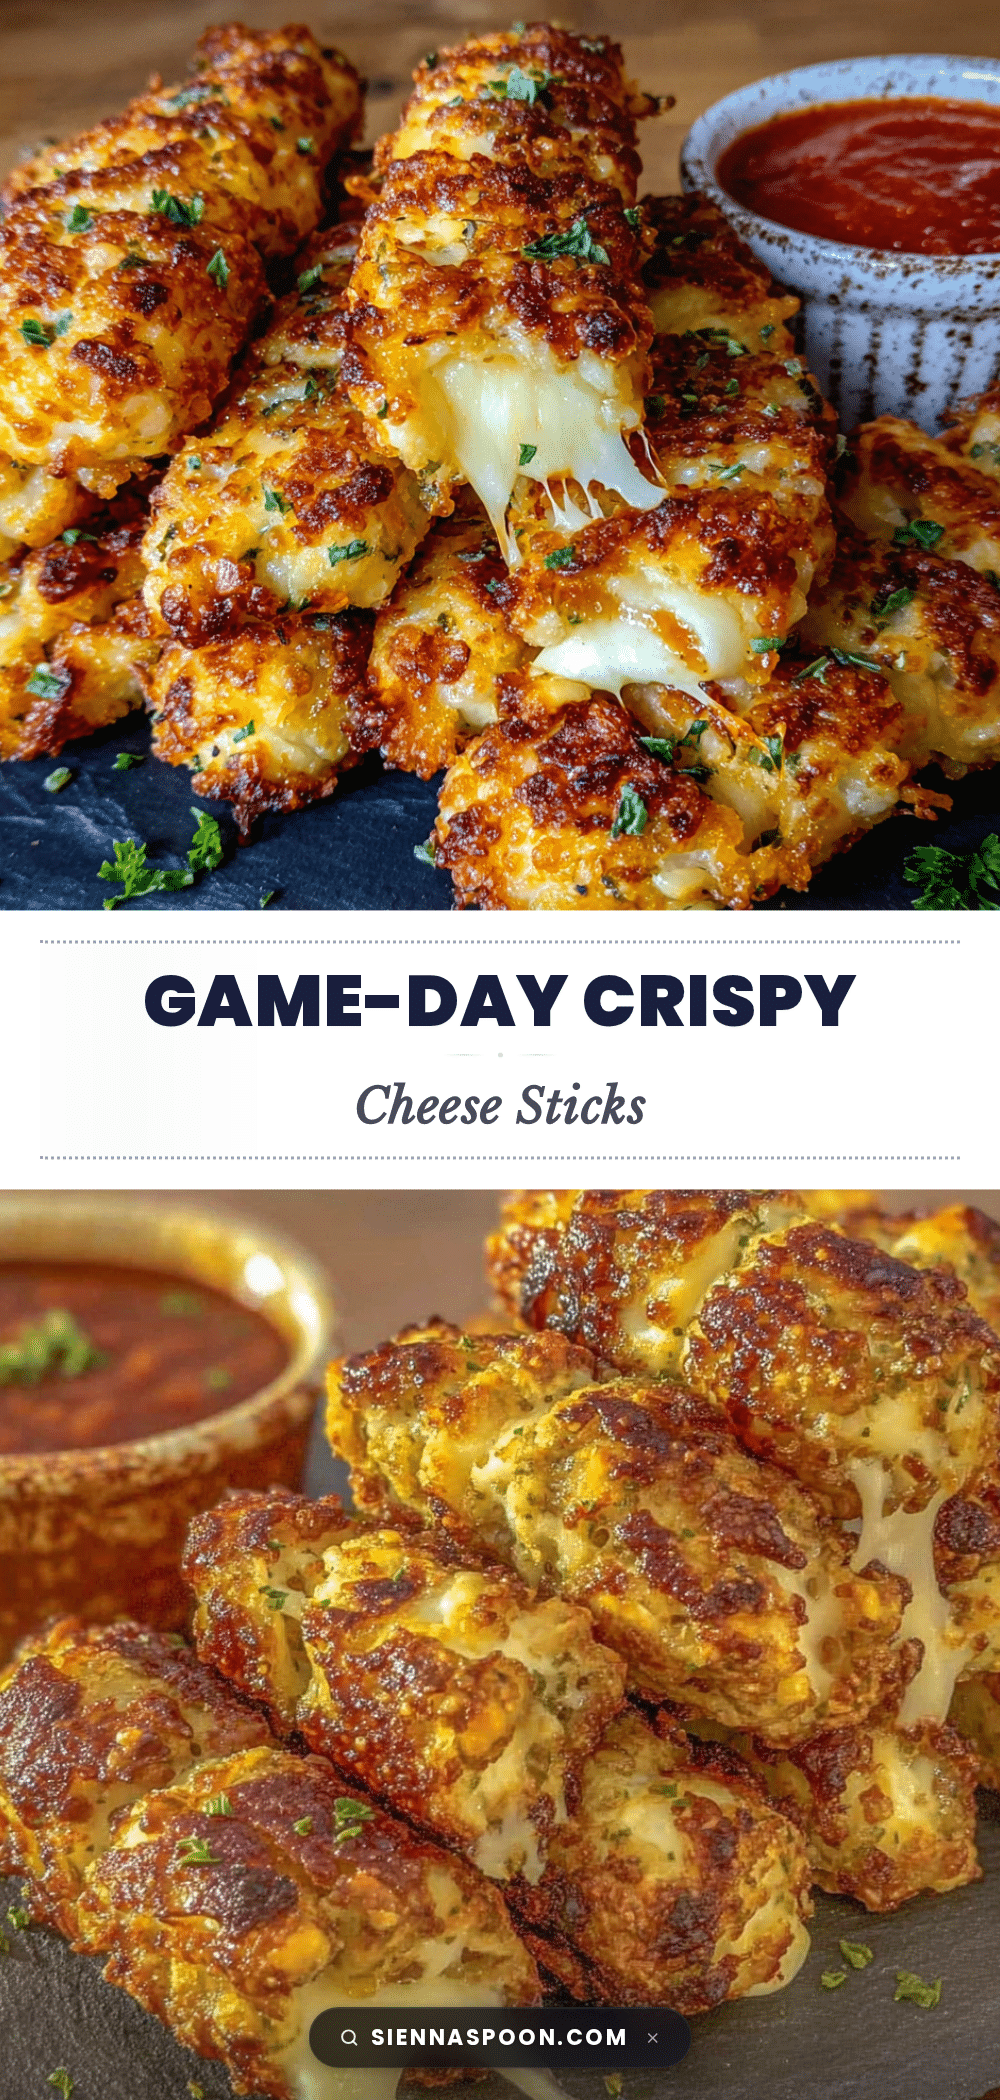
Crispy Baked Football Cheese Sticks: Easy Game Day Recipe
These crispy baked football-shaped cheese sticks are a fun, easy game day snack that will impress your guests. Made with simple ingredients and baked to golden perfection, they’re a crowd-pleaser that disappears fast.
- Prep Time: 15 minutes
- Cook Time: 10 minutes
- Total Time: 25 minutes
- Yield: 4 servings 1x
- Category: Appetizer
- Cuisine: American
Ingredients
- 8 ounces mozzarella cheese block (cold)
- 1 cup panko breadcrumbs
- 1/2 cup all-purpose flour
- 2 large eggs, beaten
- 1 teaspoon garlic powder
- 1/2 teaspoon onion powder
- 1/2 teaspoon dried oregano
- 1/2 teaspoon salt
- 1/4 teaspoon black pepper
- 1/2 teaspoon paprika
- Cooking spray (olive oil or avocado oil)
- Marinara sauce (for dipping)
Instructions
- Preheat your oven to 425°F (220°C). Line a baking sheet with parchment paper or a silicone mat.
- Cut the mozzarella block into sticks about 3 inches long and 1/2 inch thick. You should get about 12-14 sticks.
- Shape each stick into a football: gently pinch the ends to taper them, then roll the center slightly to create a rounded middle.
- Set up your breading station: In the first shallow bowl, add the flour. In the second bowl, beat the eggs with 1 tablespoon water. In the third bowl, combine panko breadcrumbs, garlic powder, onion powder, oregano, salt, pepper, and paprika.
- Bread each cheese stick: First, roll in flour, shaking off excess. Then dip in beaten eggs. Finally, press into panko mixture, coating all sides. For extra crunch, repeat the egg and panko steps (double dip). Place on the prepared baking sheet.
- Chill the breaded sticks: Place the baking sheet in the freezer for 10-15 minutes.
- Spray with oil: Remove from freezer and lightly spray each cheese stick with cooking spray.
- Bake for 8-10 minutes: Bake for 4-5 minutes, then carefully flip each stick using tongs. Bake for another 4-5 minutes, until golden brown and cheese is just starting to soften.
- Serve immediately: Transfer to a platter, let rest 1-2 minutes, then serve with warm marinara sauce.
Notes
Keep the cheese cold to prevent leaking. Double breading is worth it for extra crunch. Don’t overcrowd the baking sheet. Watch the clock closely as they go from perfect to overdone quickly. For best results, freeze the breaded sticks before baking.
Nutrition
- Serving Size: 3 cheese sticks
- Calories: 290
- Sugar: 2
- Sodium: 520
- Fat: 16
- Saturated Fat: 8
- Carbohydrates: 18
- Fiber: 1
- Protein: 18
Keywords: cheese sticks, football cheese sticks, game day snack, baked cheese sticks, mozzarella sticks, football shaped cheese sticks, easy appetizer


