Love this? Save it for later!
Share the inspiration with your friends
There used to be a tiny, no-name rotisserie spot tucked behind a laundromat on the corner of 7th and Main that made the most unreal chicken thighs. When the owner retired and the place became a vape shop, I won’t lie—I went through a real mourning period. After maybe a dozen attempts—some burnt, some sad and flabby—I finally cracked the code. These crispy air fryer chicken thighs are the exact golden, juicy, skin-crackling victory I was chasing. Honestly, the air fryer does all the hard work. You just have to know one little trick with the skin, and I’m sharing it all below.
This isn’t some complicated, breaded situation. It’s just pure, honest chicken. The kind where the skin turns into this shatteringly thin, salty, golden crust while the meat underneath stays so tender it practically falls off the bone. I mean, I’ve made these on a frantic Tuesday night after a long day and they came out looking like something from a fancy dinner party. You know that feeling when you bite into something and you just have to stop talking for a second? That’s this recipe. Let me tell you, once you make these, you’ll never look at a sad, soggy baked chicken thigh the same way again.
Why You’ll Love This Recipe
This recipe is my absolute go-to because it solves every problem you have with chicken. It’s fast, it’s foolproof, and the result is genuinely restaurant-quality without the grease. I’ve tested this more times than I care to admit, and I’ve learned exactly what works so you don’t have to guess.
- Quick & Easy: Ready in under 30 minutes with almost no active prep. Perfect for those evenings when you need dinner on the table yesterday.
- Simple Ingredients: No breading, no buttermilk, no weird marinades. You probably have everything in your kitchen right now.
- Perfect for Busy Weeknights: This is the recipe you turn to when you want something satisfying but don’t want to spend an hour in the kitchen.
- Crowd-Pleaser: I’ve served these to picky kids, diet-conscious friends, and hardcore meat-lovers. Every single person goes back for seconds.
- Unbelievably Delicious: The skin gets so crispy it crackles when you bite into it. The meat is juicy and packed with flavor. It’s comfort food that feels good to eat.
What makes this different from every other air fryer chicken recipe? It’s the technique. Most recipes tell you to just pat the skin dry and season it. That’s fine, but it’s not enough. I use a specific method to get the skin paper-thin and ultra-crispy without any oil spray or breading. It’s a simple step, but it makes all the difference between good chicken and “I can’t believe I made this” chicken. This isn’t just another version—it’s the best version I’ve ever had.
And honestly? This recipe is for anyone who loves good food but doesn’t want to feel weighed down after eating. It’s satisfying without being heavy. It’s indulgent without being greasy. It’s the kind of meal that makes you feel like you’ve treated yourself, even though it’s perfectly sensible for a regular Tuesday.
What Ingredients You Will Need
This recipe is beautifully simple. You only need a handful of ingredients, and they all work together to create that perfect golden crust and juicy interior. The magic is in the technique, not a long shopping list.
- Bone-in, skin-on chicken thighs (4-6 thighs, about 1.5 lbs total): This is non-negotiable for the best results. The bone keeps the meat moist during cooking, and the skin is what gives you that incredible crispy texture. Look for thighs that are roughly the same size so they cook evenly. I prefer organic or free-range chicken for better flavor, but any good-quality thigh will work.
- Kosher salt (1 teaspoon): Don’t skip this or skimp on it. Salt is what draws out the moisture from the skin, which is the first step to getting it crispy. I use Diamond Crystal kosher salt—it’s less salty by volume than Morton’s, so if you’re using a different brand, you might need to adjust slightly.
- Baking powder (1/2 teaspoon): This is the secret ingredient. It’s not for leavening—it’s for crisping. Baking powder raises the pH of the skin, which helps it brown and crisp up much faster. Make sure it’s baking powder, not baking soda. Baking soda will leave a metallic taste. I use Rumford brand, which is aluminum-free.
- Garlic powder (1/2 teaspoon): For that savory depth. It doesn’t overpower the chicken, it just makes everything taste more delicious. Avoid garlic salt here—you want to control the salt separately.
- Onion powder (1/4 teaspoon): A subtle sweetness that balances the savory notes. It’s a small amount, but it makes a difference.
- Paprika (1/2 teaspoon): This adds a beautiful golden color and a hint of smoky sweetness. You can use sweet paprika or smoked paprika depending on your mood. Smoked paprika gives a deeper, more complex flavor.
- Black pepper (1/4 teaspoon, freshly ground): A little bit of heat and earthiness. Freshly ground is always better, but pre-ground works in a pinch.
- Optional: Fresh herbs for garnish (thyme, rosemary, or parsley): Not necessary for the recipe, but a sprinkle of fresh herbs makes it look beautiful and adds a pop of freshness.
That’s it. Seven ingredients, and most of them are pantry staples. The chicken is the star here, and everything else just helps it shine. If you want to experiment, you can add a pinch of cayenne for heat or some dried oregano for an Italian twist, but the base recipe is perfect as is.
Equipment Needed
The beauty of this recipe is that you don’t need much. Here’s what you’ll need to get those perfect crispy air fryer chicken thighs.
- Air Fryer: This is obviously the main event. I use a 5.8-quart basket-style air fryer, and it fits 4-6 thighs perfectly without overcrowding. If you have a smaller air fryer, you might need to cook in batches. Don’t try to cram them all in—crowding the basket is the number one reason they don’t get crispy.
- Paper Towels: You’ll need these for patting the chicken skin completely dry. This is a crucial step, so don’t use a kitchen towel that might have lint or bacteria. Dedicated paper towels are best.
- Mixing Bowl: A medium bowl for tossing the chicken with the seasoning mixture. Nothing fancy needed.
- Tongs: For flipping the chicken halfway through cooking. Metal or silicone tongs work fine. Just make sure they have a good grip so you don’t drop a hot thigh.
- Instant-Read Thermometer: This is my favorite tool for perfect chicken. It takes the guesswork out of cooking. Chicken thighs are done at 175-185°F (79-85°C) for the best texture. I use a Thermapen, but any reliable instant-read thermometer will work.
- Cutting Board and Knife: For resting and carving the chicken after it’s done. A sharp chef’s knife makes quick work of it.
If you don’t have an air fryer, you can make this in the oven on a wire rack set over a baking sheet. Bake at 425°F (218°C) for about 35-40 minutes, flipping halfway. It won’t be quite as crispy as the air fryer version, but it’s still delicious.
Preparation Method
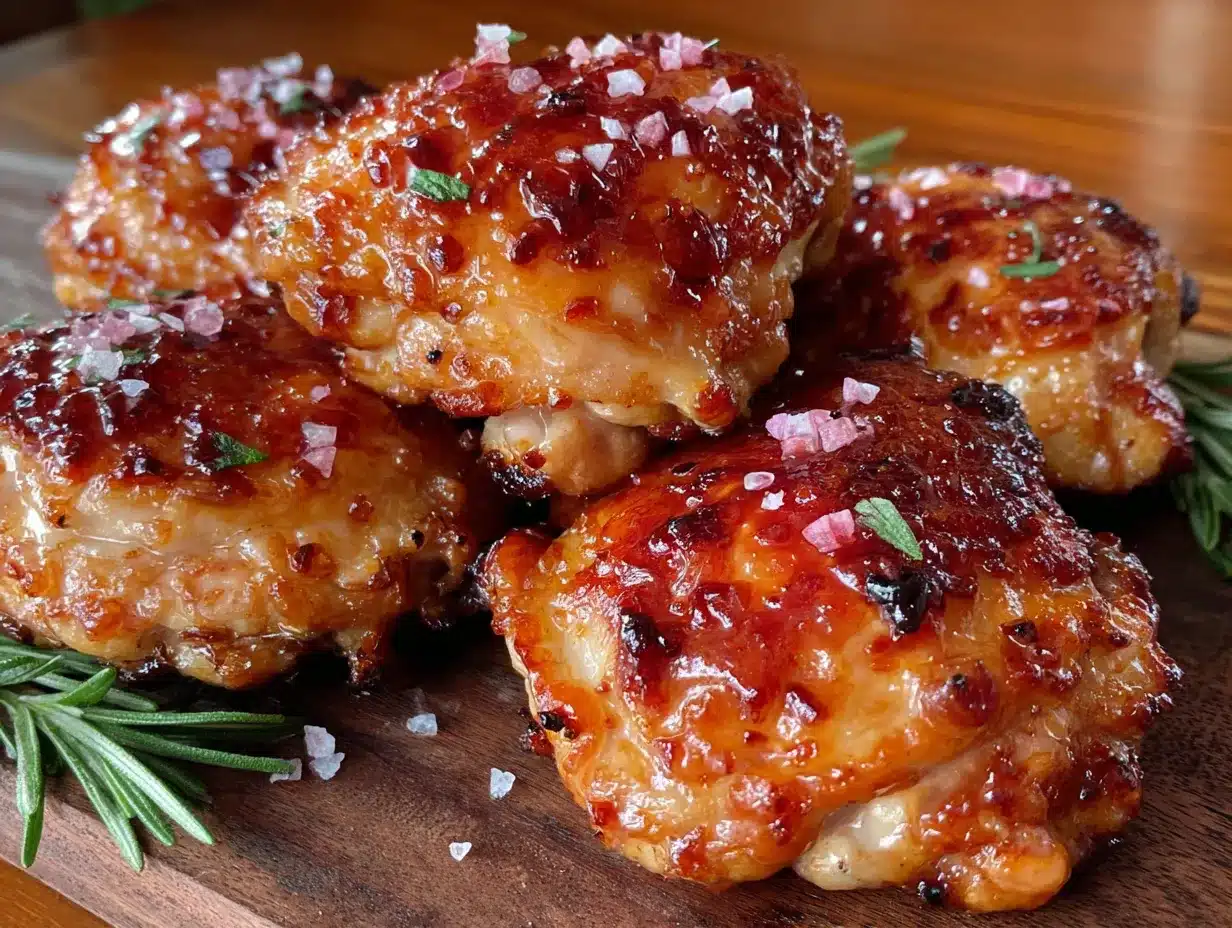
Alright, let’s get cooking. This process is straightforward, but each step matters. Follow these instructions closely, and you’ll be rewarded with the crispiest, juiciest chicken thighs of your life.
- Prep the chicken (5 minutes): Take your chicken thighs out of the refrigerator about 15-20 minutes before you start cooking. This helps them cook more evenly. Pat them completely dry with paper towels. I mean completely dry—get every bit of moisture off the skin. This is the single most important step. If the skin is wet, it will steam instead of crisp, and you’ll end up with sad, rubbery skin. I usually use about 3-4 paper towels per batch.
- Score the skin (2 minutes): Using a sharp knife, make 2-3 shallow cuts through the skin and fat, but not into the meat. This helps render the fat more efficiently and prevents the skin from shrinking up too much. Don’t skip this—it’s a game-changer for getting that perfectly flat, crispy skin.
- Season the chicken (3 minutes): In a small bowl, mix together the kosher salt, baking powder, garlic powder, onion powder, paprika, and black pepper. Sprinkle this mixture evenly over both sides of the chicken thighs. Use your hands to rub it in gently, making sure every bit of skin is coated. Don’t forget the underside of the thighs—the meat there needs flavor too.
- Rest the seasoned chicken (10-15 minutes): This is the step that most recipes skip, and it’s the one that makes the biggest difference. Let the seasoned chicken sit on a plate or wire rack at room temperature for 10-15 minutes. This allows the salt to start drawing out more moisture from the skin, and the baking powder starts working its magic. You’ll actually see tiny beads of moisture forming on the skin—that’s a good thing. Pat the skin dry again with a paper towel right before cooking.
- Preheat the air fryer (3-5 minutes): Set your air fryer to 380°F (193°C) and let it preheat for 3-5 minutes. Preheating is important for even cooking. If you put cold chicken into a cold air fryer, the cooking time will be off and the skin won’t crisp as well.
- Arrange the chicken (2 minutes): Place the chicken thighs in the air fryer basket, skin side down. Make sure they are in a single layer with a little space between each piece. Overcrowding traps steam and prevents crisping. If you need to cook in batches, do it. It’s worth the extra few minutes.
- Air fry the first side (12 minutes): Cook at 380°F (193°C) for 12 minutes. Don’t open the basket during this time. Let the hot air do its job. You’ll start to smell that amazing chicken aroma filling your kitchen.
- Flip and air fry the second side (10-12 minutes): Carefully flip the thighs over using your tongs. They should be golden brown on the skin side. Cook for another 10-12 minutes at 380°F (193°C). The total cooking time will depend on the size of your thighs and your air fryer model. I start checking at the 10-minute mark.
- Check for doneness (1 minute): The internal temperature should reach 175-185°F (79-85°C) when inserted into the thickest part of the thigh, avoiding the bone. If you don’t have a thermometer, pierce the thickest part with a knife—the juices should run clear, not pink.
- Rest the chicken (5 minutes): This is crucial. Remove the chicken from the air fryer and let it rest on a cutting board or plate for 5 minutes. This allows the juices to redistribute throughout the meat. If you cut into it immediately, all those delicious juices will run out onto the board instead of staying in the chicken. Trust me, I’ve made that mistake more times than I can count.
And that’s it. You’ll see that the skin is incredibly thin, golden, and crispy. The meat underneath will be tender and juicy. It’s almost magical how simple ingredients and a little patience can create something so perfect.
Cooking Tips & Techniques
I’ve made this recipe probably fifty times by now, and I’ve learned a few things the hard way. Here are the tips and tricks that will save you from my mistakes.
The biggest mistake is not drying the skin enough. I cannot stress this enough. Moisture is the enemy of crispiness. You need to pat the skin dry before seasoning, and then again after the resting period. If you see any shiny spots, that’s moisture. Blot it off. I once skipped the second drying step because I was in a hurry, and the skin came out chewy and disappointing. Never again.
Don’t skip the baking powder. I know it sounds weird, but it’s not a gimmick. It truly changes the texture of the skin. Just make sure it’s baking powder, not baking soda. I accidentally used baking soda once, and the chicken had a strange, metallic taste that ruined the whole meal. Learn from my pain.
Let the chicken come to room temperature before cooking. This isn’t just for food safety—it’s for even cooking. If you put cold chicken straight from the fridge into the air fryer, the outside will cook much faster than the inside. You’ll end up with burnt skin and raw meat near the bone. Giving it 15-20 minutes on the counter makes a huge difference.
Use a thermometer. I used to think I could tell when chicken was done by looking at it. I was wrong. A thermometer takes the guesswork out of cooking and ensures perfectly juicy meat every single time. Chicken thighs are forgiving, but they’re best at 175-185°F. Any lower and they’re undercooked; any higher and they start to dry out.
Multitasking strategy: While the chicken is resting after seasoning, preheat your air fryer and get your sides ready. I like to toss some vegetables in a little oil and salt and throw them in the air fryer with the chicken for the last 10 minutes. It’s an efficient way to get a complete meal on the table with minimal cleanup.
Variations & Adaptations
This recipe is a fantastic base, and you can easily adapt it to suit your taste or what you have on hand. Here are some of my favorite variations.
Spicy Buffalo Style: After cooking, toss the crispy thighs in a mixture of melted butter and your favorite hot sauce (about 2 tablespoons each). Serve with blue cheese or ranch dressing and celery sticks. It’s a healthier take on buffalo wings that’s incredibly satisfying.
Herb and Garlic Crust: Add 1 teaspoon of dried thyme and 1 teaspoon of dried rosemary to the seasoning mixture. Finely chop 2 cloves of fresh garlic and rub it under the skin before seasoning. The garlic infuses the meat with incredible flavor without burning on the surface.
Lemon Pepper Version: Replace the paprika with 1 teaspoon of lemon zest and increase the black pepper to 1/2 teaspoon. The lemon adds a bright, fresh note that cuts through the richness of the chicken. It’s perfect for spring and summer meals.
Dietary Adaptations: This recipe is naturally gluten-free, low-carb, and keto-friendly. There’s no breading or flour involved, so it fits perfectly into a low-carb lifestyle. If you’re watching your sodium, reduce the salt to 3/4 teaspoon. The baking powder is still essential for crispiness, but you can find low-sodium versions if needed.
Different Cooking Methods: If you don’t have an air fryer, you can bake these in the oven. Place the seasoned thighs on a wire rack set over a baking sheet and bake at 425°F (218°C) for 35-40 minutes, flipping halfway. The skin won’t be quite as crispy as the air fryer version, but it’s still delicious. You can also grill them over medium-high heat for 6-8 minutes per side, but watch out for flare-ups from the rendered fat.
My personal favorite variation is the lemon pepper version. I made it last summer when I had an abundance of lemons from my neighbor’s tree, and it was absolutely incredible. The zest adds a brightness that I didn’t expect. It’s become my go-to for warm weather meals.
Serving & Storage Suggestions
These crispy air fryer chicken thighs are incredibly versatile. Here’s how to serve them and how to store any leftovers (if you have any).
Serving Temperature: Serve these hot, right after the 5-minute rest. The skin is at its crispiest immediately out of the air fryer. If you let them sit too long, the skin will start to soften from the steam trapped underneath.
Presentation Tips: Arrange the thighs on a platter with the crispy skin facing up. Garnish with fresh herbs like thyme sprigs or chopped parsley. A squeeze of fresh lemon juice over the top adds a beautiful brightness and cuts through the richness. For a more casual meal, serve them right on a cutting board with some crusty bread to soak up any juices.
What to Serve With Them: These chicken thighs pair beautifully with almost any side dish. I love them with a simple green salad dressed with lemon vinaigrette, roasted vegetables like asparagus or broccoli, or creamy mashed potatoes. For a low-carb option, serve them with cauliflower mash or a big pile of sautéed greens. The possibilities are endless.
Storage Instructions: Store any leftover chicken thighs in an airtight container in the refrigerator for up to 4 days. The skin will lose its crispiness in the fridge, but the meat will stay juicy and flavorful. To reheat, I recommend using the air fryer again. Preheat it to 350°F (177°C) and cook the thighs for 3-4 minutes until heated through and the skin re-crisps. You can also reheat them in a 350°F oven for 10-12 minutes. Avoid the microwave—it will make the skin rubbery and the meat tough.
Freezing Instructions: These freeze surprisingly well. Let the cooked chicken cool completely, then wrap each thigh individually in plastic wrap and place them in a freezer-safe bag. They’ll keep for up to 3 months. To thaw, transfer them to the refrigerator overnight. Reheat in the air fryer as directed above.
One thing I love about this recipe is that the flavors actually deepen overnight. The leftovers are fantastic chopped up and tossed into a salad or shredded for tacos. The crispy skin might be gone, but the flavor is still incredible.
Nutritional Information & Benefits
This recipe is a fantastic choice for anyone looking for a satisfying, protein-rich meal that doesn’t compromise on flavor. Here’s the estimated nutritional breakdown per serving (one thigh, assuming 4 servings).
- Calories: 280-320
- Protein: 25-28g
- Fat: 20-24g (mostly healthy monounsaturated and polyunsaturated fats from the skin)
- Saturated Fat: 5-6g
- Carbohydrates: 0-1g
- Fiber: 0g
- Sugar: 0g
- Sodium: 550-650mg (depending on your salt brand)
Health Benefits: Chicken thighs are an excellent source of high-quality protein, which is essential for muscle building and repair. They’re also rich in B vitamins, particularly B6 and B12, which support energy metabolism and brain function. The skin contains healthy fats that help your body absorb fat-soluble vitamins. Plus, by cooking in the air fryer instead of deep-frying, you significantly reduce the amount of added fat and calories.
Dietary Considerations: This recipe is naturally gluten-free, grain-free, low-carb, keto-friendly, and Whole30-compliant (if you use a compliant baking powder). It contains no dairy, eggs, or soy. The only potential allergen is the chicken itself, so it’s suitable for most dietary restrictions.
From a personal wellness perspective, I love that this recipe allows me to enjoy a truly indulgent-tasting meal without any guilt. It’s proof that eating well doesn’t mean sacrificing flavor. The high protein content keeps me full and satisfied for hours, which helps with mindful eating and portion control. It’s comfort food that actually supports my health goals.
Conclusion
These crispy air fryer chicken thighs are more than just a recipe—they’re a solution. They solve the problem of wanting something deeply satisfying without spending hours in the kitchen or consuming a ton of unhealthy ingredients. They solve the problem of boring, dry chicken that makes you dread dinner. And honestly? They solve the problem of missing that perfect rotisserie chicken from that little shop that closed down.
I’ve made these countless times now, and they never get old. The way the skin crackles when you bite into it, the way the meat is so tender it practically melts—it’s pure comfort. And the best part? You can make it your own. Add different spices, try different sides, use it in tacos or salads. This recipe is a starting point for endless delicious meals.
I’d love to hear how these turn out for you. Did you try a variation? Did you serve them with something amazing? Drop a comment below and let me know. And if you loved this recipe, please share it with a friend who needs some crispy chicken in their life. Happy cooking, my friend. You’ve got this.
Frequently Asked Questions
Can I use boneless, skinless chicken thighs?
You can, but the results will be different. Boneless, skinless thighs cook much faster (about 8-10 minutes total) and won’t have that crispy skin. They’ll still be juicy and flavorful, but you’ll miss out on the best part of this recipe. If you’re short on time, it’s a fine substitute, but I highly recommend sticking with bone-in, skin-on for the full experience.
Why is my chicken skin not crispy?
There are three common reasons. First, the skin wasn’t dried enough before cooking. Moisture is the enemy of crispiness. Second, the air fryer basket was overcrowded, which trapped steam. Third, you didn’t use enough baking powder or it wasn’t distributed evenly. Check these three things, and your next batch will be perfect.
Do I need to flip the chicken halfway through?
Yes, flipping is essential for even cooking and crispiness on both sides. The skin side needs direct contact with the hot air to get that golden, crackling texture. The underside needs time to cook through without burning. Flipping ensures both sides get equal attention.
Can I marinate the chicken beforehand?
You can, but I don’t recommend it for this recipe. Marinades add moisture to the skin, which works against crispiness. If you want extra flavor, I suggest dry brining instead. Rub the seasoning mixture onto the chicken and let it sit in the refrigerator uncovered for 2-4 hours. This draws out moisture and concentrates the flavor without sacrificing crispiness.
How do I reheat leftovers without losing crispiness?
The air fryer is your best friend here. Preheat it to 350°F (177°C) and reheat the thighs for 3-4 minutes. The hot air will re-crisp the skin and warm the meat through without drying it out. The oven works too, but it takes longer (10-12 minutes at 350°F). Avoid the microwave at all costs—it will ruin the texture.
Pin This Recipe!
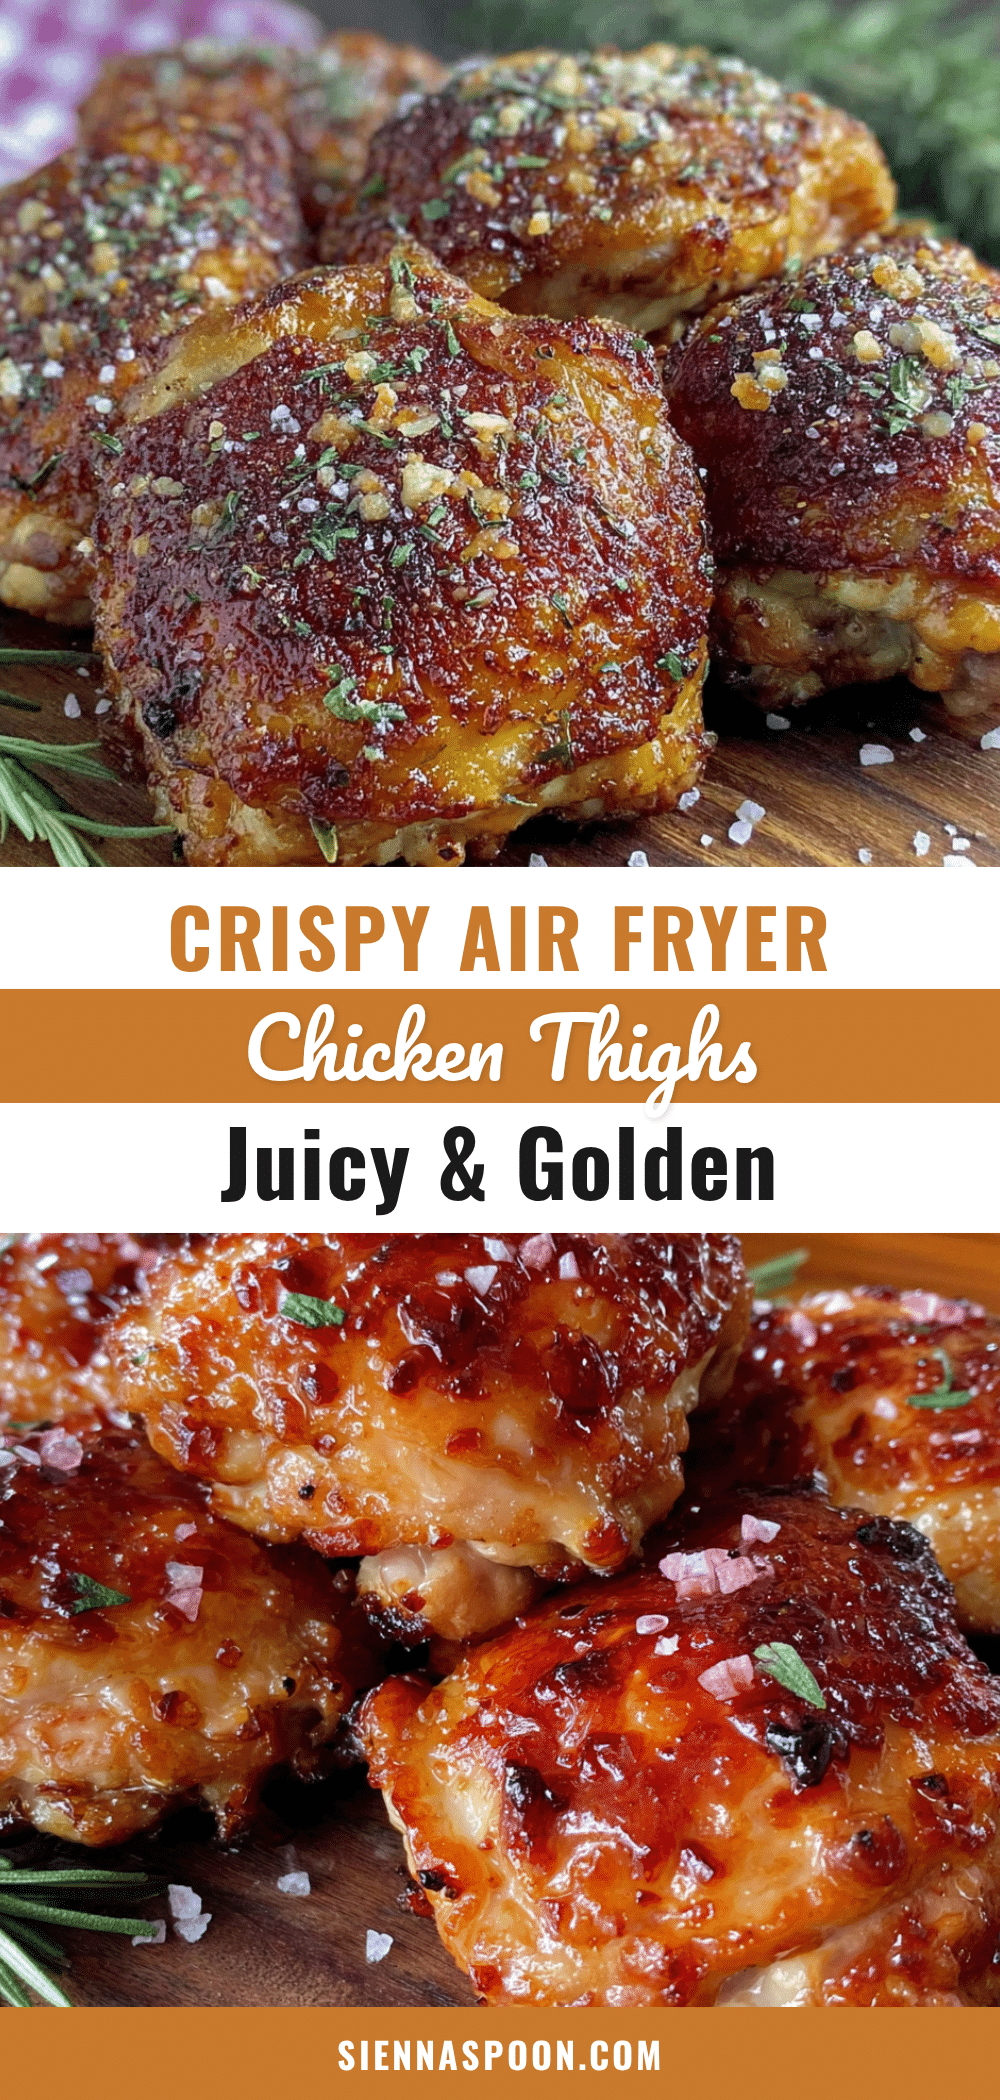
Crispy Air Fryer Chicken Thighs Recipe – Juicy & Golden

These crispy air fryer chicken thighs are the exact golden, juicy, skin-crackling victory I was chasing. The air fryer does all the hard work, and you just have to know one little trick with the skin.
- Prep Time: 15 minutes
- Cook Time: 22-24 minutes
- Total Time: 37-39 minutes
- Yield: 4 servings
- Category: Main Course
- Cuisine: American
Ingredients
- Bone-in, skin-on chicken thighs (4-6 thighs, about 1.5 lbs total)
- Kosher salt (1 teaspoon)
- Baking powder (1/2 teaspoon)
- Garlic powder (1/2 teaspoon)
- Onion powder (1/4 teaspoon)
- Paprika (1/2 teaspoon)
- Black pepper (1/4 teaspoon, freshly ground)
- Optional: Fresh herbs for garnish (thyme, rosemary, or parsley)
Instructions
- Prep the chicken (5 minutes): Take your chicken thighs out of the refrigerator about 15-20 minutes before you start cooking. Pat them completely dry with paper towels.
- Score the skin (2 minutes): Using a sharp knife, make 2-3 shallow cuts through the skin and fat, but not into the meat.
- Season the chicken (3 minutes): In a small bowl, mix together the kosher salt, baking powder, garlic powder, onion powder, paprika, and black pepper. Sprinkle this mixture evenly over both sides of the chicken thighs.
- Rest the seasoned chicken (10-15 minutes): Let the seasoned chicken sit on a plate or wire rack at room temperature for 10-15 minutes. Pat the skin dry again with a paper towel right before cooking.
- Preheat the air fryer (3-5 minutes): Set your air fryer to 380°F (193°C) and let it preheat for 3-5 minutes.
- Arrange the chicken (2 minutes): Place the chicken thighs in the air fryer basket, skin side down, in a single layer with a little space between each piece.
- Air fry the first side (12 minutes): Cook at 380°F (193°C) for 12 minutes. Don’t open the basket during this time.
- Flip and air fry the second side (10-12 minutes): Carefully flip the thighs over using your tongs. Cook for another 10-12 minutes at 380°F (193°C).
- Check for doneness (1 minute): The internal temperature should reach 175-185°F (79-85°C) when inserted into the thickest part of the thigh, avoiding the bone.
- Rest the chicken (5 minutes): Remove the chicken from the air fryer and let it rest on a cutting board or plate for 5 minutes.
Notes
The biggest mistake is not drying the skin enough. Don’t skip the baking powder. Let the chicken come to room temperature before cooking. Use a thermometer for best results. For reheating, use the air fryer at 350°F for 3-4 minutes to re-crisp the skin.
Nutrition
- Serving Size: 1 thigh
- Calories: 300
- Sodium: 600
- Fat: 22
- Saturated Fat: 5.5
- Carbohydrates: 0.5
- Protein: 26.5
Keywords: air fryer chicken thighs, crispy chicken thighs, juicy chicken thighs, air fryer recipe, chicken recipe, gluten-free, keto, low-carb


