Love this? Save it for later!
Share the inspiration with your friends
I was at the hardware store—of all places—buying a new showerhead when the woman behind me in line started talking about pumpkin cookies. Not just any pumpkin cookies, mind you. She was describing these bar cookies with such specific, almost reverent detail that I nearly forgot why I was there. She was maybe seventy, wearing a faded flannel shirt, and she had this way of gesturing with her hands that made you see exactly what she was describing. “The trick,” she said, leaning in like we were old friends, “is to use just enough pumpkin to keep them soft but not so much that they get cakey. You want them to have that slight chew.” I nodded along, holding my showerhead, completely captivated.
She told me she’d been making them for thirty years, ever since her daughter’s kindergarten teacher brought them to a fall party. The teacher had scribbled the recipe on a napkin, and over the decades, the napkin had become so stained and crinkled it was barely legible. But the woman had memorized it by heart. “I don’t even need the napkin anymore,” she said, laughing. “It’s in here.” She tapped her head. “And here.” She tapped her heart. I mean, how could I not ask for the recipe?
So there I was, standing between plumbing supplies and paint samples, getting a masterclass in pumpkin snickerdoodle cookie bars from a complete stranger. She didn’t have a blog or a cookbook. She just knew what she was doing. Honestly, that’s the best kind of recipe source—someone who’s made it so many times they could make it in their sleep. I scribbled her instructions on the back of my receipt, and let me tell you, that crumpled receipt is still tucked into my recipe box. These are the kind of cookie bars you’ll want to make all fall long. Maybe you’ve been there—standing in an unlikely place, getting cooking advice from someone you never expected, and walking away with a recipe that changes everything.
Why You’ll Love This Recipe
These pumpkin snickerdoodle cookie bars are the fall dessert you didn’t know you needed. I’ve tested this recipe at least a dozen times, tweaking the ratios, adjusting the spice levels, and trying different pumpkin purées to get it just right. My family has been my official taste-testing panel, and they’ve never complained once. Not a single complaint. That’s how you know it’s good.
- Quick & Easy: From start to finish, these bars come together in about 35 minutes. No chilling, no rolling, no fuss. Just mix, spread, and bake.
- Simple Ingredients: You likely already have everything in your pantry. No trips to specialty stores or weird ingredients you’ll never use again.
- Perfect for Fall Gatherings: Great for Thanksgiving, Halloween parties, cozy movie nights, or just because it’s Tuesday and you want something warm and spiced.
- Crowd-Pleaser: These bars disappear fast. Kids love them, adults love them, and even people who “don’t like pumpkin” have been converted. I’ve seen it happen.
- Unbelievably Delicious: The texture is the real star here—soft, chewy, with that signature snickerdoodle tang from the cream of tartar, plus warm pumpkin spice in every bite.
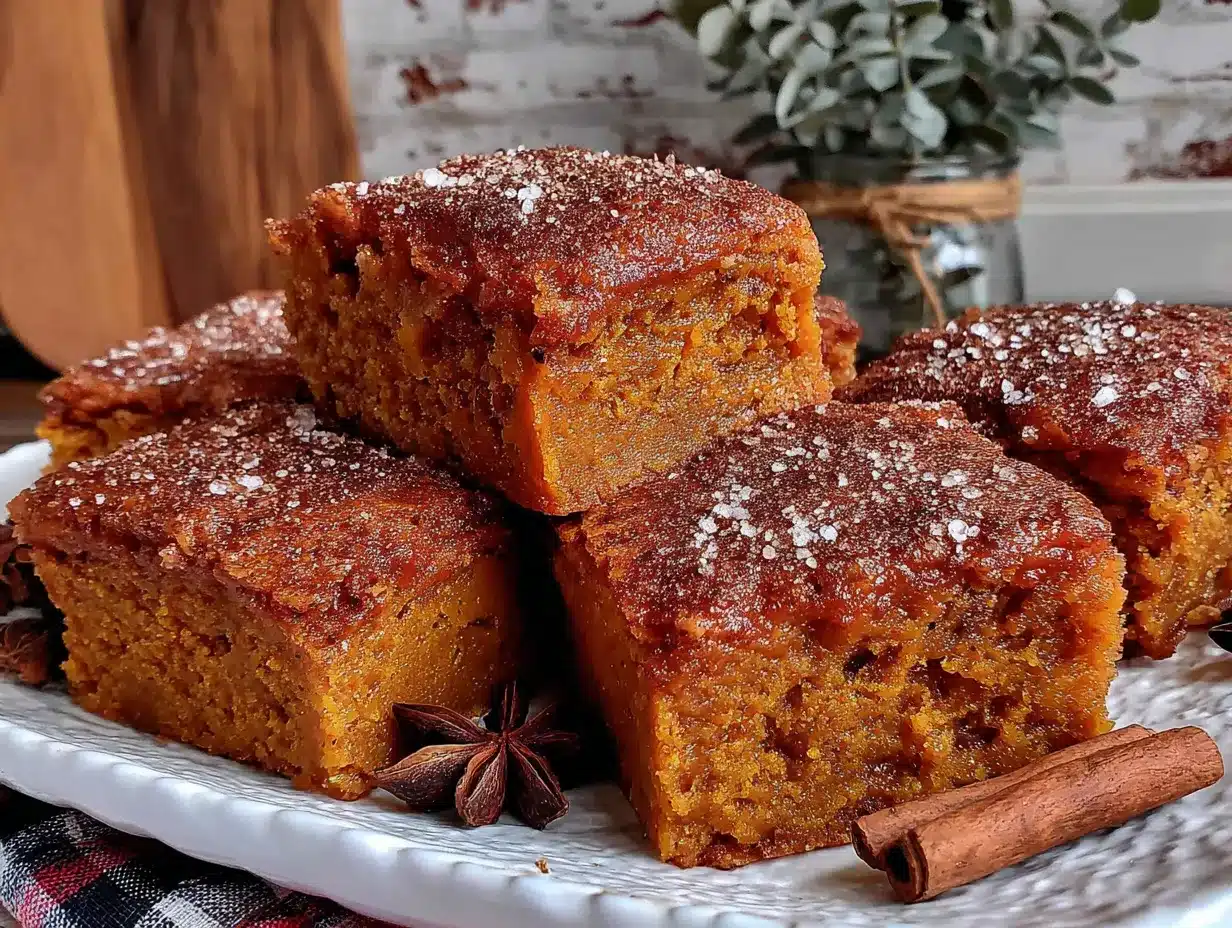
What makes these different from every other pumpkin bar recipe out there? It’s the combination of pumpkin and cream of tartar. The cream of tartar gives the bars that classic snickerdoodle chewiness, while the pumpkin keeps them incredibly moist. Most pumpkin bars are basically cake—soft and fluffy. These have substance. They have bite. They’re cookie bars that actually taste like cookies, not cake masquerading as cookies. The cinnamon-sugar topping is the final touch, creating that signature snickerdoodle crust that crackles when you bite into it.
This isn’t just another fall dessert recipe. It’s the kind that makes you close your eyes after the first bite. It’s comfort food reimagined—familiar enough to feel nostalgic, but fresh enough to feel exciting. Perfect for impressing guests without any stress, or turning a simple weeknight into something memorable.
What Ingredients You Will Need
This recipe uses simple, wholesome ingredients to deliver bold flavor and satisfying texture. Most of these are pantry staples, so you might already have everything you need. Here’s what you’ll need and why each ingredient matters:
For the Cookie Bars
- Unsalted butter, softened (1 cup / 2 sticks) – Butter gives these bars their rich flavor and tender crumb. I always use unsalted so I can control the salt level. Let it come to room temperature for easy creaming.
- Granulated sugar (1 ½ cups / 300g) – Sugar does more than sweeten—it helps create that chewy texture and golden color. Don’t reduce it or the texture will suffer.
- Pumpkin purée (1 cup / 245g) – Use 100% pure pumpkin purée, not pumpkin pie filling. Libby’s is my go-to brand for consistent results. The pumpkin adds moisture, color, and a subtle earthy sweetness.
- Large egg (1, room temperature) – The egg binds everything together and adds structure. Room temperature eggs incorporate more evenly into the batter.
- Vanilla extract (1 teaspoon) – Pure vanilla extract adds depth and warmth. Imitation vanilla works in a pinch, but pure is better.
- All-purpose flour (2 ½ cups / 312g) – Spoon and level your flour—don’t scoop directly from the bag or you’ll end up with dry bars. Too much flour is the number one mistake people make.
- Cream of tartar (2 teaspoons) – This is the secret ingredient. Cream of tartar gives snickerdoodles their signature tangy flavor and chewy texture. Don’t skip it.
- Baking soda (1 teaspoon) – Works with the cream of tartar to help the bars rise and spread properly.
- Salt (½ teaspoon) – Balances the sweetness and enhances all the flavors. I use fine sea salt.
- Pumpkin pie spice (2 teaspoons) – You can use store-bought or make your own blend. If you’re making your own, combine cinnamon, nutmeg, ginger, cloves, and allspice.
- Cinnamon (1 teaspoon) – Adds extra warmth and complements the pumpkin pie spice.
For the Topping
- Granulated sugar (¼ cup / 50g) – For that classic snickerdoodle coating.
- Cinnamon (1 tablespoon) – Mix with the sugar to create the signature topping that crackles as it bakes.
Substitution Guidance: If you’re out of cream of tartar, you can substitute 2 teaspoons of lemon juice or white vinegar mixed with 1 teaspoon of baking soda, though the flavor will be slightly different. For a dairy-free version, use vegan butter sticks (not margarine) and ensure they’re softened properly. Gluten-free all-purpose flour blends work well—just add ¼ teaspoon of xanthan gum if your blend doesn’t already include it.
Equipment Needed
You don’t need fancy equipment to make these pumpkin snickerdoodle cookie bars. Here’s what you’ll need:
- 9×13-inch baking pan – This is the standard size for bars. If you use a different size, your baking time will change. A metal pan works best for even browning.
- Parchment paper – Line your pan with parchment paper, leaving an overhang on two sides. This creates “handles” that make lifting the bars out a breeze. Trust me, this is a game-changer.
- Electric mixer – A hand mixer or stand mixer both work. You’ll be creaming butter and sugar, so having some power helps. A wooden spoon and some elbow grease will also work if you’re feeling ambitious.
- Mixing bowls – You’ll need a large bowl for the wet ingredients and a medium bowl for the dry ingredients.
- Measuring cups and spoons – For accuracy, especially with the cream of tartar and spices. I’ve learned the hard way that eyeballing baking soda never ends well.
- Rubber spatula – For scraping down the sides of the bowl and spreading the batter evenly in the pan.
- Cooling rack – Allows air to circulate around the pan so the bars cool evenly. If you don’t have one, just let them cool in the pan on the counter.
Budget-Friendly Tip: If you don’t have parchment paper, you can grease the pan thoroughly with butter or non-stick spray. Just be careful when removing the bars—they might stick a little. A plastic knife can help loosen the edges.
Preparation Method
- Preheat and prep your pan. Preheat your oven to 350°F (175°C). Line your 9×13-inch baking pan with parchment paper, leaving about 2 inches of overhang on the long sides. This will make lifting the bars out so much easier later. I forgot to do this once and spent twenty minutes trying to pry bars out of the pan. Not fun.
- Cream the butter and sugar. In a large mixing bowl, beat the softened butter and granulated sugar together until light and fluffy, about 3-4 minutes. You want the mixture to look pale and almost doubled in volume. Scrape down the sides of the bowl halfway through. If you’re using a hand mixer, medium-high speed works well.
- Add the pumpkin, egg, and vanilla. Add the pumpkin purée, room temperature egg, and vanilla extract to the butter mixture. Beat on medium speed until fully combined. The mixture might look a little curdled or separated at this point—that’s totally normal. Don’t panic. The flour will bring everything together.
- Whisk the dry ingredients. In a separate medium bowl, whisk together the all-purpose flour, cream of tartar, baking soda, salt, pumpkin pie spice, and cinnamon. Whisking ensures everything is evenly distributed. I like to whisk at least 20 seconds to make sure there are no clumps of baking soda or cream of tartar.
- Combine wet and dry ingredients. Gradually add the dry ingredients to the wet ingredients, mixing on low speed until just combined. Stop as soon as you don’t see any more streaks of flour. Overmixing will develop the gluten and make the bars tough. A few small lumps are fine.
- Spread the batter in the pan. Transfer the batter to your prepared pan. It will be thick and a little sticky—that’s exactly what you want. Use a rubber spatula to spread it evenly into all corners. If the batter is too sticky to spread easily, lightly dampen your spatula with water. This trick works like magic.
- Make the cinnamon-sugar topping. In a small bowl, mix together the granulated sugar and cinnamon for the topping. Sprinkle it evenly over the batter. Don’t be shy—every bit of that topping belongs on the bars. It creates that signature snickerdoodle crust.
- Bake to perfection. Bake for 22-26 minutes, or until the edges are set and lightly golden. The center will still look slightly soft and puffy—that’s okay. A toothpick inserted into the center should come out with a few moist crumbs, not wet batter. My oven runs hot, so I check at 22 minutes and go from there.
- Cool completely before cutting. Let the bars cool in the pan on a cooling rack for at least 30 minutes. Then use the parchment paper handles to lift the entire block of bars out onto the cooling rack. Let them cool completely before cutting. I know it’s hard to wait, but warm bars will crumble when you cut them. Patience pays off here.
- Cut and serve. Once completely cool, use a sharp knife to cut into squares. I usually cut 12 large bars or 24 smaller ones, depending on the occasion. A bench scraper also works great for clean cuts.
Cooking Tips & Techniques
After making these bars more times than I can count, I’ve learned a few things the hard way. Here are my best tips to ensure success every time:
Don’t overmix the batter. This is the most common mistake. Once you add the flour, mix only until it disappears. Overmixing develops gluten, which makes the bars tough and dense instead of soft and tender. I’ve ruined a batch by getting distracted and mixing too long. Learn from my mistake.
Use room temperature ingredients. Your butter, egg, and even the pumpkin purée should be at room temperature. Cold ingredients don’t cream together properly, which affects the texture. If you forgot to take the egg out ahead of time, place it in a bowl of warm water for 5 minutes. For the butter, cut it into small cubes and let it sit for 15 minutes.
Measure your flour correctly. Spoon the flour into your measuring cup and level it off with a knife. Scooping directly from the bag compacts the flour, and you can end up with 20-30% more flour than the recipe calls for. That extra flour will make your bars dry and crumbly. A kitchen scale is the most accurate method—312 grams is your target.
Check for doneness carefully. These bars are meant to be soft and chewy, so they’ll look slightly underdone in the center when you take them out. That’s intentional. The residual heat will continue baking them as they cool. If you wait until the center looks fully set, they’ll be overbaked and dry. Look for golden edges and a center that’s puffed but still soft.
Let them cool completely. I cannot stress this enough. Cutting warm bars is a recipe for disaster. They’ll crumble, stick to the knife, and lose their beautiful shape. If you’re in a hurry, pop the pan in the fridge for 20 minutes after the initial 30-minute counter cool. Cold bars cut much more cleanly.
Variations & Adaptations
One of the best things about this recipe is how adaptable it is. Here are some variations I’ve tried and loved:
Gluten-Free Version
Substitute the all-purpose flour with a 1:1 gluten-free baking flour blend. I’ve had great results with Bob’s Red Mill Gluten-Free 1-to-1 Baking Flour. Add ¼ teaspoon of xanthan gum if your blend doesn’t already include it. The texture will be slightly more delicate, but still delicious. Bake time might be 2-3 minutes shorter, so keep an eye on them.
Vegan Version
Use vegan butter sticks (I like Miyoko’s or Earth Balance) and replace the egg with a flax egg (1 tablespoon ground flaxseed mixed with 3 tablespoons water, let sit for 5 minutes). The bars will be a little less tender, but the flavor is still spot-on. Make sure your sugar is vegan-friendly (most granulated sugar is, but some brands use bone char).
Extra Spiced Version
If you love warm spices as much as I do, add an extra teaspoon of pumpkin pie spice and a pinch of ground ginger and cardamom. You can also add ¼ teaspoon of black pepper for a subtle heat that complements the pumpkin beautifully. This version is perfect for when you want something a little more grown-up.
Chocolate Chip Version
Fold in 1 cup of semi-sweet chocolate chips or white chocolate chips before spreading the batter in the pan. The chocolate adds richness and makes these bars even more indulgent. I’ve made this version for holiday parties and they disappear instantly.
Nutty Version
Add ½ cup of chopped pecans or walnuts to the batter, or sprinkle them on top before baking. Toast the nuts first for extra flavor—just spread them on a baking sheet and bake at 350°F for 5-7 minutes until fragrant. This adds a lovely crunch that contrasts with the soft bars.
Serving & Storage Suggestions
These pumpkin snickerdoodle cookie bars are incredibly versatile when it comes to serving. Here’s how to enjoy them at their best:
Serving Temperature: These bars are delicious at room temperature, but I also love them slightly warm. If you’ve stored them in the fridge, pop a bar in the microwave for 10-15 seconds. The warmth makes the spices more aromatic and the texture even softer. For a truly indulgent treat, serve with a scoop of vanilla ice cream or a drizzle of caramel sauce.
Presentation Ideas: Arrange the bars on a rustic wooden board or a white platter for a beautiful fall presentation. Dust with a little extra cinnamon-sugar just before serving for a fresh, bakery-style look. For gifting, stack them in a decorative tin lined with parchment paper—they make wonderful homemade gifts for neighbors, teachers, or coworkers.
Complementary Dishes: These bars pair beautifully with hot apple cider, chai tea, or a classic pumpkin spice latte. For a full fall dessert spread, serve alongside classic apple crisp or pumpkin bundt cake. They also work great as part of a Thanksgiving dessert table—lighter than pie, but just as satisfying.
Storage Instructions: Store the bars in an airtight container at room temperature for up to 4 days. Layer them with parchment paper between layers to prevent sticking. If your kitchen is warm or humid, store them in the refrigerator to extend their shelf life. The cool temperature actually makes them easier to cut, too.
Freezing Instructions: These bars freeze beautifully. Cut them into squares, place them on a baking sheet in a single layer, and freeze for 1 hour. Then transfer the frozen bars to a freezer-safe bag or container. They’ll keep for up to 3 months. To thaw, let them sit at room temperature for about 30 minutes, or pop them in the microwave for 15-20 seconds. The texture remains remarkably close to fresh-baked.
Flavor Development: Here’s a little secret—these bars actually taste better the next day. The flavors meld together overnight, and the texture becomes even more tender. If you can resist eating them all on day one, you’ll be rewarded on day two. I often make these a day ahead for parties and they’re always a hit.
Nutritional Information & Benefits
While these are definitely a treat, there are a few nutritional bright spots worth mentioning. Here’s the estimated nutritional breakdown for one bar (based on 12 servings):
| Nutrient | Amount per Serving |
|---|---|
| Calories | 320 |
| Total Fat | 14g |
| Saturated Fat | 8g |
| Carbohydrates | 47g |
| Fiber | 2g |
| Sugar | 28g |
| Protein | 3g |
| Vitamin A | 85% DV |
Health Benefits: Pumpkin is packed with vitamin A, which supports eye health and immune function. It’s also a good source of fiber, which aids digestion and helps you feel full longer. The cream of tartar adds potassium, and the cinnamon has anti-inflammatory properties. Of course, these are still cookies—but it’s nice to know there’s some nutritional value hiding in that deliciousness.
Dietary Considerations: This recipe contains gluten, dairy, and eggs. For gluten-free and vegan options, see the variations section above. These bars are nut-free as written, making them a safe choice for school events or parties where allergies are a concern. Always check your ingredient labels to be sure.
Personal Perspective: I believe in balance. These bars are a celebration of fall flavors, and they’re meant to be enjoyed without guilt. One bar with a cup of coffee or tea is the perfect way to savor the season. Life’s too short to skip dessert, especially when it’s this good.
Conclusion
These cozy pumpkin snickerdoodle cookie bars are everything I love about fall baking—warm spices, soft texture, and that irresistible cinnamon-sugar topping. They came to me in the most unexpected way, from a stranger in a hardware store, and they’ve become a staple in my kitchen every autumn. That’s the thing about good recipes—they find you when you least expect them, and they stay with you for years.
I hope you’ll give these bars a try. Make them for a potluck, a family dinner, or just because you want your kitchen to smell like fall. Customize them with your favorite add-ins, share them with people you love, and don’t be afraid to make them your own. The best recipes are the ones that evolve with you.
If you make these pumpkin snickerdoodle cookie bars, I’d love to hear about it. Leave a comment below and let me know how they turned out—did you add chocolate chips? Try the gluten-free version? Serve them with ice cream? Your feedback helps other readers, and it makes my day to hear about your baking adventures. Happy fall baking, friends!
Frequently Asked Questions
Can I use pumpkin pie filling instead of pumpkin purée?
No, I don’t recommend it. Pumpkin pie filling is pre-sweetened and spiced, which will throw off the sugar and spice balance in this recipe. Stick with 100% pure pumpkin purée for the best results. Libby’s is my go-to brand, but any brand of pure pumpkin purée will work.
Why did my bars turn out dry?
Dry bars are usually the result of overbaking or overmeasuring the flour. Make sure you’re spooning and leveling your flour, not scooping directly from the bag. Also, pull the bars out of the oven when the center still looks slightly soft—they’ll continue baking as they cool. If your oven runs hot, check them a few minutes early.
Can I make these bars ahead of time?
Absolutely! In fact, these bars taste even better the next day after the flavors have had time to meld. You can bake them up to 2 days ahead and store them in an airtight container at room temperature. They also freeze beautifully for up to 3 months—just thaw at room temperature before serving.
Can I use a different size pan?
You can, but you’ll need to adjust the baking time. A 9×13-inch pan is ideal for this recipe. If you use an 8×8-inch pan, the bars will be thicker and will need about 30-35 minutes of baking time. If you use a 9×9-inch pan, check at 25-28 minutes. Keep an eye on the edges—they should be golden and set.
Can I skip the cream of tartar?
I really don’t recommend it. Cream of tartar is what gives snickerdoodles their signature tangy flavor and chewy texture. Without it, these bars will be more like plain pumpkin cookies—still good, but not the same. If you’re in a pinch, you can substitute 2 teaspoons of lemon juice or white vinegar mixed with 1 teaspoon of baking soda, but the flavor will be slightly different.
Pin This Recipe!
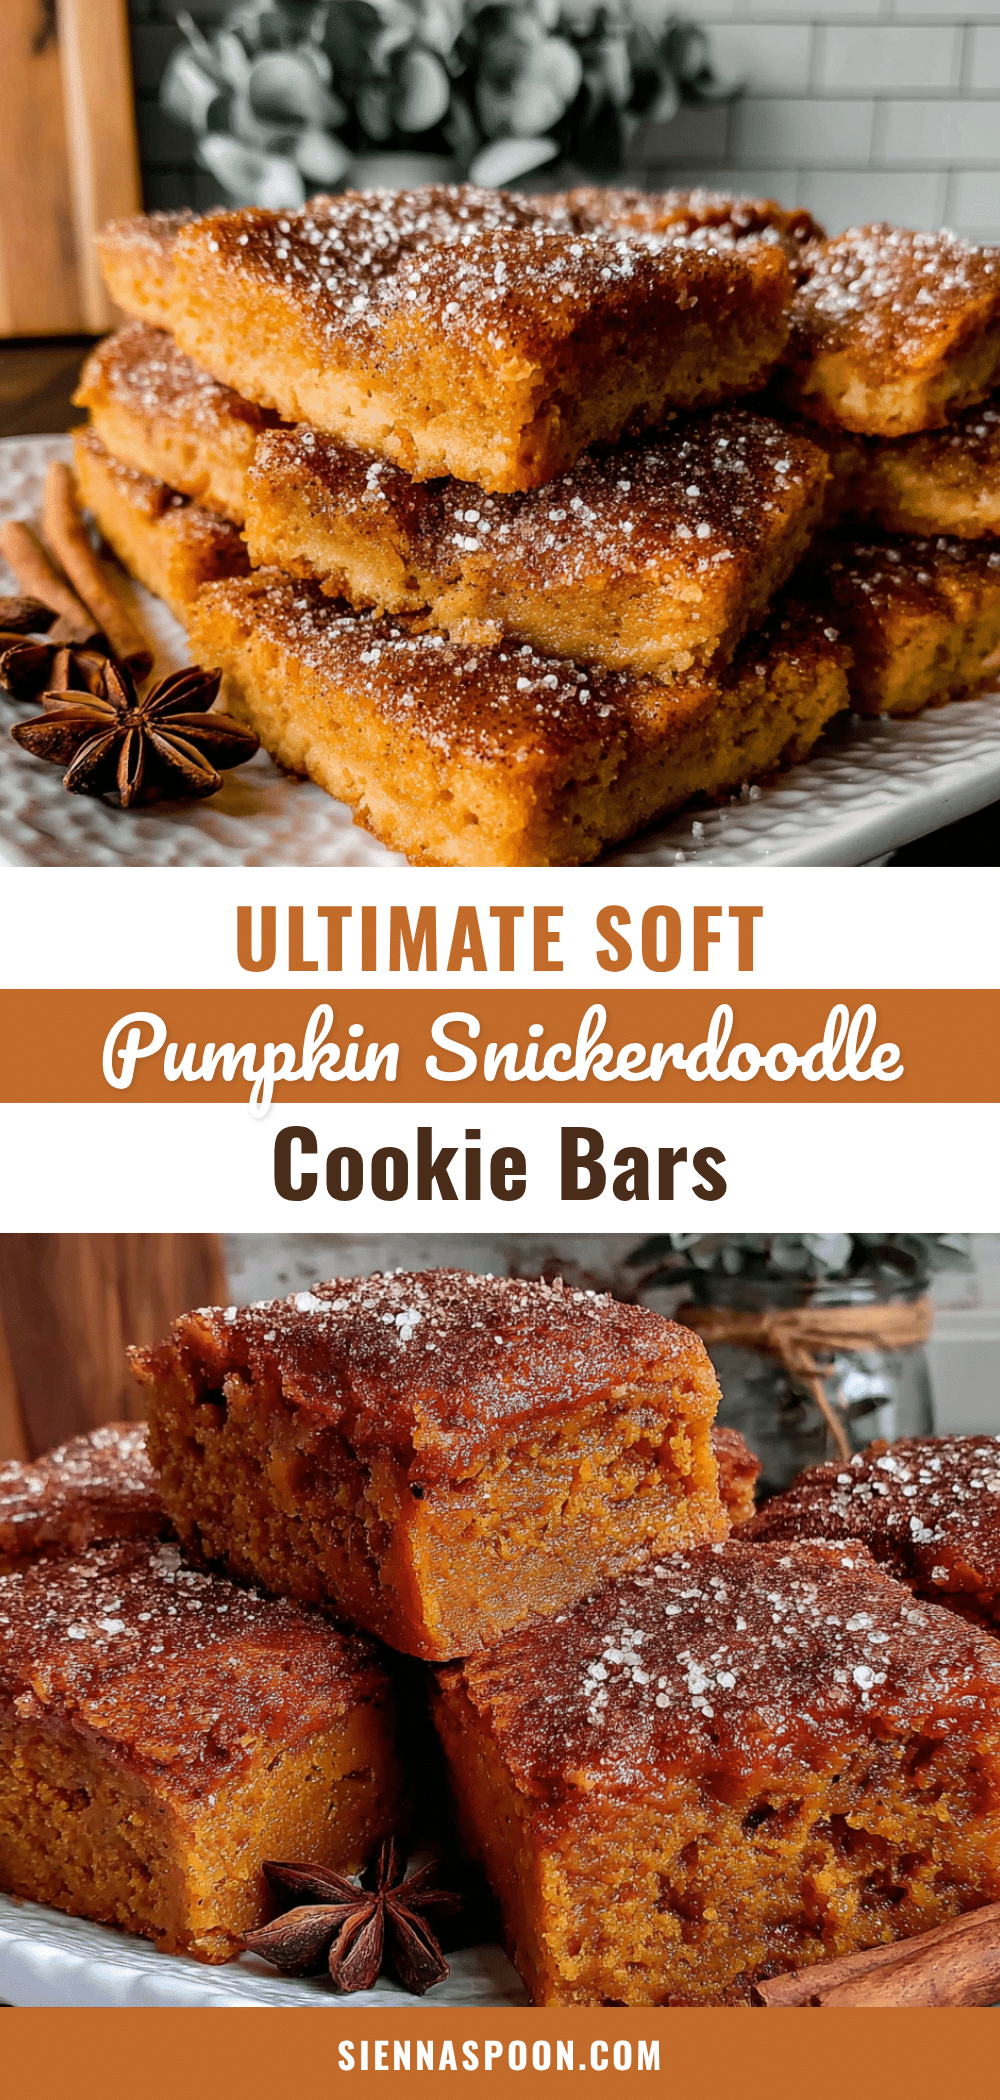
Cozy Pumpkin Snickerdoodle Cookie Bars: Easy Fall Dessert
These pumpkin snickerdoodle cookie bars are the fall dessert you didn’t know you needed. Soft, chewy, with that signature snickerdoodle tang from the cream of tartar, plus warm pumpkin spice in every bite.
- Prep Time: 15 minutes
- Cook Time: 25 minutes
- Total Time: 40 minutes
- Yield: 12 servings 1x
- Category: Dessert
- Cuisine: American
Ingredients
- 1 cup (2 sticks) unsalted butter, softened
- 1 ½ cups (300g) granulated sugar
- 1 cup (245g) pumpkin purée (100% pure, not pumpkin pie filling)
- 1 large egg, room temperature
- 1 teaspoon vanilla extract
- 2 ½ cups (312g) all-purpose flour
- 2 teaspoons cream of tartar
- 1 teaspoon baking soda
- ½ teaspoon salt
- 2 teaspoons pumpkin pie spice
- 1 teaspoon cinnamon
- ¼ cup (50g) granulated sugar (for topping)
- 1 tablespoon cinnamon (for topping)
Instructions
- Preheat your oven to 350°F (175°C). Line a 9×13-inch baking pan with parchment paper, leaving about 2 inches of overhang on the long sides.
- In a large mixing bowl, beat the softened butter and 1 ½ cups granulated sugar together until light and fluffy, about 3-4 minutes. Scrape down the sides of the bowl halfway through.
- Add the pumpkin purée, room temperature egg, and vanilla extract to the butter mixture. Beat on medium speed until fully combined. The mixture may look slightly curdled—this is normal.
- In a separate medium bowl, whisk together the all-purpose flour, cream of tartar, baking soda, salt, pumpkin pie spice, and cinnamon for at least 20 seconds to ensure even distribution.
- Gradually add the dry ingredients to the wet ingredients, mixing on low speed until just combined. Do not overmix; stop as soon as no streaks of flour remain.
- Transfer the batter to the prepared pan. It will be thick and slightly sticky. Use a rubber spatula to spread it evenly into all corners. If too sticky, lightly dampen the spatula with water.
- In a small bowl, mix together the ¼ cup granulated sugar and 1 tablespoon cinnamon for the topping. Sprinkle evenly over the batter.
- Bake for 22-26 minutes, or until the edges are set and lightly golden. The center will still look slightly soft and puffy. A toothpick inserted into the center should come out with a few moist crumbs, not wet batter.
- Let the bars cool in the pan on a cooling rack for at least 30 minutes. Then use the parchment paper handles to lift the entire block of bars out onto the cooling rack. Cool completely before cutting.
- Once completely cool, use a sharp knife to cut into squares. Cut 12 large bars or 24 smaller ones.
Notes
Don’t overmix the batter to avoid tough bars. Use room temperature ingredients for best texture. Measure flour correctly by spooning and leveling. Check for doneness carefully—bars should look slightly underdone in the center. Cool completely before cutting to prevent crumbling. These bars taste even better the next day.
Nutrition
- Serving Size: 1 bar (based on 12 s
- Calories: 320
- Sugar: 28
- Sodium: 200
- Fat: 14
- Saturated Fat: 8
- Carbohydrates: 47
- Fiber: 2
- Protein: 3
Keywords: pumpkin snickerdoodle cookie bars, fall dessert, pumpkin bars, snickerdoodle bars, easy pumpkin recipe


