Love this? Save it for later!
Share the inspiration with your friends
My brother-in-law, Mark, had refused to touch pecan pie for thirty-seven years. Three decades and seven years of Thanksgiving dinners where he’d push the pie plate away with a polite, “No thanks, not my thing.” The man would rather eat a sad, dry sugar cookie than face that sticky-sweet filling. Then, last Christmas Eve, I caught him standing over the counter where I’d left a pan of these Maple Bourbon Pecan Pie Bars to cool. He was cutting himself a second piece. Didn’t even bother with a plate—just stood there, eating it over the sink like a man possessed.
I didn’t say a word. I just watched him take that third bite, saw the little crumble of buttery shortbread crust fall onto his sweater, and felt a quiet, deeply satisfying victory. He never admitted I was right, of course. But he did ask for the recipe before he left that night, muttering something about “needing it for a work potluck.” Sure, Mark. Sure you do.
These bars started as a happy accident. I was trying to make traditional pecan pie for a holiday cookie exchange, but I had a bottle of good bourbon sitting on the counter and a bag of maple sugar I’d impulse-bought at a farmer’s market back in October. The pie filling felt too wobbly, too predictable. I wanted something with a little more backbone, a little more warmth. Something that tasted like sitting by a fire while snow piles up outside the window. Honestly, I wanted a dessert that felt like a hug, and a standard pie just wasn’t going to cut it that day.
The first batch came out of the oven looking like a glorious, golden-brown mess. The filling had bubbled up over the crust a little, and I’d forgotten to toast the pecans first—a rookie mistake I still make when I’m rushing. But that first bite? The way the buttery shortbread crust crunched, then melted against the rich, boozy-maple filling? I knew I had something. Maybe you’ve been there, chasing a flavor memory in your kitchen, hoping it turns out half as good as you imagined. This one actually did.
Why You’ll Love This Recipe
Let me tell you why these bars have become my most-requested holiday dessert, even beating out my famous chocolate chip cookies. It’s not just the flavor—it’s the whole experience of making and eating them.
- Quick & Easy: No rolling out finicky pie dough or blind-baking crusts. The shortbread base presses right into the pan, and the filling comes together in one bowl in under ten minutes. You’ll have these in the oven before a traditional pie crust even finishes chilling.
- Simple Ingredients: You probably have most of these in your pantry right now. Butter, flour, sugar, eggs, vanilla. The only “special” items are the bourbon and maple syrup, and honestly, if you have a half-empty bottle of bourbon from last New Year’s Eve, you’re already set.
- Perfect for Holiday Gatherings: These bars are the unsung hero of the dessert table. They travel beautifully, don’t need to be served warm, and you can cut them into neat little squares that people can grab and go. No messy pie slices sliding off plates.
- Crowd-Pleaser: I’ve served these at parties where half the guests “don’t like nuts” and the other half “don’t like bourbon desserts.” Every single bar disappeared. The maple mellows the bourbon into something warm and caramel-like, and the pecans toast right in the filling, losing any raw bitterness.
- Unbelievably Delicious: That first bite is a three-act play. The crisp, buttery crust. The chewy, almost fudge-like filling. The crunchy pecans on top. It’s texture heaven, and the flavor—smoky, sweet, with a little bourbon kick at the end—is pure comfort.
What makes these different from every other pecan bar recipe out there is the shortbread crust. It’s not just a dry, crumbly base. It’s a buttery, slightly salty foundation that stands up to the rich filling without getting soggy. I use a technique where you par-bake the crust just until it’s golden, then pour the filling over the hot crust. That little trick creates a barrier that keeps the bottom perfectly crisp, even after the bars sit out for hours. It’s the kind of detail that turns a good bar into a “can I have the recipe?” bar.
These bars are comfort food reimagined. They have all the soul-soothing satisfaction of a classic pecan pie, but they’re faster, easier, and honestly, more forgiving. Perfect for impressing guests without the stress of a pie crust that cracks or a filling that weeps. These bars just work.
What Ingredients You Will Need
This recipe uses simple, wholesome ingredients to create something that tastes far more complex than the sum of its parts. Most of these are pantry staples, but I’ve included a few notes on how to pick the best versions for the best results.
For the Shortbread Crust
- Unsalted butter, softened (1 cup / 2 sticks / 226g) — I prefer Kerrygold or Plugrà for their higher butterfat content, which makes the crust extra tender. Make sure it’s truly softened to room temperature, not melted. Cold butter won’t cream properly, and melted butter will make the crust greasy.
- Granulated sugar (½ cup / 100g) — Regular white sugar is perfect here. It adds sweetness without overpowering the butter flavor.
- All-purpose flour (2 cups / 240g) — Spoon and level your flour. Scooping directly from the bag can pack in too much flour, leading to a dry, crumbly crust that won’t hold together.
- Salt (½ teaspoon) — I use fine sea salt. It balances the sweetness of the filling and enhances the butter flavor.
For the Maple Bourbon Filling
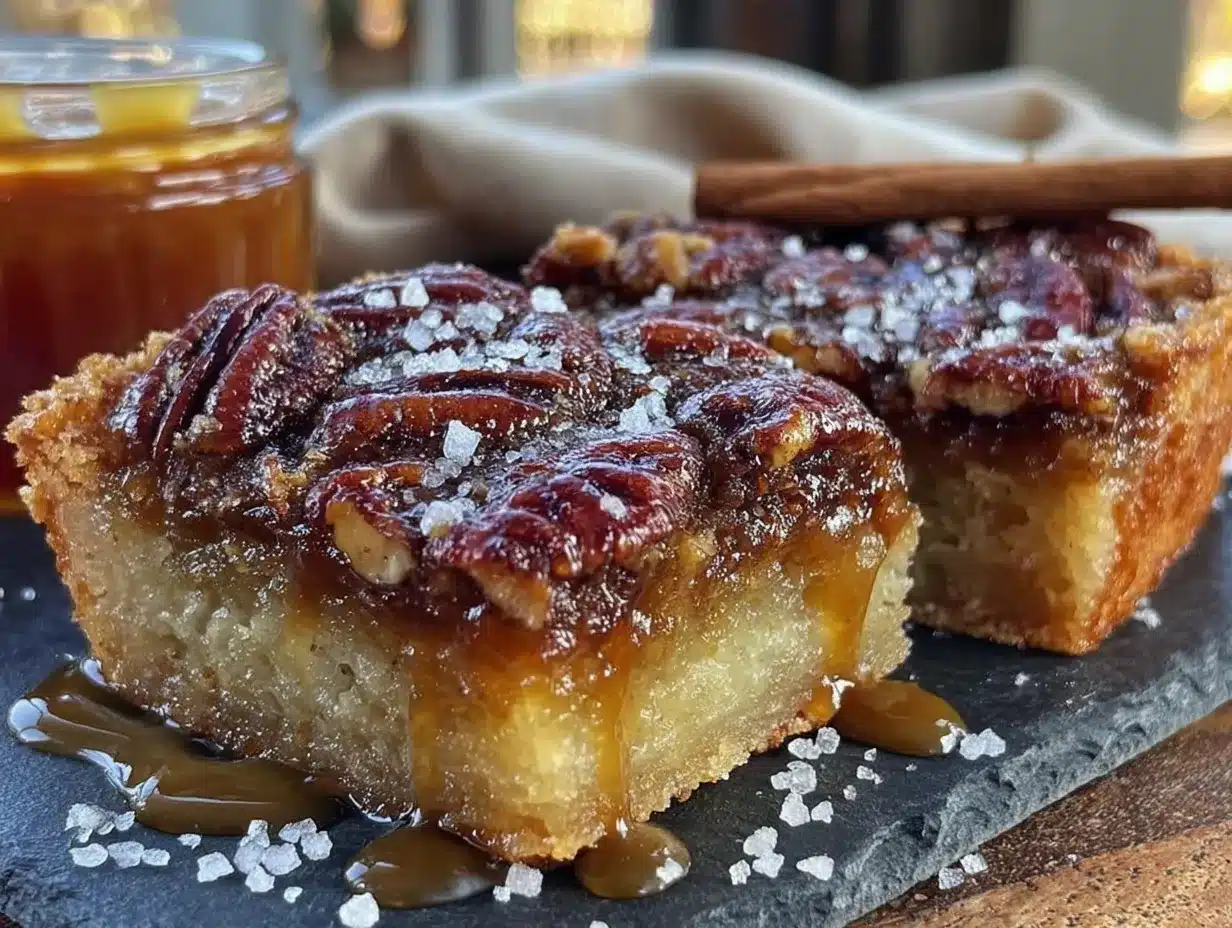
- Large eggs (3, room temperature) — Room temperature eggs blend into the filling more smoothly, creating a silky, uniform texture. If you forget to take them out ahead of time, place them in a bowl of warm water for 5 minutes.
- Pure maple syrup (1 cup / 240ml) — Please, please use real maple syrup, not pancake syrup. Grade A Dark Amber is my favorite for baking because it has a deeper, more robust maple flavor that stands up to the bourbon. The difference is night and day.
- Brown sugar, packed (¾ cup / 150g) — Light or dark brown sugar both work. Dark brown sugar adds a deeper molasses note that I love, but light brown sugar lets the maple flavor shine more.
- Unsalted butter, melted (¼ cup / ½ stick / 57g) — Melted and slightly cooled. Don’t use hot butter or it might scramble the eggs.
- Bourbon (3 tablespoons / 45ml) — Use a bourbon you’d actually drink, not the cheapest bottle on the shelf. I like Buffalo Trace or Maker’s Mark for their smooth, slightly sweet profiles. The alcohol mostly cooks off, leaving behind warm, vanilla-oak notes.
- Vanilla extract (2 teaspoons) — Pure vanilla extract, not imitation. It rounds out the flavors beautifully.
- Salt (¼ teaspoon) — Just a pinch to balance the sweetness.
- Pecan halves (2 cups / 200g) — Buy raw, unsalted pecan halves. I recommend buying them from a bulk bin at a store with high turnover so they’re fresh. Stale pecans can taste bitter and ruin the whole dish.
Equipment Needed
You don’t need a fancy kitchen to make these bars, but a few specific tools will make your life easier.
- 9×13-inch baking pan — A metal pan is ideal because it conducts heat evenly and gives you a crispier crust. Glass or ceramic will work, but you may need to add 5-10 minutes to the baking time. I use my old, scratched-up Nordic Ware pan that’s seen a thousand batches.
- Parchment paper — Non-negotiable. Line the pan with a parchment sling (two long strips crossing each other) so you can lift the entire batch out of the pan for clean, easy cutting. Trust me, trying to cut these in the pan is a sticky nightmare.
- Electric mixer — A hand mixer or stand mixer with the paddle attachment works for the crust. You can also do it by hand with a pastry cutter, but the mixer is faster and gives you a more consistent crumb.
- Large mixing bowls — One for the crust, one for the filling.
- Whisk — For the filling. A balloon whisk works great.
- Measuring cups and spoons — Accurate measurements matter in baking. Use dry measuring cups for the flour and sugar, and a liquid measuring cup for the maple syrup and bourbon.
- Sharp knife — For cutting the bars. A chef’s knife or a long serrated knife works well. Clean the blade between cuts for the cleanest edges.
Preparation Method
Let’s make these bars. I’ll walk you through every step, including the little things I’ve learned from making this recipe about a dozen times.
- Preheat and Prep (10 minutes)
Preheat your oven to 350°F (175°C). While it’s heating, line your 9×13-inch baking pan with a parchment paper sling. Cut two long strips of parchment, each about 8 inches wide and 18 inches long. Lay one strip across the width of the pan and the other across the length, letting the excess hang over the edges. This will be your lifeline later. - Make the Shortbread Crust (15 minutes)
In a large mixing bowl, beat the softened butter and granulated sugar together on medium speed until light and fluffy, about 2-3 minutes. Scrape down the sides of the bowl once. In a separate small bowl, whisk together the flour and salt. Add the flour mixture to the butter mixture on low speed, mixing just until a soft, crumbly dough forms. Don’t overmix, or the crust will be tough. - Press and Par-Bake the Crust (20 minutes)
Transfer the dough to your prepared pan. Using your fingertips or the bottom of a flat measuring cup, press the dough into an even layer across the bottom of the pan. Really get it into the corners and make sure the thickness is uniform. Prick the dough all over with a fork (this prevents it from puffing up). Bake for 15-18 minutes, until the crust is set and the edges are just starting to turn a light golden brown. The center will still look pale, and that’s perfect. Remove from the oven and let it cool on a wire rack for 5 minutes while you make the filling. Leave the oven on. - Make the Maple Bourbon Filling (10 minutes)
In a large bowl, whisk the eggs until they’re frothy and light, about 30 seconds. Add the maple syrup, packed brown sugar, melted butter, bourbon, vanilla extract, and salt. Whisk vigorously until everything is completely combined and smooth. The mixture will be thin and smell amazing—like liquid caramel with a boozy kick. - Assemble and Top with Pecans (5 minutes)
Pour the filling directly over the warm pre-baked crust. It will spread out and settle into an even layer. Now, here’s the trick: don’t stir the pecans into the filling. Instead, scatter the pecan halves evenly over the top of the filling. Some will sink in slightly, and some will stay on top. This creates a beautiful, textured surface where every bite has a mix of gooey filling and crunchy pecans. - Bake to Perfection (35-40 minutes)
Place the pan back in the oven and bake for 35-40 minutes. The filling should be set around the edges but still have a slight jiggle in the center when you gently shake the pan. It will continue to set as it cools. The top should be a deep golden brown, and you’ll see the filling bubbling up around the pecans. If the top is browning too quickly after 25 minutes, loosely tent the pan with aluminum foil. - Cool Completely (2 hours minimum)
This is the hardest part. Place the pan on a wire rack and let it cool completely at room temperature. This takes at least 2 hours. Do not rush this step. If you cut into the bars while they’re still warm, the filling will run everywhere, and you’ll have a delicious but messy puddle. For the cleanest cuts, once the pan is cool, refrigerate it for another 30 minutes before slicing. - Slice and Serve (10 minutes)
Once completely cool (and chilled, if you have time), use the parchment sling to lift the entire block of bars out of the pan and onto a cutting board. Use a sharp knife to cut into 24 even bars, wiping the blade clean between each cut. I usually cut 6 rows lengthwise and 4 rows widthwise. Serve at room temperature.
Cooking Tips & Techniques
I’ve made this recipe enough times to know where things can go wrong. Here’s what I’ve learned, often the hard way.
The Crust Isn’t Coming Together? If your dough seems too dry and crumbly to press into the pan, don’t panic. This usually happens if your butter wasn’t soft enough or if you over-measured the flour. Try adding one tablespoon of cold water and mixing it in with your fingers. If that doesn’t work, just press the crumbly dough into the pan as best you can—it will still bake up fine, just a little more rustic.
Don’t Overbake the Filling. I once got distracted by a phone call and left these in the oven for 45 minutes. The filling came out hard and almost candy-like, which was still tasty but lost that beautiful, gooey-chewy texture. The key is to pull them out when the center still has a slight wobble, like a just-set cheesecake. The residual heat will finish the job as it cools.
My Filling Wept. This happens when the filling gets too hot and separates. It usually means your oven runs hot or you overbaked it. Check your oven temperature with an independent thermometer—many ovens run 25°F off. Also, make sure your eggs are at room temperature; cold eggs can shock the hot crust and cause the filling to separate.
Multitasking Strategy. While the crust is par-baking, get all your filling ingredients measured and ready. That way, the moment the crust comes out, you can whisk the filling together and pour it over the warm crust. The warmth helps the filling start setting immediately, creating that perfect texture.
Consistency Tip. For the most consistent results, weigh your ingredients. A kitchen scale is a twenty-dollar investment that will transform your baking. Flour is especially tricky—a cup can weigh anywhere from 120 to 150 grams depending on how you scoop it. I’ve had the most reliable results using 120g per cup of flour for this shortbread crust.
Variations & Adaptations
One of the best things about this recipe is how flexible it is. Here are a few ways I’ve adapted it over the years.
Bourbon-Free Version. Not everyone wants boozy dessert, and that’s okay. Substitute the 3 tablespoons of bourbon with 2 tablespoons of apple cider and 1 tablespoon of vanilla extract. You’ll lose the smoky bourbon note, but you’ll gain a lovely apple-maple flavor that’s equally cozy. I made this version for a friend’s baby shower, and it was a hit.
Chocolate Maple Pecan Bars. This is my personal favorite variation. Before you pour the filling over the crust, sprinkle ½ cup of semi-sweet chocolate chips over the hot crust. The heat melts them slightly, creating a thin layer of chocolate between the crust and the pecan filling. It adds a richness that makes these bars dangerously addictive. I’ve also tried it with dark chocolate chunks, and that works beautifully too.
Gluten-Free Adaptation. Substitute the all-purpose flour in the crust with a 1:1 gluten-free baking flour blend that contains xanthan gum. I’ve had great results with Bob’s Red Mill 1-to-1 Baking Flour. The crust will be a little more delicate, so handle it gently when pressing it into the pan. Everything else in the recipe is naturally gluten-free, so these are perfect for guests with celiac disease.
Spiced Maple Version. For a warmer, more aromatic flavor, add 1 teaspoon of cinnamon, ½ teaspoon of nutmeg, and ¼ teaspoon of ground ginger to the filling. This turns the bars into a fall-spiced dream that pairs perfectly with a cup of chai or hot apple cider. I made this version for a Friendsgiving dinner, and someone asked if I’d “secretly put pumpkin pie spices in there.” Guilty as charged.
Nut-Free Alternative. If you’re serving someone with a nut allergy, replace the pecans with roasted pumpkin seeds (pepitas) or sunflower seeds. The texture will be different—crunchier and less rich—but the maple-bourbon filling is so good that the base recipe still shines. Toast the seeds lightly before adding them to the top for extra flavor.
Serving & Storage Suggestions
These bars are incredibly versatile when it comes to serving. Here’s how I like to do it.
Serving Temperature. Serve these bars at room temperature for the best texture. The filling is perfectly chewy, and the crust stays crisp. If they’ve been refrigerated, let them sit out for 15-20 minutes before serving. For an extra-special treat, warm a bar in the microwave for 10 seconds and top it with a scoop of vanilla bean ice cream. The warm-cold contrast is heavenly.
Presentation Ideas. Dust the bars with a light sprinkle of flaky sea salt (like Maldon) right before serving. The salt crystals add a little crunch and perfectly balance the sweetness. For holiday parties, I cut the bars into smaller, bite-sized squares and arrange them on a wooden board with fresh rosemary sprigs and cranberries for a festive look. They also look beautiful stacked in a clear glass jar tied with a ribbon—perfect for gift-giving.
Complementary Dishes and Beverages. These bars are fantastic on their own, but they pair beautifully with a cup of black coffee, a dark roast tea, or a glass of cold milk. For a dessert board, serve them alongside dark chocolate truffles, dried figs, and a cheese like aged cheddar or brie. The salty-sweet combination is unforgettable. If you’re serving them after a holiday meal, they’re a great follow-up to a lighter main course like roasted turkey or herb-crusted pork loin.
Storage Instructions. Store the bars in an airtight container at room temperature for up to 5 days. Layer them between sheets of parchment paper so they don’t stick together. Do not store them in the refrigerator unless you’ve already cut them and need them to hold their shape—the fridge can dry out the crust. If you live in a humid climate, the crust might soften slightly after a day or two, but the flavor will still be fantastic.
Freezing Instructions. These bars freeze beautifully. Once they’re completely cool, cut them into bars and place them on a baking sheet in the freezer for 1 hour (this is called flash-freezing). Then transfer the frozen bars to a zip-top freezer bag or an airtight container. They’ll keep for up to 3 months. To thaw, let them sit at room temperature for about 30 minutes. The texture will be almost as good as fresh. I always keep a stash in my freezer for unexpected guests or late-night cravings.
How Flavors Develop. Honestly, these bars taste even better the next day. The flavors have time to meld together, and the bourbon and maple notes become more pronounced. If you’re making them for a party, I highly recommend baking them a day ahead. Your future self will thank you.
Nutritional Information & Benefits
Let’s be real—these are a treat, not a health food. But knowing what’s in them helps you enjoy them mindfully.
Estimated Nutritional Values (per bar, based on 24 servings):
- Calories: 285
- Total Fat: 18g
- Saturated Fat: 8g
- Cholesterol: 55mg
- Sodium: 95mg
- Total Carbohydrates: 30g
- Dietary Fiber: 2g
- Sugars: 22g
- Protein: 4g
Health Benefits of Key Ingredients. Pecans are a surprisingly good source of healthy fats, fiber, and antioxidants. They contain magnesium, which supports muscle and nerve function, and thiamine, which helps convert food into energy. Maple syrup, while still sugar, contains some antioxidants and minerals like zinc and manganese. The bourbon, well, let’s just say it’s good for the soul in moderation.
Dietary Considerations. This recipe is vegetarian and can be made gluten-free and nut-free with the substitutions mentioned above. It is not vegan, dairy-free, or low-carb. For a lower-sugar option, you could reduce the brown sugar to ½ cup, but the texture will be slightly less gooey.
Potential Allergens. This recipe contains dairy (butter, eggs), tree nuts (pecans), and gluten (wheat flour). Please check your bourbon if you have a gluten sensitivity—most bourbons are gluten-free, but some brands may contain trace amounts.
My Personal Perspective. I believe in balance. I eat my vegetables and drink my water, and I also believe that a dessert like this, made from scratch with real ingredients, is a beautiful part of a joyful life. These bars are not about guilt—they’re about gathering, celebrating, and savoring a moment of sweetness. Enjoy them without apology.
Conclusion
These Cozy Maple Bourbon Pecan Pie Bars are more than just a dessert. They’re the recipe that converted a pecan-pie-hater into a fan. They’re the pan that disappears at every holiday party. They’re the taste of a quiet winter evening, a crackling fire, and a glass of something warm.
I hope you make these bars your own. Maybe you’ll add a little extra bourbon (I won’t tell). Maybe you’ll swap in walnuts or leave out the nuts entirely. Maybe you’ll double the batch because one pan is never enough. Whatever you do, I’d love to hear about it. Drop a comment below and tell me how they turned out, or tag me in your photos on social media. There’s nothing that makes me happier than seeing someone else find joy in a recipe I love.
So go ahead. Preheat that oven, pour yourself a little taste of the bourbon (for quality control, of course), and make some magic. These bars are waiting for you.
Frequently Asked Questions
Can I use a different type of alcohol instead of bourbon?
Absolutely. Dark rum is a fantastic substitute—it adds a similar warm, caramel-like sweetness. You can also use whiskey or even a splash of spiced rum for a different flavor profile. If you want to skip the alcohol entirely, use the apple cider and vanilla substitution I mentioned in the variations section.
Why did my filling turn out too hard or too runny?
This usually comes down to baking time. If the filling is hard and almost candy-like, you overbaked it. Next time, pull the bars out when the center still has a slight jiggle. If the filling is runny and never set, you underbaked it or your oven temperature might be too low. An oven thermometer is your best friend here.
Can I make these bars ahead of time for a party?
Yes, and I actually recommend it! These bars taste even better the next day as the flavors meld together. Bake them a day ahead, let them cool completely, and store them in an airtight container at room temperature. Cut them into bars just before serving for the freshest look.
How do I get clean, neat cuts on my bars?
The secret is patience. Let the bars cool completely at room temperature, then refrigerate them for at least 30 minutes before cutting. Use a sharp chef’s knife and wipe the blade clean with a damp paper towel between each cut. This prevents the filling from dragging and gives you beautiful, professional-looking squares.
Can I toast the pecans before adding them to the filling?
You can, but I don’t recommend it for this recipe. The pecans toast perfectly in the oven as the bars bake, and toasting them beforehand can make them too dark and slightly bitter. If you do choose to toast them, keep a close eye on them and only toast until they’re fragrant, about 5 minutes at 350°F.
Pin This Recipe!
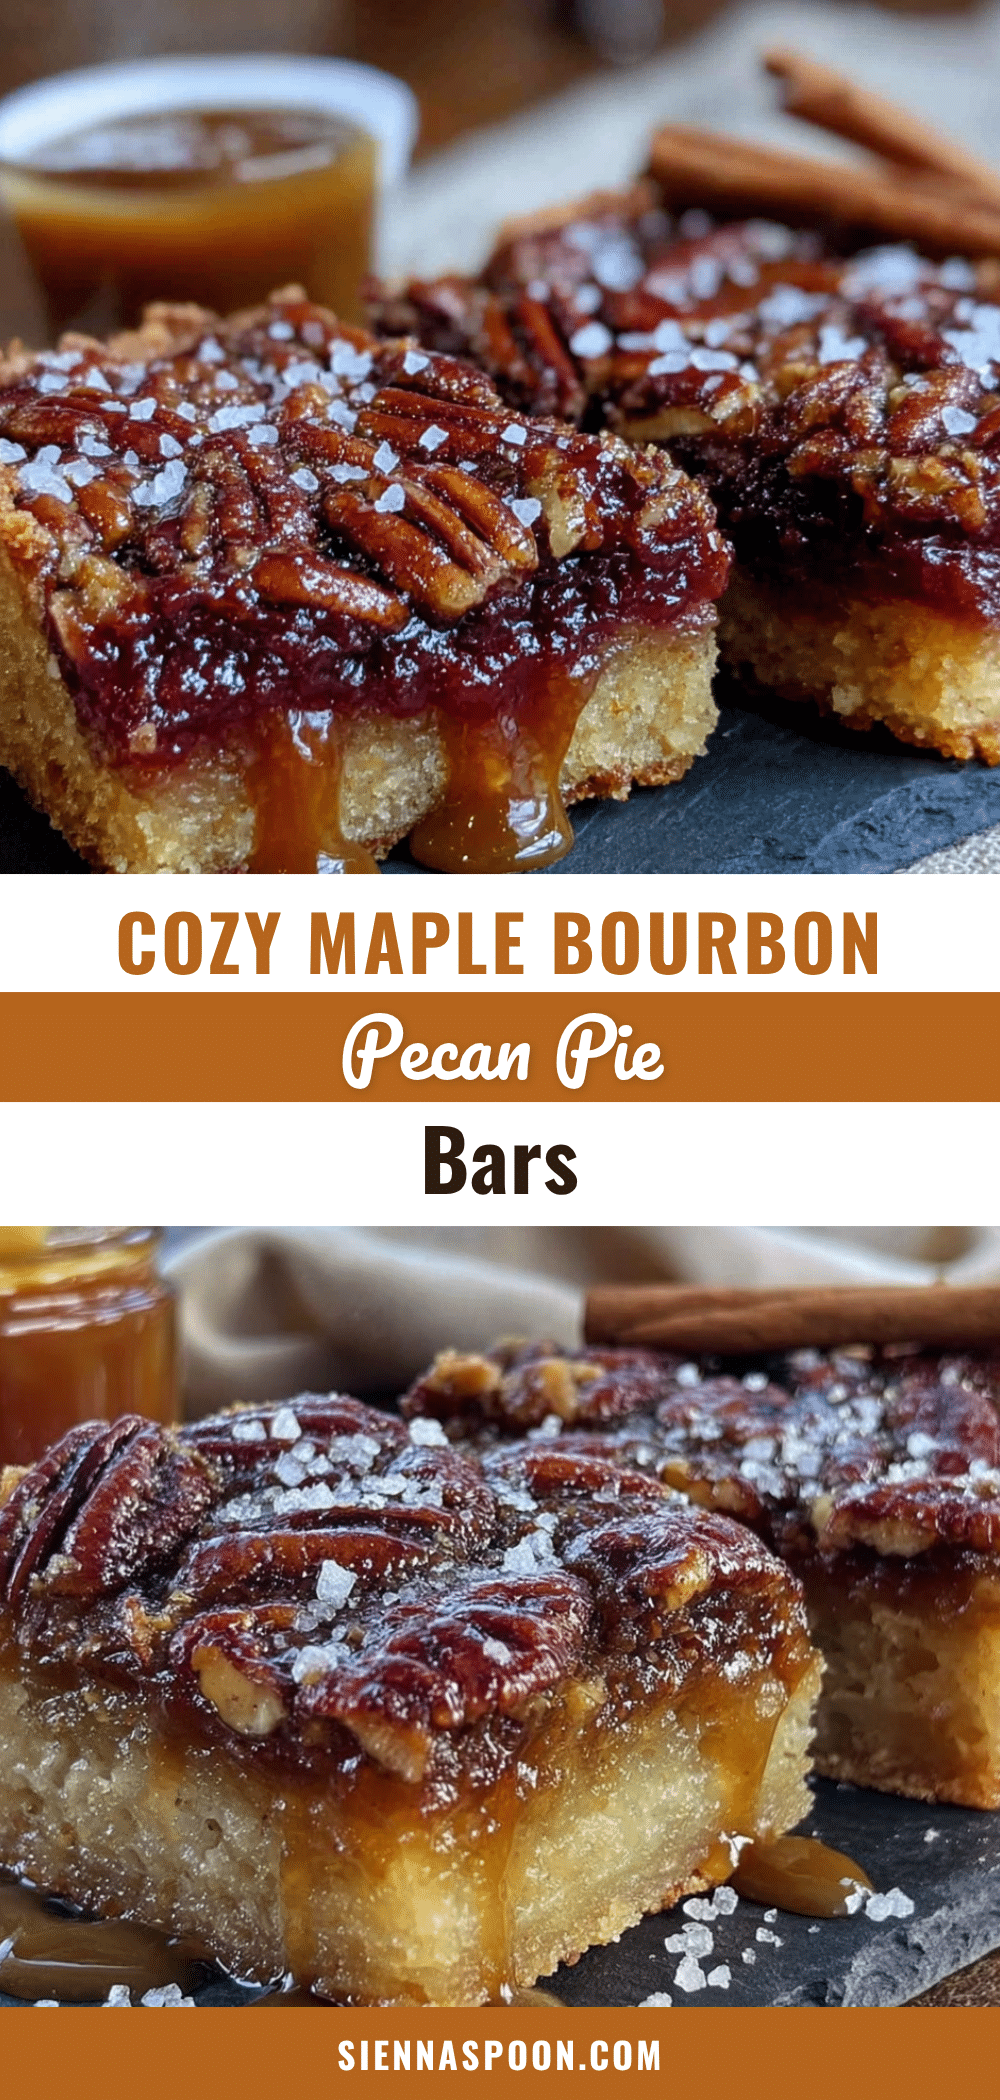
Cozy Maple Bourbon Pecan Pie Bars – Easy Holiday Dessert
These Maple Bourbon Pecan Pie Bars feature a buttery shortbread crust, a rich maple-bourbon filling, and crunchy pecans. They’re a quick, easy, and crowd-pleasing holiday dessert that tastes like a warm hug.
- Prep Time: 25 minutes
- Cook Time: 55-58 minutes (includes par-bake and final bake)
- Total Time: 3 hours 20 minutes (includes cooling)
- Yield: 24 bars 1x
- Category: Dessert
- Cuisine: American
Ingredients
- 1 cup (2 sticks / 226g) unsalted butter, softened
- ½ cup (100g) granulated sugar
- 2 cups (240g) all-purpose flour
- ½ teaspoon fine sea salt
- 3 large eggs, room temperature
- 1 cup (240ml) pure maple syrup (Grade A Dark Amber preferred)
- ¾ cup (150g) packed brown sugar (light or dark)
- ¼ cup (½ stick / 57g) unsalted butter, melted and slightly cooled
- 3 tablespoons (45ml) bourbon (e.g., Buffalo Trace or Maker’s Mark)
- 2 teaspoons pure vanilla extract
- ¼ teaspoon salt
- 2 cups (200g) raw, unsalted pecan halves
Instructions
- Preheat oven to 350°F (175°C). Line a 9×13-inch baking pan with a parchment paper sling (two long strips crossing each other, letting excess hang over edges).
- Make the shortbread crust: In a large bowl, beat softened butter and granulated sugar on medium speed until light and fluffy, 2-3 minutes. In a small bowl, whisk flour and ½ teaspoon salt. Add flour mixture to butter mixture on low speed, mixing just until a soft, crumbly dough forms. Do not overmix.
- Press dough evenly into the prepared pan using fingertips or a flat measuring cup. Prick dough all over with a fork. Bake for 15-18 minutes, until set and edges are light golden brown. Cool on a wire rack for 5 minutes. Leave oven on.
- Make the filling: In a large bowl, whisk eggs until frothy, about 30 seconds. Add maple syrup, brown sugar, melted butter, bourbon, vanilla extract, and ¼ teaspoon salt. Whisk until completely combined and smooth.
- Pour filling over the warm pre-baked crust. Scatter pecan halves evenly over the top (do not stir in).
- Bake for 35-40 minutes, until filling is set around the edges but still slightly jiggly in the center. If top browns too quickly after 25 minutes, tent loosely with foil.
- Cool completely on a wire rack for at least 2 hours. For cleanest cuts, refrigerate for 30 minutes before slicing.
- Use parchment sling to lift bars onto a cutting board. Cut into 24 even bars (6 rows lengthwise, 4 rows widthwise) using a sharp knife, wiping blade clean between cuts. Serve at room temperature.
Notes
For best results, use room temperature ingredients. The filling should have a slight jiggle in the center when done; it will set as it cools. Refrigerating before cutting yields cleaner slices. Bars taste even better the next day. Store in an airtight container at room temperature for up to 5 days, or freeze for up to 3 months.
Nutrition
- Serving Size: 1 bar
- Calories: 285
- Sugar: 22
- Sodium: 95
- Fat: 18
- Saturated Fat: 8
- Carbohydrates: 30
- Fiber: 2
- Protein: 4
Keywords: pecan pie bars, maple bourbon, holiday dessert, shortbread crust, easy pecan bars, Thanksgiving dessert, Christmas dessert


