Love this? Save it for later!
Share the inspiration with your friends
It was 11:47 PM on a random Wednesday in late October, and I had this overwhelming urge to throw a party. Not a big one, mind you—just a gathering. A small, warm, candlelit thing with people who laugh too loud and stay too late. The problem? I didn’t have the energy for a full spread, but I had a block of cheddar, some salami from last week’s grocery run, and a bag of those tiny sweet peppers that were starting to look sad. And then it hit me—what if I made charcuterie, but made it personal? Like, everyone gets their own little cup of fancy snacks. No sharing, no reaching across the table, no awkward “you take the last olive” dance. Just pure, individual cozy chaos.
I grabbed a stack of those little paper cups I use for portioning out snacks for my kid’s lunch, and I just started layering. Cheese cubes, a fold of prosciutto, a handful of nuts, a few grapes. It looked ridiculous and wonderful all at once. I honestly didn’t think it would work—I mean, charcuterie is supposed to be this big, sprawling board, right? But by the time I finished assembling the sixth cup, I was grinning like an idiot. There was something so satisfying about making each one slightly different, like little edible gifts for each person I’d invite. The kitchen was a mess, and there was a smear of fig jam on my favorite sweater, but I didn’t care. I had stumbled onto something good.
These Cozy Friendsgiving Charcuterie Cups are what happened when a late-night craving met a fridge full of odds and ends. They’re not fancy, and they’re not trying to be. They’re just really, really smart. Perfect for a Friendsgiving where everyone’s bringing something, or for a quiet night in when you want to feel like you’re at a party even if you’re in pajamas. Maybe you’ve been there—wanting to host but feeling too tired to make it complicated. Trust me, these cups are your answer. They stayed with me because they solved a problem I didn’t even know I had: how to make a gathering feel special without the stress.
Why You’ll Love This Recipe
Let me tell you why these little cups are going to become your new favorite party trick. I’ve tested this concept for four different gatherings now (including a Friendsgiving where someone spilled red wine on my white rug—but that’s another story), and every single time, people lose their minds over them. Here’s what makes them special:
- Quick & Easy: You can assemble a dozen of these in under 15 minutes. No cooking, no complicated techniques, no waiting. Just grab, layer, and serve.
- Simple Ingredients: Everything comes from a standard grocery store. No need to hunt down obscure cheeses or specialty crackers. I’ve made these with stuff I literally had in my fridge after a week of not shopping.
- Perfect for Friendsgiving: These are the ultimate shareable-but-not-shared appetizer. Everyone gets their own cup, which means no double-dipping and no fighting over the last piece of salami. Plus, they look so cute on a table.
- Crowd-Pleaser: I’ve served these to picky eaters, cheese snobs, and gluten-free friends alike. Everyone finds something to love. The kids especially go wild for the mini cups of their own.
- Unbelievably Delicious: There’s something about having your own little curated selection of flavors that makes everything taste better. The combination of salty, sweet, creamy, and crunchy in one cup is pure comfort.
What makes these different from every other charcuterie board out there is the individual portion factor. It’s not just a smaller version of a big board—it’s a whole different experience. Each cup becomes a personal tasting journey. You get to customize them for each guest (I always make one with extra olives for my friend Sarah and one with no nuts for my neighbor). And honestly, there’s less waste. Everyone eats their own cup, so nothing gets left behind. These aren’t just appetizers—they’re a whole vibe. The kind of food that makes people feel seen and cared for without you having to do much work at all.
What Ingredients You Will Need
This recipe uses simple, flexible ingredients that you can swap based on what you love or what’s on sale. The beauty of charcuterie cups is that there are no hard rules—just delicious combinations. Here’s what I typically use for a classic Friendsgiving version:
For the Cheese Selection
- Sharp cheddar cheese, cut into 1/2-inch cubes (about 1/4 cup per cup) — I prefer Cabot or Tillamook for that extra tangy bite
- Soft goat cheese, crumbled or sliced into rounds (2-3 slices per cup) — look for a log that feels firm but yields slightly when pressed
- Smoked gouda, cut into small wedges (adds a cozy, smoky flavor that screams fall)
For the Meats
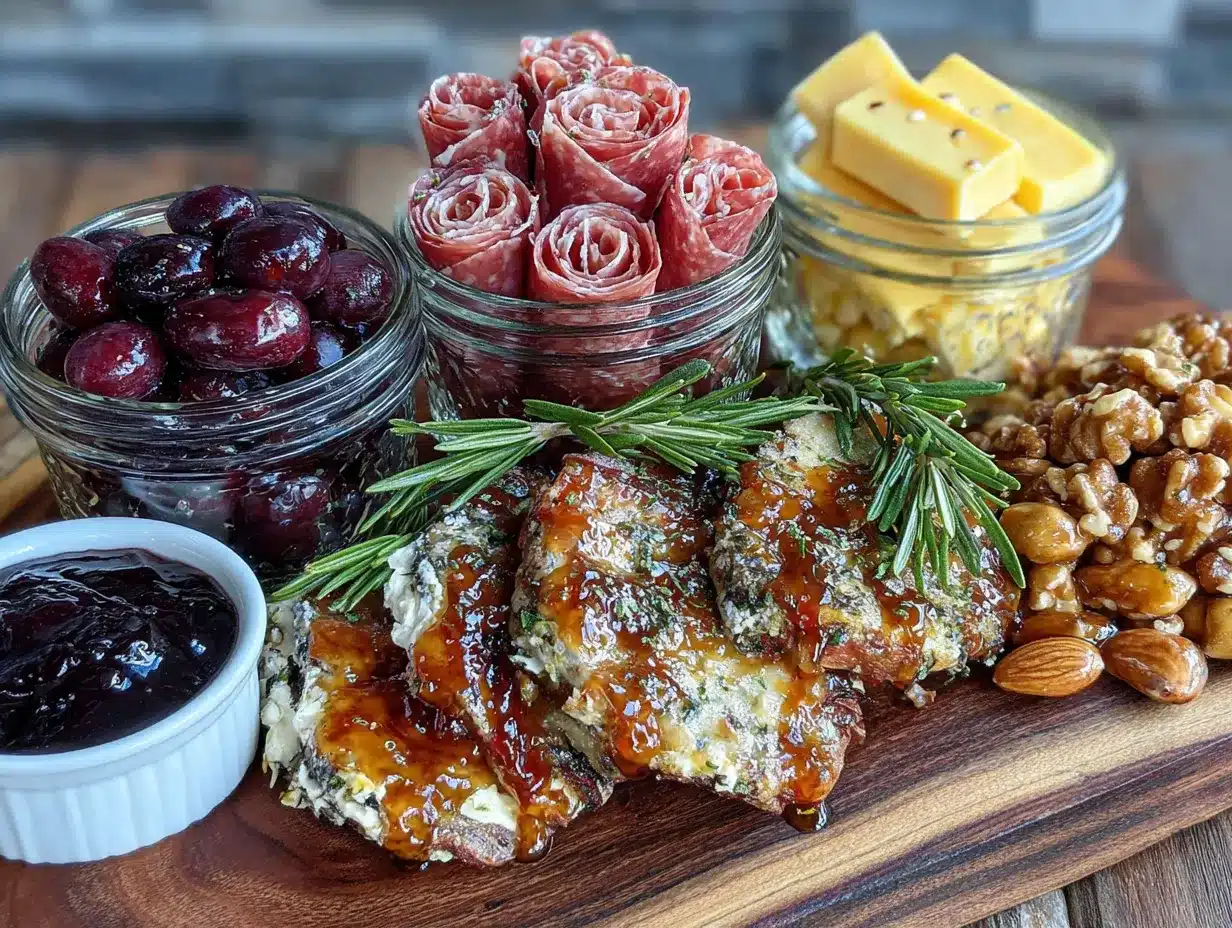
- Prosciutto, torn into ribbons (2-3 slices per cup, folded loosely) — the saltiness balances the cheese perfectly
- Salami, either mini slices or cut into quarters (3-4 pieces per cup) — I like Genoa salami for its mild, garlicky flavor
- Optional: Soppressata for a spicier kick (use instead of salami if you want heat)
For the Fruits & Sweet Elements
- Red seedless grapes, washed and dried (3-4 per cup) — they add that pop of sweetness that cuts through the salt
- Dried figs or apricots, halved (1-2 per cup) — chewy and sweet, perfect for fall
- Honey or fig jam, a small drizzle or dollop (about 1 teaspoon per cup) — this is the secret to making everything sing
For the Crunch
- Almonds or pecans, toasted if you have time (about 1 tablespoon per cup) — I’ve used both, and pecans give a more Thanksgiving-y feel
- Crackers or crostini, 2-3 small pieces per cup — I recommend rosemary crackers or plain water crackers; avoid anything too flavored that might clash
- Cornichons or mini pickles, 1-2 per cup (optional but highly recommended for that briny burst)
Substitution Guidance: If you’re dairy-free, use vegan cheese alternatives (I’ve had good luck with Miyoko’s brand) or just skip the cheese and double up on meats and nuts. For gluten-free guests, use gluten-free crackers or just include extra nuts and dried fruit. You can also swap the grapes for apple slices in the fall or fresh berries in summer. The key is keeping a balance of salty, sweet, creamy, and crunchy in each cup.
Equipment Needed
You don’t need anything fancy for these cups, which is part of why I love them. Here’s what I use:
- Small cups or containers: I use 8-ounce paper cups (the kind you’d use for snacks at a kids’ party), but you can also use small mason jars, ramekins, or even disposable plastic cups. Just make sure they’re sturdy enough to hold everything without tipping over.
- Cutting board and sharp knife: For cubing cheese and slicing anything that needs slicing. A good chef’s knife makes this job take two minutes.
- Small spoon or drizzle bottle: For the honey or fig jam. A regular teaspoon works fine, but a drizzle bottle makes it look fancier.
- Tongs or your hands: For arranging everything neatly. Honestly, I mostly use my hands—it’s faster and more fun.
- Serving tray or platter: To arrange the cups on. A big wooden board or a simple white platter both look great.
I’ve made these cups with nothing more than a butter knife and some plastic cups from a birthday party, so don’t stress about equipment. If you have a cutting board and something to put the food in, you’re good to go. The only thing I’d recommend splurging on is a good set of small tongs for serving—guests love using them to grab their cup without touching everything else.
Preparation Method
Okay, let’s get into the actual making of these little beauties. I’ve broken it down step by step so you can follow along without any guesswork. Trust me, once you make these once, you’ll be able to do it with your eyes closed.
Step 1: Prep Your Ingredients (5 minutes)
Start by taking your cheeses out of the fridge about 10 minutes before you start—they’ll taste better at room temperature. While they’re warming up, wash and dry your grapes (wet grapes make everything soggy, so pat them dry with a paper towel). Cube your cheddar into 1/2-inch pieces—you want them small enough to fit in the cup but big enough to feel substantial. Slice your goat cheese into rounds about 1/4-inch thick. Tear your prosciutto into ribbons by hand—don’t use a knife, the torn edges look more rustic and pretty.
Step 2: Layer the Base (2 minutes per cup)
Take your cups and start building from the bottom up. First, add a small handful of nuts—about a tablespoon. This creates a little cushion that keeps everything else from getting crushed. Then add your cheese cubes, spacing them out so they’re not all stuck together. I usually put 3-4 cubes of cheddar and 2-3 pieces of smoked gouda in each cup. The key here is to not overfill—you want room for everything else.
Step 3: Add the Meats and Fruits (3 minutes per cup)
Next, fold your prosciutto ribbons and tuck them in around the cheese. Add your salami slices or pieces, pressing them gently into the nuts so they stay put. Then add your grapes (3-4 per cup) and dried fruit (1-2 pieces). The grapes should sit on top of the meats, not buried underneath—they look prettier that way. If you’re using cornichons, tuck one or two in between the cheese cubes.
Step 4: Top with Soft Cheese and Drizzle (1 minute per cup)
Now for the finishing touches. Place your goat cheese rounds on top of everything—I like to put them right in the center so they’re the first thing people see. Then drizzle about a teaspoon of honey or fig jam over the goat cheese. Don’t be shy with it—the sweetness really brings everything together. Finally, add your crackers or crostini, sticking them upright into the cup like little flags. They should be easy to grab without toppling everything over.
Step 5: Garnish and Serve (1 minute)
If you’re feeling fancy, sprinkle a tiny pinch of flaky sea salt over the top of each cup—it sounds extra, but it makes the flavors pop. You can also add a sprig of fresh rosemary or thyme for a festive look (just make sure people know it’s garnish, not food). Arrange the cups on a serving tray or platter, spacing them about an inch apart so they’re easy to grab. Serve immediately, or cover loosely with plastic wrap and refrigerate for up to 2 hours before serving.
Pro tip from my own kitchen disasters: Don’t assemble these more than 2 hours ahead of time, or the crackers will get soft and the grapes will make everything soggy. I learned this the hard way when I made them the night before a party and ended up with sad, limp cups. If you need to prep ahead, just chop all your ingredients and store them separately, then assemble right before guests arrive.
Cooking Tips & Techniques
After making these cups for every gathering I’ve hosted in the past year, I’ve picked up a few tricks that make a real difference. Let me share them so you don’t have to learn the hard way.
The biggest mistake people make is overfilling the cups. I know it’s tempting to cram in as much as possible, but a cup that’s bursting at the seams is hard to eat from without making a mess. Leave about a half-inch of space at the top so guests can actually grab things without everything falling out. Trust me, I’ve had a guest drop a whole cup of charcuterie on my floor (RIP to that salami).
Balance is everything. Each cup should have a mix of textures and flavors. If you’re heavy on the cheese, balance it with something acidic like cornichons or grapes. If you’re using a lot of salty meats, add something sweet like dried figs or a honey drizzle. I always taste-test one cup before making the rest—it’s the best way to check your ratios.
Temperature matters more than you think. Charcuterie tastes best at room temperature, so if you’re refrigerating your cups, take them out 15-20 minutes before serving. The cheese will be creamier, the meats will be more flavorful, and the honey will be less sticky. I once served them straight from the fridge and everyone said the cheese tasted like cardboard. Lesson learned.
Multitask like a pro. While you’re cubing cheese, have the nuts measured out in a bowl. While you’re tearing prosciutto, have the grapes washed and drying. The more you can prep in batches, the faster assembly goes. I can now make 12 cups in under 10 minutes because I’ve got a system down. It’s all about flow.
Variations & Adaptations
One of the best things about these cups is how endlessly customizable they are. Here are some of my favorite variations:
Fall Harvest Version
Swap the grapes for sliced apple or pear (toss them in a little lemon juice so they don’t brown). Use sharp cheddar and brie instead of goat cheese and gouda. Add a few dried cranberries and a sprinkle of pumpkin seeds. This version screams “Friendsgiving” and always gets compliments.
Mediterranean Twist
Use feta cheese instead of goat cheese, add kalamata olives and roasted red peppers, swap the prosciutto for pepperoni, and drizzle with balsamic glaze instead of honey. This is my go-to for summer gatherings—it feels lighter and brighter.
Sweet & Spicy Combo
Add a few slices of jalapeño (pickled or fresh) and use spicy soppressata instead of salami. Drizzle with hot honey if you can find it—if not, regular honey with a pinch of red pepper flakes works great. This one’s for the adventurous eaters in your group.
Dietary Adaptations
- Gluten-free: Use gluten-free crackers or just skip them entirely and add extra nuts and dried fruit.
- Dairy-free: Use vegan cheese or skip the cheese and double up on meats and veggies. I’ve also used hummus as a creamy element.
- Vegetarian: Skip the meats and add more cheese, roasted veggies, marinated artichoke hearts, and extra nuts.
- Low-carb/Keto: Skip the crackers and dried fruit, add extra cheese, nuts, and meats. Use cucumber slices as a crunchy element.
I once made a batch of these for a friend who’s vegan and gluten-free—it took some creativity, but I ended up with cups full of roasted chickpeas, olives, dairy-free cheese, and cucumber slices. She said it was the best party food she’d had in years. Don’t be afraid to experiment!
Serving & Storage Suggestions
These cups are best served at room temperature, so plan to take them out of the fridge about 20 minutes before your guests arrive. Arrange them on a large wooden board or a white platter—the contrast makes the colors pop. I like to scatter a few extra grapes and nuts around the platter for a more abundant look.
For a full Friendsgiving spread, pair these cups with a warm soup (like butternut squash or tomato bisque), a simple salad, and maybe a crusty bread on the side. They also go beautifully with a glass of crisp white wine or a light red like Pinot Noir. If you’re doing a dessert table afterward, these cups transition perfectly into a sweet version with chocolate, berries, and shortbread cookies.
Storage: If you have leftovers (which is rare, honestly), you can store the cups in the refrigerator for up to 24 hours. But here’s the thing—the crackers will get soft and the grapes might release some moisture. I recommend eating them within a few hours of assembly for the best texture. If you must store them, keep the crackers separate and add them just before serving.
Reheating: There’s no reheating needed for these cups—they’re served cold or at room temperature. If you’ve refrigerated them, just let them sit out for 15-20 minutes before serving. The flavors actually develop a bit after sitting together, so they might taste even better after an hour or two.
Nutritional Information & Benefits
While these cups are definitely a treat, they do offer some nutritional benefits. Here’s a rough estimate for one cup (based on the classic version with cheddar, goat cheese, prosciutto, almonds, grapes, and crackers):
- Calories: Approximately 280-350 per cup
- Protein: 12-15 grams (from cheese and meats)
- Fat: 18-22 grams (mostly from cheese and nuts—the good kind)
- Carbohydrates: 15-20 grams (from fruit and crackers)
- Fiber: 2-3 grams (from nuts and fruit)
The nuts provide healthy fats and protein that keep you full, while the grapes and dried fruit offer natural sweetness and a dose of fiber. Cheese is a good source of calcium, and the meats add iron. Of course, these are meant to be an appetizer, not a main course, so portion control is built right in with the individual cups.
If you’re watching your sodium, choose low-sodium meats and cheeses, or skip the salami and use only prosciutto. For a lighter version, use more fruit and veggies and less cheese. I like to think of these as a balanced snack—they’ve got a little bit of everything, which is why they’re so satisfying.
Conclusion
These Cozy Friendsgiving Charcuterie Cups have honestly become my signature party dish. Every time I bring them to a gathering, someone asks for the recipe, and I love watching people’s faces light up when they see their own little cup of goodies. There’s something so personal about it—like you made each one just for them. And in a way, you did.
I hope you’ll try these for your next Friendsgiving or any get-together where you want to impress without the stress. Feel free to make them your own—swap in your favorite cheeses, use whatever meats you have on hand, or go totally wild with the toppings. That’s the beauty of this recipe: it’s more of a framework than a strict set of rules.
When you make them (and I know you will), I’d love to hear how they turned out. Drop a comment below and tell me what combinations you came up with, or tag me in your photos if you share them online. Nothing makes me happier than seeing these cups out in the wild, bringing people together one little cup at a time. Happy Friendsgiving, friends!
Frequently Asked Questions
Can I make these cups ahead of time?
You can assemble them up to 2 hours ahead, but any longer and the crackers will get soft. I recommend prepping all your ingredients the night before and assembling just before your guests arrive.
What size cups should I use?
8-ounce paper cups or small mason jars work perfectly. You want something that holds about a cup of food but isn’t so big that it looks empty. Small ramekins are also great if you want something reusable.
Can I make these for a crowd?
Absolutely! I’ve made up to 24 cups at once. Just set up an assembly line with all your ingredients prepped and ready to go. It takes about 15-20 minutes for a large batch.
What if someone has food allergies?
These cups are super easy to customize. Make a few special cups for guests with allergies—just use a different container or add a small flag so they know which ones are safe. I always make two nut-free cups for my friend’s son.
Can I use these for something other than Friendsgiving?
Yes! These work for literally any gathering—birthday parties, game day, brunch, picnics, or even a fancy movie night at home. Just switch up the ingredients to match the occasion. For a summer picnic, I use lighter ingredients like fresh mozzarella, basil, and cherry tomatoes.
Pin This Recipe!
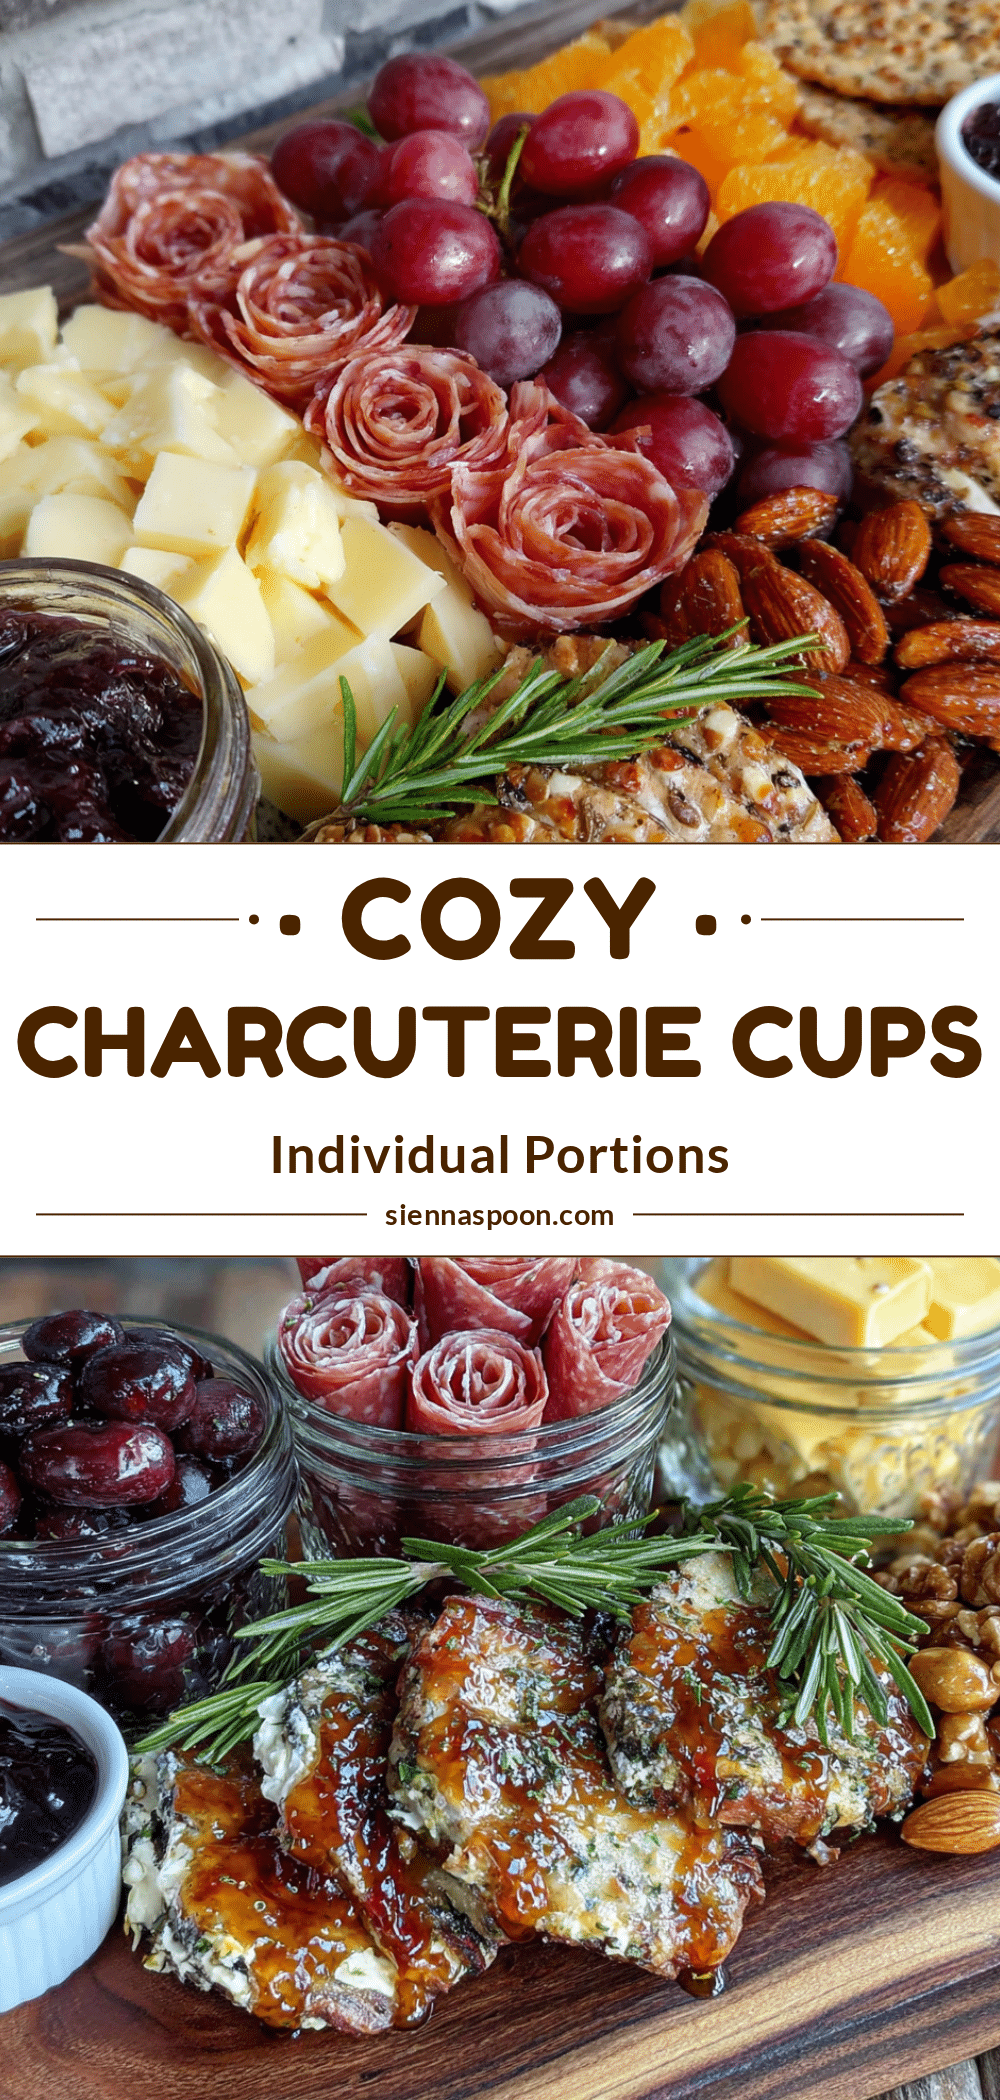
Cozy Friendsgiving Charcuterie Cups: Easy Individual Appetizers
These individual charcuterie cups are the perfect easy appetizer for Friendsgiving or any gathering. Each cup is a personal tasting journey with cheese, meats, fruits, and nuts, making them fun, customizable, and stress-free to assemble.
- Prep Time: 15 minutes
- Cook Time: 0 minutes
- Total Time: 15 minutes
- Yield: 6 servings
- Category: Appetizer
- Cuisine: American
Ingredients
- Sharp cheddar cheese, cut into 1/2-inch cubes (about 1/4 cup per cup)
- Soft goat cheese, crumbled or sliced into rounds (2-3 slices per cup)
- Smoked gouda, cut into small wedges
- Prosciutto, torn into ribbons (2-3 slices per cup)
- Salami, mini slices or cut into quarters (3-4 pieces per cup)
- Optional: Soppressata for a spicier kick
- Red seedless grapes, washed and dried (3-4 per cup)
- Dried figs or apricots, halved (1-2 per cup)
- Honey or fig jam (about 1 teaspoon per cup)
- Almonds or pecans, toasted if possible (about 1 tablespoon per cup)
- Crackers or crostini (2-3 small pieces per cup)
- Cornichons or mini pickles (1-2 per cup, optional)
- Flaky sea salt for garnish (optional)
- Fresh rosemary or thyme sprigs for garnish (optional)
Instructions
- Prep your ingredients: Take cheeses out of fridge 10 minutes before starting. Wash and dry grapes. Cube cheddar into 1/2-inch pieces. Slice goat cheese into 1/4-inch rounds. Tear prosciutto into ribbons by hand.
- Layer the base: Add a small handful of nuts (about 1 tablespoon) to the bottom of each cup. Add cheese cubes (3-4 cheddar, 2-3 smoked gouda), spacing them out.
- Add meats and fruits: Fold prosciutto ribbons and tuck around cheese. Add salami pieces, pressing gently into nuts. Add grapes (3-4 per cup) and dried fruit (1-2 pieces) on top. Tuck in cornichons if using.
- Top with soft cheese and drizzle: Place goat cheese rounds in center of each cup. Drizzle about 1 teaspoon honey or fig jam over goat cheese. Add crackers or crostini upright like flags.
- Garnish and serve: Sprinkle flaky sea salt on top if desired. Add herb sprigs for decoration. Arrange cups on a serving tray and serve immediately, or refrigerate for up to 2 hours.
Notes
Don’t assemble more than 2 hours ahead or crackers will get soft. For best flavor, serve at room temperature. Customize each cup for guests with dietary restrictions. Prep ingredients separately if making ahead, then assemble just before serving.
Nutrition
- Serving Size: 1 cup
- Calories: 315
- Sugar: 10
- Sodium: 650
- Fat: 20
- Saturated Fat: 8
- Carbohydrates: 17
- Fiber: 2
- Protein: 13
Keywords: charcuterie cups, Friendsgiving appetizer, individual charcuterie, easy appetizer, party food, no-cook appetizer


