Love this? Save it for later!
Share the inspiration with your friends
My daughter asked why I couldn’t just dump the cream cheese in with the pumpkin batter and swirl it around. I started to explain why that wouldn’t work — then stopped. I mean, I’d been making cream cheese swirl recipes for years, and you always, always prepared the cream cheese layer separately and dolloped it on top. That was the rule. But she was nine and watching me with that impatient look kids get when they think adults are making things harder than they need to be.
Honestly, I almost kept explaining. But something about her certainty made me pause. I had a bowl of pumpkin batter and a bowl of softened cream cheese sitting right there. So I just poured the cream cheese mixture into the pumpkin, gave it three lazy swirls with a butter knife, and poured the whole thing into the pan. I fully expected a muddy, marbled mess.
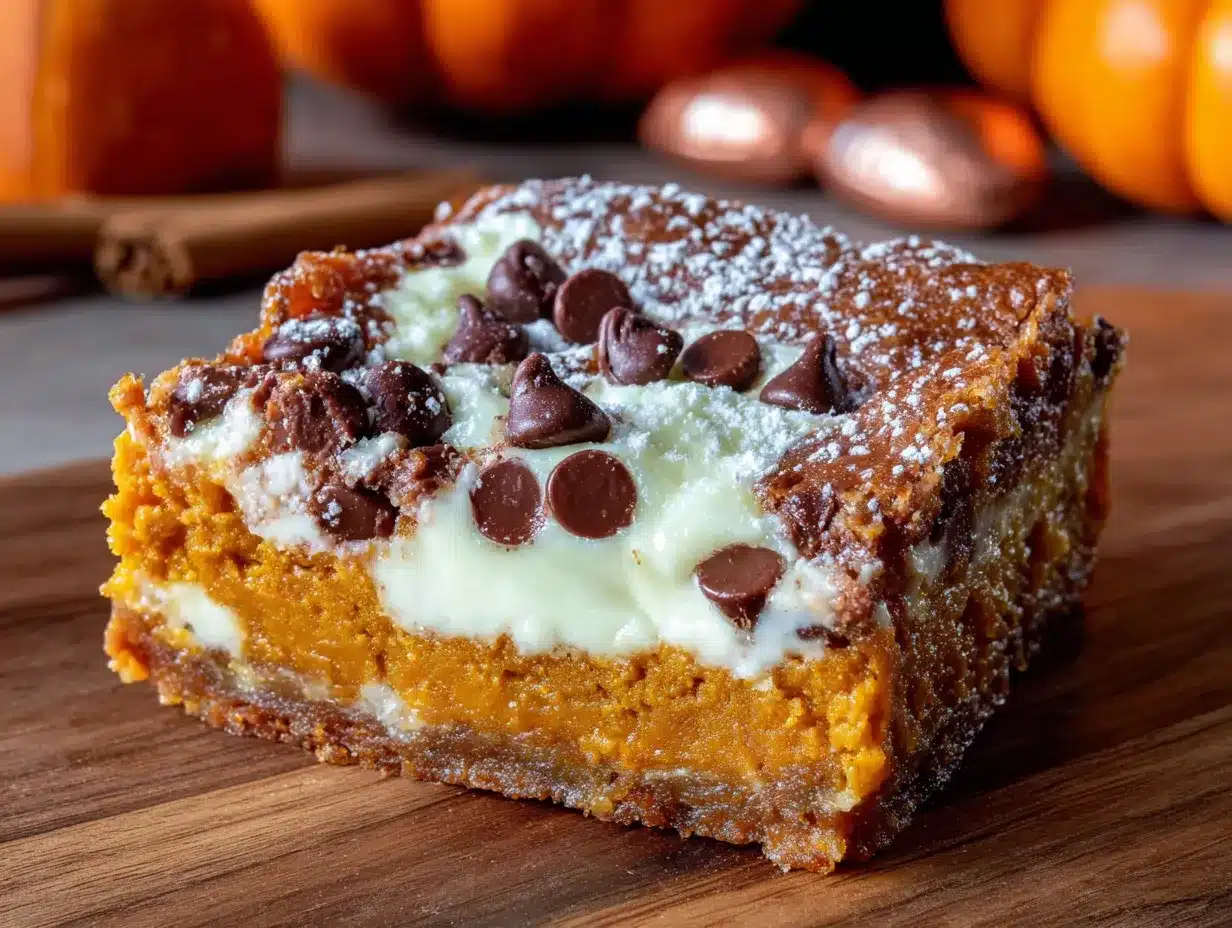
What came out of the oven was the most beautiful thing I’d seen in weeks — ribbons of creamy white running through that deep orange pumpkin base, like something you’d pay twelve dollars for at a fancy bakery. My daughter just said “told you” and grabbed one while it was still warm. And you know what? She was right. Maybe you’ve been there — that moment when you realize the simple way actually works better. That’s how these kid-approved pumpkin chocolate chip bars with cream cheese swirl were born. Not from my expertise, but from a fourth grader who didn’t know any better.
Why You’ll Love This Recipe
These pumpkin chocolate chip bars have become my most-requested fall recipe, and I’ve tested them at least a dozen times to make sure they’re foolproof. Here’s why they keep disappearing from kitchen counters everywhere:
- One-Bowl Wonder : The cream cheese swirl technique is genuinely easier than traditional methods — no separate layering, no piping bags, no fuss.
- Budget-Friendly Ingredients : Everything comes from a standard grocery run. Canned pumpkin, cream cheese, chocolate chips — you probably have most of it already.
- Picky Eater Approved : My kids inhale these, and I’ve watched them convert pumpkin skeptics at three different school bake sales.
- Perfect for Fall Gatherings : They travel well, don’t need frosting, and look stunning on a dessert table without any decorating skills.
- Freezer-Friendly : Make a batch now, stash some for later, and thank yourself when unexpected guests show up.
What makes these bars different from every other pumpkin dessert out there is the cream cheese integration. Instead of a separate layer that can crack or slide off, the cream cheese gets gently swirled into the batter just before baking. The result is this gorgeous marbled effect that stays soft and creamy, even after the bars have cooled completely. It’s comfort food made simpler — richer in flavor, easier to execute, and somehow still budget-conscious enough for a Tuesday night.
These bars have that magical quality where the first bite makes you close your eyes for a second. The pumpkin keeps them moist without being heavy, the chocolate chips add little pockets of sweetness, and that cream cheese swirl brings just enough tang to balance everything out. They’re the kind of dessert that makes a regular fall evening feel like something special.
What Ingredients You Will Need
This recipe uses simple, honest ingredients to create something that tastes far more complicated than it is. Most of these are pantry staples, especially during pumpkin season, so you might not even need a shopping trip.
For the Pumpkin Base:
- 1 ¾ cups all-purpose flour (I use Gold Medal unbleached — it gives a tender crumb)
- 1 teaspoon baking soda
- 2 teaspoons pumpkin pie spice (or make your own: 1 tsp cinnamon, ½ tsp ginger, ½ tsp nutmeg, ¼ tsp cloves)
- ½ teaspoon salt
- 1 cup granulated sugar
- ½ cup packed brown sugar (light or dark both work; dark gives deeper flavor)
- ½ cup vegetable oil (canola or melted coconut oil also work well)
- 2 large eggs, room temperature
- 1 cup canned pumpkin purée (not pumpkin pie filling — make sure it’s 100% pumpkin)
- 1 teaspoon vanilla extract
- 1 cup semi-sweet chocolate chips (I prefer Ghirardelli for consistent melting)
For the Cream Cheese Swirl:
- 8 ounces cream cheese, softened to room temperature (full-fat works best for texture)
- ¼ cup granulated sugar
- 1 large egg yolk
- ½ teaspoon vanilla extract
The pumpkin purée is the backbone here — it adds moisture and that earthy sweetness without making the bars taste like a health food. I’ve tried homemade pumpkin purée in this recipe, and honestly, canned works better. It’s more consistent in moisture content, which matters for baking. Libby’s is my go-to, but store brands work fine as long as they’re pure pumpkin.
For the cream cheese, let it sit on the counter for at least 30 minutes before you start. Cold cream cheese won’t blend smoothly into that swirl mixture, and you’ll end up with little white lumps instead of creamy ribbons. Trust me on this — I’ve made that mistake on a rushed Tuesday afternoon and regretted it.
The chocolate chips are negotiable. Semi-sweet is my sweet spot because it’s not too sugary against the pumpkin, but milk chocolate chips work great if your kids prefer them. Dark chocolate chips would also be lovely if you want a more grown-up version. Just avoid white chocolate chips — they tend to get lost against the cream cheese swirl visually.
Equipment Needed
You don’t need fancy equipment for these bars, which is part of why I make them so often. Here’s what you’ll actually use:
- 9×13-inch baking pan — Glass or metal both work. I prefer metal because it conducts heat more evenly, but glass is fine if that’s what you have.
- Parchment paper — This is non-negotiable for easy removal. Cut two strips that overhang the long sides of the pan.
- Two mixing bowls — One medium for dry ingredients, one large for wet ingredients.
- Hand mixer or stand mixer — For the cream cheese swirl. You can do it by hand with a wooden spoon, but your arm will thank you for using a mixer.
- Rubber spatula — For folding and scraping every last bit of batter.
- Butter knife or skewer — For creating the swirl pattern.
- Cooling rack — Essential for even cooling so the bottoms don’t get soggy.
I bought my 9×13 pan at a thrift store for three dollars, and it’s still going strong after five years. You really don’t need expensive bakeware for this recipe. Just make sure whatever pan you use has straight sides — those angled ones make cutting clean bars harder.
Preparation Method
Preheat your oven to 350°F (175°C). Line your 9×13 pan with parchment paper, leaving about two inches of overhang on the long sides. This is your lifting handle later — don’t skip it.
Step 1: Mix the Dry Ingredients
In a medium bowl, whisk together the flour, baking soda, pumpkin pie spice, and salt. Set this aside. I usually give it about 20 seconds of whisking to make sure everything is evenly distributed. Clumps of baking soda are the enemy here.
Step 2: Combine the Wet Ingredients
In a large bowl, whisk the granulated sugar, brown sugar, and vegetable oil together until smooth. Add the eggs one at a time, whisking well after each addition. The mixture should look thick and glossy. Stir in the pumpkin purée and vanilla extract until fully combined. This is where the kitchen starts smelling amazing — that warm pumpkin-vanilla aroma.
Step 3: Bring It Together
Pour the dry ingredients into the wet ingredients and fold gently with a rubber spatula. Stop as soon as you no longer see streaks of flour. Overmixing will make the bars tough, and nobody wants tough pumpkin bars. Fold in the chocolate chips, reserving about a quarter cup to sprinkle on top later.
Step 4: Make the Cream Cheese Swirl
In a separate small bowl, beat the softened cream cheese with the electric mixer until smooth and fluffy — about 2 minutes. Add the sugar, egg yolk, and vanilla, then beat for another minute until everything is silky. Scrape down the sides of the bowl at least once.
Step 5: Assemble and Swirl
Pour the pumpkin batter into the prepared pan and spread it evenly. Drop spoonfuls of the cream cheese mixture randomly across the surface — about 8 to 10 dollops. Take a butter knife or skewer and drag it through the batter in a figure-eight pattern. Don’t over-swirl. Three or four passes is plenty. You want distinct ribbons, not a uniform tan color.
Step 6: Top and Bake
Sprinkle the reserved chocolate chips over the top. Bake for 28 to 32 minutes, or until the edges are set and a toothpick inserted in the center comes out with moist crumbs (not wet batter). The center will look slightly underdone — that’s okay. It will continue setting as it cools.
Step 7: Cool Completely
Let the bars cool in the pan on a wire rack for at least 1 hour. Then lift them out using the parchment paper overhang and transfer to a cutting board. Let them cool completely before cutting — about another 30 minutes. I know it’s hard to wait, but warm bars will crumble when you cut them.
Cut into 24 squares or 12 larger rectangles, depending on your crowd size. For clean cuts, wipe your knife clean between each cut.
Cooking Tips & Techniques
I’ve made these bars more times than I can count, and I’ve learned a few things the hard way. Here’s what I wish someone had told me:
Don’t overmix the cream cheese swirl. The first time I made these, I got excited and swirled for a solid 30 seconds. The result was a uniform pale orange bar with no visible cream cheese. You want distinct ribbons, not a blended mess. Three or four figure-eight passes with your knife is all it takes.
Room temperature ingredients matter. I know it’s annoying to wait for eggs and cream cheese to warm up, but cold ingredients don’t emulsify properly. Your batter will look curdled, and the texture won’t be as tender. Set everything out 30 minutes before you start, and you’ll thank yourself later.
Use the parchment paper trick. I forgot parchment once and had to chisel bars out of the pan with a spatula. Never again. Those overhanging strips are your best friend for clean removal and easy cleanup.
Check for doneness at 28 minutes. Every oven runs differently. My old oven took 32 minutes, but my current one is done at 29. Start checking early. The edges should be golden and pulling away from the pan slightly, and the center should look just set with a slight jiggle.
Let them cool completely. This is the hardest tip to follow, I know. But cutting warm bars is a recipe for crumbly disappointment. The bars continue to set as they cool, and the cream cheese swirl firms up. Give them the full cooling time, and you’ll get clean, beautiful squares.
Variations & Adaptations
These pumpkin chocolate chip bars are flexible enough to adapt to different needs and cravings. Here are some variations I’ve tried and loved:
Gluten-Free Version : Substitute the all-purpose flour with a 1:1 gluten-free baking flour blend. I’ve used Bob’s Red Mill with great results. Add an extra tablespoon of flour because gluten-free blends tend to absorb liquid differently. The texture will be slightly more tender, but still delicious.
Dairy-Free Adaptation : Use dairy-free cream cheese (I like Kite Hill or Violife) and dairy-free chocolate chips. The cream cheese swirl won’t be quite as creamy, but it still tastes fantastic. Use coconut oil instead of butter if your recipe calls for it.
Extra Pumpkin Spice : If you’re a pumpkin spice fanatic like me, add an extra teaspoon of pumpkin pie spice and a pinch of black pepper to the dry ingredients. The pepper sounds weird, but it actually enhances the warming spices without making things spicy.
Nutty Crunch : Fold in ½ cup of chopped pecans or walnuts along with the chocolate chips. Toast them first in a dry pan for about 3 minutes to bring out their flavor. My husband insists this is the only way to make them.
Mini Muffin Version : Spoon the batter into greased mini muffin tins and bake for 12 to 15 minutes. These are perfect for lunchboxes or Halloween parties. Just reduce the cream cheese swirl amount slightly so it doesn’t overflow.
I once made a batch with white chocolate chips and dried cranberries for a holiday party, and they disappeared faster than the traditional version. Don’t be afraid to experiment — the pumpkin base is forgiving enough to handle most mix-ins.
Serving & Storage Suggestions
These bars are best served at room temperature or slightly warm. If you’re reheating, pop a bar in the microwave for about 10 seconds — just enough to soften the chocolate chips without melting the cream cheese swirl.
For presentation, I like to dust the tops with a light sprinkle of powdered sugar and a pinch of cinnamon. It makes them look fancy without any actual effort. Arrange them on a white platter for maximum visual impact — the orange, white, and dark chocolate colors really pop.
These bars pair beautifully with a hot cup of coffee or a tall glass of cold milk. For fall gatherings, I serve them alongside apple cider or a warm chai latte. They’re also fantastic crumbled over vanilla ice cream for an impromptu dessert sundae.
Storage Instructions:
- Store in an airtight container at room temperature for up to 3 days.
- Refrigerate for up to 5 days — the cream cheese swirl stays fresher in the fridge.
- Freeze for up to 3 months. Wrap individual bars in plastic wrap, then place in a freezer bag. Thaw at room temperature for about 30 minutes before serving.
The flavors actually develop overnight. I’ve found that day-old bars taste even better than fresh ones — the pumpkin and spices have time to meld together, and the chocolate chips settle into this perfect chewy texture. So don’t feel bad if you make them a day ahead.
Nutritional Information & Benefits
Per bar (based on 24 servings):
- Calories: 215
- Total Fat: 11g
- Saturated Fat: 4g
- Cholesterol: 35mg
- Sodium: 180mg
- Total Carbohydrates: 28g
- Dietary Fiber: 1g
- Sugars: 18g
- Protein: 3g
These bars aren’t health food, but they do have some redeeming qualities. Pumpkin is packed with vitamin A and fiber, and it adds moisture without requiring extra butter or oil. The cream cheese provides a small amount of calcium and protein. And dark chocolate contains antioxidants — so there’s that.
For a slightly lighter version, you can reduce the sugar to ¾ cup granulated and ¼ cup brown sugar. The bars won’t be as sweet, but the chocolate chips and cream cheese swirl still provide plenty of sweetness. You can also use reduced-fat cream cheese, though the swirl won’t be quite as creamy.
These bars are nut-free if you skip the pecan variation, making them safe for school bake sales and lunchboxes. They do contain gluten, dairy, and eggs, so keep that in mind for allergy-conscious gatherings.
Conclusion
These kid-approved pumpkin chocolate chip bars with cream cheese swirl have become a staple in my kitchen for good reason. They’re simple enough for a Tuesday afternoon but impressive enough for a holiday table. The cream cheese swirl trick — which I learned from my nine-year-old, of all people — makes them look like you spent hours when you really spent about 20 minutes of active time.
What I love most about this recipe is how adaptable it is. You can dress it up with nuts and cranberries for company, or keep it simple for family movie night. The base recipe works every time, and the variations let you make it your own. That’s the kind of recipe worth holding onto.
I’d love to hear how these turn out for you. Did your kids have any suggestions? Did you try a fun variation? Drop a comment below and let me know — I genuinely read every single one. And if you share a photo on social media, tag me so I can see your beautiful creations. Happy baking, friends!
Frequently Asked Questions
Can I use fresh pumpkin instead of canned?
You can, but I don’t recommend it for this recipe. Fresh pumpkin purée has higher water content than canned, which can make the bars soggy. If you really want to use fresh, roast the pumpkin until very dry, then strain the purée through cheesecloth for at least an hour to remove excess moisture.
Why did my cream cheese swirl disappear into the batter?
You probably over-swirled. The cream cheese mixture should be dolloped on top and gently swirled with just three or four passes of a knife. If you keep mixing, it blends completely into the pumpkin batter and you lose those beautiful ribbons.
Can I make these bars ahead of time?
Absolutely. These bars actually taste better the next day. Bake them, cool completely, and store in an airtight container at room temperature for up to 3 days or in the fridge for up to 5 days. They also freeze beautifully for up to 3 months.
My bars came out dry. What went wrong?
Most likely you overbaked them. Start checking at 28 minutes, and remember that the center should look slightly underdone when you pull them out. They continue baking in the hot pan as they cool. Also, make sure you’re using 100% pumpkin purée, not pumpkin pie filling, which has different moisture content.
Can I reduce the sugar in this recipe?
Yes, you can reduce the granulated sugar to ¾ cup and the brown sugar to ¼ cup without major texture changes. The bars will be less sweet, but the chocolate chips and cream cheese swirl still provide plenty of sweetness. I wouldn’t reduce it further than that, though, because sugar contributes to the tender texture of baked goods.
Pin This Recipe!
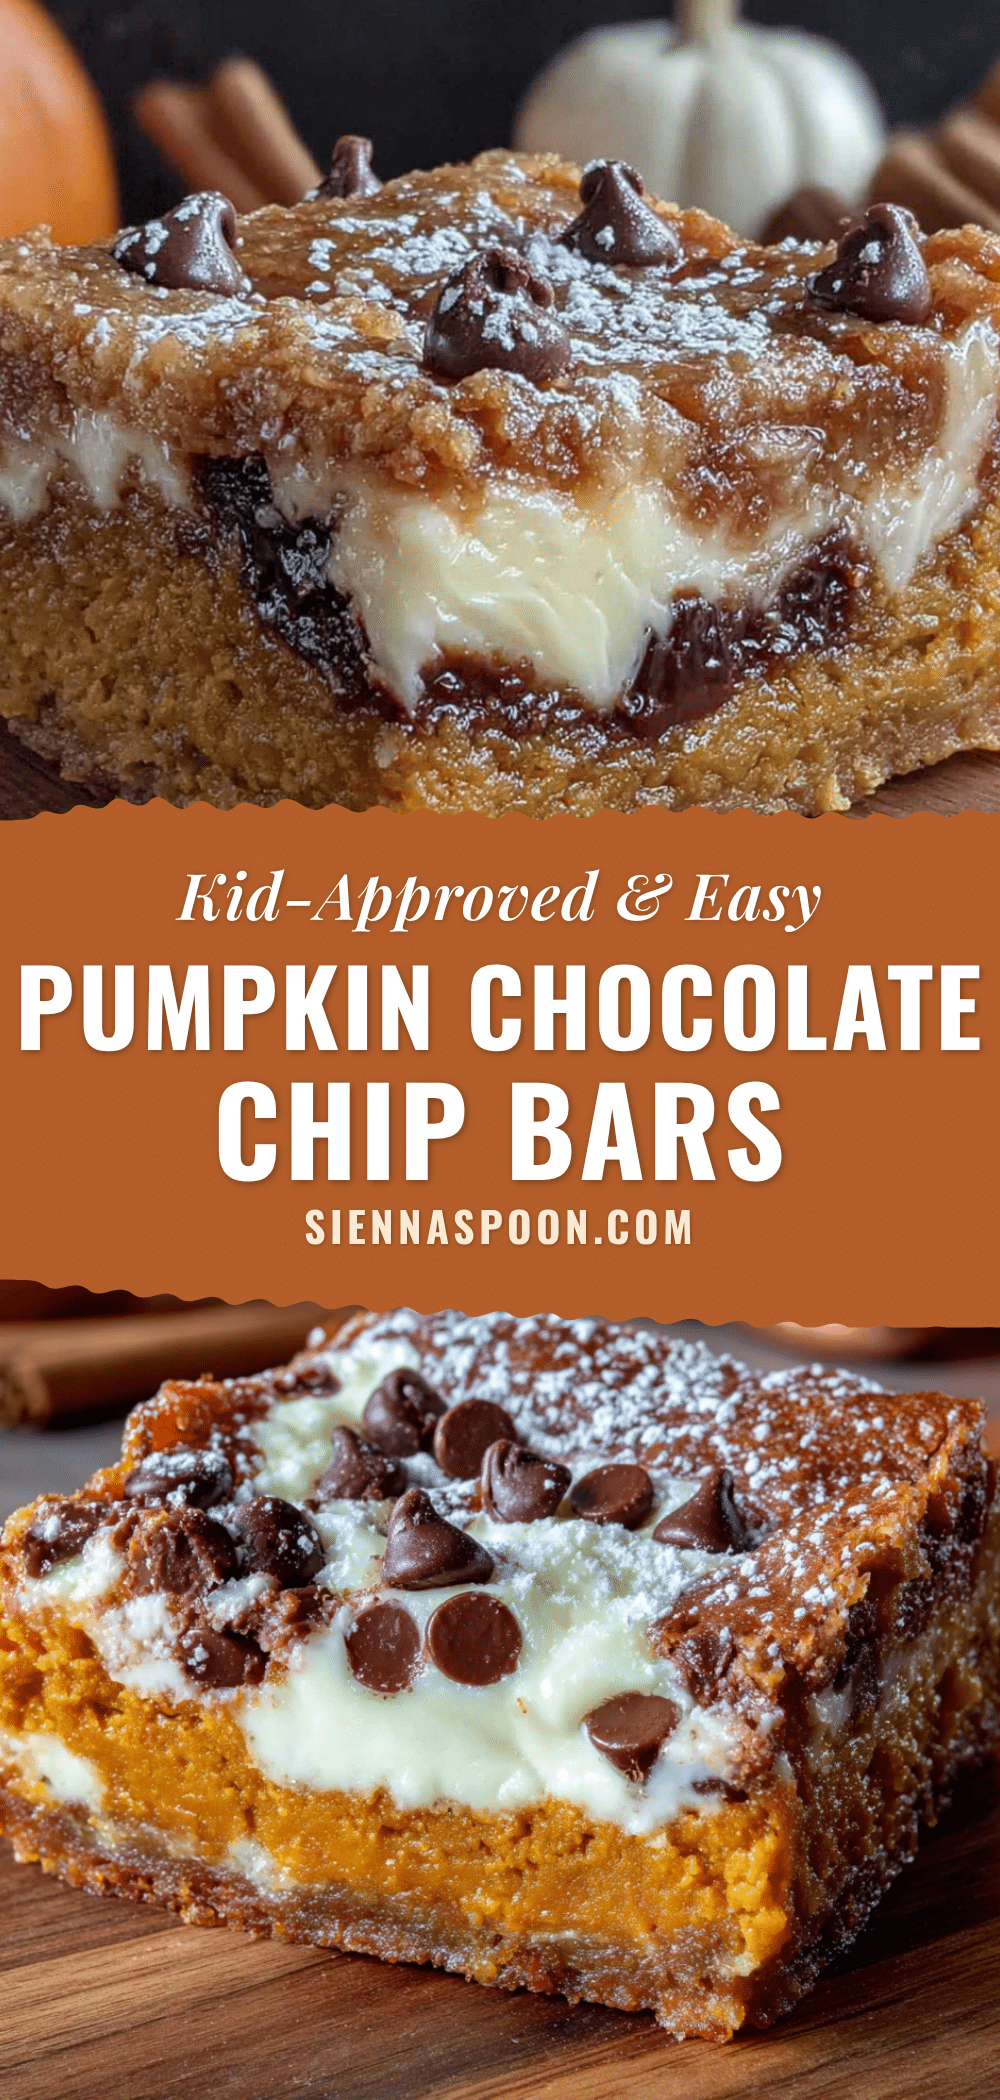
Best Kid-Approved Pumpkin Chocolate Chip Bars with Cream Cheese Swirl
These pumpkin chocolate chip bars feature a gorgeous cream cheese swirl that’s easier than traditional methods. Made with simple ingredients in one bowl, they’re moist, perfectly spiced, and packed with chocolate chips — a foolproof fall dessert that kids and adults alike devour.
- Prep Time: 20 minutes
- Cook Time: 30 minutes
- Total Time: 1 hour 50 minutes (includes cooling)
- Yield: 24 servings 1x
- Category: Dessert
- Cuisine: American
Ingredients
- 1 ¾ cups all-purpose flour
- 1 teaspoon baking soda
- 2 teaspoons pumpkin pie spice (or 1 tsp cinnamon, ½ tsp ginger, ½ tsp nutmeg, ¼ tsp cloves)
- ½ teaspoon salt
- 1 cup granulated sugar
- ½ cup packed brown sugar (light or dark)
- ½ cup vegetable oil (canola or melted coconut oil)
- 2 large eggs, room temperature
- 1 cup canned pumpkin purée (100% pumpkin, not pie filling)
- 1 teaspoon vanilla extract
- 1 cup semi-sweet chocolate chips
- 8 ounces cream cheese, softened to room temperature
- ¼ cup granulated sugar (for cream cheese swirl)
- 1 large egg yolk
- ½ teaspoon vanilla extract (for cream cheese swirl)
Instructions
- Preheat oven to 350°F (175°C). Line a 9×13-inch baking pan with parchment paper, leaving about 2 inches of overhang on the long sides.
- In a medium bowl, whisk together flour, baking soda, pumpkin pie spice, and salt. Set aside.
- In a large bowl, whisk granulated sugar, brown sugar, and vegetable oil until smooth. Add eggs one at a time, whisking well after each. Stir in pumpkin purée and vanilla extract until fully combined.
- Pour dry ingredients into wet ingredients and fold gently with a rubber spatula until just combined. Do not overmix. Fold in chocolate chips, reserving about ¼ cup for topping.
- In a separate small bowl, beat softened cream cheese with an electric mixer until smooth and fluffy, about 2 minutes. Add ¼ cup sugar, egg yolk, and ½ teaspoon vanilla; beat for another minute until silky.
- Pour pumpkin batter into prepared pan and spread evenly. Drop spoonfuls of cream cheese mixture randomly across the surface (8-10 dollops). Use a butter knife or skewer to drag through batter in a figure-eight pattern, 3-4 passes only.
- Sprinkle reserved chocolate chips over the top. Bake for 28-32 minutes, until edges are set and a toothpick inserted in center comes out with moist crumbs (not wet batter).
- Cool in pan on a wire rack for at least 1 hour. Lift out using parchment overhang and transfer to a cutting board. Cool completely before cutting (about another 30 minutes). Cut into 24 squares or 12 rectangles.
Notes
Don’t over-swirl the cream cheese — 3-4 passes is plenty. Room temperature ingredients are crucial for proper emulsification. Start checking for doneness at 28 minutes. Let bars cool completely before cutting to avoid crumbling. Bars taste even better the next day as flavors meld.
Nutrition
- Serving Size: 1 bar (based on 24 s
- Calories: 215
- Sugar: 18
- Sodium: 180
- Fat: 11
- Saturated Fat: 4
- Carbohydrates: 28
- Fiber: 1
- Protein: 3
Keywords: pumpkin bars, chocolate chip bars, cream cheese swirl, fall dessert, kid-friendly, pumpkin dessert, easy baking, one-bowl recipe


