Love this? Save it for later!
Share the inspiration with your friends
This was supposed to be a simple loaf of sourdough bread. I had my starter bubbling away on the counter, the kitchen smelled like a bakery, and I was feeling pretty proud of myself. But then my toddler woke up from his nap screaming, the phone rang, and I completely forgot about the discard sitting in a bowl on the counter. By the time I got back to it, the starter had been fed, but that sad little bowl of discarded starter was just sitting there, looking at me. I couldn’t bring myself to throw it away—honestly, I hate wasting anything in the kitchen. So I poured it into a jar, shoved it in the fridge, and told myself I’d figure something out later.
Three days later, I was staring into that same fridge, craving something sweet but not wanting to make another loaf of bread. My eyes landed on that jar of sourdough discard, and a memory from my childhood popped into my head: those frosted, rectangular pastries my mom used to buy in the box. You know the ones. I thought, “Could I make a homemade version with this discard?” I grabbed some butter, some jam, and crossed my fingers. The first batch came out of the oven looking a little lopsided, and the icing was a bit too runny. But that first bite? Honestly, I stood at the counter and ate three of them before my husband even got home. The tangy, flaky crust paired with the sweet, nutty brown butter icing was something I never expected to work so well.
These Homemade Sourdough Discard Pop Tarts with Brown Butter Icing are now a staple in our house. They are the kind of thing that makes you feel like you’ve discovered a secret—turning something you almost threw away into something absolutely incredible. Maybe you’ve got a jar of discard in your fridge right now, wondering what to do with it. Let me tell you, this is the answer.
Why You’ll Love This Recipe
I have tested this recipe more times than I can count, and every single time, I am blown away by how good it is. As someone who has spent years working with sourdough and developing recipes, I can tell you that this one is special. It is not just another way to use up discard—it is a genuinely delicious pastry that rivals anything you can buy at the store.
- Quick & Easy: From start to finish, these come together in about 45 minutes. The dough comes together in a single bowl, and there is no complicated shaping involved. Perfect for a weekend morning or a last-minute dessert.
- Simple Ingredients: You likely already have everything in your kitchen. Flour, butter, sugar, jam, and your sourdough discard. No fancy grocery trips needed.
- Perfect for Using Up Discard: If you keep a sourdough starter, you know the struggle of having too much discard. This recipe uses a full cup of it, making it the perfect solution for that jar sitting in your fridge.
- Crowd-Pleaser: I have brought these to brunches, potlucks, and even just left them on the counter for my neighbors. They disappear every single time. Kids and adults both go crazy for them.
- Unbelievably Delicious: The crust is flaky, tangy, and buttery. The filling is sweet and fruity. And that brown butter icing? It is pure magic. The combination is next-level comfort food.
What makes this recipe different from all the other pop tart recipes out there? It is the sourdough discard. That little bit of tang cuts through the sweetness perfectly, creating a balanced flavor that you just cannot get with regular pastry dough. It is not just another version—it is the best version.
This recipe is the kind that makes you close your eyes after the first bite. It is comfort food reimagined—homemade, flaky, and with that same soul-soothing satisfaction you remember from childhood. Perfect for impressing guests without stress, or turning a simple Saturday morning into something memorable.
What Ingredients You Will Need
This recipe uses simple, wholesome ingredients to deliver that perfect flaky crust and rich, nutty icing. Most of these are pantry staples, which makes this recipe incredibly accessible. Let me walk you through each one so you know exactly what to look for.
For the Dough
- All-purpose flour, 2 ½ cups (315g): This is the backbone of the dough. I prefer King Arthur Flour for its consistent protein content, but any good all-purpose flour will work. Do not use bread flour here—it will make the crust tough.
- Cold unsalted butter, 1 cup (2 sticks, 226g), cut into small cubes: The butter must be very cold. I actually pop my cubed butter in the freezer for 10 minutes before I start. This is the key to a flaky crust. I recommend Kerrygold or any European-style butter for the best flavor.
- Sourdough discard, 1 cup (240g), unfed: Use it straight from the fridge. It does not need to be active or bubbly—this is discard, after all. If your discard is very thick, you may need to add a tablespoon of cold water. If it is very runny, add an extra tablespoon of flour.
- Granulated sugar, 2 tablespoons (25g): Just a little sweetness to balance the tang of the sourdough.
- Salt, 1 teaspoon (6g): Do not skip this. Salt is essential for flavor in any pastry dough.
For the Filling
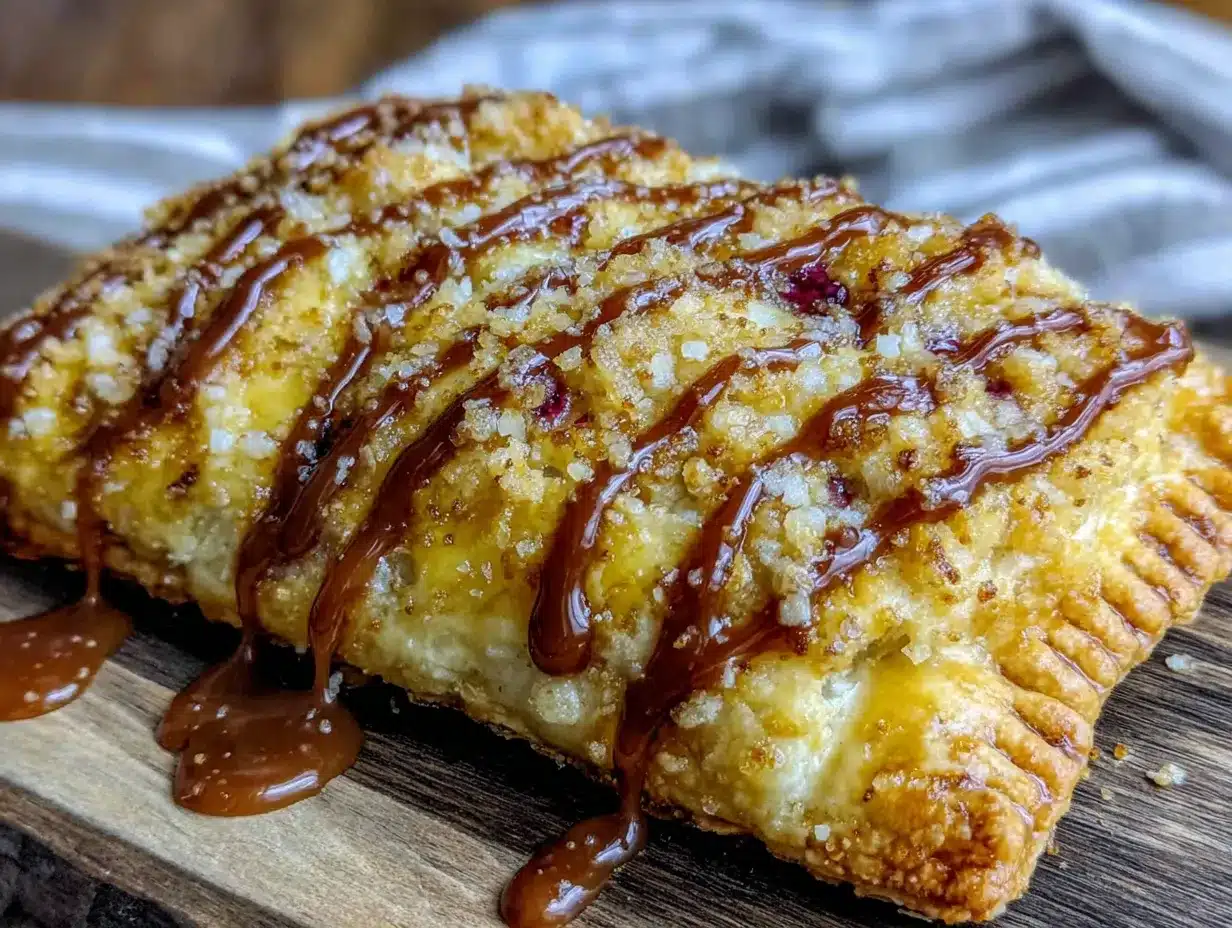
- Your favorite jam or preserves, about ½ cup (160g): I have used strawberry, raspberry, apricot, and even fig jam. They all work beautifully. Use a good quality jam—the kind with visible fruit pieces. Smuckers is fine, but a local or artisan jam will give you better flavor. If your jam is very runny, simmer it on the stove for a few minutes to thicken it up.
- Optional: cream cheese, 2 ounces (56g), softened: For a cheesecake-inspired variation, mix a little softened cream cheese with your jam before filling the tarts. It adds a lovely tangy richness.
For the Brown Butter Icing
- Unsalted butter, ¼ cup (½ stick, 56g): You will be browning this, so use a light-colored pan so you can see the color change.
- Powdered sugar, 1 cup (120g), sifted: Sifting is important here to avoid lumps in your icing.
- Milk, 2-3 tablespoons (30-45ml): Whole milk works best, but any milk you have on hand will do. You can also use heavy cream for an extra rich icing.
- Vanilla extract, ½ teaspoon (2ml): Pure vanilla extract is always best. Imitation will work, but the flavor will not be as deep.
- Pinch of salt: This balances the sweetness and enhances the brown butter flavor.
For Assembly
- 1 large egg, beaten: For the egg wash. This gives the pop tarts that beautiful golden-brown color.
- Sprinkles (optional): For a classic pop tart look, add some colorful sprinkles on top of the icing before it sets. My kids insist on this step.
Equipment Needed
You do not need anything fancy to make these, which is one of the reasons I love this recipe so much. Here is what you will need:
- Large mixing bowl: For making the dough. Any bowl will do, but a wide, shallow one makes it easier to work the butter into the flour.
- Pastry cutter or two forks: To cut the butter into the flour. You can also use your hands, but work quickly so the butter does not warm up. If you do this often, a pastry blender is a worthwhile investment—they are cheap and make the job so much easier.
- Rolling pin: A standard rolling pin works perfectly. If you do not have one, a clean wine bottle works in a pinch—I have done it!
- Parchment paper: Essential for rolling out the dough and for baking. It prevents sticking and makes cleanup a breeze.
- Baking sheet: A standard half-sheet pan is perfect. Line it with parchment paper.
- Sharp knife or pizza cutter: For cutting the dough into rectangles. A pizza cutter gives the cleanest edges.
- Ruler (optional): If you want perfectly uniform pop tarts, a ruler helps. I usually just eyeball it, and they turn out fine.
- Small saucepan: For browning the butter. Use a light-colored pan so you can see the butter change color.
- Small bowl: For mixing the icing.
- Pastry brush: For the egg wash. A silicone brush works great and is easy to clean.
- Cooling rack: For cooling the pop tarts before icing them. This helps the icing set properly.
I have made these with a cheap rolling pin and a butter knife, and they still came out amazing. Do not let the equipment list intimidate you. Use what you have.
Preparation Method
Alright, let us get to the fun part. Follow these steps, and you will have a batch of incredible homemade pop tarts in no time. I am going to walk you through every detail, including what to look for at each stage.
- Make the dough. In a large mixing bowl, whisk together the all-purpose flour, granulated sugar, and salt. Add the cold, cubed butter. Using a pastry cutter or your fingertips, work the butter into the flour until the mixture resembles coarse meal with some pea-sized butter pieces remaining. You want to see visible pieces of butter—this is what creates those flaky layers. Do not overwork it.
- Add the discard. Pour the sourdough discard over the flour-butter mixture. Use a fork to stir everything together until a shaggy dough forms. It will look dry and crumbly at first. That is okay. Use your hands to gently press the dough together into a ball. If it is too dry to come together, add cold water one tablespoon at a time. If it is too sticky, add a little more flour.
- Chill the dough. Flatten the dough into a disc about 1-inch thick. Wrap it tightly in plastic wrap and refrigerate for at least 30 minutes. This step is non-negotiable. Chilling the dough relaxes the gluten and re-solidifies the butter, which is essential for a flaky texture. You can make the dough a day ahead and keep it in the fridge.
- Preheat the oven. About 15 minutes before you are ready to bake, preheat your oven to 375°F (190°C). Line a baking sheet with parchment paper.
- Roll out the dough. Lightly flour your work surface and rolling pin. Place the chilled dough on the surface and roll it out into a large rectangle, about ⅛-inch thick. Try to keep the edges as straight as possible. If the dough starts to stick, add a little more flour underneath it. If it starts to feel soft, pop it back in the fridge for 10 minutes.
- Cut the rectangles. Using a sharp knife or pizza cutter, cut the dough into rectangles. I like mine about 3 inches by 4 inches. You should get about 8 to 10 rectangles, depending on how you cut them. Re-roll the scraps once to get more rectangles—do not overwork the scraps or they will be tough.
- Add the filling. Place half of the rectangles on your prepared baking sheet, spacing them about 2 inches apart. Spoon about 1 to 1 ½ teaspoons of jam into the center of each rectangle, leaving a ½-inch border around the edges. Do not overfill, or the jam will leak out during baking. Trust me on this—I have made that mistake.
- Seal the tarts. Brush the edges of the filled rectangles with the beaten egg. Place the remaining rectangles on top of the filled ones. Gently press the edges to seal. Use a fork to crimp the edges all around—this creates a decorative edge and helps seal them tightly. Poke a few small holes in the top of each tart with a fork to allow steam to escape.
- Chill again. Place the baking sheet with the assembled pop tarts in the refrigerator for 15 minutes. This is another crucial step. It firms up the butter again, which prevents the tarts from spreading too much in the oven.
- Bake. Brush the tops of the chilled pop tarts with the remaining beaten egg. Bake for 18 to 22 minutes, or until the tops are golden brown and the edges are lightly browned. The jam might bubble out a little—that is perfectly fine. Let them cool on the baking sheet for 5 minutes, then transfer to a cooling rack to cool completely before icing.
- Make the brown butter icing. While the pop tarts are cooling, make the icing. Place the ¼ cup of butter in a small saucepan over medium heat. Melt the butter, then continue cooking, swirling the pan occasionally. The butter will foam, then the foam will subside, and you will see brown specks forming at the bottom. This happens quickly—watch it carefully. Once the butter is a deep golden brown and smells nutty, remove it from the heat immediately. Pour it into a small bowl to stop the cooking.
- Finish the icing. Add the sifted powdered sugar, 2 tablespoons of milk, the vanilla extract, and a pinch of salt to the browned butter. Whisk until smooth. If the icing is too thick, add another tablespoon of milk. If it is too thin, add a little more powdered sugar. The icing should be thick but pourable.
- Ice the tarts. Once the pop tarts are completely cool, spoon or drizzle the brown butter icing over the tops. If you are using sprinkles, add them immediately before the icing sets. Let the icing set for about 15 minutes before serving.
Cooking Tips & Techniques
Over the many batches I have made, I have learned a few things the hard way so you do not have to. Here are my best tips for perfect pop tarts every time.
Keep everything cold. This is the number one rule of flaky pastry. If your butter melts into the flour before it goes in the oven, you will end up with a dense, tough crust instead of a flaky one. If at any point your dough feels warm or sticky, just pop it in the fridge for 10 to 15 minutes. I have done this mid-rolling, and it saves the dough every time.
Do not skip the second chill. I know it is tempting to just throw them in the oven after assembling, but that 15-minute chill in the fridge is what prevents your pop tarts from turning into blobs. The cold butter creates steam as it melts in the oven, which lifts the layers and creates that beautiful flaky texture.
Watch the brown butter like a hawk. I cannot stress this enough. Brown butter goes from perfect to burnt in about 30 seconds. The first time I made it, I got distracted by my kids and ended up with black butter. It smelled terrible and I had to start over. Stand at the stove, watch it, and the moment it turns a deep amber color and smells nutty, pull it off the heat.
Let them cool completely. If you ice the pop tarts while they are still warm, the icing will melt right off and make a mess. I know it is hard to wait, but it is worth it. I usually make the icing while they are cooling so everything is ready at the same time.
Use good jam. The filling is the star of the show, so use a jam you actually love eating. I once used a cheap, overly sweet jam, and the whole batch tasted artificial. A good quality jam with real fruit makes a huge difference.
Variations & Adaptations
One of the best things about this recipe is how versatile it is. Here are some of my favorite variations that I have tested over the years.
- Savory Version: Skip the sugar in the dough and fill these with cheese, herbs, and a little bit of caramelized onion. Leave out the icing and brush the tops with melted butter and flaky sea salt after baking. They are incredible served alongside a bowl of soup.
- Chocolate Hazelnut: Use chocolate hazelnut spread (like Nutella) as the filling. The tangy sourdough crust pairs perfectly with the rich, sweet spread. Add a sprinkle of sea salt on top of the icing for a sweet-salty combo.
- Apple Cinnamon: Instead of jam, use apple pie filling. Cook down some diced apples with butter, brown sugar, and cinnamon until thick and jammy. Fill the tarts with this mixture and add a pinch of cinnamon to the brown butter icing.
- Gluten-Free Option: I have made these with a good quality 1-to-1 gluten-free flour blend (like Bob’s Red Mill). The dough is a bit more delicate to work with, so be gentle when rolling and sealing. The texture is slightly different but still delicious.
- Vegan Version: Use vegan butter in both the dough and the icing. Use a flax egg (1 tablespoon ground flaxseed mixed with 3 tablespoons water) for the egg wash. Coconut milk works well in the icing. The texture will be a little less flaky, but the flavor is still fantastic.
- Berry Blast: Use a mix of raspberry, strawberry, and blueberry jam for a mixed berry filling. I did this for a summer brunch, and the colors were beautiful.
Serving & Storage Suggestions
These pop tarts are best enjoyed fresh, but they store surprisingly well. Here is how I serve and store them.
Serving: Serve these at room temperature or slightly warm. If you want to reheat them, pop them in a 300°F (150°C) oven for 5 to 7 minutes. This warms the filling and crisps up the crust again. Do not microwave them—the crust will become soggy. They are perfect for breakfast with a cup of coffee, as an afternoon snack with tea, or as a fun dessert. I love serving them on a platter for brunch—they always get compliments.
Storage: Store any leftover pop tarts in an airtight container at room temperature for up to 3 days. Place a sheet of parchment paper between layers to prevent the icing from sticking. If you live in a humid climate, the crust might soften a bit. To fix this, reheat them in the oven for a few minutes.
Freezing: These freeze beautifully. Freeze the baked, un-iced pop tarts on a baking sheet until solid, then transfer them to a freezer-safe bag. They will keep for up to 3 months. When you are ready to eat them, thaw them at room temperature, then reheat in the oven and ice them fresh. You can also freeze the assembled, unbaked pop tarts. Bake them straight from the freezer, adding 3 to 5 minutes to the baking time.
Flavor Development: Honestly, the flavors get even better after a day. The tanginess of the sourdough mellows out and blends with the sweetness of the jam and icing. I have been known to hide a few in the back of the fridge just for myself.
Nutritional Information & Benefits
While these are definitely a treat, there are a few benefits to using sourdough discard. Here is a rough estimate of the nutritional information per pop tart (based on 8 servings).
| Nutrient | Amount per Serving |
|---|---|
| Calories | 320 |
| Total Fat | 18g |
| Saturated Fat | 11g |
| Cholesterol | 55mg |
| Sodium | 210mg |
| Total Carbohydrates | 38g |
| Dietary Fiber | 1g |
| Sugars | 16g |
| Protein | 4g |
Health Benefits: Sourdough fermentation breaks down some of the phytic acid in flour, which can make the nutrients in the grains more bioavailable. It also introduces beneficial bacteria to your digestive system. While these pop tarts are still an indulgent treat, the sourdough discard adds a little something extra that boxed pastries just do not have. Plus, you control the ingredients—no preservatives or artificial flavors here.
Dietary Considerations: This recipe is vegetarian. For a gluten-free or vegan version, see the variations section above. It contains dairy and gluten in its standard form.
Conclusion
These Homemade Sourdough Discard Pop Tarts with Brown Butter Icing are more than just a way to use up your discard. They are a genuinely special treat that turns a kitchen leftover into something you will crave. The flaky, tangy crust, the sweet fruit filling, and that nutty brown butter icing come together in a way that feels both nostalgic and brand new.
I hope you give these a try. Play around with the fillings and make them your own. Maybe you will discover a combination that becomes your family’s favorite. That is the beauty of cooking—taking something simple and making it yours.
If you make these, I would love to hear about it. Leave a comment below and let me know what filling you used, or share a photo of your creation. Do not forget to share this recipe with a friend who has a jar of sourdough discard sitting in their fridge right now, wondering what to do with it. Happy baking, friends.
Frequently Asked Questions
Can I use active sourdough starter instead of discard?
Yes, you can. The dough will be slightly more bubbly and might be a little stickier to work with. You may need to add an extra tablespoon of flour. The flavor will be slightly less tangy, but it will still work beautifully.
My dough is too sticky. What should I do?
If your dough is sticky, it is likely because your sourdough discard is very runny or the butter is too warm. Add flour one tablespoon at a time until the dough comes together. Then, chill it for at least 30 minutes before rolling. If it is still sticky after chilling, dust your work surface and rolling pin generously with flour.
Can I make these without a rolling pin?
Absolutely. I have used a clean wine bottle in a pinch. You can also press the dough out with your hands, though it will be harder to get an even thickness. Just be patient and work gently.
My jam leaked out during baking. What went wrong?
This usually happens if you overfill the tarts or if you did not seal the edges tightly enough. Make sure you leave a ½-inch border around the filling and press the edges firmly with a fork. Chilling the assembled tarts before baking also helps the seal hold.
Can I skip the brown butter icing?
You can, but I would not recommend it. The brown butter icing is what makes these pop tarts truly special. However, if you are short on time, you can use a simple glaze of powdered sugar and milk. It will still be delicious, just not as complex.
Pin This Recipe!
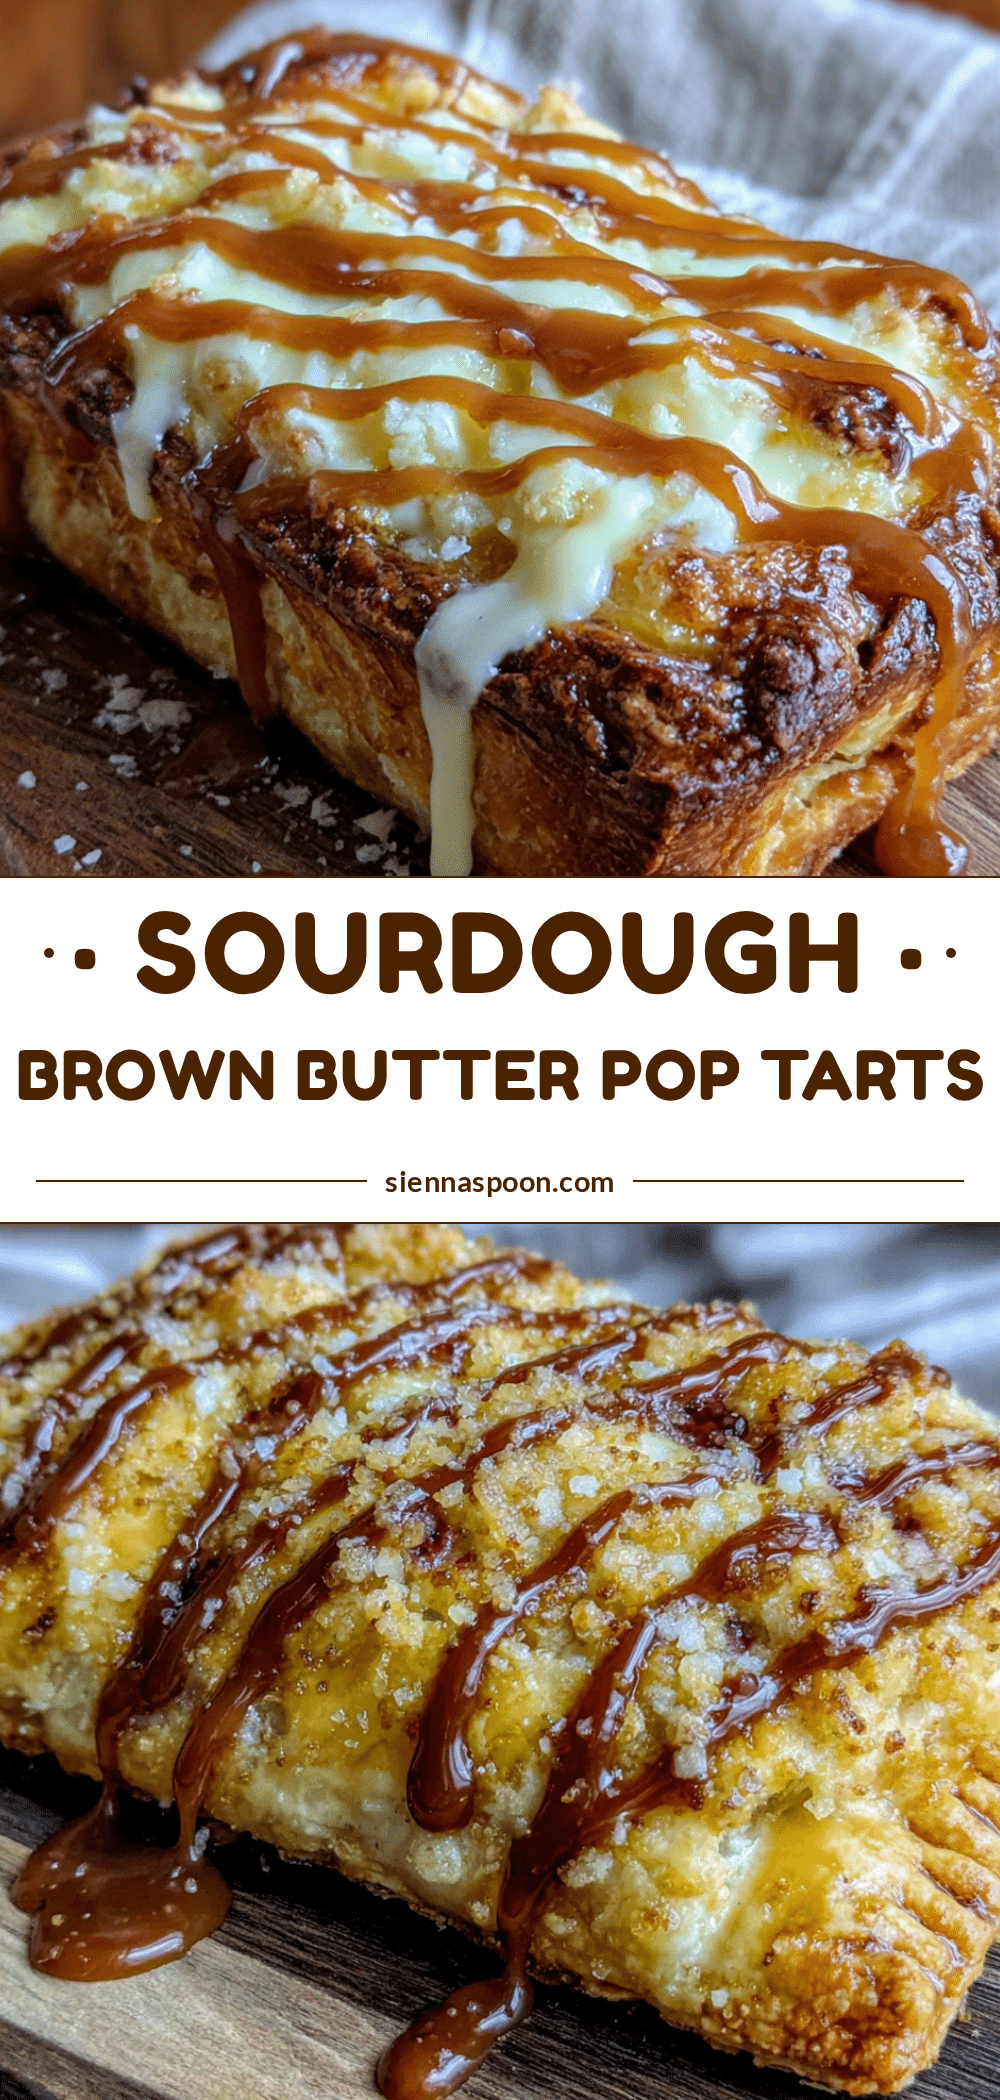
Best Homemade Sourdough Discard Pop Tarts with Brown Butter Icing
Flaky, tangy sourdough discard pop tarts filled with your favorite jam and topped with a nutty brown butter icing. A delicious way to use up sourdough discard.
- Prep Time: 30 minutes
- Cook Time: 20 minutes
- Total Time: 50 minutes
- Yield: 8 servings 1x
- Category: Dessert
- Cuisine: American
Ingredients
- 2 ½ cups (315g) all-purpose flour
- 1 cup (2 sticks, 226g) cold unsalted butter, cut into small cubes
- 1 cup (240g) sourdough discard, unfed
- 2 tablespoons (25g) granulated sugar
- 1 teaspoon (6g) salt
- ½ cup (160g) your favorite jam or preserves
- 2 ounces (56g) cream cheese, softened (optional)
- ¼ cup (½ stick, 56g) unsalted butter (for icing)
- 1 cup (120g) powdered sugar, sifted
- 2–3 tablespoons (30-45ml) milk
- ½ teaspoon (2ml) vanilla extract
- Pinch of salt (for icing)
- 1 large egg, beaten (for egg wash)
- Sprinkles (optional)
Instructions
- Make the dough: In a large mixing bowl, whisk together the all-purpose flour, granulated sugar, and salt. Add the cold, cubed butter. Using a pastry cutter or your fingertips, work the butter into the flour until the mixture resembles coarse meal with some pea-sized butter pieces remaining.
- Add the discard: Pour the sourdough discard over the flour-butter mixture. Use a fork to stir everything together until a shaggy dough forms. Use your hands to gently press the dough together into a ball. If too dry, add cold water one tablespoon at a time. If too sticky, add a little more flour.
- Chill the dough: Flatten the dough into a disc about 1-inch thick. Wrap it tightly in plastic wrap and refrigerate for at least 30 minutes.
- Preheat the oven: About 15 minutes before baking, preheat your oven to 375°F (190°C). Line a baking sheet with parchment paper.
- Roll out the dough: Lightly flour your work surface and rolling pin. Roll the chilled dough into a large rectangle, about ⅛-inch thick.
- Cut the rectangles: Using a sharp knife or pizza cutter, cut the dough into rectangles about 3 inches by 4 inches. You should get about 8 to 10 rectangles.
- Add the filling: Place half of the rectangles on the prepared baking sheet, spacing them about 2 inches apart. Spoon about 1 to 1 ½ teaspoons of jam into the center of each, leaving a ½-inch border.
- Seal the tarts: Brush the edges of the filled rectangles with the beaten egg. Place the remaining rectangles on top. Gently press the edges to seal. Use a fork to crimp the edges. Poke a few small holes in the top of each tart with a fork.
- Chill again: Place the baking sheet with the assembled pop tarts in the refrigerator for 15 minutes.
- Bake: Brush the tops of the chilled pop tarts with the remaining beaten egg. Bake for 18 to 22 minutes, until golden brown. Let cool on the baking sheet for 5 minutes, then transfer to a cooling rack to cool completely.
- Make the brown butter icing: In a small saucepan over medium heat, melt ¼ cup butter. Continue cooking, swirling occasionally, until the butter turns a deep golden brown and smells nutty. Remove from heat immediately and pour into a small bowl.
- Finish the icing: Add the sifted powdered sugar, 2 tablespoons of milk, vanilla extract, and a pinch of salt to the browned butter. Whisk until smooth. Adjust consistency with additional milk or powdered sugar as needed.
- Ice the tarts: Once the pop tarts are completely cool, spoon or drizzle the brown butter icing over the tops. Add sprinkles immediately if using. Let the icing set for about 15 minutes before serving.
Notes
Keep all ingredients cold for a flaky crust. Do not skip the second chill before baking. Watch the brown butter carefully to avoid burning. Let pop tarts cool completely before icing.
Nutrition
- Serving Size: 1 pop tart
- Calories: 320
- Sugar: 16
- Sodium: 210
- Fat: 18
- Saturated Fat: 11
- Carbohydrates: 38
- Fiber: 1
- Protein: 4
Keywords: sourdough discard, pop tarts, brown butter icing, homemade pop tarts, sourdough pastry


