Love this? Save it for later!
Share the inspiration with your friends
It was 10:47 PM on a rainy Thursday in late October, and I had an unreasonable craving for something that tasted like fall had exploded in my mouth. I didn’t have the fancy pastry flour or the patience for a laminated dough that a proper bakery scone would need, but I had a half-can of pumpkin puree leftover from a soup I’d made two days ago, and a bottle of maple syrup I’d bought on impulse at the farmer’s market. The idea arrived like a quiet little whisper: what if I just threw it all together and hoped for the best? Honestly, I was tired. I didn’t care if it failed. I just needed the smell of cinnamon and nutmeg in my kitchen to fix the kind of day where everything felt a little off. I pulled out my biggest mixing bowl, and I’ll admit, I forgot to set the butter out to soften—so I did that thing where you microwave it in five-second bursts and pray you don’t end up with a puddle of melted fat. It worked, somehow. The dough came together in a shaggy, sticky mess that I patted into a rough circle on a floured counter, and when I cut those triangles and slid them into the oven, I felt this small, silly sense of victory. Twenty minutes later, the kitchen smelled like a candle store and a bakery had a baby. I made the brown butter glaze on a whim, standing over the stove watching the butter foam and turn amber, and when I drizzled it over those warm, tender scones, I knew I’d stumbled onto something special. Maybe you’ve been there—that late-night kitchen experiment that turns into a recipe you keep coming back to. These maple pumpkin scones with brown butter glaze are that recipe for me. They’re the ones I make when I need a little comfort, a little sweetness, and a whole lot of fall flavor in one single bite.
Why You’ll Love This Recipe
Let me tell you why these scones have earned a permanent spot in my fall baking rotation. They’re not your average dry, crumbly scone that leaves you reaching for a glass of milk after every bite. These are tender, almost creamy on the inside with that perfect crispy edge on the outside.
- Quick & Easy: From mixing bowl to cooling rack in under 35 minutes. No stand mixer required, no complicated folding techniques, and no chilling the dough overnight. This is weeknight baking at its finest.
- Simple Ingredients: You probably already have most of these in your pantry right now. Pumpkin puree, maple syrup, butter, flour, and a few warm spices. No trips to specialty grocery stores needed.
- Perfect for Fall Gatherings: These scones are the star of any brunch table, Thanksgiving morning breakfast, or cozy afternoon coffee date. They travel well, so bring them to your next potluck.
- Crowd-Pleaser: I’ve served these to kids who usually hate anything with pumpkin and adults who claim they don’t like sweets. The brown butter glaze is the secret weapon—it makes everything better.
- Unbelievably Delicious: The combination of maple and pumpkin is already a winning duo, but when you add that nutty, toasty brown butter glaze on top? It’s next-level comfort food that tastes like a hug in pastry form.
What makes this recipe different from the dozens of pumpkin scone recipes out there is the technique. I use a method where you freeze the butter and grate it into the flour mixture, which creates those flaky, tender layers without any fuss. Plus, the brown butter glaze isn’t just a drizzle—it’s a thick, glossy coating that soaks into the warm scone and creates this caramelized top that’s absolutely addictive. This isn’t just another pumpkin scone recipe; it’s the one I’ve tested six times to get just right.
What Ingredients You Will Need
This recipe uses simple, wholesome ingredients to deliver that bold maple-pumpkin flavor and tender texture without any complicated steps. Most of these are pantry staples, especially if you’re a fall baking enthusiast like me.
For the Scones
- All-purpose flour, 2 ½ cups (315g) — Spoon and level for accuracy. Too much flour makes dense scones.
- Granulated sugar, ⅓ cup (65g) — Adds just enough sweetness without overpowering the maple.
- Baking powder, 1 tablespoon — Make sure it’s fresh for the best rise.
- Pumpkin pie spice, 2 teaspoons — You can use a store-bought blend or mix your own with cinnamon, nutmeg, ginger, and cloves.
- Ground cinnamon, 1 teaspoon — I use Saigon cinnamon for its stronger, warmer flavor.
- Salt, ½ teaspoon — Balances the sweetness and enhances the spices.
- Unsalted butter, ½ cup (113g), frozen — This is the key to flaky scones. Freeze it for at least 30 minutes before grating.
- Pumpkin puree, ¾ cup (170g) — Not pumpkin pie filling! Look for 100% pure pumpkin puree. Libby’s is my go-to brand.
- Pure maple syrup, ¼ cup (60ml) — Use the real stuff, not pancake syrup. Grade A dark amber gives the best flavor.
- Heavy cream, ¼ cup (60ml) — Adds richness and tenderness. You can substitute half-and-half in a pinch.
- Vanilla extract, 1 teaspoon — Pure vanilla, not imitation.
For the Brown Butter Glaze
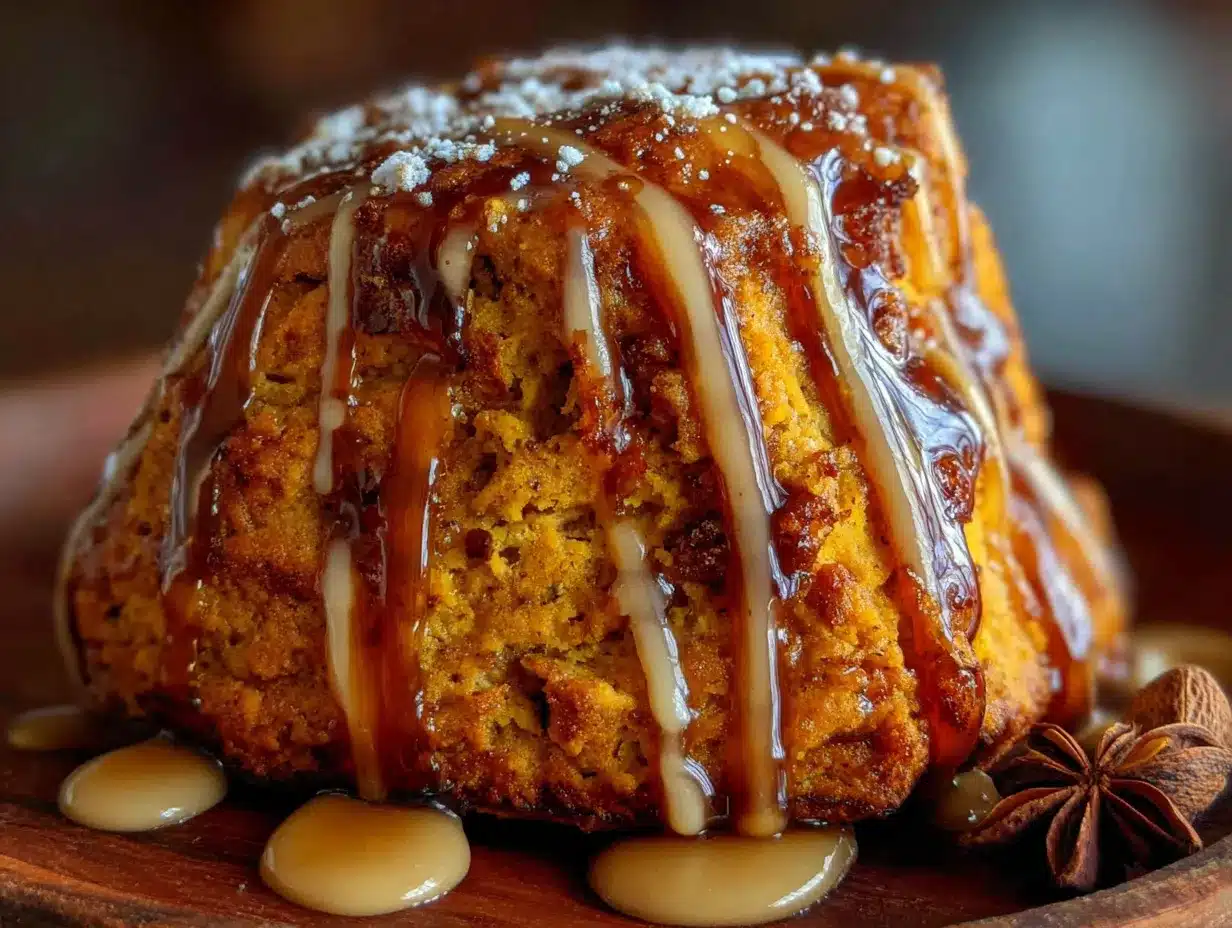
- Unsalted butter, ¼ cup (57g) — You’ll brown this on the stovetop until it smells nutty and turns amber.
- Powdered sugar, 1 ½ cups (180g) — Sifted to avoid lumps.
- Pure maple syrup, 2 tablespoons — For that double maple punch.
- Heavy cream, 2-3 tablespoons — Adjust for desired consistency.
- Vanilla extract, ½ teaspoon — Enhances the brown butter flavor beautifully.
Equipment Needed
You don’t need a fancy bakery setup for these scones. Here’s what you’ll need and a few tips I’ve learned along the way.
- Large mixing bowl — Any bowl works, but a wide one makes mixing easier.
- Pastry cutter or box grater — I prefer a box grater for the frozen butter. It creates tiny, even pieces that distribute perfectly. If you don’t have one, a pastry cutter works too.
- Baking sheet — Line it with parchment paper for easy cleanup. I use Nordic Ware sheets because they don’t warp in the oven.
- Parchment paper — Non-negotiable for preventing sticking and making cleanup a breeze.
- Bench scraper — Helpful for cutting the dough into triangles without mangling them. A sharp knife works too.
- Small saucepan — For browning the butter. A light-colored pan helps you see the color change.
- Whisk — For the glaze. A fork works in a pinch.
- Cooling rack — Allows air to circulate so the glaze sets properly.
If you don’t have a box grater, just cut the frozen butter into tiny cubes with a knife. It takes a few extra minutes but works just as well. I’ve also used a food processor to pulse the butter into the flour, but be careful not to overdo it—you want pea-sized pieces, not powder.
Preparation Method
Let’s get baking. I’ve broken this down into simple steps with all the little details I wish someone had told me the first time I made scones.
- Preheat your oven to 400°F (200°C). Place a rack in the middle position. Line a baking sheet with parchment paper and set it aside.
- Grate your frozen butter. Take your ½ cup of frozen unsalted butter and grate it on the large holes of a box grater. Work quickly so the butter doesn’t soften. Place the grated butter back in the freezer while you mix the dry ingredients. This keeps the butter cold, which is the secret to flaky layers.
- Whisk the dry ingredients. In a large bowl, combine 2 ½ cups all-purpose flour, ⅓ cup granulated sugar, 1 tablespoon baking powder, 2 teaspoons pumpkin pie spice, 1 teaspoon ground cinnamon, and ½ teaspoon salt. Whisk until everything is evenly distributed.
- Add the grated butter. Take the grated butter from the freezer and add it to the flour mixture. Use your fingers or a fork to toss the butter pieces with the flour until each piece is coated. You’re looking for a mixture that resembles coarse meal with some pea-sized butter pieces still visible. Don’t overwork it—you want those butter chunks to create steam pockets in the oven.
- Mix the wet ingredients. In a separate small bowl, whisk together ¾ cup pumpkin puree, ¼ cup pure maple syrup, ¼ cup heavy cream, and 1 teaspoon vanilla extract. Make sure they’re well combined. The mixture will look a little thick and glossy.
- Combine wet and dry. Pour the wet ingredients into the flour-butter mixture. Use a rubber spatula or your hands to gently mix until just combined. The dough will look shaggy and a little dry in spots—that’s exactly what you want. Overmixing leads to tough scones. If there are a few floury patches, that’s okay.
- Shape the dough. Turn the dough out onto a lightly floured surface. Gently bring it together with your hands, patting it into a rectangle about ¾-inch thick. Don’t knead it—just press it together. Use a bench scraper to fold the dough over itself once, then pat it back into a rectangle. This creates even more layers.
- Cut the scones. Using a sharp knife or bench scraper, cut the rectangle into 8 triangles. You can also use a 2.5-inch round biscuit cutter if you prefer round scones. Place the scones on the prepared baking sheet, spacing them about 2 inches apart. They don’t spread much, so you can fit all 8 on one sheet.
- Chill briefly (optional but recommended). Pop the baking sheet in the fridge for 10-15 minutes while the oven finishes preheating. This firms up the butter again and helps the scones hold their shape. I skip this step when I’m in a hurry, but the scones rise higher when I don’t.
- Bake. Bake for 14-18 minutes, rotating the pan halfway through. The scones are done when they’re golden brown on the bottom and the edges look set. The tops should be lightly golden, not dark. Let them cool on the baking sheet for 5 minutes, then transfer to a cooling rack.
- Make the brown butter glaze. While the scones are cooling, place ¼ cup unsalted butter in a small saucepan over medium heat. Melt the butter, then continue cooking, swirling the pan occasionally. The butter will foam, then the foam will subside, and you’ll see brown specks forming at the bottom. When the butter smells nutty and turns a deep amber color (about 4-5 minutes), remove it from the heat immediately. Pour it into a heatproof bowl to stop the cooking.
- Finish the glaze. Add 1 ½ cups sifted powdered sugar, 2 tablespoons maple syrup, ½ teaspoon vanilla extract, and 2 tablespoons heavy cream to the browned butter. Whisk until smooth. If the glaze is too thick, add another tablespoon of cream. If it’s too thin, add a little more powdered sugar. You want it thick enough to coat the back of a spoon but still pourable.
- Glaze the scones. While the scones are still warm (but not hot), drizzle the brown butter glaze over the top. Use a spoon or a small offset spatula to spread it evenly. The warmth helps the glaze soak into the scones slightly, creating that magical caramelized top. Let the glaze set for 5-10 minutes before serving.
Cooking Tips & Techniques
I’ve made these scones at least a dozen times, and I’ve learned a few things the hard way. Here are my best tips to make sure yours turn out perfect every time.
Keep everything cold. This is the number one rule of scone-making. Cold butter creates steam pockets as it melts in the oven, which gives you those flaky layers. If your kitchen is warm, pop the shaped scones in the fridge for 15 minutes before baking. I once left my butter out too long and ended up with flat, greasy scones—never again.
Don’t overmix the dough. I know it’s tempting to keep working the dough until it looks smooth and uniform, but resist that urge. Overmixing develops the gluten and makes scones tough and bread-like. Stop mixing as soon as the dough comes together, even if it looks a little shaggy. Trust the process.
Use a light-colored pan for browning butter. Dark pans make it hard to see the color change, and you’ll end up with burnt butter. I use a stainless steel saucepan, and I watch it like a hawk. The moment it turns amber and smells nutty, I pull it off the heat. Burnt brown butter tastes bitter and sad.
Test your baking powder. If your baking powder is old, your scones won’t rise properly. To test it, drop a teaspoon of baking powder into a small bowl of hot water. If it fizzes vigorously, it’s good. If it barely bubbles, toss it and buy fresh.
Glaze while warm, not hot. If the scones are too hot, the glaze will melt into a puddle and run off. If they’re completely cool, the glaze will sit on top and not soak in at all. The sweet spot is about 5-10 minutes after they come out of the oven—warm enough to absorb the glaze, but cool enough that it stays put.
Variations & Adaptations
One of the best things about this recipe is how flexible it is. Here are a few ways I’ve adapted it over the years.
Gluten-Free Version: Substitute the all-purpose flour with a 1:1 gluten-free baking flour blend. I use King Arthur Measure for Measure, and it works beautifully. Add an extra tablespoon of cream because gluten-free flours tend to absorb more liquid. The texture is slightly more tender, but still delicious.
Vegan Adaptation: Use cold vegan butter (I like Miyoko’s) in place of regular butter. Replace the heavy cream with full-fat coconut cream or oat milk. For the glaze, use vegan butter and a plant-based milk. The scones won’t be quite as flaky, but the flavor is still amazing.
Add-Ins: Fold in ½ cup of chopped pecans or walnuts for crunch. Dried cranberries or chopped crystallized ginger add a nice pop of sweetness. I once added ½ cup of white chocolate chips, and honestly, it was incredible—like a pumpkin white chocolate dream.
Spice It Up: If you like things warm and spicy, add ¼ teaspoon of ground cardamom or a pinch of cayenne pepper to the flour mixture. The cayenne doesn’t make them spicy—it just enhances the warmth of the other spices.
Maple Cream Cheese Glaze: For an extra decadent version, beat 2 ounces of softened cream cheese with 2 tablespoons of softened butter, then add the powdered sugar, maple syrup, and cream. It’s thicker and tangier, and it pairs beautifully with the pumpkin.
Serving & Storage Suggestions
These scones are best served warm, right after the glaze has set. The contrast between the crisp edges and the tender, almost creamy interior is at its peak within the first hour. I like to serve them with a hot cup of spiced chai or a strong black coffee—the bitterness balances the sweetness perfectly.
If you’re serving them for a brunch spread, arrange them on a wooden board with a bowl of extra maple syrup for drizzling and a pat of salted butter on the side. They also pair beautifully with a simple arugula salad dressed with lemon vinaigrette for a sweet-savory combo that surprises everyone.
Storage: Store leftover scones in an airtight container at room temperature for up to 2 days. After that, the glaze starts to soften and the scones lose their texture. If you live in a humid climate (like I do), the glaze can get sticky—just pop them in a 300°F oven for 5 minutes to crisp them back up.
Freezing: You can freeze the unbaked scones! Place the cut scones on a baking sheet and freeze until solid, then transfer to a freezer bag. Bake from frozen, adding 2-3 minutes to the baking time. You can also freeze baked, unglazed scones for up to 3 months. Thaw at room temperature, then reheat and glaze fresh.
Reheating: The microwave works in a pinch, but it makes the scones soft and a little gummy. For the best results, reheat in a 350°F oven for 5-7 minutes. The edges get crispy again, and the glaze gets that lovely crackly texture.
One thing I’ve noticed: the maple flavor actually deepens overnight. If you can resist eating them all on day one, the scones on day two have a more pronounced maple taste. Not that they usually last that long in my house.
Nutritional Information & Benefits
Here’s the honest nutritional breakdown for one scone with glaze. These numbers are estimates and will vary based on your specific ingredients.
| Nutrient | Amount per Scone |
|---|---|
| Calories | 385 |
| Total Fat | 18g |
| Saturated Fat | 11g |
| Cholesterol | 50mg |
| Sodium | 320mg |
| Total Carbohydrates | 52g |
| Dietary Fiber | 2g |
| Sugars | 28g |
| Protein | 5g |
On the health front, pumpkin is a nutritional powerhouse. It’s packed with vitamin A (one serving gives you over 100% of your daily needs), which supports eye health and immune function. The fiber from the pumpkin and flour helps with digestion and keeps you feeling full. Maple syrup contains antioxidants and minerals like zinc and manganese, though it’s still sugar, so moderation is key.
These scones are not gluten-free, low-carb, or sugar-free, but they are made with real ingredients and no artificial flavors or preservatives. If you’re watching your sugar intake, you can reduce the glaze amount or skip it entirely—the scones are still delicious on their own. For a lower-calorie option, use a simple dusting of powdered sugar instead of the glaze.
Frequently Asked Questions
Can I use pumpkin pie filling instead of pumpkin puree?
No, please don’t. Pumpkin pie filling is already sweetened and spiced, which will throw off the balance of this recipe. Stick with 100% pure pumpkin puree. If you only have pumpkin pie filling, reduce the sugar and spices in the recipe, but I can’t guarantee the results will be the same.
Why did my scones turn out dry and crumbly?
This usually happens for one of two reasons: too much flour or overbaking. Make sure you’re spooning and leveling your flour instead of scooping directly from the bag. And check your scones at the 14-minute mark—ovens vary, and even one extra minute can make the difference between tender and dry.
Can I make the dough ahead of time?
Absolutely. Shape the scones, place them on a parchment-lined baking sheet, and refrigerate for up to 24 hours. Cover them loosely with plastic wrap. You can bake them straight from the fridge—just add a minute or two to the baking time. This is actually my preferred method because the butter stays extra cold.
My glaze turned out too thin. How do I fix it?
Don’t panic. Just whisk in a little more powdered sugar, one tablespoon at a time, until it reaches the consistency you want. If it’s too thick, add a splash of cream or milk. The glaze should be thick enough to coat the back of a spoon but still pourable. And remember, it will thicken slightly as it cools.
Can I use salted butter instead of unsalted?
You can, but reduce the added salt in the recipe to ¼ teaspoon. Salted butter has varying amounts of salt depending on the brand, so it’s harder to control the final flavor. I prefer unsalted for baking because it gives me complete control over the salt level.
Conclusion
These maple pumpkin scones with brown butter glaze are everything I want in a fall recipe—they’re warm, comforting, and packed with flavor that makes you want to curl up with a good book and a hot drink. The combination of tender, spiced pumpkin scone with that nutty, sweet glaze is honestly hard to beat. I’ve made these for Thanksgiving brunch, for lazy Sunday mornings, and for those late-night baking sessions when I just need something cozy to look forward to.
What I love most about this recipe is how forgiving it is. You don’t need to be a pastry chef to pull these off. You just need a box grater, a little patience, and the willingness to stand over a saucepan watching butter turn brown. Trust me, it’s worth every second.
I’d love to hear how yours turn out. Did you add anything fun to the dough? Did you try the cream cheese glaze? Drop a comment below and let me know—I read every single one, and your tweaks and variations inspire me to keep experimenting. Happy baking, friends. May your kitchen smell like maple and pumpkin for days to come.
Pin This Recipe!
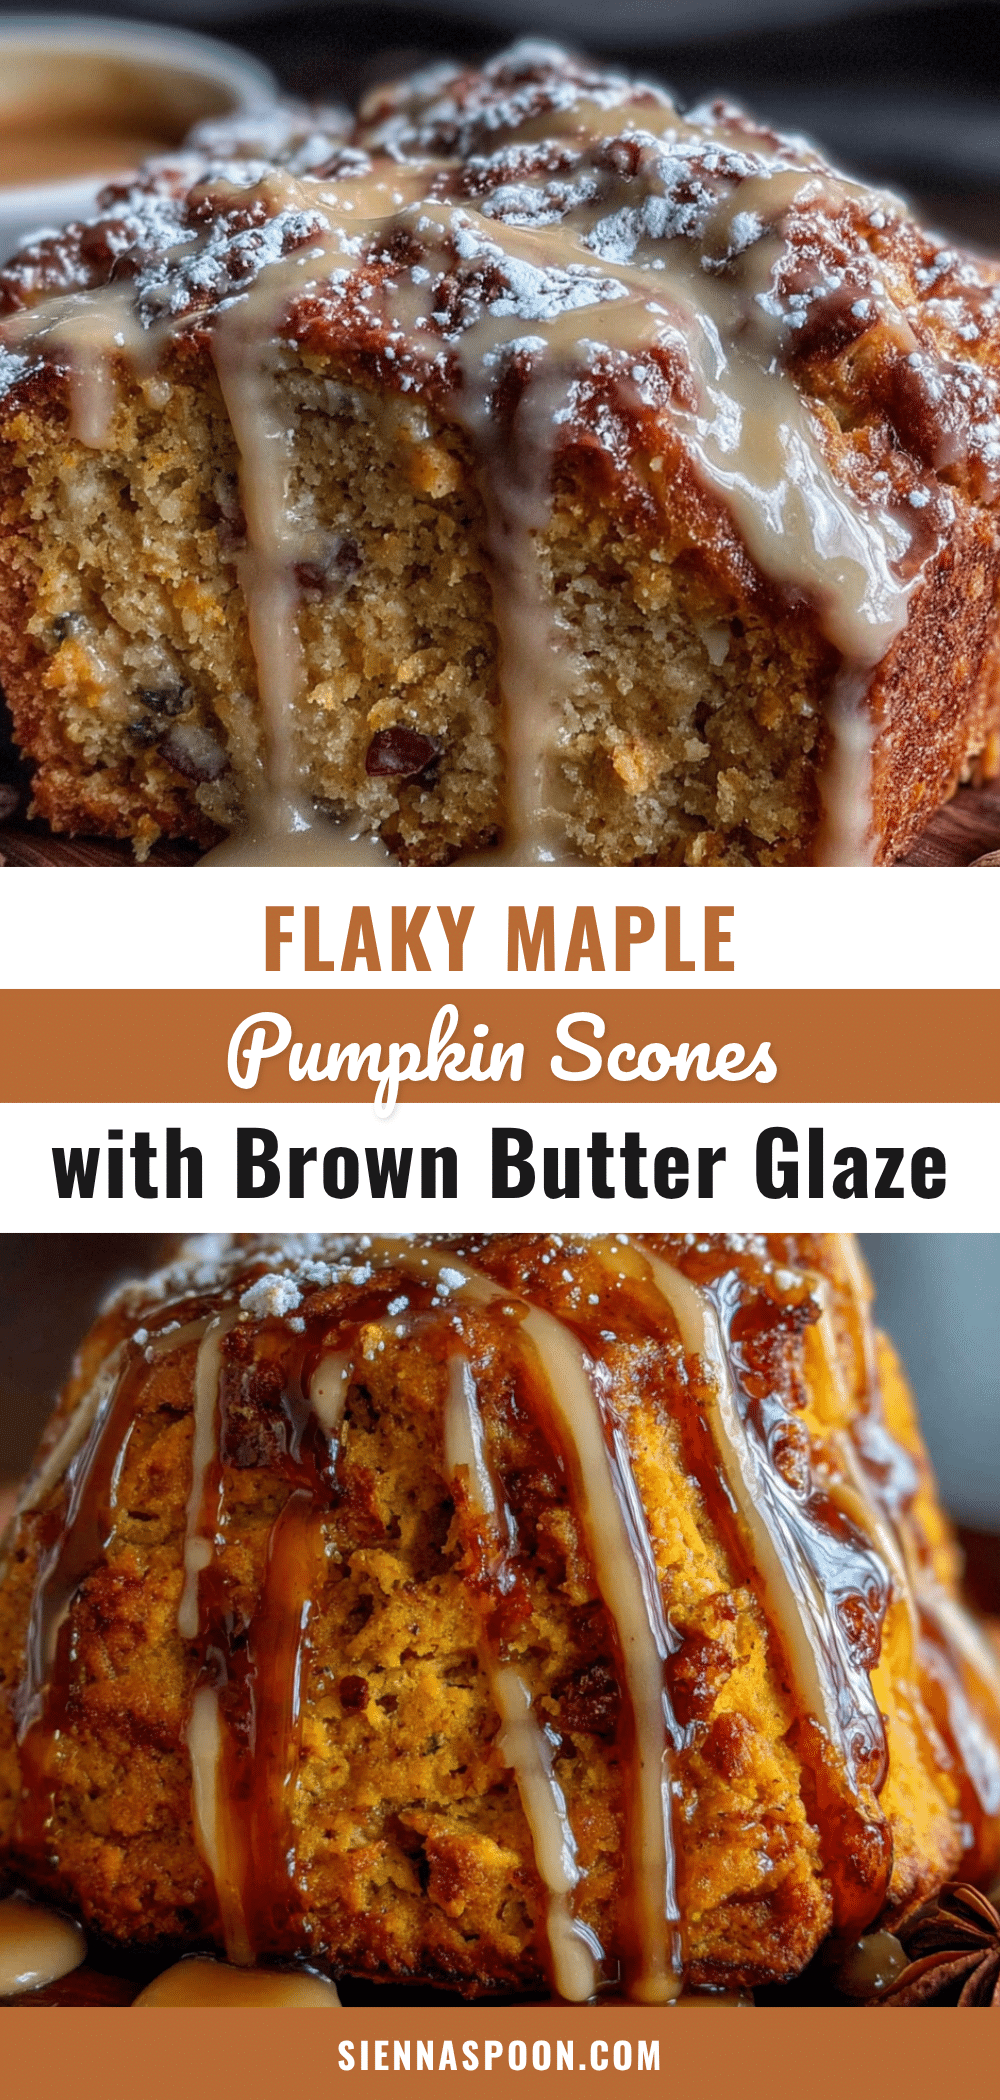
Best Easy Maple Pumpkin Scones with Brown Butter Glaze
Tender, flaky maple pumpkin scones topped with a nutty brown butter glaze. This easy recipe uses frozen butter for perfect layers and comes together in under 35 minutes for a cozy fall treat.
- Prep Time: 15 minutes
- Cook Time: 18 minutes
- Total Time: 33 minutes
- Yield: 8 servings 1x
- Category: Breakfast
- Cuisine: American
Ingredients
- 2 ½ cups (315g) all-purpose flour
- ⅓ cup (65g) granulated sugar
- 1 tablespoon baking powder
- 2 teaspoons pumpkin pie spice
- 1 teaspoon ground cinnamon
- ½ teaspoon salt
- ½ cup (113g) unsalted butter, frozen
- ¾ cup (170g) pumpkin puree (100% pure, not pie filling)
- ¼ cup (60ml) pure maple syrup
- ¼ cup (60ml) heavy cream
- 1 teaspoon vanilla extract
- ¼ cup (57g) unsalted butter (for glaze)
- 1 ½ cups (180g) powdered sugar, sifted
- 2 tablespoons pure maple syrup (for glaze)
- 2–3 tablespoons heavy cream (for glaze)
- ½ teaspoon vanilla extract (for glaze)
Instructions
- Preheat oven to 400°F (200°C). Line a baking sheet with parchment paper.
- Grate frozen butter on the large holes of a box grater. Place back in freezer while mixing dry ingredients.
- In a large bowl, whisk together flour, sugar, baking powder, pumpkin pie spice, cinnamon, and salt.
- Add grated butter to flour mixture. Toss with fingers or a fork until butter pieces are coated and mixture resembles coarse meal with some pea-sized pieces.
- In a separate bowl, whisk together pumpkin puree, maple syrup, heavy cream, and vanilla extract until well combined.
- Pour wet ingredients into flour-butter mixture. Mix gently with a rubber spatula or hands until just combined. Dough should be shaggy with some dry spots.
- Turn dough onto a lightly floured surface. Gently pat into a ¾-inch thick rectangle. Fold dough over itself once, then pat back into a rectangle.
- Cut rectangle into 8 triangles using a sharp knife or bench scraper. Place on prepared baking sheet, spacing 2 inches apart.
- Optional: Chill baking sheet in fridge for 10-15 minutes to firm up butter.
- Bake for 14-18 minutes, rotating pan halfway through, until golden brown on bottom and edges are set. Cool on baking sheet for 5 minutes, then transfer to a cooling rack.
- While scones cool, make brown butter glaze: Melt ¼ cup butter in a small saucepan over medium heat. Cook, swirling occasionally, until butter foams, then turns amber and smells nutty (about 4-5 minutes). Remove from heat immediately and pour into a heatproof bowl.
- Add sifted powdered sugar, 2 tablespoons maple syrup, ½ teaspoon vanilla, and 2 tablespoons heavy cream to browned butter. Whisk until smooth. Add more cream if too thick, more powdered sugar if too thin.
- Drizzle glaze over warm scones. Let set for 5-10 minutes before serving.
Notes
Keep all ingredients cold for flaky layers. Do not overmix dough. Glaze while scones are warm (not hot) for best absorption. For gluten-free, use 1:1 gluten-free flour blend and add extra tablespoon of cream. For vegan, use cold vegan butter and full-fat coconut cream or oat milk.
Nutrition
- Serving Size: 1 scone with glaze
- Calories: 385
- Sugar: 28
- Sodium: 320
- Fat: 18
- Saturated Fat: 11
- Carbohydrates: 52
- Fiber: 2
- Protein: 5
Keywords: maple pumpkin scones, brown butter glaze, fall scones, pumpkin scones, easy scone recipe, maple scones


