Love this? Save it for later!
Share the inspiration with your friends
I was sorting through a box of old Halloween decorations last October when a crumpled piece of parchment paper fell out from between two plastic skeleton hands. Unfolding it, I found a faded, slightly greasy handwritten note from my college roommate, Jenna, with the words “Black Velvet Spider Web Cookies — the ones everyone begged for!” scrawled across the top in purple ink. I hadn’t thought about those cookies in maybe fifteen years, but the second I saw that looping handwriting, I could practically taste the rich, dark cocoa and the smooth vanilla buttercream. That moment, standing in a pile of fake cobwebs and orange tinsel, I knew I had to bring them back — but bigger, better, and undeniably more dramatic. This Best Black Velvet Spider Web Cookie Cake is the result of that nostalgic kitchen mission, and honestly, it’s the most fun I’ve ever had with a batch of dough.
The original cookies were good — really good, actually — but they were fiddly. Little individual rounds, each one needing its own web piped on top. By the time I’d finished decorating two dozen, my piping hand was cramping and I’d lost all my Halloween enthusiasm. So this time, I thought, why not turn it into a giant cookie cake? One massive, chewy, black velvet base, big enough to share with a whole party, with a stunning spider web design that actually looks impressive without requiring surgical precision. Let me tell you, it was the best decision I’ve made all spooky season.
There’s something magical about black velvet desserts, isn’t there? That deep, dramatic color paired with a tender, moist crumb feels like edible theater. You know that feeling when you bring out a dessert and everyone stops talking to stare? That’s this cookie cake. It’s the centerpiece of any Halloween gathering, the thing people photograph before they eat, and the recipe everyone asks for before the night is over. Honestly, I wasn’t sure I could recreate that college memory, but this version? It’s even better than I remembered.
Why You’ll Love This Recipe
This isn’t just another Halloween dessert — this is the one that will have people asking for the recipe before they’ve even finished their first slice. I’ve tested this cookie cake five times to get the texture absolutely perfect, and let me tell you, it was worth every single trial batch. Here’s why this Best Black Velvet Spider Web Cookie Cake belongs in your Halloween rotation:
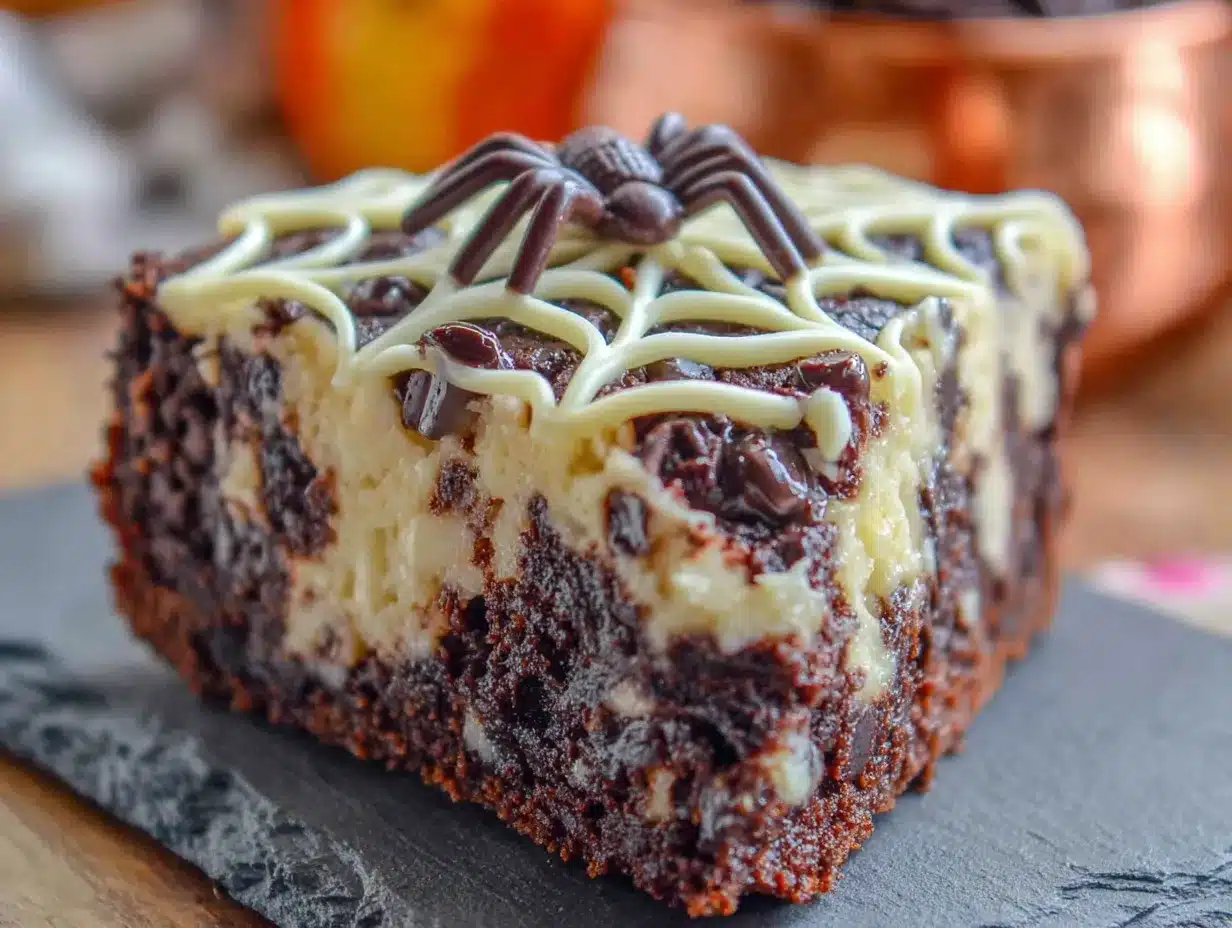
- Stunning Visual Impact: The black velvet base with the white spider web design is pure edible art. It looks like you spent hours in the kitchen, but the decorating technique is surprisingly forgiving.
- Perfectly Chewy Texture: This cookie cake has that ideal balance — crisp edges, soft and chewy center, and a tender crumb that melts in your mouth. No dry, cakey disasters here.
- No Fancy Equipment Needed: You don’t need a stand mixer or a pastry bag. A hand mixer and a zip-top bag with the corner snipped off will get you that gorgeous web design.
- Customizable for Any Crowd: It’s naturally egg-free friendly with a simple swap, and you can adjust the sweetness level to your preference. Plus, it feeds a crowd without any individual cookie fuss.
- Make-Ahead Friendly: The dough can be prepared two days in advance, and the finished cookie cake stays fresh for days. Perfect for busy Halloween week schedules.
What makes this recipe different from the dozens of spider web cookies out there? It’s the texture. I spent an entire afternoon testing different ratios of butter to oil, dark cocoa to regular flour, and sugar types until I found the combination that gives you that signature black velvet softness without making the cookie cake taste like a brownie or a cake. It’s its own thing — a chewy, substantial cookie base that can hold the weight of the frosting without getting soggy. Plus, the black cocoa powder I recommend (I’m partial to the one from King Arthur Flour) gives it that deep, almost Oreo-like flavor that makes black velvet so addictive.
This is the kind of dessert that makes you close your eyes after the first bite. It’s comfort food with a spooky twist — familiar enough to satisfy, dramatic enough to impress. Perfect for Halloween parties, spooky movie nights, or just because you want to eat something that looks like a work of art.
What Ingredients You Will Need
This recipe uses mostly pantry staples with a few special additions that make all the difference. The ingredients work together to create that signature black velvet color and tender texture without any artificial food coloring tricks.
For the Cookie Cake Base
- 1 cup (226g) unsalted butter, softened — I use Land O’Lakes for consistent results. Make sure it’s truly softened to room temperature, not melted, for the best texture.
- 1 ½ cups (300g) granulated sugar — Regular white sugar gives the best structure. Don’t substitute with brown sugar here, as it will alter the color.
- 2 large eggs, room temperature — Cold eggs will seize the butter mixture. Leave them on the counter for 30 minutes before starting.
- 2 teaspoons vanilla extract — Pure vanilla, not imitation, for the richest flavor.
- 2 cups (250g) all-purpose flour — Spoon and level your flour for accurate measuring. Too much flour makes a dry cookie cake.
- ½ cup (50g) black cocoa powder — This is the secret ingredient. Black cocoa powder is what gives black velvet its dramatic color and Oreo-like taste. Regular Dutch-process cocoa will work, but the color won’t be as intense. I recommend the black cocoa from King Arthur Flour or Rodelle.
- 1 teaspoon baking soda — Make sure it’s fresh. Test by dropping a bit in vinegar — it should bubble vigorously.
- ½ teaspoon salt — Fine sea salt works best. It balances the sweetness and enhances the chocolate flavor.
- ½ cup (120ml) buttermilk, room temperature — Buttermilk is key for that tender black velvet crumb. If you don’t have it, make a quick substitute: add 1 tablespoon of lemon juice or white vinegar to ½ cup of regular milk and let it sit for 5 minutes.
For the Spider Web Frosting
- ½ cup (113g) unsalted butter, softened — Again, room temperature is crucial for smooth frosting.
- 2 cups (240g) powdered sugar — Sift it if it’s lumpy. Nobody wants lumpy frosting.
- 2-3 tablespoons heavy cream or milk — Heavy cream gives a richer, more luxurious texture, but regular milk works fine.
- 1 teaspoon vanilla extract — For that classic buttercream flavor.
- Pinch of salt — To balance the sweetness.
- Black gel food coloring (optional) — If you want to tint the frosting for a more dramatic web, use gel coloring, not liquid, as it won’t thin the frosting.
Ingredient Selection Tips
For the most dramatic black velvet color, black cocoa powder is non-negotiable. Regular cocoa powder will give you a dark brown cookie cake, which is still delicious but won’t have that striking visual impact. I’ve tested this with Hershey’s Special Dark cocoa, and while it tastes great, the color is more “dark chocolate” than “black velvet.” If you can’t find black cocoa, you can add a teaspoon of activated charcoal powder (food grade!) to regular cocoa, but go easy — too much can taste bitter.
Equipment Needed
- 10-inch round pizza pan or tart pan — A pizza pan with a slight lip works perfectly. I use a non-stick one from Chicago Metallic. If you only have a 9-inch pan, the cookie cake will be thicker and need a few extra minutes of baking time.
- Electric hand mixer or stand mixer — A hand mixer is totally fine here. I actually prefer it because there’s less to clean.
- Mixing bowls — At least two: one for dry ingredients, one for wet.
- Parchment paper — Essential for easy removal. Cut a circle to fit your pan.
- Spatula — A rubber spatula for scraping down the bowl and spreading the dough.
- Piping bag or zip-top bag — For the spider web design. A quart-sized zip-top bag works beautifully and costs nothing.
- Small round piping tip (optional) — If you want a cleaner line for the web, a Wilton #2 or #3 tip is perfect. But honestly, a snipped corner works just fine.
- Cooling rack — For even cooling and to prevent a soggy bottom.
I’ve made this cookie cake with both a fancy stand mixer and a $20 hand mixer, and honestly, the results were identical. Don’t let equipment hold you back. If you don’t have a pizza pan, a 10-inch cast iron skillet works beautifully — just reduce the baking time by a few minutes since cast iron holds heat differently.
Preparation Method
- Preheat your oven to 350°F (175°C). Position the rack in the center of the oven. While it’s heating, cut a circle of parchment paper to fit your 10-inch pan and lightly grease the pan with butter or non-stick spray.
- Whisk the dry ingredients together. In a medium bowl, combine the 2 cups of all-purpose flour, ½ cup of black cocoa powder, 1 teaspoon of baking soda, and ½ teaspoon of salt. Whisk thoroughly to break up any lumps in the cocoa powder. Set this aside.
- Cream the butter and sugar. In a large mixing bowl, beat the 1 cup of softened unsalted butter with the 1 ½ cups of granulated sugar. Beat on medium speed for 3-4 minutes, until the mixture is light, fluffy, and pale in color. You should see it visibly lighten. This step is important for the texture — don’t rush it.
- Add the eggs and vanilla. Add the 2 room-temperature eggs one at a time, beating well after each addition. Then add the 2 teaspoons of vanilla extract and beat until combined. The mixture might look slightly curdled at this point — that’s okay, especially if your eggs were a bit cold.
- Alternate adding dry ingredients and buttermilk. With the mixer on low speed, add about one-third of the flour mixture. Mix until just combined, then add half of the buttermilk. Repeat with another third of flour, the remaining buttermilk, and finish with the last of the flour. Mix only until you can’t see any more streaks of flour. Overmixing will make the cookie cake tough.
- Spread the dough in the pan. The dough will be thick and slightly sticky — that’s perfect. Transfer it to your prepared pan. Using a spatula (or lightly oiled hands), spread the dough evenly to the edges. Try to make it as even as possible so it bakes uniformly. The dough will be about ½ inch thick.
- Bake the cookie cake. Bake for 18-22 minutes, or until the edges look set and the center is just slightly puffed. A toothpick inserted into the center should come out with a few moist crumbs, not wet batter. The cookie cake will continue to set as it cools. I start checking at 18 minutes — my oven runs hot, so yours might need the full 22 minutes.
- Cool completely. Let the cookie cake cool in the pan on a wire rack for 10 minutes, then carefully lift it out using the parchment paper and transfer to the rack to cool completely. This is crucial — if you try to frost it while it’s still warm, the frosting will melt into a sad puddle. Wait at least 1 hour.
- Make the frosting. While the cookie cake cools, make the spider web frosting. In a medium bowl, beat the ½ cup of softened butter until smooth and creamy. Gradually add the 2 cups of powdered sugar, beating on low speed to avoid a sugar cloud. Add the vanilla and a pinch of salt, then add the heavy cream one tablespoon at a time until the frosting reaches a smooth, pipeable consistency. It should be thick enough to hold its shape but soft enough to pipe easily.
- Frost the cookie cake. Once the cookie cake is completely cool, spread a thin, even layer of frosting over the entire surface. This is your base layer — it doesn’t need to be perfect, just smooth enough to pipe the web on top.
- Pipe the spider web. Spoon about ¼ cup of the remaining frosting into a piping bag or a zip-top bag. If using a zip-top bag, snip off a tiny corner — start small, you can always cut more. Pipe a spiral starting from the center and working outward, leaving about ½ inch between each ring. Then, using a toothpick or a skewer, gently drag lines from the center outward through the spiral, creating the web effect. Start at the center and pull outward, wiping the toothpick clean between each line. You’ll see the magic happen instantly!
- Add the spider (optional but fun). For a finishing touch, pipe a small spider shape on top using the remaining frosting. Or place a gummy spider on the web for extra Halloween flair.
Cooking Tips & Techniques
Let me save you from the mistakes I made during my five test batches. First and foremost: do not overbake this cookie cake. I know it’s tempting to leave it in until the center looks completely set, but that extra two minutes is the difference between a perfectly chewy cookie cake and a dry, crumbly one. The edges should be just barely golden (they won’t look very golden because of the black cocoa, so look for a slight cracking at the edges), and the center should still look slightly soft. It will continue baking from residual heat as it cools.
Here’s something I learned the hard way: black cocoa powder is more absorbent than regular cocoa powder. If your dough seems too dry, don’t panic. Add an extra tablespoon of buttermilk and mix gently. Conversely, if the dough seems too sticky to spread, dust your hands with a little powdered sugar before pressing it into the pan. I’ve done this every time since batch two, and it makes the spreading process infinitely less frustrating.
For the spider web design, practice on a piece of parchment paper first. I know it sounds silly, but getting a feel for the pressure and speed of piping takes a minute. The first web I piped looked more like a tangled fishing net than a spider web. But here’s the beautiful thing about this design: even a messy spider web looks intentional. Spiders aren’t perfect, and neither should your web be. Embrace the imperfection — it adds character.
One more thing: if you’re making this for a party, the cookie cake actually tastes better the next day. The flavors meld together overnight, and the texture becomes even more tender. I’ve started making mine the day before and storing it uncovered at room temperature (the frosting needs air to set properly). It’s one less thing to stress about on party day.
Variations & Adaptations
This Best Black Velvet Spider Web Cookie Cake is wonderfully adaptable. Here are some variations I’ve tried and loved:
Gluten-Free Version
Swap the all-purpose flour with a 1:1 gluten-free baking flour blend. I’ve tested this with Bob’s Red Mill 1-to-1 Baking Flour, and it worked beautifully. Add an extra tablespoon of buttermilk since gluten-free flours tend to absorb more moisture. The texture will be slightly more tender, but the flavor is spot-on.
Dairy-Free Adaptation
Use vegan butter (I like Miyoko’s) and replace the buttermilk with ½ cup of unsweetened almond milk mixed with 1 tablespoon of lemon juice. For the frosting, use vegan butter and full-fat coconut cream instead of heavy cream. The coconut flavor is subtle and actually complements the black cocoa beautifully.
Spooky Color Variations
Want to switch up the color scheme? Use white cocoa powder (yes, it exists!) for the base and pipe the web with black frosting for a reverse spider web effect. Or add a drop of purple gel food coloring to the frosting for a witchy vibe. I made a purple web version for a friend’s Halloween party, and it was a huge hit.
Mini Cookie Cake Version
Divide the dough into two 6-inch pans and bake for 14-16 minutes. These are perfect for smaller gatherings or for gifting. Just adjust the frosting quantity accordingly — you’ll need about half the recipe for each mini cake.
Extra Chocolatey Twist
Fold ½ cup of dark chocolate chips into the dough before spreading it in the pan. The pockets of melted chocolate add another layer of richness. I did this for batch four, and it was dangerously good.
Serving & Storage Suggestions
This cookie cake is best served at room temperature. The texture is at its peak — chewy, tender, and perfectly soft. If you’ve refrigerated it, let it sit on the counter for at least 30 minutes before serving. I like to serve it on a black cake stand for maximum dramatic effect, with a few fake spiders scattered around for decoration.
For storage, keep the cookie cake in an airtight container at room temperature for up to 3 days. Do not refrigerate it — the cold will dry out the cookie cake and make the frosting hard. If you need to store it longer, you can freeze the unfrosted cookie cake for up to 2 months. Wrap it tightly in plastic wrap, then foil. When you’re ready to serve, thaw it at room temperature, then make the frosting and decorate.
This cookie cake pairs beautifully with a cold glass of milk, a scoop of vanilla ice cream, or a warm cup of spiced apple cider. For an adult twist, serve it alongside a dark stout or a creamy Irish coffee. The bitterness of the black cocoa plays wonderfully with the richness of the beer or coffee.
One thing I’ve noticed: the spider web design will soften slightly after a day, but it still looks gorgeous. If you’re serving it the next day, you can refresh the web by piping a few extra lines on top. It takes two minutes and makes it look freshly decorated.
Nutritional Information & Benefits
Here’s the estimated nutritional breakdown per serving (based on 12 servings):
| Nutrient | Amount per Serving |
|---|---|
| Calories | 385 |
| Total Fat | 20g |
| Saturated Fat | 12g |
| Cholesterol | 75mg |
| Sodium | 210mg |
| Total Carbohydrates | 50g |
| Dietary Fiber | 2g |
| Sugars | 35g |
| Protein | 4g |
While this is definitely a treat, black cocoa powder actually contains antioxidants called flavonoids, which are beneficial for heart health. Plus, the buttermilk adds a dose of calcium and probiotics. I’m not saying this is health food, but it’s nice to know there are a few redeeming qualities hidden in that decadent slice!
This recipe contains gluten, dairy, and eggs. For allergen-friendly adaptations, see the Variations section above.
Frequently Asked Questions
Can I make this cookie cake ahead of time?
Absolutely! You can prepare the dough up to 2 days in advance and store it tightly wrapped in the refrigerator. Let it sit at room temperature for 15 minutes before spreading it in the pan. Alternatively, bake the cookie cake a day ahead, cool it completely, and store it unfrosted at room temperature. Frost and decorate the day you plan to serve it.
Why is my black cocoa powder not making the dough black?
Black cocoa powder varies in intensity between brands. If your dough looks more dark brown than black, you can add a tiny bit of black gel food coloring (about ½ teaspoon) to deepen the color. Avoid liquid food coloring, as it will affect the texture. Also, keep in mind that the color deepens as the cookie cake bakes, so don’t panic if it looks lighter in the bowl.
My spider web design looks messy. What did I do wrong?
Probably nothing! Spider webs are naturally irregular and organic. However, if the lines are bleeding together, your frosting might be too thin. Add a bit more powdered sugar to thicken it. If the lines are breaking, the frosting might be too thick — add a teaspoon of cream. And remember, practice makes perfect. Even a messy web looks charming on a Halloween dessert.
Can I use a different pan size?
Yes! For a 9-inch pan, increase the baking time by 3-5 minutes. For a 12-inch pan, decrease the baking time by 2-3 minutes. If using a 9×13-inch rectangular pan, the cookie cake will be thinner and bake in about 15-17 minutes. Just keep an eye on it and use the toothpick test to check for doneness.
How do I get clean slices without the frosting smearing?
Use a sharp, thin-bladed knife and wipe it clean between each cut. For the cleanest slices, chill the cookie cake in the refrigerator for 15 minutes before slicing. This firms up the frosting just enough to prevent smearing. Let the slices come back to room temperature before serving for the best texture.
Conclusion
This Best Black Velvet Spider Web Cookie Cake is more than just a Halloween dessert — it’s a memory maker, a conversation starter, and honestly, the most satisfying baking project you’ll tackle this spooky season. From that first nostalgic spark in my cluttered decoration box to the perfectly piped web on my fifth test batch, this recipe has become my go-to for every Halloween gathering. The dramatic black velvet base, the creamy vanilla frosting, and that show-stopping spider web design come together to create something that looks like it came from a bakery but tastes like it came from a home kitchen — the best kind of dessert, if you ask me.
I’d love to see your spider web creations! Tag me in your photos when you make this, and don’t be shy about customizing it — add extra sprinkles, swap the frosting flavor, or go wild with different web designs. The best recipes are the ones you make your own. So grab your black cocoa powder, preheat that oven, and let’s make some edible Halloween magic together. Happy baking, and may your webs be ever spooky!
Pin This Recipe!
Best Black Velvet Spider Web Cookie Cake Recipe
A dramatic and delicious black velvet cookie cake topped with a stunning spider web design. This chewy, tender dessert is perfect for Halloween parties and is sure to impress with its edible art presentation.
- Prep Time: 20 minutes
- Cook Time: 20 minutes
- Total Time: 1 hour 40 minutes (including cooling)
- Yield: 12 servings 1x
- Category: Dessert
- Cuisine: American
Ingredients
- 1 cup (226g) unsalted butter, softened
- 1 ½ cups (300g) granulated sugar
- 2 large eggs, room temperature
- 2 teaspoons vanilla extract
- 2 cups (250g) all-purpose flour
- ½ cup (50g) black cocoa powder
- 1 teaspoon baking soda
- ½ teaspoon salt
- ½ cup (120ml) buttermilk, room temperature
- ½ cup (113g) unsalted butter, softened (for frosting)
- 2 cups (240g) powdered sugar
- 2–3 tablespoons heavy cream or milk
- 1 teaspoon vanilla extract (for frosting)
- Pinch of salt (for frosting)
- Black gel food coloring (optional)
Instructions
- Preheat your oven to 350°F (175°C). Cut a circle of parchment paper to fit a 10-inch pan and lightly grease the pan.
- In a medium bowl, whisk together 2 cups all-purpose flour, ½ cup black cocoa powder, 1 teaspoon baking soda, and ½ teaspoon salt.
- In a large mixing bowl, beat 1 cup softened unsalted butter with 1 ½ cups granulated sugar on medium speed for 3-4 minutes until light and fluffy.
- Add 2 room-temperature eggs one at a time, beating well after each addition. Add 2 teaspoons vanilla extract and beat until combined.
- With the mixer on low speed, alternately add the flour mixture and ½ cup buttermilk, starting and ending with the flour. Mix until just combined.
- Spread the thick dough evenly into the prepared pan, about ½ inch thick.
- Bake for 18-22 minutes, until edges are set and center is slightly puffed. A toothpick should come out with moist crumbs.
- Cool in the pan on a wire rack for 10 minutes, then transfer to the rack to cool completely (at least 1 hour).
- For the frosting, beat ½ cup softened butter until smooth. Gradually add 2 cups powdered sugar, then add 1 teaspoon vanilla, a pinch of salt, and 2-3 tablespoons heavy cream until pipeable.
- Spread a thin layer of frosting over the cooled cookie cake.
- Spoon ¼ cup frosting into a piping bag or zip-top bag with a snipped corner. Pipe a spiral from center outward, leaving ½ inch between rings.
- Use a toothpick to drag lines from the center outward through the spiral to create the web effect. Optionally, pipe a small spider on top.
Notes
Do not overbake; the center should look slightly soft. Black cocoa powder is key for the dramatic color. The cookie cake tastes even better the next day. For a dairy-free version, use vegan butter and almond milk with lemon juice. For gluten-free, use a 1:1 gluten-free flour blend.
Nutrition
- Serving Size: 1 slice (1/12 of cak
- Calories: 385
- Sugar: 35
- Sodium: 210
- Fat: 20
- Saturated Fat: 12
- Carbohydrates: 50
- Fiber: 2
- Protein: 4
Keywords: Halloween, spider web, cookie cake, black velvet, chocolate, buttercream, spooky, party dessert


