Love this? Save it for later!
Share the inspiration with your friends
The PTA Halloween bake sale was in six hours and I’d completely forgotten. Everyone else would be bringing those picture-perfect creations—the ones that look like they took three days and a pastry degree. I had a box of black food coloring, some cocoa powder I’d bought on a whim, and a vague memory of a red velvet recipe I’d messed up spectacularly last Christmas. Let me tell you, the panic was real. I mean, I actually stood in my kitchen staring at the ceiling for a full minute, hoping an idea would just fall out of the air.
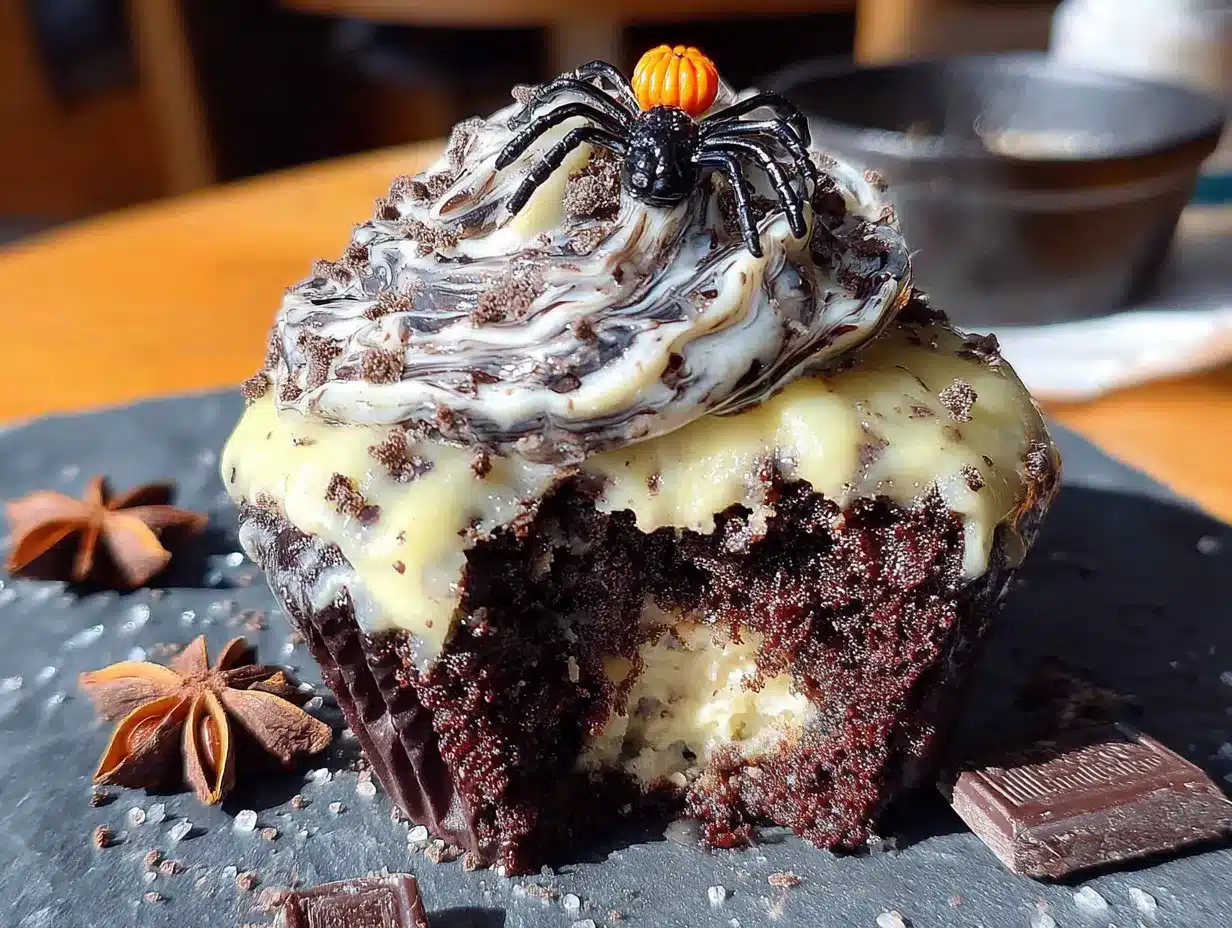
And then it hit me—what if I took that failed red velvet concept and went full Halloween with it? Black velvet. It sounded dramatic, maybe a little goth, and honestly, I had no time to overthink it. I threw together the batter, praying the color would actually turn black and not some sad, muddy gray. The kitchen looked like a crime scene by the time I was done. I had black food coloring on my hands, the counter, and somehow, my forehead. But the cupcakes came out of the oven looking… perfect. Deep, dark, almost velvety black. I topped them with a cream cheese frosting (because everyone knows that’s the only frosting for velvet cakes) and threw on some orange sprinkles I found in the back of the pantry.
You know that feeling when you bring something to a party and you’re secretly bracing for it to be ignored? Yeah, that was me. But these black velvet Halloween cupcakes? They were gone in twenty minutes. People kept asking for the recipe, and I had to pretend I’d planned it all along. I didn’t tell them I’d made it up in a panic that morning. Some secrets are worth keeping.
Why You’ll Love This Recipe
These aren’t just another Halloween treat. They’re the ones that steal the show without you having to break a sweat. I’ve tested this recipe at three different parties now, and it’s never let me down. Here’s why you’ll fall for these black velvet cupcakes:
- Quick & Easy: From start to finish, you’re looking at about 40 minutes. That’s mixing, baking, and frosting. Perfect for when you realize the school party is tomorrow and you have nothing.
- Simple Ingredients: No weird specialty items. You probably have most of this in your pantry right now. The only “special” thing is black food coloring, and you can grab that at any grocery store.
- Perfect for Halloween Gatherings: Whether it’s a potluck, a costume party, or just a spooky movie night with friends, these cupcakes fit right in. They’re dramatic enough to impress but casual enough to not feel fussy.
- Crowd-Pleaser: Kids love the color, adults love the flavor. It’s a win-win. I’ve seen people who swear they don’t like cake go back for seconds.
- Unbelievably Delicious: The texture is what gets you. It’s not a dry, crumbly cupcake. It’s soft, moist, and that cream cheese frosting on top? Pure magic.
What makes this recipe different from every other black cupcake out there is the balance. Most black velvet recipes either taste like straight food coloring or they’re so dense they could double as doorstops. This one uses a trick I learned from my grandmother’s red velvet recipe—a touch of vinegar and buttermilk that makes the crumb impossibly tender. The cocoa powder adds just enough depth without making it taste like a chocolate cupcake. It’s subtle, sophisticated, and honestly, it’s the kind of cupcake that makes you close your eyes after the first bite.
Hosting a party? These cupcakes are your secret weapon. They look like you spent hours, but they’re actually one of the easiest things you’ll bake. Your guests will think you’re a kitchen wizard, and you can just smile and nod.
What Ingredients You Will Need
This recipe uses simple, everyday ingredients to create something that looks anything but ordinary. The magic is in how they work together—the acidity of the buttermilk and vinegar reacts with the baking soda to give you that signature velvet texture, while the black food coloring does all the heavy lifting visually.
For the Cupcakes
- All-purpose flour – 1 ½ cups (180g). I use Gold Medal or King Arthur for consistent results. Don’t scoop directly from the bag; spoon it into your measuring cup and level it off.
- Granulated sugar – 1 cup (200g). Regular white sugar works best here. I’ve tried coconut sugar, and it makes the color a weird brownish-black.
- Unsweetened cocoa powder – 1 tablespoon (5g). Just a touch. You’re not going for chocolate flavor here—it’s more about depth. I recommend Hershey’s or Droste.
- Baking soda – 1 teaspoon (5g). Make sure it’s fresh. Old baking soda won’t give you the rise you need.
- Salt – ½ teaspoon (3g). Fine sea salt or table salt, not kosher.
- Vegetable oil – ½ cup (120ml). Canola or any neutral oil works. Don’t use olive oil—the flavor will clash.
- Buttermilk – ½ cup (120ml), room temperature. This is non-negotiable for the texture. If you don’t have buttermilk, you can make a quick substitute by adding 1 ½ teaspoons of lemon juice or white vinegar to regular milk and letting it sit for 5 minutes.
- Large egg – 1, room temperature. Cold egg will seize up the batter. Leave it on the counter for 30 minutes before starting.
- White vinegar – 1 teaspoon (5ml). Sounds weird, I know. But trust me, it reacts with the baking soda to create those tender crumbs.
- Vanilla extract – 1 teaspoon (5ml). Pure vanilla, not imitation. It makes a difference.
- Black gel food coloring – 2 to 3 tablespoons (30-45ml). Don’t use liquid food coloring from the little grocery store bottles. You’ll need half the bottle and your cupcakes will taste like chemicals. Gel coloring is concentrated and won’t mess with the flavor. I use Americolor Super Black or Wilton Color Right System.
For the Cream Cheese Frosting
- Cream cheese – 8 ounces (226g), softened. Full-fat, block-style cream cheese. Don’t use the spreadable tub kind—it’s too soft and your frosting will be runny.
- Unsalted butter – ½ cup (113g), softened. Let it sit out with the cream cheese so they’re both the same temperature.
- Powdered sugar – 3 to 4 cups (360-480g). Sift it if you want a silky-smooth frosting. I sometimes skip sifting when I’m in a rush, and you can tell the difference.
- Vanilla extract – 1 teaspoon (5ml). Again, pure vanilla.
- Pinch of salt – Just a tiny one. It balances the sweetness.
For Decoration
- Orange sprinkles – For that pop of Halloween color against the black frosting.
- Optional: Candy eyeballs, mini spider rings, or edible glitter for extra flair.
Equipment Needed
You don’t need a professional bakery setup for these. Here’s what you’ll want to have on hand:
- Muffin tin – Standard 12-cup size. I have a non-stick one from Wilton that’s served me well for years.
- Cupcake liners – Go with black or orange ones for the full Halloween effect. White liners will look fine too, but the dark ones make the presentation pop.
- Mixing bowls – One medium, one large. Glass or stainless steel works best.
- Electric hand mixer or stand mixer – You can whisk the batter by hand, but the frosting really needs some mechanical help. A hand mixer is perfectly fine.
- Rubber spatula – For scraping down the bowl and folding in the food coloring.
- Measuring cups and spoons – Accurate measurements matter here, especially with the cocoa powder and vinegar.
- Cooling rack – Wire rack is best. If you don’t have one, you can use a clean dish towel on the counter, but the bottoms might get a little soft.
- Piping bag and tip – I use a Wilton 1M tip for that classic swirl look. If you don’t have a piping bag, a zip-top bag with the corner snipped off works in a pinch.
- Toothpick or cake tester – For checking doneness.
Budget-friendly tip: Check your local dollar store for muffin tins and mixing bowls. They’re usually just as good as the expensive ones. I still use a $3 hand mixer I bought five years ago.
Preparation Method
Alright, let’s get into it. This is the part where the magic happens. Take your time, read through each step before starting, and you’ll be fine.
- Preheat your oven to 350°F (175°C). Line your muffin tin with 12 cupcake liners. I like to double up the liners for a sturdier look, but that’s optional.
- Whisk the dry ingredients together. In a medium bowl, combine the flour, sugar, cocoa powder, baking soda, and salt. Whisk until everything is evenly distributed. Make sure there are no lumps of cocoa powder—I’ve missed them before, and you get bitter little pockets in your cupcakes.
- Mix the wet ingredients. In a large bowl, whisk together the vegetable oil, buttermilk, egg, vinegar, and vanilla extract. Whisk until smooth and well combined. The mixture should look pale and slightly thickened.
- Combine wet and dry. Pour the dry ingredients into the wet ingredients. Stir gently with a rubber spatula until just combined. Do not overmix. A few small lumps are okay—overmixing will make your cupcakes tough. This is where I always remind myself: “Lumpy is fine, overworked is not.”
- Add the black food coloring. This is the fun part. Add 2 tablespoons of black gel food coloring to the batter and stir until the color is uniform. If the batter looks more dark gray than black, add the third tablespoon. The color will deepen slightly as the cupcakes bake, so don’t panic if it’s not pitch black in the bowl. I once added too much and the batter turned almost blue—still tasted fine, but it looked weird.
- Fill the liners. Divide the batter evenly among the 12 cupcake liners, filling each about two-thirds full. I use a cookie scoop for this—it’s cleaner and ensures even sizes. You should get exactly 12 cupcakes with no leftover batter.
- Bake. Place the muffin tin in the preheated oven and bake for 18 to 22 minutes. At the 18-minute mark, insert a toothpick into the center of a cupcake. If it comes out clean or with a few moist crumbs, they’re done. If it’s wet batter, give them another 2 minutes and check again. The tops should spring back when lightly touched.
- Cool completely. Let the cupcakes cool in the tin for 5 minutes, then transfer them to a wire rack to cool completely. This is crucial—if you try to frost them while they’re even slightly warm, your frosting will melt into a sad, soupy mess. I learned this the hard way at a birthday party once. Trust me, wait it out.
- Make the frosting. While the cupcakes are cooling, in a large bowl, beat the softened cream cheese and butter together on medium speed until smooth and fluffy, about 2 minutes. Scrape down the sides of the bowl. Add the powdered sugar one cup at a time, beating on low speed after each addition to avoid a sugar cloud. Add the vanilla and salt, then increase the speed to medium-high and beat for 2 more minutes until light and airy.
- Frost the cupcakes. Fit your piping bag with the 1M tip and fill it with the cream cheese frosting. Pipe a swirl onto each cooled cupcake. Start from the outside edge and work your way in, lifting up at the end for a nice peak. If you don’t have a piping bag, you can spread the frosting with a knife. It won’t look as fancy, but it’ll taste the same.
- Decorate. Sprinkle orange sprinkles over the frosting immediately, before it sets. If you’re using candy eyes or other decorations, press them in gently. The frosting should hold them in place.
- Chill before serving. Pop the frosted cupcakes in the fridge for at least 15 minutes. This sets the frosting and makes them easier to transport. I’ve skipped this step before, and the frosting got all smushed in the container. Not a good look.
Cooking Tips & Techniques
I’ve made these black velvet Halloween cupcakes more times than I can count, and I’ve definitely made my share of mistakes. Here’s what I’ve learned so you don’t have to repeat my failures.
Don’t skimp on the food coloring. I know it feels wrong to add tablespoons of anything that’s not a real food, but trust me, you need it. The first time I made these, I used about a teaspoon and ended up with gray cupcakes. They tasted fine, but they looked like something you’d find in a sad office break room. Go bold or go home.
Room temperature ingredients matter. Cold buttermilk and cold egg will make your batter lumpy and your cupcakes dense. Set everything out on the counter 30 minutes before you start. I keep a little timer on my phone for this because I always forget.
Watch your oven like a hawk. Every oven runs differently. My old oven would bake these in exactly 19 minutes. My new one takes 21. Start checking at 18 minutes and don’t walk away. Overbaked cupcakes are dry, and there’s no fixing dry.
Let the frosting soften naturally. If you’re in a hurry, it’s tempting to microwave the cream cheese to soften it faster. Don’t. You’ll end up with partially melted cream cheese that makes your frosting grainy. Just let it sit out. I usually take the cream cheese and butter out when I start mixing the batter, and by the time the cupcakes are cool, the frosting ingredients are perfect.
Multitask like a pro. While the cupcakes are baking, clean up your mixing bowls and measure out your powdered sugar. While they’re cooling, make the frosting. This way, by the time the cupcakes are cool, you’re ready to go. It makes the whole process feel faster and less chaotic.
The fingerprint test. If you’re not sure if your cupcakes are cool enough to frost, gently press your finger on the top. If it leaves a mark or feels warm, wait longer. If it springs back and feels room temperature, you’re good to go.
Variations & Adaptations
One of the best things about this recipe is how flexible it is. Here are some ways to make it your own:
Gluten-Free Version: Swap the all-purpose flour with a 1:1 gluten-free baking flour. I’ve used Bob’s Red Mill and King Arthur’s gluten-free blends with good results. The texture is slightly more crumbly, but the flavor is still spot on. Add an extra tablespoon of buttermilk to help with moisture.
Vegan Adaptation: Replace the egg with a flax egg (1 tablespoon ground flaxseed mixed with 3 tablespoons water, let sit for 5 minutes). Use a plant-based buttermilk by adding vinegar to almond or oat milk. For the frosting, use vegan cream cheese and butter—Miyoko’s and Violife both work well. The cupcakes won’t rise quite as high, but they’ll still be delicious.
Spooky Spider Web Design: Instead of orange sprinkles, pipe a spider web design on top. Use the cream cheese frosting as the base, then pipe concentric circles with a dark chocolate ganache. Drag a toothpick from the center outward to create the web effect. It looks impressive but takes about 30 seconds per cupcake.
Blood Red Velvet Twist: For a more traditional Halloween vibe, split the batter in half. Color one half black and the other half red using red gel food coloring. Layer them in the liners for a two-tone effect. It looks like a candy corn pattern when you bite into it.
Mini Cupcake Version: Use a mini muffin tin and bake for 10 to 12 minutes instead of 18 to 22. You’ll get about 36 mini cupcakes. These are perfect for parties where people want to try multiple desserts without committing to a full-sized cupcake.
I once tried a pumpkin spice variation where I added ¼ cup of pumpkin puree and a teaspoon of pumpkin pie spice. It turned out… interesting. The color was more of a muddy brown-black, and the pumpkin flavor fought with the cocoa. Not my finest moment. Stick to the original for best results.
Serving & Storage Suggestions
These black velvet Halloween cupcakes are best served at room temperature. The cream cheese frosting softens slightly, and the cake crumb is at its most tender. If you’ve chilled them, let them sit on the counter for about 20 minutes before serving.
For a Halloween party spread, arrange them on a black cake stand or a dark platter. The contrast with the orange sprinkles will pop. I like to scatter a few candy eyeballs and fake spider webs around the base for extra spooky vibes. It’s a small touch that makes a big impression.
These pair beautifully with a hot cup of coffee or a glass of cold milk. For an adult gathering, a dark stout beer or a bourbon cocktail complements the subtle cocoa notes. I’ve served them alongside a pumpkin spice latte bar, and it was a hit.
Storage: Keep frosted cupcakes in an airtight container in the refrigerator for up to 5 days. The cream cheese frosting needs to stay chilled. If you’re storing unfrosted cupcakes, they’ll keep at room temperature in a sealed container for 2 days, or in the freezer for up to 3 months.
Freezing: Unfrosted cupcakes freeze beautifully. Wrap each one individually in plastic wrap, then place them in a freezer bag. When you’re ready to serve, thaw them at room temperature for about an hour, then frost. I do this all the time for parties. It makes last-minute hosting so much less stressful.
Reheating: If you prefer your cupcakes slightly warm, pop an unfrosted cupcake in the microwave for 10 seconds. Don’t do this with frosted cupcakes unless you want a puddle of cream cheese on your plate.
One thing I’ve noticed: the flavor actually gets better on day two. The cocoa and vanilla meld together, and the texture becomes even more moist. So if you can, make these a day ahead. Your future self will thank you.
Nutritional Information & Benefits
Let’s be real—these are cupcakes, not health food. But here’s the breakdown so you know what you’re working with. Per cupcake (with frosting):
- Calories: Approximately 320-350
- Fat: 18g
- Carbohydrates: 42g
- Protein: 4g
- Sugar: 30g
- Sodium: 220mg
The cream cheese frosting actually has less sugar than a traditional buttercream, and the buttermilk adds a bit of calcium and probiotics. The cocoa powder contains antioxidants called flavonoids, which are good for heart health. Is it a superfood? No. But it’s not the worst thing you could eat either.
For those with dietary restrictions, this recipe contains gluten, dairy, and eggs. The vegan and gluten-free variations I mentioned earlier are solid alternatives. If you’re watching your sugar intake, you could reduce the sugar in the frosting by using a sugar-free powdered sweetener, but I haven’t tested that personally, so proceed with caution.
I’m not a nutritionist, and I don’t pretend to be one. What I can tell you is that these cupcakes make people happy, and sometimes that’s its own kind of nutrition. Balance is everything—enjoy the treat, share it with friends, and don’t overthink it.
Conclusion
These black velvet Halloween cupcakes have become my go-to for every spooky gathering, and I honestly think they’ll become yours too. They’re dramatic enough to impress, simple enough to make on a whim, and delicious enough that people will ask for the recipe every single time. The combination of that tender, velvety crumb with the tangy cream cheese frosting is just unbeatable.
What I love most about this recipe is how forgiving it is. You don’t need to be a professional baker to nail it. You just need a little patience, the right food coloring, and a willingness to get a little messy. And honestly, isn’t that what Halloween is all about? A little chaos, a little creativity, and a lot of sugar.
I’d love to hear how yours turn out. Did you add your own twist? Did your kids help with the sprinkles? Did you bring them to a party and watch them disappear? Drop a comment below and let me know. And if you’re looking for more Halloween baking inspiration, check out my spiderweb dip recipe for a savory option that pairs perfectly with these cupcakes. Happy baking, and happy Halloween!
Frequently Asked Questions
Can I use liquid food coloring instead of gel?
You can, but I really wouldn’t recommend it. Liquid food coloring is much less concentrated, so you’d need a lot more to get the same black color. That extra liquid can throw off the batter’s consistency, and you’ll end up with a chemical aftertaste. Gel food coloring is worth the extra dollar or two.
Why did my cupcakes turn out gray instead of black?
This usually happens when you don’t use enough food coloring. The cocoa powder in the batter naturally darkens things, but you still need a good 2 to 3 tablespoons of black gel coloring to get that deep, true black. Also, make sure you’re mixing the coloring in thoroughly. Streaks of gray mean it wasn’t fully incorporated.
Can I make these cupcakes ahead of time?
Absolutely. You can bake the cupcakes up to two days in advance and store them unfrosted in an airtight container at room temperature. Frost them the day you plan to serve them for the best presentation. Or freeze the unfrosted cupcakes for up to three months—just thaw and frost when you’re ready.
My cream cheese frosting is too runny. What went wrong?
The most common culprit is warm cream cheese or butter. If they’re too soft, the frosting won’t hold its shape. Make sure both are softened but still cool to the touch. If your frosting is already runny, pop it in the fridge for 15 minutes to firm up, then try whipping it again. You can also add a little more powdered sugar to thicken it.
Can I make these into a cake instead of cupcakes?
Yes! Pour the batter into two greased and floured 8-inch round cake pans. Bake at 350°F for 25 to 30 minutes, or until a toothpick comes out clean. Let them cool completely before frosting. You’ll want to double the frosting recipe to have enough for the layers and the outside. It makes a stunning Halloween layer cake.
Pin This Recipe!
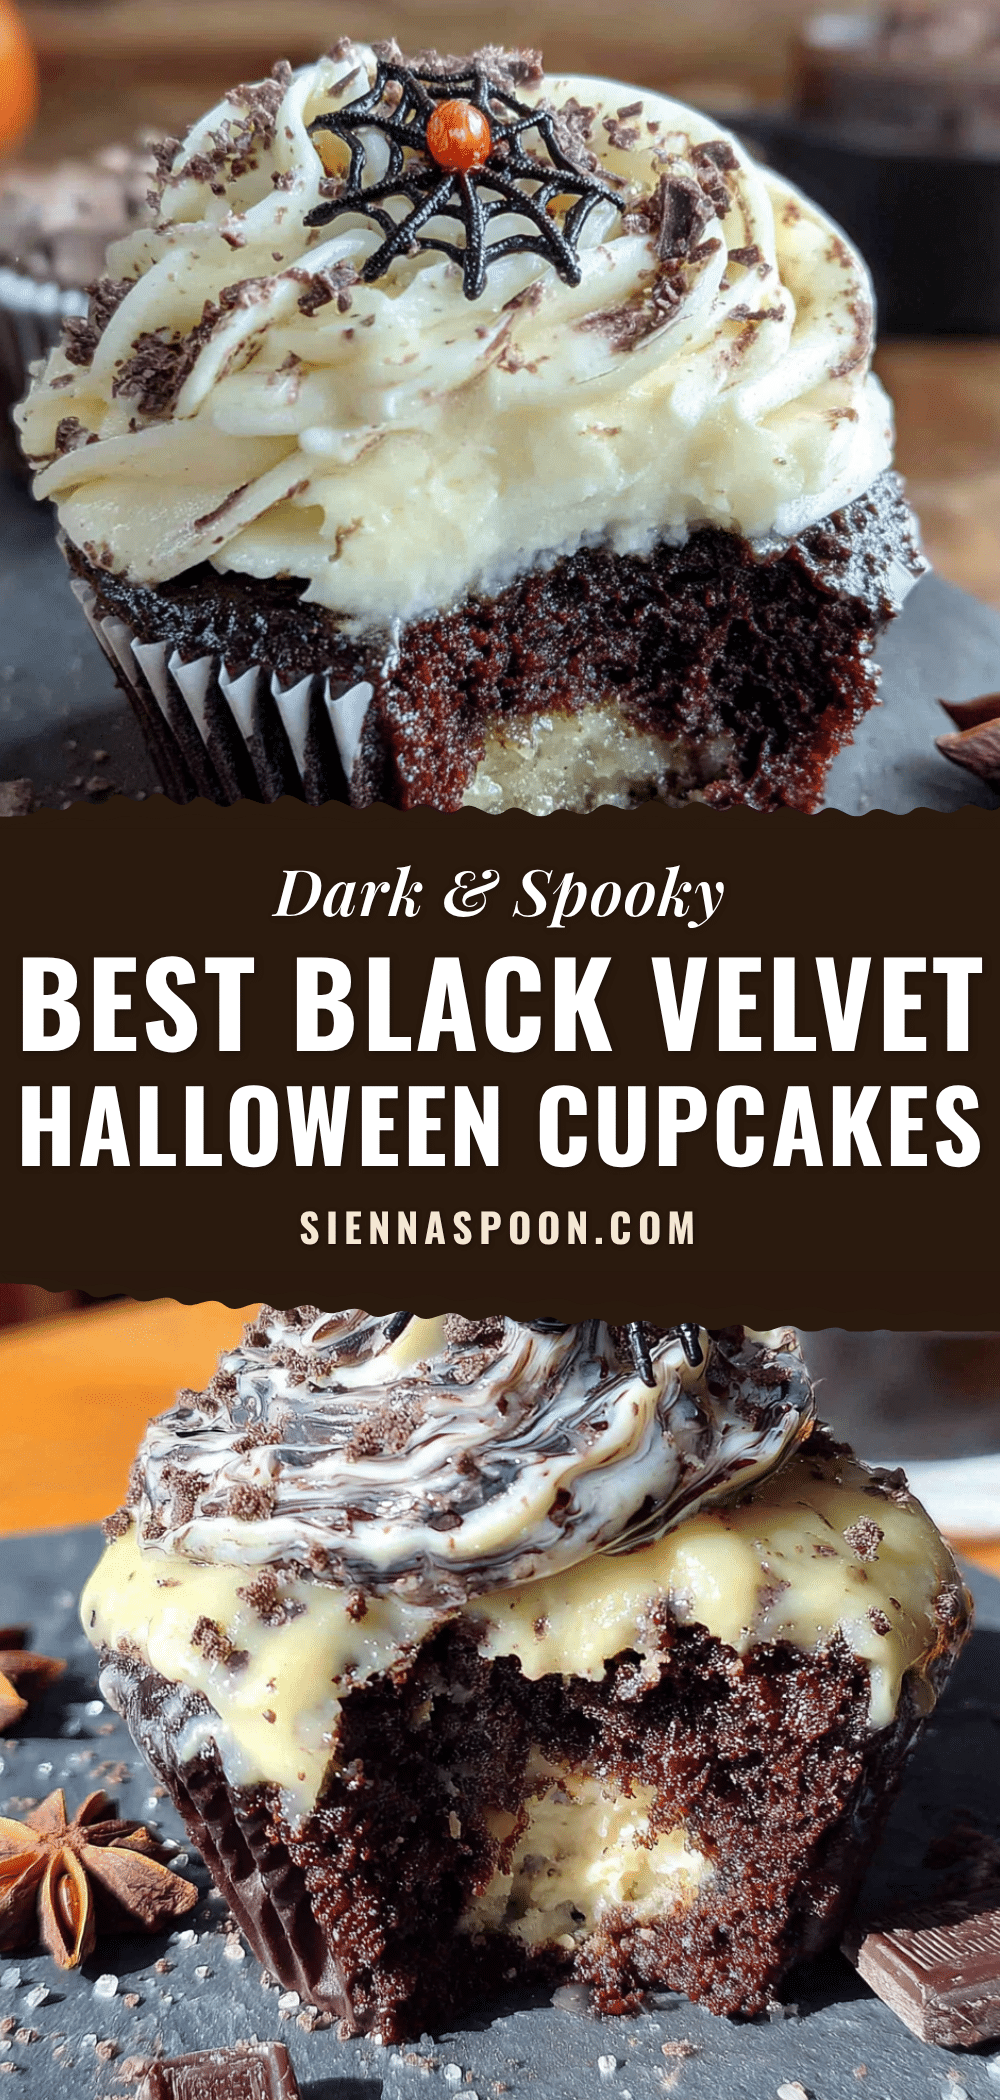
Best Black Velvet Halloween Cupcakes – Easy & Perfect Recipe
These black velvet Halloween cupcakes are dramatic, delicious, and surprisingly easy to make. With a tender, velvety crumb and tangy cream cheese frosting, they’re the perfect spooky treat for any Halloween gathering.
- Prep Time: 15 minutes
- Cook Time: 20 minutes
- Total Time: 40 minutes
- Yield: 12 cupcakes 1x
- Category: Dessert
- Cuisine: American
Ingredients
- 1 ½ cups (180g) all-purpose flour
- 1 cup (200g) granulated sugar
- 1 tablespoon (5g) unsweetened cocoa powder
- 1 teaspoon (5g) baking soda
- ½ teaspoon (3g) salt
- ½ cup (120ml) vegetable oil
- ½ cup (120ml) buttermilk, room temperature
- 1 large egg, room temperature
- 1 teaspoon (5ml) white vinegar
- 1 teaspoon (5ml) vanilla extract
- 2 to 3 tablespoons (30-45ml) black gel food coloring
- 8 ounces (226g) cream cheese, softened
- ½ cup (113g) unsalted butter, softened
- 3 to 4 cups (360-480g) powdered sugar
- 1 teaspoon (5ml) vanilla extract
- Pinch of salt
- Orange sprinkles for decoration
- Optional: candy eyeballs, mini spider rings, or edible glitter
Instructions
- Preheat your oven to 350°F (175°C). Line your muffin tin with 12 cupcake liners.
- In a medium bowl, whisk together the flour, sugar, cocoa powder, baking soda, and salt until evenly distributed.
- In a large bowl, whisk together the vegetable oil, buttermilk, egg, vinegar, and vanilla extract until smooth and well combined.
- Pour the dry ingredients into the wet ingredients and stir gently with a rubber spatula until just combined. Do not overmix.
- Add 2 tablespoons of black gel food coloring and stir until the color is uniform. Add the third tablespoon if the batter is not dark enough.
- Divide the batter evenly among the 12 cupcake liners, filling each about two-thirds full.
- Bake for 18 to 22 minutes, or until a toothpick inserted into the center comes out clean or with a few moist crumbs. Let cool in the tin for 5 minutes, then transfer to a wire rack to cool completely.
- While the cupcakes cool, make the frosting: In a large bowl, beat the softened cream cheese and butter together on medium speed until smooth and fluffy, about 2 minutes. Add the powdered sugar one cup at a time, beating on low speed after each addition. Add the vanilla and salt, then increase speed to medium-high and beat for 2 more minutes until light and airy.
- Fit a piping bag with a 1M tip and fill with the cream cheese frosting. Pipe a swirl onto each cooled cupcake.
- Sprinkle orange sprinkles over the frosting immediately. If using candy eyes or other decorations, press them in gently.
- Chill the frosted cupcakes in the refrigerator for at least 15 minutes before serving.
Notes
Don’t skimp on the food coloring; use gel for best results. Room temperature ingredients are crucial for texture. Check cupcakes at 18 minutes to avoid overbaking. Let frosting ingredients soften naturally—do not microwave. For best flavor, make a day ahead.
Nutrition
- Serving Size: 1 cupcake
- Calories: 335
- Sugar: 30
- Sodium: 220
- Fat: 18
- Saturated Fat: 8
- Carbohydrates: 42
- Fiber: 1
- Protein: 4
Keywords: Halloween cupcakes, black velvet cupcakes, cream cheese frosting, easy Halloween dessert, spooky cupcakes


