Love this? Save it for later!
Share the inspiration with your friends
There used to be a tiny bakery tucked between a laundromat and a vintage shop on the corner of Elm and 4th Street in my old neighborhood. They made the most incredible pumpkin cookie I have ever had in my life—soft, pillowy, with a maple cream cheese icing that had this tangy-sweet balance I couldn’t get enough of. When they closed their doors two years ago, I honestly felt a little lost. I mean, that cookie had gotten me through three autumns, two bad breakups, and one particularly rough November where everything seemed to go wrong at once.
After about twelve tries—twelve, let me tell you, some of them were straight-up disasters—I finally got it. The first successful batch came out of my oven on a rainy Tuesday afternoon, and I actually teared up a little. The texture was exactly right: soft and cake-like, not too dense, with that perfect crumb that holds together but still melts in your mouth. And the icing? It took me forever to nail that ratio of cream cheese to maple syrup, but when I did, I knew I had something special.
The funny thing is, I almost gave up after attempt number seven. That batch was so flat and greasy I honestly wanted to throw the whole mixing bowl out the window. But maybe you’ve been there too—obsessed with recreating a food memory that feels impossible to capture. That persistence paid off, and now I’m sharing the exact recipe with you. These cozy pumpkin cookies with maple cream cheese icing are the ones I’ve been making every single fall since, and they never fail to bring that same warmth and comfort I felt walking into that little bakery on Elm Street.
Why You’ll Love This Recipe
These aren’t just any pumpkin cookies. After all those test batches, I can tell you with confidence that this version has something special going on. Let me break down exactly why these will become your new fall favorite.
- Soft and Cake-Like Texture : These cookies come out perfectly pillowy every single time. The combination of pumpkin puree and the right amount of leavening creates a texture that’s almost like a little pumpkin cake in cookie form. No dry, crumbly disasters here.
- Simple Pantry Ingredients : You probably already have most of what you need sitting in your kitchen right now. Canned pumpkin, basic baking staples, and cream cheese for the icing—nothing fancy or hard to find.
- Perfect for Cozy Fall Evenings : These cookies were made for those chilly autumn nights when all you want is something warm and comforting with a cup of tea or coffee. They’re the definition of comfort food in cookie form.
- Crowd-Pleaser Guaranteed : I’ve brought these to potlucks, family gatherings, and work parties, and they disappear faster than almost anything else on the table. Kids love them, adults love them, pumpkin skeptics even love them.
- That Maple Cream Cheese Icing : Let’s be honest—the icing is what makes these cookies truly unforgettable. The tangy cream cheese paired with rich maple syrup creates a flavor combination that’s absolutely next-level. You’ll want to put this icing on everything.
What makes this recipe different from all the other pumpkin cookie recipes out there? It’s the technique. I learned through trial and error that chilling the dough for just twenty minutes makes a huge difference in how these cookies hold their shape. And the secret to that perfectly smooth icing? Room temperature cream cheese and a little patience while whipping it. This isn’t just another pumpkin cookie recipe—it’s the one I spent months perfecting so you don’t have to.
The first time you bite into one of these cookies, you’ll understand why I was so obsessed with getting it right. That combination of soft pumpkin cookie with creamy maple icing is the kind of thing that makes you close your eyes after the first bite. It’s pure comfort, pure nostalgia, and honestly, pure happiness in cookie form.
What Ingredients You Will Need
This recipe uses simple, wholesome ingredients to create something truly special. Most of these are pantry staples, which makes these cookies perfect for spontaneous baking when that pumpkin craving hits.
For the Pumpkin Cookies
- All-purpose flour, 2 ½ cups (300g) – Spoon and level your flour for the most accurate measurement. Too much flour will make these cookies dense instead of soft.
- Baking soda, 1 teaspoon – This helps the cookies spread just enough while staying soft in the middle.
- Baking powder, 1 teaspoon – The double leavening action is what gives these cookies their cake-like texture.
- Ground cinnamon, 2 teaspoons – I recommend using a good quality cinnamon like Saigon or Ceylon for the warmest flavor.
- Ground nutmeg, ½ teaspoon – Freshly grated if you have it, but pre-ground works perfectly fine.
- Ground ginger, ½ teaspoon – Adds that little warmth in the background that makes pumpkin recipes taste so cozy.
- Ground cloves, ¼ teaspoon – Just a pinch, really. Cloves are strong, so don’t go overboard.
- Salt, ½ teaspoon – Balances the sweetness and brings out all the other flavors.
- Unsalted butter, ½ cup (113g), softened – Make sure it’s truly at room temperature. Cold butter won’t cream properly with the sugar.
- Granulated sugar, 1 cup (200g) – Regular white sugar gives these cookies the right structure.
- Light brown sugar, ½ cup (100g), packed – Adds moisture and a deeper flavor from the molasses content.
- Pumpkin puree, 1 cup (240g) – Not pumpkin pie filling! Make sure you’re getting 100% pure pumpkin puree. I personally prefer Libby’s brand for consistent results.
- Large egg, 1, room temperature – Room temperature eggs incorporate better into the batter.
- Vanilla extract, 1 teaspoon – Pure vanilla extract makes a noticeable difference, but imitation works in a pinch.
For the Maple Cream Cheese Icing
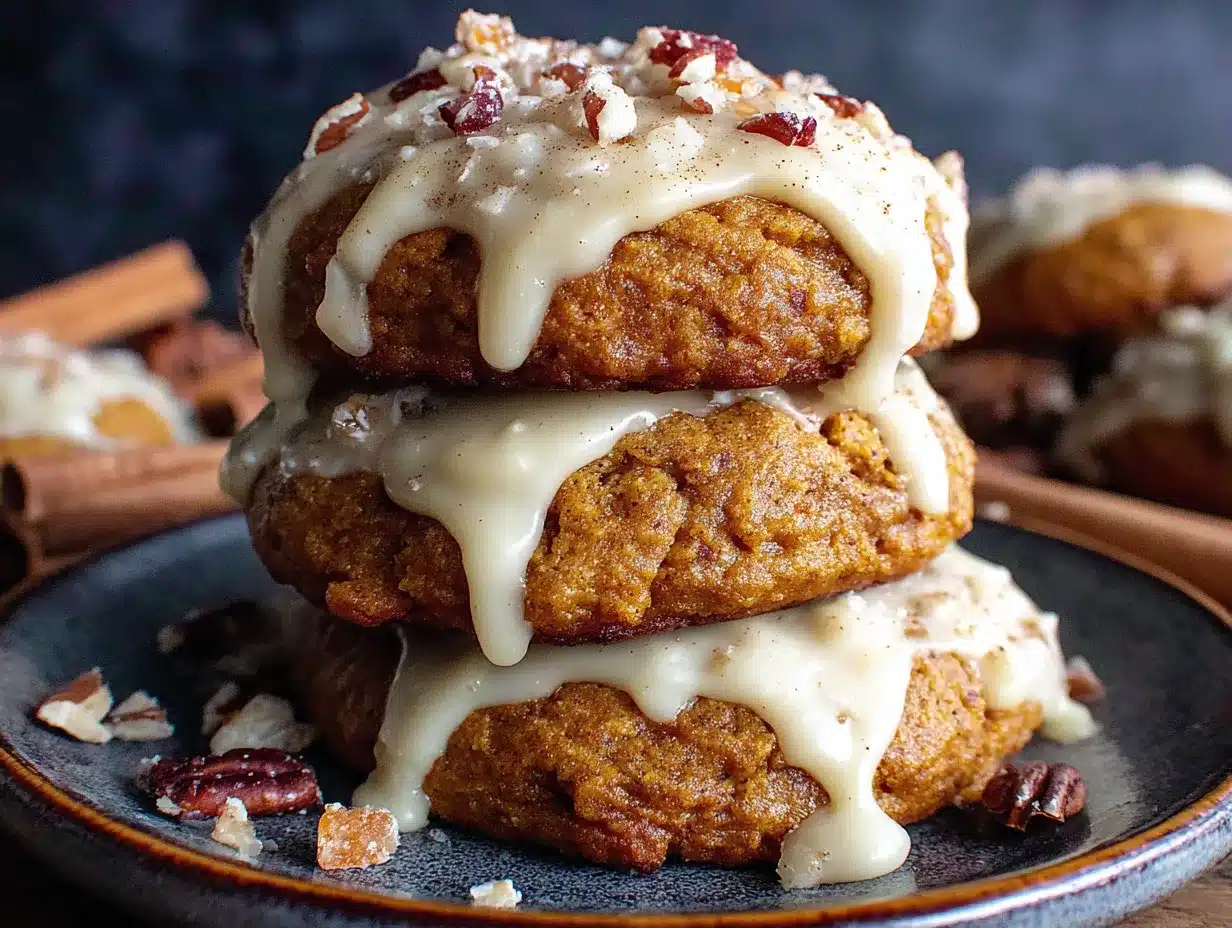
- Cream cheese, 4 oz (113g), softened – Full-fat cream cheese gives the best texture and flavor. Let it sit out for at least 30 minutes before using.
- Unsalted butter, 2 tablespoons (28g), softened – Adds richness and helps the icing hold its shape.
- Pure maple syrup, 3 tablespoons – Please use real maple syrup, not pancake syrup. Grade A dark amber has the strongest maple flavor and works beautifully here.
- Powdered sugar, 1 cup (120g), sifted – Sifting prevents lumps in your icing. Trust me on this one.
- Vanilla extract, ½ teaspoon – Rounds out the maple flavor nicely.
- Pinch of salt – Just a tiny pinch to balance the sweetness.
If you’re dairy-free, you can substitute the butter and cream cheese with plant-based alternatives, though the texture of the icing will be slightly different. For a gluten-free version, use a 1:1 gluten-free all-purpose flour blend—I’ve had good results with King Arthur’s measure-for-measure blend.
Equipment Needed
You don’t need any fancy equipment for these cookies, which is part of what makes them so great. Here’s what you’ll need:
- Large mixing bowls (2) – One for the dry ingredients and one for the wet ingredients. I use my grandmother’s old ceramic bowls, but any large bowl works fine.
- Electric hand mixer or stand mixer – You can absolutely cream the butter and sugar by hand with a wooden spoon, but it takes some serious arm work. A hand mixer makes the process much easier.
- Whisk – For mixing the dry ingredients together evenly.
- Rubber spatula – For scraping down the sides of the bowl and folding in the dry ingredients.
- Baking sheets (2) – Light-colored baking sheets work best. Dark sheets can cause the bottoms of the cookies to brown too quickly.
- Parchment paper or silicone baking mats – Parchment paper is my go-to because it’s easy to clean up and helps the cookies bake evenly.
- Cookie scoop (about 2 tablespoons) – This gives you evenly sized cookies that bake at the same rate. A regular spoon works too, but the scoop is worth the investment.
- Cooling rack – Essential for letting the cookies cool completely before icing them.
- Small mixing bowl – For making the icing.
- Sifter or fine-mesh strainer – For sifting the powdered sugar to avoid lumps in the icing.
If you don’t have a cookie scoop, use two spoons to portion out the dough. And if you don’t have a cooling rack, you can let the cookies cool on the baking sheet for a few minutes, then carefully transfer them to a plate. The bottoms might get a little soft, but they’ll still taste amazing.
Preparation Method
Let’s get to the fun part—making these cozy pumpkin cookies with that incredible maple cream cheese icing. Take your time with each step, and don’t rush the chilling process. It makes a real difference.
- Preheat your oven to 350°F (175°C) and line two baking sheets with parchment paper. Give yourself enough room to work—clear off your counter and get everything organized before you start mixing.
- In a medium bowl, whisk together the dry ingredients: 2 ½ cups all-purpose flour, 1 teaspoon baking soda, 1 teaspoon baking powder, 2 teaspoons cinnamon, ½ teaspoon nutmeg, ½ teaspoon ginger, ¼ teaspoon cloves, and ½ teaspoon salt. Whisk until everything is evenly distributed. This takes about 30 seconds of vigorous whisking. Set this bowl aside for now.
- In a large mixing bowl, cream together the softened butter and sugars. Using your hand mixer or stand mixer with the paddle attachment, beat ½ cup softened butter, 1 cup granulated sugar, and ½ cup packed light brown sugar together on medium speed until light and fluffy—about 2 to 3 minutes. You’ll know it’s ready when the mixture looks pale and slightly increased in volume. Scrape down the sides of the bowl with your rubber spatula halfway through.
- Add the pumpkin, egg, and vanilla. Beat in 1 cup pumpkin puree, 1 room temperature egg, and 1 teaspoon vanilla extract. Mix on low speed until just combined. The batter will look a little curdled at this point—that’s totally normal. Don’t panic. Just scrape the bowl again and make sure everything is incorporated.
- Gradually add the dry ingredients to the wet ingredients. Add the flour mixture in two additions, mixing on low speed after each addition until just combined. Stop mixing as soon as you no longer see streaks of flour. Overmixing at this stage will make your cookies tough, so be gentle. The dough will be soft and slightly sticky—that’s exactly what you want.
- Chill the dough for 20 minutes. This is not a step you want to skip. Cover the bowl with plastic wrap and pop it in the fridge. While the dough chills, wash your mixing bowls and get your icing ingredients ready. The chilling time helps the cookies hold their shape and prevents them from spreading too much in the oven.
- Scoop and arrange the dough. Using your cookie scoop or a spoon, portion the dough into balls about 2 tablespoons each. Place them on the prepared baking sheets about 2 inches apart. These cookies do spread a little, so give them room to breathe. You should get about 24 cookies total, so plan for 12 per baking sheet.
- Bake for 12 to 14 minutes. Place one sheet at a time on the middle rack of your preheated oven. Bake until the edges are set and the tops look dry and slightly cracked. The centers will still look a little soft—that’s fine. They’ll continue to set as they cool. For softer, more cake-like cookies, bake for 12 minutes. For slightly firmer cookies, go the full 14 minutes.
- Cool on the baking sheet for 5 minutes. Let the cookies rest on the hot baking sheet for exactly 5 minutes. This allows them to finish setting up without overbaking. After 5 minutes, transfer them to a cooling rack using a thin metal spatula. Let them cool completely before icing—about 30 minutes. I know it’s tempting, but warm cookies will turn your beautiful icing into a melty mess.
- Make the maple cream cheese icing while the cookies cool. In a small bowl, beat together 4 oz softened cream cheese and 2 tablespoons softened butter until smooth and creamy—about 2 minutes. Add 3 tablespoons pure maple syrup and ½ teaspoon vanilla extract, and beat until combined. Gradually add 1 cup sifted powdered sugar, mixing on low speed until smooth. Add a tiny pinch of salt and give it one final mix. The icing should be thick but spreadable. If it’s too thick, add a teaspoon of milk. Too thin? Add a little more powdered sugar.
- Ice the completely cooled cookies. Using a small offset spatula or the back of a spoon, spread about a tablespoon of icing onto each cookie. Don’t worry about making them perfect—a rustic swirl looks beautiful and homemade. Let the icing set for about 15 minutes before serving.
A few notes from my many test batches: If your dough feels too sticky to scoop after chilling, wet your cookie scoop with a little water between scoops. And if you’re baking both sheets at once, rotate them halfway through and switch the racks. Every oven has hot spots, and rotating helps everything bake evenly.
Cooking Tips & Techniques
After making these cookies more times than I care to count, I’ve picked up a few tricks that make the process smoother and the results more consistent. Let me share what I’ve learned the hard way so you don’t have to.
Don’t overmix the dough. This is probably the most important tip I can give you. Once you add the flour mixture to the wet ingredients, mix only until you can’t see any more white streaks. Overmixing develops the gluten in the flour, which will make your cookies tough and dense instead of soft and cake-like. I learned this lesson on batch number three, which came out of the oven looking like little hockey pucks.
Use room temperature ingredients. Cold butter won’t cream properly with the sugar, and cold cream cheese will leave lumps in your icing that are impossible to get out. Take everything out of the fridge about 30 to 45 minutes before you start baking. If you forget, you can soften cream cheese in the microwave for about 10 seconds, but be careful not to melt it.
Chill the dough—no exceptions. I know it adds an extra 20 minutes to the process, but it’s absolutely worth it. Chilling solidifies the fat in the dough, which means the cookies will spread less and bake up thicker and softer. The first time I tried skipping this step, my cookies spread into thin, flat discs that looked more like lace than cookies. Never again.
Sift your powdered sugar. I used to skip this step because I was impatient, and my icing always had tiny lumps that wouldn’t beat out. Sifting takes about 30 seconds and makes a huge difference in the smoothness of your final icing. Use a fine-mesh strainer if you don’t have a sifter.
Let the cookies cool completely. I know the smell of these cookies fresh from the oven is almost irresistible. But warm cookies will melt that beautiful maple cream cheese icing into a puddle. Give them a full 30 minutes on the cooling rack. Use that time to clean up your kitchen or make a cup of coffee—you’ve earned it.
Use a cookie scoop for even sizing. Cookies that are all the same size bake at the same rate. If some are bigger than others, you’ll end up with some overdone and some underdone. A simple cookie scoop costs about five dollars and is one of the best baking investments you can make.
Variations & Adaptations
One of the best things about this recipe is how adaptable it is. Here are some variations I’ve tried and loved:
Gluten-Free Version : Substitute the all-purpose flour with a 1:1 gluten-free baking flour blend. I’ve had great results with Bob’s Red Mill and King Arthur brands. The texture will be slightly more delicate, so handle the dough gently. Everything else stays the same.
Dairy-Free Version : Use plant-based butter and cream cheese alternatives. I’ve found that Miyoko’s brand works really well for both the cookies and the icing. The cookies will be a touch less tender, but the flavor is still fantastic. Use a dairy-free milk alternative if you need to thin the icing.
Vegan Version : Replace the egg with a flax egg (1 tablespoon ground flaxseed mixed with 3 tablespoons water, let sit for 5 minutes). Use the dairy-free substitutions above. The cookies will be a bit denser but still delicious. Make sure your sugar is certified vegan if that matters to you.
Add Mix-Ins : Fold in ½ cup of chocolate chips, dried cranberries, or chopped pecans before chilling the dough. White chocolate chips are especially good with the pumpkin and maple flavors. I made a batch with white chocolate and dried cranberries for a holiday party last year, and they disappeared in minutes.
Spice It Up : If you love warm spices, add an extra ½ teaspoon of cinnamon and a pinch of cardamom to the dry ingredients. Cardamom and pumpkin are a surprisingly good combination—earthy and bright at the same time.
Make It a Sandwich Cookie : Double the icing recipe and spread a generous layer between two cookies for the ultimate pumpkin maple sandwich. It’s messy, decadent, and absolutely worth the sticky fingers.
Pumpkin Whoopie Pies : Drop the dough into larger rounds (about 3 tablespoons each) and bake for 14 to 16 minutes. Sandwich two cookies together with a thick layer of the maple cream cheese icing. You’ve just made pumpkin whoopie pies, and they are incredible.
Serving & Storage Suggestions
These cookies are best served at room temperature, when the icing has set but the cookie itself is still soft and tender. Arrange them on a pretty plate or cake stand for a cozy fall presentation that will make your kitchen feel like a bakery.
What to serve with them: A warm cup of coffee, chai tea, or spiced apple cider is the perfect companion. The warmth of the drink balances the cool, creamy icing beautifully. For a dessert spread, pair these cookies with vanilla ice cream or a dollop of whipped cream. They also make a wonderful addition to any fall brunch table alongside pumpkin bread and apple muffins.
Storage instructions: Store the iced cookies in an airtight container in the refrigerator for up to 5 days. Place a sheet of wax paper between layers to prevent the icing from sticking. Let them sit at room temperature for about 15 minutes before serving to bring back that soft texture.
Freezing instructions: You can freeze the un-iced cookies for up to 3 months. Bake and cool the cookies completely, then place them in a single layer on a baking sheet and freeze until solid. Transfer to a freezer-safe bag or container. When you’re ready to enjoy them, thaw at room temperature, then make the icing fresh and spread it on. I do this every fall so I have pumpkin cookies ready to go whenever the craving strikes.
Reheating tip: If you want that just-baked warmth, pop an un-iced cookie in the microwave for about 10 seconds. Add the icing after warming, or enjoy it plain. The flavors actually deepen after a day or two in the fridge, so don’t be surprised if these cookies taste even better on day two.
Nutritional Information & Benefits
Here’s the estimated nutritional information for one cookie with icing, based on a batch of 24 cookies:
| Nutrient | Amount per Cookie |
|---|---|
| Calories | 185 |
| Total Fat | 8g |
| Saturated Fat | 5g |
| Cholesterol | 28mg |
| Sodium | 135mg |
| Total Carbohydrates | 27g |
| Dietary Fiber | 1g |
| Sugars | 18g |
| Protein | 2g |
These cookies are a treat, but they do have some redeeming qualities. Pumpkin is packed with vitamin A, which supports eye health and immune function. It’s also a good source of fiber and antioxidants. The cinnamon and ginger in these cookies have anti-inflammatory properties, and real maple syrup contains antioxidants and minerals like zinc and manganese.
For a slightly lighter version, you can reduce the sugar in the cookie dough to ¾ cup granulated and ¼ cup brown sugar. The cookies won’t be quite as tender, but they’ll still be delicious. And if you’re watching your sugar intake, the icing can be made with just ½ cup powdered sugar—it will be thinner but still tasty.
These cookies contain gluten, dairy, and eggs, so they’re not suitable for those with allergies to those ingredients. See the variations section above for adaptation options.
Conclusion
These cozy pumpkin cookies with maple cream cheese icing are everything I hoped they would be when I started my quest to recreate that bakery cookie from Elm Street. They’re soft, they’re comforting, and that icing is honestly something special. Every time I make them, I’m transported back to that little bakery, standing at the counter with a paper bag in my hand, feeling like everything was going to be okay.
I hope you’ll give these cookies a try and make them your own. Maybe you’ll add some chocolate chips, or double the cinnamon, or turn them into whoopie pies. That’s the beauty of a good recipe—it’s a starting point for your own kitchen adventures. Don’t be afraid to experiment and see what happens.
If you make these cookies, I’d love to hear about it. Leave a comment below and tell me how they turned out, or share your own twist on the recipe. Tag me in your photos if you post them—I get so excited seeing these cookies in other people’s kitchens. And if you have a bakery memory like mine, a recipe you’ve been trying to recreate for years, tell me about that too. Some of the best recipes come from chasing a taste we can’t forget.
Happy baking, friends. May your kitchen smell like pumpkin and maple, and may every bite bring you the comfort you deserve.
Frequently Asked Questions
Can I use fresh pumpkin instead of canned?
Yes, you can use fresh pumpkin puree. Just make sure to drain it well after blending, because fresh pumpkin tends to have more water than canned. Spread the puree on a paper towel-lined plate for about 10 minutes to remove excess moisture before using it in the recipe.
Why did my cookies turn out flat?
Flat cookies usually happen for one of three reasons: the butter was too soft or melted, the dough wasn’t chilled long enough, or too much sugar was used. Make sure your butter is softened but not greasy, chill the dough for the full 20 minutes, and measure your ingredients accurately.
Can I make the dough ahead of time?
Absolutely. You can prepare the dough up to 2 days in advance and keep it covered in the refrigerator. Let it sit at room temperature for about 10 minutes before scooping and baking, as it will be quite firm straight from the fridge. You can also freeze the dough balls for up to 3 months and bake them straight from frozen—just add 2 to 3 minutes to the baking time.
How do I get my icing smooth without lumps?
The key is room temperature cream cheese and sifted powdered sugar. If your cream cheese is cold, it will form lumps that are nearly impossible to beat out. Let it sit at room temperature for at least 30 minutes before starting. And always sift your powdered sugar—even if it looks lump-free in the bag, it almost never is.
Can I skip the icing?
You absolutely can. The cookies are delicious on their own—soft, spiced, and perfectly sweet. If you want a simpler version, just dust the cooled cookies with a little powdered sugar or skip the topping altogether. They’re still wonderful, just a little less decadent.
Pin This Recipe!
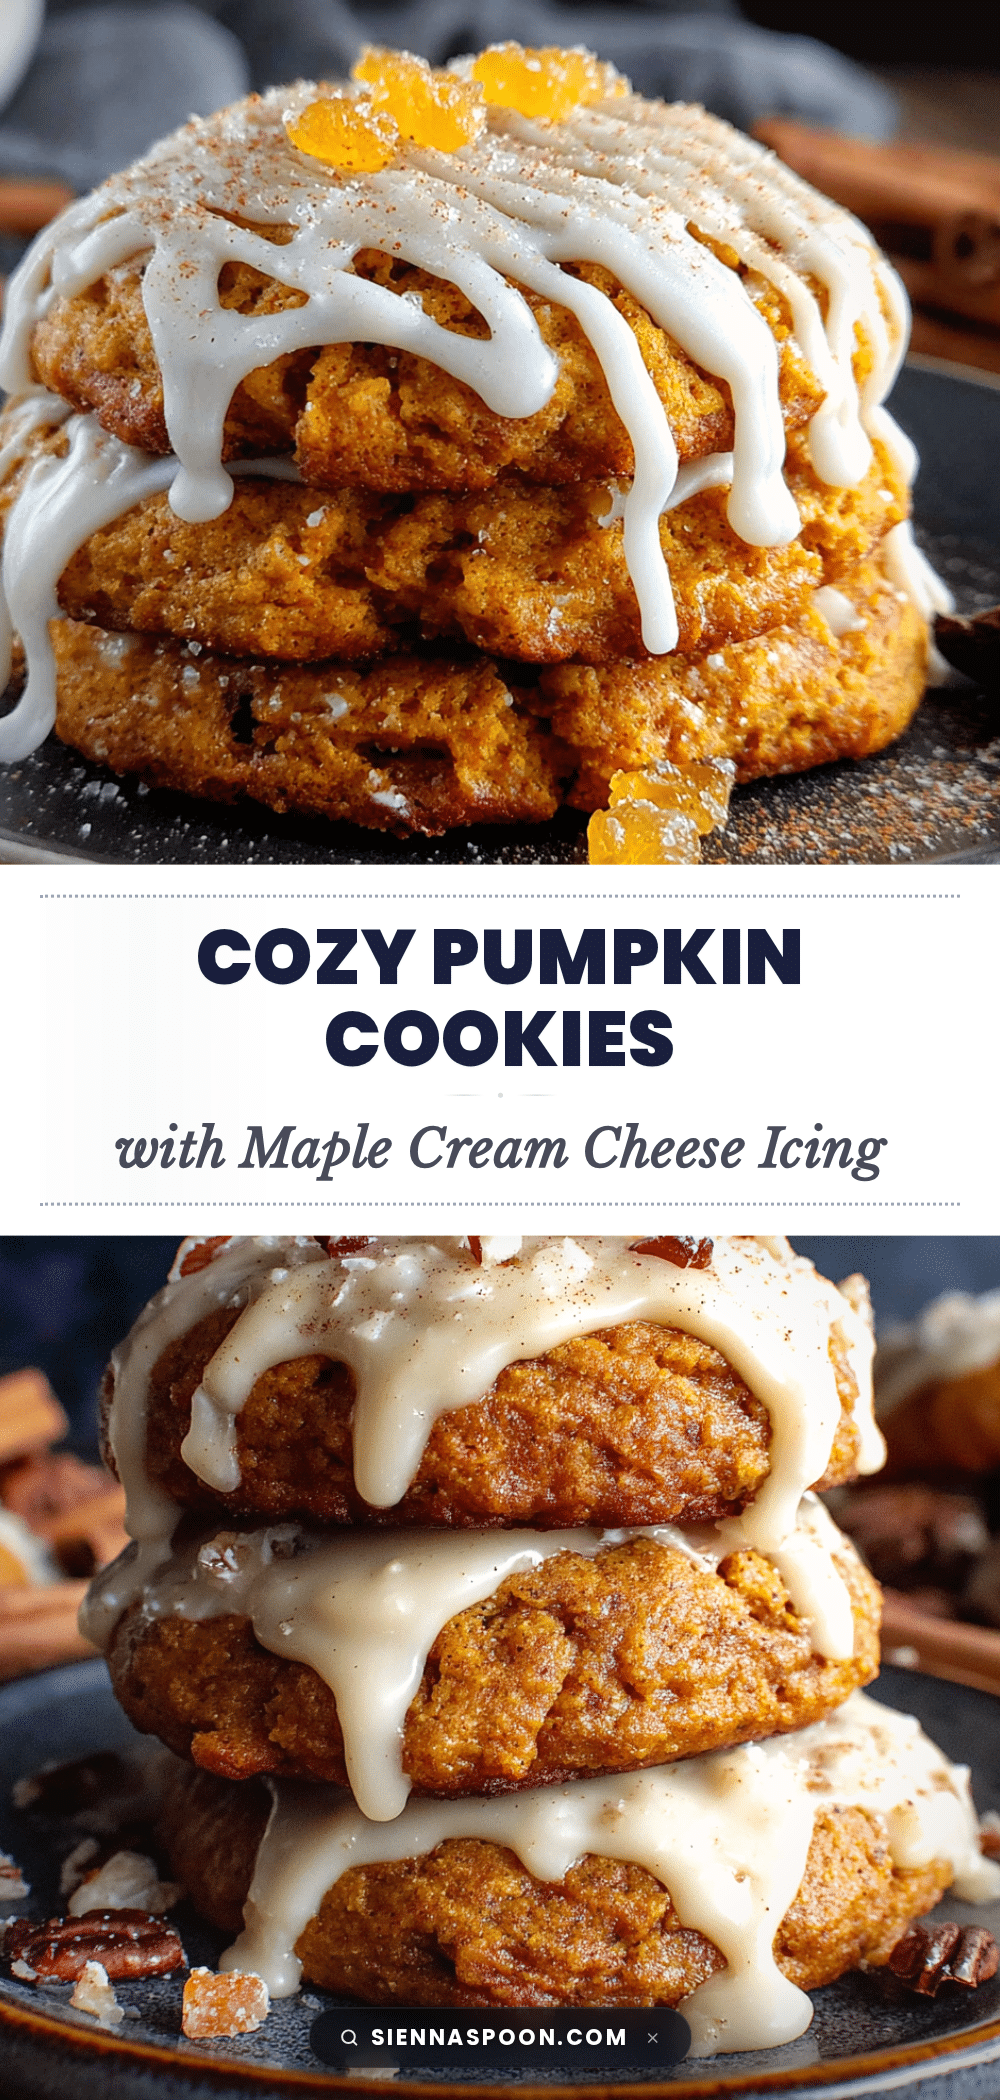
Cozy Pumpkin Cookies with Easy Maple Cream Cheese Icing

Soft, pillowy pumpkin cookies with a tangy-sweet maple cream cheese icing that captures the warmth and comfort of a beloved bakery recipe. Perfect for cozy fall evenings.
- Prep Time: 20 minutes
- Cook Time: 12-14 minutes
- Total Time: 1 hour 10 minutes
- Yield: 24 cookies 1x
- Category: Dessert
- Cuisine: American
Ingredients
- 2 ½ cups (300g) all-purpose flour
- 1 teaspoon baking soda
- 1 teaspoon baking powder
- 2 teaspoons ground cinnamon
- ½ teaspoon ground nutmeg
- ½ teaspoon ground ginger
- ¼ teaspoon ground cloves
- ½ teaspoon salt
- ½ cup (113g) unsalted butter, softened
- 1 cup (200g) granulated sugar
- ½ cup (100g) light brown sugar, packed
- 1 cup (240g) pumpkin puree (not pumpkin pie filling)
- 1 large egg, room temperature
- 1 teaspoon vanilla extract
- 4 oz (113g) cream cheese, softened
- 2 tablespoons (28g) unsalted butter, softened
- 3 tablespoons pure maple syrup
- 1 cup (120g) powdered sugar, sifted
- ½ teaspoon vanilla extract
- Pinch of salt
Instructions
- Preheat oven to 350°F (175°C) and line two baking sheets with parchment paper.
- In a medium bowl, whisk together flour, baking soda, baking powder, cinnamon, nutmeg, ginger, cloves, and salt.
- In a large bowl, cream together softened butter, granulated sugar, and brown sugar until light and fluffy, about 2-3 minutes.
- Beat in pumpkin puree, egg, and vanilla extract until just combined.
- Gradually add dry ingredients to wet ingredients, mixing on low until just combined. Do not overmix.
- Chill dough for 20 minutes.
- Scoop dough into 2-tablespoon balls and place 2 inches apart on prepared baking sheets.
- Bake for 12-14 minutes, until edges are set and tops look dry.
- Cool on baking sheet for 5 minutes, then transfer to a wire rack to cool completely.
- For icing: Beat cream cheese and butter until smooth. Add maple syrup and vanilla, then gradually beat in sifted powdered sugar and a pinch of salt until smooth.
- Spread icing on completely cooled cookies. Let set for 15 minutes before serving.
Notes
Chill the dough for at least 20 minutes to prevent spreading. Use room temperature cream cheese for smooth icing. For softer cookies, bake 12 minutes; for firmer, 14 minutes. Store iced cookies in the refrigerator for up to 5 days.
Nutrition
- Serving Size: 1 cookie
- Calories: 185
- Sugar: 18
- Sodium: 135
- Fat: 8
- Saturated Fat: 5
- Carbohydrates: 27
- Fiber: 1
- Protein: 2
Keywords: pumpkin cookies, maple cream cheese icing, fall cookies, pumpkin dessert, cream cheese frosting, soft pumpkin cookies


