Love this? Save it for later!
Share the inspiration with your friends
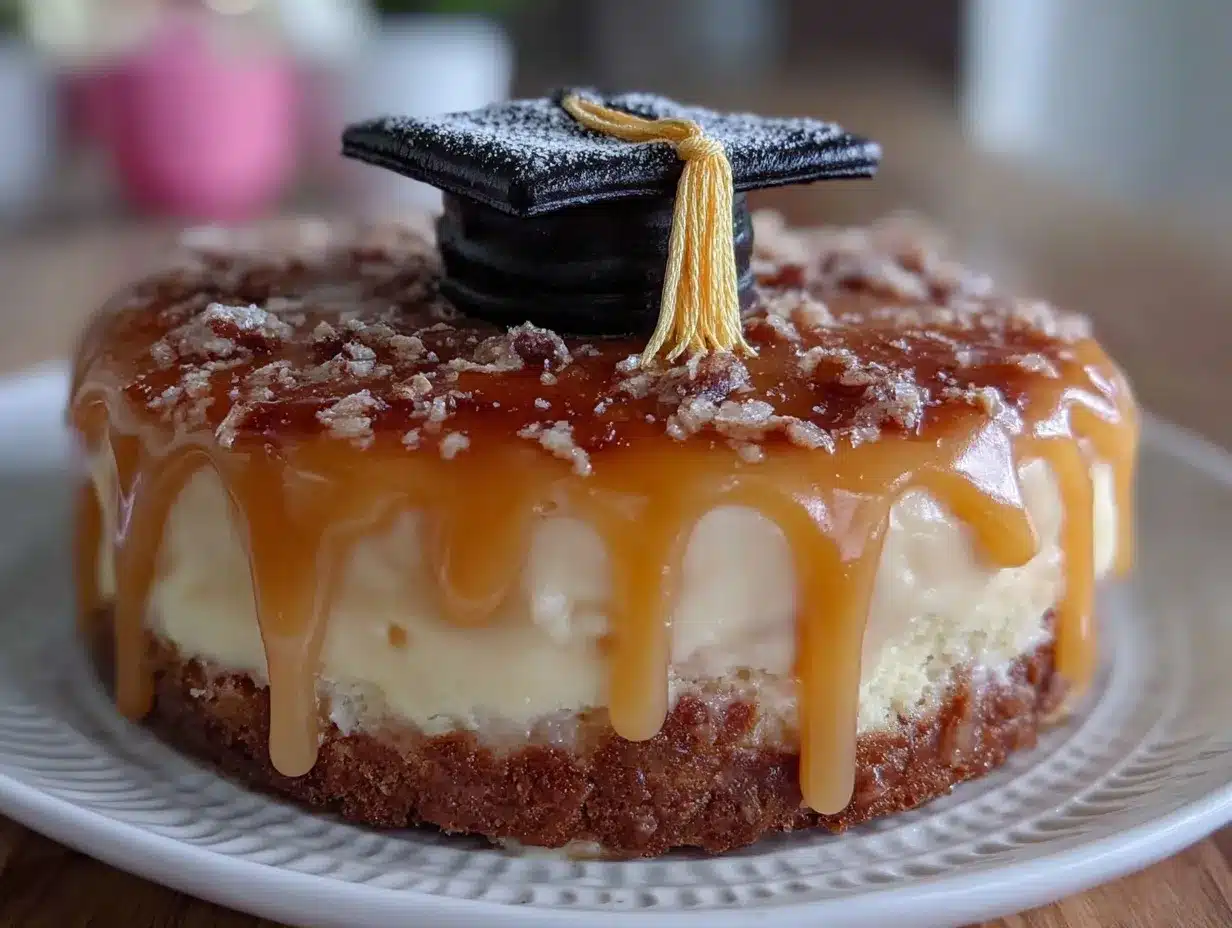
“I wasn’t expecting to become a cake decorator that night,” I admitted to my friend while brushing stray flour off my hands. It was the evening before my niece’s graduation party, and the idea of crafting an easy elegant graduation cake with gold drip and fondant cap came out of sheer necessity. You know that feeling when you realize the store-bought cake just won’t cut it, and there’s zero time to order a fancy one? Yeah, that was me—staring at a blank, sad-looking sponge cake that needed some serious love.
The kitchen smelled faintly of vanilla and butter as I fumbled with the piping bag, accidentally knocking over a bowl of gold-colored edible paint. I almost gave up right there, but something about this cake needing to shine for that milestone made me keep going. Honestly, it was a mess at first—fondant sticking to my fingers, drips going a little wild—but by the end, it looked like something straight out of a bakery window. The best part? It was surprisingly simple to pull off with everyday tools and ingredients.
Maybe you’ve been there—wanting something that looks stunning but doesn’t require a pastry degree or hours of prep. This graduation cake recipe stuck with me because it balances elegance with ease. The gold drip adds that wow moment without a fuss, and the fondant cap is the perfect nod to the grad’s big achievement. Let me tell you, seeing that proud smile when the cake was finally revealed made every little kitchen slip-up worth it.
Why You’ll Love This Recipe
- Quick & Easy: Comes together in under 2 hours, perfect for last-minute celebrations or busy days.
- Simple Ingredients: Uses pantry staples and easily found decorating supplies—no specialty stores required.
- Perfect for Graduation Parties: Stylish enough to impress guests without the stress of complicated decorating.
- Crowd-Pleaser: Delicious vanilla sponge with smooth buttercream, loved by kids and adults alike.
- Unbelievably Delicious: The gold drip adds a luxe finish while the fondant cap creates a memorable centerpiece.
This isn’t your run-of-the-mill cake. What sets it apart is the balance between the dramatic gold drip that feels special but isn’t tricky, and the fondant cap that gives it that classic graduation vibe. I’ve tested this recipe multiple times, tweaking the drip consistency and fondant shaping to make it beginner-friendly yet elegant. Honestly, it’s the kind of cake that makes you close your eyes and smile after the first bite, knowing all the effort was totally worth it.
Whether you’re making it for your own grad or a friend, this cake recipe will help you create a moment that’s both beautiful and delicious—without turning your kitchen into a disaster zone.
What Ingredients You Will Need
This recipe uses straightforward, wholesome ingredients to achieve a light, moist cake with smooth buttercream and a striking gold drip. Most of these are pantry essentials or easy to find at any grocery store.
- For the Cake Layers:
- All-purpose flour – 2 ½ cups (320 g), sifted for a tender crumb
- Baking powder – 2 ½ teaspoons
- Salt – ½ teaspoon
- Unsalted butter – 1 cup (226 g), softened (I like using Land O’Lakes for consistent texture)
- Granulated sugar – 2 cups (400 g)
- Large eggs – 4, room temperature (helps with even mixing)
- Pure vanilla extract – 2 teaspoons (freshly bottled preferred for best aroma)
- Whole milk – 1 cup (240 ml), room temperature (can swap with almond milk if needed)
- For the Buttercream Frosting:
- Unsalted butter – 1 cup (226 g), softened
- Powdered sugar – 4 cups (480 g), sifted
- Pure vanilla extract – 2 teaspoons
- Heavy cream – 2 to 3 tablespoons (can substitute with milk, but cream gives a richer taste)
- Pinch of salt (balances sweetness)
- For the Gold Drip:
- White chocolate chips – ¾ cup (135 g)
- Heavy cream – ⅓ cup (80 ml)
- Edible gold luster dust – 1 teaspoon (choose a trusted brand like Wilton for vibrant shine)
- Clear vanilla or lemon extract – a few drops (optional, enhances flavor)
- For the Fondant Cap:
- Pre-made white fondant – about 8 oz (225 g), store-bought saves time
- Black gel food coloring – a small amount (for cap details)
- Edible glue or water – to help pieces stick
- Gold edible paint (optional, for tassel highlight)
If you want to switch things up, almond flour can be used for a gluten-free base, but expect a slightly denser cake. For the gold drip, you can use a ready-made gold-colored candy melts alternative, but I prefer the homemade white chocolate version for a smoother finish. Seasonal variations like swapping vanilla for lemon zest in the cake batter work beautifully for spring or summer graduations.
Equipment Needed
- Two 8-inch (20 cm) round cake pans (non-stick or well-greased)
- Mixing bowls (medium and large)
- Electric mixer (stand or hand-held) – crucial for smooth buttercream
- Rubber spatula and whisk
- Offset spatula – for even frosting application
- Cake turntable (optional but super helpful for smooth decorating)
- Small saucepan – to heat cream for gold drip
- Heatproof bowl – for melting white chocolate (double boiler method)
- Piping bags and small round piping tip – for drip control
- Rolling pin – to smooth fondant cap
- Food-safe paintbrush – for edible gold paint details
If you don’t have a cake turntable, no worries—rotating the cake gently by hand works fine. For melting chocolate, a microwave-safe bowl can be used in short bursts, but be careful not to burn the chocolate. A bench scraper is a nice-to-have tool for frosting smoothness but isn’t essential. Budget-friendly alternatives like silicone spatulas and plastic turntables work great for beginners.
Preparation Method
- Preheat & Prep: Preheat your oven to 350°F (175°C). Grease and flour two 8-inch cake pans, or line with parchment paper. This prevents sticking and ensures clean edges. (10 minutes prep)
- Make the Cake Batter: In a bowl, whisk together 2 ½ cups (320 g) of sifted all-purpose flour, 2 ½ teaspoons baking powder, and ½ teaspoon salt. In a separate large bowl, beat 1 cup (226 g) softened butter with 2 cups (400 g) granulated sugar until light and fluffy—this usually takes about 3-4 minutes on medium speed. Add 4 room-temperature eggs one at a time, mixing well after each. Stir in 2 teaspoons vanilla extract.
- Combine Wet & Dry: Add the dry ingredients to the wet mixture in three parts, alternating with 1 cup (240 ml) whole milk, beginning and ending with the dry. Mix gently until just combined—overmixing can make the cake tough. (15 minutes total mixing)
- Bake: Divide batter evenly between the pans. Bake for 30-35 minutes or until a toothpick inserted in the center comes out clean. Let cakes cool in pans for 10 minutes, then transfer to wire racks to cool completely. (35-40 minutes baking + cooling)
- Prepare Buttercream: Beat 1 cup (226 g) softened butter until creamy. Gradually add 4 cups (480 g) powdered sugar, mixing on low speed to avoid a sugar cloud. Add 2 teaspoons vanilla, pinch of salt, and 2-3 tablespoons heavy cream until smooth and spreadable. (10 minutes)
- Assemble the Cake: Level the cakes if needed (a serrated knife works wonders). Place the first layer on your cake board or plate. Spread a generous amount of buttercream on top, then place the second layer. Apply a thin crumb coat of buttercream all over the cake and chill for 20 minutes to set.
- Final Frosting: Apply the final, smooth layer of buttercream using an offset spatula or bench scraper. Chill again for 10 minutes to firm up.
- Make Gold Drip: Heat ⅓ cup (80 ml) heavy cream until just simmering. Pour over ¾ cup (135 g) white chocolate chips in a heatproof bowl; let sit 2 minutes, then stir until smooth. Mix 1 teaspoon edible gold luster dust into the ganache until fully blended. Let cool slightly to thicken but stay pourable.
- Apply Drip: Transfer ganache to a piping bag with a small round tip or use a spoon. Gently pipe drips around the top edge of the chilled cake, letting it drip naturally down the sides. Work quickly before it sets. Chill cake briefly to set the drip. (15 minutes)
- Create Fondant Cap: Roll out white fondant to about ⅛ inch (3 mm) thickness. Cut a circle slightly larger than cake diameter for the cap top. Shape a small square for the mortarboard base and form a thin strip for the cap’s edge. Use black gel to paint details and edible glue to assemble. Optional: paint a gold tassel. Place carefully on cake center after drip sets.
Pro tip: When leveling the cake layers, it helps to use a cake leveler or a serrated knife held steady—no one wants a lopsided graduation cake! Also, don’t rush the drip; if it’s too hot, it’ll run off too fast; too cold, and it won’t drip properly. I learned this the hard way during my first attempt.
Cooking Tips & Techniques
One thing I’ve learned is that the buttercream’s texture is everything here. If it’s too soft, the drip will slide right off; too stiff, and it’s hard to get a smooth finish. Keep your butter at room temperature but not melting—think soft enough to press but not greasy.
When mixing cake batter, fold in the flour gently. Overmixing develops gluten, which can make the cake dense and chewy—nobody wants that for a celebration cake. Also, always sift your powdered sugar and flour for the lightest texture possible.
For the gold drip, using a double boiler to melt chocolate gently prevents burning and graininess. If you don’t have one, a microwave in 20-second bursts with stirring is a decent backup. Remember to let the ganache cool slightly before applying—it should be pourable but not runny.
Multitasking helps a lot here—while the cake cools, whip up your buttercream and prep the fondant cap. If you try to do everything last minute, you’ll stress yourself out (trust me, I’ve been there). Chill times are your friend: they help set each layer and make decorating easier.
Variations & Adaptations
- Chocolate Version: Swap ½ cup of flour for cocoa powder and add ½ cup chocolate chips to the batter for a rich chocolate cake base.
- Fruit Filling: Add a layer of raspberry jam or fresh strawberry slices between the cake layers for a fruity twist that balances the richness.
- Dairy-Free Adaptation: Use dairy-free butter and coconut cream for the frosting, almond milk for the batter, and ensure your fondant is vegan-friendly.
- Color Twist: Tint the buttercream in your school colors instead of classic white for a personalized touch.
- Alternative Decorations: Instead of a fondant cap, try edible gold leaf accents or fresh flowers for a different elegant look.
I once made a version with lavender-infused buttercream for a spring grad, and it was surprisingly fresh and sophisticated. It’s fun to tailor this cake to different tastes and occasions without losing that elegant vibe.
Serving & Storage Suggestions
Serve this cake at room temperature to really enjoy the smooth buttercream and moist crumb. If chilled, take it out 30 minutes before slicing. Presentation-wise, place it on a decorative cake stand to show off the gold drip and fondant cap—trust me, it makes a difference!
This cake pairs wonderfully with a light sparkling wine or a fresh berry compote on the side. For a non-alcoholic option, a sparkling lemonade or iced tea fits the celebratory mood.
Store leftover cake in an airtight container in the refrigerator for up to 4 days. If freezing, wrap tightly in plastic wrap and foil—thaw overnight in the fridge before serving. The flavor actually deepens a bit after a day, so it’s great for prepping ahead.
Nutritional Information & Benefits
This easy elegant graduation cake offers a moderate calorie count per serving, roughly 350-400 calories depending on slice size. Key ingredients like eggs and butter provide protein and fat that contribute to satiety.
Using real butter and sugar keeps it traditional, but you can lighten the recipe by reducing sugar slightly or substituting with natural sweeteners. The vanilla extract adds flavor without calories.
For those with gluten sensitivities, swapping to almond or gluten-free flour makes this recipe accessible. The fondant cap contains sugar and should be consumed in moderation especially for those monitoring sugar intake.
Overall, this cake is a joyful treat that celebrates a milestone and can be part of a balanced approach to indulgence.
Conclusion
This easy elegant graduation cake with gold drip and fondant cap is proof that you don’t need hours or fancy skills to create something memorable. It’s a recipe born from real-life urgency, a bit of kitchen chaos, and a whole lot of heart. I love this cake because it brings sparkle to celebrations without stress and tastes just as good as it looks.
Feel free to adjust colors, flavors, or decorations to match your grad’s personality—this recipe welcomes your creativity. I can’t wait to hear how it turns out for you! Please share your photos or any fun twists you try in the comments below. Let’s make graduation celebrations deliciously unforgettable together.
FAQs
Can I make this cake ahead of time?
Yes! You can bake the cake layers a day in advance and keep them wrapped tightly at room temperature or refrigerated. Assemble and decorate on the day you plan to serve for best freshness.
How do I prevent the gold drip from sliding off?
Make sure your buttercream is chilled and firm before applying the drip. Also, let the ganache cool slightly so it’s thick but still pourable to control drip length.
Is the fondant cap hard to work with for beginners?
Not at all. Using pre-made fondant and simple shapes makes it approachable. A bit of edible glue or water helps pieces stick easily, and you can use store-bought edible paints for details.
Can I use other colors for the drip?
Absolutely! You can swap gold luster dust for silver, rose gold, or even colored candy melts to match your theme.
What’s the best way to store leftover cake?
Keep it in an airtight container in the fridge for up to 4 days. For longer storage, freeze tightly wrapped and thaw in the fridge overnight before serving.
For a fun twist on celebration cakes, you might enjoy the rich layers of chocolate raspberry layer cake or the fresh feel of a lemon blueberry cake, both perfect for marking special moments.
Pin This Recipe!
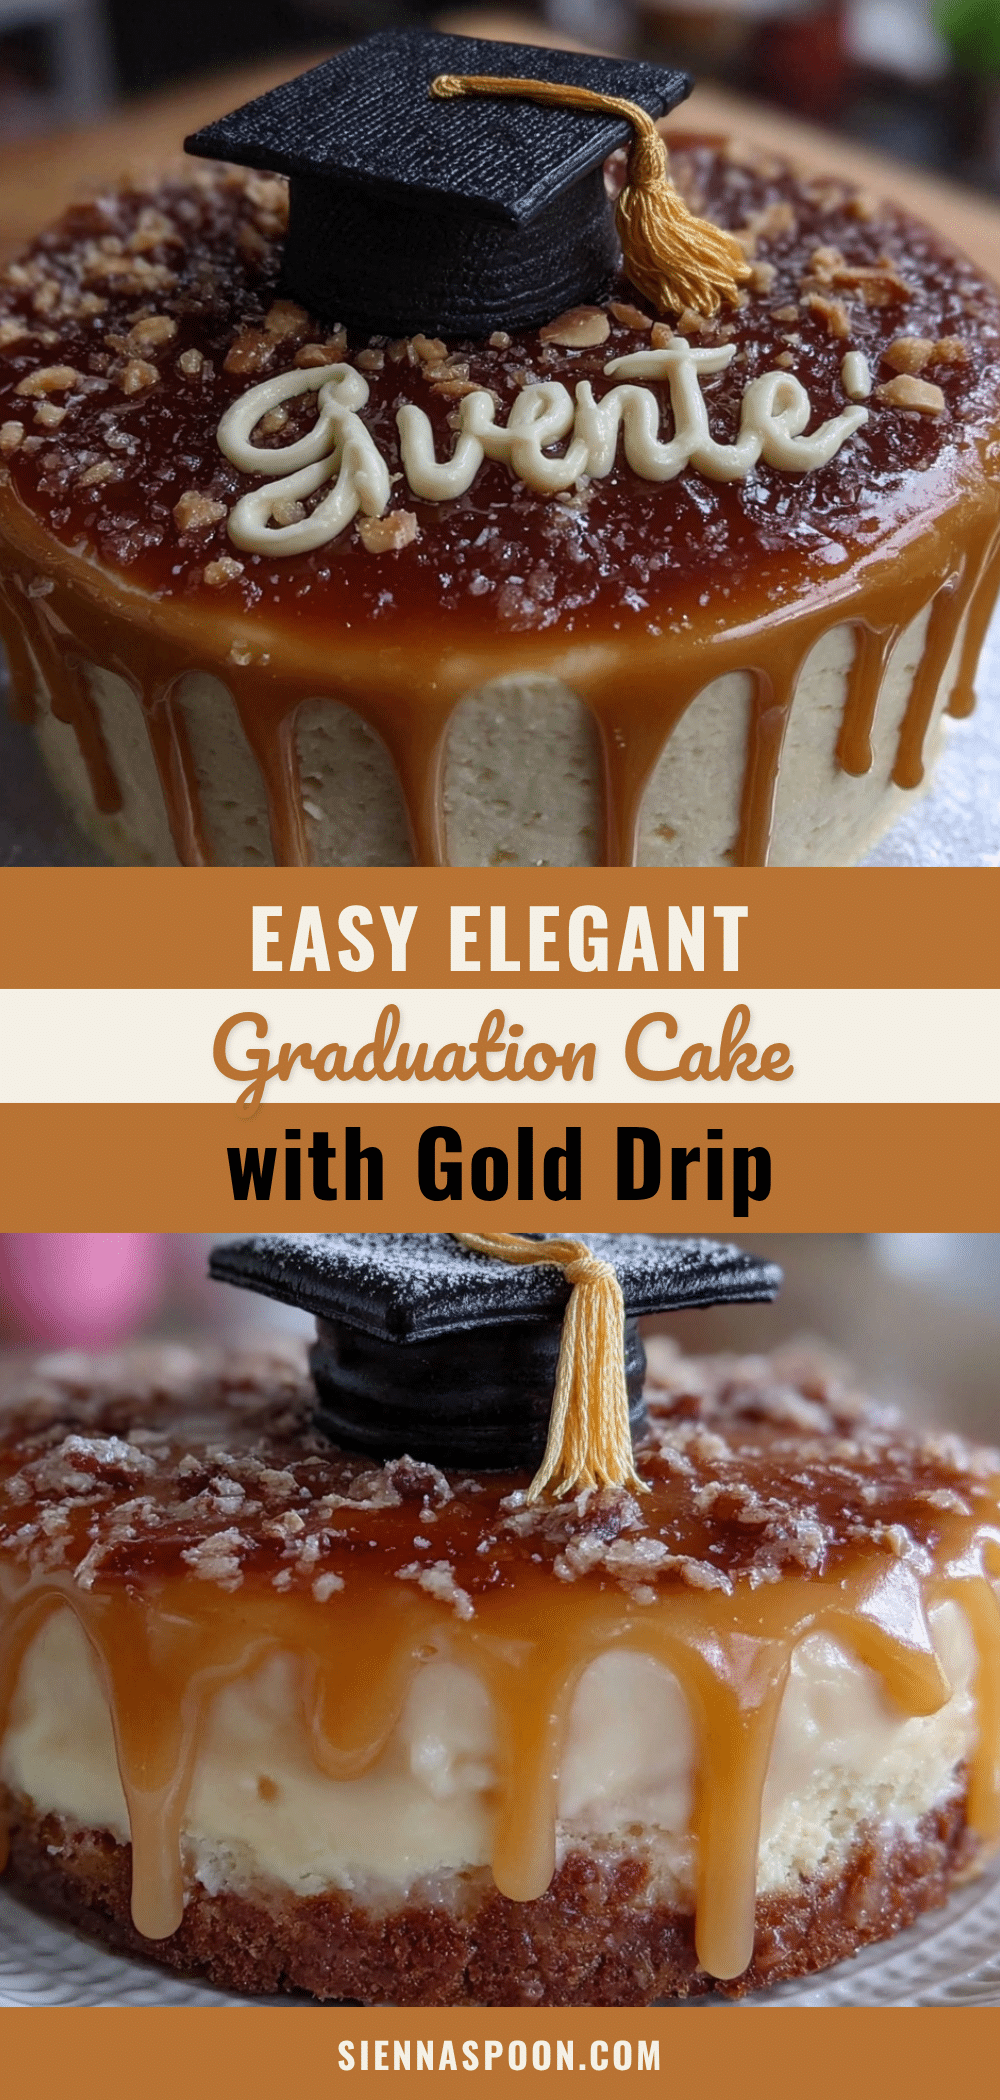
Easy Elegant Graduation Cake Recipe with Gold Drip and Fondant Cap Tutorial
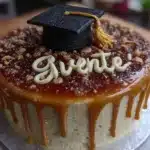
A quick and easy vanilla sponge cake decorated with smooth buttercream, a striking gold drip, and a fondant graduation cap, perfect for last-minute celebrations and graduation parties.
- Prep Time: 30 minutes
- Cook Time: 35 minutes
- Total Time: 1 hour 45 minutes
- Yield: 12 servings 1x
- Category: Dessert
- Cuisine: American
Ingredients
- 2 ½ cups (320 g) all-purpose flour, sifted
- 2 ½ teaspoons baking powder
- ½ teaspoon salt
- 1 cup (226 g) unsalted butter, softened
- 2 cups (400 g) granulated sugar
- 4 large eggs, room temperature
- 2 teaspoons pure vanilla extract
- 1 cup (240 ml) whole milk, room temperature
- 1 cup (226 g) unsalted butter, softened (for buttercream)
- 4 cups (480 g) powdered sugar, sifted
- 2 teaspoons pure vanilla extract (for buttercream)
- 2 to 3 tablespoons heavy cream
- Pinch of salt
- ¾ cup (135 g) white chocolate chips
- ⅓ cup (80 ml) heavy cream (for gold drip)
- 1 teaspoon edible gold luster dust
- A few drops clear vanilla or lemon extract (optional)
- About 8 oz (225 g) pre-made white fondant
- Black gel food coloring
- Edible glue or water
- Gold edible paint (optional)
Instructions
- Preheat oven to 350°F (175°C). Grease and flour two 8-inch cake pans or line with parchment paper.
- In a bowl, whisk together sifted flour, baking powder, and salt.
- In a large bowl, beat softened butter with granulated sugar until light and fluffy (3-4 minutes).
- Add eggs one at a time, mixing well after each. Stir in vanilla extract.
- Add dry ingredients to wet mixture in three parts, alternating with milk, beginning and ending with dry. Mix gently until just combined.
- Divide batter evenly between pans. Bake for 30-35 minutes or until a toothpick comes out clean.
- Cool cakes in pans for 10 minutes, then transfer to wire racks to cool completely.
- Beat softened butter for buttercream until creamy. Gradually add powdered sugar on low speed.
- Add vanilla extract, salt, and heavy cream until smooth and spreadable.
- Level cakes if needed. Place first layer on cake board, spread buttercream, then add second layer.
- Apply thin crumb coat of buttercream all over cake and chill for 20 minutes.
- Apply final smooth layer of buttercream and chill for 10 minutes.
- Heat heavy cream until simmering. Pour over white chocolate chips, let sit 2 minutes, then stir until smooth.
- Mix in edible gold luster dust until blended. Cool slightly to thicken but remain pourable.
- Transfer ganache to piping bag or use spoon. Pipe drips around top edge of chilled cake and chill briefly to set.
- Roll out fondant to ⅛ inch thickness. Cut circle slightly larger than cake diameter for cap top.
- Shape small square for mortarboard base and thin strip for cap edge. Paint details with black gel and assemble with edible glue.
- Optionally paint gold tassel. Place fondant cap on cake center after drip sets.
Notes
Keep buttercream at room temperature but not melting for best drip adherence. Let ganache cool slightly before applying to control drip length. Use a serrated knife or cake leveler for even layers. Chill cake between frosting steps for easier decorating. Microwave chocolate in short bursts if no double boiler is available.
Nutrition
- Serving Size: 1 slice (1/12th of c
- Calories: 375
- Sugar: 38
- Sodium: 180
- Fat: 18
- Saturated Fat: 11
- Carbohydrates: 52
- Fiber: 1
- Protein: 4
Keywords: graduation cake, gold drip cake, fondant cap, vanilla sponge cake, easy cake recipe, buttercream frosting, celebration cake