Love this? Save it for later!
Share the inspiration with your friends
Introduction
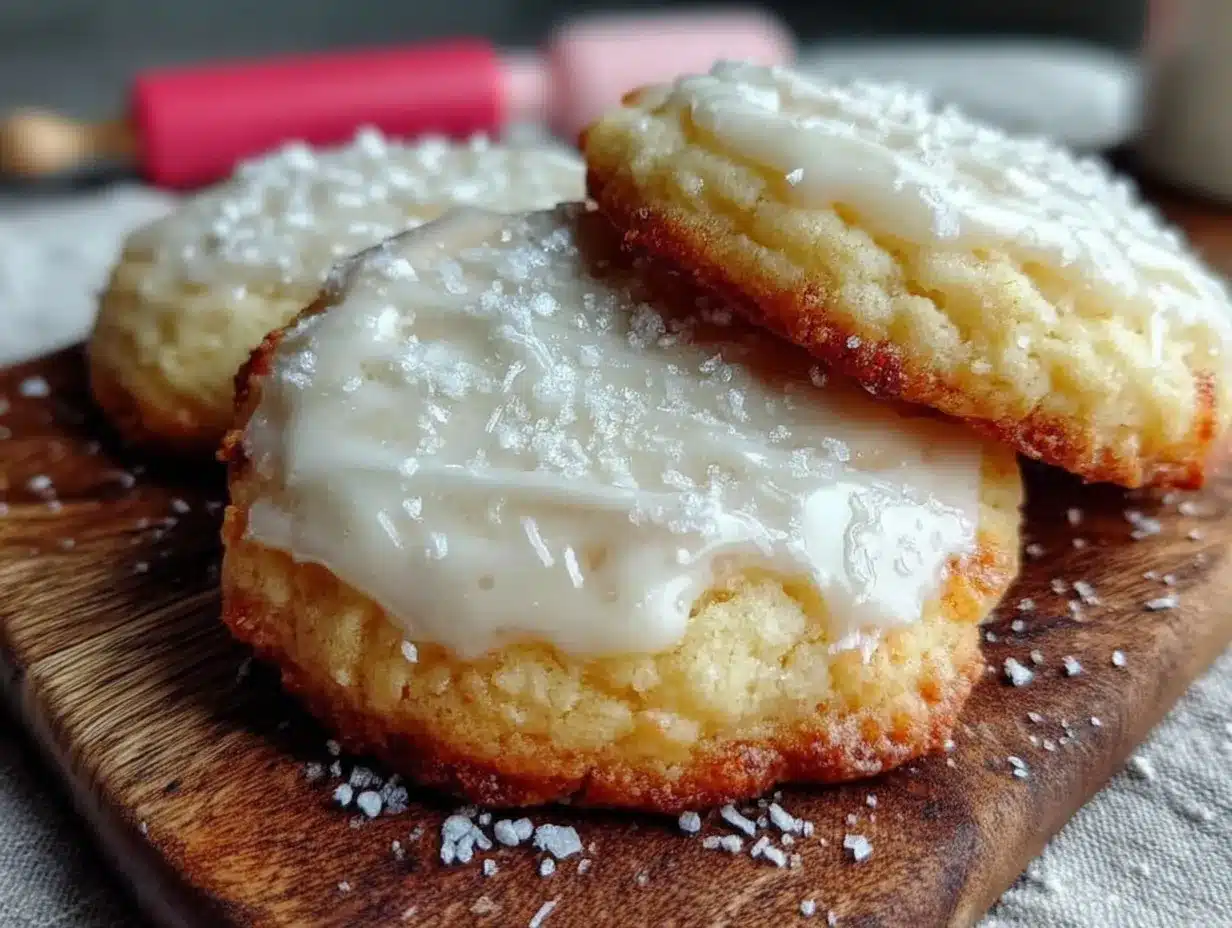
“You know that moment when you bite into a sugar cookie, and the icing cracks just perfectly beneath your teeth?” That’s exactly what happened one lazy Sunday afternoon when I found myself staring at a half-frosted batch of sugar cookies, wishing for a simple icing that looked as good as it tasted. I wasn’t aiming to make anything fancy—honestly, I just wanted something quick and fuss-free. I grabbed a random jar of powdered sugar, a bottle of light corn syrup buried in the back of the pantry, and a splash of vanilla, thinking, “Let’s see if this works.”
The first batch came out with a glossy, glass-like shell that hardened just right, catching the light like little edible jewels. It wasn’t just about the shine—there was that perfect snap, and underneath, the cookie stayed soft and tender. I remember my friend Jenna stopping by and saying, “Where’ve you been hiding this magic?” It wasn’t magic, really—just three ingredients and a little patience, but that shiny, hard finish on sugar cookie icing stuck with me.
Maybe you’ve been there—trying all sorts of complicated recipes that call for a dozen ingredients or hours of drying time. This recipe is different. It’s a no-nonsense, straightforward method that delivers a stunning, professional-looking finish without the stress. And honestly, once you try it, you’ll wonder why you ever settled for anything else.
Why You’ll Love This Recipe
Let me tell you why this easy 3-ingredient sugar cookie icing recipe has become my go-to for holiday baking and beyond. After testing countless icings over the years, this one stands out for a handful of reasons:
- Quick & Easy: Ready in under 10 minutes, perfect for those last-minute cookie decorating sessions or casual baking days.
- Simple Ingredients: It calls for just powdered sugar, light corn syrup, and vanilla extract—most of which you probably already have on hand.
- Perfect for Any Occasion: Whether it’s a festive Christmas cookie exchange or just a sweet treat on a Tuesday afternoon, this icing shines—literally.
- Crowd-Pleaser: Kids love the glossy, colorful surface, and adults appreciate the subtle vanilla flavor and crisp finish.
- Unbelievably Delicious: The hard finish snaps just right without being overly sweet or sticky, creating a delightful contrast with soft sugar cookies.
What really sets this recipe apart is its balance—the shine isn’t overly glossy or sticky like some royal icings, and it dries hard without cracking crazily or losing its smooth surface. Plus, the vanilla adds just enough warmth to keep it from tasting flat. Honestly, I’ve tried several fancy recipes, but this simple version keeps winning on taste and ease.
What Ingredients You Will Need
This recipe uses simple, wholesome ingredients to deliver bold flavor and that satisfying shiny, hard finish without the fuss. You don’t need any special fancy stuff—just pantry staples that you probably already have.
- Powdered Sugar (Confectioners’ Sugar) – about 2 cups (240g). I prefer Domino or Bob’s Red Mill for their fine texture that smooths out easily.
- Light Corn Syrup – 2 tablespoons (30ml). This ingredient is key for the glossy, shiny finish and helps the icing harden properly. If you want a vegan option, you can experiment with maple syrup, but the finish won’t be quite as shiny.
- Vanilla Extract – 1 teaspoon (5ml). Use pure vanilla extract for the best flavor; imitation vanilla can work in a pinch but won’t have the same depth.
Optional: If you want to add a splash of milk (up to 1 teaspoon) for thinning, you can, but it might affect how hard the icing dries. I usually stick to the three main ingredients for that perfect snap.
Equipment Needed
- Mixing Bowl: A medium-sized bowl to combine your ingredients smoothly.
- Whisk or Spoon: For mixing the icing until it’s shiny and smooth. I sometimes use a small hand whisk for better control.
- Spatula: To spread the icing evenly on the cookies.
- Cookie Sheet or Wire Rack: For letting your iced cookies dry. A wire rack is best to allow air circulation and prevent the icing from sticking underneath.
- Measuring Cups and Spoons: Precision matters for this icing, so accurate measuring tools help.
If you don’t have light corn syrup, some folks try using glucose syrup or golden syrup, but the texture and shine may vary. I’ve found corn syrup gives the most reliable finish and is budget-friendly too.
Preparation Method
- Sift the powdered sugar. Start by sifting 2 cups (240g) of powdered sugar into your mixing bowl to avoid lumps. This makes the icing silky smooth—trust me, it’s worth the little extra step. (Time: 2 minutes)
- Add corn syrup and vanilla. Pour in 2 tablespoons (30ml) of light corn syrup and 1 teaspoon (5ml) of vanilla extract. The corn syrup is the secret weapon here for that shiny, hard finish.
- Mix thoroughly. Use a whisk or spoon to stir the mixture until it becomes glossy and smooth. The icing should hold its shape but still be spreadable—thick enough to stay put, but soft enough to glide on your sugar cookies. (Time: 3-4 minutes)
- Adjust consistency. If your icing feels too stiff, add a few drops of water or milk—but be cautious; too much liquid will prevent it from hardening properly. If too thin, add a pinch more powdered sugar.
- Spread icing on cooled sugar cookies. Use a spatula or the back of a spoon to gently spread the icing. Work quickly as the icing starts to set fast. (Time: 5-10 minutes)
- Let dry. Place the iced cookies on a wire rack and allow them to dry at room temperature for 4-6 hours or overnight. The icing will harden to that perfect shiny, crisp finish. Avoid stacking or covering the cookies until fully dry to prevent smudging.
Pro tip: If you notice tiny air bubbles or uneven spots, use a toothpick to gently pop bubbles and smooth the surface while still wet. Also, don’t rush the drying process; patience pays off with that flawless finish.
Cooking Tips & Techniques
From my experience, the secret to this sugar cookie icing’s success lies in the mixing and drying phases. Here are some tips I swear by:
- Don’t skip sifting. Lumps in powdered sugar can cause bumps in the icing. Sifting is quick and smooths out the texture beautifully.
- Mix until glossy. The glossy sheen means the corn syrup and sugar are well combined, which helps the icing dry with a hard finish.
- Work on cooled cookies. Applying icing on warm cookies can cause it to melt or become sticky, ruining that shiny finish.
- Thin carefully. If your icing is too thick to spread, add liquid a drop at a time. Too much liquid can make the icing sticky and prevent hardening.
- Drying environment matters. A dry, cool room helps the icing set properly. Avoid humid kitchens or covering the cookies during drying.
One time, I forgot to let the cookies cool fully and the icing started sliding off—lesson learned! Also, I used a plastic spoon to spread the icing, but switching to a small offset spatula made the job much easier and smoother.
Variations & Adaptations
This easy 3-ingredient sugar cookie icing is surprisingly versatile. Here are some ways you can tweak it:
- Flavor twists: Swap vanilla extract for almond, lemon, or peppermint extract to suit your mood or season.
- Color it: Add gel food coloring a drop at a time to get vibrant colors without thinning the icing.
- Gluten-free or vegan: The icing itself is naturally gluten-free. For vegan options, try maple syrup instead of corn syrup, though the shine might be less intense.
- Faster drying: Use a fan or place cookies near a cool draft to speed up drying, but watch closely to avoid cracking.
Personally, I once tried a lemon-vanilla combo for a spring party and got rave reviews. It’s a fun way to keep this simple icing exciting without complicating the recipe.
Serving & Storage Suggestions
Serve these iced sugar cookies at room temperature so you get that satisfying snap when you bite in. They look stunning on a festive platter or even wrapped individually as sweet gifts.
If you’re serving with drinks, I find a warm cup of tea or classic milk pairs perfectly, balancing the sweet crispness.
To store, keep the cookies in an airtight container at room temperature. They last well for up to 5 days without losing their shiny finish. Avoid refrigeration—it can cause condensation and soften the icing.
You can freeze the cookies after the icing has completely dried. Wrap them individually in plastic wrap and place in a freezer-safe container. When ready to enjoy, thaw at room temperature; the icing might lose a bit of its shine but still tastes great.
Nutritional Information & Benefits
This sugar cookie icing is mostly powdered sugar and corn syrup, so it’s definitely a treat to enjoy in moderation. Per serving (per cookie, roughly), it contains about 50-70 calories, mostly from sugars.
While not a health food, the simple ingredients mean there are no artificial additives or preservatives, and you can control the sweetness by adjusting your sugar base.
For gluten-free bakers, this icing is a safe choice as long as your cookies are gluten-free. It’s also nut-free and dairy-free, making it accessible for many dietary needs.
Personally, I appreciate that it uses minimal ingredients and no complicated steps, making it easier to bake with kids or for casual gatherings without sacrificing that professional look.
Conclusion
If you’re looking for an easy, fuss-free icing that gives your sugar cookies that perfect shiny, hard finish, this 3-ingredient recipe is a keeper. It’s straightforward, reliable, and just plain fun to make.
Feel free to play with flavors or colors to make it your own—this icing is forgiving and adapts well. I love how it brings a little sparkle to my cookie platters, and honestly, it’s become my secret weapon for impressing guests without the stress.
Give it a try, experiment a bit, and let me know how your cookies turn out. I’d love to hear your twists or favorite flavor combos!
Remember, baking is about joy and sharing—so have fun, make a mess if you have to, and enjoy every shiny bite.
FAQs
Can I use powdered sugar substitutes for this icing?
Powdered sugar is best because it dissolves smoothly and helps the icing harden properly. Granulated sugar won’t work here.
How long does it take for the icing to harden completely?
Typically, it takes 4 to 6 hours at room temperature. For best results, let the cookies dry overnight.
Can I make this icing ahead of time?
Yes! You can prepare the icing and store it in an airtight container for up to 3 days. Stir well before using.
What if my icing cracks after drying?
Cracking can happen if the icing is too thick or dried too quickly. Try thinning the icing slightly or drying in a less drafty area next time.
Is it possible to add colors to this icing?
Absolutely! Use gel food coloring to avoid thinning the icing. Add a tiny amount until you reach your desired shade.
Speaking of decorating, if you enjoy this icing, you might also appreciate the buttery richness of my classic sugar cookie recipe that pairs perfectly with it. And for a different texture contrast, the crispy garlic chicken recipe offers a savory balance to your sweet treats when hosting parties!
Pin This Recipe!
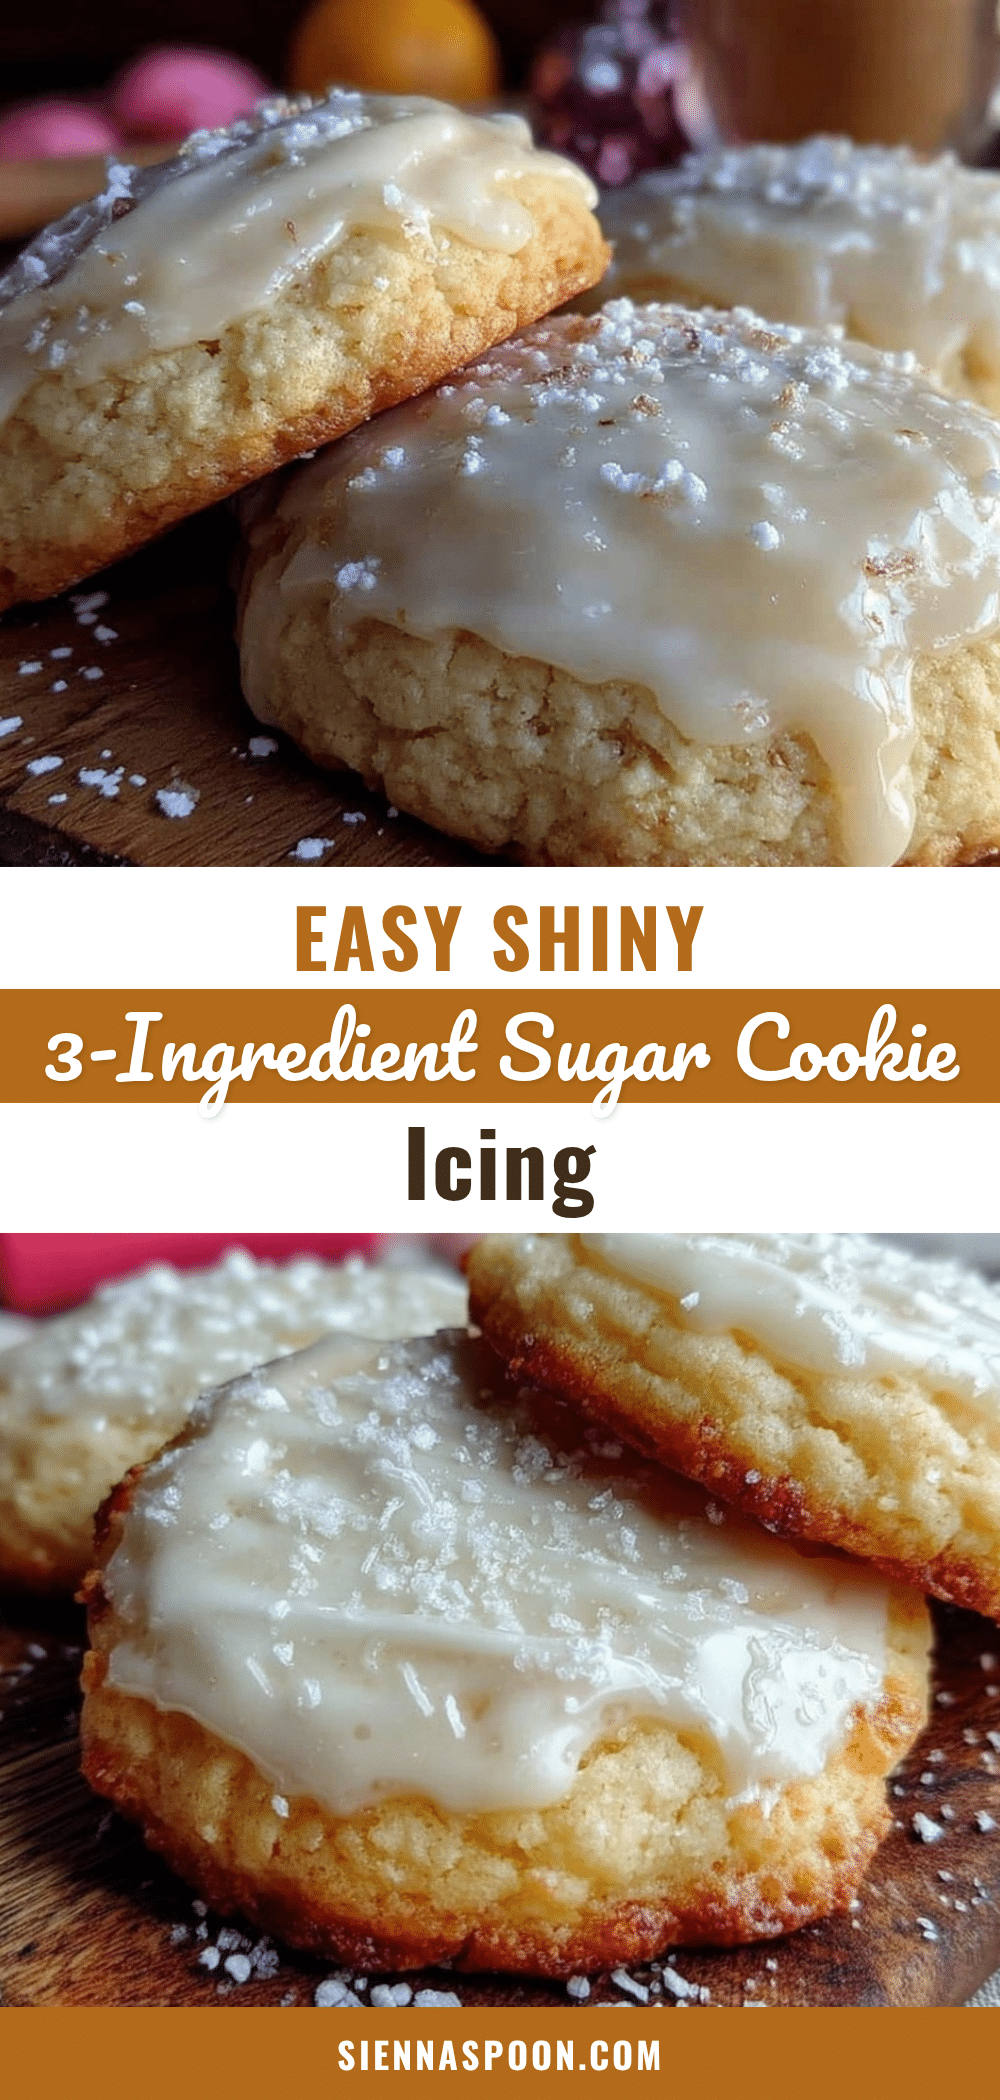
Easy 3-Ingredient Sugar Cookie Icing Recipe for Perfect Hard Shine Finish

A quick and simple icing recipe using just powdered sugar, light corn syrup, and vanilla extract that creates a glossy, hard finish perfect for sugar cookies.
- Prep Time: 5 minutes
- Cook Time: 0 minutes
- Total Time: 4-6 hours drying time
- Yield: Enough icing for about 24 sugar cookies
- Category: Dessert
- Cuisine: American
Ingredients
- 2 cups (240g) powdered sugar (confectioners’ sugar)
- 2 tablespoons (30ml) light corn syrup
- 1 teaspoon (5ml) vanilla extract
- Optional: up to 1 teaspoon milk or water for thinning
Instructions
- Sift 2 cups (240g) of powdered sugar into a mixing bowl to avoid lumps.
- Add 2 tablespoons (30ml) of light corn syrup and 1 teaspoon (5ml) of vanilla extract to the bowl.
- Mix thoroughly with a whisk or spoon until the mixture is glossy and smooth, thick but spreadable.
- If the icing is too stiff, add a few drops of water or milk cautiously; if too thin, add a pinch more powdered sugar.
- Spread the icing evenly on cooled sugar cookies using a spatula or the back of a spoon, working quickly.
- Place the iced cookies on a wire rack and let dry at room temperature for 4-6 hours or overnight until the icing hardens to a shiny, crisp finish.
Notes
Sift powdered sugar to avoid lumps. Work on cooled cookies to prevent melting. Add liquid sparingly to avoid sticky icing. Let icing dry in a cool, dry place for best results. Use gel food coloring for coloring without thinning. Store icing in airtight container up to 3 days. Avoid refrigeration of iced cookies to prevent condensation.
Nutrition
- Serving Size: Per cookie (roughly)
- Calories: 5070
- Sugar: 1216
- Carbohydrates: 1317
Keywords: sugar cookie icing, easy icing recipe, 3-ingredient icing, glossy cookie icing, hard finish icing, quick cookie icing