Love this? Save it for later!
Share the inspiration with your friends
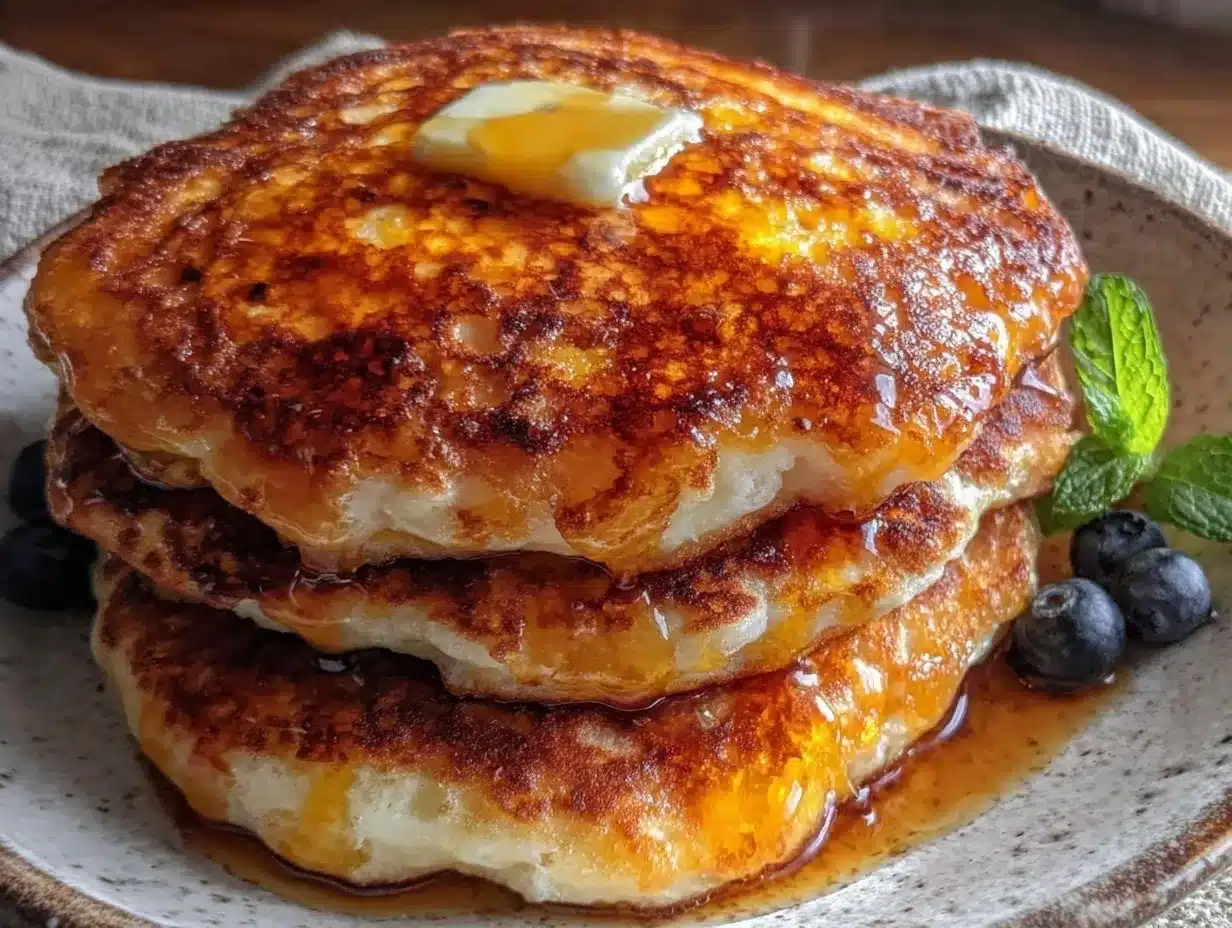
“You’ve got sourdough discard? Let me show you a quick magic trick,” my neighbor Mark said one Saturday morning while I was fumbling with my usual pancake batter. I wasn’t expecting a cooking lesson from the guy who usually shows up with a skateboard under his arm, but there we were, huddled in my tiny kitchen, as he whisked up what he swore were the fluffiest pancakes he’d ever made. Honestly, I was skeptical. I mean, sourdough discard? That’s the stuff I usually toss or forget about. But the way those pancakes came out—crispy edges with centers so soft they practically melted in your mouth—changed my breakfast game forever.
The best part? It took only 10 minutes. Not the usual pancake marathon with endless flipping and waiting. I remember almost burning the first batch because I got distracted by my phone, but even the “oops” pancakes were surprisingly delicious. Maybe you’ve been there—trying to use sourdough discard and ending up with a sad, dense mess. This recipe flips that script. It’s straightforward, forgiving, and perfect for anyone who loves quick, cozy mornings without the fuss.
Since that morning, I’ve made these crispy sourdough discard pancakes more times than I can count—especially on sleepy Sundays when I want breakfast fast but fabulous. Let me tell you, once you try this, it’s hard to go back to plain old pancake batter.
Why You’ll Love This Recipe
After testing this recipe countless times (and yes, eating my fair share of pancakes), I can confidently say this is the best way to turn sourdough discard into breakfast gold. Here’s why it’s become a staple in my kitchen:
- Quick & Easy: Ready in under 10 minutes, this recipe is perfect when you want breakfast fast—no long rising times or complicated steps.
- Simple Ingredients: You probably have everything on hand already—flour, eggs, milk, and your sourdough discard. No surprise grocery runs needed!
- Perfect for Cozy Mornings: Whether it’s a lazy weekend brunch or a weekday treat, these pancakes hit the spot with their crispy edges and fluffy centers.
- Crowd-Pleaser: Kids, partners, even picky eaters can’t resist. I’ve seen skeptical friends sneak second helpings without admitting it.
- Unbelievably Delicious: The sourdough discard adds a subtle tang that balances the sweetness, making each bite a little more interesting than your average pancake.
This isn’t just any pancake recipe—it’s a clever way to rescue sourdough discard that usually gets ignored. The trick is in the balance of wet and dry ingredients and giving the batter just the right amount of rest. Plus, I love how the crispy edges contrast with the soft, fluffy centers—kind of like the best parts of a diner pancake, but homemade and faster.
Honestly, this recipe has saved me from wasting sourdough discard more times than I can count. It’s comfort food, no-fuss style, that feels both familiar and a little special. You’re going to want to keep this one bookmarked.
What Ingredients You Will Need
This recipe uses simple, wholesome ingredients to deliver pancakes with that perfect crispy exterior and cloud-like interior—without any fuss. Most of these are pantry staples, and you can tweak a couple depending on your diet or what’s in your fridge.
- Sourdough discard, unfed and room temperature (about 1 cup / 240 ml) – This adds tang and tenderizes the pancake.
- All-purpose flour (1 cup / 125 g) – I prefer King Arthur for consistent results, but any brand works.
- Baking powder (1 teaspoon) – The secret to those fluffy centers; make sure it’s fresh!
- Baking soda (½ teaspoon) – Works with the sourdough’s acidity for lift.
- Granulated sugar (2 tablespoons) – Balances the tanginess; you can reduce if you prefer less sweet.
- Salt (¼ teaspoon) – Just enough to enhance flavors.
- Milk (¾ cup / 180 ml) – Whole milk is best, but almond or oat milk works fine too.
- Large egg, beaten (1) – Adds structure and richness.
- Unsalted butter, melted (2 tablespoons) – For richness and that golden crust; use dairy-free margarine if needed.
- Optional: Vanilla extract (1 teaspoon) – A tiny touch that adds warmth.
If you’re feeling adventurous, you can swap the all-purpose flour for a gluten-free blend or use coconut sugar instead of granulated sugar for a different flavor profile. The key is keeping the batter loose enough to spread easily but not runny. I’ve found that adjusting the milk slightly can fix any texture quirks.
Equipment Needed
- Non-stick skillet or griddle – A heavy-bottomed pan works best to maintain even heat and avoid hot spots. I use a cast iron skillet most mornings; it holds heat beautifully and helps achieve that irresistible crispiness.
- Mixing bowls – One medium for dry ingredients, one for wet.
- Whisk or fork – For combining ingredients smoothly, although a handheld mixer is optional.
- Measuring cups and spoons – Precision matters here, especially with the baking powder and soda.
- Spatula – A thin, wide spatula makes flipping pancakes easy and clean.
If you don’t have a griddle, a non-stick frying pan will do just fine. Just watch the heat so you don’t burn the edges while waiting for the centers to cook through. Also, keeping your butter melted and warm makes mixing a breeze, so I usually melt mine in the microwave for 20 seconds.
Preparation Method
- Gather your ingredients: Measure out all your ingredients so you’re ready to go. This helps keep the process smooth (and reduces the chance of the inevitable “forgot the egg” moment).
- Mix dry ingredients: In a medium bowl, whisk together 1 cup (125 g) all-purpose flour, 1 teaspoon baking powder, ½ teaspoon baking soda, 2 tablespoons sugar, and ¼ teaspoon salt. Mixing these first ensures even distribution.
- Combine wet ingredients: In another bowl, beat 1 large egg, then add 1 cup (240 ml) sourdough discard, ¾ cup (180 ml) milk, 2 tablespoons melted butter, and 1 teaspoon vanilla extract if using. Whisk until smooth.
- Fold wet into dry: Pour the wet ingredients into the dry. Gently stir with a spatula or wooden spoon just until combined. The batter should be lumpy but without big pockets of flour. Overmixing can cause tough pancakes, so resist the urge to whisk it smooth.
- Rest the batter: Let it sit for 5 minutes at room temperature. This gives the baking soda and powder time to react with the sourdough’s acidity, creating bubbles that make the pancakes fluffy inside.
- Preheat your skillet: Heat your non-stick pan or griddle over medium heat. To test readiness, sprinkle a few drops of water on the surface—if they dance and evaporate quickly, you’re good.
- Cook pancakes: Lightly grease the skillet with a bit of melted butter or oil. Pour about ¼ cup (60 ml) batter per pancake onto the skillet. Cook until bubbles form on the surface and edges look set, about 2-3 minutes. Flip carefully and cook for another 2 minutes or until golden brown.
- Adjust heat as needed: If pancakes brown too fast, lower the heat. You want crispy edges but fully cooked centers. This balancing act is key to the recipe’s success.
- Serve immediately: Stack your pancakes and enjoy with butter, maple syrup, or your favorite toppings.
Pro tip: If you’re making a big batch, keep cooked pancakes warm in a low oven (around 200°F / 90°C) on a baking sheet while you finish cooking the rest.
Cooking Tips & Techniques
Getting those perfect crispy edges and fluffy centers takes a bit of practice, but here are some tips I’ve learned the hard way:
- Don’t overmix the batter: Lumps are okay! Overmixing activates gluten and leads to chewy pancakes, which is the last thing you want.
- Resting the batter is crucial: I know it’s tempting to cook immediately, but that 5-minute wait lets the leaveners work with the sourdough’s natural acids.
- Control your heat: Medium heat is your friend. Too hot, and you get burnt edges with raw centers; too low, and pancakes turn out pale and dense.
- Use melted butter in batter and for the pan: It adds flavor and helps develop those crispy edges. I once tried oil only and missed that golden crust.
- Flip only once: Wait for bubbles and set edges before flipping. Flipping too early or multiple times can deflate your pancakes.
- Keep the pan clean: Wipe out excess crumbs or burned bits between batches to prevent bitterness.
I remember the first time I rushed and didn’t let the batter rest—my pancakes were flat and dense. Now, I treat that resting time like gold. Also, multitasking helps: while the batter rests, I set the table or chop fruit for topping.
Variations & Adaptations
This recipe is a great base to tweak and make your own. Here are some ways I’ve played around with it:
- Gluten-Free Version: Swap all-purpose flour with a 1:1 gluten-free blend. I use Bob’s Red Mill Gluten-Free Baking Flour with good results.
- Vegan Adaptation: Use flax egg (1 tablespoon ground flaxseed + 3 tablespoons water) instead of eggs, and plant-based milk with coconut oil instead of butter.
- Flavor Twists: Add fresh blueberries, chopped nuts, or cinnamon to the batter for extra flavor and texture.
- Cooking Method: These pancakes also cook well on a griddle or electric skillet, great for making larger batches.
- Personal Favorite: I sometimes fold in a tablespoon of cream cheese for ultra-rich centers, which sounds wild but is ridiculously good.
Serving & Storage Suggestions
These pancakes are best served hot, straight from the pan. The crispy edges soften a bit as they cool, but honestly, I’ve never had leftovers last long enough to notice. Here’s how I like to serve and store them:
- Top with real maple syrup, a pat of butter, and fresh fruit for a classic combo.
- Try dollops of yogurt and a drizzle of honey for a tangy-sweet twist.
- Serve alongside crispy bacon or scrambled eggs for a hearty brunch.
- To store, place cooled pancakes in an airtight container in the refrigerator for up to 3 days.
- For longer storage, freeze pancakes in a single layer on a baking sheet, then transfer to a freezer bag. They keep well for up to 2 months.
- Reheat in a toaster or oven to bring back some crispiness—microwaving tends to make them soft and chewy.
Flavors deepen slightly after resting, so leftovers can taste even better the next day if reheated properly.
Nutritional Information & Benefits
Each serving of these sourdough discard pancakes (about 2-3 medium pancakes) contains approximately:
| Calories | 280-320 kcal |
|---|---|
| Protein | 8-10 grams |
| Carbohydrates | 40-45 grams |
| Fat | 8-10 grams |
| Fiber | 1-2 grams |
Sourdough discard adds a small dose of probiotics and makes the pancakes easier to digest thanks to the fermentation process. Using whole milk and butter provides richness and fat necessary for satiety, while the eggs boost protein content. This recipe is naturally free from artificial additives and can be adapted for gluten-free and dairy-free diets easily.
Conclusion
If you’ve got sourdough discard lying around, don’t let it go to waste. These crispy 10-minute sourdough discard pancakes with fluffy centers are proof that simple ingredients and a little patience can make breakfast feel special without hours in the kitchen. I love how this recipe turns what might seem like a kitchen leftover into a showstopper meal. It’s quick, forgiving, and downright delicious—perfect for anyone who wants to impress themselves or their loved ones with minimal effort.
Give it a try, tweak it your way, and let me know how you make it your own. I’m always eager to hear if you’ve added your twist or discovered a new favorite topping. Happy pancake flipping!
FAQs
Can I use fed sourdough starter instead of discard?
Yes, but reduce the milk slightly since a fed starter is more hydrated. The pancakes may be a bit tangier and fluffier.
Do I have to let the batter rest?
Resting for about 5 minutes helps the leaveners react with the sourdough acids, creating fluffier pancakes. You can skip it but expect slightly denser results.
Can I make the batter ahead of time?
You can prepare the batter up to a few hours in advance and refrigerate it. Let it come to room temperature before cooking.
What if my pancakes are too flat?
Make sure your baking powder is fresh and don’t overmix the batter. Also, check the heat isn’t too low; medium heat works best.
How do I store leftover pancakes?
Store cooled pancakes in an airtight container in the fridge for up to 3 days or freeze for longer storage. Reheat in a toaster or oven for best texture.
For a different take on quick breakfast favorites, you might enjoy my crispy garlic chicken recipe or check out the easy weeknight dinners section for more speedy meals.
Pin This Recipe!
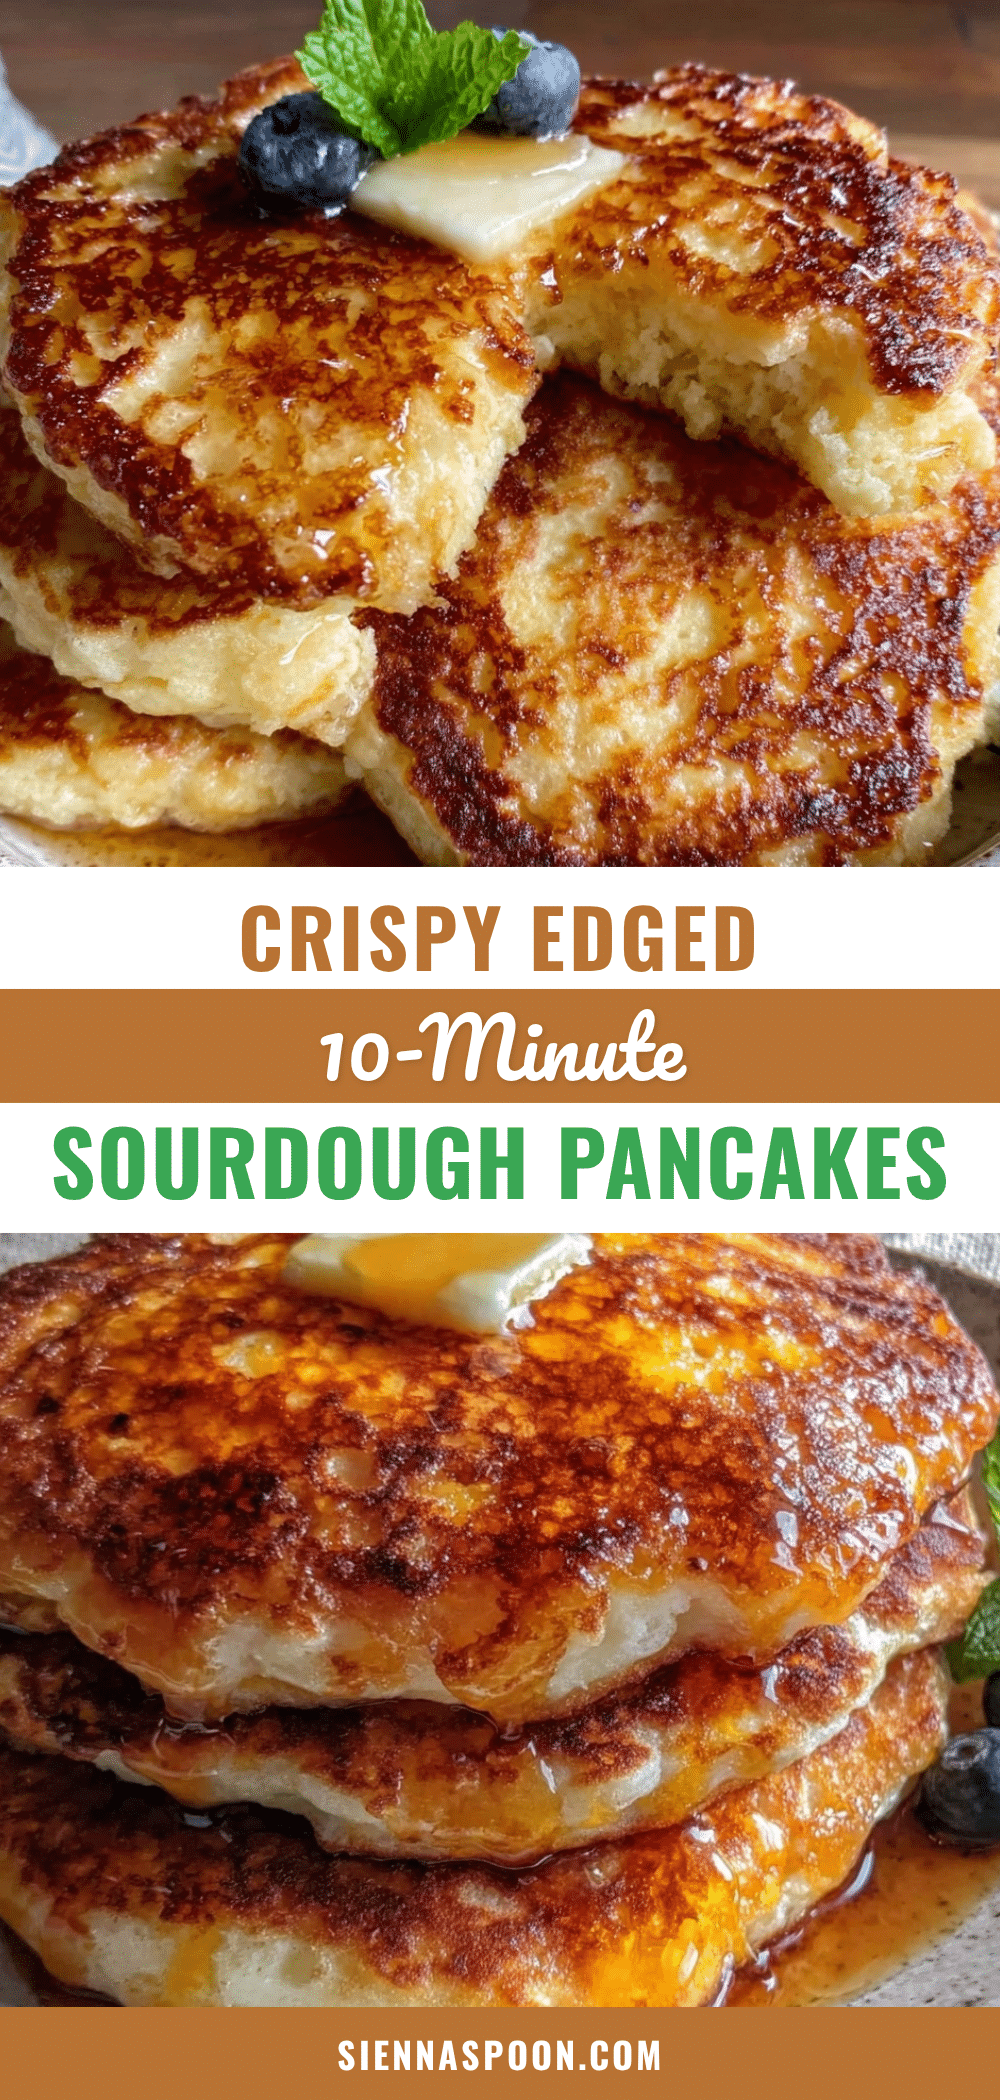
Crispy Sourdough Discard Pancakes 10-Minute Easy Fluffy Recipe
Quick and easy pancakes made with sourdough discard that have crispy edges and fluffy centers, ready in just 10 minutes.
- Prep Time: 5 minutes
- Cook Time: 5 minutes
- Total Time: 10 minutes
- Yield: 4 servings 1x
- Category: Breakfast
- Cuisine: American
Ingredients
- 1 cup (240 ml) sourdough discard, unfed and room temperature
- 1 cup (125 g) all-purpose flour
- 1 teaspoon baking powder
- ½ teaspoon baking soda
- 2 tablespoons granulated sugar
- ¼ teaspoon salt
- ¾ cup (180 ml) milk (whole milk preferred, almond or oat milk works too)
- 1 large egg, beaten
- 2 tablespoons unsalted butter, melted
- 1 teaspoon vanilla extract (optional)
Instructions
- Gather your ingredients and measure them out.
- In a medium bowl, whisk together the flour, baking powder, baking soda, sugar, and salt.
- In another bowl, beat the egg, then add the sourdough discard, milk, melted butter, and vanilla extract if using. Whisk until smooth.
- Pour the wet ingredients into the dry ingredients and gently stir just until combined. The batter should be lumpy but without big pockets of flour. Do not overmix.
- Let the batter rest for 5 minutes at room temperature.
- Preheat a non-stick skillet or griddle over medium heat. Test readiness by sprinkling a few drops of water on the surface; if they dance and evaporate quickly, it’s ready.
- Lightly grease the skillet with melted butter or oil. Pour about ¼ cup (60 ml) batter per pancake onto the skillet.
- Cook until bubbles form on the surface and edges look set, about 2-3 minutes. Flip carefully and cook for another 2 minutes or until golden brown.
- Adjust heat as needed to achieve crispy edges and fully cooked centers.
- Serve immediately with butter, maple syrup, or your favorite toppings.
Notes
Do not overmix the batter; lumps are okay. Let the batter rest for 5 minutes to allow leaveners to react with sourdough acidity. Use medium heat to avoid burnt edges or raw centers. Flip pancakes only once when bubbles form and edges set. Keep cooked pancakes warm in a low oven if making a big batch.
Nutrition
- Serving Size: About 2-3 medium pan
- Calories: 300
- Sugar: 6
- Sodium: 300
- Fat: 9
- Saturated Fat: 5
- Carbohydrates: 43
- Fiber: 1.5
- Protein: 9
Keywords: sourdough discard pancakes, crispy pancakes, fluffy pancakes, quick breakfast, easy pancakes, sourdough recipe