Love this? Save it for later!
Share the inspiration with your friends
I was digging through a box of old cookbooks at a flea market last October, looking for nothing in particular, when the woman running the booth—probably in her seventies, with bright purple glasses and a voice like gravel—started telling me about the Halloween parties she used to throw. I wasn’t expecting cooking advice from a flea market vendor, but there I was, covered in dust, listening to her describe exactly how to make something she called “Witch’s Apple Bites.” She scribbled the recipe on the back of a receipt, and honestly, I almost lost it twice before I got home. But I’m so glad I didn’t.
That scribbled note became the foundation for these Spooky Caramel Apple Candy Bites, and let me tell you—they’re the kind of treat that makes you feel like a kid again, but without all the sticky mess of a full caramel apple. The woman told me she’d been making them for forty years, and after one batch, I understood why. They’re bite-sized, perfectly spooky, and somehow manage to be both elegant and completely ridiculous at the same time. I mean, what other dessert lets you call a caramel apple “spooky” with a straight face?
These little bites have become my go-to for Halloween gatherings, and maybe you’ve been there too—needing something festive that doesn’t require a pastry degree or a trip to three different stores. The best part? They come together faster than you’d think, and the look on people’s faces when they see them is absolutely priceless. You know that feeling when something turns out better than you expected? That’s these bites, every single time.
Why You’ll Love This Recipe
Let me be honest with you—I’ve tested this recipe about six times to get it just right. The first batch was too sticky, the second fell apart, and the third? Well, let’s just say the caramel didn’t cooperate. But by the fourth try, I had something special. These Spooky Caramel Apple Candy Bites are tested, tweaked, and absolutely foolproof if you follow the steps. Here’s why they’ll become your new Halloween favorite:
- Quick & Easy: You can have these ready in under 30 minutes, which is perfect when you’re juggling costumes, candy bowls, and last-minute decorations.
- Simple Ingredients: No fancy grocery trips needed. Apples, caramel, candy melts, and a few decorations—that’s it. You probably already have most of it.
- Perfect for Halloween: Whether it’s a classroom party, a spooky movie night, or just because you want something fun, these bites fit the occasion perfectly.
- Crowd-Pleaser: Kids love them, adults sneak them, and everyone asks for the recipe. I’ve yet to meet someone who doesn’t grin at the sight of these little guys.
- Unbelievably Delicious: The combination of crisp apple, chewy caramel, and crunchy toppings is next-level comfort food. It’s like a caramel apple, but better because it’s bite-sized and way less messy.
What makes these different from the usual caramel apple recipes? It’s the technique. Instead of trying to coat whole apples (which, let’s face it, is a sticky nightmare), we’re cutting them into rounds and layering the caramel and candy on top. This means you get the perfect apple-to-caramel ratio in every single bite, and no one ends up with a face full of apple juice and regret. Plus, the flat surface makes decorating so much easier—you can get really creative with the spooky faces without worrying about everything sliding off.
This recipe isn’t just good—it’s the kind that makes you close your eyes after the first bite. It’s comfort food reimagined for Halloween: festive, fun, and with the same soul-soothing satisfaction as the original. Perfect for impressing guests without stress, or turning a simple snack into something memorable.
What Ingredients You Will Need
This recipe uses simple, everyday ingredients to deliver big flavor and spooky fun without the fuss. Most of these are pantry staples or easy to find at any grocery store, especially during apple season.
For the Apple Bites
- 3 large apples (I recommend Granny Smith for tartness that balances the sweet caramel, or Honeycrisp for a sweeter option)
- 1 tablespoon lemon juice (to prevent browning—trust me, this matters)
- 1 cup cold water (for the lemon water bath)
For the Caramel Layer
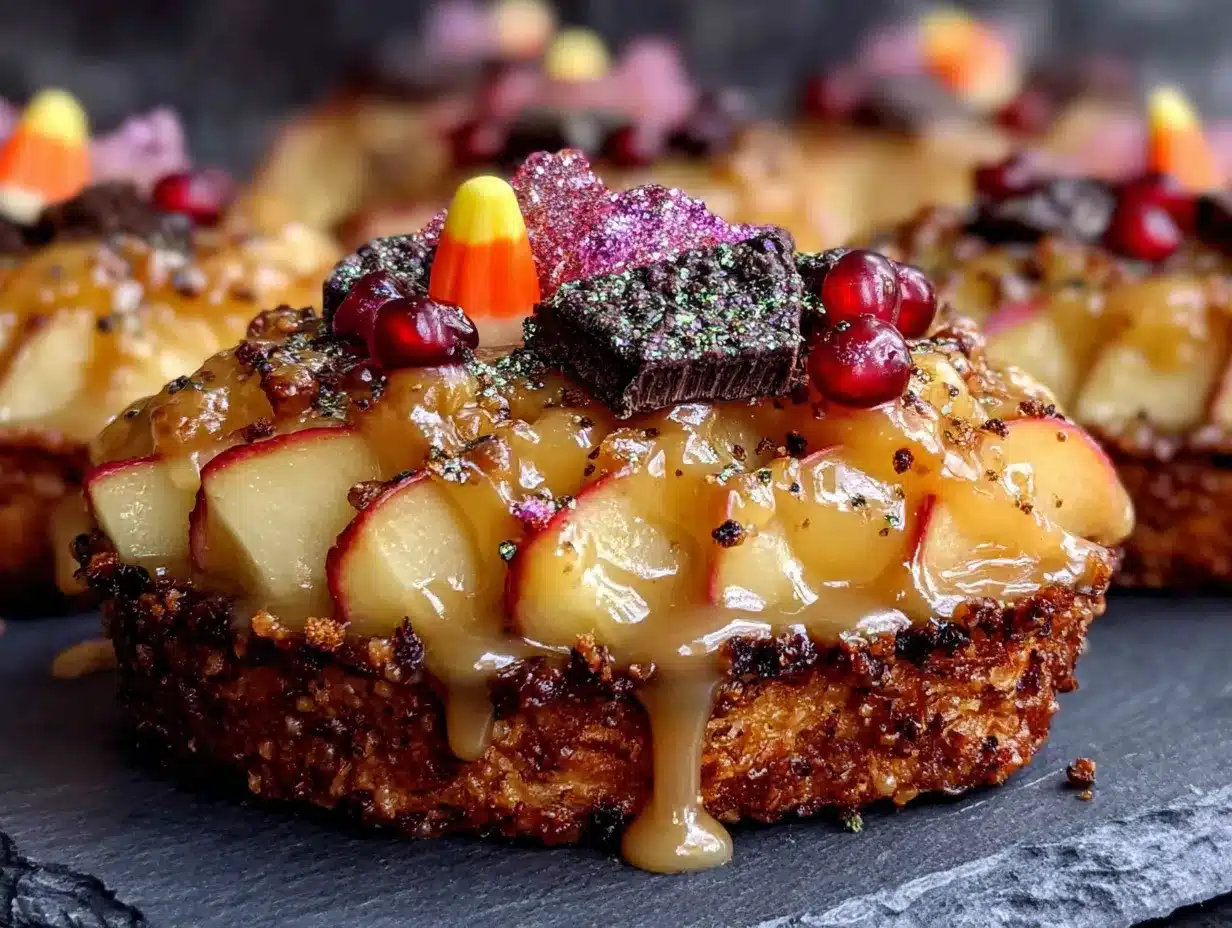
- 14 ounces soft caramel candies (about 40-50 pieces, unwrapped—I prefer Kraft or Werther’s for consistent melting)
- 2 tablespoons heavy cream (adds richness and helps the caramel stay smooth; use whole milk if needed)
- 1 teaspoon vanilla extract (optional, but it adds a lovely depth)
- Pinch of sea salt (balances the sweetness—don’t skip it)
For the Spooky Decorations
- 1 cup white candy melts (for ghosts and spider webs—Wilton brand works great)
- 1 cup orange candy melts (for pumpkins and jack-o’-lantern faces)
- 1/2 cup dark chocolate chips or black candy melts (for eyes and mouths)
- Assorted sprinkles (orange, black, and white—the more variety, the better)
- Edible googly eyes (optional, but highly recommended for maximum spookiness)
- Pretzel sticks (broken into small pieces for witch hat brims or spider legs)
- Mini chocolate chips (for tiny eyes and noses)
For the Toppings (Optional but Fun)
- 1/4 cup crushed graham crackers (for a “dirt” effect on pumpkin bites)
- 1/4 cup shredded coconut, toasted (for “ghost hair” or cobweb texture)
- 1/4 cup chopped peanuts (adds crunch and pairs beautifully with caramel)
- Cinnamon sugar (a light dusting gives a fall flavor boost)
Ingredient Selection Tips: For the best texture, choose apples that are firm and not mealy. I like to buy mine a day or two before so they’re still crisp but have softened just slightly. If you’re using caramel candies, make sure they’re fresh—stale caramels won’t melt smoothly and can turn grainy. For the candy melts, I recommend Wilton or Ghirardelli for the best consistency, but any brand will work as long as you melt them slowly and add a teaspoon of coconut oil if they seem too thick.
Substitution Guidance: If you need a dairy-free option, use dairy-free caramel candies (like the ones from Enjoy Life) and coconut cream instead of heavy cream. For a gluten-free version, double-check your candy melts and pretzels—most are gluten-free, but it’s worth verifying. You can also swap the apples for pears if you’re feeling adventurous, though the texture will be slightly softer.
Equipment Needed
You don’t need a fancy kitchen to make these Spooky Caramel Apple Candy Bites, but having the right tools makes the process so much smoother. Here’s what you’ll need:
- Apple corer or a sharp paring knife (an apple corer is faster, but a knife works fine—I’ve used both)
- Cutting board (preferably with a groove to catch juice)
- Small saucepan (for melting the caramel; a double boiler works too if you’re fancy)
- Microwave-safe bowls (for melting the candy melts—I use three separate ones to avoid color mixing)
- Parchment paper or silicone baking mat (absolutely essential—these bites will stick to wax paper)
- Baking sheet (to hold the bites while they set)
- Small offset spatula or butter knife (for spreading caramel and candy melts)
- Toothpicks or small skewers (for dipping and decorating—I prefer toothpicks for precision)
- Piping bags or small zip-top bags (for drizzling chocolate and making spider webs)
- Measuring cups and spoons (accuracy matters with caramel)
Budget-Friendly Options: If you don’t have a double boiler, just use a heatproof bowl set over a pot of simmering water. No piping bags? Snip a tiny corner off a zip-top bag—it works perfectly. And if you don’t have an apple corer, a melon baller or even a small spoon can scoop out the core, though it takes a bit more patience.
Personal Note: I learned the hard way that parchment paper is non-negotiable here. My first batch ended up welded to a regular baking sheet, and I spent twenty minutes chipping caramel off with a spatula while questioning all my life choices. Trust me on the parchment.
Preparation Method
Alright, let’s get into the fun part. Here’s how to make these Spooky Caramel Apple Candy Bites step by step.
Step 1: Prep the Apples
Start by filling a medium bowl with 1 cup of cold water and the tablespoon of lemon juice. This is your anti-browning bath, and it’s non-negotiable. Core your apples using an apple corer or a sharp knife—cut around the core in a square shape, then remove the seeds. Slice the apples crosswise into rounds about 1/2-inch thick. You should get 4-5 rounds per apple, depending on size. Immediately drop each round into the lemon water as you go. Let them soak for 2-3 minutes, then pat them dry with paper towels. Pro tip: Don’t skip the drying step. Wet apples + hot caramel = a slippery mess that won’t stick.
Step 2: Melt the Caramel
Unwrap all your caramel candies and place them in a small saucepan with the heavy cream and a pinch of sea salt. Heat over medium-low heat, stirring constantly with a silicone spatula. This takes about 5-7 minutes, and you’ll know it’s ready when the caramel is smooth, glossy, and coats the back of a spoon. Remove from heat and stir in the vanilla extract if you’re using it. Warning: Don’t walk away from this. Caramel burns faster than you’d think, and burnt caramel smells like regret. If it seems too thick, add another tablespoon of cream. If it’s too thin, let it cool for a minute—it’ll thicken as it sits.
Step 3: Assemble the Bites
Line your baking sheet with parchment paper. Place the apple rounds on the sheet, spacing them about an inch apart. Using a small spoon or offset spatula, spoon about a tablespoon of warm caramel onto each apple round. Spread it gently to the edges—it doesn’t have to be perfect, but try to cover the entire surface. The caramel should be warm enough to spread easily but not so hot that it runs off the sides. Let them sit at room temperature for 5 minutes to set slightly. Sensory cue: The caramel should look glossy and feel tacky to the touch, not liquid.
Step 4: Melt the Candy Melts
While the caramel sets, melt your candy melts. Place the white and orange melts in separate microwave-safe bowls. Microwave each in 30-second intervals, stirring between each, until smooth. This usually takes about 1-2 minutes total. Be careful not to overheat them—candy melts can seize up if they get too hot, and then you’re stuck with a lumpy mess. If they seem thick, stir in 1/2 teaspoon of coconut oil or vegetable shortening to thin them out.
Step 5: Decorate the Bites
Now for the fun part. Here are a few spooky designs to try:
Ghost Bites: Spoon a small amount of white candy melt over the caramel layer, letting it drip slightly over the edges (like a ghost’s flowing body). Add two mini chocolate chips for eyes before the candy sets. Use a toothpick to create a tiny smile.
Jack-o’-Lantern Bites: Spread orange candy melt over the caramel. While it’s still wet, use a toothpick dipped in dark chocolate to draw a jack-o’-lantern face—triangle eyes, a jagged smile. Add a small piece of pretzel stick on top for a stem.
Spider Bites: Spread dark chocolate over the caramel. Place four pretzel stick pieces on each side for spider legs (break them to about 1 inch each). Add two edible googly eyes on top. For extra creepiness, drizzle a thin line of white candy melt to look like a web.
Witch Hat Bites: Spread orange or purple candy melt over the caramel. Place a chocolate kiss or a small triangle of dark chocolate in the center for the hat. Add a thin strip of orange candy melt around the base for a hatband. Use a toothpick to add a tiny buckle.
Step 6: Let Them Set
Once decorated, let the bites set at room temperature for about 15-20 minutes. If you’re in a hurry, pop them in the refrigerator for 10 minutes, but don’t leave them longer than that—the apples can get watery. You’ll know they’re ready when the candy coatings are firm to the touch and the caramel doesn’t squish when you gently press it.
Troubleshooting Tip: If your caramel is sliding off the apples, it’s probably too warm. Let it cool for a minute before spooning it on. If the candy melts are too thick to spread, add a tiny bit of coconut oil. And if everything goes wrong? Honestly, just eat the components separately—caramel-dipped apple slices are never a bad thing.
Cooking Tips & Techniques
After making these Spooky Caramel Apple Candy Bites about a dozen times (and failing spectacularly at least twice), I’ve picked up a few tricks that make the process smoother. Here’s what I wish someone had told me:
Temperature is everything. The caramel needs to be warm enough to spread but not so hot that it cooks the apple surface. If the apple rounds start looking translucent or releasing juice, your caramel is too hot. Let it cool for a minute before trying again. I learned this the hard way when my first batch turned into apple soup.
Work in small batches. Don’t try to decorate all the bites at once. The candy melts start to set after about 5 minutes, so work with 3-4 bites at a time. This gives you enough time to be creative without rushing. I usually do the ghosts first, then the pumpkins, then the spiders—it keeps things organized.
Use a toothpick for details. For tiny eyes, mouths, and spider webs, a toothpick is your best friend. Dip it in melted chocolate or candy melt and draw directly on the surface. It takes a little practice, but you’ll get the hang of it after a few tries. And honestly, imperfect faces look more spooky anyway.
Don’t overthink the designs. These are supposed to be fun, not perfect. Some of my favorite bites have lopsided eyes or smudged smiles—they look like they came straight out of a haunted kitchen. Embrace the imperfections. Your kids (or your inner child) will love them anyway.
Multitask smartly. While the caramel is melting, prep your decorations. Have your sprinkles, googly eyes, and pretzel pieces ready in small bowls. This way, when the candy melts are ready, you can decorate without scrambling. I once tried to find sprinkles while holding a spoonful of melting chocolate—it didn’t end well.
Keep the apples cold. If your apples are room temperature, the caramel will slide off more easily. Pop the apple rounds in the fridge for 10 minutes before you start. Cold apples + warm caramel = better adhesion. It’s a simple trick, but it makes a huge difference.
Variations & Adaptations
One of the best things about these Spooky Caramel Apple Candy Bites is how adaptable they are. Here are some variations I’ve tried and loved:
Dietary Variations
Vegan Version: Use dairy-free caramel candies (Enjoy Life makes great ones) and coconut cream instead of heavy cream. For the candy melts, check the label—many are accidentally vegan. I’ve made this version for a friend’s Halloween party, and honestly, no one could tell the difference.
Gluten-Free Version: Most caramel candies and candy melts are naturally gluten-free, but double-check the labels on your sprinkles and pretzels. Use gluten-free pretzel sticks or skip them entirely. I’ve tested this with gluten-free pretzels, and they work just as well.
Low-Sugar Version: Use sugar-free caramel candies and dark chocolate with at least 70% cocoa. The apples provide natural sweetness, so you won’t miss the extra sugar. My aunt, who’s diabetic, loves these with a sprinkle of cinnamon instead of candy melts.
Seasonal Adaptations
Fall Harvest Version: Swap the spooky decorations for autumnal ones. Use orange and yellow candy melts, add crushed pecans or walnuts on top, and drizzle with white chocolate to look like falling leaves. These are perfect for Thanksgiving or a fall harvest party.
Christmas Version: Use red and green candy melts, add crushed candy canes on top, and shape the white chocolate into snowmen or Christmas trees. I made these for a holiday party last year, and they disappeared faster than the cookies.
Flavor Twists
Peanut Butter Caramel: Stir 2 tablespoons of peanut butter into the caramel while it’s melting. The salty-sweet combination is incredible, and it pairs beautifully with the apple. Just make sure to use smooth peanut butter for the best texture.
Spiced Apple Bites: Add 1/2 teaspoon of cinnamon and a pinch of nutmeg to the caramel. It gives the bites a warm, cozy flavor that’s perfect for fall. I like to sprinkle a little cinnamon sugar on top before the caramel sets.
Salted Caramel Version: Sprinkle a tiny pinch of flaky sea salt on top of each bite before the caramel sets. The salt cuts through the sweetness and makes the flavors pop. It’s a simple tweak, but it feels fancy.
Serving & Storage Suggestions
These Spooky Caramel Apple Candy Bites are best served at room temperature, which lets the caramel soften slightly and the apple stay crisp. Arrange them on a platter lined with parchment paper or a festive Halloween napkin. I like to group them by design—ghosts on one side, pumpkins on the other, spiders in the middle—so guests can pick their favorite.
What to Serve With Them: These bites pair beautifully with a warm apple cider or a hot cup of coffee. For a Halloween party spread, serve them alongside popcorn balls, pumpkin-shaped cookies, and a bowl of candy corn. They also work great as a dessert table centerpiece—just arrange them in a circular pattern on a cake stand.
Storage Instructions: Store any leftovers in an airtight container in the refrigerator for up to 3 days. Place them in a single layer with parchment paper between each layer to prevent sticking. Important: Don’t stack them too high, or the caramel and candy coatings might smudge. I learned this the hard way when my beautifully decorated ghosts turned into a blob of white chocolate.
Reheating Tips: If you’re serving them the next day, let them sit at room temperature for about 15 minutes before serving. This softens the caramel back to its chewy texture. Don’t microwave them—the apples will turn mushy, and the caramel will get runny. Trust me, I tried it once, and it was not pretty.
How Flavors Develop: Interestingly, these bites taste even better after a few hours in the refrigerator. The caramel absorbs a bit of apple flavor, and the textures meld together beautifully. If you’re making them for a party, I recommend assembling them the night before and letting them chill overnight. Just add any delicate decorations (like googly eyes) right before serving.
Nutritional Information & Benefits
While these Spooky Caramel Apple Candy Bites are definitely a treat, they do have some redeeming qualities. Here’s a rough nutritional breakdown per bite (assuming 20 bites total):
| Nutrient | Amount Per Bite |
|---|---|
| Calories | 120-150 |
| Total Fat | 5-7g |
| Saturated Fat | 3-4g |
| Carbohydrates | 18-22g |
| Sugar | 14-17g |
| Fiber | 1-2g |
| Protein | 1-2g |
Health Benefits: Apples are packed with fiber and vitamin C, and the caramel provides a quick energy boost (in moderation, of course). The dark chocolate in the spider bites contains antioxidants, and the nuts add healthy fats and protein. Are these a health food? No. But they’re a fun, festive treat that won’t completely derail your healthy eating habits if you enjoy them in moderation.
Dietary Considerations: These bites contain dairy (from the caramel and candy melts) and may contain gluten (from the pretzels and some sprinkles). The vegan and gluten-free variations above address these concerns. As always, check your ingredient labels if you have specific allergies.
Personal Wellness Perspective: I believe in balance. These bites are meant to be enjoyed as a special treat for Halloween, not an everyday snack. Make them, share them, and don’t stress about the sugar content. Life’s too short to skip the caramel apples.
Conclusion
So there you have it—Spooky Caramel Apple Candy Bites that are equal parts fun, delicious, and surprisingly easy to make. Whether you’re hosting a Halloween party, bringing treats to a school event, or just want to make something special for your family, these little bites deliver every time. They’re the kind of recipe that makes you look like a kitchen wizard, even if you’re just following instructions.
I love these bites because they remind me of that flea market lady with the purple glasses. She had no reason to share her recipe with a stranger, but she did, and now it’s become a tradition in my kitchen. That’s the thing about food—it connects us in ways we don’t always expect. So go ahead, make these bites your own. Add your own spooky twists, experiment with the decorations, and don’t be afraid to get a little messy. That’s half the fun.
I’d love to hear how yours turn out! Drop a comment below and tell me which design was your favorite, or share a photo of your creations. And if you come up with a new spooky variation, let me know—I’m always looking for fresh ideas. Happy Halloween, and happy snacking!
Frequently Asked Questions
Can I make these Spooky Caramel Apple Candy Bites ahead of time?
Absolutely! You can assemble them the night before and store them in the refrigerator. Just add any delicate decorations like googly eyes right before serving to keep them looking fresh.
Why is my caramel sliding off the apples?
This usually happens when the caramel is too hot or the apples are too warm. Let the caramel cool for a minute before spooning it on, and make sure your apple rounds are cold from the fridge. Patting them dry also helps the caramel stick.
Can I use pre-made caramel sauce instead of caramel candies?
You can, but it won’t set as firmly. Pre-made caramel sauce is thinner and will run off the apples more easily. If you use it, add a little cornstarch or let it simmer until it thickens, but honestly, the candies work much better.
How do I keep the apples from browning?
The lemon water bath is key. Soak the apple rounds for 2-3 minutes, then pat them dry. The lemon juice slows down oxidation, keeping your apples looking fresh and appetizing even after a few hours.
Can I freeze these bites?
I don’t recommend it. Freezing changes the texture of the apples—they become mushy and watery when thawed. These are best enjoyed fresh or within 2-3 days of making them. Trust me, they won’t last that long anyway.
Pin This Recipe!
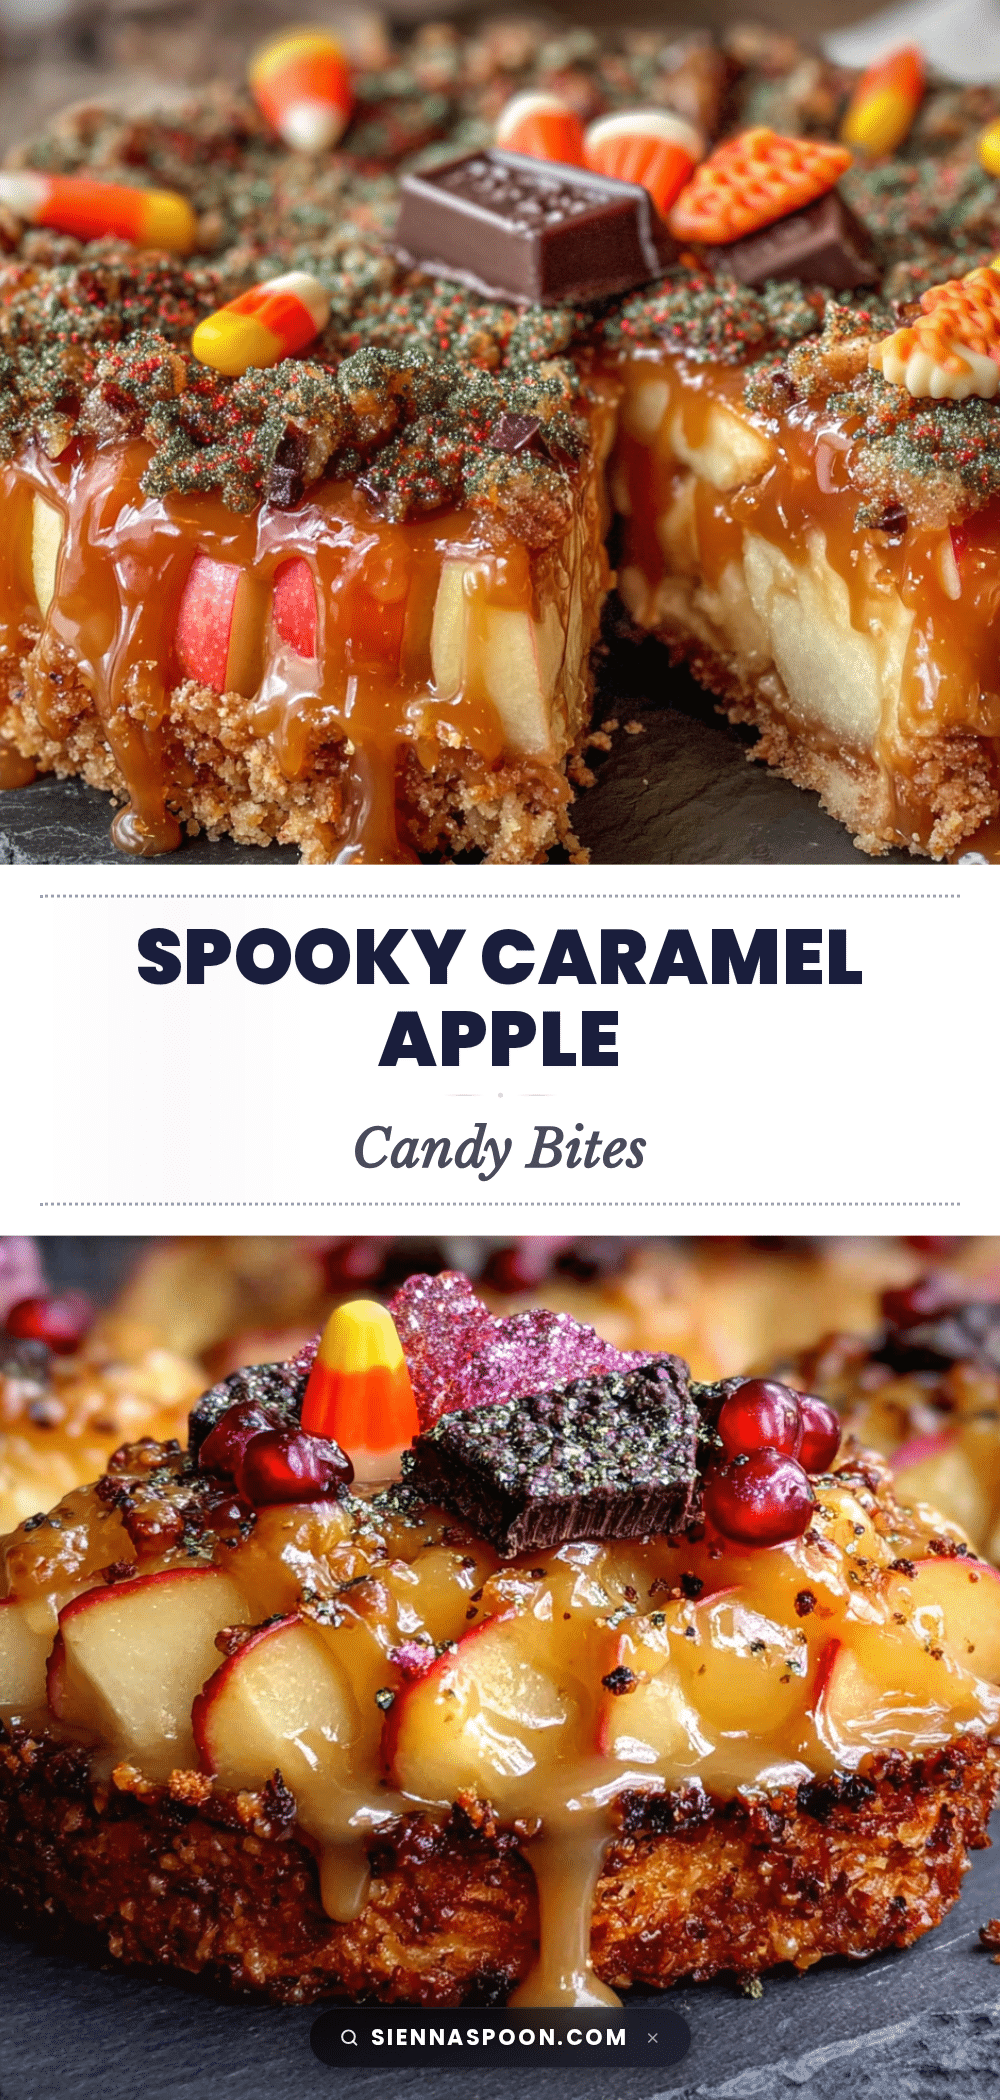
Spooky Caramel Apple Candy Bites: Easy Halloween Treat

Bite-sized caramel apple rounds with spooky decorations, perfect for Halloween parties. Quick, easy, and endlessly customizable with ghost, pumpkin, spider, and witch hat designs.
- Prep Time: 15 minutes
- Cook Time: 10 minutes
- Total Time: 25 minutes
- Yield: 20 servings 1x
- Category: Dessert
- Cuisine: American
Ingredients
- 3 large apples (Granny Smith or Honeycrisp recommended)
- 1 tablespoon lemon juice
- 1 cup cold water
- 14 ounces soft caramel candies (about 40–50 pieces, unwrapped)
- 2 tablespoons heavy cream
- 1 teaspoon vanilla extract (optional)
- Pinch of sea salt
- 1 cup white candy melts
- 1 cup orange candy melts
- 1/2 cup dark chocolate chips or black candy melts
- Assorted sprinkles (orange, black, white)
- Edible googly eyes (optional)
- Pretzel sticks (broken into small pieces)
- Mini chocolate chips
- 1/4 cup crushed graham crackers (optional)
- 1/4 cup shredded coconut, toasted (optional)
- 1/4 cup chopped peanuts (optional)
- Cinnamon sugar (optional)
Instructions
- Prep the apples: Fill a medium bowl with 1 cup cold water and 1 tablespoon lemon juice. Core the apples and slice crosswise into 1/2-inch thick rounds. Soak rounds in lemon water for 2-3 minutes, then pat dry with paper towels.
- Melt the caramel: Unwrap caramel candies and place in a small saucepan with heavy cream and a pinch of sea salt. Heat over medium-low, stirring constantly, until smooth and glossy (5-7 minutes). Remove from heat and stir in vanilla extract if using.
- Assemble the bites: Line a baking sheet with parchment paper. Place apple rounds on the sheet. Spoon about 1 tablespoon of warm caramel onto each round and spread gently to the edges. Let set at room temperature for 5 minutes.
- Melt the candy melts: Place white and orange candy melts in separate microwave-safe bowls. Microwave in 30-second intervals, stirring between each, until smooth (1-2 minutes total). Add 1/2 teaspoon coconut oil if too thick.
- Decorate the bites: Create designs such as ghosts (white candy melt with mini chocolate chip eyes), jack-o’-lanterns (orange candy melt with chocolate face), spiders (dark chocolate with pretzel legs and googly eyes), or witch hats (orange/purple candy melt with chocolate kiss hat). Use toothpicks for fine details.
- Let them set: Allow bites to set at room temperature for 15-20 minutes, or refrigerate for 10 minutes. Serve at room temperature.
Notes
Temperature is key: caramel should be warm but not hot. Work in small batches as candy melts set quickly. Keep apple rounds cold for better caramel adhesion. Store in airtight container in refrigerator for up to 3 days. Let sit at room temperature 15 minutes before serving.
Nutrition
- Serving Size: 1 bite
- Calories: 135
- Sugar: 15.5
- Sodium: 85
- Fat: 6
- Saturated Fat: 3.5
- Carbohydrates: 20
- Fiber: 1.5
- Protein: 1.5
Keywords: Halloween treats, caramel apple bites, spooky desserts, easy Halloween recipes, apple candy bites


