Love this? Save it for later!
Share the inspiration with your friends
I was standing in the frozen foods aisle last October, staring at a bag of something called “spider web bites,” when the fluorescent lights flickered overhead. And just like that, I was seven years old again, sitting on a sticky vinyl stool at my Aunt Carol’s kitchen counter. She was humming something off-key while wrapping a strip of crescent dough around a hot dog, and I remember thinking it looked like a tiny, edible ghost with a sausage body. She called them “mummies,” and I thought she was the cleverest person alive. That moment—the smell of cheap dough and the sound of her humming—hit me so hard I almost laughed out loud in the grocery store. Honestly, I hadn’t thought about those mummy hot dogs in twenty years. But there I was, cart parked sideways, trying to remember if she used ketchup or mustard for the eyes. (It was mustard. She always said ketchup was for regular hot dogs, not mummies.)
That night, I bought the ingredients and made them myself. And let me tell you, they were exactly as silly and wonderful as I remembered. Maybe you’ve had that feeling too—where a random smell or sight yanks you right back to a specific person and a specific kitchen. These mummy hot dogs are that for me. They’re not fancy. They’re not complicated. But they’re the kind of thing that makes Halloween feel like Halloween, you know? The kind of recipe that stays with you because it was made by someone who knew exactly how to make a kid feel special. I’ve been making them every year since, and I’ve tweaked them just enough to make them my own. They’re the perfect spooky Halloween dinner that takes almost zero effort but delivers maximum fun.
Why You’ll Love This Recipe
Let’s be real for a second. Halloween dinner is usually an afterthought. You’re busy carving pumpkins, sorting candy, and trying to convince your kids that a full costume change before trick-or-treating is not actually necessary. The last thing you need is a complicated meal. That’s where these easy mummy hot dogs come in. They’re the hero of the spooky season, and here’s why you’re going to love them:
- Ready in Under 20 Minutes: From fridge to table in about 15 minutes flat. That’s faster than ordering pizza, and way more fun.
- Simple Ingredients: You only need three things—hot dogs, crescent roll dough, and mustard. You probably already have all of them.
- Perfect for Halloween Night: Whether you’re hosting a costume party, having a family movie night, or just trying to get something warm in bellies before the sugar rush, these fit the bill perfectly.
- Crowd-Pleaser for All Ages: Kids love the mummy look, and adults secretly love them too. I’ve never seen a plate of these last longer than five minutes.
- Unbelievably Fun: There’s something deeply satisfying about wrapping a hot dog in dough and calling it a mummy. It’s silly, it’s simple, and it works.
What makes these different from every other hot dog recipe out there? It’s the little things. I use a specific brand of crescent dough (more on that below) that gives the perfect golden, flaky wrap. And I’ve figured out the exact oven temperature that crisps the dough without drying out the hot dog. Plus, I’ve tested a few variations over the years—cheese-stuffed, spicy, even a vegetarian version—so you can pick what works for your crew. This isn’t just another Halloween snack. It’s the one that makes your kids say, “Can we make these every year?” Trust me, they will.
What Ingredients You Will Need
This recipe uses the simplest ingredients to create something that feels special. No fancy trips to a specialty store. No obscure spices. Just honest, pantry-friendly staples that come together in a way that feels almost magical. Here’s what you’ll need:
- 1 package (8-count) refrigerated crescent roll dough – I recommend Pillsbury Original Crescent Rolls for the best texture and flavor. The dough is soft, buttery, and wraps around the hot dogs like a dream. If you can find the sheet-style crescent dough (without the perforations), even better—it’s easier to cut into even strips.
- 8 regular-sized hot dogs – Use your favorite brand. I personally go with all-beef hot dogs for a richer flavor, but turkey or chicken hot dogs work great too. If you’re feeling fancy, look for jumbo hot dogs and adjust the dough strips to be a little wider.
- Yellow mustard – For the mummy eyes. You could also use ketchup or even small dots of sriracha for a spicy kick, but mustard gives that classic yellow “eye” look that reads as mummy. I’ve tried using black sesame seeds too, and while they look cool, they don’t stick as well.
- Optional: 4 slices of cheese, cut into thin strips – If you want to take these to the next level, tuck a thin strip of cheddar or mozzarella under one of the dough wraps. It melts into a gooey surprise that kids (and adults) go crazy for.
- Optional: Everything bagel seasoning or sesame seeds – For a little extra texture on the dough. Not traditional, but honestly, it’s delicious.
That’s it. Seriously. Three main ingredients, maybe two optional ones, and you’re in business. The beauty of this recipe is that it’s endlessly adaptable to what you have on hand. No crescent dough? Use refrigerated pizza dough cut into thin strips. No hot dogs? Try smoked sausages or even pre-cooked chicken sausages. The spirit of the recipe is about making something fun and spooky with what you’ve got. And honestly, that’s the kind of cooking I love most.
Equipment Needed
You don’t need a fully stocked kitchen for this one. Here’s what you’ll want to have ready:
- Baking sheet – A standard half-sheet pan works perfectly. Line it with parchment paper or a silicone baking mat for easy cleanup. Trust me, the melted cheese and dough can get sticky.
- Sharp knife or pizza cutter – For cutting the crescent dough into thin strips. A pizza cutter makes this job incredibly easy and gives you clean, even strips. If you’re using a knife, make sure it’s sharp so you don’t squish the dough.
- Small bowl – For the mustard “eyes.” You’ll dip a toothpick or the tip of a knife into the mustard to dot the eyes on.
- Toothpick or skewer – For applying the mustard eyes. A toothpick gives you the most control for tiny dots.
- Pastry brush (optional) – If you want to brush the dough with an egg wash for extra golden color. Totally optional, but it does make them look prettier.
- Cooling rack – Not essential, but if you have one, let the mummy hot dogs rest on a rack for a minute after baking. It keeps the bottoms from getting soggy.
That’s really all you need. No food processor, no stand mixer, no special gadgets. This is the kind of recipe that proves you don’t need fancy equipment to make something memorable.
Preparation Method
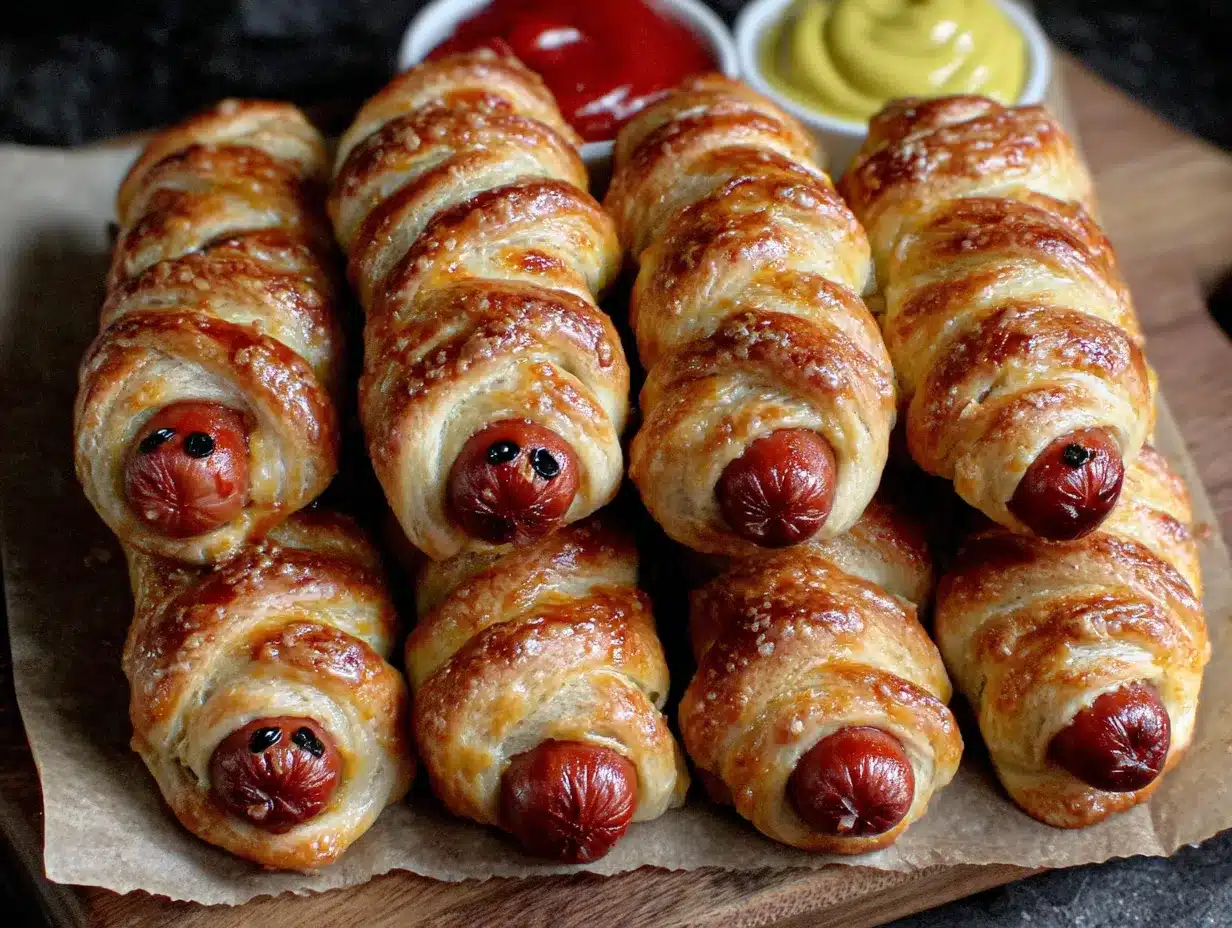
Alright, let’s get to the fun part. Here’s how to make these easy mummy hot dogs step by step. I’ve made these more times than I can count, so I’ll share all the little tricks I’ve picked up along the way.
- Preheat your oven to 375°F (190°C). Line a baking sheet with parchment paper. Getting the oven hot while you prep saves time and ensures the dough starts baking immediately when it goes in.
- Unroll the crescent dough onto a clean cutting board. If you’re using the perforated kind, press the seams together gently with your fingers to seal them. You want one solid sheet of dough. If you’re using the sheet-style dough, you’re already ahead of the game.
- Cut the dough into thin strips. Using a pizza cutter or a sharp knife, slice the dough lengthwise into about 8 to 10 strips per sheet. Aim for strips that are about half an inch wide. They don’t have to be perfectly even—mummies are supposed to look a little messy, right? (I once cut them too thick, and the mummies looked more like fluffy caterpillars. Still tasted great, but the visual was off.)
- Wrap the hot dogs. Take one hot dog and start wrapping a strip of dough around it at a slight angle, overlapping slightly as you go. Leave a small gap near the top for the “face.” Tuck the end of the dough strip under the wrap to secure it. Repeat with the remaining hot dogs. If you’re adding cheese, tuck a thin strip of cheese under one of the dough layers before wrapping.
- Place the wrapped hot dogs on the prepared baking sheet, leaving a little space between each one. They don’t spread much, but you want air to circulate for even browning.
- Bake for 12 to 15 minutes, or until the dough is golden brown and cooked through. The exact time depends on your oven and how thick your dough strips are. Start checking at 12 minutes. The dough should look puffed and golden, and the hot dog should be heated through.
- Let them cool for 2 to 3 minutes on the baking sheet. This is important—the dough is hot and the cheese (if you used it) is molten. Moving them too soon can cause the dough to tear.
- Add the eyes. Dip a toothpick into yellow mustard and dot two small eyes onto the exposed part of the hot dog at the top. Don’t overthink it—two little dots is all you need. If you want them to look extra spooky, make the dots slightly uneven. Mummies aren’t known for perfect symmetry.
And that’s it. You’ve just made mummy hot dogs. Serve them warm, watch them disappear, and try not to feel too proud of yourself for making something this cute with almost zero effort.
Cooking Tips & Techniques
I’ve learned a few things the hard way so you don’t have to. Here are my best tips for perfect mummy hot dogs every time:
Don’t over-wrap the hot dogs. I know it’s tempting to use every bit of dough, but too many layers means the center of the dough won’t cook through. Three to four wraps around the hot dog is the sweet spot. The dough should be thin enough to bake fully but thick enough to look like mummy bandages.
Leave room for the face. I made the mistake of wrapping the dough all the way to the top of the hot dog on my first batch. The mummies looked like they were wearing turtlenecks, and I couldn’t see where to put the eyes. Leave about an inch of hot dog exposed at the top. It looks more like a mummy that way anyway.
Use cold dough. If the crescent dough gets too warm, it becomes sticky and hard to work with. Keep the dough in the fridge until you’re ready to use it. If it starts to feel soft while you’re wrapping, pop the wrapped hot dogs into the fridge for 5 minutes before baking. It makes a big difference in how clean the stripes look.
Watch the oven. Every oven is different. I’ve burned a batch because I got distracted by a phone call. Set a timer for 12 minutes and check them. If they need more time, give them another minute or two. Golden brown is the goal—anything darker and the dough gets a little hard.
Make ahead tip. You can assemble these a few hours ahead of time. Wrap the hot dogs, place them on the baking sheet, cover with plastic wrap, and refrigerate. Bake them just before serving. This is a lifesaver on busy Halloween nights when you’re juggling costumes and candy.
Variations & Adaptations
One of the best things about this recipe is how easy it is to change up. Here are some variations I’ve tried and loved:
Cheesy Mummy Hot Dogs: Before wrapping, cut a slit lengthwise down the center of each hot dog (not all the way through) and stuff it with a thin strip of cheddar or mozzarella. Wrap as usual. The cheese melts into the hot dog and creates a gooey center that’s absolutely irresistible.
Spicy Mummy Sausages: Swap the regular hot dogs for spicy Italian sausage or chorizo links. Precook them first (sausages need to be fully cooked before wrapping), then wrap and bake as directed. The spicy kick is a nice contrast to the buttery dough.
Vegetarian Mummy Dogs: Use your favorite plant-based hot dogs or sausages. I’ve tried this with both tofu-based and vegetable-based hot dogs, and they work perfectly. Just make sure to check the cooking instructions on the package—some plant-based hot dogs need less time in the oven.
Pizza Mummies: Before wrapping, brush the hot dogs with a little pizza sauce and sprinkle with shredded mozzarella. Wrap with dough and bake. Serve with extra sauce for dipping. This one is a huge hit with kids.
Gluten-Free Version: Use gluten-free crescent dough or puff pastry. I’ve tested this with a few brands, and the texture is slightly different (a little more crumbly), but the taste is still great. Just handle the dough gently—it’s more delicate than regular dough.
Serving & Storage Suggestions
These mummy hot dogs are best served warm, right out of the oven. The dough is at its flakiest, the hot dog is juicy, and the mustard eyes are still bright and fresh. I like to arrange them on a platter with a small bowl of ketchup or mustard for dipping. If you’re serving them at a Halloween party, you can add a few “spooky” sides like black olive “spiders” or carrot sticks cut to look like bones.
For drinks, these pair well with apple cider (hot or cold), pumpkin juice (just apple juice with a drop of orange food coloring), or a simple punch. For the adults, a dark beer or a smoky mezcal cocktail works surprisingly well with the savory-sweet combo.
Storage: If you have leftovers (unlikely, but possible), let them cool completely, then store them in an airtight container in the refrigerator for up to 3 days. The dough will soften a bit, but they’re still tasty.
Reheating: The best way to reheat these is in the oven or toaster oven at 350°F (175°C) for about 5 minutes. The microwave works in a pinch, but the dough will be soft and a little chewy. If you’re reheating in the microwave, wrap them in a paper towel to absorb excess moisture.
One thing I’ve noticed—the flavors actually meld a little more after a day in the fridge. The mustard mellows into the hot dog, and the dough takes on a slightly sweeter note. They’re not quite as pretty the next day, but they’re still delicious.
Nutritional Information & Benefits
Let’s be honest—these are a treat, not a health food. But here’s the estimate per serving (one mummy hot dog):
- Calories: Approximately 250-280
- Protein: 10-12g
- Fat: 16-18g
- Carbohydrates: 18-20g
- Sodium: 600-700mg
If you want to lighten them up, use turkey or chicken hot dogs and reduced-fat crescent dough. You’ll save about 50-70 calories per serving. The cheese-stuffed version adds about 30-40 calories and 3-4g of fat.
On the plus side, hot dogs do provide a decent amount of protein, and the crescent dough offers a quick source of energy. For a Halloween treat, they’re actually not terrible—especially compared to the candy that’s coming later. And honestly, sometimes the nutritional value is in the joy they bring. I stand by that.
Conclusion
These easy mummy hot dogs are the kind of recipe that proves you don’t need to spend hours in the kitchen to create something special. They’re simple, they’re fun, and they capture the playful spirit of Halloween without any stress. Every time I make them, I think of my Aunt Carol and her off-key humming, and I smile. That’s what food should do—connect us to people and moments we love.
I hope you give these a try, whether it’s for a Halloween party, a family dinner, or just because you want to make a Tuesday night a little more fun. Customize them however you like—add cheese, try different sausages, make them spicy or mild. The recipe is yours to play with. And when you do, I’d love to hear about it. Leave a comment below and tell me how they turned out, or share a photo of your mummy creations. Tag me so I can see your spooky masterpieces. Happy Halloween, friends. Make it delicious, make it fun, and don’t forget the mustard eyes.
Frequently Asked Questions
Can I make these mummy hot dogs ahead of time?
Absolutely. You can assemble them up to 24 hours in advance. Just wrap the hot dogs, place them on a baking sheet, cover with plastic wrap, and refrigerate. Bake them right before serving for the best texture.
Can I use puff pastry instead of crescent dough?
Yes, you can. Puff pastry will give you a flakier, more buttery texture. Just thaw it according to the package directions, cut it into thin strips, and wrap as usual. The baking time may be slightly longer—about 15 to 18 minutes at 375°F (190°C).
How do I prevent the dough from unraveling during baking?
Make sure you tuck the end of the dough strip securely under the wrap. You can also press the end gently against the hot dog to help it stick. If you’re really worried, place the wrapped hot dogs seam-side down on the baking sheet.
Can I use ketchup instead of mustard for the eyes?
You can, but the mustard gives a better “mummy” look because it’s thicker and doesn’t spread as much. Ketchup tends to be runnier and can blur into the dough. If you want to use ketchup, use a very small amount and let the hot dogs cool slightly before adding it.
What can I serve with mummy hot dogs for a full Halloween meal?
These pair well with simple sides like potato wedges (cut into “bone” shapes), carrot sticks, apple slices, or a small salad. For a fun dessert, try Halloween-themed cookies or cupcakes. And don’t forget the apple cider or pumpkin punch!
Pin This Recipe!
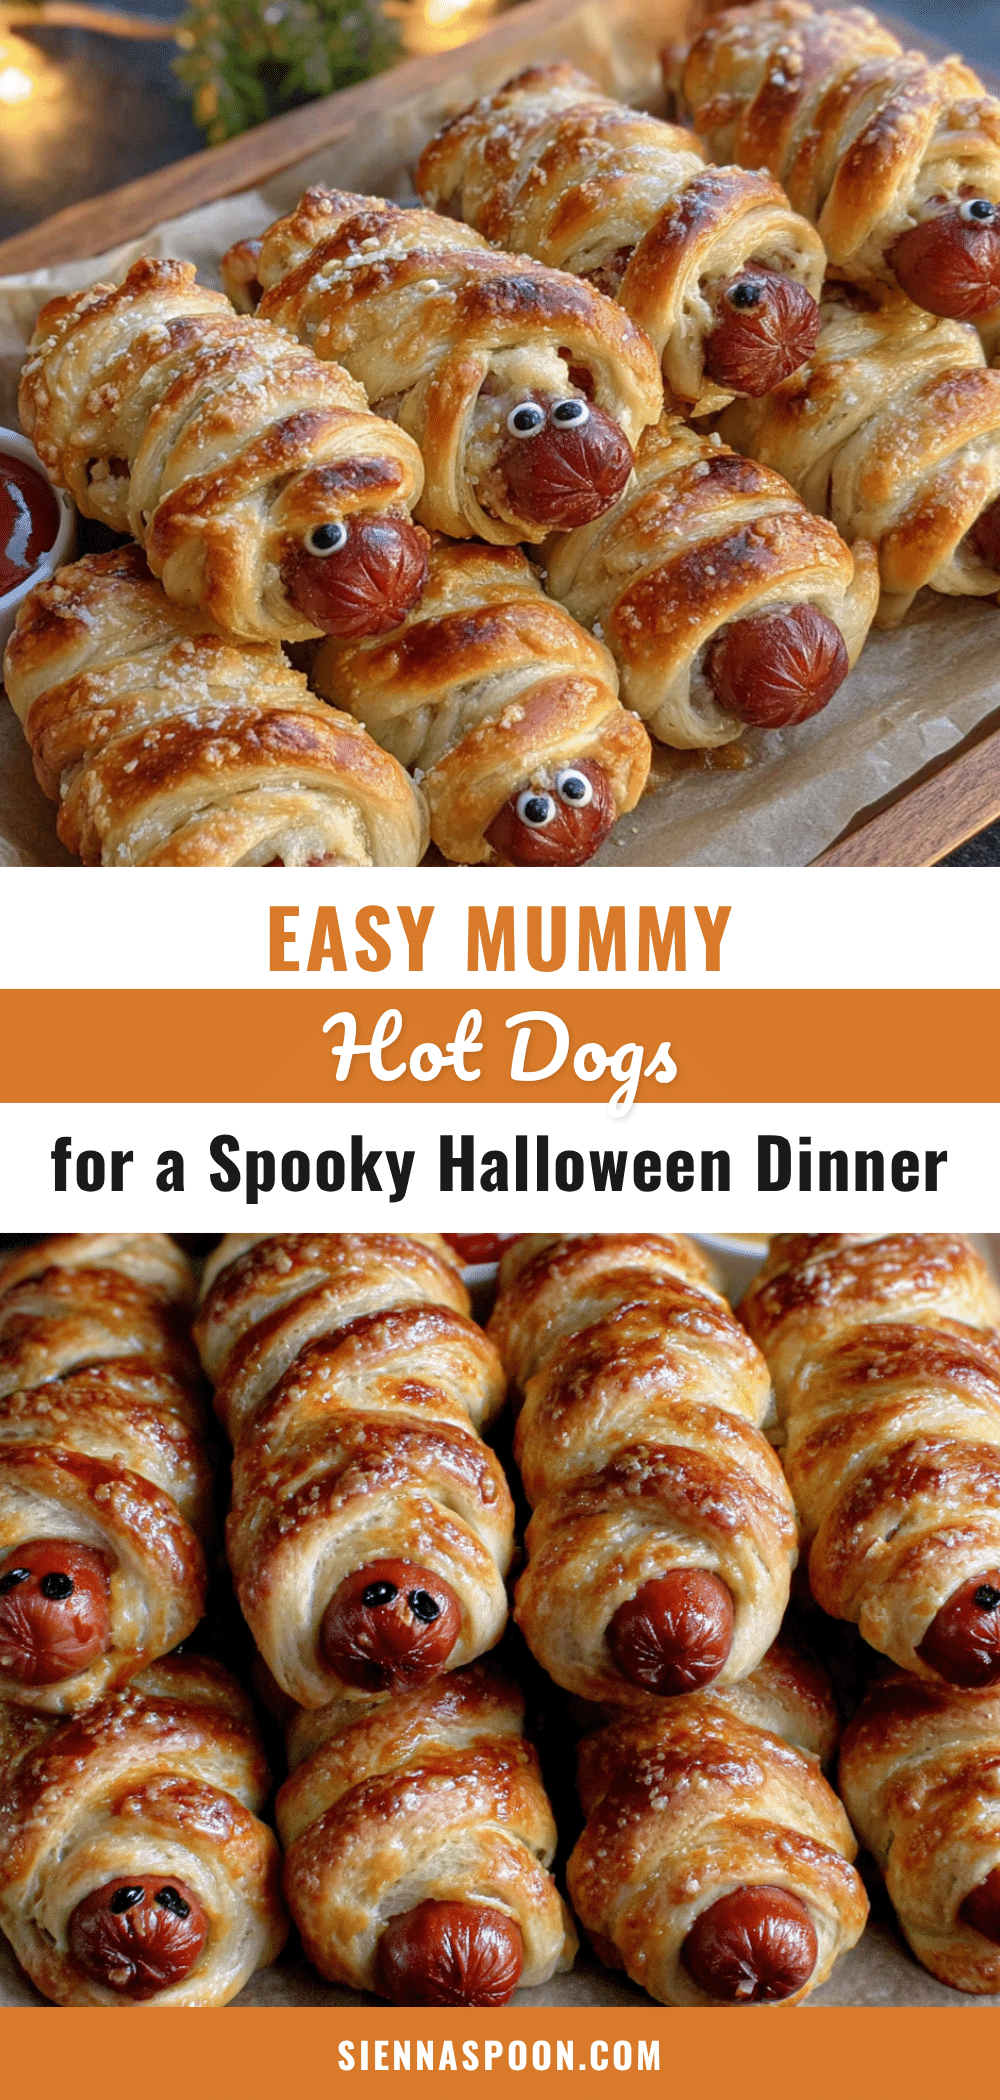
Easy Mummy Hot Dogs: Perfect Spooky Halloween Dinner

These easy mummy hot dogs are the perfect spooky Halloween dinner that takes almost zero effort but delivers maximum fun. Made with just three simple ingredients—hot dogs, crescent roll dough, and mustard—they’re ready in under 20 minutes and are a crowd-pleaser for all ages.
- Prep Time: 10 minutes
- Cook Time: 15 minutes
- Total Time: 25 minutes
- Yield: 8 servings 1x
- Category: Main Course
- Cuisine: American
Ingredients
- 1 package (8-count) refrigerated crescent roll dough (recommended: Pillsbury Original Crescent Rolls)
- 8 regular-sized hot dogs (all-beef recommended, or turkey/chicken)
- Yellow mustard (for mummy eyes)
- Optional: 4 slices of cheese (cheddar or mozzarella), cut into thin strips
- Optional: Everything bagel seasoning or sesame seeds
Instructions
- Preheat your oven to 375°F (190°C). Line a baking sheet with parchment paper.
- Unroll the crescent dough onto a clean cutting board. If using perforated dough, press the seams together gently to seal into one solid sheet.
- Using a pizza cutter or sharp knife, cut the dough lengthwise into about 8 to 10 thin strips, approximately half an inch wide.
- Take one hot dog and start wrapping a strip of dough around it at a slight angle, overlapping slightly. Leave a small gap near the top for the ‘face.’ Tuck the end of the dough strip under the wrap to secure. Repeat with remaining hot dogs. If adding cheese, tuck a thin strip under one dough layer before wrapping.
- Place the wrapped hot dogs on the prepared baking sheet, leaving a little space between each.
- Bake for 12 to 15 minutes, or until the dough is golden brown and cooked through. Start checking at 12 minutes.
- Let them cool on the baking sheet for 2 to 3 minutes.
- Dip a toothpick into yellow mustard and dot two small eyes onto the exposed part of the hot dog at the top. Serve warm.
Notes
Don’t over-wrap the hot dogs; 3-4 wraps is ideal. Leave about an inch of hot dog exposed at the top for the face. Use cold dough for easier handling. For make-ahead, assemble up to 24 hours in advance and refrigerate, then bake just before serving. For gluten-free, use gluten-free crescent dough or puff pastry.
Nutrition
- Serving Size: 1 mummy hot dog
- Calories: 265
- Sugar: 4
- Sodium: 650
- Fat: 17
- Saturated Fat: 6
- Carbohydrates: 19
- Protein: 11
Keywords: mummy hot dogs, Halloween dinner, spooky recipes, easy Halloween food, crescent roll hot dogs, kid-friendly Halloween


