Love this? Save it for later!
Share the inspiration with your friends
It was 11:47 PM on a random Wednesday in late October, and I had a very specific craving for something warm, melty, and wrapped in carbs. I didn’t have the puff pastry I normally use for baked brie, but I had a tube of crescent rolls in the fridge and a wheel of brie that was staring at me from the cheese drawer. The idea arrived like a little kitchen gremlin whispering in my ear: what if I wrapped it like a mummy? Honestly, I thought it was either going to be genius or a complete disaster. I was too tired to care which one it turned out to be.
I started cutting the crescent dough into thin strips, and somewhere around the third strip, I realized I was grinning like an idiot. There’s something about the late night that loosens the usual rules, you know? You stop worrying about whether it’s pretty or perfect and just go with whatever feels right. The kitchen was quiet except for the hum of the fridge, and I was standing there in my pajamas, weaving dough strips over a wheel of cheese like some sort of culinary mad scientist. I mean, let’s be honest—I’ve made a lot of questionable decisions at 11 PM, but this one was about to pay off big time.
The first time I pulled this mummy-wrapped brie out of the oven, I actually laughed out loud. It looked ridiculous in the best way possible—golden and crispy with little dough eyes peeking out, like a cozy little monster that just wanted to be dipped in. Maybe you’ve been there, standing in your kitchen at odd hours, making something that doesn’t follow any recipe you’ve ever seen. That’s exactly where this recipe came from, and honestly, it’s the reason I keep making it. It’s not fancy or fussy. It’s just warm, cheesy, and wrapped in a buttery hug. And let me tell you—it stayed with me because it proved that the best ideas don’t always happen during daylight hours.
Why You’ll Love This Recipe
This cozy mummy-wrapped baked brie is the kind of appetizer that makes people stop mid-conversation and just stare at it. I’ve tested this recipe at least six times now, tweaking the dough thickness and bake time until it was absolutely perfect. My neighbor Sarah, who’s a professional event planner, told me it’s the most fun she’s ever had with a cheese dish, and she’s seen some fancy cheese boards in her day.
- Quick & Easy: Comes together in under 25 minutes, perfect for last-minute Halloween parties or surprise guests.
- Simple Ingredients: No fancy grocery trips needed—you likely already have crescent rolls and brie in your kitchen.
- Perfect for Parties: Great for Halloween gatherings, game day snacks, or cozy movie nights.
- Crowd-Pleaser: Always gets rave reviews from kids and adults alike. I’ve never seen leftovers.
- Unbelievably Delicious: The flaky, buttery crust paired with warm, melty brie is next-level comfort food.
What makes this recipe different from the rest is the technique. Instead of using puff pastry, which can be fussy and hard to work with, I use crescent roll dough cut into strips. This creates a lighter, flakier wrap that bakes up golden and gorgeous. The mummy design isn’t just cute—it actually helps the heat distribute evenly so the brie gets perfectly soft without turning into a puddle. It’s comfort food reimagined—faster, easier, but with the same soul-soothing satisfaction. Perfect for impressing guests without stress, or turning a simple snack into something memorable.
What Ingredients You Will Need
This recipe uses simple, everyday ingredients to deliver bold flavor and satisfying texture without the fuss. Most of these are pantry staples you probably already have on hand, which makes this perfect for those spontaneous cravings.
- 1 wheel of brie cheese (8 ounces / 225g): Look for a wheel that’s firm to the touch but gives slightly when pressed. I recommend Président or a good-quality store brand for consistent melting. (Adds rich, creamy texture)
- 1 can of refrigerated crescent roll dough (8 ounces / 226g): Pillsbury is my go-to for consistent results, but any brand works. (Creates the flaky, buttery mummy wrap)
- 1 large egg: For the egg wash that gives the dough that gorgeous golden color. (Adds shine and helps browning)
- 1 tablespoon water: To thin the egg wash for even application.
- Optional: 2 tablespoons honey or maple syrup: For drizzling over the finished brie. (Adds sweetness that pairs beautifully with the savory cheese)
- Optional: Fresh rosemary or thyme sprigs: For garnish and a hint of herbaceous flavor.
- Optional: Crackers, sliced baguette, or apple slices: For serving alongside the warm brie.
Ingredient Tips & Sourcing Notes: I’ve learned through trial and error that the quality of the brie makes a big difference here. Avoid the pre-sliced or pre-wrapped brie wedges—you want a whole wheel for the best presentation. If you can find a double-cream brie, even better. It melts more smoothly and has a richer flavor. For the crescent rolls, keep them refrigerated until you’re ready to use them. Warm dough is harder to cut into clean strips and won’t hold its shape as well during baking.
Substitution Guidance: Use a dairy-free brie alternative if needed, though the melting properties may vary. You can also swap the crescent dough with puff pastry sheets cut into strips, but the texture will be different—more dense and buttery rather than light and flaky. For a gluten-free option, try using gluten-free crescent dough, but note that it may be more delicate to work with.
Equipment Needed
You don’t need a lot of fancy tools for this recipe, which is part of what makes it so great. Here’s what you’ll need:
- Baking sheet: A standard half-sheet pan works perfectly. Line it with parchment paper for easy cleanup.
- Parchment paper: Non-stick and makes cleanup a breeze. Trust me, you don’t want melted cheese stuck to your pan.
- Sharp knife or pizza cutter: For cutting the crescent dough into strips. A pizza cutter gives cleaner edges.
- Small bowl: For whisking the egg wash.
- Pastry brush: For applying the egg wash evenly. A silicone one works great and is easy to clean.
- Cutting board: A clean surface for working with the dough.
- Serving platter: Something wide enough to hold the baked brie and accompaniments.
Personal Experience: I’ve made this recipe using both a pizza cutter and a regular kitchen knife, and honestly, the pizza cutter wins every time. It glides through the dough without dragging or tearing. If you don’t have one, make sure your knife is really sharp. I learned this the hard way when my first attempt looked more like a sad, torn bandage than a mummy.
Preparation Method
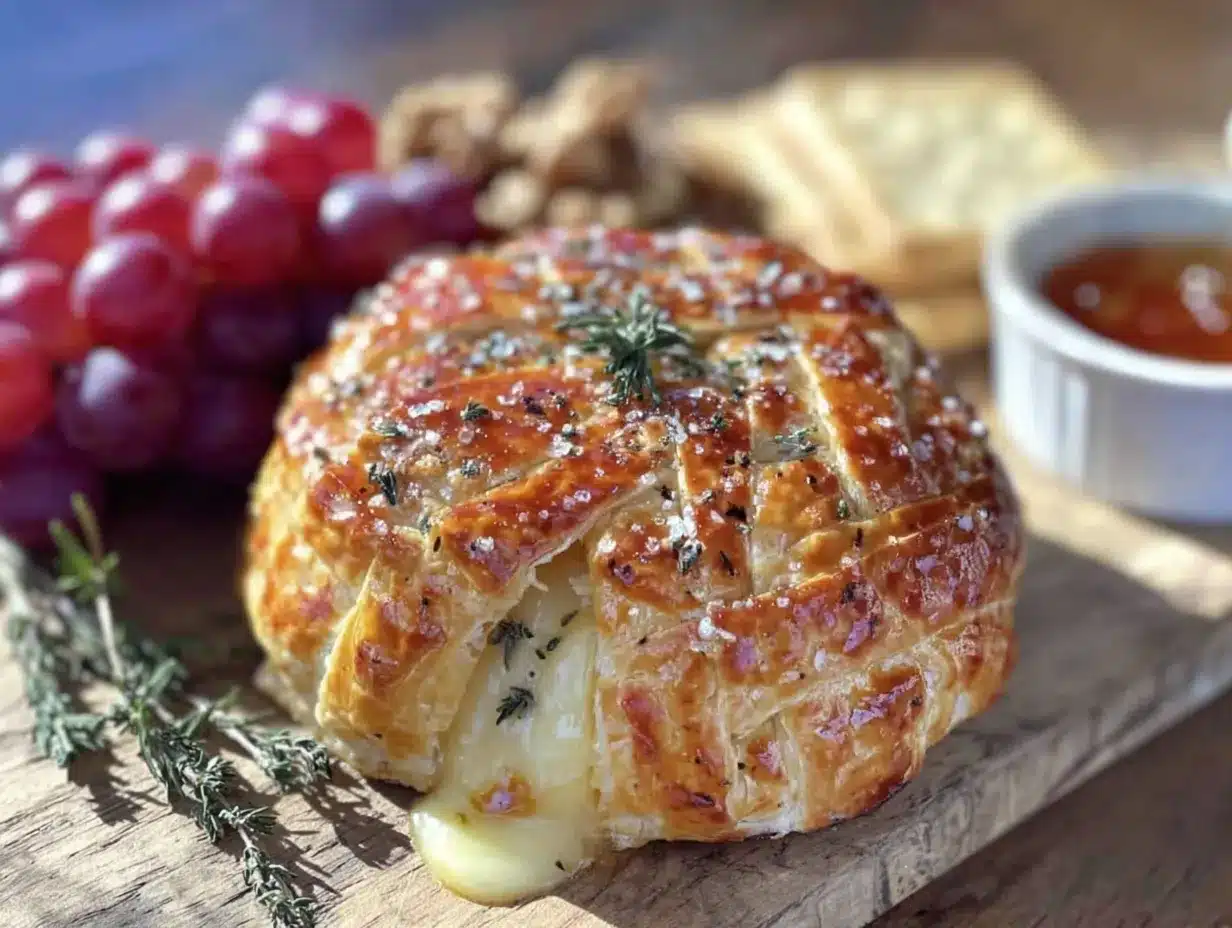
- Preheat your oven to 375°F (190°C). Line a baking sheet with parchment paper. Getting the oven hot before you start is important—you want that immediate heat to create steam and help the dough rise.
- Remove the brie from its packaging. If there’s a rind, leave it on—it’s edible and helps the cheese hold its shape as it melts. Pat the brie dry with a paper towel to remove any excess moisture. This helps the dough stick better.
- Unroll the crescent dough onto a clean cutting board. Don’t separate the triangles at the perforations. Instead, use a sharp knife or pizza cutter to cut the entire sheet of dough into thin strips about ½ inch (1.25 cm) wide. You should get about 12-15 strips. (Pro tip: If the dough starts to warm up and get sticky, pop it in the fridge for 5 minutes.)
- Place the brie wheel in the center of the prepared baking sheet. Position it so you have room to wrap the strips around it.
- Start wrapping the brie like a mummy. Take one strip of dough and lay it across the top of the brie, letting the ends hang down the sides. Continue adding strips, slightly overlapping each one, until the entire brie is covered. Don’t worry about making it perfect—the messy, overlapping look is part of the charm. Leave a small gap at the top center for the “face” if you want to add dough eyes later.
- For the mummy eyes: Take two small pieces of dough and roll them into tiny balls. Press them gently onto the brie in the gap you left at the top. These will bake up into cute little dough eyes.
- In a small bowl, whisk together the egg and water. Brush the egg wash generously over all the dough strips. This is what gives the mummy that beautiful golden-brown color. Don’t skip this step—it makes a huge difference in appearance.
- Bake for 15-18 minutes, or until the dough is golden brown and puffed. The brie should be soft and slightly melted when you gently press the center. Keep an eye on it during the last few minutes—ovens vary, and you don’t want the dough to burn.
- Let it rest on the baking sheet for 2-3 minutes. This allows the cheese to set slightly so it doesn’t all rush out when you cut into it. Use a spatula to carefully transfer the mummy brie to a serving platter.
- Drizzle with honey or maple syrup if desired, and garnish with fresh herbs. Serve warm with crackers, sliced baguette, or apple slices. Watch it disappear!
Cooking Tips & Techniques
I’ve made this cozy mummy-wrapped baked brie more times than I care to admit, and I’ve definitely learned a few things the hard way. Here are my best tips for success:
Don’t overwork the dough. Crescent roll dough is delicate, and handling it too much will make it tough. Cut your strips quickly and wrap them loosely around the brie. I once tried to make the strips perfectly even, and by the time I was done, the dough was warm and sticky and tore apart when I tried to lift it. Learn from my mistakes—keep it quick and casual.
Watch the bake time carefully. The difference between perfectly golden and burnt is about 2 minutes. Start checking at the 15-minute mark. The dough should be deep golden brown and puffed, and the brie should feel soft when you press the center through the dough. If you see any cheese starting to leak out, pull it immediately—it’s done.
Let it rest before serving. I know it’s tempting to cut into it right away, but giving it those 2-3 minutes of rest makes a huge difference. The cheese will still be warm and melty, but it won’t turn into a lava flow the second you break the crust. Trust me on this one.
Use a serrated knife to cut. When you’re ready to serve, use a serrated knife to saw through the crust gently. A regular knife will squish the dough and push the cheese out. I learned this lesson after my first attempt looked more like a cheese explosion than a graceful cut.
Variations & Adaptations
One of the best things about this recipe is how easy it is to customize. Here are some variations I’ve tried and loved:
- Savory Herb Version: Sprinkle dried rosemary, thyme, and a pinch of garlic powder over the brie before wrapping. The herbs infuse into the cheese as it bakes and smell absolutely incredible.
- Spicy Maple Glaze: Mix 2 tablespoons of maple syrup with ½ teaspoon of red pepper flakes. Drizzle over the baked brie for a sweet and spicy kick that’s surprisingly addictive.
- Cranberry & Walnut: Top the baked brie with a spoonful of cranberry sauce and some chopped walnuts before serving. The tartness cuts through the richness of the cheese beautifully.
- Bacon Wrapped: Cook 4 slices of bacon until crispy, crumble them, and sprinkle over the brie after baking. Because everything is better with bacon.
- Air Fryer Method: Cook at 350°F (175°C) for 8-10 minutes, checking frequently. The air fryer creates an even crispier crust, but you’ll need to watch it closely to prevent burning.
Personal Variation I Love: I once made this with a fig jam spread on the brie before wrapping. I spread about 2 tablespoons of fig jam over the top of the brie, then wrapped it as usual. The jam caramelized slightly during baking and created this amazing sweet-savory combination that I still dream about. Highly recommend trying it.
Serving & Storage Suggestions
This cozy mummy-wrapped baked brie is best served warm, straight from the oven. The contrast between the crispy, flaky dough and the warm, melty cheese is absolutely magical. Place it on a wooden board or a decorative platter surrounded by crackers, sliced baguette, apple slices, and pear slices. The fruit adds a fresh, crisp element that balances the richness of the cheese.
For a Halloween party spread, arrange it alongside other spooky snacks like deviled eggs with olive spiders, pretzel broomsticks, and pumpkin-shaped cheese balls. The mummy theme fits right in and always gets a laugh. For a cozy night in, serve it with a glass of crisp white wine or a warm apple cider.
Storage: If you somehow have leftovers, store them in an airtight container in the refrigerator for up to 2 days. The dough will lose its crispness, but the flavor is still great. To reheat, place it in a 350°F (175°C) oven for 5-7 minutes, or until warmed through and the crust crisps back up. I don’t recommend microwaving—it makes the dough soggy and the cheese rubbery.
Flavor Development: Honestly, the flavors actually meld together beautifully overnight. The next day, the brie absorbs a bit of the buttery flavor from the dough, and it’s delicious cold or at room temperature. I’ve been known to eat leftover mummy brie straight from the fridge as a late-night snack. No judgment here.
Nutritional Information & Benefits
While this is definitely a treat-yourself recipe, it does have some redeeming qualities. Brie is a good source of calcium and protein, and it contains beneficial probiotics that support gut health. The crescent dough provides carbohydrates for energy, making this a satisfying snack that keeps you full.
Estimated Nutritional Values (per serving, based on 8 servings):
- Calories: 210
- Total Fat: 14g
- Saturated Fat: 8g
- Cholesterol: 45mg
- Sodium: 380mg
- Total Carbohydrates: 15g
- Dietary Fiber: 0g
- Sugars: 3g
- Protein: 8g
Dietary Considerations: This recipe contains dairy, gluten, and eggs. For a dairy-free version, use a plant-based brie alternative. For gluten-free, use gluten-free crescent dough. Always check labels to ensure ingredients meet your dietary needs.
My Wellness Perspective: I believe in balance. This isn’t an everyday snack, but it’s perfect for special occasions when you want something indulgent and fun. Pair it with fresh fruit and vegetables to round out the nutritional profile, and enjoy every single bite without guilt.
Conclusion
This cozy mummy-wrapped baked brie is proof that the best recipes often come from late-night kitchen experiments and a willingness to try something ridiculous. It’s warm, it’s cheesy, it’s wrapped in a buttery hug, and it makes people smile every single time. Whether you’re making it for a Halloween party, a game day gathering, or just because you need a little comfort on a cold evening, this recipe delivers.
I’d love to hear how yours turns out! Did you add any fun variations? Did your mummy have a personality? Drop a comment below and share your creation. And if you’re feeling generous, tag me in your photos—I genuinely get excited every time I see someone else make this recipe. It’s become one of my most-requested appetizers, and I have a feeling it will become one of yours too.
So go ahead, grab that brie and those crescent rolls, and make yourself something cozy. You deserve it.
Frequently Asked Questions
Can I make this mummy-wrapped brie ahead of time?
Yes! You can assemble the mummy brie up to 24 hours in advance. Wrap the brie with the dough strips, place it on the parchment-lined baking sheet, cover it loosely with plastic wrap, and refrigerate. When you’re ready to bake, brush with the egg wash and add 2-3 minutes to the baking time since you’re starting from cold.
What if I can’t find crescent roll dough?
No problem! You can use puff pastry sheets instead. Thaw the puff pastry, cut it into strips, and proceed with the wrapping instructions. The texture will be more buttery and flaky, and it will take about 2-3 minutes longer to bake. Just keep an eye on it.
How do I prevent the cheese from leaking out during baking?
Make sure the brie is well-chilled before wrapping, and don’t cut the dough strips too thin—½ inch is perfect. Also, make sure the strips overlap slightly so there are no gaps for the cheese to escape through. If you see any cheese starting to leak, pull it from the oven immediately.
Can I use a different type of cheese?
Absolutely! Camembert is a great substitute since it has a similar texture and flavor profile. You can also try a soft goat cheese log for a tangier version. Just keep in mind that different cheeses melt at different rates, so adjust the baking time accordingly.
Is this recipe suitable for kids to help with?
Definitely! Kids love the mummy-wrapping part. Let them arrange the dough strips and add the eyes. It’s a fun, hands-on activity that gets them excited about cooking. Just supervise the cutting of the dough and the hot oven part.
Pin This Recipe!
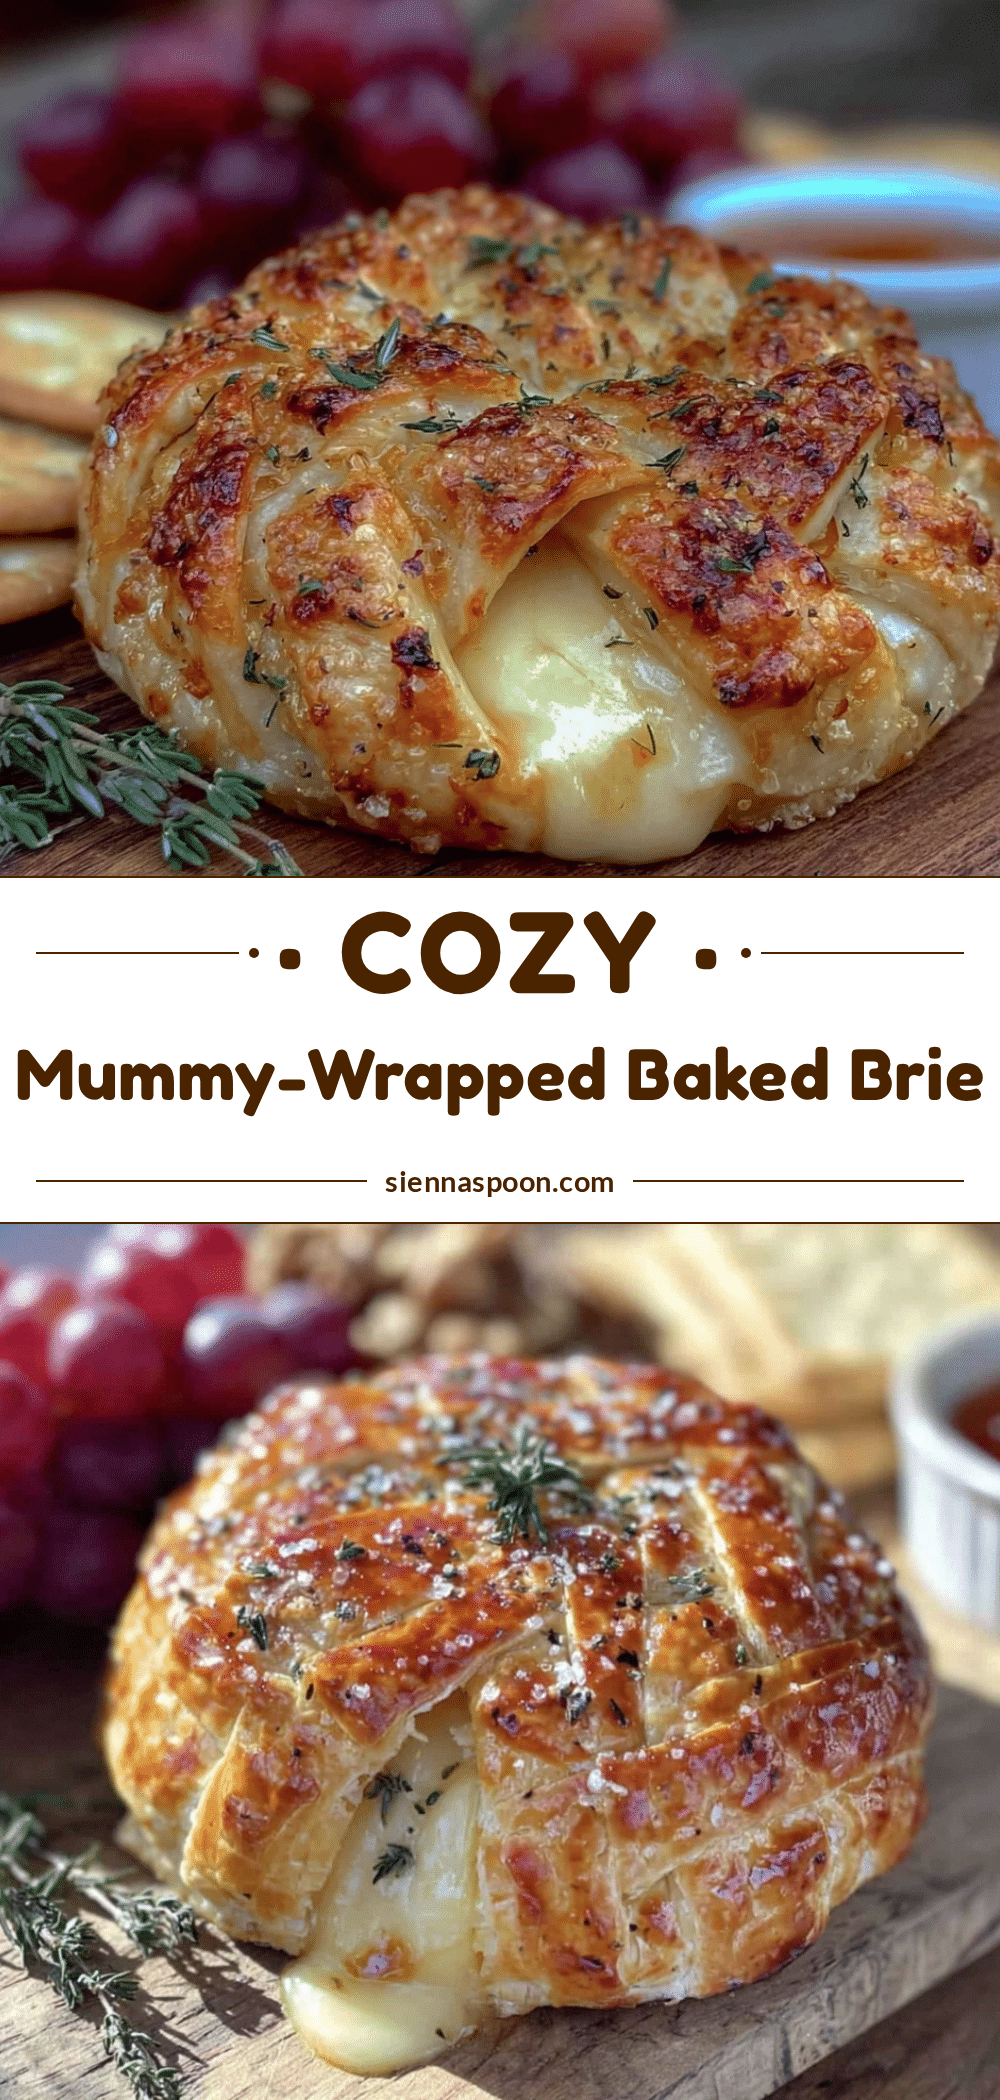
Cozy Mummy-Wrapped Baked Brie: Best Easy Appetizer

A warm, melty wheel of brie wrapped in crescent roll dough strips to look like a mummy. This quick and easy appetizer is perfect for Halloween parties, game day snacks, or cozy movie nights.
- Prep Time: 10 minutes
- Cook Time: 15-18 minutes
- Total Time: 25 minutes
- Yield: 8 servings 1x
- Category: Appetizer
- Cuisine: American
Ingredients
- 1 wheel of brie cheese (8 ounces / 225g)
- 1 can of refrigerated crescent roll dough (8 ounces / 226g)
- 1 large egg
- 1 tablespoon water
- Optional: 2 tablespoons honey or maple syrup
- Optional: Fresh rosemary or thyme sprigs
- Optional: Crackers, sliced baguette, or apple slices
Instructions
- Preheat your oven to 375°F (190°C). Line a baking sheet with parchment paper.
- Remove the brie from its packaging. Leave the rind on. Pat the brie dry with a paper towel.
- Unroll the crescent dough onto a clean cutting board. Use a sharp knife or pizza cutter to cut the entire sheet of dough into thin strips about ½ inch (1.25 cm) wide. You should get about 12-15 strips.
- Place the brie wheel in the center of the prepared baking sheet.
- Start wrapping the brie like a mummy. Take one strip of dough and lay it across the top of the brie, letting the ends hang down the sides. Continue adding strips, slightly overlapping each one, until the entire brie is covered. Leave a small gap at the top center for the ‘face’ if you want to add dough eyes later.
- For the mummy eyes: Take two small pieces of dough and roll them into tiny balls. Press them gently onto the brie in the gap you left at the top.
- In a small bowl, whisk together the egg and water. Brush the egg wash generously over all the dough strips.
- Bake for 15-18 minutes, or until the dough is golden brown and puffed. The brie should be soft and slightly melted when you gently press the center.
- Let it rest on the baking sheet for 2-3 minutes. Use a spatula to carefully transfer the mummy brie to a serving platter.
- Drizzle with honey or maple syrup if desired, and garnish with fresh herbs. Serve warm with crackers, sliced baguette, or apple slices.
Notes
Don’t overwork the dough. Watch the bake time carefully. Let it rest before serving. Use a serrated knife to cut. For best results, keep the brie well-chilled before wrapping. The mummy design helps heat distribute evenly so the brie gets perfectly soft without turning into a puddle.
Nutrition
- Serving Size: 1 serving
- Calories: 210
- Sugar: 3
- Sodium: 380
- Fat: 14
- Saturated Fat: 8
- Carbohydrates: 15
- Protein: 8
Keywords: baked brie, mummy brie, Halloween appetizer, crescent roll brie, easy appetizer, party snack, cheesy appetizer


