Love this? Save it for later!
Share the inspiration with your friends
My neighbor Donna wasn’t making a big deal of it. I’d stopped by to drop off her mail that got delivered to my house by mistake, and the smell hit me before I even made it past her front door. It was this warm, sweet, buttery scent—the kind that makes you stop mid-sentence and just breathe in. She was standing in her kitchen in paint-stained jeans, humming along to some oldies station, casually frosting a cake like she’d done it a thousand times before.
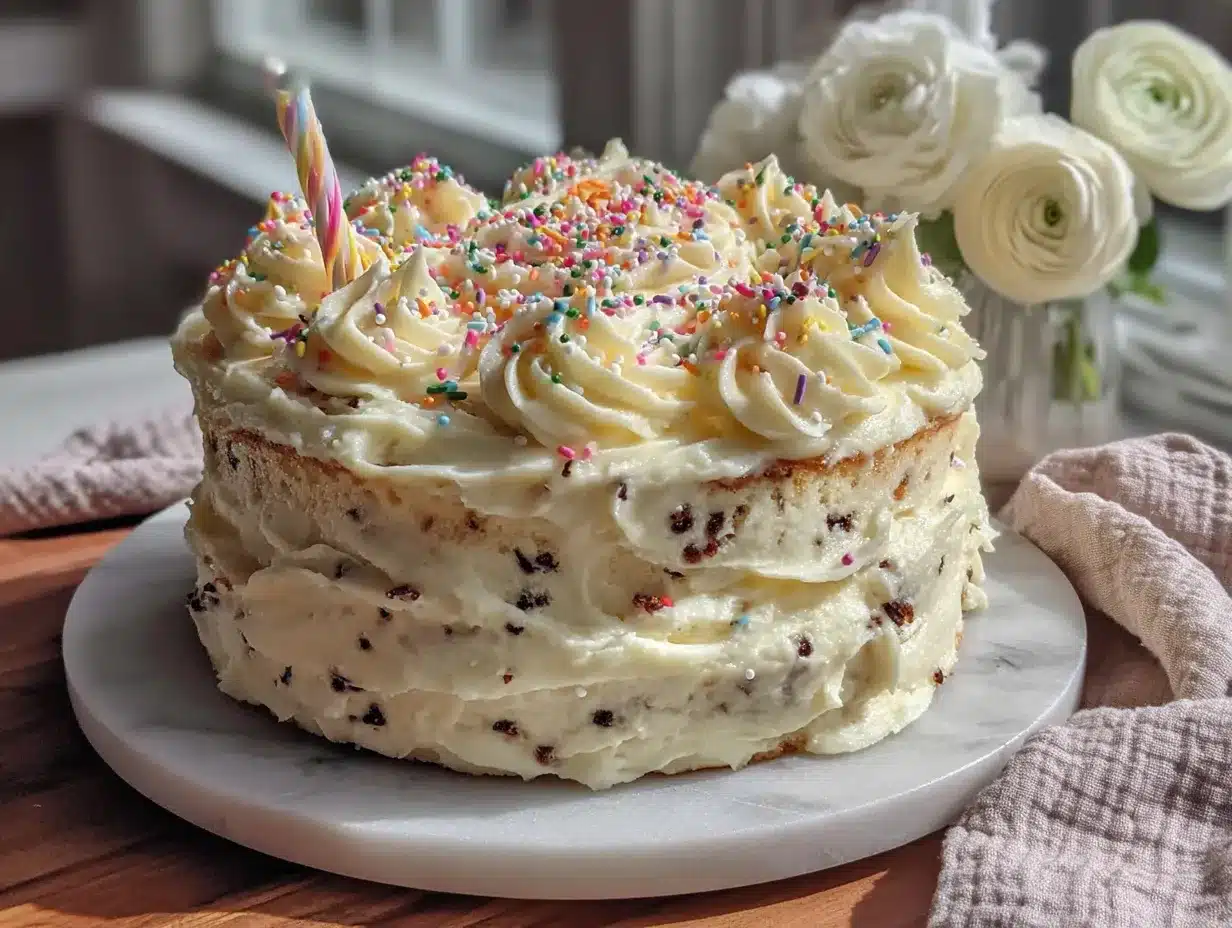
“Oh, that’s just my kid’s birthday cake,” she said when I asked. Just. Like it was nothing. Like she hadn’t created this towering, sprinkle-studded masterpiece that looked like it belonged in a bakery window. The layers were perfectly even, the buttercream was swooped into these gorgeous swirls, and there were rainbow sprinkles packed into every visible inch. I stood there, honestly a little jealous of how effortless she made it look. Meanwhile, my last attempt at a birthday cake had involved a lopsided crumb situation and a lot of frustrated sighing.
She handed me a slice on a paper plate—no fancy presentation, just a fork and a “here, try this.” That first bite stopped me cold. The cake was impossibly moist, tender, with little pops of color from the sprinkles that had somehow stayed vibrant instead of bleeding into the batter. The buttercream was light and silky, not the greasy, overly sweet stuff you get from a can. I asked her for the recipe, and she shrugged and scribbled it on a sticky note. That sticky note is now stained and crinkled, tucked into my favorite cookbook. And honestly, I’ve been making this homemade funfetti birthday layer cake with vanilla buttercream ever since.
Why You’ll Love This Recipe
There are birthday cakes, and then there’s this birthday cake. This isn’t just another sprinkle-studded dessert—it’s the kind of cake that makes people close their eyes after the first bite. I’ve tested this recipe more times than I can count, tweaking the flour ratio, the butter temperature, the exact moment to fold in the sprinkles. It’s been taste-tested by picky kids, critical in-laws, and a neighbor who “doesn’t really like cake.” Spoiler: she asked for seconds.
- Quick & Easy: Don’t let the three layers fool you. This comes together in about 45 minutes of active time, with the rest being baking and cooling. Perfect for the night before a birthday when you realize you forgot to order a cake.
- Simple Ingredients: No weird stabilizers, no hard-to-find extracts. You probably have most of this in your pantry right now, minus maybe the sprinkles.
- Perfect for Celebrations: Birthdays, obviously, but also anniversaries, promotions, “just because it’s Tuesday” moments. Any occasion that calls for joy and sprinkles.
- Crowd-Pleaser: I’ve yet to meet someone who doesn’t light up at the sight of a funfetti cake. It’s nostalgic without being childish, fancy without being fussy.
- Unbelievably Delicious: The texture is where this recipe shines. It’s tender but sturdy enough to hold up to stacking, with a crumb that’s almost velvety. The buttercream is the perfect balance of sweet and creamy.
What makes this recipe different from the rest? It’s the technique—creaming the butter and sugar until it’s genuinely light and fluffy, not just combined. It’s using room temperature eggs that actually incorporate properly. It’s folding the sprinkles in by hand at the very end so they don’t bleed their color everywhere. This isn’t just another version of a funfetti cake. It’s my best version, developed through trial, error, and a lot of butter.
This cake is comfort food in dessert form. It’s the kind that makes you feel like a kid again, sitting at a party table with a paper plate and a grin. It’s warm, nostalgic, and honestly, it fixes a rough day faster than almost anything I know.
What Ingredients You Will Need
This recipe uses simple, wholesome ingredients to deliver that classic birthday cake flavor and tender crumb. No strange additions, just the good stuff. Here’s what you’ll need, broken down by component.
For the Cake Layers
- All-purpose flour, 3 cups (360g) — spooned and leveled, not scooped straight from the bag. I prefer King Arthur Flour for consistent results.
- Granulated sugar, 2 cups (400g) — this isn’t the time to reduce sugar; it’s essential for texture and sweetness.
- Unsalted butter, 1 cup (226g), softened to room temperature — really softened, not microwaved. Let it sit out for at least an hour.
- Large eggs, 4, at room temperature — cold eggs won’t emulsify properly into the batter.
- Buttermilk, 1 cup (240ml), room temperature — adds tenderness and a slight tang that balances the sweetness. No buttermilk? Add 1 tablespoon of lemon juice to regular milk and let it sit for 5 minutes.
- Baking powder, 2 ½ teaspoons — make sure it’s fresh, not expired.
- Baking soda, ½ teaspoon — helps with browning and lift.
- Salt, 1 teaspoon — I use fine sea salt. It enhances all the flavors.
- Vanilla extract, 2 teaspoons — pure vanilla, not imitation. Trust me on this one.
- Rainbow jimmies sprinkles, ½ cup (80g) — these are the long, rod-shaped sprinkles. Not the little round ones, which tend to bleed color. I’ve tested this with Wilton brand and they hold up beautifully.
For the Vanilla Buttercream
- Unsalted butter, 1 ½ cups (339g), softened — again, room temperature is critical here. Cold butter creates lumpy, separated frosting.
- Powdered sugar, 5 cups (600g), sifted — sifting removes lumps and makes the frosting silky smooth. I know it’s an extra step, but it’s worth it.
- Heavy cream, 3-4 tablespoons (45-60ml) — adds richness. You can use milk in a pinch, but the cream makes it luxurious.
- Vanilla extract, 2 teaspoons — pure vanilla, always.
- Salt, ¼ teaspoon — just a pinch to cut the sweetness.
For Decoration (Optional but Recommended)
- Extra rainbow jimmies, ¼ cup — for pressing into the sides of the frosted cake.
- Birthday candles — because what’s a birthday cake without candles?
A quick note on substitutions: if you need a dairy-free version, you can use plant-based butter and a dairy-free milk alternative with a splash of vinegar to mimic buttermilk. The texture will be slightly different, but still delicious. I’ve also made this with gluten-free all-purpose flour blends, and it works—just don’t overmix the batter.
Equipment Needed
You don’t need a professional bakery setup for this, but having the right tools makes a difference. Here’s what I use every time I make this cake.
- Three 8-inch round cake pans — I prefer light-colored aluminum pans. Dark pans can cause the edges to brown too quickly. If you only have two pans, you can bake the layers in batches.
- Stand mixer or hand mixer — creaming the butter and sugar properly requires some arm power. I use my KitchenAid, but a hand mixer works fine if you’re patient.
- Mixing bowls — at least two, one for dry ingredients and one for wet.
- Whisk and rubber spatula — the whisk for combining dry ingredients, the spatula for folding in sprinkles and scraping down the bowl.
- Parchment paper — cut into circles to line the bottom of your pans. This is non-negotiable for clean release.
- Cooling rack — wire racks allow air to circulate so your cakes cool evenly. No cooling rack? Invert the pans onto a clean towel for a few minutes.
- Offset spatula — for frosting. A regular butter knife works, but an offset spatula makes those smooth swirls so much easier.
- Cake turntable — not essential, but helpful if you want a really polished look. I got mine for $15 and it’s been a game-changer.
- Serrated knife — for leveling the cake tops. A bread knife works perfectly.
Budget-friendly tip: you don’t need to buy everything at once. Start with the pans, a spatula, and a hand mixer. Upgrade as you go. I made this cake for years with just those basics.
Preparation Method
Let’s get to the good part. Here’s how to make this homemade funfetti birthday layer cake with vanilla buttercream, step by step. Take your time, and don’t rush the little details—they matter.
Step 1: Prep Your Pans and Oven
Preheat your oven to 350°F (175°C). Grease three 8-inch round cake pans with butter or non-stick spray, then line the bottoms with parchment paper circles. Grease the parchment too. Dust the pans lightly with flour and tap out the excess. This double-prevention method means your cakes will release without a fight.
Step 2: Mix the Dry Ingredients
In a medium bowl, whisk together 3 cups (360g) all-purpose flour, 2 ½ teaspoons baking powder, ½ teaspoon baking soda, and 1 teaspoon salt. Set this aside. Whisking aerates the flour and distributes the leavening agents evenly.
Step 3: Cream the Butter and Sugar
In the bowl of your stand mixer fitted with the paddle attachment (or a large bowl with a hand mixer), beat 1 cup (226g) softened unsalted butter and 2 cups (400g) granulated sugar on medium-high speed for 3-4 minutes. You’re looking for a pale, fluffy mixture that looks almost like whipped cream. Scrape down the sides and bottom of the bowl halfway through. This step is crucial—don’t shortcut it. The air you incorporate here is what gives the cake its lift.
Step 4: Add the Eggs and Vanilla
Add the 4 room-temperature eggs, one at a time, beating well after each addition. The batter might look slightly curdled after the first egg, but it will smooth out. Add 2 teaspoons vanilla extract and beat until combined. If the mixture looks grainy or separated, your butter was too cold or your eggs were too cold. Don’t panic—it will come together when you add the flour.
Step 5: Alternate the Dry and Wet Ingredients
With the mixer on low speed, add about a third of the flour mixture. Mix until just combined. Then add half of the 1 cup (240ml) buttermilk. Mix gently. Repeat with another third of flour, the remaining buttermilk, and finally the last of the flour. Stop mixing as soon as the flour disappears. Overmixing develops gluten, which makes the cake tough. We want tender, not tough.
Step 6: Fold in the Sprinkles
Remove the bowl from the mixer. Using a rubber spatula, gently fold in ½ cup (80g) rainbow jimmies sprinkles. Fold just until they’re distributed—about 8-10 strokes. Over-folding will cause the sprinkles to bleed their color, turning your batter a sad grayish-pink. Don’t ask me how I know this.
Step 7: Divide and Bake
Divide the batter evenly among the three prepared pans. I use a kitchen scale for accuracy—about 450g per pan. Smooth the tops with a spatula. Bake for 22-26 minutes, rotating the pans halfway through. The cakes are done when a toothpick inserted in the center comes out clean or with a few moist crumbs. The tops should spring back when lightly pressed. Let the cakes cool in the pans for 10 minutes, then run a knife around the edges and turn them out onto a wire rack to cool completely. And I mean completely—warm cake will melt your buttercream into a sad puddle.
Step 8: Make the Buttercream
While the cakes cool, make the frosting. In your mixer bowl, beat 1 ½ cups (339g) softened unsalted butter on medium-high speed for 2-3 minutes until it’s smooth and pale. Gradually add the sifted powdered sugar, 1 cup at a time, beating on low speed to avoid a sugar cloud. Once all the sugar is in, add 3 tablespoons heavy cream, 2 teaspoons vanilla extract, and ¼ teaspoon salt. Beat on medium-high for 2-3 minutes until light and fluffy. If the frosting is too thick, add another tablespoon of cream. Too thin? Add a little more powdered sugar.
Step 9: Level and Assemble
Once the cakes are completely cool, use a serrated knife to level the tops if they’ve domed. Place one layer on your cake plate or board. Spread about ¾ cup of buttercream evenly on top. Repeat with the second and third layers. Apply a thin “crumb coat” of frosting all over the cake—just enough to seal in the crumbs. Chill for 20 minutes. Then apply the final, thicker layer of frosting, using your offset spatula to create swirls or smooth sides. Press extra sprinkles into the sides if you want that classic funfetti look.
Cooking Tips & Techniques
I’ve made this homemade funfetti birthday layer cake with vanilla buttercream at least two dozen times, and I’ve learned a few things the hard way. Here are my best tips for success.
Room temperature ingredients are not optional. I know, I know—you’re in a hurry. But cold butter doesn’t cream properly, cold eggs don’t emulsify, and cold buttermilk seizes the batter. Take everything out of the fridge an hour before you start. Set a timer if you have to.
Don’t overmix the batter. This is the number one mistake I see. Once you add the flour, mix on low and stop as soon as it comes together. Overmixing develops gluten, and gluten makes cake tough. You want a tender crumb, not a bread loaf.
Use jimmies, not nonpareils. The little round sprinkles (nonpareils) bleed their color into the batter almost immediately. Jimmies—the long, rod-shaped ones—hold their color and shape much better. I learned this after making a grayish-green cake for my nephew’s birthday. He was gracious about it, but I knew.
Wrap your cake layers before freezing. If you’re making this ahead, wrap each cooled layer tightly in plastic wrap and then foil. Freeze for up to a month. Frozen cakes are actually easier to frost because they’re firmer and produce fewer crumbs.
Chill between coats. The crumb coat is your friend. Apply a thin layer of frosting, chill for 20 minutes, then apply the final coat. This prevents crumbs from ruining your beautiful smooth finish. I skipped this step once and ended up with a cake that looked like it had a bad case of dandruff.
Warm your offset spatula. Run it under hot water, dry it off, and use it to smooth the frosting. The warmth helps the buttercream glide. It’s a small trick that makes a big difference.
Variations & Adaptations
One of the things I love about this cake is how adaptable it is. Here are some variations I’ve tried and loved.
Chocolate Funfetti Cake: Replace ½ cup (60g) of the all-purpose flour with ½ cup (50g) unsweetened cocoa powder. Proceed with the recipe as written. The chocolate-sprinkle combo is surprisingly good—like a birthday party in a brownie.
Lemon Funfetti Cake: Add the zest of 2 lemons to the sugar and rub it in with your fingers before creaming with the butter. Replace 2 tablespoons of the buttermilk with 2 tablespoons fresh lemon juice. The lemon brightens up the cake beautifully and pairs perfectly with the vanilla buttercream.
Gluten-Free Version: Use a 1:1 gluten-free all-purpose flour blend that contains xanthan gum. I’ve had good results with Bob’s Red Mill. Don’t overmix, and let the batter rest for 10 minutes before baking to allow the flours to hydrate.
Dairy-Free Version: Use plant-based butter (I like Miyoko’s) and a dairy-free milk alternative with a splash of apple cider vinegar for the buttermilk. The texture will be slightly less tender, but still delicious.
Cupcake Adaptation: This batter makes about 24 cupcakes. Bake at 350°F (175°C) for 16-18 minutes. The frosting recipe is enough to pipe a generous swirl on each one.
My personal favorite variation: I once made this with a strawberry buttercream by blending ½ cup of freeze-dried strawberries into a powder and mixing it into the frosting. The result was this gorgeous pale pink cake with bright berry flavor. It was for a friend’s baby shower, and people still ask me about it.
Serving & Storage Suggestions
This cake is best served at room temperature. If you’ve refrigerated it, let it sit out for about 30 minutes before slicing. The buttercream softens, the cake becomes more tender, and the flavors really come through.
For presentation, I like to place the cake on a simple white stand and scatter a few extra sprinkles around the base. It’s festive without being fussy. A few fresh flowers (edible ones, like pansies or violets) on top make it look extra special for spring or summer birthdays.
Storage-wise, this cake keeps well. In an airtight container at room temperature, it’ll stay fresh for up to 2 days. In the refrigerator, it’ll last up to 5 days. The cake might dry out slightly in the fridge, so let it come to room temperature before serving.
For longer storage, you can freeze the fully assembled and frosted cake. Place it in the freezer unwrapped for an hour until the frosting is firm, then wrap it tightly in plastic wrap and foil. It’ll keep for up to 3 months. Thaw overnight in the refrigerator, then bring to room temperature before serving.
One thing I’ve noticed: the flavors actually develop and deepen after a day. The cake becomes more moist, the vanilla more pronounced. It’s one of those rare desserts that’s even better on day two. If you can resist eating it all on day one, anyway.
Nutritional Information & Benefits
Let’s be real—this is a celebration cake, not a health food. But here’s the estimated nutritional breakdown per slice (based on 12 servings):
| Nutrient | Amount Per Slice |
|---|---|
| Calories | ~520 kcal |
| Total Fat | 28g |
| Saturated Fat | 17g |
| Carbohydrates | 66g |
| Sugar | 48g |
| Protein | 5g |
That said, there are some redeeming qualities. The buttermilk adds a bit of calcium and probiotics. The eggs provide protein and B vitamins. And honestly, there’s something to be said for the mental health benefits of a slice of birthday cake shared with people you love. I’m not a nutritionist, but I firmly believe that joy is a nutrient too.
If you’re watching your sugar intake, you can reduce the sugar in the cake to 1 ½ cups and the powdered sugar in the frosting to 4 cups. The texture will be slightly less tender, but it’ll still be delicious. For a lower-fat option, you can replace half the butter in the cake with unsweetened applesauce. I’ve tried both, and while they’re not the same as the original, they’re still pretty great.
Potential allergens: this recipe contains dairy, eggs, and gluten. It can be adapted for dairy-free and gluten-free diets as noted in the variations section.
Conclusion
This homemade funfetti birthday layer cake with vanilla buttercream is more than just a recipe—it’s a little piece of joy you can bake. It’s the cake that makes people smile before they even taste it, the one that turns an ordinary evening into a celebration. I’ve made it for birthdays, for no reason at all, and for days when I just needed something bright and cheerful in my kitchen.
The best part? You don’t need to be a professional baker to pull it off. The instructions are straightforward, the ingredients are simple, and the result is genuinely impressive. Whether you’re making it for a toddler’s first birthday or your own 40th, this cake delivers every single time.
I’d love to hear how yours turns out. Did you try a variation? Did you add extra sprinkles (the correct answer is always yes)? Drop a comment below and let me know. And if you share it on social media, tag me—I want to see your beautiful creations. Happy baking, friends. You’ve got this.
Frequently Asked Questions
Can I make this cake ahead of time?
Absolutely. You can bake the cake layers up to a month in advance and freeze them, tightly wrapped. The buttercream can be made up to a week ahead and refrigerated—just bring it to room temperature and re-whip before using.
Why did my sprinkles bleed into the batter?
This usually happens when you use the wrong type of sprinkles or overmix the batter. Stick with rainbow jimmies (the long, rod-shaped ones) and fold them in gently at the very end. Also, make sure your batter isn’t too warm when you add them.
Can I use this recipe for a two-layer cake instead of three?
Yes. Divide the batter between two 9-inch round pans and bake for 28-32 minutes. You’ll have slightly thicker layers, and you might have a little extra frosting. Not a bad problem to have.
My cake stuck to the pan. What went wrong?
Either the pan wasn’t greased thoroughly, or you didn’t let the cake cool long enough in the pan. I always line the bottom with parchment paper as insurance. Let the cake cool in the pan for exactly 10 minutes, then turn it out onto a rack.
How do I get smooth frosting without crumbs?
The secret is the crumb coat. Apply a thin layer of frosting all over the cake, then refrigerate for 20 minutes until it’s firm. This seals in the crumbs so your final coat stays clean and smooth. A warm offset spatula helps too.
Pin This Recipe!
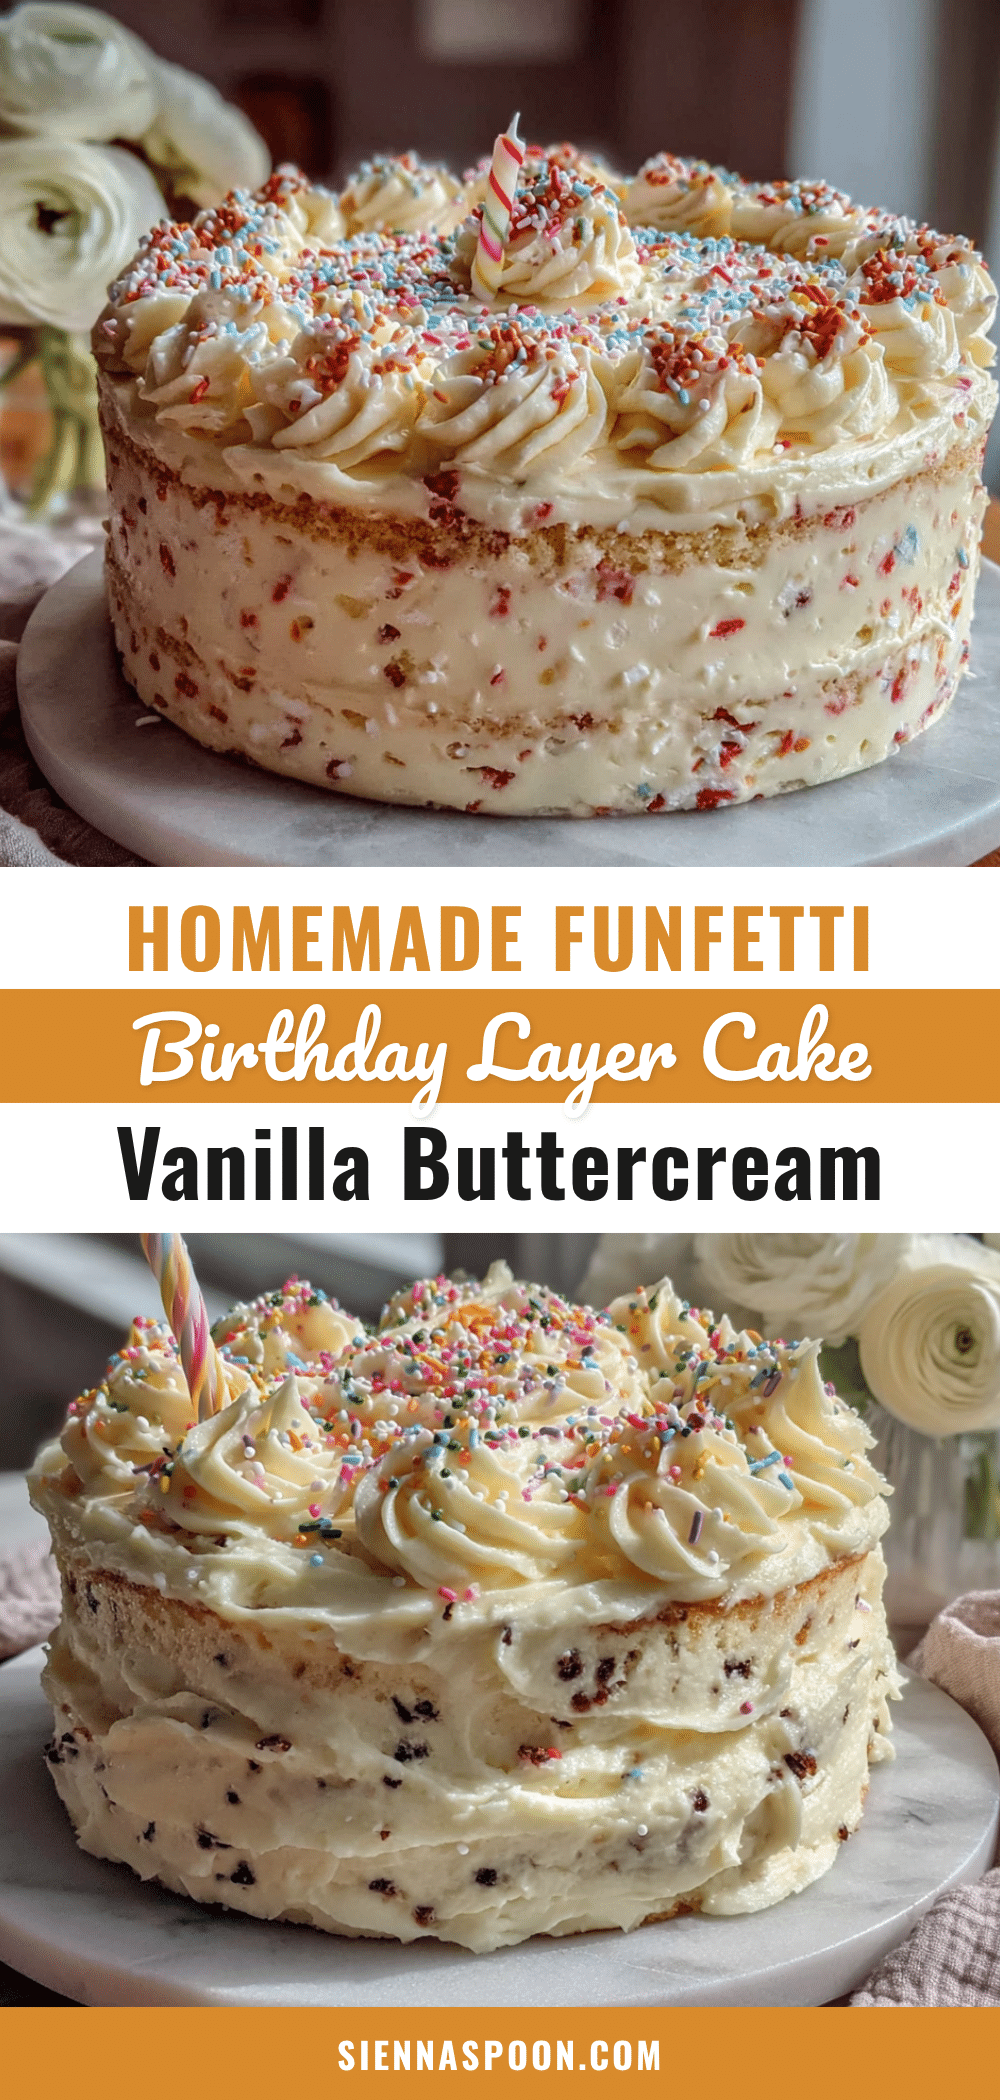
Homemade Funfetti Birthday Cake with Easy Vanilla Buttercream
This moist, tender funfetti layer cake is studded with rainbow sprinkles and topped with a silky vanilla buttercream. It’s the perfect celebration cake that comes together with simple ingredients and easy-to-follow steps.
- Prep Time: 45 minutes
- Cook Time: 26 minutes
- Total Time: 1 hour 11 minutes
- Yield: 12 servings 1x
- Category: Dessert
- Cuisine: American
Ingredients
- 3 cups (360g) all-purpose flour, spooned and leveled
- 2 cups (400g) granulated sugar
- 1 cup (226g) unsalted butter, softened to room temperature
- 4 large eggs, at room temperature
- 1 cup (240ml) buttermilk, room temperature
- 2 ½ teaspoons baking powder
- ½ teaspoon baking soda
- 1 teaspoon fine sea salt
- 2 teaspoons pure vanilla extract
- ½ cup (80g) rainbow jimmies sprinkles
- 1 ½ cups (339g) unsalted butter, softened (for buttercream)
- 5 cups (600g) powdered sugar, sifted
- 3–4 tablespoons (45-60ml) heavy cream
- 2 teaspoons pure vanilla extract (for buttercream)
- ¼ teaspoon salt (for buttercream)
- ¼ cup rainbow jimmies sprinkles (for decoration, optional)
Instructions
- Preheat oven to 350°F (175°C). Grease three 8-inch round cake pans, line bottoms with parchment paper, grease parchment, and dust with flour.
- In a medium bowl, whisk together flour, baking powder, baking soda, and salt.
- In a stand mixer with paddle attachment, beat 1 cup butter and sugar on medium-high for 3-4 minutes until pale and fluffy.
- Add eggs one at a time, beating well after each. Add 2 teaspoons vanilla and beat until combined.
- With mixer on low, add flour mixture in thirds, alternating with buttermilk, beginning and ending with flour. Mix until just combined.
- Remove bowl from mixer. Gently fold in ½ cup sprinkles with a rubber spatula until just distributed (8-10 strokes).
- Divide batter evenly among prepared pans (about 450g each). Bake for 22-26 minutes, rotating halfway, until toothpick comes out clean. Cool in pans 10 minutes, then turn out onto wire rack to cool completely.
- For buttercream: Beat 1 ½ cups butter on medium-high for 2-3 minutes until smooth. Gradually add sifted powdered sugar, 1 cup at a time, on low. Add 3 tablespoons heavy cream, 2 teaspoons vanilla, and ¼ teaspoon salt. Beat on medium-high for 2-3 minutes until fluffy. Adjust consistency with extra cream or sugar if needed.
- Level cooled cake tops with a serrated knife. Place one layer on plate, spread about ¾ cup buttercream. Repeat with remaining layers. Apply thin crumb coat, chill 20 minutes, then apply final frosting layer. Press extra sprinkles into sides if desired.
Notes
Use room temperature ingredients for best results. Fold sprinkles gently to prevent color bleeding. Chill cake between crumb coat and final frosting for a clean finish. Cake can be made ahead and frozen.
Nutrition
- Serving Size: 1 slice
- Calories: 520
- Sugar: 48
- Fat: 28
- Saturated Fat: 17
- Carbohydrates: 66
- Protein: 5
Keywords: funfetti cake, birthday cake, vanilla buttercream, sprinkle cake, layer cake, celebration cake


