Love this? Save it for later!
Share the inspiration with your friends
I was standing in the canned goods aisle at my local grocery store last October, staring at a display of pumpkin puree like it held the secrets to the universe. The fluorescent lights were humming that weird hum they do, and someone’s cart had a squeaky wheel that echoed through the whole place. Then this smell hit me—not from the store, but from my memory. It was the scent of my neighbor Mrs. Patterson’s kitchen, that warm, spiced aroma that used to drift through the fence every autumn afternoon when I was maybe nine years old. She’d always bring over a plate of something warm, wrapped in foil, and I’d sit on our back steps eating it while the leaves crunched under my sneakers. I haven’t thought about her in years. She moved away when I was in high school, and I honestly don’t even know if she’s still around. But standing there in that aisle, I could almost feel the warmth of that foil in my hands again. So I grabbed a can of pumpkin puree, a box of cake mix, and I went home to try and catch that feeling. Let me tell you, this easy two-ingredient pumpkin dump cake is the closest I’ve ever come to getting it right. It’s not fancy, it’s not complicated, and honestly, that’s the whole point. Maybe you’ve been there too—chasing a taste you can’t quite name but you know when you’ve found it.
Why You’ll Love This Recipe
After testing this recipe about seven times in one weekend—yes, seven—I can tell you with absolute confidence that this is the version you want. I’ve made it with different cake mixes, tried adding extra spices, even attempted a from-scratch version that took way too long and honestly wasn’t as good. This two-ingredient pumpkin dump cake is the one I keep coming back to, and here’s why:
- Quick & Easy: It takes about five minutes to throw together. No mixing bowls, no electric mixer, no complicated steps. Just dump, spread, and bake.
- Simple Ingredients: You literally need two things from the store. No fancy grocery trips, no hunting for obscure spices. If you’ve got a can of pumpkin puree and a box of yellow cake mix, you’re in business.
- Perfect for Fall Gatherings: This is the dessert you bring to Thanksgiving when you’re the designated “easy dish” person. It disappears fast, and nobody believes it only has two ingredients.
- Crowd-Pleaser: I’ve served this to picky kids, health-conscious friends, and my uncle who claims he “doesn’t do pumpkin.” They all went back for seconds.
- Unbelievably Delicious: The top gets this incredible golden, crunchy crust while the bottom stays soft and almost pudding-like. It’s like a pumpkin pie and a coffee cake had a baby, and that baby is perfect.
This isn’t just another dump cake recipe you’ll forget about. The texture is next-level—crispy on top, tender underneath, with that warm pumpkin flavor that makes you close your eyes after the first bite. It’s comfort food reimagined: faster, simpler, but with the same soul-soothing satisfaction. Perfect for impressing guests without stress, or turning a random Tuesday into something special.
What Ingredients You Will Need
This recipe uses two simple ingredients to deliver bold flavor and satisfying texture without any fuss. Both are pantry staples that you probably already have on hand during fall baking season.
- Canned Pumpkin Puree (15 oz / 425g): Make sure you grab 100% pure pumpkin puree, not pumpkin pie filling. They look similar, but the pie filling has added sugar and spices that will throw off the texture. I personally prefer Libby’s for consistent results, but any brand works as long as it’s pure pumpkin. (Look for “100% pure pumpkin” on the label.)
- Yellow Cake Mix (15.25 oz / 432g): One standard box, dry, right out of the box. Do not prepare the mix according to package directions—we’re using it straight. Duncan Hines and Betty Crocker both work great. The yellow cake mix gives that buttery, vanilla flavor that complements the pumpkin perfectly.
Optional but Highly Recommended Additions:
- Melted Butter (½ cup / 1 stick / 113g): This isn’t technically one of the two ingredients, but drizzling melted butter over the top before baking gives you that gorgeous golden crust. Without it, the top can be a little dry and powdery. Trust me on this one.
- Pumpkin Pie Spice (1 teaspoon): If your pumpkin puree is plain, a sprinkle of pumpkin pie spice adds that warm, cozy flavor we all love in fall desserts. You can also use cinnamon, nutmeg, or a mix of both.
- Chopped Pecans or Walnuts (½ cup): For some crunch on top. Totally optional, but my neighbor who tried this version said it was “the best thing I’ve eaten all month.”
Substitution Guidance: For a gluten-free option, use a gluten-free yellow cake mix. For a dairy-free version, use a dairy-free cake mix and substitute the butter with melted coconut oil or a plant-based butter alternative. The texture will be slightly different, but still delicious.
Equipment Needed
You don’t need much for this recipe, which is honestly my favorite part. Here’s what you’ll need:
- 9×13-inch Baking Dish: A standard rectangular baking dish works best. Glass or ceramic both work fine. I’ve used a metal pan before too, and it worked, but the edges browned a little faster so keep an eye on it.
- Can Opener: For opening your pumpkin puree. Basic, but essential.
- Spatula or Spoon: For spreading the pumpkin puree evenly in the dish. Nothing fancy needed.
- Measuring Cup (optional): If you’re adding the melted butter, you’ll want something to measure it with. Or just eyeball it—I won’t tell.
Budget-Friendly Tips: Don’t have a 9×13 dish? You can use a 9×9 square pan or even an 8×8—just adjust the baking time slightly (start checking at 35 minutes). I once made this in a disposable aluminum pan when I was bringing it to a friend’s house, and it turned out perfectly. No need to buy special equipment for this one.
Preparation Method
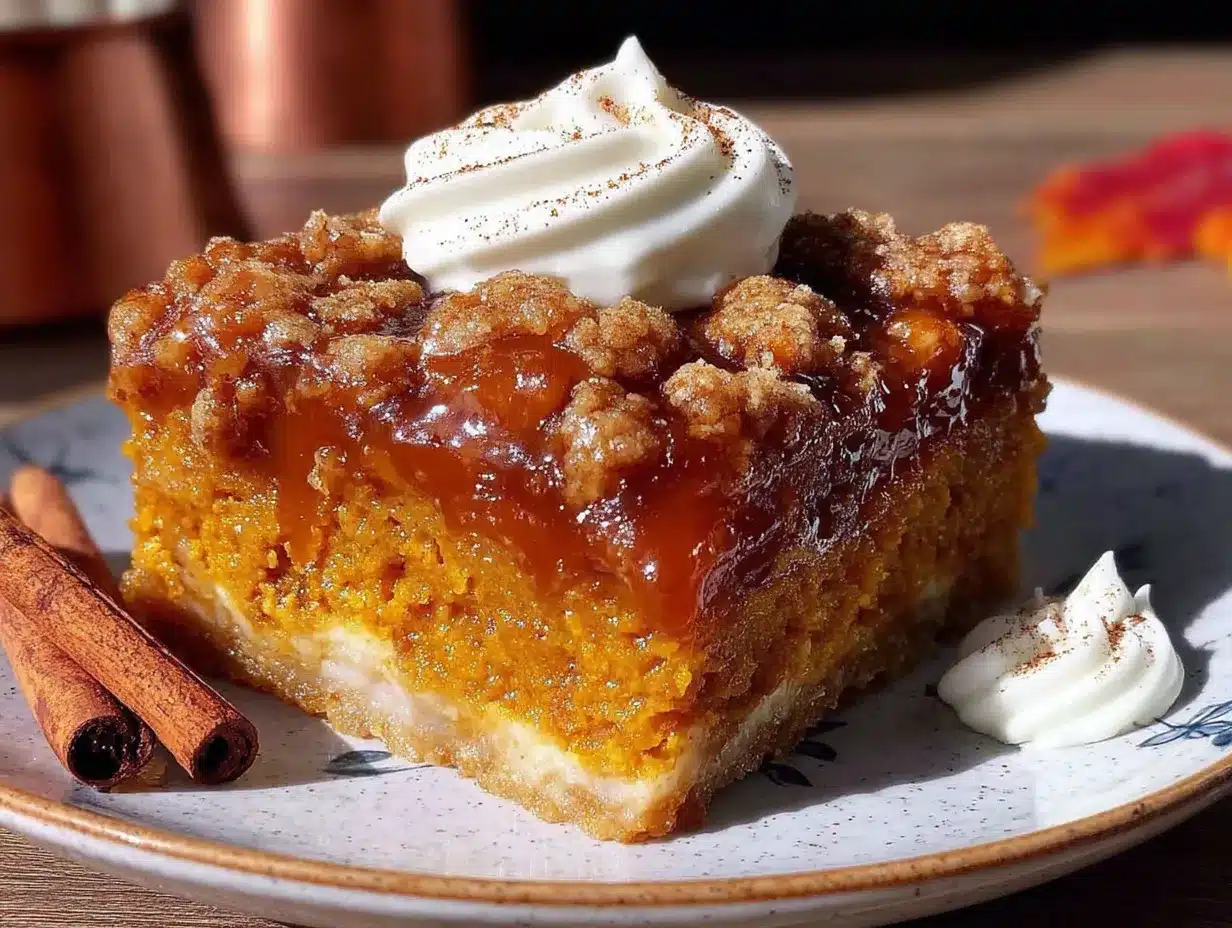
This is the easiest dessert you’ll make all fall. I promise. Here’s how to do it:
- Preheat your oven to 350°F (175°C). Give it a good 10-15 minutes to come to temperature. While it’s heating, grab your 9×13-inch baking dish—no need to grease it, the pumpkin will keep everything from sticking.
- Empty the canned pumpkin puree into the baking dish. Use your spatula to spread it into an even layer. It should cover the bottom of the dish completely. Don’t worry if it looks a little thin—the cake mix will absorb some of the moisture as it bakes. (I learned this the hard way after making it too thick the first time and ending up with raw pumpkin in the middle.)
- Sprinkle the dry cake mix evenly over the pumpkin. Open the box, dump it over the pumpkin, and use your fingers or a fork to spread it into an even layer. Make sure you cover every bit of that orange goodness. Some spots might look a little dry—that’s okay.
- If using, drizzle the melted butter over the top. Try to get it as even as possible, but don’t stress if some areas get more than others. The butter will help the cake mix turn golden and crispy. Without it, the top can be a bit powdery and sad. (Yes, I’ve made that mistake too.)
- Optional: Sprinkle pumpkin pie spice or chopped nuts over the top. This is where you can get creative. I like to add a light dusting of cinnamon and a handful of pecans for crunch.
- Bake for 40-45 minutes, or until the top is golden brown and the edges are bubbly. Your kitchen is going to smell incredible—like fall in a pan. The top should look crispy and slightly cracked, and you should see little bubbles of pumpkin around the edges. If you insert a toothpick into the center, it should come out mostly clean, maybe with a few moist crumbs.
- Let it cool for at least 10-15 minutes before serving. I know it’s tempting to dig in right away, but letting it rest helps the layers set. The first time I made this, I scooped into it immediately and got a spoonful of hot pumpkin soup with cake crumbs floating on top. Not ideal. Give it time to cool, and you’ll get those beautiful distinct layers.
Sensory Cue: When it’s done, the top should be a deep golden brown and feel slightly firm to the touch. The edges will be bubbly and the whole thing will have this amazing aroma—warm, sweet, with a hint of toasty cake mix. You’ll know it’s ready because your whole house will smell like a bakery.
Cooking Tips & Techniques
I’ve made this easy two-ingredient pumpkin dump cake more times than I care to admit, and I’ve picked up a few tricks along the way. Here’s what I’ve learned:
Don’t skip the butter. I know the recipe is called “two-ingredient,” and technically the butter is optional, but honestly? It makes a huge difference. Without it, the top layer of cake mix stays dry and powdery. With it, you get that gorgeous golden crust that everyone fights over. If you’re trying to keep it dairy-free, use melted coconut oil instead—it works surprisingly well.
Spread the pumpkin evenly. This is the most important step. If your pumpkin layer is thicker in some spots than others, those thicker spots won’t cook through properly. Take an extra thirty seconds to smooth it out. Your future self will thank you.
Let it cool completely before cutting. I know, I know—I already said this. But I’m saying it again because I keep making this mistake. Warm dump cake is delicious, but it’s also a runny mess. Give it a full 20 minutes if you can. The layers will set, and you’ll get clean, beautiful squares instead of pumpkin soup.
Use a toothpick to check doneness. The top should be golden and crispy, but the real test is the toothpick. Insert it into the center—if it comes out with wet batter, give it another 5 minutes. If it comes out with moist crumbs, you’re good to go.
One mistake I made: The first time I tried this, I used a spice cake mix instead of yellow. Don’t do that. The spice cake mix has way too much cinnamon and clove, and it overpowered the pumpkin completely. It tasted like someone dumped a whole bottle of pumpkin pie spice into a bowl. Yellow cake mix gives you that buttery, neutral base that lets the pumpkin shine.
Variations & Adaptations
This recipe is incredibly forgiving, so feel free to play around. Here are some variations I’ve tried and loved:
1. Pumpkin Chocolate Chip Dump Cake: After sprinkling the cake mix over the pumpkin, scatter ½ cup of chocolate chips on top before baking. The chocolate melts into little pockets of sweetness that pair beautifully with the pumpkin. I made this for a Halloween party and it was gone in twenty minutes.
2. Vegan Pumpkin Dump Cake: Use a vegan yellow cake mix (most are accidentally vegan, but check the label) and substitute the butter with melted coconut oil. It turns out slightly less crispy on top, but still delicious. I’ve made this for my vegan sister-in-law and she asked for the recipe twice.
3. Spiced Pumpkin Dump Cake: Mix 1 teaspoon of pumpkin pie spice, ½ teaspoon of cinnamon, and ¼ teaspoon of nutmeg into the dry cake mix before sprinkling it over the pumpkin. This gives you that warm, cozy fall flavor without needing to add anything extra. Perfect for when you want that “homemade” taste with zero extra effort.
4. Gluten-Free Version: Use a gluten-free yellow cake mix. I’ve tested this with King Arthur’s gluten-free yellow cake mix and it turned out great—slightly more crumbly on top, but the flavor was spot on. Just make sure your pumpkin puree is also gluten-free (which it usually is, but always check).
5. Apple Pumpkin Dump Cake: Spread a layer of thinly sliced apples (about 1 cup) over the pumpkin before adding the cake mix. The apples add a little tartness and texture that balances the sweet pumpkin. I tried this on a whim one afternoon and it’s become my go-to fall variation.
Serving & Storage Suggestions
This easy two-ingredient pumpkin dump cake is best served warm, but it’s honestly delicious at any temperature. Here’s how to make the most of it:
Serving Temperature: Warm is ideal—the top is crispy, the bottom is soft, and the flavors are at their peak. Let it cool for 15-20 minutes after baking, then scoop it into bowls. If you’re serving it later, pop individual portions in the microwave for 15-20 seconds to bring back that fresh-from-the-oven feel.
Toppings: A scoop of vanilla ice cream is the classic choice—the cold creaminess pairs perfectly with the warm, spiced cake. Whipped cream works too, or a drizzle of caramel sauce if you’re feeling fancy. I’ve also served it with a dollop of Greek yogurt for a slightly healthier option, and it was surprisingly good.
Storage: Cover the baking dish with foil or plastic wrap and store it in the refrigerator for up to 5 days. The texture will soften a bit as it sits, but the flavor actually gets better—the pumpkin and cake mix have time to meld together. I actually prefer it on day two, when it’s almost like a pumpkin pudding.
Freezing: This freezes beautifully. Cut it into squares, wrap each piece individually in plastic wrap, then place them in a freezer bag. They’ll keep for up to 3 months. To reheat, just microwave a frozen square for 30-45 seconds, or let it thaw in the fridge overnight and warm it in the oven at 300°F for 10 minutes.
Flavor Development: The flavors deepen and meld together after a day or two in the fridge. The pumpkin becomes more pronounced, and the cake layer softens into something almost custard-like. It’s a different experience than fresh-baked, but equally delicious in its own way.
Nutritional Information & Benefits
Here’s a rough estimate for one serving (based on 12 servings, without optional toppings):
- Calories: Approximately 220-250
- Total Fat: 8-10g (from butter and cake mix)
- Carbohydrates: 35-40g
- Fiber: 2-3g (from pumpkin)
- Sugar: 18-22g
- Protein: 2-3g
- Vitamin A: High (pumpkin is loaded with it)
Health Benefits: Pumpkin is packed with vitamin A, which supports eye health and immune function. It’s also a good source of fiber, which helps with digestion and keeps you feeling full. The cake mix and butter add calories and sugar, of course, but this is a dessert—it’s meant to be enjoyed in moderation. I like to think of it as a treat that happens to have some nutritional value hidden inside.
Dietary Considerations: This recipe is vegetarian as written. For vegan or gluten-free options, see the variations section above. It does contain wheat and dairy (from the cake mix and butter), so it’s not suitable for those with celiac disease or dairy allergies without substitutions.
Conclusion
This easy two-ingredient pumpkin dump cake is the kind of recipe that makes you look like a hero with almost zero effort. It’s warm, cozy, and tastes like fall in a pan—exactly what I was chasing that day in the grocery store aisle. I love that it’s simple enough for a random Tuesday but impressive enough for a holiday table. It’s forgiving, adaptable, and somehow always turns out exactly right.
I hope you give this one a try. Customize it however you like—add chocolate chips, throw in some nuts, or keep it classic with just the two ingredients. However you make it, I think you’ll love it. And if you do, I’d love to hear about it. Drop a comment below and let me know how it turned out, or share your favorite variation. Happy baking, friends—and here’s to chasing those good food memories, one simple recipe at a time.
Frequently Asked Questions
Can I use pumpkin pie filling instead of pumpkin puree?
I wouldn’t recommend it. Pumpkin pie filling already has sugar and spices added, which will make your dump cake overly sweet and throw off the texture. Stick with 100% pure pumpkin puree for the best results.
Do I need to add eggs or oil to the cake mix?
Nope! That’s the beauty of this recipe. You’re using the cake mix dry, straight out of the box. The pumpkin provides enough moisture to hydrate the mix as it bakes. No eggs, no oil, no extra liquid needed.
Can I make this in a slow cooker?
Yes, you can! Spray your slow cooker with non-stick spray, add the pumpkin, sprinkle the cake mix on top, and drizzle with melted butter. Cook on low for 2-3 hours or on high for 1-2 hours, until the top is golden and the edges are bubbly. The texture will be softer than the oven version, but still delicious.
How do I know when it’s done baking?
The top should be golden brown and slightly cracked, and the edges should be bubbly. Insert a toothpick into the center—if it comes out with wet batter, give it more time. If it comes out with a few moist crumbs, it’s ready. The center should be set but still soft.
Can I double this recipe?
Absolutely. Use a larger baking dish (like a 11×15 or two 9×13 dishes) and double both the pumpkin and cake mix. The baking time might increase by 5-10 minutes, so start checking around the 45-minute mark. You might need to rotate the pan halfway through for even browning.
Pin This Recipe!
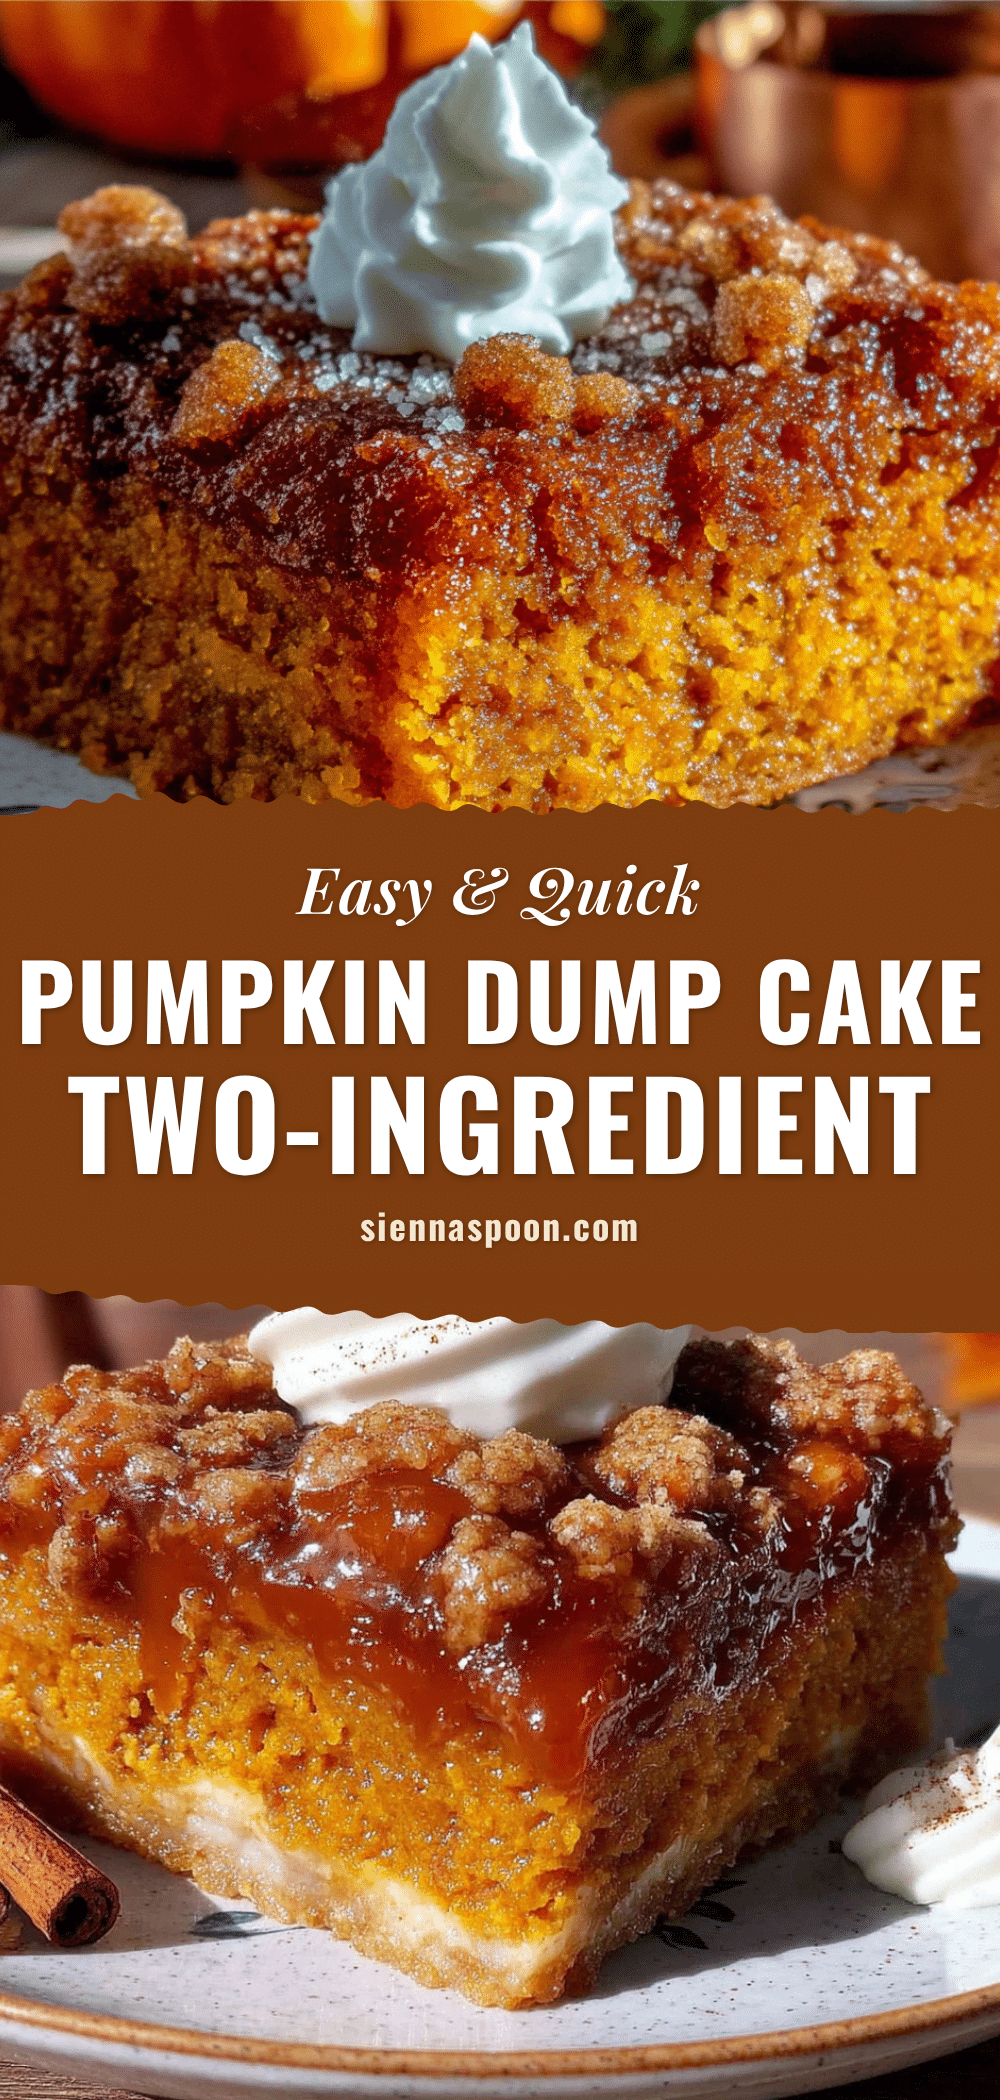
Easy Two-Ingredient Pumpkin Dump Cake (Best Fall Dessert)
This easy two-ingredient pumpkin dump cake is the closest I’ve ever come to getting that warm, spiced aroma from my neighbor Mrs. Patterson’s kitchen. It’s not fancy, it’s not complicated, and honestly, that’s the whole point.
- Prep Time: 5 minutes
- Cook Time: 40-45 minutes
- Total Time: 45-50 minutes
- Yield: 12 servings 1x
- Category: Dessert
- Cuisine: American
Ingredients
- 1 can (15 oz / 425g) canned pumpkin puree (100% pure pumpkin, not pumpkin pie filling)
- 1 box (15.25 oz / 432g) yellow cake mix (dry, not prepared)
- ½ cup (1 stick / 113g) melted butter (optional but highly recommended)
- 1 teaspoon pumpkin pie spice (optional)
- ½ cup chopped pecans or walnuts (optional)
Instructions
- Preheat your oven to 350°F (175°C). No need to grease the 9×13-inch baking dish.
- Empty the canned pumpkin puree into the baking dish and spread it into an even layer with a spatula.
- Sprinkle the dry cake mix evenly over the pumpkin, covering every bit of the pumpkin.
- If using, drizzle the melted butter evenly over the top of the cake mix.
- Optional: Sprinkle pumpkin pie spice or chopped nuts over the top.
- Bake for 40-45 minutes, or until the top is golden brown and the edges are bubbly. A toothpick inserted into the center should come out mostly clean with a few moist crumbs.
- Let it cool for at least 10-15 minutes before serving. For best results, cool for 20 minutes to allow layers to set.
Notes
Don’t skip the butter—it creates a golden, crispy crust. Spread the pumpkin evenly to ensure even cooking. Let the cake cool completely before cutting to get clean squares. Use a toothpick to check doneness. Avoid using spice cake mix; yellow cake mix is best.
Nutrition
- Serving Size: 1 serving (1/12 of r
- Calories: 220250
- Sugar: 1822
- Sodium: 300350
- Fat: 810
- Saturated Fat: 45
- Carbohydrates: 3540
- Fiber: 23
- Protein: 23
Keywords: pumpkin dump cake, two-ingredient dessert, easy fall dessert, pumpkin cake, dump cake recipe


