Love this? Save it for later!
Share the inspiration with your friends
The summer I turned thirty, I found myself in Mrs. Kowalski’s kitchen, watching her roll out dough with the kind of quiet confidence that only comes from decades of practice. I had mentioned, almost as an afterthought, that my kids were driving me crazy with their after-school snack demands—everything had to be store-bought, everything had to be packaged, and nothing I made at home ever seemed to measure up. She didn’t say anything at first. She just wiped her flour-dusted hands on her apron, pulled a worn recipe card from a tin box on the counter, and handed it to me. “Try these,” she said. “My boys ate them by the dozen.” The card read “Pumpkin Scones” in faded blue ink, and honestly, I almost laughed. My kids were picky. They didn’t do pumpkin anything. But Mrs. Kowalski had this way of making you feel like you could do anything, so I thanked her and tucked the card into my pocket. Three days later, with a bruised pumpkin from the discount bin and a half-empty bag of powdered sugar, I made her recipe for the first time. The kitchen smelled like fall, my kids actually asked for seconds, and I think I finally understood what she meant about feeding people you love. It’s not about fancy ingredients or perfect technique—it’s about the quiet exchange of something good, something made with your own hands. These scones have been in my regular rotation ever since, and every time I make them, I think of her kitchen, her flour-dusted apron, and the way she trusted me with her recipe. Maybe you’ve been there too—wanting to make something special but worried it won’t be worth the effort or the grocery bill. Let me tell you, these pumpkin scones are worth every penny, and they’ll make you feel like a kitchen hero without breaking the bank.
Why You’ll Love This Recipe
Let me be straight with you—I’ve tested a lot of pumpkin scone recipes over the years. Some were too dry. Some were too sweet. Some required ingredients I had to drive to three different stores to find. These pumpkin scones are none of those things. They’re the Goldilocks of fall baking, and here’s why they work for real families on real budgets.
- Budget-Friendly Ingredients: You probably already have most of what you need in your pantry. Canned pumpkin is cheap, especially when you grab it on sale. The rest is basic baking stuff—flour, sugar, butter, spices. No trips to specialty stores required.
- Kid-Approved Texture: These scones are tender on the inside with slightly crisp edges. They’re not too crumbly, not too dense. My own kids, who once turned up their noses at anything with a vegetable in it, now ask for these in their lunchboxes.
- Quick to Make: From start to finish, you’re looking at about 30 minutes. That’s faster than a trip to the coffee shop, and honestly, they taste better than anything you’ll get behind a glass case.
- Perfect for Fall Mornings: There’s something about the smell of pumpkin and cinnamon baking that just feels right when the leaves start changing. These scones make regular mornings feel special without any extra fuss.
- Leftovers That Reheat Well: This is a big one for me. Nobody wants to eat a sad, stale scone the next day. These reheat beautifully in the microwave or oven, so you can make a batch on Sunday and enjoy them all week.
What makes these different from every other pumpkin scone recipe out there? It’s the balance. The pumpkin keeps them moist without making them gummy. The maple glaze adds sweetness without being cloying. And the whole thing comes together with ingredients you can feel good about feeding your family. This isn’t just another recipe—it’s the one you’ll come back to every fall.
What Ingredients You Will Need
This recipe uses simple, wholesome ingredients to deliver big flavor without the fuss. Most of these are pantry staples, and the ones that aren’t are easy to find and easy on your wallet.
For the Scones
- 2 cups all-purpose flour (I use unbleached for better texture, but regular works fine)
- 1/3 cup granulated sugar (you can reduce to 1/4 cup if you prefer less sweet scones)
- 1 tablespoon baking powder (make sure it’s fresh—this is key for flaky scones)
- 1/2 teaspoon baking soda
- 1/2 teaspoon salt
- 1 teaspoon ground cinnamon
- 1/2 teaspoon ground nutmeg
- 1/4 teaspoon ground ginger
- 1/4 teaspoon ground cloves (or use 2 teaspoons pumpkin pie spice instead of the individual spices)
- 1/2 cup cold unsalted butter, cut into small cubes (cold butter is non-negotiable for flaky scones)
- 1/2 cup canned pumpkin puree (not pumpkin pie filling—look for 100% pure pumpkin)
- 1/4 cup milk (whole milk gives the best texture, but 2% or oat milk work too)
- 1 large egg
- 1 teaspoon vanilla extract
For the Maple Glaze
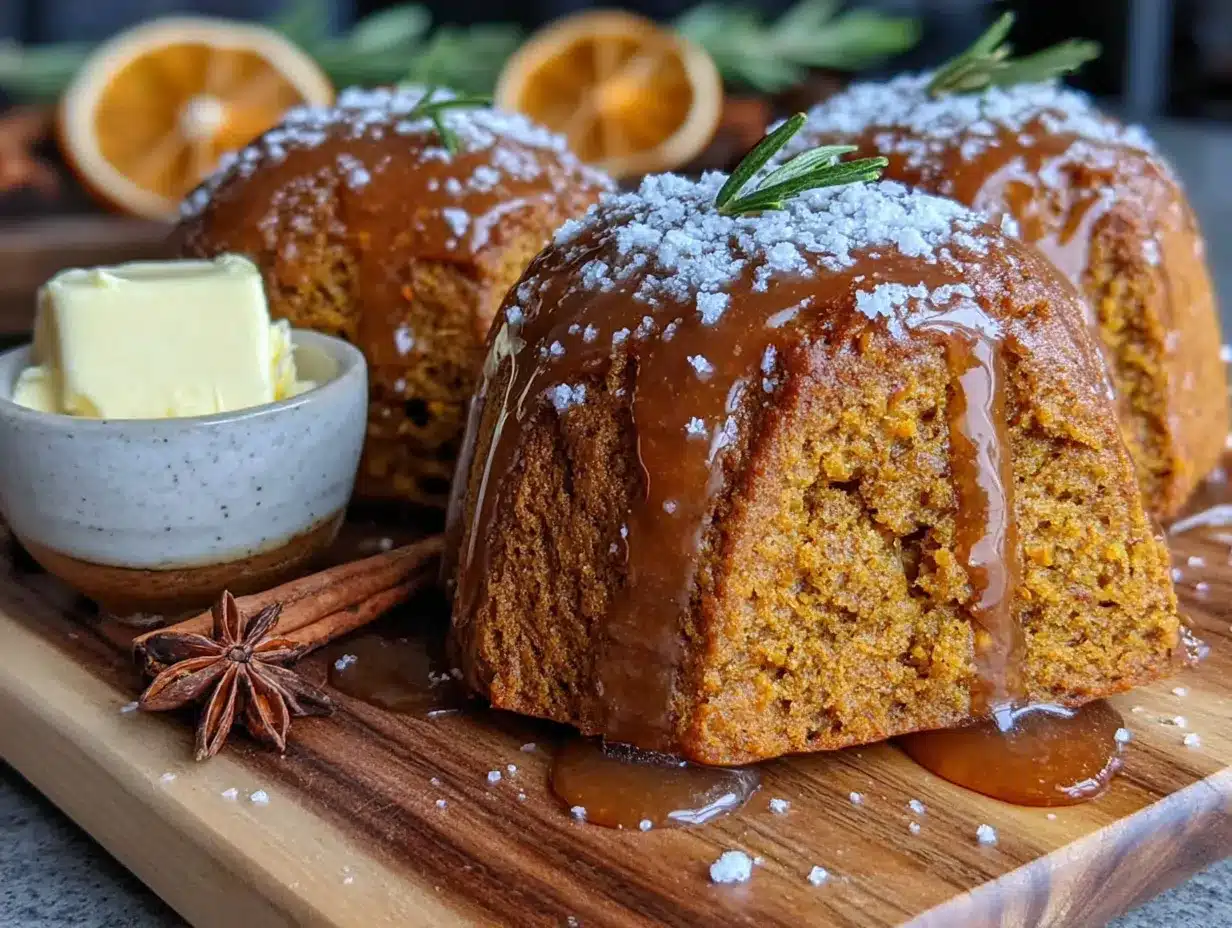
- 1 cup powdered sugar, sifted (sifting prevents lumps)
- 2 tablespoons pure maple syrup (the real stuff makes a difference here)
- 1-2 tablespoons milk (add slowly until you reach your desired consistency)
- 1/4 teaspoon maple extract (optional, but it really boosts the maple flavor)
A quick note on pumpkin: I always keep a few cans of Libby’s pumpkin puree in my pantry when it goes on sale in the fall. It’s consistent, affordable, and works perfectly in this recipe. If you’re feeling ambitious, you can use homemade pumpkin puree, just make sure to drain it well so your scones don’t turn out soggy.
For the butter, I really do recommend using unsalted so you can control the salt level. If all you have is salted butter, just reduce the added salt to 1/4 teaspoon. And please, please use cold butter. I learned this the hard way after making a batch of flat, greasy scones because I used butter that was too soft. Cold butter creates steam pockets as it bakes, which gives you those lovely flaky layers.
Equipment Needed
You don’t need a fancy kitchen to make these pumpkin scones. Here’s what you’ll actually use:
- Large mixing bowl (any bowl will do, but a wide one makes mixing easier)
- Pastry cutter or two forks (for cutting butter into flour—I prefer a pastry cutter because it’s faster, but forks work in a pinch)
- Whisk (for mixing dry ingredients and the glaze)
- Baking sheet (line it with parchment paper for easy cleanup)
- Parchment paper (trust me, it’s worth the few cents)
- Bench scraper or sharp knife (for cutting the scone dough into triangles)
- Cooling rack (helps the glaze set properly)
- Measuring cups and spoons
If you don’t have a pastry cutter, don’t worry. I’ve made these scones using two butter knives in a crisscross motion, and they turned out just fine. You can even use a food processor if you’re in a hurry—just pulse the butter into the flour until it looks like coarse meal, then transfer to a bowl before adding the wet ingredients.
One tip I wish someone had told me earlier: keep your baking sheet in the fridge while you prepare the dough. A cold baking sheet helps the scones hold their shape and rise better. It’s a small step that makes a noticeable difference.
Preparation Method
- Preheat your oven to 400°F (200°C) and line a baking sheet with parchment paper. Pop the baking sheet in the fridge while you prepare the dough—this keeps everything cold and helps the scones rise tall.
- Mix the dry ingredients. In a large bowl, whisk together the flour, sugar, baking powder, baking soda, salt, cinnamon, nutmeg, ginger, and cloves. Make sure everything is evenly distributed. I like to use a whisk for this because it aerates the flour and breaks up any clumps.
- Cut in the cold butter. Add the cold butter cubes to the flour mixture. Using a pastry cutter or two forks, cut the butter into the flour until the mixture resembles coarse meal with some pea-sized butter pieces remaining. Don’t overdo it—those little bits of butter are what make the scones flaky. If you’re using a food processor, pulse 8-10 times, then transfer to a bowl.
- Combine the wet ingredients. In a separate small bowl, whisk together the pumpkin puree, milk, egg, and vanilla extract until smooth. The mixture should be a uniform orange color with no streaks of egg white.
- Bring it all together. Pour the wet ingredients into the dry ingredients and stir with a wooden spoon or spatula just until combined. The dough will be sticky and a little shaggy—that’s exactly what you want. Don’t overmix, or your scones will be tough. Stop as soon as you don’t see any more dry flour.
- Shape the dough. Turn the dough out onto a lightly floured surface. Gently bring it together with your hands, patting it into a circle about 3/4-inch thick. Don’t use a rolling pin—the heat from your hands is enough. If the dough is too sticky, sprinkle a little more flour on top, but go easy.
- Cut the scones. Using a bench scraper or a sharp knife, cut the circle into 8 equal wedges like you’re cutting a pizza. Transfer the wedges to your chilled baking sheet, spacing them about 2 inches apart. They’ll spread a little as they bake.
- Bake. Place the baking sheet in the preheated oven and bake for 12-15 minutes, or until the scones are golden brown on the bottom and slightly firm to the touch. The tops should look dry and the edges should be just starting to brown. A toothpick inserted into the center should come out clean.
- Cool completely. Transfer the scones to a wire rack and let them cool for at least 15 minutes before glazing. I know it’s tempting to glaze them while they’re warm, but the glaze will just melt and slide right off. Patience pays off here.
- Make the glaze. While the scones cool, whisk together the powdered sugar, maple syrup, and 1 tablespoon of milk in a small bowl. If the glaze is too thick, add more milk one teaspoon at a time. If it’s too thin, add more powdered sugar. You want it thick enough to coat the back of a spoon but still drizzle easily.
- Glaze and serve. Drizzle the glaze over the cooled scones using a spoon or a piping bag. Let the glaze set for about 5 minutes before serving. The glaze will harden slightly, giving you that beautiful crackly top.
Cooking Tips & Techniques
I’ve made these pumpkin scones more times than I can count, and I’ve learned a few things along the way. Here are the tips that make the biggest difference.
Keep everything cold. This is the number one rule of scone-making. Cold butter creates steam in the oven, which lifts the dough and creates flaky layers. If your kitchen is warm, pop the shaped scones in the freezer for 10 minutes before baking. I once made the mistake of letting my dough sit out while I answered the phone, and the scones came out flat and dense. Never again.
Don’t twist the cutter. If you’re using a round biscuit cutter instead of cutting wedges, press straight down without twisting. Twisting seals the edges and prevents the scones from rising properly. For wedges, use a sharp, clean cut with a bench scraper or knife.
Handle the dough gently. Scone dough doesn’t need a lot of love. Overworking it develops the gluten, which makes the scones tough and chewy instead of tender and flaky. Mix until just combined, shape gently, and get them in the oven as quickly as possible.
Use a light hand with the glaze. You can drizzle the glaze in a zigzag pattern, or you can dip the tops of the scones directly into the glaze for a thicker coating. I prefer drizzling because it looks prettier and uses less sugar. If you want a thinner glaze, add a little more milk. If you want it thicker, add more powdered sugar.
Check your baking powder. This is one of those things nobody tells you until it’s too late. Baking powder loses its potency over time. If your scones aren’t rising, your baking powder might be old. Test it by dropping a teaspoon into hot water—if it fizzes vigorously, it’s still good. If not, buy a new can.
Make ahead tip. You can prepare the scone dough, cut it into wedges, and freeze them on a baking sheet. Once frozen solid, transfer the wedges to a freezer bag. When you’re ready to bake, pop them straight into the oven from the freezer—just add a couple of minutes to the baking time. Fresh scones any morning of the week.
Variations & Adaptations
One of the things I love about this recipe is how adaptable it is. Here are some variations I’ve tried and loved.
Gluten-Free Version: Substitute the all-purpose flour with a 1:1 gluten-free baking flour blend. I’ve had good luck with Bob’s Red Mill Gluten-Free 1-to-1 Baking Flour. The texture will be slightly more crumbly, but the flavor is still spot-on. Add an extra tablespoon of milk if the dough seems too dry.
Vegan Adaptation: Use cold vegan butter (I like Earth Balance) and replace the egg with a flax egg (1 tablespoon ground flaxseed mixed with 3 tablespoons water, let sit for 5 minutes). Use oat milk or almond milk instead of dairy milk. The scones will be a little less tender, but they’re still delicious.
Chocolate Chip Pumpkin Scones: Fold in 1/2 cup of mini chocolate chips along with the wet ingredients. The chocolate pairs beautifully with the pumpkin and spices, and my kids go absolutely crazy for these. Dark chocolate chips work great if you want to cut some of the sweetness.
Spiced Cranberry Version: Add 1/2 cup dried cranberries and an extra 1/4 teaspoon of orange zest to the dough. The tartness of the cranberries balances the sweetness of the maple glaze, and the orange adds a bright note that feels very fall.
Less Sugar Option: Reduce the sugar in the scone dough to 2 tablespoons and skip the glaze entirely. Brush the tops of the scones with a little milk and sprinkle with coarse sugar before baking for a subtle sweetness. This version is great for breakfast or with a cup of tea.
Serving & Storage Suggestions
These pumpkin scones are best served the same day you make them, ideally within a few hours of baking. The glaze stays glossy and the scones are at their flakiest. Serve them slightly warm or at room temperature—both are delicious.
For a cozy fall breakfast, pair these scones with a hot cup of coffee, spiced chai, or a tall glass of cold milk. They’re also wonderful alongside a bowl of soup or chili for lunch. I’ve even crumbled leftover scones over vanilla ice cream for a quick dessert—don’t judge until you try it.
Storage Instructions: Store leftover scones in an airtight container at room temperature for up to 3 days. Place a paper towel in the bottom of the container to absorb excess moisture, and another paper towel on top. Change the paper towels if they get damp. This keeps the scones from getting soggy.
Freezer Instructions: You can freeze unglazed scones for up to 3 months. Wrap each scone individually in plastic wrap, then place them in a freezer bag. When you’re ready to enjoy them, thaw at room temperature, then reheat in a 350°F oven for 5-7 minutes. Glaze after reheating.
Reheating Tips: The microwave works in a pinch (about 20 seconds), but the oven gives you better results. Pop the scones in a 350°F oven for 5 minutes to restore their crisp edges. If you’re reheating glazed scones, the glaze might get a little melty, but they’ll still taste amazing.
One thing I’ve noticed: these scones actually get better on day two. The flavors meld together, and the texture becomes even more tender. So don’t worry if you can’t finish the whole batch in one day—they’re just as good the next morning with your coffee.
Nutritional Information & Benefits
Here’s the approximate nutritional breakdown for one pumpkin scone with maple glaze (based on 8 servings):
| Nutrient | Amount per Serving |
|---|---|
| Calories | 290 |
| Total Fat | 13g |
| Saturated Fat | 8g |
| Cholesterol | 55mg |
| Sodium | 320mg |
| Total Carbohydrates | 40g |
| Dietary Fiber | 2g |
| Sugars | 20g |
| Protein | 4g |
These numbers are estimates and can vary based on the specific brands and ingredients you use.
On the health front, pumpkin is a nutritional powerhouse. It’s packed with vitamin A (great for eye health), vitamin C, and fiber. The spices—cinnamon, nutmeg, ginger, and cloves—are all anti-inflammatory and add flavor without extra sugar or salt. While these scones are definitely a treat, they’re a more wholesome option than many store-bought pastries.
If you’re watching your sugar intake, you can reduce the glaze or skip it entirely. The scones are still delicious on their own, especially if you sprinkle a little coarse sugar on top before baking. For a lower-fat option, you can replace half the butter with Greek yogurt, though the texture will be a bit more cake-like.
Conclusion
These pumpkin scones with maple glaze have become a fall tradition in my house, and I hope they become one in yours too. They’re proof that you don’t need fancy ingredients or complicated techniques to make something that feels special. A can of pumpkin, some basic pantry staples, and about half an hour is all it takes to fill your kitchen with the smell of autumn and your family’s bellies with something warm and satisfying.
What I love most about this recipe is how forgiving it is. The first time I made it, I forgot to add the vanilla and used salted butter without adjusting the salt. They still turned out great. So don’t stress about perfection—just make them, share them, and enjoy the little moments they create around your table.
I’d love to hear how these turn out for you. Did your kids love them? Did you try a fun variation? Drop a comment below and let me know—I read every single one. And if you share a photo on social media, tag me so I can see your beautiful scones. Happy baking, friends!
Frequently Asked Questions
Can I use fresh pumpkin instead of canned?
Yes, you can use fresh pumpkin puree, but you’ll need to drain it well. Fresh pumpkin has more water content than canned, which can make your scones soggy. After pureeing your roasted pumpkin, place it in a fine-mesh strainer lined with cheesecloth and let it drain for at least an hour. Squeeze out as much liquid as possible before using.
Why did my scones turn out dry?
Dry scones usually come from one of two things: overmixing the dough or overbaking. Mix the dough just until the flour is incorporated—no more. And check your scones at the 12-minute mark. They should be golden on the bottom and just firm to the touch. If they’re browning too quickly, your oven might run hot.
Can I make the dough ahead of time?
Absolutely. You can prepare the dough, shape it into wedges, and refrigerate them on a baking sheet for up to 24 hours before baking. Just cover them tightly with plastic wrap. You can also freeze the unbaked wedges for up to 3 months—bake directly from frozen, adding 2-3 minutes to the baking time.
What’s the best way to reheat leftover scones?
For the best texture, reheat scones in a 350°F oven for 5-7 minutes. If you’re in a hurry, the microwave works—just heat for 15-20 seconds. Keep in mind that microwaved scones won’t have the same crisp exterior. If your scones are glazed, the glaze might get sticky when reheated, but they’ll still taste great.
Can I skip the maple glaze?
Of course! The scones are delicious on their own. If you want a little sweetness without the glaze, brush the tops with milk and sprinkle with coarse sugar or turbinado sugar before baking. You can also dust them with powdered sugar after they cool for a simple finishing touch.
Pin This Recipe!
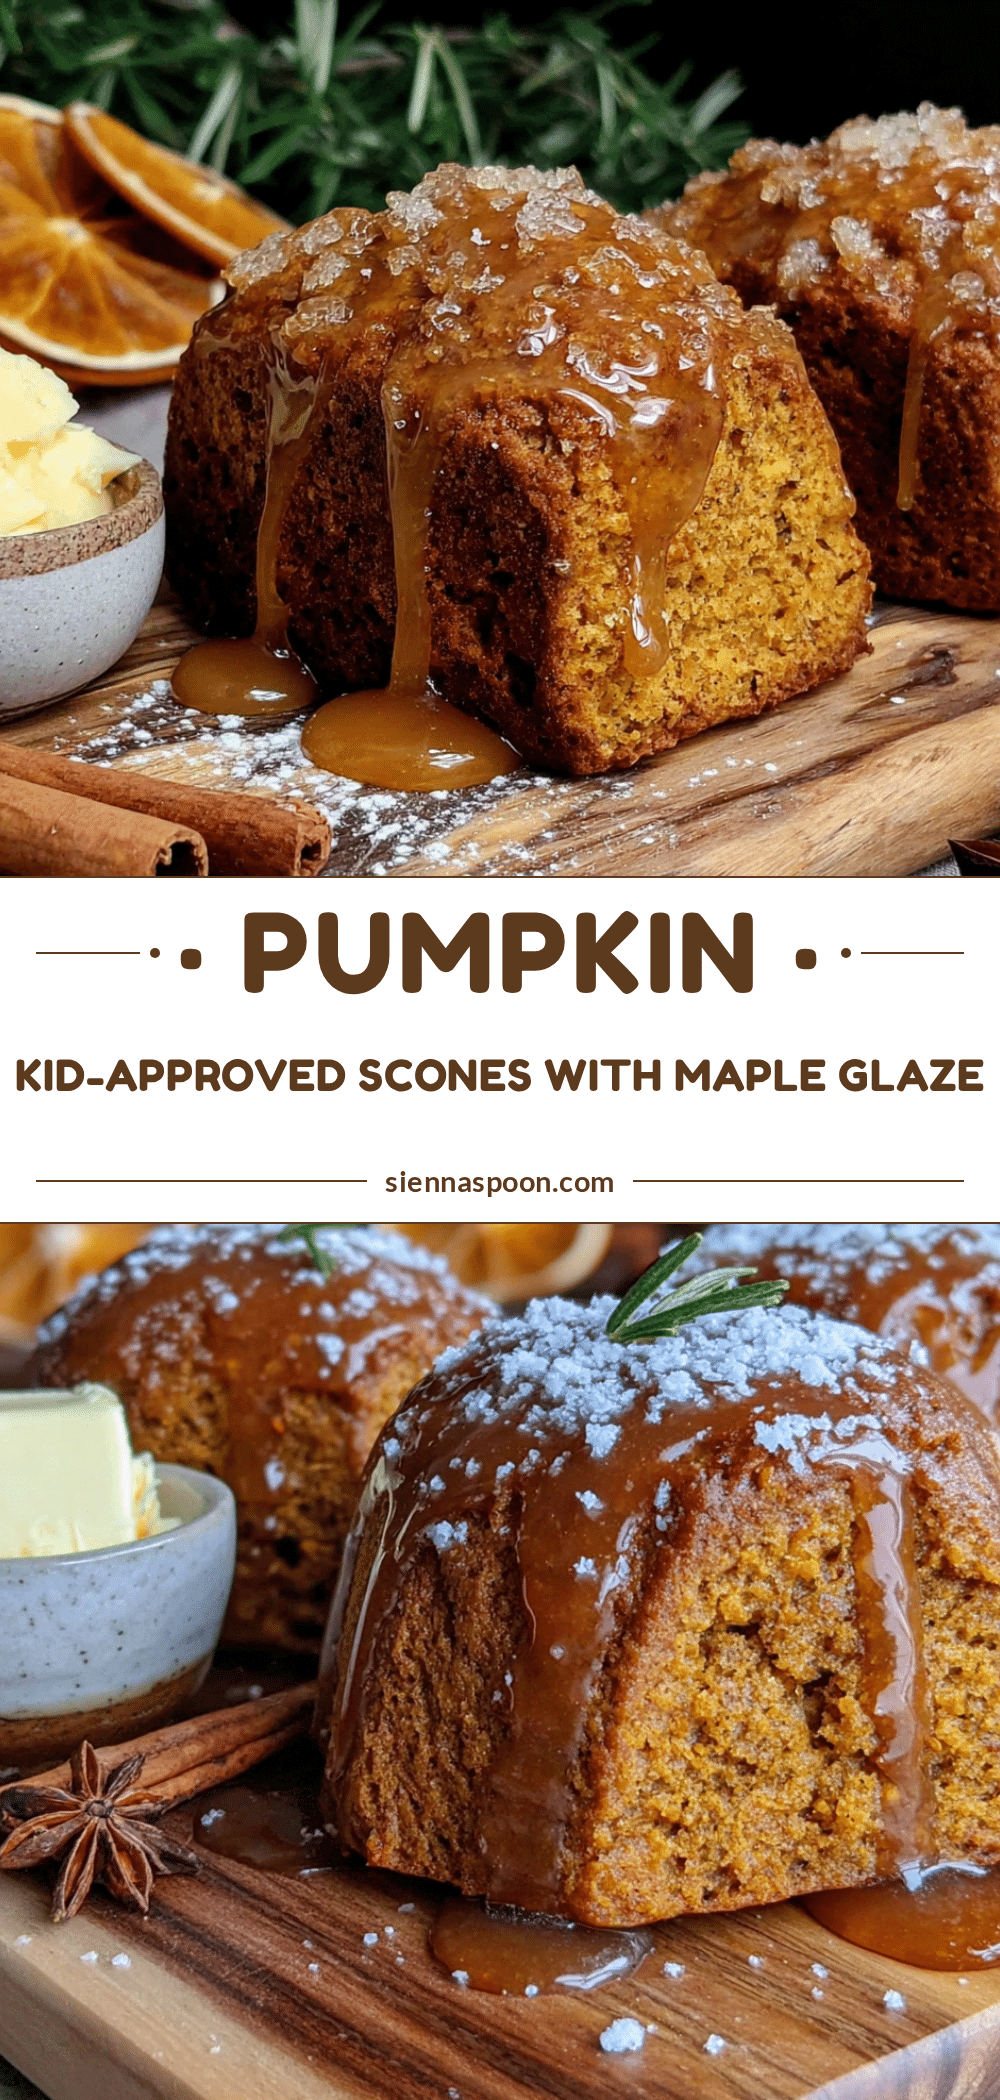
Budget-Friendly Pumpkin Scones with Easy Maple Glaze
These tender, flaky pumpkin scones are made with simple, budget-friendly ingredients and topped with a sweet maple glaze. Ready in about 30 minutes, they’re a kid-approved fall treat that makes any morning feel special.
- Prep Time: 15 minutes
- Cook Time: 15 minutes
- Total Time: 30 minutes
- Yield: 8 servings 1x
- Category: Breakfast, Dessert
- Cuisine: American
Ingredients
- 2 cups all-purpose flour
- 1/3 cup granulated sugar
- 1 tablespoon baking powder
- 1/2 teaspoon baking soda
- 1/2 teaspoon salt
- 1 teaspoon ground cinnamon
- 1/2 teaspoon ground nutmeg
- 1/4 teaspoon ground ginger
- 1/4 teaspoon ground cloves
- 1/2 cup cold unsalted butter, cut into small cubes
- 1/2 cup canned pumpkin puree
- 1/4 cup milk
- 1 large egg
- 1 teaspoon vanilla extract
- 1 cup powdered sugar, sifted
- 2 tablespoons pure maple syrup
- 1–2 tablespoons milk
- 1/4 teaspoon maple extract (optional)
Instructions
- Preheat your oven to 400°F (200°C) and line a baking sheet with parchment paper. Pop the baking sheet in the fridge while you prepare the dough.
- In a large bowl, whisk together the flour, sugar, baking powder, baking soda, salt, cinnamon, nutmeg, ginger, and cloves.
- Add the cold butter cubes to the flour mixture. Using a pastry cutter or two forks, cut the butter into the flour until the mixture resembles coarse meal with some pea-sized butter pieces remaining.
- In a separate small bowl, whisk together the pumpkin puree, milk, egg, and vanilla extract until smooth.
- Pour the wet ingredients into the dry ingredients and stir with a wooden spoon or spatula just until combined. The dough will be sticky and shaggy.
- Turn the dough out onto a lightly floured surface. Gently bring it together with your hands, patting it into a circle about 3/4-inch thick.
- Using a bench scraper or a sharp knife, cut the circle into 8 equal wedges. Transfer the wedges to your chilled baking sheet, spacing them about 2 inches apart.
- Bake for 12-15 minutes, or until the scones are golden brown on the bottom and slightly firm to the touch. A toothpick inserted into the center should come out clean.
- Transfer the scones to a wire rack and let them cool for at least 15 minutes before glazing.
- While the scones cool, whisk together the powdered sugar, maple syrup, and 1 tablespoon of milk in a small bowl. If the glaze is too thick, add more milk one teaspoon at a time. If it’s too thin, add more powdered sugar.
- Drizzle the glaze over the cooled scones using a spoon or a piping bag. Let the glaze set for about 5 minutes before serving.
Notes
Keep all ingredients cold for flaky scones. Do not overmix the dough. For best results, chill the baking sheet while preparing the dough. Scones can be frozen unbaked for up to 3 months. Leftover scones reheat well in a 350°F oven for 5-7 minutes.
Nutrition
- Serving Size: 1 scone
- Calories: 290
- Sugar: 20
- Sodium: 320
- Fat: 13
- Saturated Fat: 8
- Carbohydrates: 40
- Fiber: 2
- Protein: 4
Keywords: pumpkin scones, maple glaze, fall baking, budget-friendly, easy scone recipe, pumpkin recipes, breakfast scones


