Love this? Save it for later!
Share the inspiration with your friends
I was standing in the spice aisle at the grocery store last Tuesday when a woman walked past me, and the air shifted. She was carrying a pumpkin pie, still in its cardboard box from the bakery section, and that scent—that faint, warm cloud of cinnamon and clove—hit me before I even saw her. And suddenly I wasn’t in the fluorescent-lit aisle anymore. I was ten years old, sitting on the cool linoleum floor of my aunt Maggie’s kitchen, watching her pull a glass dish from the oven. The top was golden and slightly cracked, and she called it her “lazy cake” because she just dumped everything in and hoped for the best.
My aunt Maggie passed away three years ago, and honestly, I haven’t made a proper pumpkin dessert since. Every time I tried, it felt heavy—not just the butter and sugar, but the weight of trying to get it right. I wanted that same golden top and that same soft, almost pudding-like center, but I also wanted to feel good after eating it, you know? Not that heavy, sluggish feeling where you regret the second slice before you’ve finished the first.
So I started tinkering. I swapped out half the butter, cut the sugar, and used a smaller dish because let’s face it—I don’t need a 9×13 pan of cake sitting on my counter for a week. This lighter small-batch pumpkin dump cake is what came out of those experiments. It’s not my aunt’s version, but it has her spirit. And that first bite? I closed my eyes, and for a second, I was back on that linoleum floor. Maybe you’ve had a moment like that—where a taste brings someone back, even just for a heartbeat.
Why You’ll Love This Recipe
This isn’t your average pumpkin dump cake. I’ve tested this recipe seven times—yes, seven—to get the balance right. It’s lighter than the traditional version, but it doesn’t taste like a compromise. Here’s why this one stands out:
- Quick & Easy: Comes together in under 10 minutes of prep time. The oven does the rest. Perfect for those evenings when you want something warm and spiced but don’t have the energy for a full baking project.
- Simple Ingredients: You probably have most of this in your pantry right now. No trips to specialty stores, no hunting down obscure extracts.
- Perfect for Small Households: This bakes in a 6×6 or 8×8 dish—no leftovers that go soggy by day three. It’s just enough for two people with maybe a slice leftover for breakfast (no judgment here).
- Lighter but Still Indulgent: I cut the butter by a third and swapped in Greek yogurt for some of the richness. The texture stays soft and tender, but you won’t feel like you need a nap after eating it.
- Crowd-Pleaser: I brought this to a small dinner party last week, and three people asked for the recipe before they even finished their slice. Nobody guessed it was the “lighter” version.
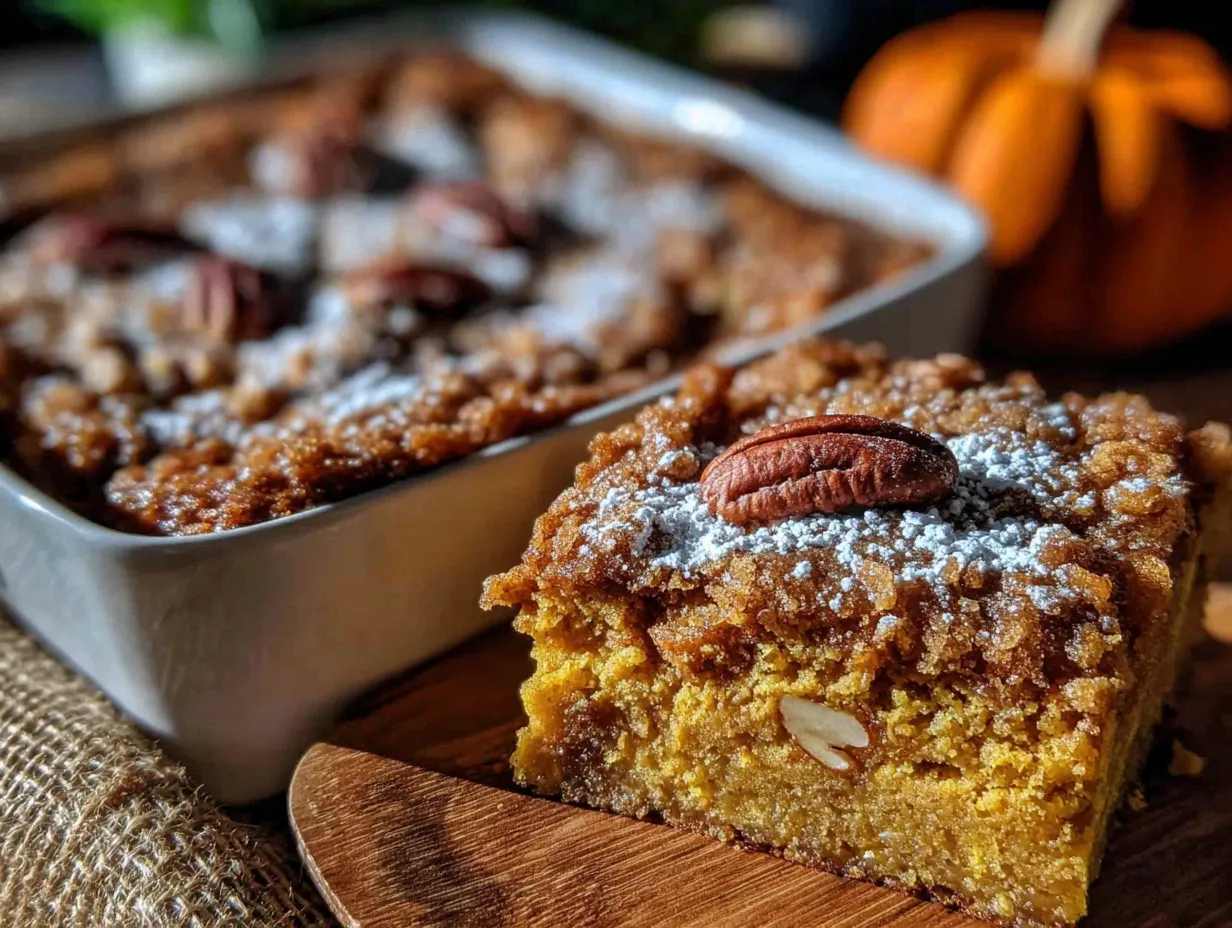
What makes this recipe different is the technique. Instead of dumping all the butter on top at once, I drizzle it slowly and let it soak into the cake mix in layers. It creates this beautiful, almost crumbly top crust while keeping the pumpkin layer underneath soft and almost custard-like. It’s comfort food reimagined—healthier, faster, but with the same soul-soothing satisfaction that makes you close your eyes after the first bite.
What Ingredients You Will Need
This recipe uses simple, wholesome ingredients to deliver that classic pumpkin dump cake flavor without the heavy butter and sugar load. Most of these are pantry staples, which makes this an easy last-minute dessert when fall cravings hit.
For the Pumpkin Layer
- 1 can (15 oz) pumpkin puree (not pumpkin pie filling—look for 100% pure pumpkin. I prefer Libby’s for consistent texture)
- 1/2 cup evaporated milk (or use regular milk for a slightly less rich version)
- 1/3 cup granulated sugar (I’ve tested this with coconut sugar too—it works but gives a darker color)
- 1 large egg, room temperature
- 1 teaspoon pumpkin pie spice (store-bought is fine, but I mix my own: 1/2 tsp cinnamon, 1/4 tsp ginger, 1/8 tsp nutmeg, 1/8 tsp cloves)
- 1/2 teaspoon vanilla extract
- 1/4 cup plain Greek yogurt (this is the secret ingredient—adds creaminess without extra butter)
For the Topping
- 3/4 cup yellow cake mix (about half a standard box. I use Duncan Hines, but any brand works)
- 2 tablespoons cold unsalted butter, cut into small pieces
- 1/4 cup chopped pecans or walnuts (optional, but highly recommended for crunch)
- 1 tablespoon brown sugar (for sprinkling on top—adds a caramel-like finish)
Ingredient Tips: Make sure your pumpkin puree is thick and not watery. If it looks loose, pat it dry with a paper towel before mixing. For the cake mix, you can use a gluten-free yellow cake mix if needed—I’ve tested it with King Arthur’s gluten-free blend, and it works perfectly. The Greek yogurt is my favorite swap here because it keeps the pumpkin layer creamy without adding extra fat. If you’re dairy-free, use a plain coconut or almond yogurt instead.
Equipment Needed
The beauty of a dump cake is that you don’t need fancy equipment. Here’s what you’ll need:
- 6×6 or 8×8 baking dish (a 9-inch pie plate works too, but the cake will be slightly thinner)
- Medium mixing bowl (for the pumpkin mixture)
- Whisk (a fork works in a pinch, but whisking gives a smoother texture)
- Measuring cups and spoons
- Chef’s knife (for cutting butter into small pieces)
- Spatula (for spreading the pumpkin layer evenly)
If you don’t have a 6×6 dish, you can use a small cast-iron skillet—it actually creates a nicer crust on the edges. I’ve also made this in ramekins for individual servings; just reduce the baking time to about 25 minutes. Budget-friendly tip: thrift stores almost always have small baking dishes for a dollar or two.
Preparation Method
- Preheat your oven to 350°F (175°C). Lightly grease your baking dish with cooking spray or a thin layer of butter. I use a 6×6 dish for a thicker cake, but an 8×8 works if you want more surface area for the crunchy topping.
- Make the pumpkin layer. In your medium bowl, whisk together the pumpkin puree, evaporated milk, granulated sugar, egg, pumpkin pie spice, vanilla extract, and Greek yogurt. Whisk until smooth—about 30 seconds. The mixture should be thick but pourable, like a loose pudding. If it looks too stiff, add a tablespoon more milk.
- Pour the pumpkin mixture into your prepared baking dish. Use your spatula to spread it evenly to the edges. Don’t worry if it looks a little uneven—the topping will cover it.
- Add the cake mix layer. Sprinkle the 3/4 cup of yellow cake mix evenly over the top of the pumpkin mixture. Don’t stir it in—this is a dump cake, so the magic happens in layers. Use your fingers to break up any clumps of cake mix as you sprinkle.
- Dot with butter. Scatter the small pieces of cold butter evenly over the cake mix layer. Try to distribute them so every inch of the top gets a little butter. This is what creates those golden, crunchy pockets.
- Add the nuts and brown sugar. Sprinkle the chopped pecans (if using) and the brown sugar over the top. The brown sugar will caramelize as it bakes, giving you that slightly crackly top that makes dump cakes so satisfying.
- Bake for 35-40 minutes (for a 6×6 dish) or 30-35 minutes (for an 8×8 dish). The cake is done when the top is golden brown and the edges are bubbling. The center should be slightly jiggly—it will set as it cools. If you insert a toothpick into the cake layer, it should come out clean, but the pumpkin layer underneath will still be soft.
- Cool for at least 15 minutes before serving. This is the hardest part, I know, but it needs this time to set properly. If you scoop it too soon, it’ll be runny. Trust me—I learned this the hard way on my first test batch.
Sensory cues: When it’s ready, your kitchen will smell like a fall candle factory exploded—in the best way. The top should look golden with darker brown spots where the butter pooled. You’ll see bubbles around the edges where the pumpkin layer is gently simmering. Let it cool until the bubbling stops, and you’ll get cleaner slices.
Cooking Tips & Techniques
I’ve made this recipe more times than I care to admit, and I’ve learned a few things the hard way. Here’s what I wish someone had told me:
Don’t overmix the pumpkin layer. I know it’s tempting to keep whisking until it’s perfectly smooth, but overmixing can make the texture a little dense. Just whisk until the ingredients come together—a few small lumps are fine.
Cold butter is crucial. If your butter is soft, it’ll melt into the cake mix too quickly and you won’t get those lovely crunchy pockets. Cut the butter into small pieces and keep it in the fridge until the last minute. I’ve forgotten to do this before, and the top came out flat and greasy instead of golden and crumbly.
Watch your oven carefully. Every oven runs a little differently. My old oven would brown the top in 30 minutes, but the center would still be liquid. My current oven takes a full 40 minutes. Start checking at 30 minutes, and if the top is browning too fast, tent it loosely with foil for the last 10 minutes.
Let it rest. I cannot stress this enough. The first time I made this, I dug in after 5 minutes and ended up with a soupy mess. The pumpkin layer needs time to firm up. Fifteen minutes is the minimum—thirty is better if you can wait.
Multitasking tip: While the cake bakes, whip up a quick dollop of whipped cream or mix some vanilla yogurt with a dash of cinnamon. It takes two minutes and makes the dessert feel extra special.
Variations & Adaptations
This recipe is forgiving, which is one of the reasons I love it. Here are some ways to make it your own:
- Gluten-Free Version: Use a gluten-free yellow cake mix. I’ve tested this with King Arthur’s gluten-free blend, and it works beautifully. The texture is slightly more crumbly, but the flavor is spot-on.
- Dairy-Free Adaptation: Swap the evaporated milk for canned coconut milk (full-fat for best results), use a dairy-free yogurt, and replace the butter with coconut oil or a plant-based butter. I’ve made this for a friend with dairy allergies, and she couldn’t tell the difference.
- Spice It Up: Add 1/4 teaspoon of cardamom or a pinch of black pepper to the pumpkin layer. The pepper sounds weird, I know, but it actually enhances the pumpkin flavor in a subtle way. My neighbor tried this version and now makes it every year for Thanksgiving.
- Apple-Pumpkin Hybrid: Replace half the pumpkin puree with unsweetened applesauce. It makes the cake slightly lighter and adds a fruity note that pairs beautifully with the spices.
- Chocolate Lover’s Twist: Sprinkle 1/4 cup of dark chocolate chips over the cake mix before adding the butter. The chocolate melts into little pockets of richness that contrast with the pumpkin. Dangerous, but worth it.
Serving & Storage Suggestions
This cake is best served warm, about 15-20 minutes after it comes out of the oven. The top should still be slightly crunchy, and the pumpkin layer should be soft but not runny. I like to serve it in shallow bowls with a dollop of lightly sweetened whipped cream or a scoop of vanilla ice cream. A drizzle of caramel sauce never hurts either.
For a lighter option, try it with a spoonful of Greek yogurt mixed with a pinch of cinnamon and a drop of maple syrup. It sounds simple, but the tangy yogurt cuts through the sweetness beautifully.
Storage: Cover the dish tightly with foil or plastic wrap and store in the refrigerator for up to 4 days. The texture will become denser as it sits, but the flavor actually deepens—day two is often better than day one. I’ve been known to eat it cold straight from the fridge for breakfast (don’t tell anyone).
Reheating: Pop individual portions in the microwave for 20-30 seconds, or reheat the whole dish in a 300°F oven for about 10 minutes. The top won’t be as crunchy as fresh, but it’ll still be delicious. If you want to revive some of that crunch, sprinkle a little extra brown sugar on top before reheating.
Freezing: This cake freezes surprisingly well. Let it cool completely, then wrap the dish tightly in plastic wrap and foil. Freeze for up to 3 months. Thaw overnight in the fridge and reheat as directed above.
Nutritional Information & Benefits
Here’s the approximate nutritional breakdown per serving (based on 6 servings, without nuts):
- Calories: 245
- Fat: 9g
- Carbohydrates: 38g
- Fiber: 3g
- Sugar: 24g
- Protein: 5g
Compared to a traditional pumpkin dump cake, this version saves about 100 calories and 8 grams of fat per serving. The Greek yogurt adds a boost of protein and calcium, while the pumpkin puree is packed with vitamin A and fiber. Pumpkin is also rich in antioxidants like beta-carotene, which supports eye health and immune function.
This dessert fits into a balanced lifestyle because it satisfies that fall craving without derailing your day. It’s not “health food,” but it’s a smarter choice that still feels like a treat. And honestly, that’s the kind of eating I can stand behind—food that nourishes you and makes you happy at the same time.
Dietary Notes: This recipe contains gluten, dairy, and eggs. For gluten-free and dairy-free options, see the variations section above.
Conclusion
This lighter small-batch pumpkin dump cake is the kind of recipe that earns a permanent spot in your fall rotation. It’s easy enough for a random Tuesday night when you’re craving something warm and spiced, but impressive enough to bring to a small gathering. It uses simple ingredients you probably already have, comes together in minutes, and—most importantly—tastes like the cozy, comforting dessert you remember, without the heavy aftermath.
I love this recipe because it honors my aunt Maggie’s “lazy cake” spirit while adapting to how I actually want to eat now. It’s proof that you don’t have to choose between delicious and sensible. You can have both, right there in one small baking dish.
I’d love to hear how this turns out for you. Did you try a variation? Add your own twist? Drop a comment below and let me know—I read every single one, and your ideas often inspire my next test batch. If you loved it, share it with a friend who needs a little fall comfort. Happy baking!
Frequently Asked Questions
Can I use pumpkin pie filling instead of pumpkin puree?
I wouldn’t recommend it. Pumpkin pie filling already has sugar and spices added, which will throw off the sweetness and texture of this recipe. Stick with 100% pure pumpkin puree for the best results.
Can I make this in a slow cooker?
Yes, you can! Grease the slow cooker insert, pour in the pumpkin layer, and top with cake mix and butter as directed. Cook on low for 2-3 hours or on high for 1-1.5 hours. The top won’t get as crispy, but it’ll still be delicious.
Why is my dump cake runny in the middle?
This usually happens for one of three reasons: the cake wasn’t baked long enough, it wasn’t cooled properly, or the pumpkin puree was too watery. Make sure you let it cool for at least 15 minutes before serving, and pat your pumpkin puree dry if it looks loose.
Can I double this recipe?
Absolutely. Double all the ingredients and bake in a 9×13 dish. You’ll need to increase the baking time to about 45-50 minutes. Keep an eye on the top and tent with foil if it browns too quickly.
How do I know when the dump cake is done?
The top should be golden brown and slightly cracked, and you’ll see bubbling around the edges. The center will still jiggle a little—that’s normal. A toothpick inserted into the cake layer (not the pumpkin layer) should come out clean or with a few moist crumbs.
Pin This Recipe!
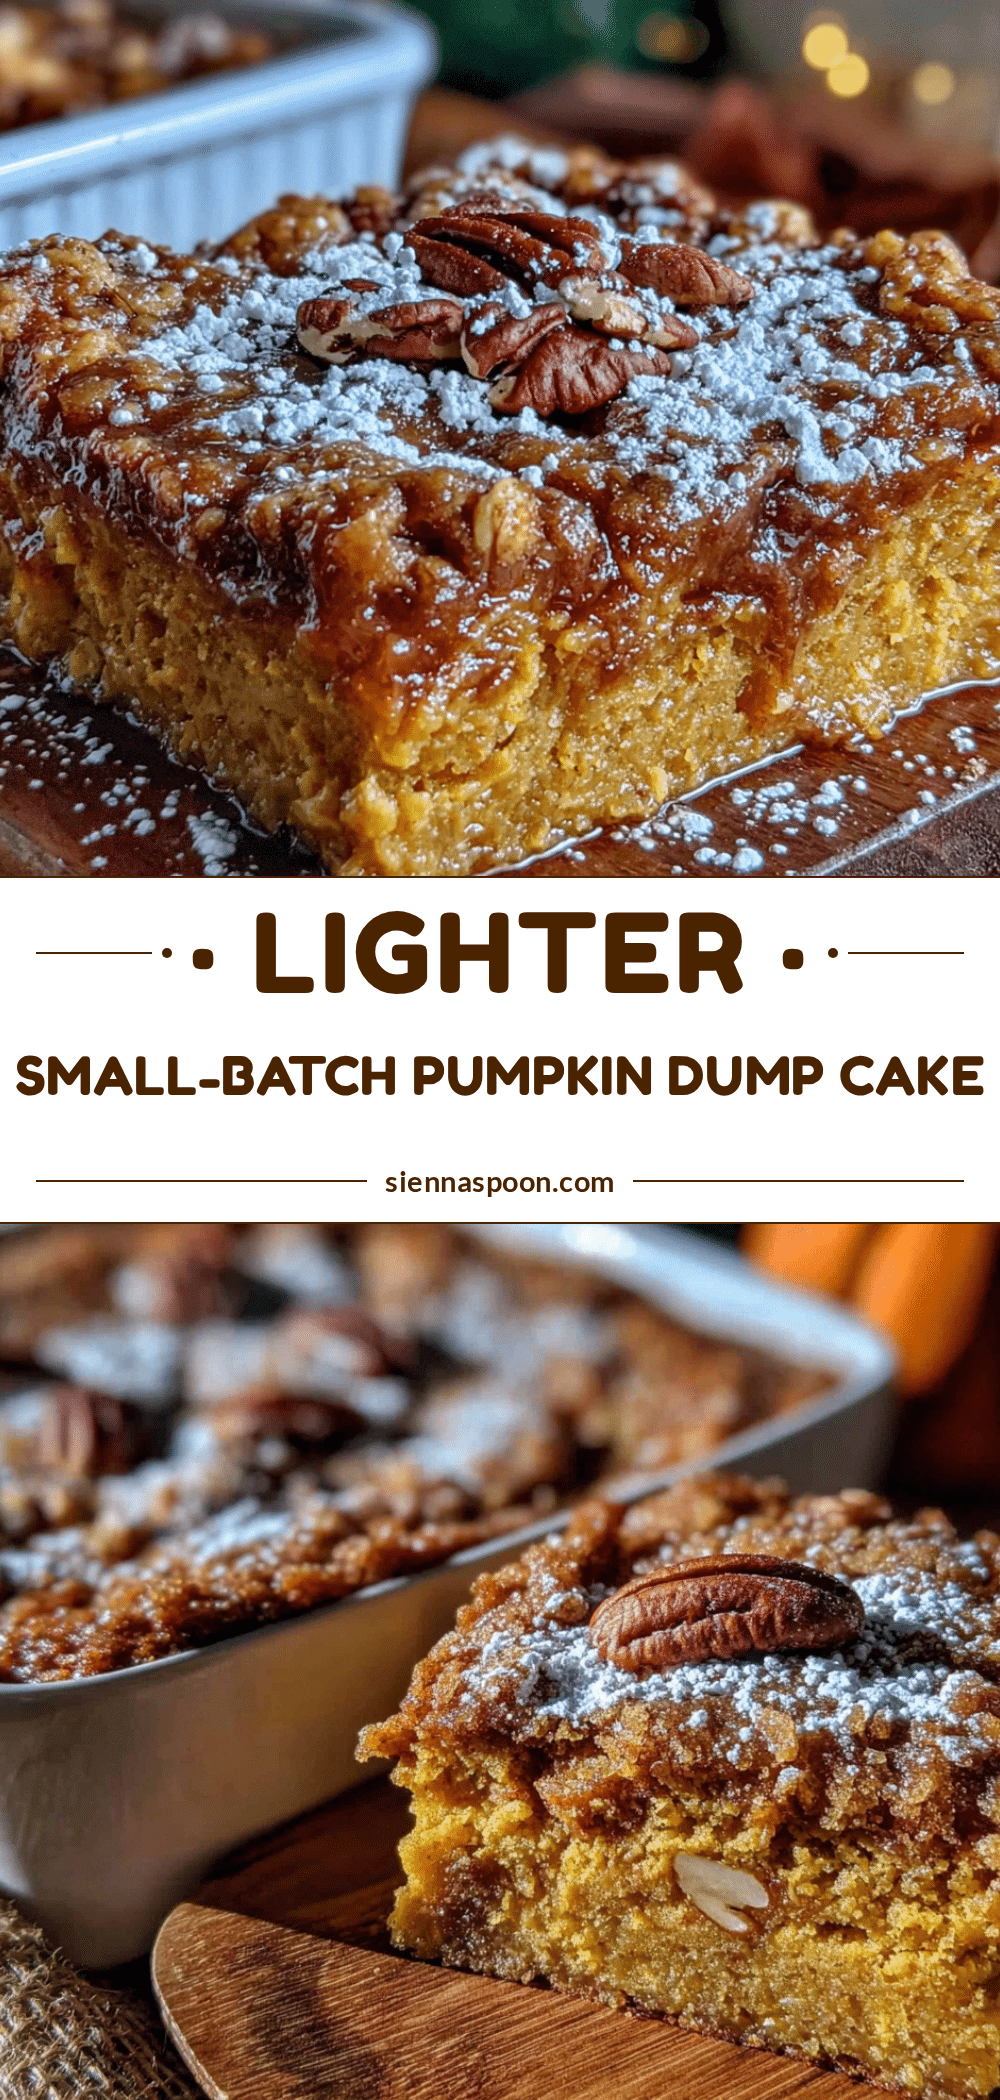
Lighter Small-Batch Pumpkin Dump Cake (Easy Fall Dessert)
A lighter, small-batch version of the classic pumpkin dump cake that’s quick to prepare and perfect for small households. This easy fall dessert features a soft, custard-like pumpkin layer topped with a golden, crumbly cake mix crust and optional pecans.
- Prep Time: 10 minutes
- Cook Time: 35 minutes
- Total Time: 45 minutes
- Yield: 6 servings 1x
- Category: Dessert
- Cuisine: American
Ingredients
- 1 can (15 oz) pumpkin puree (not pumpkin pie filling)
- 1/2 cup evaporated milk (or regular milk)
- 1/3 cup granulated sugar (or coconut sugar)
- 1 large egg, room temperature
- 1 teaspoon pumpkin pie spice (or mix: 1/2 tsp cinnamon, 1/4 tsp ginger, 1/8 tsp nutmeg, 1/8 tsp cloves)
- 1/2 teaspoon vanilla extract
- 1/4 cup plain Greek yogurt
- 3/4 cup yellow cake mix (about half a standard box)
- 2 tablespoons cold unsalted butter, cut into small pieces
- 1/4 cup chopped pecans or walnuts (optional)
- 1 tablespoon brown sugar
Instructions
- Preheat your oven to 350°F (175°C). Lightly grease a 6×6 or 8×8 baking dish with cooking spray or butter.
- In a medium bowl, whisk together the pumpkin puree, evaporated milk, granulated sugar, egg, pumpkin pie spice, vanilla extract, and Greek yogurt until smooth (about 30 seconds). The mixture should be thick but pourable.
- Pour the pumpkin mixture into the prepared baking dish and spread evenly with a spatula.
- Sprinkle the 3/4 cup of yellow cake mix evenly over the top of the pumpkin mixture. Do not stir. Use your fingers to break up any clumps.
- Scatter the small pieces of cold butter evenly over the cake mix layer.
- Sprinkle the chopped pecans (if using) and brown sugar over the top.
- Bake for 35-40 minutes for a 6×6 dish, or 30-35 minutes for an 8×8 dish, until the top is golden brown and the edges are bubbling. The center should be slightly jiggly.
- Cool for at least 15 minutes before serving to allow the cake to set properly.
Notes
Don’t overmix the pumpkin layer. Cold butter is crucial for crunchy pockets. Let the cake rest for at least 15 minutes before serving. For gluten-free, use a gluten-free yellow cake mix. For dairy-free, use canned coconut milk, dairy-free yogurt, and coconut oil or plant-based butter.
Nutrition
- Serving Size: 1 serving (based on
- Calories: 245
- Sugar: 24
- Sodium: 280
- Fat: 9
- Saturated Fat: 4
- Carbohydrates: 38
- Fiber: 3
- Protein: 5
Keywords: pumpkin dump cake, small batch, lighter dessert, fall dessert, easy pumpkin recipe, small household dessert


