Love this? Save it for later!
Share the inspiration with your friends
Last Tuesday, I was standing at the farmers market with my youngest hanging off my shopping bag, and an older woman named Helen watched me wrestle a peck of Honeycrisp apples into my canvas tote. She didn’t say anything at first. Then she reached into her own bag and pulled out a small jar of homemade caramel sauce, still warm, and pressed it into my free hand. “These apples are begging for it,” she said with a wink. “And your kids will thank you.”
Honestly, I almost forgot about the jar until the next afternoon when the after-school hangry hit like a storm. My kids were circling the kitchen, and I needed something fast that wouldn’t wreck the dinner I had planned. I sliced up those apples, warmed Helen’s caramel, and rummaged through the pantry for something crunchy to sprinkle on top. That’s when I found the toffee bits left over from a baking project—and let me tell you, that accidental discovery changed everything.
These Kid-Approved Caramel Dipped Apple Slices with Toffee Bits are now my go-to for that tricky hour between school and supper. They come together in about ten minutes, maybe less if you’re quick with a knife. The apples stay crisp, the caramel is rich without being too sweet, and the toffee bits add this little crunch that makes everyone smile. I mean, maybe you’ve been there—staring at a bunch of apples and wondering how to make them feel special without a whole production. This is that answer.
I’ve tweaked Helen’s caramel a bit over the months, adding a pinch of salt and swapping in a lighter cream, but the heart of it is still hers. That’s the thing about recipes shared between strangers—they become yours the moment you make them. And these caramel apple slices? They’ve become a Tuesday afternoon tradition in my house, and I have a feeling they’ll find a spot in yours too.
Why You’ll Love This Recipe
Let me be straight with you—I’ve tested this recipe at least a dozen times, tweaking the caramel thickness, the apple variety, even the size of the slices. My kids have been my official taste testers, and they’ve made it clear that this version is the winner. Here’s why this one stands out from every other caramel apple recipe you’ve seen:
- Quick & Easy: From start to finish, you’re looking at about 10 minutes of active work. No candy thermometers, no complicated steps—just simple, honest cooking that fits into a busy afternoon.
- Simple Ingredients: You probably have most of these in your kitchen right now. Apples, butter, brown sugar, cream, and toffee bits. That’s it. No fancy grocery store runs required.
- Perfect for After-School Snacking: This hits that sweet spot between treat and wholesome. The apples give you fiber and vitamins, while the caramel feels like a reward. My kids actually ask for these over cookies now.
- Crowd-Pleaser: I brought these to a playdate last week, and every single kid asked for seconds. The moms too, honestly. There’s something about the combination of crisp apple, creamy caramel, and crunchy toffee that appeals to every age.
- Unbelievably Delicious: The texture is what gets me every time. The caramel is silky and rich, the apple is cold and crisp, and the toffee bits add this buttery crunch that makes you close your eyes after the first bite. It’s comfort food that doesn’t weigh you down.
What makes this recipe different from the rest is the technique. Instead of dipping whole apples—which can be messy and hard for little hands—we slice them first. This means every piece gets the perfect ratio of apple to caramel to toffee. Plus, the slices are way easier to store and serve. No sticky fingers, no wasted caramel. It’s the kind of smart shortcut that makes you wonder why you haven’t been doing it this way all along.
What Ingredients You Will Need
This recipe uses simple, wholesome ingredients that work together to create something truly special. Most of these are pantry staples, and the ones that aren’t are easy to find at any grocery store. Here’s what you’ll need:
For the Caramel Sauce
- 1 cup (200g) packed light brown sugar (I prefer Domino for consistent sweetness)
- 1/2 cup (120ml) heavy cream (use full-fat for the richest texture)
- 4 tablespoons (56g) unsalted butter, cut into small cubes
- 1 teaspoon vanilla extract (pure, not imitation, if you can swing it)
- 1/4 teaspoon fine sea salt (this balances the sweetness beautifully)
For the Apple Slices

- 4 medium apples (Honeycrisp or Fuji work best—they stay crisp and hold up well)
- 1 tablespoon fresh lemon juice (keeps the apples from browning)
- 1/2 cup (60g) toffee bits (I use Heath Bits O’ Brickle, but any brand works)
- Optional: 1/4 cup chopped nuts (pecans or walnuts add a nice crunch)
A few notes on ingredient selection: When choosing apples, look for ones that are firm with no soft spots. Honeycrisp apples are my go-to because they’re naturally sweet and stay crunchy even after sitting in caramel for a while. Fuji apples are a close second—they’re slightly milder but just as crisp. Avoid mealy varieties like Red Delicious, which can get mushy.
For the heavy cream, don’t be tempted to substitute milk or half-and-half. The fat content in heavy cream is what gives the caramel its silky, luxurious texture. If you need a dairy-free option, full-fat coconut cream works surprisingly well—just know the flavor will be slightly different.
The toffee bits are where this recipe really shines. They add that unexpected crunch that makes every bite interesting. If you can’t find pre-made toffee bits, you can crush up any good-quality toffee candy bar—just remove any chocolate coating first. Store-bought is perfectly fine, but if you’re feeling ambitious, homemade toffee bits take this to another level.
Equipment Needed
You don’t need a fancy kitchen to make these caramel apple slices. Here’s what you’ll need:
- Medium saucepan: For making the caramel. A heavy-bottomed saucepan works best—it distributes heat evenly and prevents scorching. I use my trusty 2-quart stainless steel pan, but any non-reactive pan will do.
- Wooden spoon or silicone spatula: For stirring the caramel. Wooden spoons are great because they don’t conduct heat, but a heat-safe silicone spatula works just as well.
- Sharp knife and cutting board: For slicing the apples. A sharp knife makes clean cuts and reduces the risk of slipping. I prefer a chef’s knife, but a paring knife works fine for smaller apples.
- Large bowl: For tossing the apple slices with lemon juice.
- Serving platter or parchment-lined baking sheet: For arranging the finished slices. Parchment paper makes cleanup a breeze.
- Small offset spatula or butter knife: For spreading the caramel evenly on each slice. This is optional but helpful for getting a nice, even coating.
If you don’t have a candy thermometer, don’t worry—you won’t need one for this recipe. The caramel is done when it reaches a deep amber color and coats the back of a spoon. I’ve made this recipe countless times without a thermometer, and it always turns out perfectly.
One tip: use a saucepan that’s slightly larger than you think you need. Caramel can bubble up when you add the cream, and you don’t want it boiling over. I learned this the hard way—cleaning burnt caramel off the stovetop is not fun.
Preparation Method
Let me walk you through this step by step. Trust me, if I can do this while simultaneously refereeing a sibling argument, you can absolutely nail it.
- Make the caramel sauce. Place the brown sugar, heavy cream, and cubed butter in a medium saucepan over medium heat. Stir gently with your wooden spoon until the butter melts and everything comes together. This takes about 3-4 minutes. Don’t walk away—caramel can go from perfect to burnt in seconds.
- Bring to a gentle boil. Once the mixture is smooth and bubbling, let it cook for about 2 minutes without stirring. You’ll see it thicken slightly. The color should be a warm amber, like honey. If you see dark spots forming, remove the pan from heat immediately—that means it’s starting to scorch.
- Remove from heat and add vanilla and salt. Take the pan off the burner and stir in the vanilla extract and sea salt. Be careful—the mixture will bubble up when you add the vanilla. Give it a good stir until everything is smooth and glossy. Let it cool for about 5 minutes. It will thicken as it cools.
- Prepare the apples. While the caramel cools, wash and dry your apples. Cut each apple into 1/2-inch thick slices, working around the core. You should get about 8-10 slices per apple, depending on size. Place the slices in a large bowl and toss them with the lemon juice to prevent browning.
- Arrange the slices. Line a baking sheet with parchment paper. Arrange the apple slices in a single layer, making sure they’re not touching. This makes dipping and serving much easier.
- Dip and coat. Using a small offset spatula or butter knife, spread a generous layer of caramel onto each apple slice. Don’t be shy—you want enough caramel to coat the surface but not so much that it drips everywhere. A thin, even layer is perfect.
- Add the toffee bits. Immediately sprinkle the toffee bits over the caramel-coated slices. Press them gently into the caramel so they stick. Work quickly here—the caramel sets fast, especially if your apples are cold from the fridge.
- Chill and set. Place the baking sheet in the refrigerator for about 10-15 minutes. This allows the caramel to firm up slightly, making the slices easier to handle. If you’re serving them right away, you can skip this step—they’re delicious at room temperature too.
- Serve and enjoy. Arrange the slices on a serving platter. If you’re feeling fancy, drizzle a little extra caramel on top and sprinkle with a few more toffee bits. Serve within 2 hours for the best texture.
A few things to watch for: If your caramel seems too thick, you can thin it with a tablespoon of warm cream. If it’s too thin, let it simmer for another minute or two. The key is to find that sweet spot where it coats the apple without running off. And don’t worry if your first few slices look a little messy—mine always do. That’s the beauty of homemade food.
Cooking Tips & Techniques
After making these caramel apple slices more times than I can count, I’ve picked up a few tricks that make the process smoother and the results more consistent. Here’s what I’ve learned:
Temperature matters. The biggest mistake I’ve made—and I’ve made it more than once—is rushing the caramel. If you cook it over high heat, it can burn before the sugar has fully dissolved. Keep the heat at medium and be patient. Your caramel will thank you.
Prep everything before you start. Caramel waits for no one. Have your apples sliced, your toffee bits measured, and your parchment-lined sheet ready before you even turn on the stove. This makes the whole process stress-free and prevents that panicked scramble when the caramel is ready and you’re still hunting for the vanilla.
Use cold apples for better caramel adhesion. I’ve found that apples straight from the fridge hold the caramel better than room-temperature ones. The cold surface helps the caramel set faster, which means less dripping and more even coverage. Just toss them with lemon juice first to prevent browning.
Don’t skip the salt. I know it sounds counterintuitive in a sweet dessert, but that pinch of sea salt is what makes the caramel taste like more than just sugar. It balances the sweetness and brings out the buttery notes. Trust me on this one.
Work in batches if needed. If you’re making a large batch for a party, don’t try to caramelize all the slices at once. The caramel will start to set as it cools, and you’ll end up with uneven coverage. Make the caramel, dip a few slices, then reheat the caramel gently if it thickens too much.
One mistake I’ll never make again: I once used Granny Smith apples because I thought the tartness would balance the sweet caramel. It didn’t. The apples were so tart that they clashed with the caramel instead of complementing it. Stick with sweet apples like Honeycrisp or Fuji—they’re the perfect partner for that rich, buttery caramel.
Variations & Adaptations
One of the best things about this recipe is how flexible it is. Here are some variations I’ve tried and loved:
Dietary Adaptations
Dairy-Free Version: Swap the heavy cream for full-fat coconut cream and use a high-quality vegan butter. The coconut flavor is subtle and actually pairs beautifully with the apples and toffee. I’ve made this for a friend with dairy allergies, and she couldn’t tell the difference.
Nut-Free Option: Skip the optional nuts and double up on the toffee bits. You can also try crushed pretzels for a salty-sweet crunch that’s completely nut-free. My kids actually prefer this version.
Flavor Variations
Spiced Caramel: Add 1/2 teaspoon of cinnamon and a pinch of nutmeg to the caramel while it’s cooking. This gives it a cozy, fall-inspired flavor that’s perfect for Thanksgiving or Halloween parties.
Chocolate Drizzle: After adding the toffee bits, drizzle the slices with melted dark chocolate. Let it set in the fridge for a few minutes, and you’ve got a decadent treat that feels extra special. This is my go-to for birthday parties.
Salted Caramel Twist: Increase the sea salt to 1/2 teaspoon and sprinkle a few flakes of flaky sea salt on top of the toffee bits. The contrast between the sweet caramel, crunchy toffee, and salty finish is absolutely addictive.
Seasonal Adaptations
In the summer, I swap the toffee bits for crushed graham crackers and serve the slices with a side of marshmallow fluff for dipping. It feels like a s’mores-inspired treat without the campfire. In the fall, I add a sprinkle of pumpkin pie spice to the caramel for a harvest-themed dessert that always gets rave reviews.
Serving & Storage Suggestions
These caramel apple slices are best served within a few hours of making them, but they’re still delicious the next day. Here’s how to get the most out of them:
Serving Temperature: I prefer these chilled straight from the fridge—the apples stay extra crisp, and the caramel has a firm, almost fudge-like texture. But they’re also wonderful at room temperature, especially if you’ve just made them and the caramel is still slightly warm.
Presentation Ideas: Arrange the slices on a wooden board or a white platter for a beautiful, rustic look. Sprinkle a few extra toffee bits around the plate for visual interest. If you’re serving these at a party, you can stick a small skewer or toothpick into each slice for easy grabbing.
Complementary Dishes: These pair beautifully with a scoop of vanilla ice cream or a dollop of whipped cream. For a more substantial dessert, serve them alongside a warm apple crisp or a slice of pound cake. A glass of cold milk is the perfect beverage pairing—especially for the kids.
Storage Instructions: Place any leftovers in an airtight container, layering parchment paper between the slices to prevent sticking. They’ll keep in the refrigerator for up to 2 days. After that, the apples start to soften and release moisture, which can make the caramel runny.
Reheating Tips: If you prefer your caramel soft and gooey, let the slices sit at room temperature for about 15 minutes before serving. You can also microwave them for 10-15 seconds, but be careful—the apples can get mushy if overheated.
One thing I love about this recipe is how the flavors develop over time. The apples absorb a bit of the caramel flavor, and the toffee bits soften slightly, creating a texture that’s different but still delicious. Honestly, I sometimes make a double batch just so I can have leftovers for the next day.
Nutritional Information & Benefits
While these caramel apple slices are definitely a treat, they also offer some surprising nutritional benefits. Here’s a rough breakdown per serving (about 3 slices):
| Nutrient | Amount |
|---|---|
| Calories | 280 |
| Total Fat | 14g |
| Saturated Fat | 8g |
| Cholesterol | 35mg |
| Sodium | 120mg |
| Total Carbohydrates | 40g |
| Dietary Fiber | 4g |
| Sugars | 32g |
| Protein | 2g |
The apples are the real star here from a health perspective. They’re packed with fiber, vitamin C, and antioxidants called flavonoids that support heart health. One medium apple provides about 4 grams of fiber, which is about 14% of the daily recommended intake. That fiber helps keep everyone full and satisfied—a big win for after-school snacking.
The caramel, while not exactly health food, does contain calcium from the cream and a small amount of iron from the brown sugar. And the toffee bits add a bit of quick energy, which is perfect for active kids who need a boost between activities.
If you’re watching sugar intake, you can reduce the caramel amount or use a sugar substitute in the caramel sauce. I’ve tried this with a monk fruit sweetener blend, and while the texture is slightly different, the taste is still wonderful. Just know that the caramel won’t get quite as thick or glossy.
Potential allergens to note: This recipe contains dairy (butter, cream) and may contain nuts if you add the optional pecans or walnuts. The toffee bits are typically made with butter and sugar, so they contain dairy as well. For a completely dairy-free version, use the substitutions mentioned in the variations section.
Conclusion
These Kid-Approved Caramel Dipped Apple Slices with Toffee Bits have become a staple in my kitchen for good reason. They’re quick enough for a weekday snack but special enough for parties and holidays. The combination of crisp apple, silky caramel, and crunchy toffee is one of those perfect flavor marriages that just works.
What I love most about this recipe is how adaptable it is. You can dress it up with chocolate drizzle and nuts for a fancy dessert, or keep it simple with just caramel and toffee for an everyday treat. It’s the kind of recipe that grows with you—your kids will love it now, and they’ll still love it when they’re old enough to make it themselves.
I’d love to hear how these turn out for you! Drop a comment below and let me know what variations you tried, or tag me in your photos on social media. Did your kids love them as much as mine do? Did you discover a new favorite apple variety? Share your stories—I read every single one, and honestly, they make my day.
Until next time, happy cooking—and don’t forget to save a few slices for yourself. You deserve them.
Frequently Asked Questions
Can I use store-bought caramel sauce instead of making my own?
Absolutely! While homemade caramel has a richer flavor, store-bought works perfectly in a pinch. Look for a thick, high-quality caramel sauce—not the thin ice cream topping kind. Warm it slightly before dipping so it spreads easily on the apple slices.
How do I keep the apple slices from turning brown?
Tossing the slices with lemon juice is the most effective method. The citric acid slows down oxidation, keeping your apples looking fresh for hours. If you don’t have lemons, a mixture of water and a splash of vinegar works too—just rinse the slices afterward so they don’t taste like vinegar.
Can I make these ahead of time for a party?
Yes, but with a caveat. You can prepare the caramel and slice the apples up to a day in advance. Store the caramel in the fridge and the apple slices in lemon water. Assemble the slices about an hour before serving for the best texture. If you assemble them too far in advance, the apples can release moisture and make the caramel runny.
What’s the best way to reheat leftover caramel?
If your caramel has thickened in the fridge, place the jar or container in a bowl of warm water for 10-15 minutes. You can also microwave it in 10-second bursts, stirring between each, until it reaches the desired consistency. Avoid overheating, as this can cause the caramel to separate.
Can I use this caramel recipe for other desserts?
Definitely! This caramel is incredibly versatile. Drizzle it over ice cream, use it as a dip for pretzels or cookies, or stir it into your morning coffee for a treat. It also makes a wonderful filling for cakes or a topping for cheesecake. Just store any leftovers in the fridge for up to two weeks.
Pin This Recipe!
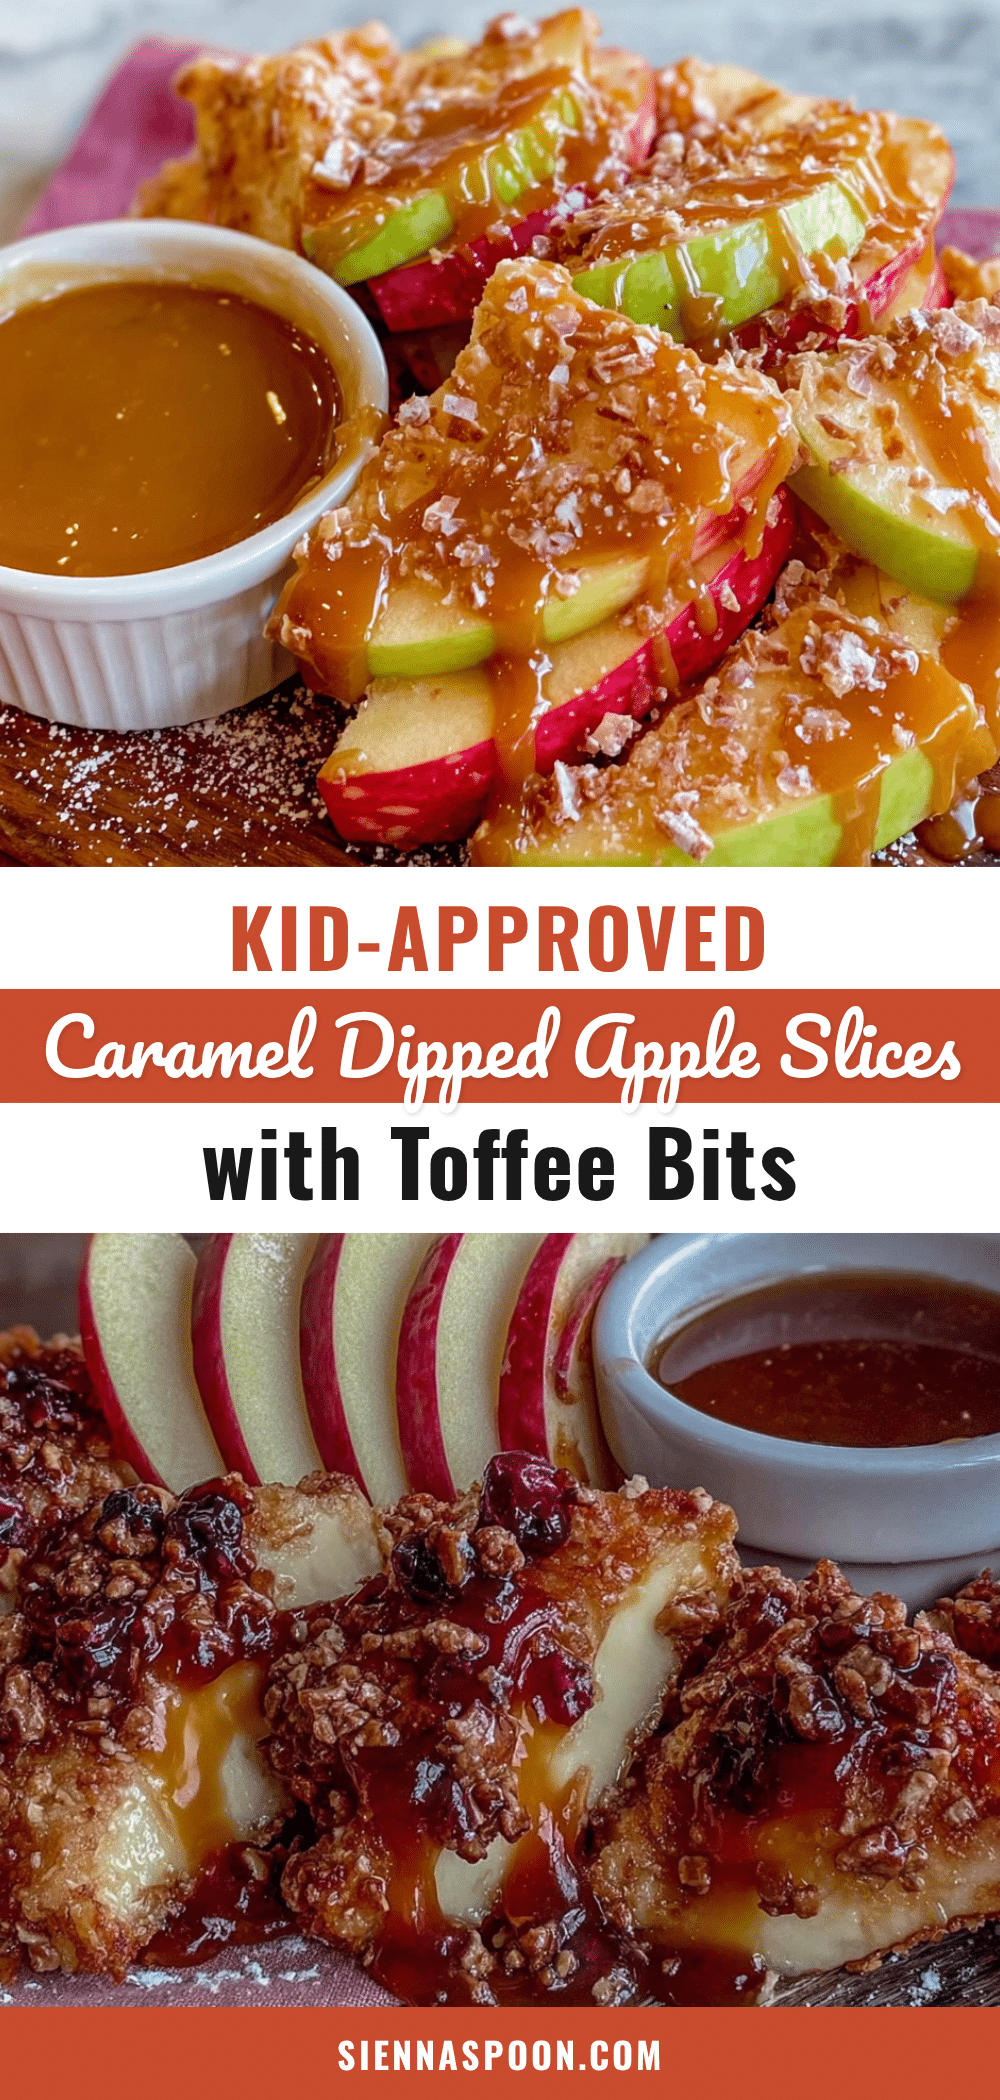
Kid-Approved Caramel Apple Slices: Easy Toffee Bits Dessert

These Kid-Approved Caramel Dipped Apple Slices with Toffee Bits are a quick and easy after-school snack that comes together in about 10 minutes. Crisp apple slices are coated in a rich, homemade caramel sauce and topped with crunchy toffee bits for a treat that both kids and adults love.
- Prep Time: 10 minutes
- Cook Time: 5 minutes
- Total Time: 15 minutes
- Yield: 4 servings 1x
- Category: Dessert
- Cuisine: American
Ingredients
- 1 cup (200g) packed light brown sugar
- 1/2 cup (120ml) heavy cream
- 4 tablespoons (56g) unsalted butter, cut into small cubes
- 1 teaspoon vanilla extract
- 1/4 teaspoon fine sea salt
- 4 medium apples (Honeycrisp or Fuji)
- 1 tablespoon fresh lemon juice
- 1/2 cup (60g) toffee bits
- Optional: 1/4 cup chopped nuts (pecans or walnuts)
Instructions
- Make the caramel sauce: Place the brown sugar, heavy cream, and cubed butter in a medium saucepan over medium heat. Stir gently until the butter melts and everything comes together, about 3-4 minutes.
- Bring to a gentle boil: Once the mixture is smooth and bubbling, let it cook for about 2 minutes without stirring. The color should be a warm amber.
- Remove from heat and add vanilla and salt: Take the pan off the burner and stir in the vanilla extract and sea salt. Let it cool for about 5 minutes.
- Prepare the apples: Wash and dry the apples. Cut each apple into 1/2-inch thick slices, working around the core. Place the slices in a large bowl and toss with lemon juice.
- Arrange the slices: Line a baking sheet with parchment paper. Arrange the apple slices in a single layer.
- Dip and coat: Using a small offset spatula or butter knife, spread a generous layer of caramel onto each apple slice.
- Add the toffee bits: Immediately sprinkle the toffee bits over the caramel-coated slices. Press them gently into the caramel.
- Chill and set: Place the baking sheet in the refrigerator for about 10-15 minutes to firm up the caramel.
- Serve and enjoy: Arrange the slices on a serving platter. Serve within 2 hours for the best texture.
Notes
Use cold apples for better caramel adhesion. Don’t skip the salt—it balances the sweetness. Work quickly when adding toffee bits as the caramel sets fast. If caramel thickens too much, reheat gently with a tablespoon of warm cream.
Nutrition
- Serving Size: 3 slices
- Calories: 280
- Sugar: 32
- Sodium: 120
- Fat: 14
- Saturated Fat: 8
- Carbohydrates: 40
- Fiber: 4
- Protein: 2
Keywords: caramel apple slices, toffee bits, easy dessert, after-school snack, kid-friendly


