Love this? Save it for later!
Share the inspiration with your friends
My husband swore he hated chocolate chip cookies. For years. The whole time we were dating, engaged, and well into our first year of marriage, he’d politely decline whenever I offered him one. “They’re just not my thing,” he’d say, with that final tone that suggested the conversation was over. I’d watch him eat brownies, cake, and even the occasional oatmeal raisin cookie without complaint, but chocolate chip? Never. I accepted it as one of those quirky partner preferences you just learn to live with. That is, until a rainy Tuesday afternoon when I caught him standing in front of the open pantry, eating one of my test batches cold, straight from the container. He froze mid-bite, cookie crumbs on his chin, looking like a kid caught with his hand in the candy jar. “These are different,” he mumbled, reaching for another. And honestly? He was right.
This recipe came from a place of pure stubbornness. I wanted a cookie that had that distinct bakery-style chewiness you get from those giant, gorgeous cookies sitting under glass domes at fancy coffee shops. You know the ones I mean—thick, golden around the edges, soft in the middle, and loaded with chocolate in every single bite. The kind that makes you close your eyes involuntarily when you take that first bite. I went through seven different batches before I got it right. There was the batch that spread into flat, crispy discs (disaster), the one that came out cakey and dry (even worse), and the batch I forgot to chill that melted into one giant cookie pancake. My kitchen looked like a flour bomb had gone off, and I’m pretty sure I went through three sticks of butter in one afternoon. Maybe you’ve been there too, chasing that perfect texture.
What finally cracked the code was a combination of techniques I’d read about but never tried together. A specific ratio of butter temperatures, a resting period that felt way too long, and a trick with the sugar that I was skeptical about until I saw the results. The first time I pulled a tray of these out of the oven, I knew something was different. They came out thick, with those beautiful crinkled tops and edges that were perfectly golden without being overdone. The centers stayed soft and almost gooey for hours after baking. I brought a batch to a neighbor’s barbecue that weekend, and three separate people asked me which bakery I’d bought them from. That’s when I knew this recipe was special. It’s the one I keep coming back to, the one that changed my husband’s mind, and the one I honestly believe can convert even the most stubborn cookie skeptic.
Why You’ll Love This Recipe
These aren’t just any chocolate chip cookies. They’re the kind that make people stop mid-conversation to ask for the recipe. I’ve tested this dozens of times, tweaked the ratios, and even had a pastry-chef friend taste-test them blind against a popular bakery version. Hers won, but just barely—and she admitted mine had a better texture. That’s the kind of confidence I have in this recipe.
- Perfect Chewy Texture: The secret is in the technique. A combination of melted and room-temperature butter gives you that dense, chewy center with slightly crispy edges. No more flat, greasy cookies.
- Simple Pantry Ingredients: You probably have everything you need already. Butter, sugar, eggs, flour, vanilla, baking soda, salt, and chocolate chips. No weird specialty ingredients or trips to a fancy grocery store.
- Bakery-Style Without the Bakery Price: A single bakery cookie can cost three dollars or more. This recipe makes two dozen giant cookies for a fraction of that cost. Your wallet will thank you.
- Make-Ahead Friendly: The dough actually gets better after resting in the fridge overnight. You can prep the dough days ahead and bake fresh cookies whenever the craving hits. Dangerous? Maybe. Worth it? Absolutely.
- Foolproof for Beginners: I’ve included every single tip I learned the hard way. You won’t end up with flat cookies or dry ones if you follow these steps. I promise.
What makes these cookies different from every other recipe out there is the way the sugar is handled. Most recipes just cream butter and sugar together and call it a day. This one uses a two-step sugar method that creates those beautiful crinkled tops and that signature chew. It’s a small extra step, but it makes all the difference. Trust me on this one.
These cookies are the kind you make when you want to impress someone without stress. They’re perfect for bake sales, holiday cookie exchanges, or just a Tuesday afternoon when you need something warm and comforting. There’s something deeply satisfying about pulling a tray of these out of the oven, watching the chocolate still slightly melted on top, and knowing you made something that looks and tastes like it came from a professional bakery.
What Ingredients You Will Need
This recipe uses simple, everyday ingredients to create something extraordinary. The magic isn’t in fancy components—it’s in how you handle them. Here’s everything you’ll need and why each ingredient matters.
For the Cookie Dough
- 2 ¼ cups (280g) all-purpose flour – Spoon and level your flour. Scooping directly from the bag packs in too much flour and leads to dry cookies. I use Gold Medal unbleached all-purpose flour for consistent results.
- 1 teaspoon baking soda – This gives the cookies their lift. Make sure yours is fresh—test it by dropping a pinch into vinegar; it should fizz immediately.
- 1 teaspoon salt – Don’t skip this. Salt balances the sweetness and enhances the chocolate flavor. I prefer fine sea salt for even distribution.
- 1 cup (226g) unsalted butter – Here’s where the technique comes in. Use ½ cup (113g) cold butter, cut into small cubes, and ½ cup (113g) melted butter, slightly cooled. This combination is the secret to that chewy texture.
- 1 cup (200g) packed light brown sugar – Brown sugar adds moisture and that deep, caramel-like flavor. Pack it firmly into your measuring cup. Dark brown sugar works too and gives an even richer flavor.
- ½ cup (100g) granulated sugar – White sugar helps with spreading and creates those crispy edges. Don’t reduce it or substitute it all with brown sugar—you need both.
- 2 large eggs, room temperature – Cold eggs will seize the butter mixture. Leave them on the counter for 30 minutes, or place them in a bowl of warm water for 5 minutes if you’re in a hurry.
- 2 teaspoons vanilla extract – Use pure vanilla extract, not imitation. The flavor is noticeably better. I buy the big bottle from Costco—it lasts forever and tastes amazing.
- 2 cups (340g) semi-sweet chocolate chips – I use Ghirardelli 60% cacao chips for the best balance of sweetness and richness. You can also chop a high-quality chocolate bar for those beautiful chocolate puddles.
Ingredient Notes and Substitutions
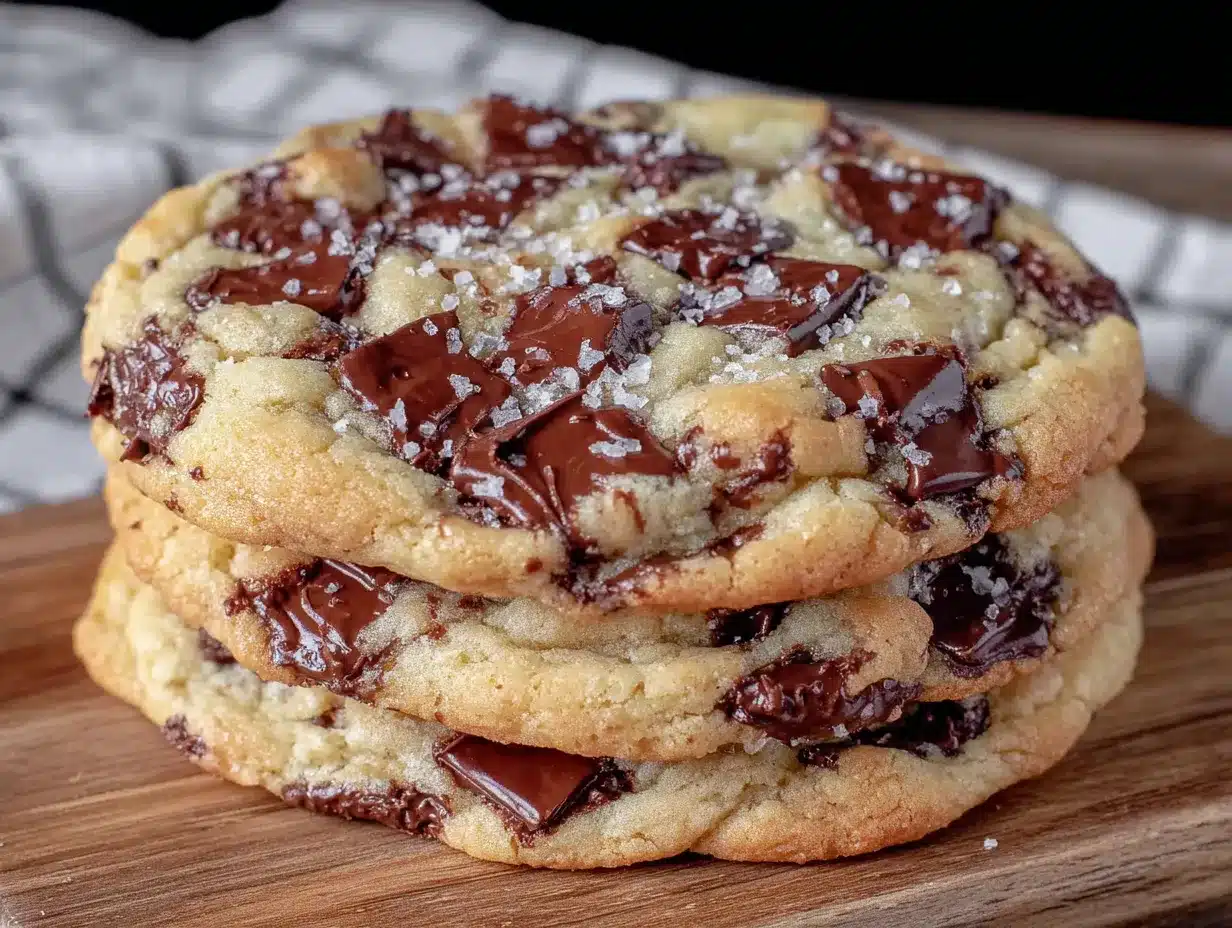
For the butter, if you only have salted butter on hand, reduce the added salt to ½ teaspoon. The texture will be the same, but you’ll want to watch the salt level. For a dairy-free version, you can use a high-quality vegan butter stick (not the spreadable kind in a tub). I’ve had good results with Miyoko’s European Style Cultured Vegan Butter.
If you’re out of brown sugar, you can make your own by mixing 1 cup of granulated sugar with 2 tablespoons of molasses. It won’t be quite the same, but it works in a pinch. For the chocolate, feel free to mix it up—milk chocolate chips, dark chocolate chunks, or even white chocolate and macadamia nuts all work beautifully with this base dough.
One thing I’ve learned from testing: don’t use margarine or low-fat spreads. They have a higher water content, which throws off the butter-to-flour ratio and results in flat, greasy cookies. Stick with real butter for the best texture and flavor.
Equipment Needed
You don’t need fancy equipment for these cookies, but a few key tools make the process smoother. Here’s what I use and what you can substitute if needed.
- Large mixing bowl – Any large bowl works. I use a stainless steel one because it’s lightweight and easy to clean.
- Medium mixing bowl – For whisking the dry ingredients together.
- Whisk – For combining the flour, baking soda, and salt evenly.
- Electric hand mixer or stand mixer – You can mix by hand with a wooden spoon, but a mixer makes creaming the butter and sugar much easier. I’ve done both—hand mixing takes more elbow grease but works fine.
- Rubber spatula – For scraping down the sides of the bowl and folding in the chocolate chips.
- Cookie scoop (3-tablespoon size) – This gives you evenly sized cookies that bake uniformly. If you don’t have one, use a measuring cup or two spoons to portion the dough.
- Baking sheets – Light-colored, rimmed baking sheets work best. Dark sheets absorb more heat and can cause the bottoms to brown too quickly.
- Parchment paper or silicone baking mat – Parchment paper is my go-to. It prevents sticking and makes cleanup a breeze. Silicone mats work too, but cookies may spread slightly more.
- Cooling rack – Essential for letting the cookies cool evenly. If you don’t have one, you can transfer cookies to a clean counter or plate after a few minutes on the sheet.
I’ve made these cookies with just a bowl and a whisk when I was visiting my parents’ house and forgot my mixer. The dough came together fine—it just took a little more arm work. Don’t let missing equipment stop you from making these.
Preparation Method
This method looks long, but I’ve broken it down into clear steps with all the little details that make the difference between good cookies and unforgettable ones. Take your time, especially with the chilling step—it’s non-negotiable for that bakery texture.
- Whisk the dry ingredients together. In a medium bowl, whisk together 2 ¼ cups (280g) all-purpose flour, 1 teaspoon baking soda, and 1 teaspoon salt. Set this aside. Whisking ensures everything is evenly distributed so you don’t bite into a pocket of baking soda later.
- Prepare the butter. Cut ½ cup (113g) of cold butter into small cubes, about ½-inch each. In a separate small microwave-safe bowl, melt the remaining ½ cup (113g) butter in 20-second intervals until just melted. Let it cool for 2-3 minutes—you don’t want it hot enough to cook the eggs.
- Cream the butter and sugars. In your large mixing bowl, combine the cubed cold butter, melted butter, 1 cup (200g) packed light brown sugar, and ½ cup (100g) granulated sugar. Beat with an electric mixer on medium speed for 2-3 minutes until the mixture looks lighter in color and slightly fluffy. The texture should be thick and grainy, not liquidy. This step creates air pockets that help the cookies rise.
- Add the eggs and vanilla. Add the 2 room-temperature eggs, one at a time, beating well after each addition. Scrape down the sides of the bowl with your spatula. Add 2 teaspoons vanilla extract and beat until combined. The mixture should look smooth and glossy, almost like a thick pudding. If it looks separated or greasy, your butter was too warm—pop the bowl in the fridge for 10 minutes before continuing.
- Incorporate the dry ingredients. Add the flour mixture to the wet ingredients in two additions, mixing on low speed just until combined after each addition. Stop mixing as soon as you no longer see streaks of flour. Overmixing at this stage develops gluten, which makes cookies tough instead of tender. I’ve learned this the hard way—trust me, stop sooner than you think you should.
- Fold in the chocolate chips. Add 2 cups (340g) semi-sweet chocolate chips to the dough. Use your rubber spatula to fold them in gently. Make sure they’re evenly distributed throughout the dough. At this point, the dough should be thick and slightly sticky but hold together when pressed.
- Chill the dough (the most important step). Cover the bowl with plastic wrap and refrigerate for at least 4 hours, but overnight is better. I know it’s hard to wait, but this step is crucial. Chilling solidifies the butter, which prevents the cookies from spreading too much in the oven. It also allows the flavors to meld and develop. Dough chilled for 24 hours produces noticeably better cookies than dough chilled for just 2 hours. I’ve tested this side by side.
- Preheat the oven. When you’re ready to bake, preheat your oven to 375°F (190°C). Line two baking sheets with parchment paper. Position the racks in the upper and lower thirds of the oven.
- Portion the dough. Use your 3-tablespoon cookie scoop to portion the dough into balls. If you don’t have a scoop, roll the dough into balls about 1.5 inches in diameter. Place them 3 inches apart on the prepared baking sheets—these cookies spread. For that tall, bakery-style look, roll each dough ball between your palms to create a rough sphere, then place it on the sheet with the craggly side up.
- Bake the cookies. Bake one sheet at a time for 11-13 minutes, rotating the pan halfway through. The cookies are done when the edges are golden brown and the centers look slightly puffy and underdone. They will continue to set on the hot pan. For softer cookies, pull them at 11 minutes. For crispier edges, go to 13 minutes. My sweet spot is 12 minutes exactly.
- Cool on the baking sheet. Let the cookies cool on the baking sheet for 5 minutes. This allows them to finish setting without overbaking. After 5 minutes, transfer them to a wire cooling rack to cool completely. If you try to move them too soon, they’ll fall apart.
Cooking Tips & Techniques
I’ve made more batches of chocolate chip cookies than I can count, and I’ve learned a few things that the recipe cards don’t always tell you. These tips come from real kitchen experience—including the failures that taught me what not to do.
Don’t skip the chilling step. I know it’s tempting, especially when you’re craving cookies right now. But warm dough spreads into thin, flat cookies every single time. I once tried to speed things up by chilling the dough in the freezer for 30 minutes instead of the fridge for 4 hours. The result? Cookies that spread almost as much as unchilled dough. The freezer firms up the outside but leaves the inside too soft. Overnight refrigeration is truly best.
Use a cookie scoop for even baking. When cookies are different sizes, some burn while others are underdone. A 3-tablespoon scoop gives you consistent results every time. I bought mine for eight dollars at a kitchen supply store, and it’s one of the most-used tools in my kitchen.
Bang the pan for crinkly tops. Here’s a trick from professional bakers: about halfway through baking, take the pan out of the oven and firmly bang it on the counter a couple of times. This deflates the cookies slightly, creating those beautiful crinkled tops. I discovered this by accident when I dropped a pan (don’t ask), and the cookies came out with the best texture I’d ever gotten. Now I do it on purpose every time.
Watch for visual cues, not just the timer. Ovens run differently. My friend’s oven bakes these perfectly at 11 minutes, while mine needs a full 13. Look for golden edges and puffy, slightly underdone centers. The cookies should look like they need another minute or two in the oven—that’s when they’re perfect.
Let them rest on the pan. The 5-minute rest on the hot baking sheet is not optional. During this time, the cookies continue to bake gently from the residual heat. Moving them too early results in cookies that fall apart. I learned this the hard way when I tried to transfer a batch immediately and ended up with a crumbly mess on my cooling rack.
Variations & Adaptations
One of the best things about this recipe is how adaptable it is. The base dough is sturdy enough to handle all kinds of changes without losing that perfect chewy texture. Here are some variations I’ve tried and loved.
Double Chocolate Chip Cookies: Replace ¼ cup (30g) of the all-purpose flour with ¼ cup (25g) of unsweetened cocoa powder. Sift it together with the other dry ingredients to avoid lumps. The cookies come out rich and fudgy, with a deep chocolate flavor that pairs beautifully with white chocolate chips or raspberry chunks.
Gluten-Free Version: Substitute the all-purpose flour with a 1-to-1 gluten-free baking flour blend that contains xanthan gum. I’ve had great results with Bob’s Red Mill 1-to-1 Baking Flour. The texture is slightly more delicate, so handle the dough gently. Chilling is even more important here—at least 6 hours or overnight.
Nutty Chocolate Chunk Cookies: Reduce the chocolate chips to 1 ½ cups and add ½ cup of toasted chopped pecans or walnuts. Toast the nuts in a dry skillet over medium heat for 3-4 minutes until fragrant, then let them cool completely before folding into the dough. The toasted flavor adds incredible depth.
Sea Salt Finish: Just before baking, sprinkle a few flakes of flaky sea salt (like Maldon) on top of each dough ball. The salt crystals provide a delightful crunch and balance the sweetness. This is my husband’s favorite variation—he says it makes the cookies taste “fancy.”
Mint Chocolate Chip: Add ½ teaspoon peppermint extract along with the vanilla extract, and use dark chocolate chips instead of semi-sweet. The mint flavor is refreshing and pairs perfectly with the rich chocolate. This version is especially popular around the holidays.
I’ve also tried adding orange zest (about 1 tablespoon) for a citrusy twist, and it was surprisingly delicious. Don’t be afraid to experiment—this dough is forgiving and rewards creativity.
Serving & Storage Suggestions
These cookies are best served slightly warm, when the chocolate is still a little melty and the texture is at its peak. If you’re serving them to guests, pop them in a 300°F (150°C) oven for 3-4 minutes to warm them up without overbaking. They’re wonderful on their own, but they also pair beautifully with a cold glass of milk, a hot cup of coffee, or even a scoop of vanilla ice cream for an indulgent dessert.
For storage, keep the cookies in an airtight container at room temperature. They’ll stay soft and chewy for up to 5 days. To maintain their texture, add a slice of plain bread to the container—the cookies absorb moisture from the bread, keeping them soft. Replace the bread slice every couple of days if the cookies last that long. (In my house, they rarely last more than two days.)
You can also freeze the baked cookies for up to 3 months. Place them in a single layer in a freezer-safe bag or container, with parchment paper between layers to prevent sticking. Thaw at room temperature for about 30 minutes, or warm them in the microwave for 10-15 seconds.
The dough itself freezes beautifully. Portion the chilled dough into balls, place them on a baking sheet, and freeze until solid (about 1 hour). Transfer the frozen dough balls to a freezer bag. When you’re ready to bake, place the frozen dough balls on a prepared baking sheet and bake at 375°F (190°C) for 13-15 minutes—no need to thaw first. Fresh cookies in under 20 minutes, anytime you want them.
One thing I’ve noticed: these cookies actually taste better on day two. The flavors meld and deepen overnight, and the texture becomes even chewier. If you can resist eating them all on day one, you’re in for a treat.
Nutritional Information & Benefits
Let’s be honest—these are indulgent cookies, not health food. But knowing what’s in them helps you enjoy them mindfully. Here’s the estimated nutritional breakdown per cookie (based on 24 cookies using the recipe as written):
- Calories: Approximately 220-250 per cookie
- Total Fat: 12-14g
- Saturated Fat: 7-8g
- Cholesterol: 35-40mg
- Sodium: 180-200mg
- Total Carbohydrates: 28-32g
- Dietary Fiber: 1-2g
- Sugars: 18-20g
- Protein: 3-4g
These numbers are estimates and can vary based on the specific brands and exact measurements you use. If you’re watching your sugar intake, you can reduce the granulated sugar to ⅓ cup (67g) without significantly affecting the texture—the brown sugar provides enough moisture and sweetness.
Dark chocolate chips contain antioxidants called flavonoids, which have been linked to heart health benefits. Using a high-quality dark chocolate (60-70% cacao) gives you more of these beneficial compounds. The butter provides fat-soluble vitamins A, D, E, and K, though in modest amounts.
For those with dietary restrictions, please note that this recipe contains gluten (from the flour), dairy (from the butter), and eggs. I’ve included gluten-free and dairy-free substitution options in the variations section above. Always check your ingredient labels if you’re cooking for someone with allergies.
My personal philosophy? These cookies are a treat, meant to be enjoyed in moderation. I’d rather have one really good, satisfying cookie than three mediocre ones. Quality over quantity, every time.
Conclusion
These Perfect Bakery-Style Chewy Chocolate Chip Cookies are the result of countless batches, failed experiments, and one very stubborn husband who finally came around. They’re everything I wanted in a cookie—thick, chewy, loaded with chocolate, and beautiful enough to pass as bakery-bought. The technique might seem fussy with the two types of butter and the long chill time, but I promise you, every single step matters. The payoff is a cookie that makes people close their eyes when they take that first bite.
What I love most about this recipe is how reliable it is. Whether I’m making them for a holiday party, a bake sale, or just a quiet afternoon at home, I know exactly what I’m going to get. No surprises, no disappointments. Just perfect cookies, every single time. And honestly? That kind of reliability in the kitchen is priceless.
I’d love to hear how these turn out for you. Did you try any of the variations? Did your family love them as much as mine does? Drop a comment below and let me know—your feedback helps me create better recipes, and I genuinely love hearing about your baking adventures. And if you snap a photo of your cookies, tag me on social media. There’s nothing that makes my day quite like seeing someone else enjoying a recipe that started in my kitchen.
Now go preheat that oven. Your cookies are waiting.
Frequently Asked Questions
Can I use all melted butter instead of half cold, half melted?
You can, but the texture will be different. Using all melted butter creates cookies that spread more and have a slightly denser, chewier texture. They’ll still be good, but they won’t have that same tall, bakery-style look. If you’re in a hurry, go ahead and use all melted butter—just expect a flatter cookie.
Why did my cookies turn out flat?
Flat cookies usually happen for one of three reasons: the dough wasn’t chilled long enough, the butter was too warm when you mixed it, or you used too much sugar. Check your measurements and make sure you’re chilling the dough for at least 4 hours. Also, make sure your baking soda is fresh—old baking soda loses its leavening power.
Can I reduce the sugar in this recipe?
You can reduce the granulated sugar to ⅓ cup without major issues, but don’t reduce the brown sugar. Brown sugar provides moisture and that chewy texture. Reducing both sugars will result in cookies that are less tender and don’t spread as nicely. If you’re looking for a lower-sugar option, try using a sugar substitute like monk fruit sweetener, but expect some textural differences.
How do I make these cookies softer or crispier?
For softer cookies, bake them for 11 minutes and pull them out while the centers still look slightly underdone. Let them cool completely on the baking sheet. For crispier cookies, bake for 13-14 minutes and transfer them to a cooling rack immediately after baking. You can also press the cookies down slightly with a spatula halfway through baking for a thinner, crisper result.
Can I make the dough ahead and bake later?
Absolutely! The dough actually improves with age. You can refrigerate the dough for up to 72 hours before baking. For longer storage, portion the dough into balls, freeze them on a baking sheet, then transfer to a freezer bag. Bake frozen dough balls at 375°F for 13-15 minutes—no need to thaw. Fresh cookies anytime you want them.
Pin This Recipe!
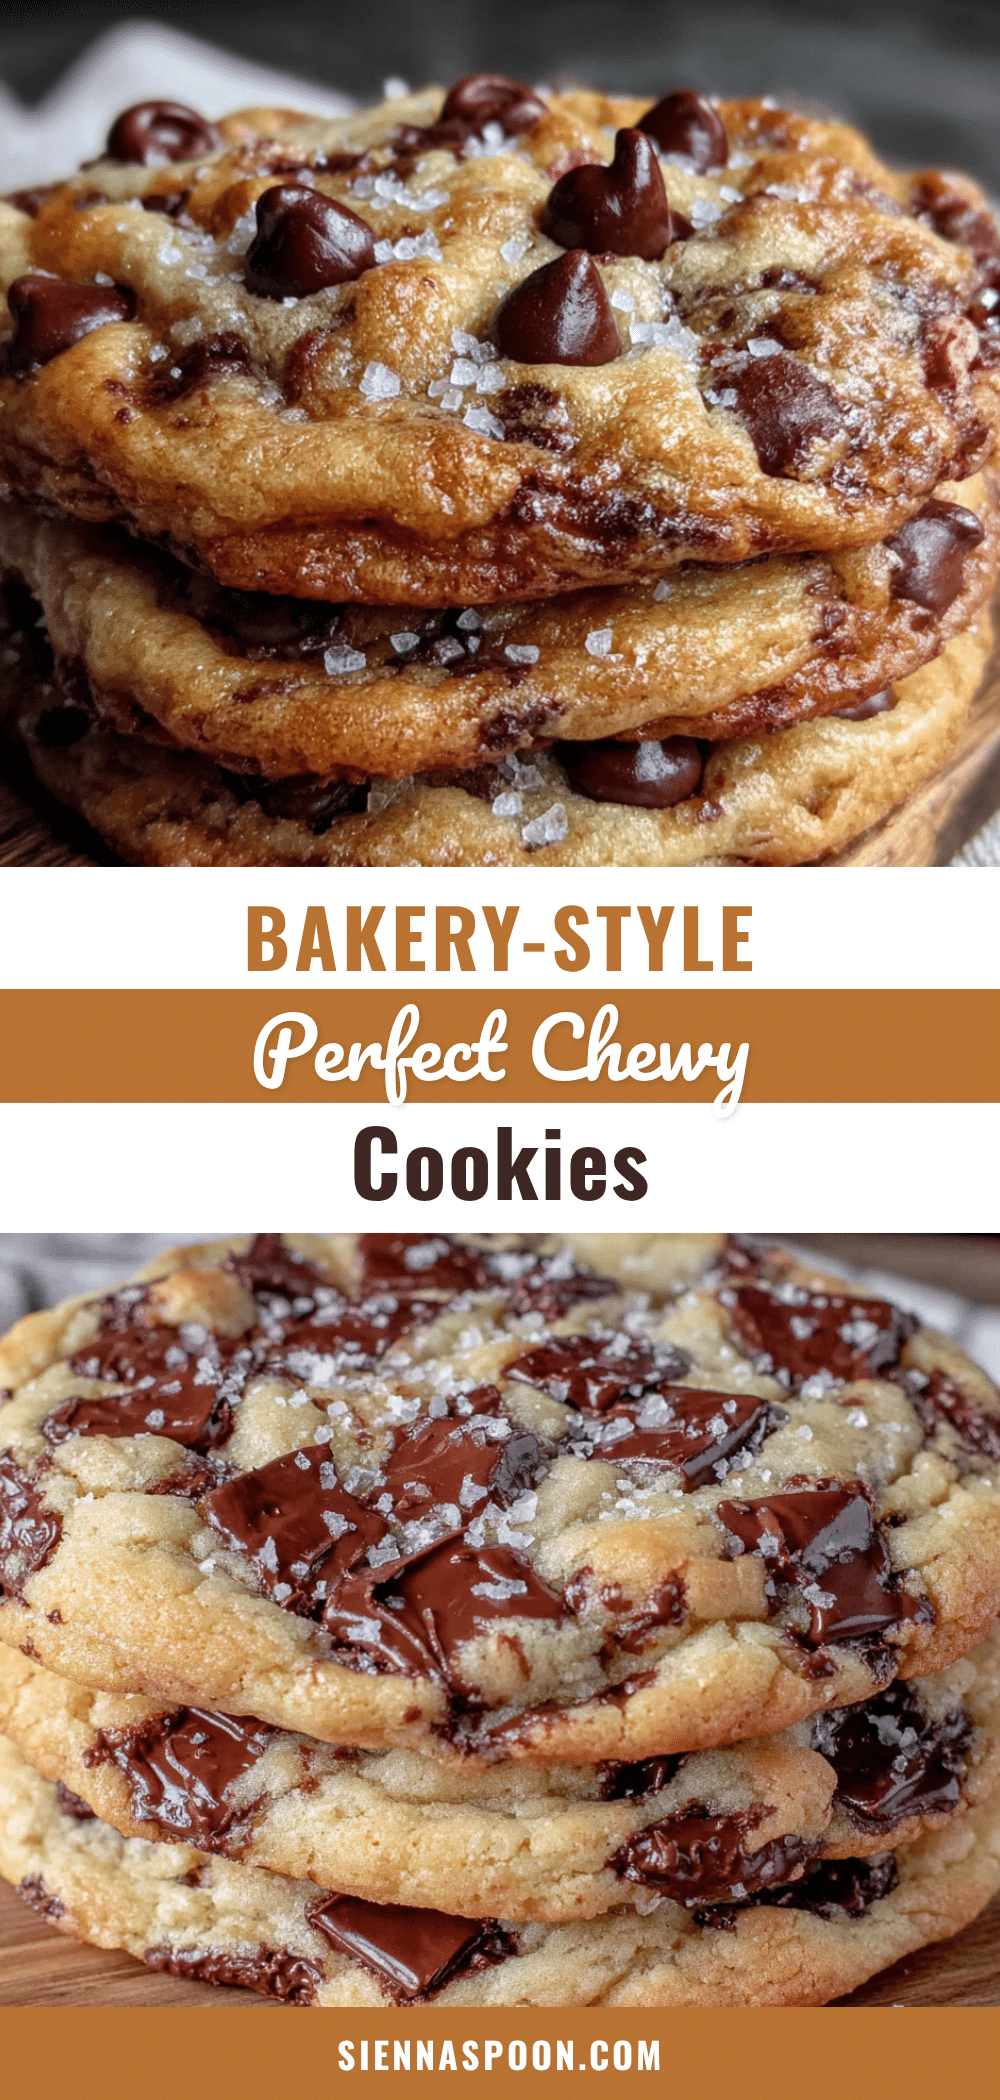
Perfect Easy Bakery-Style Chewy Chocolate Chip Cookies

These thick, chewy chocolate chip cookies have a perfect bakery-style texture with golden edges and soft, gooey centers. A combination of melted and room-temperature butter creates the ideal chew, while a long chill time ensures they don’t spread into flat discs.
- Prep Time: 20 minutes
- Cook Time: 12 minutes
- Total Time: 4 hours 32 minutes (includes 4 hours chilling)
- Yield: 24 cookies 1x
- Category: Dessert
- Cuisine: American
Ingredients
- 2 ¼ cups (280g) all-purpose flour
- 1 teaspoon baking soda
- 1 teaspoon salt
- 1 cup (226g) unsalted butter, divided (½ cup cold, cubed; ½ cup melted and slightly cooled)
- 1 cup (200g) packed light brown sugar
- ½ cup (100g) granulated sugar
- 2 large eggs, room temperature
- 2 teaspoons vanilla extract
- 2 cups (340g) semi-sweet chocolate chips
Instructions
- Whisk the dry ingredients together. In a medium bowl, whisk together 2 ¼ cups (280g) all-purpose flour, 1 teaspoon baking soda, and 1 teaspoon salt. Set aside.
- Prepare the butter. Cut ½ cup (113g) of cold butter into small cubes, about ½-inch each. In a separate small microwave-safe bowl, melt the remaining ½ cup (113g) butter in 20-second intervals until just melted. Let it cool for 2-3 minutes.
- Cream the butter and sugars. In your large mixing bowl, combine the cubed cold butter, melted butter, 1 cup (200g) packed light brown sugar, and ½ cup (100g) granulated sugar. Beat with an electric mixer on medium speed for 2-3 minutes until the mixture looks lighter in color and slightly fluffy.
- Add the eggs and vanilla. Add the 2 room-temperature eggs, one at a time, beating well after each addition. Scrape down the sides of the bowl with your spatula. Add 2 teaspoons vanilla extract and beat until combined. The mixture should look smooth and glossy.
- Incorporate the dry ingredients. Add the flour mixture to the wet ingredients in two additions, mixing on low speed just until combined after each addition. Stop mixing as soon as you no longer see streaks of flour.
- Fold in the chocolate chips. Add 2 cups (340g) semi-sweet chocolate chips to the dough. Use your rubber spatula to fold them in gently until evenly distributed.
- Chill the dough (the most important step). Cover the bowl with plastic wrap and refrigerate for at least 4 hours, but overnight is better.
- Preheat the oven. When you’re ready to bake, preheat your oven to 375°F (190°C). Line two baking sheets with parchment paper. Position the racks in the upper and lower thirds of the oven.
- Portion the dough. Use a 3-tablespoon cookie scoop to portion the dough into balls. Place them 3 inches apart on the prepared baking sheets. For tall, bakery-style cookies, roll each dough ball between your palms to create a rough sphere, then place it on the sheet with the craggly side up.
- Bake the cookies. Bake one sheet at a time for 11-13 minutes, rotating the pan halfway through. The cookies are done when the edges are golden brown and the centers look slightly puffy and underdone.
- Cool on the baking sheet. Let the cookies cool on the baking sheet for 5 minutes. After 5 minutes, transfer them to a wire cooling rack to cool completely.
Notes
Chilling the dough is non-negotiable for thick, chewy cookies. For crinkly tops, bang the pan on the counter halfway through baking. Let cookies rest on the hot pan for 5 minutes after baking to finish setting. Dough can be refrigerated for up to 72 hours or frozen for up to 3 months.
Nutrition
- Serving Size: 1 cookie
- Calories: 235
- Sugar: 19
- Sodium: 190
- Fat: 13
- Saturated Fat: 7.5
- Carbohydrates: 30
- Fiber: 1.5
- Protein: 3.5
Keywords: chocolate chip cookies, chewy cookies, bakery-style cookies, easy cookie recipe, homemade cookies


