Love this? Save it for later!
Share the inspiration with your friends
The church bake sale was in four hours and I’d completely forgotten. I mean, I’d marked it on the calendar, sure, but somehow that little notation had blended into the chaos of a Tuesday morning. Everyone else would be bringing those fancy layered cakes with perfect buttercream rosettes or those intricate French pastries that look like they belong in a magazine. I had three overripe bananas on my counter and a vague memory of my grandmother’s handwriting on a stained index card.
Let me tell you, I was not feeling confident. I rummaged through my pantry, finding a bag of walnuts that had been sitting there since… well, let’s not talk about how long. The card was tucked between pages of an old cookbook, and it was splattered with what I hoped was vanilla extract. It was a classic banana bread recipe, simple and unassuming. Honestly, it felt almost embarrassing to bring something so plain to a bake sale full of showstoppers.
But I was out of time and out of options. So I mashed those bananas, creamed the butter and sugar, and folded in the walnuts just the way the card said. The batter was thick and smelled like comfort. I poured it into a loaf pan, slid it into the oven, and prayed for a miracle. When the timer went off, the kitchen smelled like my childhood—warm, sweet, and safe. The loaf came out golden brown, cracked perfectly down the middle.
I wrapped it in some parchment paper, still warm, and practically sprinted to the church hall. I set it down on the dessert table next to a three-tier chocolate ganache cake and a tray of macarons. Mine looked like the awkward cousin at a family reunion. But you know what? It was the first thing to sell out. People kept coming back, asking for the recipe, saying it tasted like something their own grandmother used to make. Maybe you’ve been there—when the simplest thing turns out to be the thing everyone actually wants. That’s the day I learned never to underestimate a classic. And that’s why I still make this banana bread, stained card and all, every single week.
Why You’ll Love This Recipe
This isn’t just another banana bread recipe floating around the internet. This is the one. The one that makes you close your eyes after the first bite because it tastes exactly like it should. I’ve tested dozens of banana bread recipes over the years, and I keep coming back to this one because it works every single time. No fuss, no strange ingredients, no complicated techniques.
- Quick & Easy: From start to finish, this banana bread comes together in about 70 minutes. Most of that is hands-off baking time. Perfect for those mornings when you realize you need something for a school event or a last-minute guest.
- Simple Ingredients: You probably have everything you need in your kitchen right now. Butter, sugar, eggs, flour, baking soda, salt, bananas, and walnuts. That’s it. No trips to a specialty grocery store required.
- Perfect for Any Occasion: Breakfast with coffee, an afternoon snack, dessert after dinner, or a hostess gift. This banana bread fits every slot on your calendar.
- Crowd-Pleaser: I’ve made this for picky toddlers, diet-conscious friends, and my grandfather who claims he doesn’t like sweets. Everyone loves it. I mean everyone.
- Unbelievably Delicious: The texture is what gets you. It’s moist without being gummy, tender without being crumbly. And the walnuts add this perfect little crunch that makes each bite interesting.
What makes this recipe different from all the others? It’s the ratio. My grandmother somehow perfected the balance of wet to dry ingredients so the bread stays moist for days. The walnuts are toasted just enough to bring out their oils, and the banana flavor is front and center—not hidden behind too much sugar or spice. It’s comfort food at its finest, the kind that makes you feel like everything is going to be okay.
What Ingredients You Will Need
This recipe uses simple, wholesome ingredients to deliver that classic banana bread flavor we all crave. Nothing fancy here, just good quality basics that work together beautifully. Most of these are pantry staples, so you can whip this up whenever those bananas start looking spotty.
For the Banana Bread
- Unsalted butter, 1/2 cup (1 stick or 113 grams), softened to room temperature. I prefer using unsalted so I can control the salt level. If you only have salted butter, just reduce the added salt to 1/4 teaspoon.
- Granulated sugar, 1 cup (200 grams). Regular white sugar works perfectly here. It gives the bread structure and sweetness without being overpowering.
- Large eggs, 2, at room temperature. Cold eggs can seize the butter mixture, so let them sit out for about 30 minutes before starting.
- Ripe bananas, 3 medium (about 1 1/2 cups or 340 grams mashed). The riper the better. Seriously, those brown spotty bananas that look past their prime are exactly what you want. They’re sweeter and easier to mash.
- All-purpose flour, 2 cups (250 grams). Spoon and level your flour for the most accurate measurement. Scooping directly from the bag can pack in too much flour and make your bread dry.
- Baking soda, 1 teaspoon. This is the only leavening agent you need. Make sure it’s fresh—test it by dropping a bit into vinegar; it should fizz immediately.
- Salt, 1/2 teaspoon. Don’t skip this. Salt balances the sweetness and enhances the banana flavor.
- Vanilla extract, 1 teaspoon. Pure vanilla extract is worth the splurge here. It adds warmth and depth that imitation vanilla just can’t match.
For the Walnut Addition
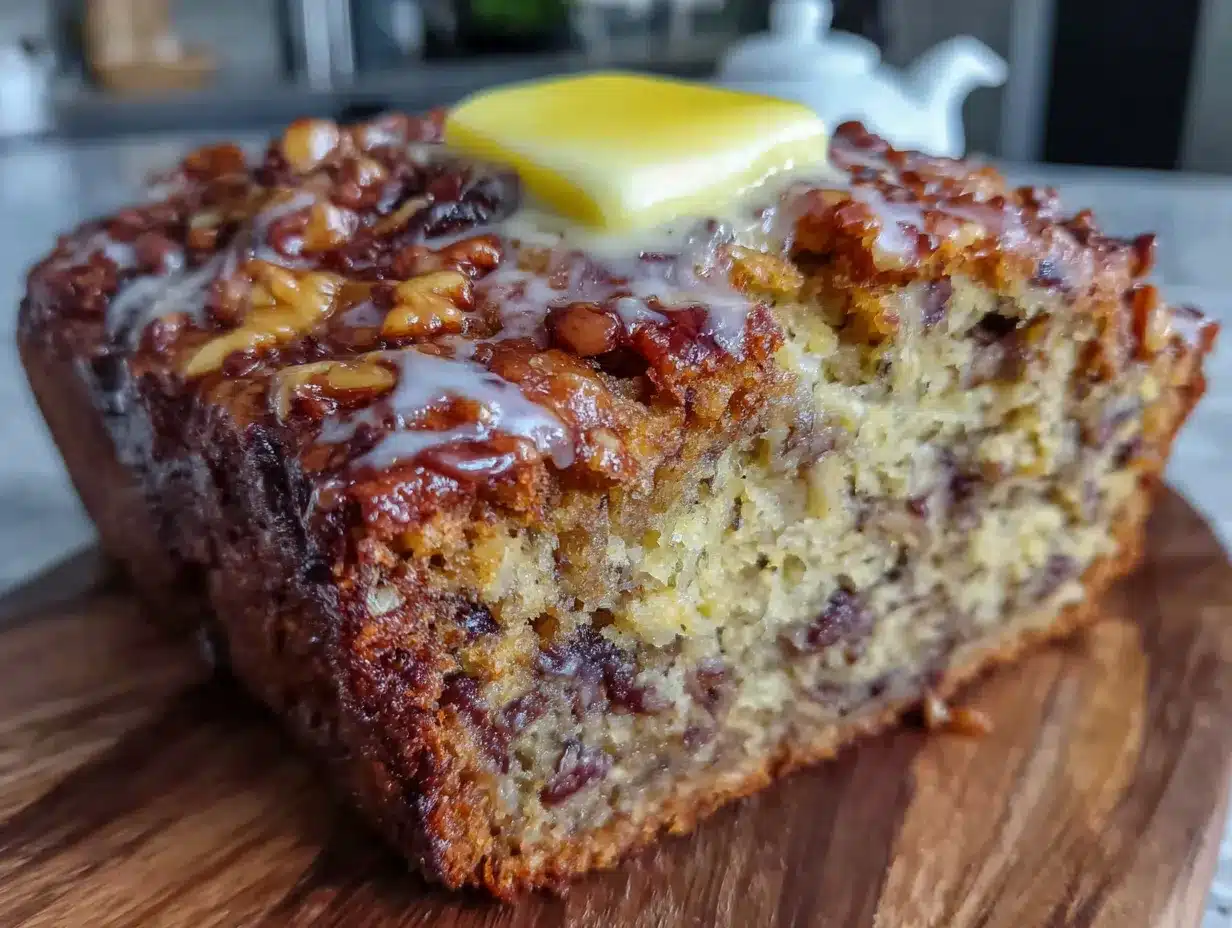
- Walnuts, 1 cup (120 grams), roughly chopped. I recommend toasting them lightly before adding to the batter. It takes about 5 minutes in a dry skillet or a 350°F oven, and it makes a world of difference in flavor. My grandmother always used Diamond brand walnuts, and honestly, they’re still my go-to.
Ingredient Substitutions
If you’re out of walnuts, pecans work beautifully. For a nut-free version, try adding chocolate chips or dried cranberries instead. You can swap the all-purpose flour with a 1:1 gluten-free baking flour blend if needed—just add an extra tablespoon of milk to keep the batter moist. And if you’re dairy-free, use vegan butter or coconut oil in place of the butter. The texture will be slightly different, but still delicious.
Equipment Needed
You don’t need a fancy kitchen to make this banana bread. Here’s what you’ll actually use:
- 9×5-inch loaf pan: This is the standard size for a classic loaf. Glass, metal, or ceramic all work fine. If you use a dark nonstick pan, reduce the oven temperature by 25°F to prevent over-browning.
- Large mixing bowl: For creaming the butter and sugar and mixing the batter.
- Medium mixing bowl: For mashing the bananas and whisking the dry ingredients.
- Hand mixer or stand mixer: You can do this by hand with a wooden spoon, but a mixer makes creaming the butter and sugar much easier. I’ve done it both ways, and honestly, the hand mixer is faster.
- Rubber spatula: For folding in the walnuts and scraping down the sides of the bowl.
- Whisk: For combining the dry ingredients evenly.
- Fork or potato masher: For mashing the bananas. A fork works perfectly; you don’t need a special tool.
- Parchment paper: Lining the pan makes lifting the bread out so much easier. Trust me on this one.
- Cooling rack: Letting the bread cool in the pan for 10 minutes, then transferring to a rack, prevents a soggy bottom.
If you don’t have a loaf pan, you can use an 8×8-inch square pan and adjust the baking time to about 35-40 minutes. I’ve also made these as muffins—just fill greased muffin tins 3/4 full and bake for 18-22 minutes.
Preparation Method
- Preheat and prep: Preheat your oven to 350°F (175°C). Grease your 9×5-inch loaf pan with butter or nonstick spray, then line it with a strip of parchment paper, leaving overhang on the two long sides. This will be your lifeline later.
- Toast the walnuts: Spread the chopped walnuts on a baking sheet and toast them in the preheating oven for 5-7 minutes, just until they smell fragrant. Watch them closely—they can burn in seconds. Set them aside to cool while you prepare the batter.
- Mash the bananas: In a medium bowl, mash the three ripe bananas with a fork until smooth. You want some small lumps for texture, but no large chunks. Set aside.
- Cream the butter and sugar: In a large mixing bowl, beat the softened butter and granulated sugar together until light and fluffy, about 3-4 minutes with a hand mixer on medium speed. Scrape down the sides of the bowl halfway through. The mixture should look pale and slightly increased in volume.
- Add the eggs and vanilla: Add the eggs one at a time, beating well after each addition. Then mix in the vanilla extract. The mixture might look a little curdled at this point—that’s totally normal, especially if your eggs were cold. Don’t panic.
- Add the bananas: Fold in the mashed bananas with a rubber spatula until just combined. The batter will look a bit lumpy and separated. That’s okay.
- Combine the dry ingredients: In the same medium bowl you used for the bananas (less dishes!), whisk together the all-purpose flour, baking soda, and salt.
- Mix wet and dry: Add the dry ingredients to the wet ingredients in two additions, folding gently with the spatula after each addition. Mix only until you no longer see streaks of flour. Overmixing will make your bread tough and dense. Trust me, I’ve learned this the hard way.
- Fold in the walnuts: Gently fold in the toasted walnuts, reserving a handful to sprinkle on top if you want a prettier presentation.
- Fill the pan: Pour the batter into the prepared loaf pan and spread it evenly. Sprinkle the reserved walnuts on top, gently pressing them into the batter so they stick during baking.
- Bake: Bake for 55-65 minutes, or until a toothpick inserted into the center comes out clean or with just a few moist crumbs. The top should be golden brown and cracked. If the top is browning too quickly (around the 40-minute mark), tent it loosely with aluminum foil.
- Cool properly: Let the banana bread cool in the pan on a wire rack for 10 minutes. Then use the parchment paper overhang to lift the loaf out of the pan. Transfer it to the rack to cool completely before slicing. I know it’s tempting to cut into it warm, but it will crumble. Give it at least an hour.
Cooking Tips & Techniques
Let me share some things I’ve learned the messy way. First, the banana ripeness thing is not a suggestion—it’s a rule. Green or yellow bananas without spots will give you bland, dense bread. Wait until they’re practically begging to be used. You know, the ones that make your kitchen smell like a fruit stand. If you’re impatient, you can ripen bananas quickly by placing them on a baking sheet in a 300°F oven for 15-20 minutes until the skins turn black. Let them cool, then proceed.
Another thing: don’t overmix the batter. I ruined my first few loaves by being too enthusiastic with the mixer. Once the flour goes in, switch to a spatula and use a gentle hand. You want the gluten to develop just enough for structure, not so much that your bread turns into a brick.
Temperature matters more than you think. Room temperature butter and eggs create a smoother, more emulsified batter. Cold ingredients can cause the batter to separate, which leads to a greasy, uneven texture. Set everything out on the counter 30-45 minutes before you start. I keep a little timer on my phone for this exact reason.
I once forgot the baking soda entirely. The bread came out flat and dense, like a banana-flavored hockey puck. My husband ate it anyway, bless his heart, but I knew. Now I always double-check my leavening agents before I start.
For the most consistent results, use a kitchen scale to measure your flour. A cup of flour can weigh anywhere from 120 to 150 grams depending on how you scoop it. That 30-gram difference can turn a moist loaf into a dry one. I use 125 grams per cup for this recipe and it’s never let me down.
Variations & Adaptations
This recipe is wonderfully adaptable. Here are some ways I’ve played with it over the years:
Chocolate Chip Banana Bread: Swap the walnuts for 1 cup of semi-sweet chocolate chips. The warm melted chocolate paired with banana is a classic for a reason. My kids prefer this version, and honestly, I don’t blame them.
Vegan Banana Bread: Replace the butter with 1/2 cup of melted coconut oil, and use 2 flax eggs (2 tablespoons ground flaxseed mixed with 6 tablespoons water, let sit for 5 minutes). It works surprisingly well. The texture is slightly denser, but the flavor is still spot on.
Spiced Banana Bread: Add 1 teaspoon of cinnamon, 1/2 teaspoon of nutmeg, and a pinch of cloves to the dry ingredients. This gives the bread a warm, autumnal flavor that’s perfect with a cup of chai or coffee.
Gluten-Free Option: Use a 1:1 gluten-free baking flour blend that contains xanthan gum. I’ve tried several brands, and King Arthur’s Measure for Measure works best. Add 2 tablespoons of milk to the batter to compensate for the extra absorbency of gluten-free flours.
Stuffed Banana Bread: Pour half the batter into the pan, add a layer of cream cheese filling (4 ounces cream cheese, 1/4 cup sugar, 1 egg, mixed until smooth), then top with the remaining batter. It’s like a surprise in every slice.
Serving & Storage Suggestions
This banana bread is best served at room temperature, sliced about 1/2-inch thick. I love it with a pat of salted butter melted into the warm slice, but it’s also fantastic plain. For a little indulgence, toast the slices in a buttered skillet until golden on both sides—it brings out the nutty flavor of the walnuts and crisps up the edges.
Pair it with a hot cup of coffee, a glass of cold milk, or a steaming mug of chai. It’s also wonderful alongside a fresh fruit salad for brunch or crumbled over vanilla ice cream for dessert.
For storage, wrap the cooled loaf tightly in plastic wrap or aluminum foil and keep it at room temperature for up to 4 days. Do not refrigerate it—the cold air will dry it out faster than you’d think. If you live in a humid climate, store it in an airtight container instead of wrapping it, to prevent mold.
This banana bread freezes beautifully. Wrap the cooled loaf (or individual slices) in plastic wrap, then in aluminum foil, and freeze for up to 3 months. To thaw, leave it on the counter for a few hours or pop a slice in the microwave for 20 seconds. I always keep a loaf in the freezer for unexpected guests or lazy Sunday mornings.
One thing to note: the flavors actually improve after a day or two. The banana flavor deepens, and the texture becomes even more tender. So if you can resist eating it immediately, you’re in for a treat.
Nutritional Information & Benefits
Here’s an approximate nutritional breakdown per slice (based on 12 slices):
| Nutrient | Amount per slice |
|---|---|
| Calories | 285 |
| Total Fat | 14g |
| Saturated Fat | 6g |
| Cholesterol | 55mg |
| Sodium | 210mg |
| Total Carbohydrates | 37g |
| Dietary Fiber | 2g |
| Sugars | 19g |
| Protein | 5g |
Bananas are packed with potassium, which supports heart health and muscle function. They also contain vitamin B6 and vitamin C. Walnuts are a great source of omega-3 fatty acids, which are good for brain health. This recipe uses a moderate amount of sugar, and you can reduce it to 3/4 cup if you prefer a less sweet loaf. For a lower-carb option, substitute almond flour for half the all-purpose flour—just note that the texture will be denser and more crumbly.
This recipe contains gluten, dairy, eggs, and tree nuts (walnuts). For allergen-friendly versions, check the variations section above.
Conclusion
This classic banana bread with walnuts is more than just a recipe—it’s a little piece of my family’s history, and now it can be a part of yours too. It’s the kind of thing that fills your kitchen with warmth and your belly with comfort. Whether you’re baking for a crowd or just for yourself on a quiet afternoon, this bread delivers every single time.
I’d love to hear how yours turns out. Did you add chocolate chips instead of walnuts? Did you double the recipe because one loaf wasn’t enough? Drop a comment below and let me know. And if you share a photo on social media, tag me so I can see your beautiful creation. Happy baking, friend. You’ve got this.
Frequently Asked Questions
Can I use frozen bananas for this recipe?
Absolutely. Thaw them completely, then drain off any excess liquid before mashing. Frozen bananas tend to be even sweeter and more flavorful, so this is actually a great option.
Why did my banana bread sink in the middle?
This usually happens when the bread is underbaked or the oven temperature is too low. Make sure your oven is fully preheated, and use an oven thermometer to check accuracy. Also, don’t open the oven door during the first 40 minutes of baking.
Can I make this into muffins instead of a loaf?
Yes! Fill greased muffin tins 3/4 full and bake at 350°F for 18-22 minutes. This recipe makes about 12 standard muffins. They’re perfect for lunchboxes or on-the-go breakfasts.
How do I know when the banana bread is done?
Insert a toothpick or wooden skewer into the center of the loaf. If it comes out clean or with just a few moist crumbs, it’s done. The top should be golden brown and cracked, and the edges should be pulling away slightly from the pan.
Can I reduce the sugar in this recipe?
You can reduce the sugar to 3/4 cup without significantly affecting the texture. If you go lower than that, the bread may be less tender and won’t brown as well. The bananas provide natural sweetness, so you might not miss the extra sugar.
Pin This Recipe!
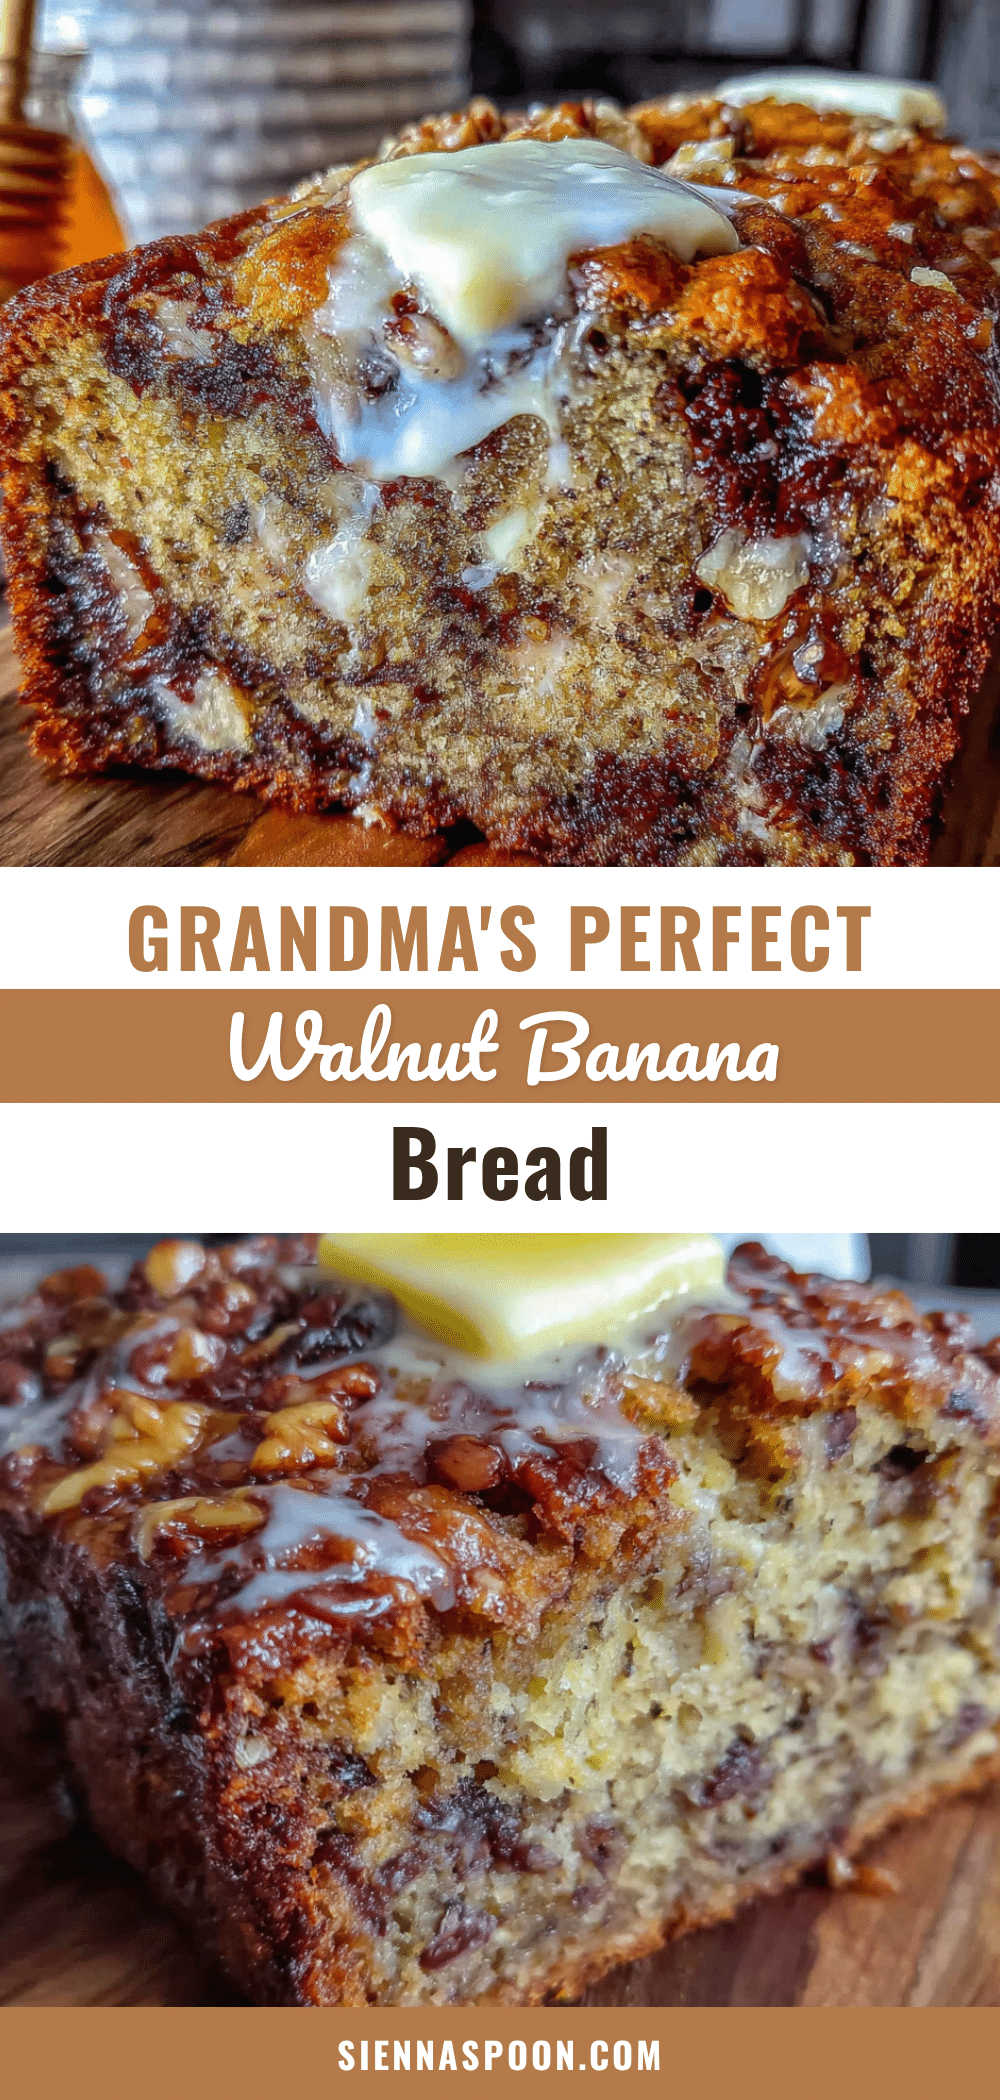
Grandma’s Classic Banana Bread with Walnuts
This classic banana bread with walnuts is moist, tender, and packed with banana flavor. It’s a simple, crowd-pleasing recipe that comes together in about 70 minutes and uses basic pantry ingredients.
- Prep Time: 15 minutes
- Cook Time: 55-65 minutes
- Total Time: 70-80 minutes
- Yield: 12 servings 1x
- Category: Dessert
- Cuisine: American
Ingredients
- 1/2 cup (1 stick or 113 grams) unsalted butter, softened to room temperature
- 1 cup (200 grams) granulated sugar
- 2 large eggs, at room temperature
- 3 medium ripe bananas (about 1 1/2 cups or 340 grams mashed)
- 2 cups (250 grams) all-purpose flour
- 1 teaspoon baking soda
- 1/2 teaspoon salt
- 1 teaspoon vanilla extract
- 1 cup (120 grams) walnuts, roughly chopped and toasted
Instructions
- Preheat your oven to 350°F (175°C). Grease a 9×5-inch loaf pan with butter or nonstick spray, then line it with a strip of parchment paper, leaving overhang on the two long sides.
- Spread the chopped walnuts on a baking sheet and toast them in the preheating oven for 5-7 minutes, just until fragrant. Set aside to cool.
- In a medium bowl, mash the three ripe bananas with a fork until smooth with some small lumps. Set aside.
- In a large mixing bowl, beat the softened butter and granulated sugar together until light and fluffy, about 3-4 minutes with a hand mixer on medium speed. Scrape down the sides of the bowl halfway through.
- Add the eggs one at a time, beating well after each addition. Then mix in the vanilla extract.
- Fold in the mashed bananas with a rubber spatula until just combined.
- In the same medium bowl used for bananas, whisk together the all-purpose flour, baking soda, and salt.
- Add the dry ingredients to the wet ingredients in two additions, folding gently with the spatula after each addition. Mix only until no streaks of flour remain.
- Gently fold in the toasted walnuts, reserving a handful to sprinkle on top if desired.
- Pour the batter into the prepared loaf pan and spread it evenly. Sprinkle the reserved walnuts on top, gently pressing them into the batter.
- Bake for 55-65 minutes, or until a toothpick inserted into the center comes out clean or with just a few moist crumbs. If the top is browning too quickly, tent it loosely with aluminum foil around the 40-minute mark.
- Let the banana bread cool in the pan on a wire rack for 10 minutes. Then use the parchment paper overhang to lift the loaf out of the pan. Transfer to the rack to cool completely before slicing.
Notes
For best results, use very ripe bananas with brown spots. Room temperature ingredients create a smoother batter. Do not overmix once flour is added. The flavors improve after a day or two. Store wrapped at room temperature for up to 4 days, or freeze for up to 3 months.
Nutrition
- Serving Size: 1 slice
- Calories: 285
- Sugar: 19
- Sodium: 210
- Fat: 14
- Saturated Fat: 6
- Carbohydrates: 37
- Fiber: 2
- Protein: 5
Keywords: banana bread, walnut banana bread, classic banana bread, easy banana bread, grandma's banana bread


