Love this? Save it for later!
Share the inspiration with your friends
Jessie wasn’t trying to impress anyone. I’d stopped by to drop off a casserole dish I’d borrowed, and the scent of vanilla and butter hit me before I even got through the side gate. It was late October, and I figured she might be baking something for her kids’ school party. But when I walked into her kitchen, there was no frantic measuring or stressed-out stirring. She was just standing there, casually spreading this electric green frosting onto a pan of golden bars, humming along to some old country song on the radio.
“Oh, hey,” she said, not even looking up. “Grab a knife. You can help me even this out.”
I stood there for a second, honestly a little stunned. The green was so bright it almost looked fake, like something out of a cartoon. And the bars underneath? They were perfectly puffed, with those slightly crispy edges that tell you the baker knows what they’re doing. She handed me a knife, and I started helping, but I kept sneaking bites of the scraps. Maybe you’ve been there—that moment when you taste something so simple and so perfect that you immediately start planning when you’re going to make it yourself.
She told me it was just a boxed mix with a few tweaks. “Frankenstein sugar cookie bars,” she said with a shrug. “The kids love ’em, and they take like twenty minutes.” I mean, I’ve made elaborate Halloween treats before—the kind that take three hours and leave your kitchen looking like a frosting bomb went off. But these bars? They were the kind of thing you could whip up after work on a Tuesday and still have time to watch a movie. That’s the recipe that stuck with me. That’s the one I keep coming back to.
Why You’ll Love This Recipe
Let me tell you why these Frankenstein sugar cookie bars have become my go-to Halloween dessert. First off, they’re ridiculously easy. We’re talking about a recipe that comes together in under 30 minutes, start to finish. No chilling dough, no rolling out cookies, no fussing with individual decorations. You mix, you bake, you frost, and you’re done. It’s the kind of recipe that makes you look like a Halloween hero without actually having to work like one.
- Quick & Easy: From mixing to serving in about 25 minutes. Perfect for last-minute Halloween parties or when the kids announce they need treats for school tomorrow.
- Simple Ingredients: You probably have most of these in your pantry right now. Sugar cookie mix, butter, eggs, and a few pantry staples. No weird specialty items.
- Perfect for Halloween: These bars are made for spooky season. The green buttercream and candy decorations make them instantly festive.
- Crowd-Pleaser: Kids go absolutely crazy for these. Adults too, honestly. There’s something about the combination of soft cookie bars and creamy frosting that hits every single time.
- Unbelievably Delicious: The texture is what gets me. Soft and tender in the middle, with those slightly golden edges that give just a little crunch. And the frosting? It’s not too sweet, which is my secret weapon.
What makes these different from every other Halloween cookie recipe out there? It’s the texture, honestly. Most sugar cookie bars turn out either too cakey or too dense. I’ve tested this version about six times to get it just right—soft but sturdy enough to hold the frosting, with a buttery flavor that doesn’t get lost under all that green. And the frosting? I use a trick I learned from a bakery owner years ago: a pinch of salt and a splash of vanilla extract balance the sweetness perfectly. This isn’t just another Halloween treat. It’s the one that disappears first from every dessert table.
What Ingredients You Will Need
This recipe uses simple, straightforward ingredients that come together to create something genuinely special. Most of these are pantry staples, which makes these bars perfect for spontaneous baking sessions.
For the Sugar Cookie Bars
- 1 box (16.5 oz) sugar cookie mix (I prefer Betty Crocker for consistent results, but any brand works)
- 1/2 cup unsalted butter, softened to room temperature (this is important for even mixing)
- 1 large egg, room temperature
- 1 teaspoon vanilla extract (use pure vanilla, not imitation, for the best flavor)
- 2 tablespoons all-purpose flour (this is my secret for the perfect chewy texture)
For the Green Buttercream Frosting
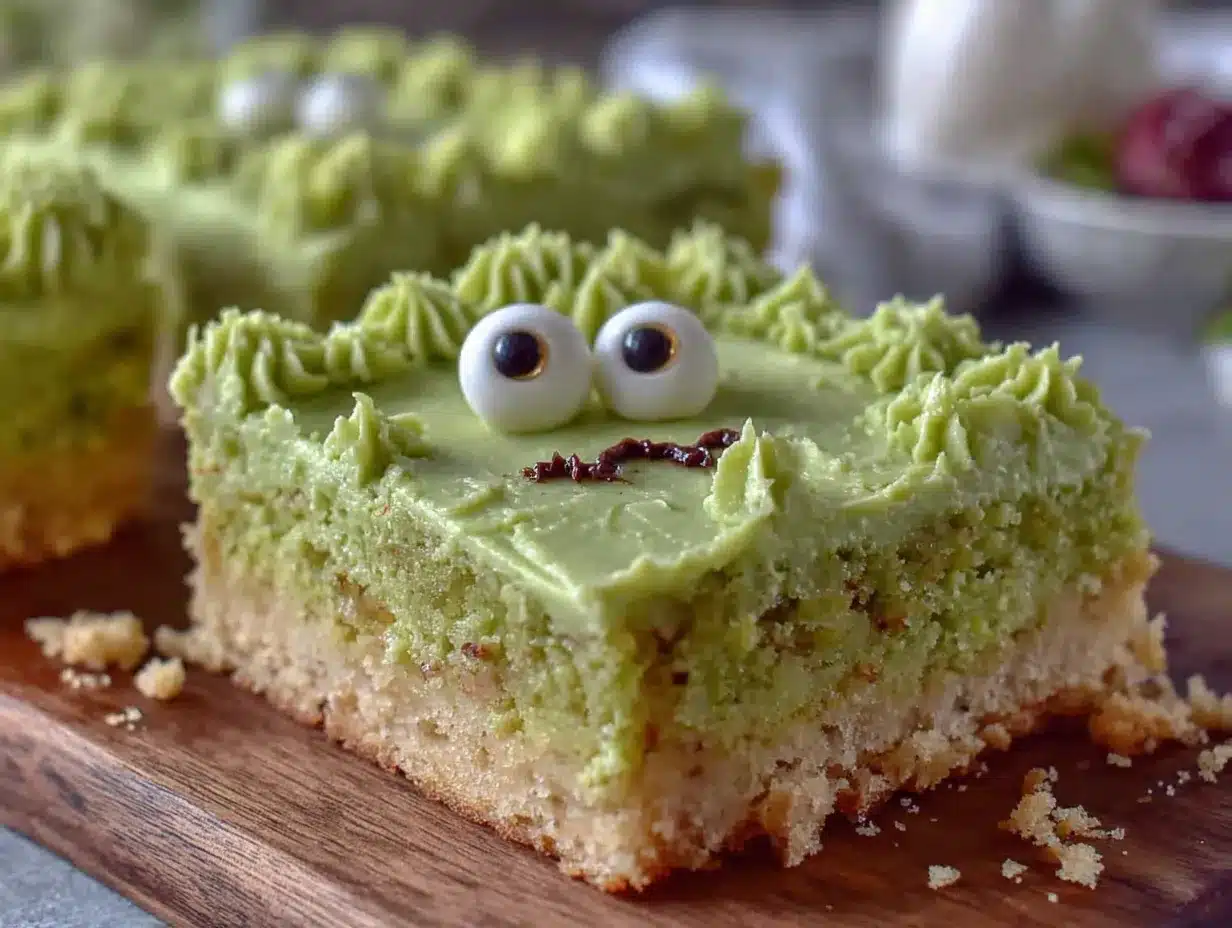
- 1/2 cup unsalted butter, softened
- 2 cups powdered sugar, sifted (sifting prevents lumps)
- 2 tablespoons heavy cream (or whole milk if that’s what you have)
- 1 teaspoon vanilla extract
- Green gel food coloring (I recommend Americolor or Wilton gel colors—liquid drops won’t give you that vibrant Frankenstein green)
- Pinch of salt (trust me on this one)
For Decoration
- Candy eyes (the little edible ones you find in the baking aisle)
- Black decorating gel (for drawing Frankenstein stitches and mouths)
- Optional: mini chocolate chips (for extra texture, if you’re feeling fancy)
A few notes on ingredients. For the butter, I always use unsalted so I can control the salt level. If you only have salted butter, just skip the pinch of salt in the frosting. The heavy cream in the frosting makes it extra silky, but I’ve made it with whole milk in a pinch and it still works great. And about that green food coloring—gel is non-negotiable here. Liquid food coloring will make your frosting watery and give you a pale, sad green instead of that vibrant Frankenstein color we’re going for.
Equipment Needed
You don’t need a fancy kitchen to pull these off. Here’s what you’ll need:
- 9×13 inch baking pan (metal works best for even baking, but glass is fine too)
- Parchment paper (for easy removal and cleanup)
- Large mixing bowl
- Electric hand mixer or stand mixer (you can do this by hand, but a mixer makes the frosting much fluffier)
- Rubber spatula
- Cooling rack
- Offset spatula or butter knife (for spreading frosting)
- Small piping bag or zip-top bag (for the decorating gel, if you want to get precise)
I’ve made these bars with just a wooden spoon and a lot of elbow grease, and they turned out fine. But honestly, a hand mixer makes the frosting so much lighter and fluffier. If you don’t have an offset spatula, a regular butter knife works perfectly—just run it under hot water and dry it off before spreading for super smooth frosting.
Preparation Method
Alright, let’s get to the fun part. Here’s how to make these Frankenstein sugar cookie bars step by step.
- Preheat your oven to 350°F (175°C). Line your 9×13 pan with parchment paper, leaving some overhang on the long sides. This makes lifting the bars out later so much easier. Spray the parchment lightly with nonstick spray just to be safe.
- Mix the cookie dough. In a large bowl, beat the softened butter with an electric mixer until it’s smooth and creamy, about 30 seconds. Add the egg and vanilla extract, and beat until combined. It might look a little separated at this point, but that’s normal.
- Add the cookie mix and flour. Pour in the sugar cookie mix and the extra two tablespoons of flour. Mix on low speed until everything comes together into a soft, thick dough. Don’t overmix—stop as soon as you don’t see any dry streaks. Overmixing will make the bars tough.
- Press into the pan. Transfer the dough to your prepared pan. It’s going to be sticky, so I recommend lightly wetting your fingers or spraying them with cooking spray. Press the dough into an even layer, making sure it reaches all the corners. The layer should be about 1/4 inch thick.
- Bake for 12-15 minutes. You want the edges to be lightly golden and the center to look set but still soft. A toothpick inserted in the center should come out with a few moist crumbs, not wet batter. The bars will continue to cook slightly as they cool, so don’t overbake them. I usually pull mine out at the 13-minute mark.
- Cool completely. Let the bars cool in the pan on a wire rack for about 10 minutes, then use the parchment paper to lift them out and transfer to the rack to cool completely. This is crucial—if you frost them while they’re still warm, the frosting will melt into a green puddle. I learned this the hard way, let me tell you.
- Make the frosting. While the bars are cooling, make the buttercream. In a large bowl, beat the softened butter until it’s light and fluffy, about 2 minutes. Add the sifted powdered sugar one cup at a time, beating on low speed. Add the heavy cream, vanilla extract, and pinch of salt. Beat on medium-high speed for about 3 minutes until the frosting is light, fluffy, and spreadable.
- Add the color. Add green gel food coloring a little at a time, mixing well after each addition. I usually start with about 8 drops and go from there. You want a vibrant Frankenstein green—think the color of a Granny Smith apple, not lime green. Keep adding until you’re happy with the shade.
- Frost the bars. Once the bars are completely cool, spread the green buttercream evenly over the top. Use an offset spatula or butter knife to create a smooth, even layer. Don’t worry about being perfect—the decorations will cover any imperfections.
- Decorate! This is where the fun begins. Place candy eyes on each bar—I usually do two eyes per bar, but you can get creative. Use the black decorating gel to draw Frankenstein stitches on the forehead and a little mouth. You can also add a squiggly line for hair if you’re feeling artistic. Let the decorations set for about 10 minutes before cutting.
- Cut into bars. Use a sharp knife to cut into 12-16 bars, depending on how big you want them. Wipe the knife clean between cuts for neat edges.
Cooking Tips & Techniques
I’ve made these Frankenstein sugar cookie bars about a dozen times now, and I’ve picked up a few tricks along the way. Here’s what I wish someone had told me the first time.
Don’t overbake. This is the number one mistake people make with cookie bars. They look underdone when you pull them out, but they continue cooking from the residual heat of the pan. If you wait until they’re golden all over, they’ll be dry and crumbly. Pull them out when the edges are just barely golden and the center still looks soft.
Room temperature ingredients matter. I know, I know, everyone says this. But it’s especially important here. Cold butter won’t cream properly, and cold egg can make the dough seize up. Take your butter and egg out about 30 minutes before you start baking.
The flour trick. Adding those extra two tablespoons of flour is what gives these bars their chewy, tender texture instead of a cakey one. I stumbled on this by accident when I was trying to make a thicker bar, and it worked so well I’ve never gone back.
Gel food coloring is your friend. I once tried to make green frosting with liquid food coloring and ended up with a sad, watery mess that tasted faintly of chemicals. Gel coloring gives you that vibrant color without changing the consistency of your frosting. It’s worth the extra dollar or two.
Let the frosting set. After you decorate the bars, let them sit at room temperature for about 20 minutes before cutting. This gives the frosting time to set slightly, which means cleaner cuts and less smudging.
My biggest failure? I tried to rush the cooling process once by putting the bars in the fridge. The frosting cracked and looked terrible. Patience is key here, folks.
Variations & Adaptations
One of the best things about this recipe is how easy it is to adapt. Here are some variations I’ve tried and loved.
Gluten-Free Version: Use a gluten-free sugar cookie mix and substitute the all-purpose flour with a gluten-free all-purpose blend. I’ve done this for a friend with celiac disease, and honestly, you couldn’t tell the difference. Just make sure your mix contains xanthan gum for structure.
Chocolate Frankenstein Bars: For a richer version, use a chocolate cake mix instead of sugar cookie mix. The green frosting against the dark chocolate bar looks incredible, and the flavor combination is amazing. Just adjust the baking time slightly—chocolate batters tend to bake a little faster.
Vegan Adaptation: Use a vegan butter stick (not margarine, which has too much water), a flax egg (1 tablespoon ground flaxseed mixed with 3 tablespoons water), and a vegan sugar cookie mix. For the frosting, use vegan butter and plant-based heavy cream. The texture will be slightly different, but still delicious.
Different Holidays: These bars are perfect for Halloween, but you can adapt them for any occasion. Use red and pink frosting for Valentine’s Day, orange for Thanksgiving, or blue and white for a winter celebration. The base recipe is so versatile.
Extra Spooky: Add a drop of black food coloring to the frosting to make it a darker, more sinister green. Or stir in some edible glitter for a magical effect. My kids love when I add a few candy spiders on top.
Serving & Storage Suggestions
These Frankenstein sugar cookie bars are best served at room temperature. The texture is soft and tender, and the frosting is perfectly creamy. If you’ve refrigerated them, let them sit out for about 15 minutes before serving.
For a Halloween party, I like to arrange them on a platter with some orange and black napkins. They’re also great for classroom parties, potlucks, or just a fun weekend baking project with the kids.
As for beverages, these bars pair beautifully with a cold glass of milk, a warm cup of apple cider, or even a pumpkin spice latte. The sweetness of the bars balances perfectly with something tart or bitter.
Storage: Store the bars in an airtight container at room temperature for up to 3 days. If you stack them, place a sheet of parchment paper between layers to prevent the frosting from sticking. Do not refrigerate them unless absolutely necessary—the refrigerator dries out the bars and makes the frosting lose its shine.
Freezing: You can freeze the unfrosted bars for up to 2 months. Wrap them tightly in plastic wrap, then foil. When you’re ready to serve, thaw them at room temperature, then make the frosting and decorate. I’ve also frozen the frosted bars, but the frosting can get a bit grainy when thawed. Better to freeze unfrosted.
The flavors actually develop and get better after about 24 hours. The butter in the bars melds with the vanilla, and the texture becomes even more tender. So if you can wait a day, do it.
Nutritional Information & Benefits
Let’s be real—these are a treat, not a health food. But here’s the estimated nutritional breakdown per bar (based on 16 bars):
| Nutrient | Amount per Bar |
|---|---|
| Calories | 285 |
| Total Fat | 14g |
| Saturated Fat | 8g |
| Carbohydrates | 38g |
| Sugar | 26g |
| Protein | 2g |
On the bright side, these bars do contain some butter, which provides a small amount of vitamin A. And if you use pure vanilla extract, you’re getting a tiny bit of antioxidants. But honestly, these are about joy and celebration, not nutrition. They’re a once-in-a-while treat that brings people together, and that has its own kind of value.
For those with dietary concerns, the main allergens are dairy (butter, heavy cream), eggs, and gluten (wheat flour). The vegan and gluten-free variations I mentioned earlier work well for most people.
Conclusion
These Frankenstein sugar cookie bars have become a staple in my Halloween rotation, and I think they’ll become one in yours too. They’re easy enough for a beginner baker but impressive enough to bring to any party. The combination of soft, buttery cookie bars and vibrant green buttercream is just plain fun.
What I love most about this recipe is how customizable it is. You can make them as simple or as elaborate as you want. Some years I go all out with multiple colors of frosting and intricate candy decorations. Other years, I just slap on some green frosting and call it a day. Both versions are delicious.
I’d love to hear how yours turn out. Did you add your own twist? Did your kids help with the decorating? Drop a comment below and let me know. And if you’re looking for more Halloween baking ideas, you might enjoy my spiderweb cupcakes or these pumpkin bread bars. Happy Halloween, and happy baking!
Frequently Asked Questions
Can I use a homemade sugar cookie recipe instead of a box mix?
Absolutely. If you have a favorite sugar cookie recipe, you can use it for the base. Just make sure it’s sturdy enough to hold the frosting—thin, crispy cookies won’t work well here. You want a soft, chewy sugar cookie dough that bakes up thick and tender.
How do I get the frosting so smooth?
The key is sifting your powdered sugar and beating the frosting for a full 3 minutes on medium-high speed. Also, make sure your butter is properly softened—not melted, just soft enough to leave a dent when you press it. If your frosting looks lumpy, add another tablespoon of cream and beat again.
Can I make these ahead of time?
Yes! You can bake the bars up to 2 days ahead and store them unfrosted at room temperature. Make the frosting and decorate them the day you plan to serve. Or you can freeze the unfrosted bars for up to 2 months.
My frosting turned out too thin. What did I do wrong?
You probably added too much liquid, or your butter was too soft. Fix it by adding more sifted powdered sugar, one tablespoon at a time, until it reaches the right consistency. If it’s too thick, add a tiny splash of cream.
Can I use a different color frosting?
Of course! While green is traditional for Frankenstein, you can use any color you like. Purple and orange are great for Halloween, or go with red and pink for Valentine’s Day. Just use gel food coloring for the best results.
Pin This Recipe!
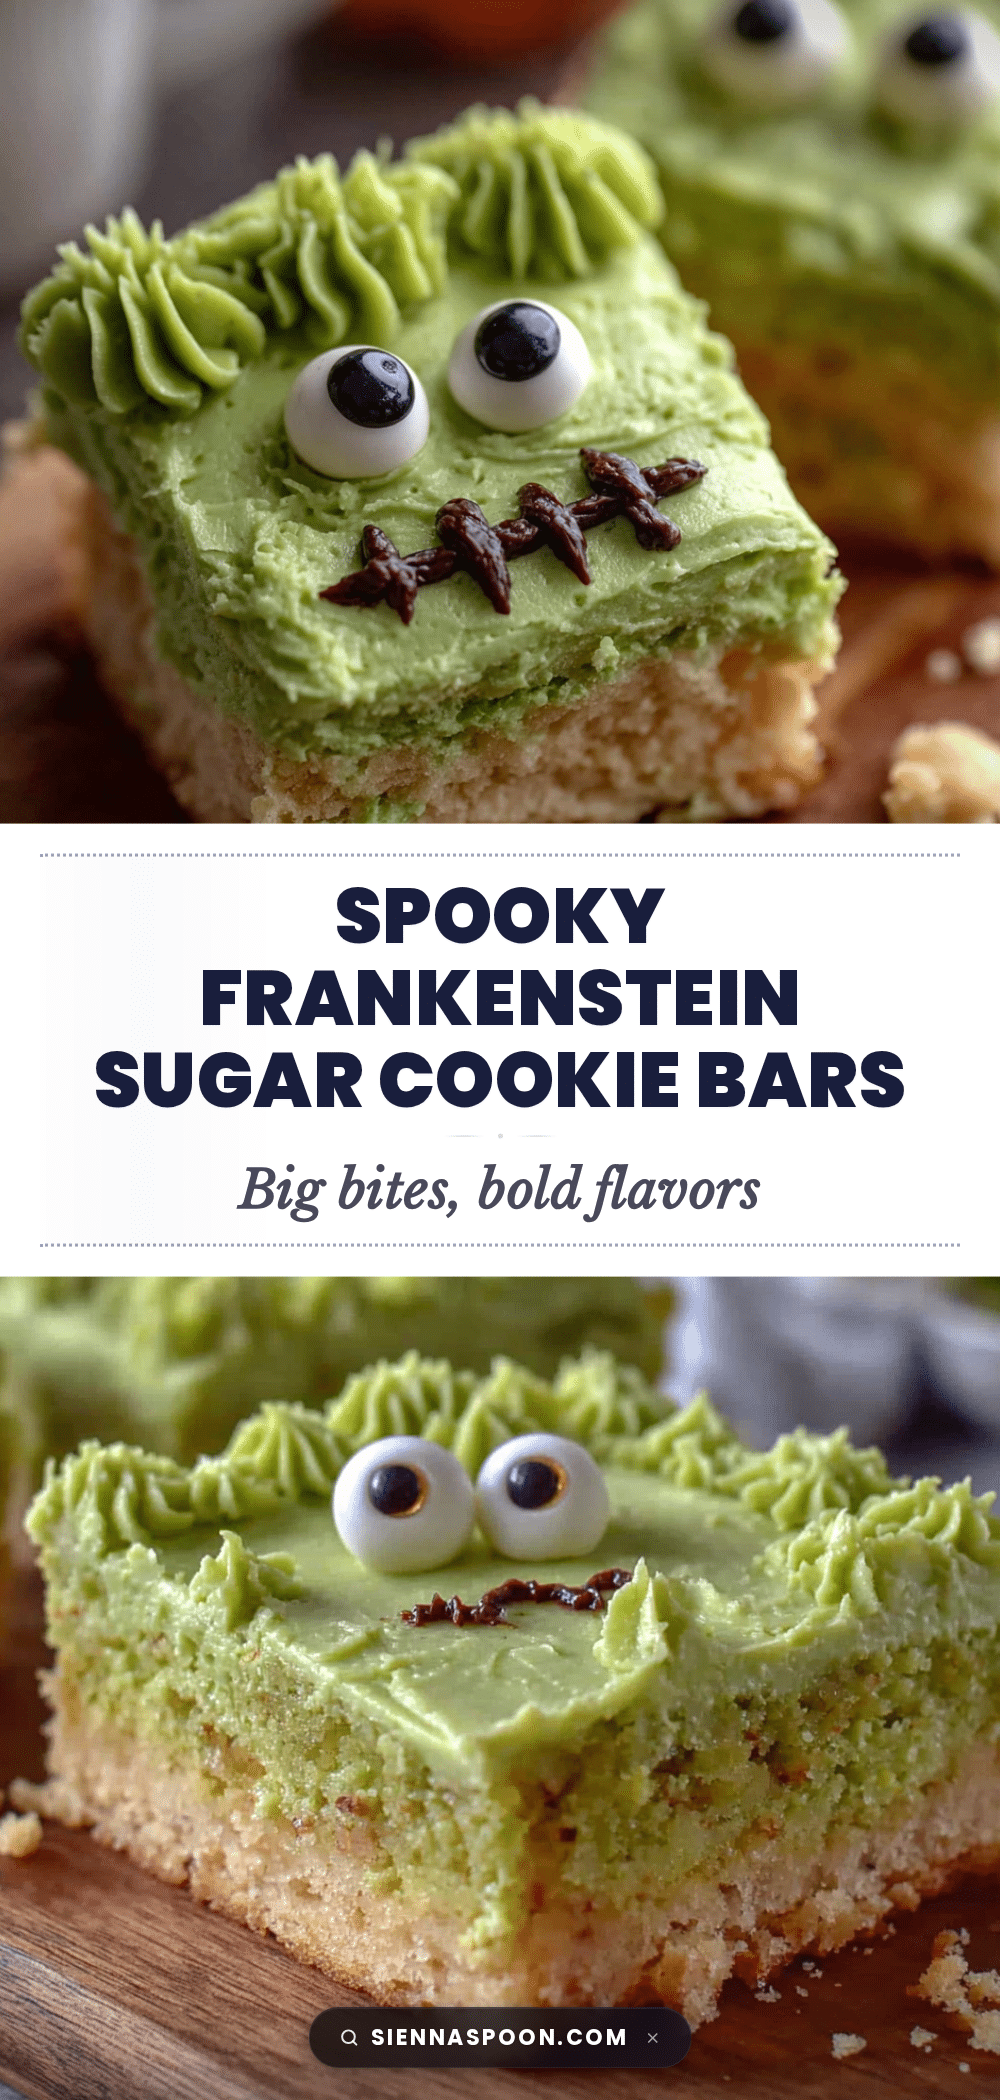
Easy Frankenstein Sugar Cookie Bars with Perfect Green Buttercream
These Frankenstein sugar cookie bars are ridiculously easy, coming together in under 30 minutes. Soft, buttery cookie bars topped with vibrant green buttercream and candy decorations make the perfect Halloween treat that kids and adults love.
- Prep Time: 10 minutes
- Cook Time: 12-15 minutes
- Total Time: 25 minutes
- Yield: 12-16 bars 1x
- Category: Dessert
- Cuisine: American
Ingredients
- 1 box (16.5 oz) sugar cookie mix (Betty Crocker recommended)
- 1/2 cup unsalted butter, softened
- 1 large egg, room temperature
- 1 teaspoon vanilla extract (pure vanilla recommended)
- 2 tablespoons all-purpose flour
- 1/2 cup unsalted butter, softened (for frosting)
- 2 cups powdered sugar, sifted
- 2 tablespoons heavy cream (or whole milk)
- 1 teaspoon vanilla extract (for frosting)
- Green gel food coloring (Americolor or Wilton recommended)
- Pinch of salt
- Candy eyes (edible)
- Black decorating gel
- Optional: mini chocolate chips
Instructions
- Preheat oven to 350°F (175°C). Line a 9×13 inch baking pan with parchment paper, leaving overhang on long sides. Lightly spray parchment with nonstick spray.
- In a large bowl, beat softened butter with an electric mixer until smooth and creamy, about 30 seconds. Add egg and vanilla extract, beat until combined.
- Add sugar cookie mix and 2 tablespoons flour. Mix on low speed until a soft, thick dough forms. Do not overmix.
- Transfer dough to prepared pan. Lightly wet fingers or spray with cooking spray, then press dough into an even layer about 1/4 inch thick.
- Bake for 12-15 minutes until edges are lightly golden and center is set but still soft. A toothpick inserted in center should come out with moist crumbs, not wet batter.
- Cool in pan on wire rack for 10 minutes, then use parchment to lift bars out and transfer to rack to cool completely.
- While bars cool, make frosting: In a large bowl, beat softened butter until light and fluffy, about 2 minutes. Add sifted powdered sugar one cup at a time, beating on low speed. Add heavy cream, vanilla extract, and pinch of salt. Beat on medium-high speed for 3 minutes until light, fluffy, and spreadable.
- Add green gel food coloring a little at a time, mixing well after each addition, until vibrant Frankenstein green is achieved (about 8 drops to start).
- Once bars are completely cool, spread green buttercream evenly over top using an offset spatula or butter knife.
- Place candy eyes on each bar. Use black decorating gel to draw Frankenstein stitches on forehead and a mouth. Optionally add squiggly hair. Let decorations set for 10 minutes before cutting.
- Cut into 12-16 bars using a sharp knife, wiping clean between cuts for neat edges.
Notes
Don’t overbake—bars continue cooking as they cool. Room temperature ingredients are important for proper mixing. Adding 2 extra tablespoons of flour gives chewy texture. Use gel food coloring, not liquid, for vibrant color without changing frosting consistency. Let bars cool completely before frosting to prevent melting. Let frosting set for 20 minutes before cutting for cleaner slices. Store in airtight container at room temperature for up to 3 days. Freeze unfrosted bars for up to 2 months.
Nutrition
- Serving Size: 1 bar
- Calories: 285
- Sugar: 26
- Sodium: 180
- Fat: 14
- Saturated Fat: 8
- Carbohydrates: 38
- Protein: 2
Keywords: Frankenstein sugar cookie bars, Halloween dessert, easy Halloween treats, sugar cookie bars, green buttercream, Halloween baking, kid-friendly Halloween recipe


