Love this? Save it for later!
Share the inspiration with your friends
My dad had avoided pumpkin bread for almost two decades. He claimed it was too dense, too sweet, too much like eating a wet sponge that had been rolled in pumpkin pie spice. Every fall, my mom would make her standard loaf, and he would politely decline. Then last October, I was testing this brown butter pumpkin bread recipe on a rainy Tuesday—just for myself, honestly, because I needed a new recipe for the blog and had a can of pumpkin staring at me from the pantry. I pulled the loaf out of the oven, let it cool just enough, and drizzled that maple glaze over the top while it was still warm. I turned around to grab a knife, and when I looked back, my dad was standing at the counter, holding a slice he had already cut himself. He had a mouthful of bread and this look on his face like he had been caught doing something wrong. “This is different,” he said, crumbs falling onto the counter. “This is actually good.” I mean, that is the highest praise you can get from a man who has been on a pumpkin bread strike since the Clinton administration. That moment is exactly why this recipe stuck with me—it turned a skeptic into a fan without me even trying.
Why You Will Love This Recipe
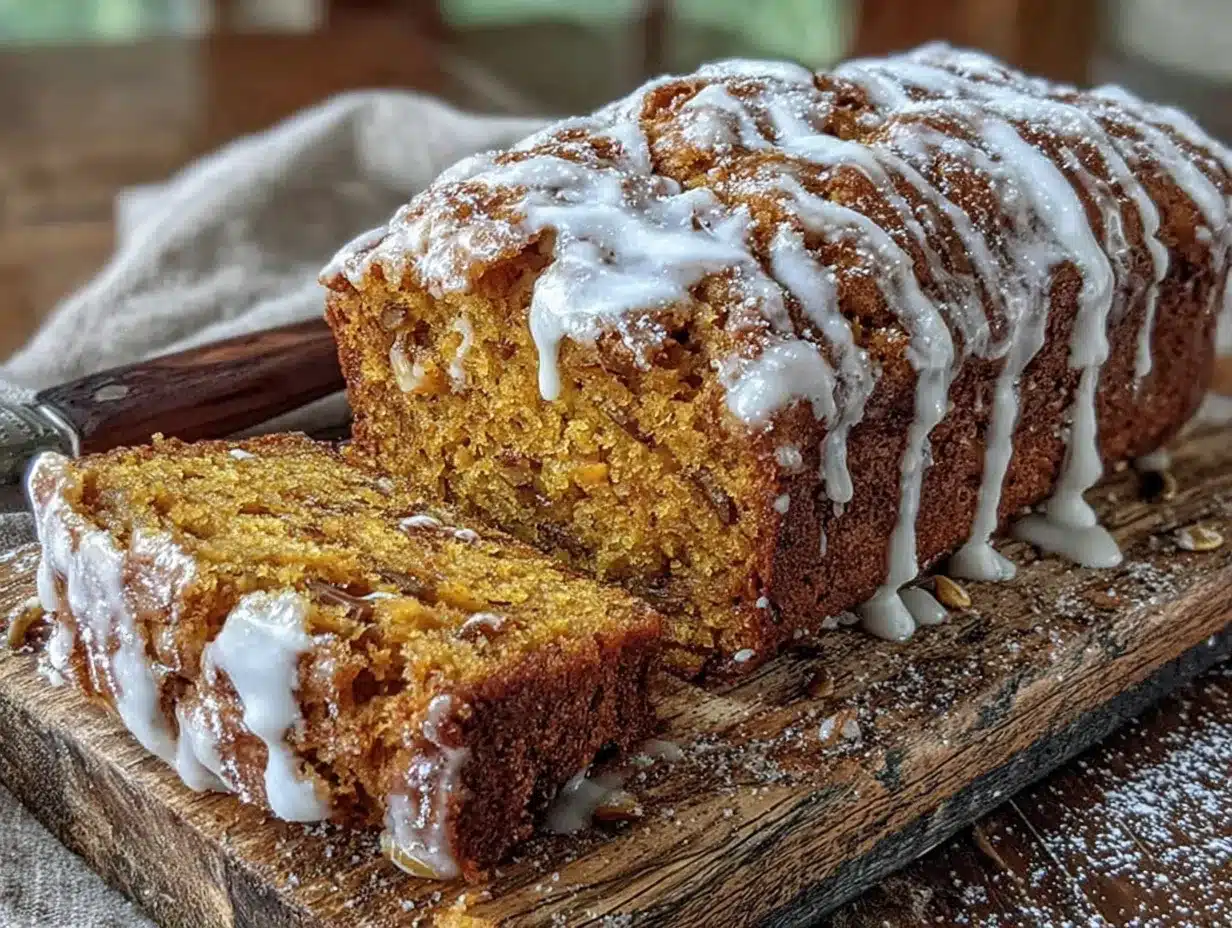
This isn’t just another pumpkin bread recipe floating around the internet. This is the one that makes you close your eyes after the first bite and forget about the mess in your kitchen. The brown butter is the secret weapon here—it adds this nutty, almost toffee-like depth that plain melted butter just cannot compete with. And that maple glaze? It seeps into the warm crust and creates a little crackly top that shatters when you bite into it.
- Simple Ingredients: You probably have most of these in your pantry right now. No weird extracts or hard-to-find flours.
- Browning Butter is Worth It: It takes about 5 extra minutes and transforms the entire flavor profile. Trust the process here.
- Perfect for Fall Mornings: This bread pairs beautifully with a hot cup of coffee or chai tea on a crisp autumn morning.
- Crowd-Pleaser: I have brought this to three different gatherings this season, and every single time, someone asks for the recipe before they finish their first slice.
- Unbelievably Moist: The combination of pumpkin puree and brown butter creates a texture that stays tender for days—if it lasts that long.
What makes this recipe different is the technique. Most pumpkin bread recipes just dump melted butter into the batter and call it a day. Taking the time to brown that butter unlocks a whole new layer of flavor that makes this bread taste like something from a fancy bakery, not your home kitchen. It is comfort food that feels a little bit special without requiring a culinary degree.
What Ingredients You Will Need
This recipe uses simple, wholesome ingredients to deliver a bold, nutty flavor and a tender crumb without any fuss. Most of these are pantry staples, especially if you bake regularly during the fall season.
For the Brown Butter Pumpkin Bread
- 1/2 cup (113g) unsalted butter — You will brown this yourself. I recommend using a good quality butter like Kerrygold for the best flavor, but any unsalted butter works great.
- 1 3/4 cups (220g) all-purpose flour — Spoon and level your flour for the most accurate measurement. Scooping directly from the bag can pack in too much flour and make the bread dry.
- 1 teaspoon baking soda — Make sure it is fresh. Expired baking soda will leave you with a dense, flat loaf.
- 1/2 teaspoon baking powder — Helps give the bread a little extra lift.
- 1 teaspoon ground cinnamon — I prefer Saigon cinnamon for its bold, spicy flavor.
- 1/2 teaspoon ground nutmeg — Freshly grated if you have it, but pre-ground works perfectly fine.
- 1/2 teaspoon ground ginger — Adds a warm, slightly peppery note.
- 1/4 teaspoon ground cloves — Just a pinch to round out the spice blend.
- 1/2 teaspoon salt — Balances the sweetness and enhances all the other flavors.
- 1 cup (200g) granulated sugar — Standard white sugar works best here for texture and sweetness.
- 1/2 cup (100g) packed light brown sugar — Adds moisture and a subtle molasses flavor that pairs beautifully with the brown butter.
- 2 large eggs — Room temperature, so they incorporate more smoothly into the batter.
- 1 cup (240g) pumpkin puree — Not pumpkin pie filling. Make sure you grab 100% pure pumpkin puree. Libby’s is my go-to brand for consistent results.
- 1/3 cup (80ml) buttermilk — Room temperature. If you do not have buttermilk, you can make a quick substitute by adding 1 tablespoon of lemon juice or white vinegar to 1/3 cup of regular milk and letting it sit for 5 minutes.
- 1 teaspoon vanilla extract — Pure vanilla extract, not imitation, for the best flavor.
For the Maple Glaze
- 1 cup (120g) powdered sugar — Sifted to remove any lumps.
- 2 tablespoons pure maple syrup — Not pancake syrup. Real maple syrup makes a huge difference here. Grade A dark amber is my favorite for its robust flavor.
- 1–2 tablespoons milk or heavy cream — Start with 1 tablespoon and add more until you reach your desired consistency.
- Pinch of salt — Optional, but it helps cut the sweetness and balance the maple flavor.
Equipment Needed
You do not need a ton of fancy equipment for this recipe, which is part of why I love it so much. Here is what you will need:
- 9×5-inch loaf pan — Standard size works perfectly. If you use an 8×4-inch pan, you will need to bake it a little longer.
- Parchment paper — I always line my loaf pan with parchment paper, leaving some overhang on the long sides. This makes lifting the bread out so much easier, and cleanup is a breeze.
- Light-colored saucepan — Browning butter in a dark pan makes it hard to see when the butter solids turn golden. A light-colored pan gives you better visual control.
- Large mixing bowl — For the dry ingredients.
- Medium mixing bowl — For the wet ingredients.
- Whisk — For combining everything smoothly.
- Rubber spatula — For folding the batter together without overmixing.
- Cooling rack — Essential for letting the bread cool evenly before glazing.
- Measuring cups and spoons — Accurate measurements are key for baking.
If you do not have a kitchen scale, do not worry. I have provided cup measurements, but I will be honest—weighing your flour and butter gives you more consistent results. A simple digital scale costs about fifteen bucks and is worth every penny if you bake often.
Preparation Method
Let me walk you through this step by step. I have made this bread at least a dozen times, so I have learned a few tricks along the way.
- Preheat your oven to 350°F (175°C). Position the rack in the center of the oven. Grease your 9×5-inch loaf pan and line it with parchment paper, leaving about 2 inches of overhang on the long sides. This will make lifting the bread out so much easier later.
- Brown the butter. Place the 1/2 cup of unsalted butter in a light-colored saucepan over medium heat. Stir it occasionally with a rubber spatula or wooden spoon. The butter will melt, then start to foam, and then you will see little brown specks forming at the bottom of the pan. This whole process takes about 5 to 7 minutes. Keep a close eye on it—butter can go from perfectly browned to burnt in about 15 seconds. When it smells nutty and the solids are a deep golden brown, remove it from the heat immediately. Pour the brown butter into a heatproof bowl to stop the cooking process. Let it cool for about 10 minutes while you prepare the other ingredients.
- Whisk the dry ingredients. In a large mixing bowl, whisk together the all-purpose flour, baking soda, baking powder, cinnamon, nutmeg, ginger, cloves, and salt. Make sure everything is evenly distributed. I like to use a whisk for this instead of a spoon because it aerates the flour a little bit and helps prevent lumps.
- Mix the wet ingredients. In a medium mixing bowl, whisk together the granulated sugar, light brown sugar, and the cooled brown butter until well combined. The mixture will look a little grainy, and that is totally fine. Add the eggs one at a time, whisking well after each addition. Then whisk in the pumpkin puree, buttermilk, and vanilla extract until everything is smooth and uniform.
- Combine wet and dry ingredients. Pour the wet ingredients into the bowl with the dry ingredients. Use a rubber spatula to fold everything together gently. Stop mixing as soon as you no longer see streaks of flour. A few small lumps are perfectly fine—overmixing will make the bread tough and dense. I learned this the hard way when I made my first batch and it came out more like a brick than a bread.
- Pour the batter into the prepared loaf pan. Use your spatula to spread it evenly. Give the pan a gentle tap on the counter to release any air bubbles trapped in the batter.
- Bake for 55 to 65 minutes. The exact time will depend on your oven. At the 50-minute mark, start checking for doneness. Insert a toothpick or a thin skewer into the center of the bread. If it comes out clean or with just a few moist crumbs clinging to it, the bread is done. If the toothpick has wet batter on it, give it another 5 minutes and check again. The top should be golden brown and cracked in a few places—that is a good sign.
- Cool the bread in the pan. Place the loaf pan on a cooling rack and let the bread cool in the pan for about 15 minutes. Then use the parchment paper overhang to lift the bread out of the pan and transfer it to the cooling rack. Let it cool completely before glazing. This is important—if you pour the glaze over warm bread, it will just melt and soak in instead of forming that beautiful crackly top.
- Make the maple glaze. While the bread is cooling, make the glaze. In a small bowl, whisk together the sifted powdered sugar, pure maple syrup, and 1 tablespoon of milk or heavy cream. Whisk until smooth. If the glaze is too thick, add another teaspoon of milk. If it is too thin, add a little more powdered sugar. You want it thick enough to drizzle but thin enough to spread slightly on its own.
- Glaze the bread. Once the bread is completely cool, drizzle the maple glaze over the top. Let it set for about 10 minutes before slicing. The glaze will harden slightly and create that lovely crackly crust I mentioned earlier.
Cooking Tips & Techniques
I have made this recipe enough times to know where things can go wrong, so let me share a few hard-earned lessons with you.
Do not skip browning the butter. I know it is an extra step, and I know it feels like a hassle when you just want to get the bread in the oven. But honestly, this is the single most important step in the entire recipe. The nutty, caramelized flavor from the brown butter is what makes this bread taste so much more complex than your standard pumpkin loaf. If you burn the butter, just start over. Burnt butter tastes bitter and will ruin the whole loaf. It happened to me once, and I tried to salvage it by adding extra sugar—do not recommend.
Room temperature ingredients matter. Cold eggs and cold buttermilk will seize up the brown butter and make the batter lumpy. Take your eggs and buttermilk out of the fridge about 30 minutes before you start baking. If you forget, you can place the eggs in a bowl of warm water for 5 minutes, and microwave the buttermilk for about 15 seconds.
Measure your flour correctly. This is the most common mistake in baking. Scooping your measuring cup directly into the flour bag packs in way more flour than you need, which leads to dry, dense bread. Instead, fluff the flour with a spoon, then spoon it into your measuring cup, and level it off with a knife. Or just use a kitchen scale—220 grams is your target.
Let the bread cool completely. I know it is tempting to pour that glaze over a warm loaf because you want to eat it right now. But the glaze will just slide right off and pool at the bottom of your plate. Patience pays off here. Give it a full hour on the cooling rack.
Variations & Adaptations
One of the best things about this recipe is how flexible it is. Here are a few ways you can make it your own.
Gluten-Free Version: Substitute the all-purpose flour with a good quality 1:1 gluten-free flour blend that contains xanthan gum. I have tested this with King Arthur’s Measure for Measure flour, and it works beautifully. The texture is slightly more tender, but the flavor is still spot on.
Add Mix-Ins: Fold in 1/2 cup of chopped pecans or walnuts after you combine the wet and dry ingredients. The crunch adds a lovely contrast to the soft crumb. You can also add 1/2 cup of chocolate chips if you want a sweeter, more indulgent loaf. I tried it with dark chocolate chips once, and it was absolutely decadent.
Dairy-Free Adaptation: Use a plant-based butter for browning—I have had good results with Miyoko’s European Style Cultured Vegan Butter. Replace the buttermilk with 1/3 cup of unsweetened almond milk mixed with 1 teaspoon of apple cider vinegar. For the glaze, use a dairy-free milk like oat milk.
Spice It Up: If you like a more assertive spice profile, add 1/4 teaspoon of cardamom or allspice to the dry ingredients. Cardamom pairs especially well with the maple glaze.
Make It Muffins: This batter also makes excellent pumpkin muffins. Divide the batter among a 12-cup muffin tin lined with paper liners and bake at 350°F for 18 to 22 minutes. The glaze is optional for muffins, but honestly, why would you skip it?
Serving & Storage Suggestions
This bread is best served at room temperature, with the maple glaze set and slightly crackly on top. I like to slice it thick—about 1-inch slices—and serve it alongside a hot cup of coffee or a chai latte. It also pairs beautifully with a scoop of vanilla ice cream for a simple dessert.
Storage: Store the glazed bread in an airtight container at room temperature for up to 3 days. The glaze will soften slightly over time, but the bread stays moist and delicious. If you live in a humid climate, you might want to store it in the refrigerator to prevent the glaze from getting sticky.
Freezing: This bread freezes beautifully. I usually bake two loaves at once—one for now and one for later. To freeze, let the bread cool completely without the glaze. Wrap it tightly in plastic wrap, then in a layer of aluminum foil, and freeze for up to 3 months. When you are ready to enjoy it, thaw it overnight in the refrigerator, then bring it to room temperature before glazing and serving. The flavors actually develop more as it sits, so frozen bread often tastes even better.
Reheating: If you want a warm slice, pop it in the microwave for about 15 seconds, or warm it in a 300°F oven for 5 to 7 minutes. The glaze will soften, but the bread will taste like it just came out of the oven.
Nutritional Information & Benefits
Here is an approximate nutritional breakdown for one slice of this brown butter pumpkin bread with maple glaze (based on 10 slices per loaf):
- Calories: 320
- Total Fat: 12g
- Saturated Fat: 7g
- Cholesterol: 65mg
- Sodium: 280mg
- Total Carbohydrates: 50g
- Dietary Fiber: 2g
- Sugars: 34g
- Protein: 4g
Pumpkin is packed with vitamin A and fiber, which supports eye health and digestion. The brown butter adds a small amount of healthy fats, and the buttermilk provides calcium and probiotics. While this is definitely a treat, it is one that offers a little more nutritional value than your average slice of cake. If you are watching your sugar intake, you can reduce the granulated sugar to 3/4 cup and cut the glaze in half.
Frequently Asked Questions
Can I use canned pumpkin pie filling instead of pumpkin puree?
No, do not do that. Pumpkin pie filling is pre-sweetened and spiced, so it will throw off the sugar and spice balance in this recipe. Stick with 100% pure pumpkin puree for the best results.
Why did my brown butter turn out bitter?
You probably cooked it a few seconds too long. Brown butter can go from perfect to burnt very quickly. Next time, remove the pan from the heat as soon as you see the brown specks forming and the butter smells nutty. Pour it into a separate bowl immediately to stop the cooking.
Can I make this recipe without a mixer?
Absolutely. This recipe only requires a whisk and a rubber spatula. No electric mixer needed at all. In fact, I prefer making it by hand because it reduces the risk of overmixing.
How do I know when the bread is fully baked?
Insert a toothpick or a thin skewer into the center of the bread. If it comes out clean or with just a few moist crumbs, the bread is done. If it has wet batter on it, bake for another 5 minutes and check again.
Can I skip the maple glaze?
You can, but I would not recommend it. The maple glaze really ties everything together and adds that extra layer of flavor that makes this bread special. If you really want to skip it, the bread is still delicious on its own—just a little less fancy.
Conclusion
This brown butter pumpkin bread with maple glaze is the kind of recipe that becomes a fall tradition. It is simple enough for a weekday morning but special enough to bring to a holiday gathering. The nutty depth of the brown butter, the warm spices, and that sweet maple glaze all come together in a way that feels cozy and indulgent without being over the top. I have made this loaf more times than I can count, and it never gets old. Honestly, it is the recipe that proved my dad wrong after twenty years of pumpkin bread skepticism—and if that is not a testament to how good it is, I do not know what is. I would love to hear how yours turns out. Did you add any mix-ins? Did you double the glaze like I always do? Drop a comment below and let me know. Happy baking, friends.
Pin This Recipe!
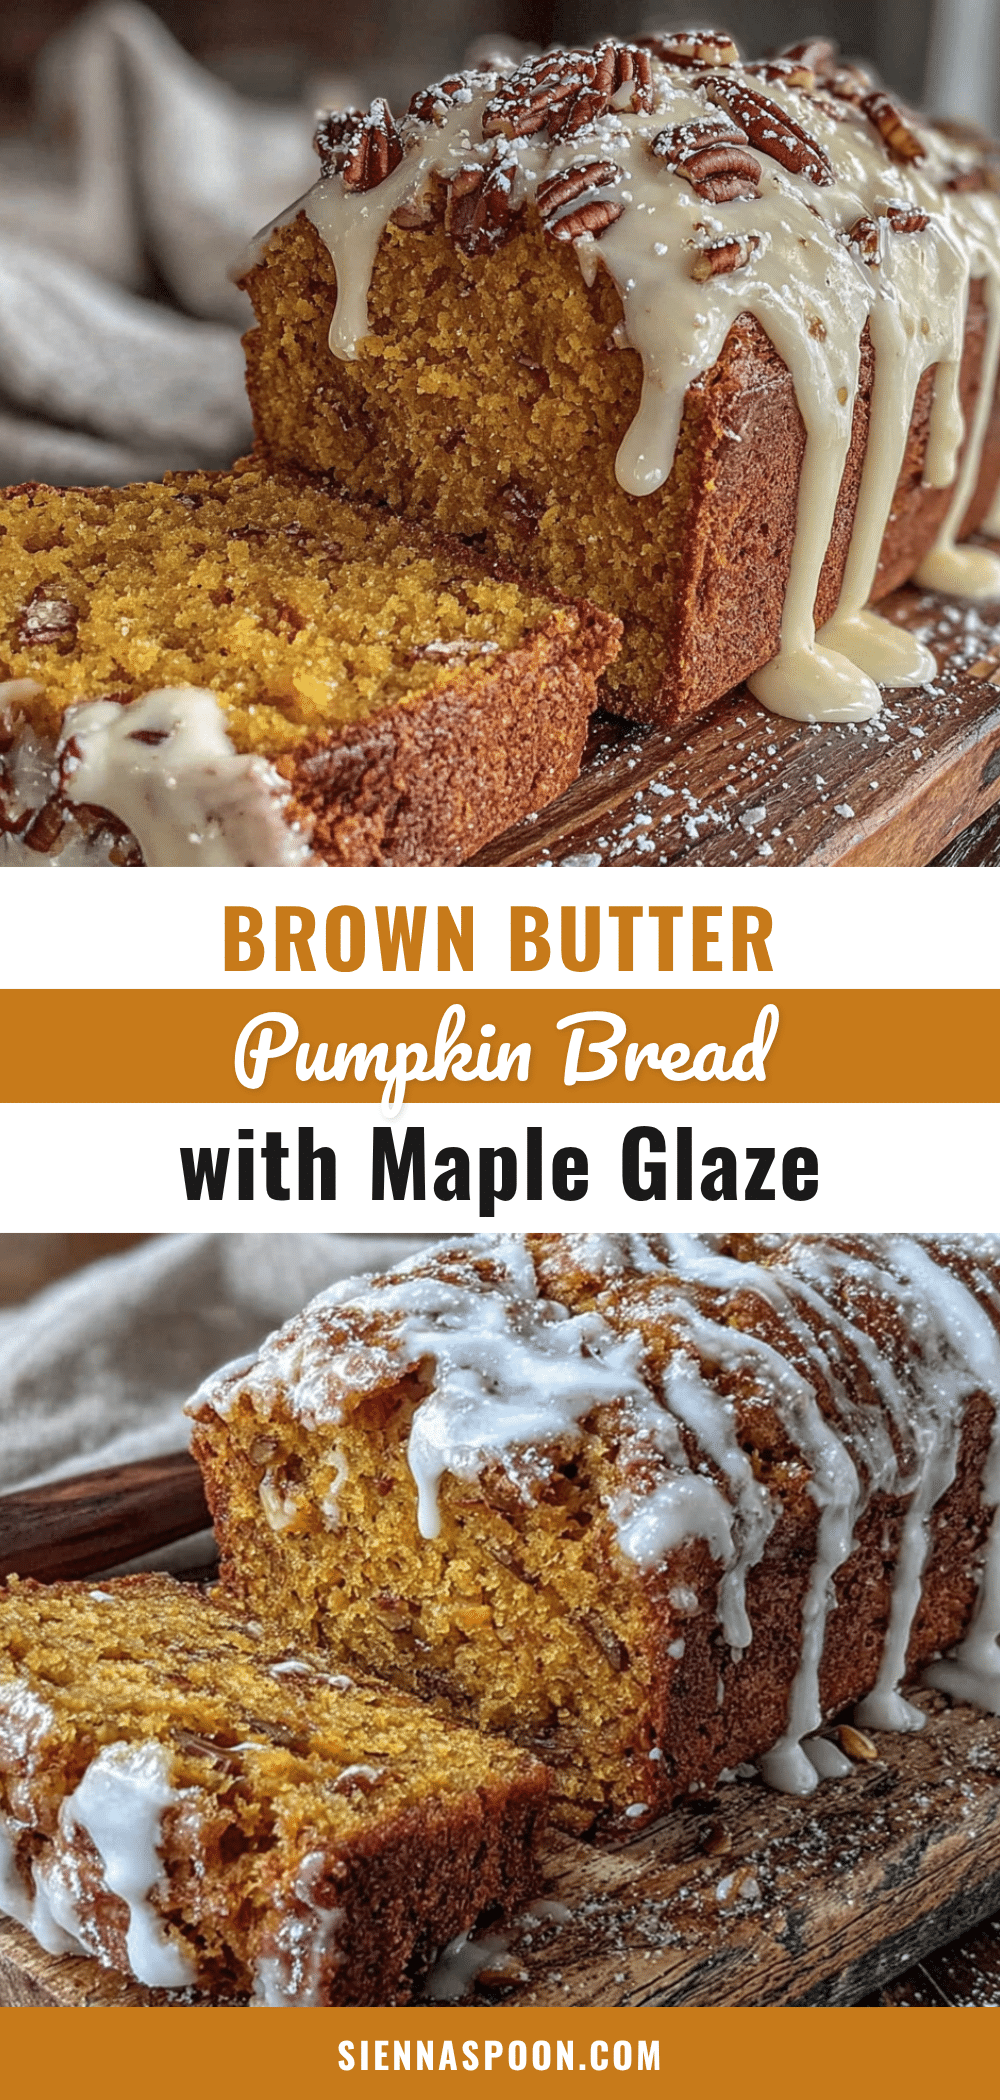
Easy Brown Butter Pumpkin Bread with Maple Glaze
This brown butter pumpkin bread is incredibly moist and flavorful, topped with a crackly maple glaze. It’s the recipe that turned a pumpkin bread skeptic into a fan.
- Prep Time: 15 minutes
- Cook Time: 55 minutes
- Total Time: 1 hour 10 minutes
- Yield: 10 servings 1x
- Category: Dessert
- Cuisine: American
Ingredients
- 1/2 cup (113g) unsalted butter
- 1 3/4 cups (220g) all-purpose flour
- 1 teaspoon baking soda
- 1/2 teaspoon baking powder
- 1 teaspoon ground cinnamon
- 1/2 teaspoon ground nutmeg
- 1/2 teaspoon ground ginger
- 1/4 teaspoon ground cloves
- 1/2 teaspoon salt
- 1 cup (200g) granulated sugar
- 1/2 cup (100g) packed light brown sugar
- 2 large eggs, room temperature
- 1 cup (240g) pumpkin puree (not pumpkin pie filling)
- 1/3 cup (80ml) buttermilk, room temperature
- 1 teaspoon vanilla extract
- 1 cup (120g) powdered sugar, sifted
- 2 tablespoons pure maple syrup
- 1–2 tablespoons milk or heavy cream
- Pinch of salt (optional)
Instructions
- Preheat your oven to 350°F (175°C). Grease a 9×5-inch loaf pan and line it with parchment paper, leaving about 2 inches of overhang on the long sides.
- Brown the butter: Place 1/2 cup unsalted butter in a light-colored saucepan over medium heat. Stir occasionally until the butter melts, foams, and brown specks form at the bottom (about 5-7 minutes). Remove from heat immediately and pour into a heatproof bowl to cool for about 10 minutes.
- In a large mixing bowl, whisk together the flour, baking soda, baking powder, cinnamon, nutmeg, ginger, cloves, and salt.
- In a medium mixing bowl, whisk together the granulated sugar, brown sugar, and cooled brown butter until combined. Add eggs one at a time, whisking well after each. Then whisk in the pumpkin puree, buttermilk, and vanilla extract until smooth.
- Pour the wet ingredients into the dry ingredients. Fold gently with a rubber spatula until just combined (a few lumps are fine). Do not overmix.
- Pour the batter into the prepared loaf pan and spread evenly. Tap the pan gently on the counter to release air bubbles.
- Bake for 55-65 minutes, or until a toothpick inserted into the center comes out clean or with a few moist crumbs. Cool in the pan for 15 minutes, then lift out using the parchment paper and transfer to a cooling rack to cool completely.
- Make the maple glaze: In a small bowl, whisk together the sifted powdered sugar, maple syrup, and 1 tablespoon of milk or heavy cream until smooth. Add more milk if needed for desired consistency.
- Once the bread is completely cool, drizzle the glaze over the top. Let set for about 10 minutes before slicing.
Notes
Do not skip browning the butter—it adds a nutty depth. Use room temperature ingredients for best results. Measure flour correctly by spooning and leveling. Let the bread cool completely before glazing to achieve a crackly top.
Nutrition
- Serving Size: 1 slice
- Calories: 320
- Sugar: 34
- Sodium: 280
- Fat: 12
- Saturated Fat: 7
- Carbohydrates: 50
- Fiber: 2
- Protein: 4
Keywords: pumpkin bread, brown butter, maple glaze, fall baking, easy pumpkin bread


